16 minute read
SKILL SET
By Matt Weber While raising three young kids, our
house remains in a steady state of chaos, with several doors to the house being opened about 500 times a day (but closed back only half the time).
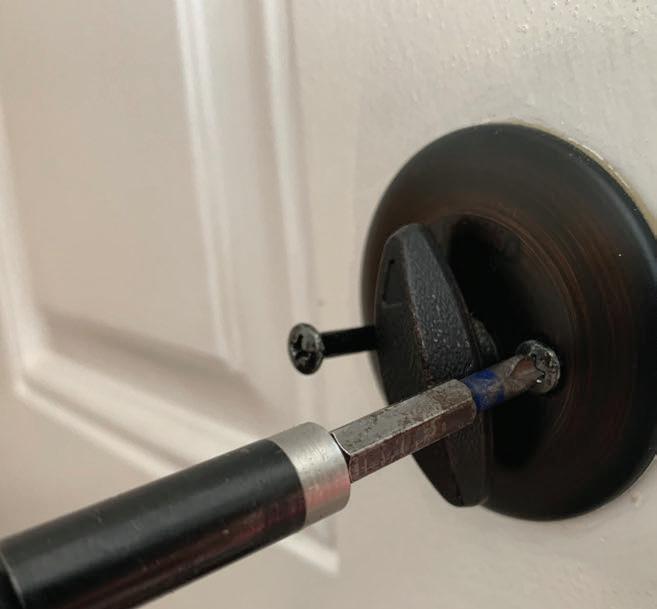
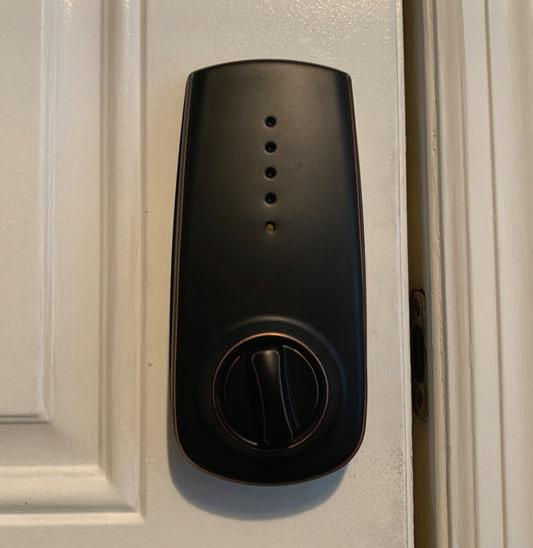
Keys get lost, and messages get mixed up, and in all this confusion, we've locked ourselves out of the house a few times. I decided to put an end to that by installing an electronic keypad door latch. I can still use an old-fashioned metal key as a backup, but plan to rely mostly on a personalized numeric code which I simply punch into the latch's keypad to unlock the door. With no metal key to keep up with, nobody will be stuck outside until someone with a key shows up to save the day. Good news for DIY'ers who want to replace an existing deadbolt: This is a very simple upgrade that doesn't require any special tools or wiring. First step is to unscrew the mounting bolts of the old deadbolt so you can separate the lock assembly in two halves, which you can them remove from each side of the door. With the lock assembly out of the way, unscrew the the two screws mounting the deadbolt and pull the bolt assembly out from the edge of the door. With all the hardware gone, you're ready to add the new keypad lock.
Begin by installing the new bolt assembly, which might slip right into the old hole with no IN ALL THIS CONFUSION, WE'VE LOCKED OURSELVES OUT OF THE HOUSE A FEW TIMES

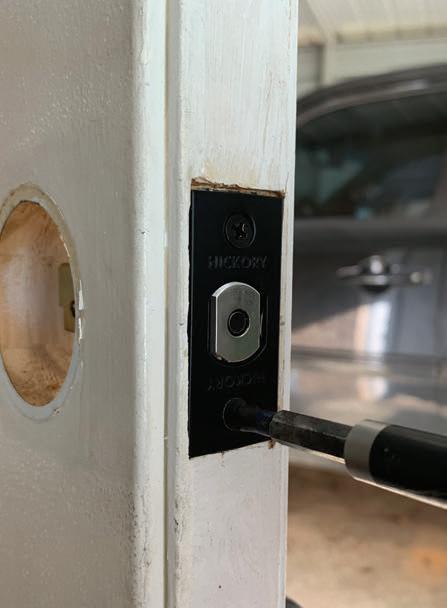
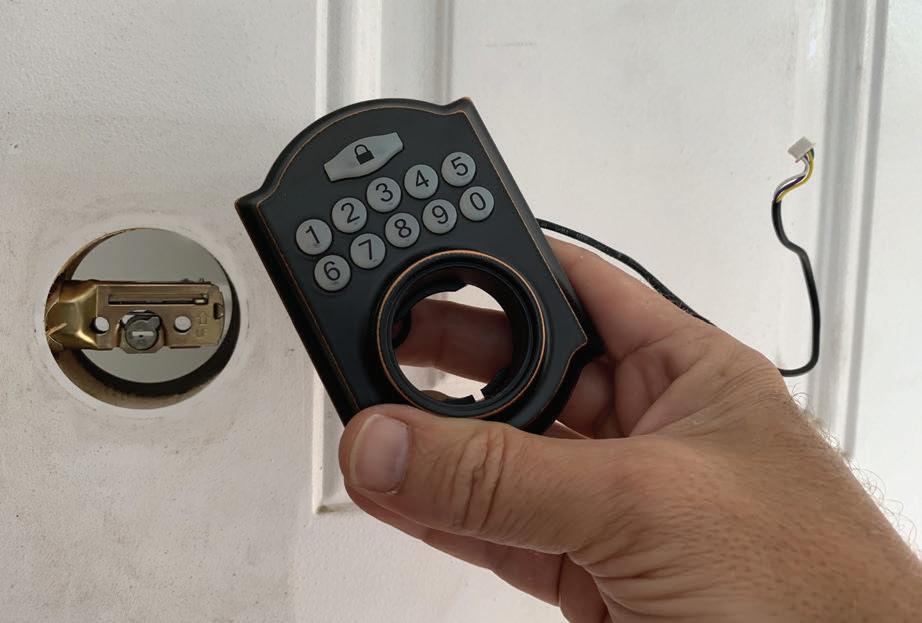
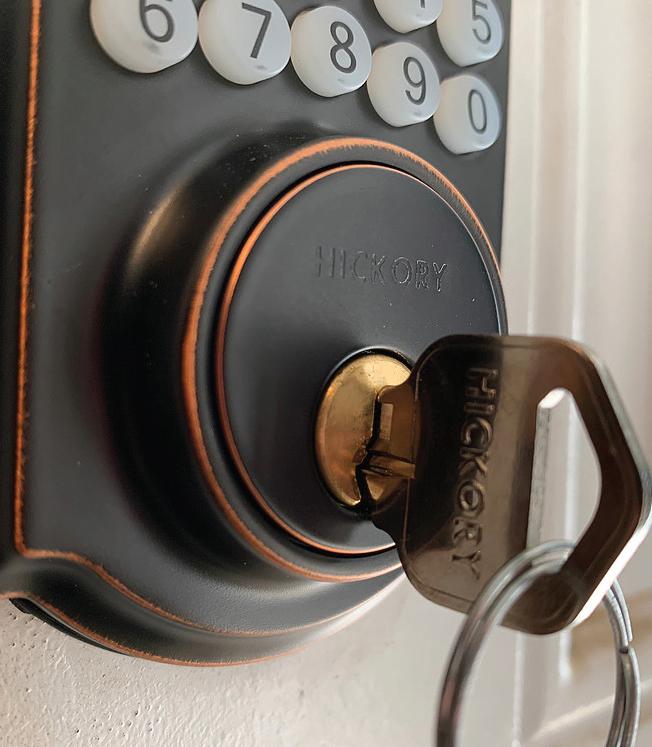
adjustment. Otherwise, it might be necessary to square up the mortise in the door's edge using a wood chisel so the face-plate fits flush with the wood surface. The Hickory Hardware product shown also includes an adjustment switch on the bolt, which can fit latch bore holes with either a 2-3/8-in. or 2-3/4-in. back-set.
The locking assembly installs similar to the ones you removed, but the interior side of the door utilizes an extra piece--a locking plate through which the two mounting bolts pass and thread into the the back of the exterior lock assembly. The exterior side of the lock includes the keypad, keyhole, adapter collar, and rubber backing, all of which you pre-assemble and install as a single piece.
When installing the lock assembly, it's important to thread the wire of the keypad under the door latch then through the wire passage on the interior mounting plate. It's also important to insert the flat arm of the exterior lock assembly through the latch while the deadbolt is in the unlocked position. meaning the slot should be oriented left to right, not up and down.
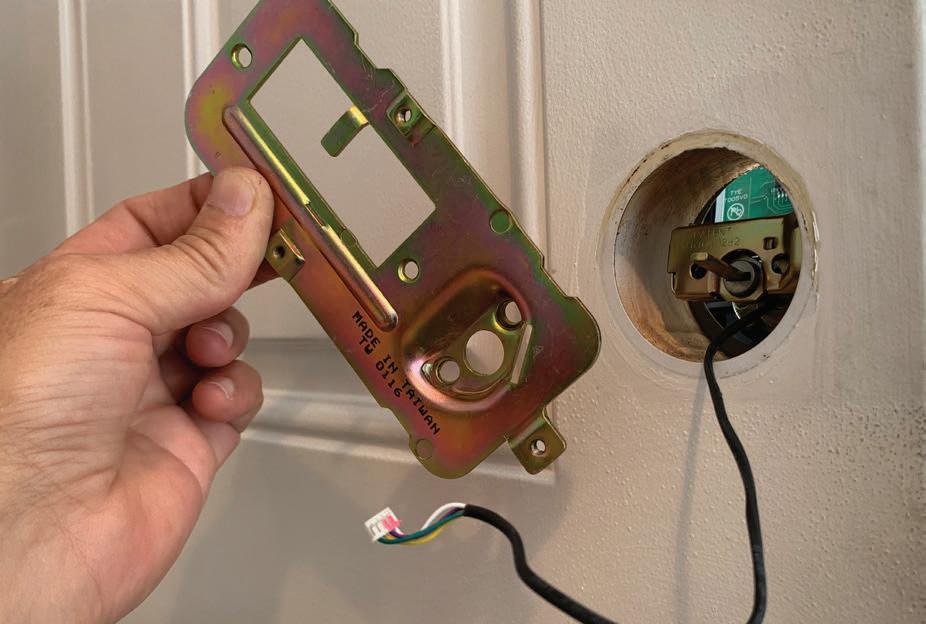
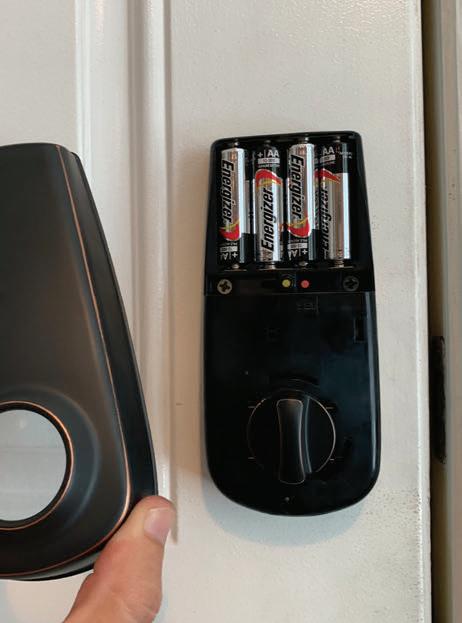
Next, you'll need to connect the wire to the terminal on the back of the interior lock assembly. Push in the plastic connector until it fits snugly. Then, place the assembly over the metal mounting plate and fasten in place with the included metal screws. To activate the keypad door latch, add the batteries--four AAs, in this case.
Follow the manufacturer's instructions for setting your personalized code using the keypad. The last step is to snap on the interior battery cover to give the door a sleek, finished appearance.
That's all there is to it. And don't worry about dead batteries causing the lock to fail. A visual indicator flashes on the lock anytime the batteries get low, so you'll have plenty of notice to install new ones.
H
Essential Non-Scratch SCRAPER TOOL!
Available in 2-packs or 5-packs
YUCK!
OUCH! Saves Time and Effort When Cleaning Small Surfaces, Edges & Grooves
• Pen-shaped design easy to keep handy • Unique rounded tip – better
scraper than a fingernail
• Second flat-edged tip – won’t
scratch like a screwdriver
• Remove stickers, tape, caulk, putty, grime & more • Perfect for home improvement projects
DOOR MOREBy Carter Swift A WITH
Want your home to make a good first impression? Start with the entryway. Replacing an old, leaky exterior door with a modern upgrade can give your home a fresh look and increase its energy-efficiency.
ORDERING AN ENTRY DOOR
When it comes to the make and model of entry doors, you’ll find countless options to suit your preferred look and style, but there are some basic considerations to nail down before you place your order.
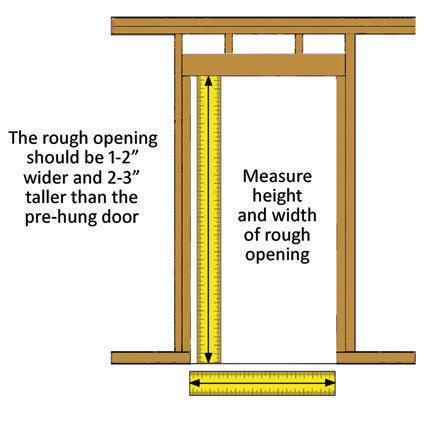
When it’s time to select a new exterior door, the first thing to determine is door size. The door must fit within the rough opening, which is the space left when you’ve removed the old door and its frame. You need to measure the rough opening, which is most accurately accomplished when the door casing is removed. The opening needs to be 1 to 2 inches wider and up to 3 inches taller than the door you are going to install. For replacements, you can simply measure the existing door for the size you need.
Doors are measured in feet and inches. A standard door measures 36 inches wide by 80 inches high by 1-3/4 inches thick. When ordering a door, this size is also designated as 3/0 by 6/8 by 1-3/4, which means 3 feet, 0 inches by 6 feet, 8 inches by 1-3/4 inches.
Door thickness is fairly easy to determine unless you have a special application (normally 1-3/4 in. for exterior doors).
Make sure you’re clear on the terminology and how it relates to the design, fit and performance of the door. If you get the terms confused when ordering, you might end up with a door that has the latch on the wrong side, or a door that swings out instead of inward.
First, know the terms Inswing and Outswing, usually abbreviated on order forms as I/S and O/S. An Inswing door opens inward to the house. An Outswing
SKILL LEVEL
3
HARD
s This custom-ordered, pre-hung replacement at the home of Michael and Paula Laney in Birmingham, Alabama, features an insulated door and gas-filled glass package for enhanced energy efficiency.
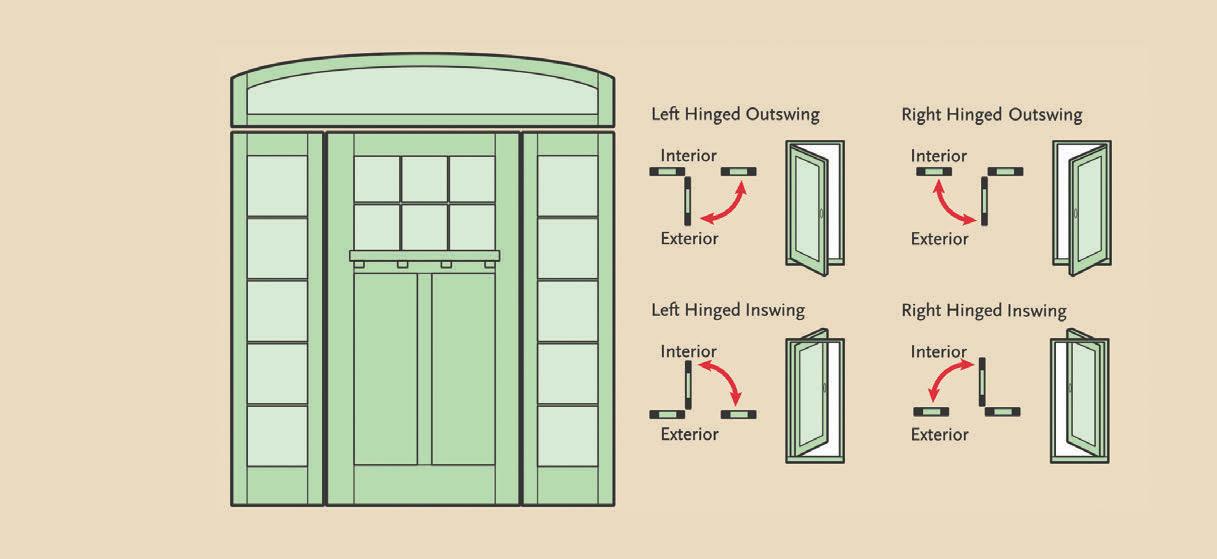
door opens outward. Most entry doors are Inswing models.
Also, when ordering a door, it is critical to understand that “hinge placement” refers to the door when viewed from the outside looking into the home.
Left Hinge: This is an I/S door an O/S door with hinges on the left.
Right Hinge: This an I/S door or an O/S door with hinges on the right.
Will the door frame be included? A Prehung Door is a complete, ready-to-install door commonly available “off the shelf” at home centers. Pre-hung doors are popular for their easy installation because they include the door slab, hinges, and weather-sealed outer frame that fits into a prepared doorway.
Note that custom-order doors can also be packaged as pre-hung units.
A Slab Door is a rectangular slab of wood, steel or composite without hinges or hardware. A slab door will be more difficult to install than a pre-hung door.
Consider your glass options, because any door can be made to include glass. A pane of glass in a door that functions as a window is called a Lite. Most exterior doors have
insulated glass for energy efficiency, but others may have beveled, silk-screened or stained glass. Glass comes in several shapes and patterns.
Divided Lite: Panes of glass that are divided within the door (or appear to be).
Grille: Plastic, wooden or metal details that give the appearance of divided lites, often in a grid pattern.
Front Door with Sidelites: A sidelite can be placed on one or either side of the door, or both sides.
Transom: A decorative accent placed above the door, which is usually available in three shapes: arch, ellipse and box.
Door suppliers generally offer customizable options in which they can make an order to your specifications, including sidelites and transoms pre-attached to the door frame to simplify installation.
For maximum savings on your utility bill, look for ENERGY STAR® certified entry doors, which include insulation of the door slabs and glass.
ILLUSTRATIONS OF INSTALLATION BASICS
STEP BY STEP
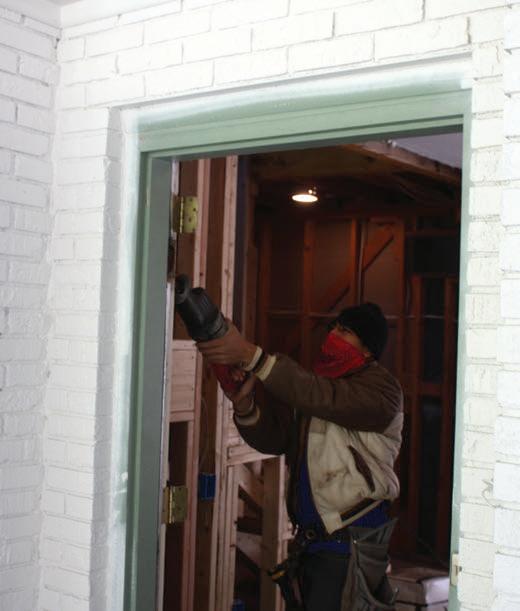
To take off the old door, start by disassembling the lockset then removing the hinge pins (starting at the bottom). Lift the door out of place, then pry off the old trim. To remove the old jamb, cut through any nails or screws by running a reciprocating saw blade between the jamb and the house framing.
The rough opening needs to be around 1 to 2 inches wider than the door you are going to install, allowing room for adjustment and shims. Clear the rough opening of any broken fasteners, insulation or old caulk. (If the rough opening is too large, you can add boards to the framing.)
Fitting the new door in place is usually a twoperson job, because one installer needs to be on the outside and the other inside to make adjustments. First, remove any cardboard packing or nails that hold the new door to the prehung jamb. Do not, however, remove the plug that connects the latch to the jamb, because this keeps the door closed during installation to keep the jamb in its rigid, rectangular shape.
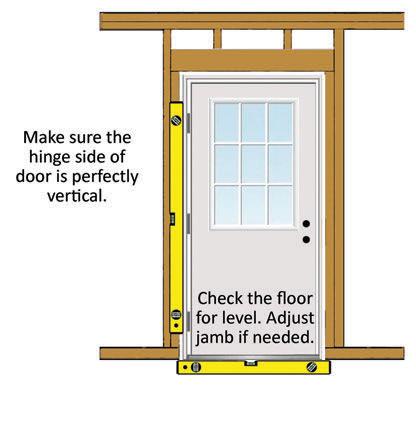
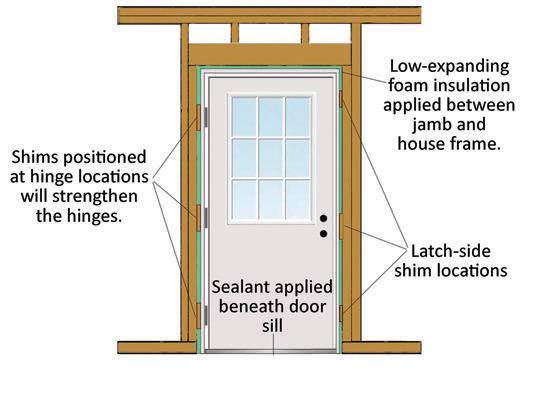
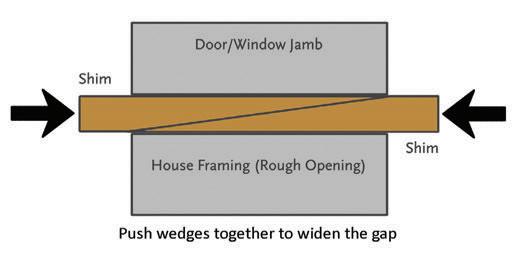
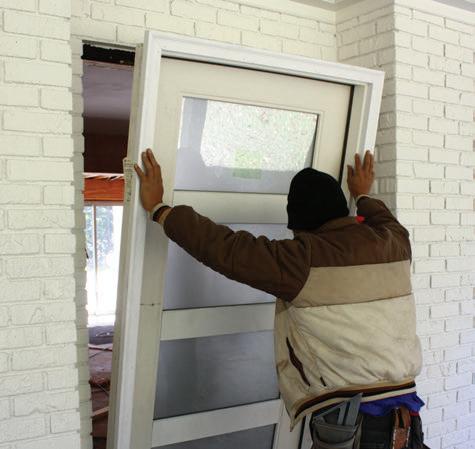
Place the door in the rough opening by tilting or sliding it into position. Make sure the hinge side of the door is perfectly vertical. When you have it lined up and have determined no major problems with the fit, apply caulk/sealant beneath the door seal. Reposition the door along the hinge side and fix it in place by tightly placing shims around the frame to hold its position. (Note: If the entry door is exposed to rain, add a sill pan or extra flashing beneath it to protect the subfloor from water damage.)
1
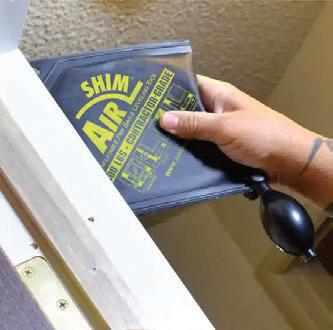
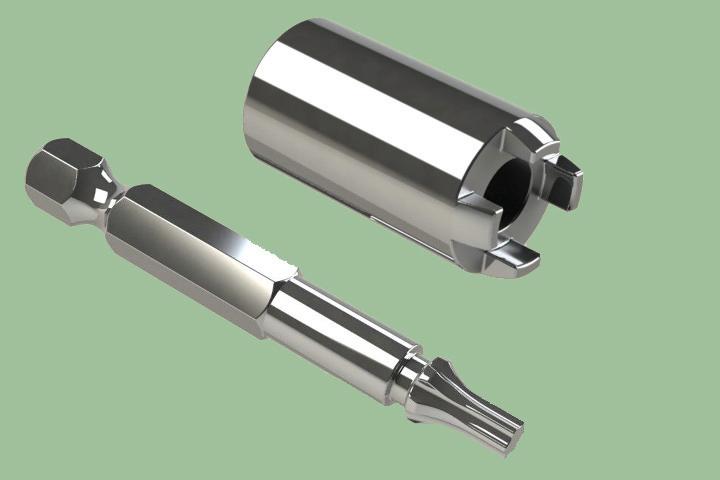
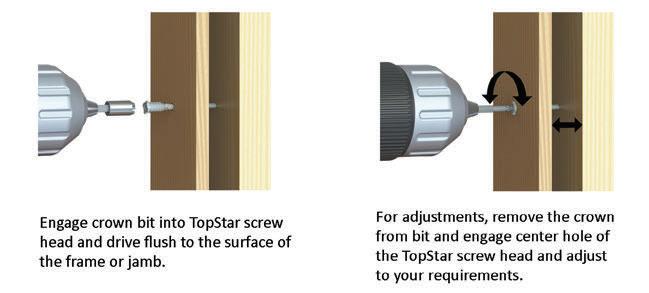
AIRSHIM The AirShim is a contractor-grade inflatable air wedge for door, window and cabinet installations. It’s designed to replace damaging pry bars and temporary wood shims. It allows a single installer to position and hold items in place, saving jobsite time and labor costs by providing a muchneeded extra hand in installations. It's perfect for window and door installations, and for positioning appliances and equipment. Use it anywhere you need to lift and align objects. The AirShim is certified for a 300-lb. load rating and has an internal stiffener with a rounded corner so it fits into tight 3/32-in. gaps without folding. When inflated, its 2-1/2-in. gap-spanning capacity means greater lifting or pushing range and more versatility on the job or around the house. Visit www.calculated.com. TOPSTAR FASTENING SYSTEM Available from U2 Fasteners, the TopStar Fastening System utilizes an ingenious two-piece “screw within a screw” to reduce labor for the plumb installation of door and window frames (jambs) and built-in cabinets. When locked, the Top Star screw gets driven into the material, and when unlocked, the fastener’s inner screw turns independently from the outer portion for easy adjustment without shims. First, drill a 5/16-in. pilot hole in the jamb then use U2’s Crown bit to drive the Top Star through

2

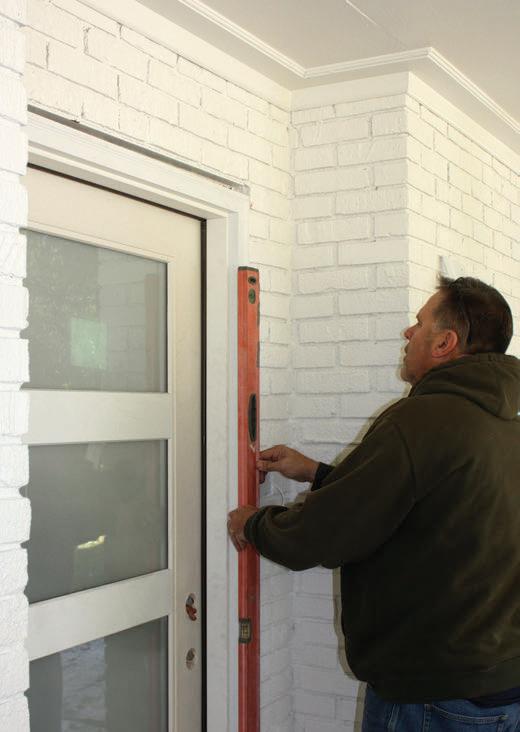
With the door in place, start at the top and measure carefully with the level. When the shim and the frame are correctly positioned, put a nail through the jamb to hold it in place.
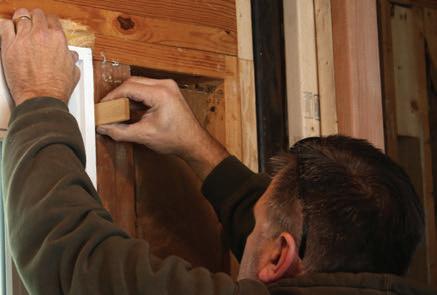
Repeat the process, inserting more shims around the door frame to hold it securely while checking for level and plumb as you go. This may require a lot of readjustments, but take your time and do it right.
Once the frame is held firmly, open and close the door to make sure everything fits. Inspect the top of the door to make sure it closes correctly with no gap. If you find errors, go back and make adjustments. You might need to add more shims on the latch side of the jamb to
3
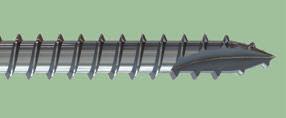
the door frame and into the roughopening until flush with the jamb. Then, slide off the crown to reveal the inner star bit and use it to adjust the Top Star’s inner screw, which moves the jamb in and out of the opening until plumb. This system is designed to make door installation faster than using wood shims to make fine adjustments. When installed with the Top Star system, if a door goes out of plumb over the years, use the Top Star screw to adjust it back to plumb position. Visit www.u2fasteners.com.
help the door align correctly. Make adjustments until the door closes properly and the gap at the top is even, then fasten through the shims into the stud framing. To give the hinges extra strength, you can place shims behind them and hold them in place with longer hinge screws driven into the studs.
When the door is fully installed, it’s a good idea to apply expanding foam in the gap between the jamb and the rough opening. Be sure to use a low-expanding formula specifically designated for doors and windows.
Finally, install your trim package of choice and seal all seams with a flexible, paintable, weather-proof caulk. Prime and paint the trim, install your doorknob or handle-set, then the job is complete.
Troubleshooting Installation
Getting the new door to fit perfectly square and plumb can be a challenge, especially for inexperienced installers. Here are a few pro tips to help get the door to fit.
4 5
GAP TOO TIGHT ON THE SIDE?
If a bowed jamb above the top hinge creates a gap that’s too tight on the strike side, drive shims between the framing and the hinge side of the head jamb until the gap is equal all around. (A bowed jamb is more common on the hinge side, but you also can use this trick to adjust the opposite side.)
GAP TOO TIGHT AT THE TOP?
If the gap above the door is too tight on one side, then insert a flat bar beneath the jamb on the tight side. Raise the jamb until the gap is even, then fasten in place.
DOOR SILL NOT LEVEL?
In older houses, you might find the door sill is not level. If the height difference between the two sides of the door is significant, the door won’t open and close correctly. Use a level to see if the floor is flat. If it’s not level, insert shims beneath the level until the bubble centers in the vial. When it’s level, measure the gap between the level and the floor. Use a hand saw (or circular saw with fine-toothed blade) to trim that measurement off one side of the door jamb so the pre-hung door will have an exact fit within the rough opening. Be careful—the side that will be on the higher side of the sill is the side that needs to be shortened.
BRICK MOLDING IN THE WAY?
Pre-hung doors commonly include pre-attached brick molding, which is wood trim surrounding the jamb to conceal gaps. The molding, however,
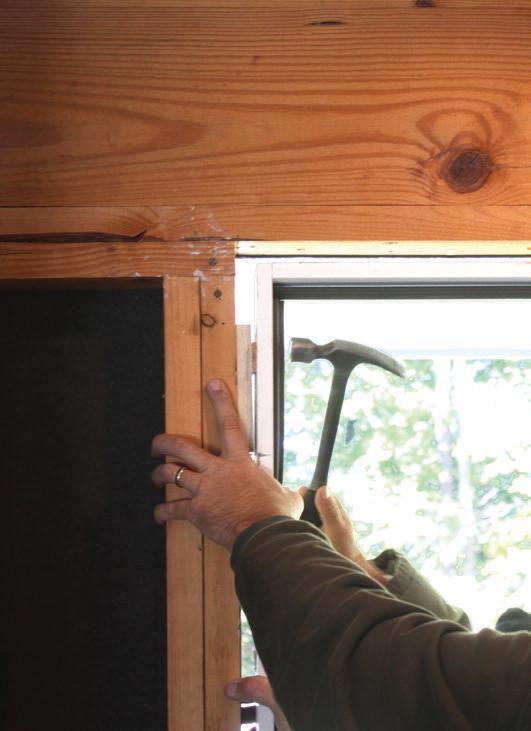
interferes with insertion of adjustable wedge-shaped wood shims from both sides of the door (as they were designed to be used). You might prefer to pry off the brick molding, install the door with shims, then reinstall the molding.
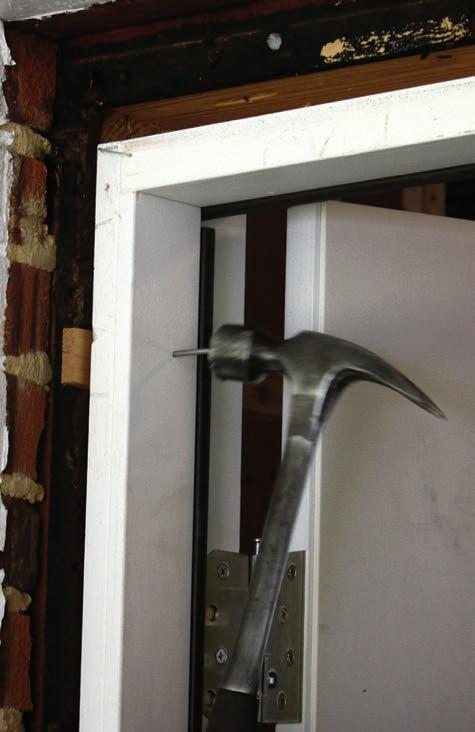
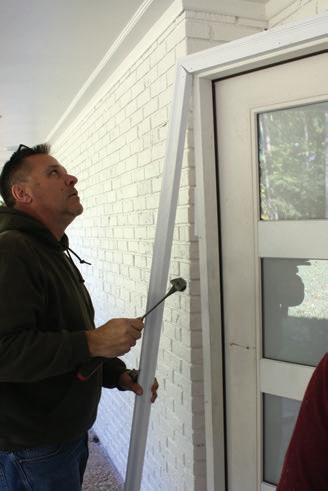
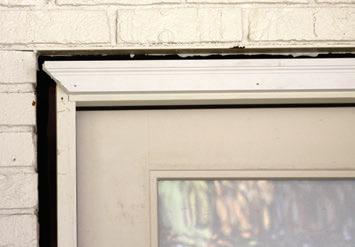
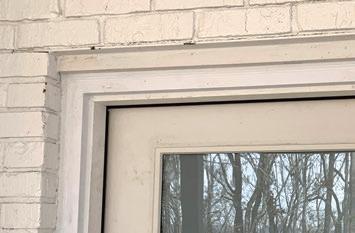
The photos show a recent door installation in Alabama, where Jeff Winkle and his Highland Properties crew found that the molding interfered with the painted brick surrounding the rough opening. Their solution was to remove the molding, rip it to a narrower size, then reattach it. Once the door was installed, caulked and painted, the alteration to the brick molding became invisible.
You can reach Jeff Winkle and Highland Properties at (205) 281-4125.
6 7
Door Alignment Trick for DIY'ers
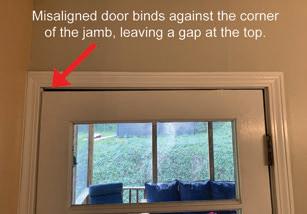
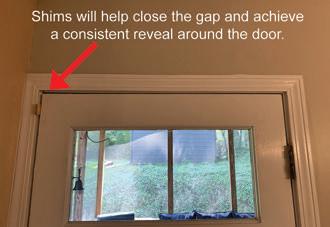
Have an old door that binds against the top corner of the jamb? Or maybe a large gap at the top of the door makes it difficult to seal when closed?
This is a common problem because the weight of a door is supported by the top hinge. Over time, the door can sag away from the top hinge and bind at the opposite corner.
Here's a simple DIY trick to correct this problem.
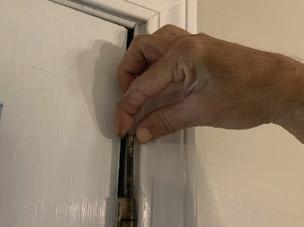
Remove the hinge pins from the top two hinges. You can unseat the pins by driving an
8d nail into the hole at the bottom of the hinge.
Once the top pin is removed, the door will be precariously attached by only the bottom hinge, so keep the door closed where its weight will be supported by the jamb. If you open the door using only the bottom hinge, the top-heavy door can fall, bend the hinge, and tear out of the jamb.
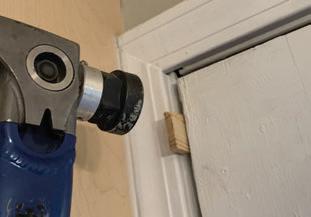
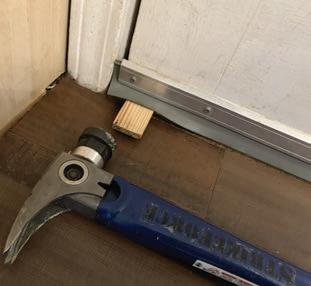
Insert shims as needed between the jamb and the door to create clearance so the door does not bind.
It might also help to use shims at the bottom to help close the top gap and achieve a consistent gap around the door.
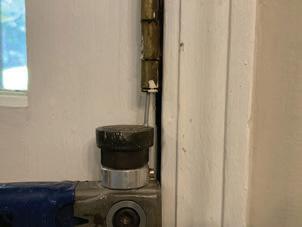
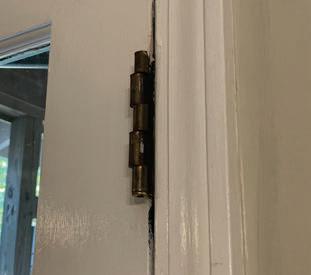
A "side effect" of adjusting the door's alignment with shims is that the knuckles of the top hinge will become misaligned. This might also happen to the middle hinge to a lesser degree.
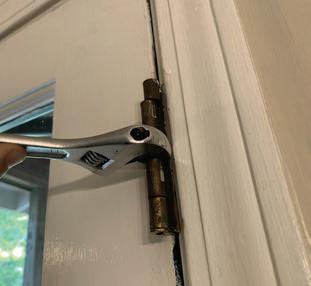
Adjust a Crescent wrench to fit snugly around the hinge knuckles, then carefully bend the three jamb knuckles so they align with the knuckles on the door.
To complete the repair, apply lubricant to the hinge pins and then reinsert them through the hinge knuckles. The door should now swing freely and have a smaller gap around its perimeter.
H
