30 minute read
Putting the M into an E39 Touring
Words Barry Sheward/Jeff Heywood - Photos Barry Sheward
In the second part of this build we followed how BMR supremo Barry Sheward stripped and prepped the Touring bodyshell in preparation for it to be sent to the bodyshop for a fresh lick of paint. As mentioned last month, some the corrosion found in the Touring’s underside did slow down the build somewhat. We left the article hanging where Barry had just received the Touring shell back from the bodyshop, looking all spick and span and totally rust free. In this issue we cover the mammoth task of rebuilding the whole car. Including slotting the drivetrain back in place, installing wiring looms, brake pipes, fuel pipes, trim, seating, headliner. Plus a plethora of new parts to give the Touring a new car feel, while making sure every switch operates just as BMW intended.
Advertisement
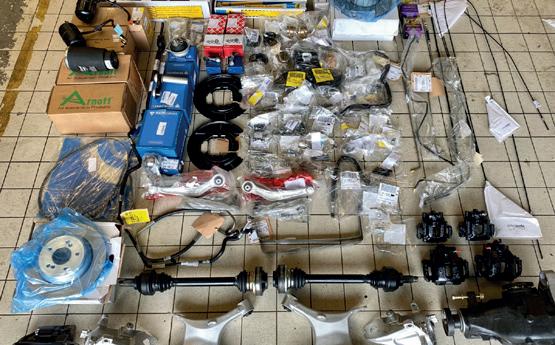
Rebuilding a car as complex as a large 5 Series Touring can be a daunting task, especially when you start to look at the piles of new parts, see the photo. Then there are the mountains of hardware, suspension, chassis, seats and interior trim that you can’t see.
The best way to tackle the job is to break it down into small manageable jobs, do them correctly (just as the factory would) and you get a sense of pride as each job on the list is completed. One of the first jobs I tackled was fitting the new OEM brake and M5 fuel lines along with new accumulators for the self-levelling rear air suspension.
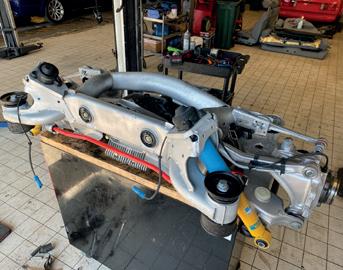
Barry then tackled the rear subframe and axle build. As you’ll remember from the previous instalment, the rear subframe was modified so that the M5’s LSD would fit perfectly, just as it does in the saloon. refurbished lower arms and hubs were fitted with new bushes used throughout. The new upper arms were fitted, along with new wheel bearings, new top mounts, new drop links and every nut and bolt was also replaced with new OEM items. The Bilstein B6 shocks were fitted, along with an Eibach anti-roll-bar. Arnott air springs were installed, along with refurbished drive shafts to complete the rear subframe and axle build.
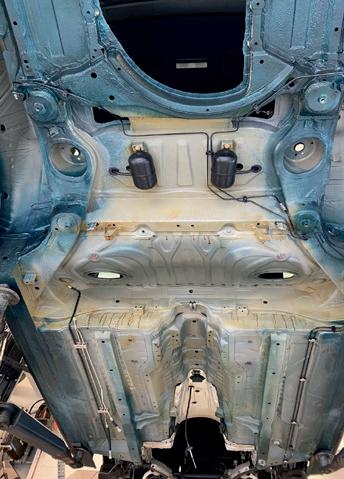
I’ve made a start! On went the new accumulators for the selflevelling rear air suspension followed by the OEM brake and M5 fuel lines
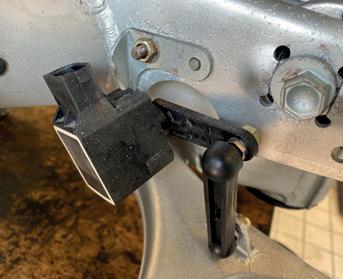
The rear axle is built up and complete. I used the modified rear subframe (covered in the first instalment) and fitted the rebuilt M5 LSD to the frame, followed by refurbished lower arms and hubs and new bushes throughout. All new upper arms, new wheel bearings, new top mounts, new drop links were fitted, along with the Bilstein B6 shocks, Eibach ARB and Arnott air springs. Finally the refurbished drive shafts were installed and it was good to go. This strange item is the level sensor for the self-levelling suspension

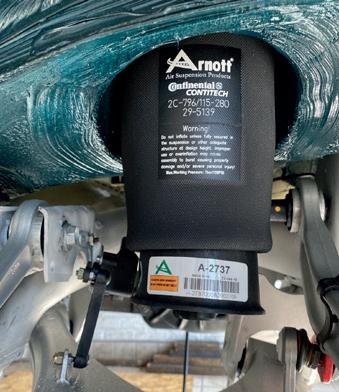
Here’s a close up of the Arnott air spring Once the subframe and rear axle was bolted in place along with the fuel tank using new tank straps, it felt like we were making progress
The mighty V8 engine ready for its marriage to the body
Next on the list was to build up the front subframe, which was first blasted and painted before an M5 anti-roll-bar, M5 steering box, new centre drag link, steering linkage, all new bushes and all new M5 PAS pipes were fitted.
Having covered around 125,000 miles, the S62 V8 was now due for some attention. Although a good engine, the S62 isn’t perfect. BMR have seen engines with timing chain, guide issues and Vanos problems, so while the engine was sat on a cradle Barry took the opportunity to give the engine a good look over. Everything seemed to be fine, but he also decided to inspect and replace the rod bearings, see photo.
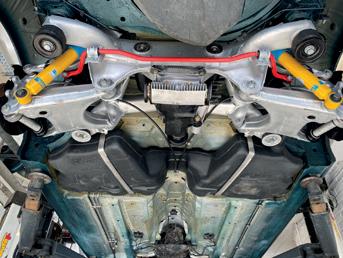
The rear axle was then bolted up in place along with the fuel tank using new tank straps. The engine and gearbox was mated, along with the recently replaced clutch and flywheel. It was then bolted onto the built-up front subframe using new engine mounts ready for its “marriage” to the body. Finally the S62 was bolted up into the engine bay and the car was put back on all four wheels with the rear air suspension inflated. The list of work in this paragraph was the result of 27 hours of graft over the May Bank Holiday weekend. Still, there was lots more to do.

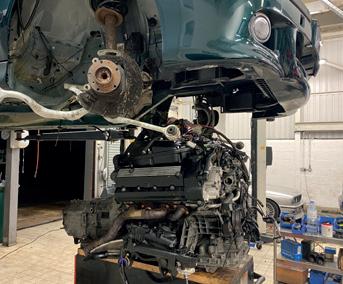
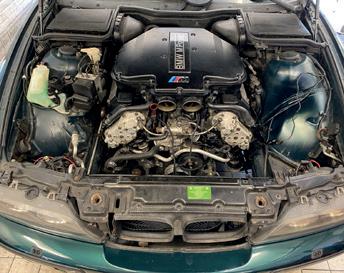
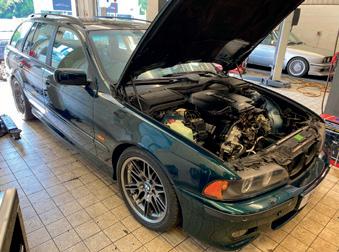
Using every bit of spare time available without the wife divorcing him(!), Barry pressed on to meet the Caffeine & Machine deadline.
Next on the agenda were the brakes. Not everything went smoothly, there were one or two issues that cropped up like the parking brakes and the rear brake hoses that needed one to get one’s thinking cap on. This next sequence is better told in photos and captions.

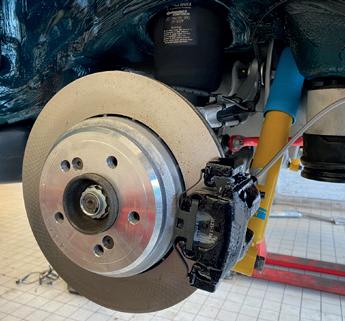
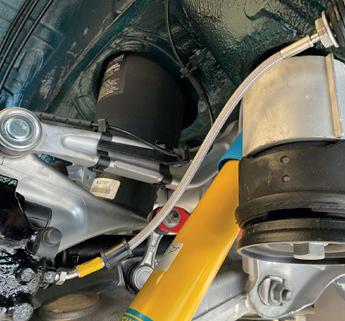
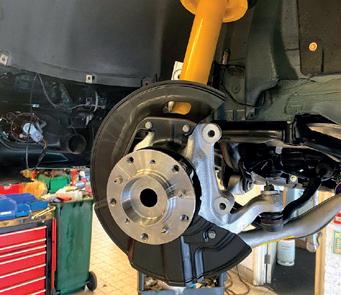

Brakes. The first photo shows the new parking brake hardware and new wheel bearings fitted. Photo 2 shows the M5 hub flange. Note the two grub screw bolt holes; non-M5s don’t have these. New discs, pads and rebuilt calipers complete the rear brakes.
Saloons and Tourings differ where their parking cables pass through the knuckle. It’s at 12 o’clock on the Saloon and 9 o’clock on the Touring. This presents a minor problem. The M5 uses bigger rear discs and therefore bigger back plates, so there are two options to address this issue; either weld in the centre of a Touring back plate to an M5 outer plate or cut down the Touring’s back plate to clear the M5 disc. I chose the latter as it’s easier than welding thin bits of steel that can distort and the plates have a shape critical to the operation of the parking brake.
Another difference between the Saloon and Touring that needed to be overcome was the rear brake hoses. On a Saloon the hose exits the calliper horizontally then attaches to the rigid pipe in a vertical position. On the Touring, the hose comes out at an approximate 45-degree angle then turns rearward to a horizontal join on the rigid pipe. The reason for this is to clear the shock absorber, there is a difference in mounting points; the Saloon is vertical to the top of the inner wheel arch and the Touring is set at about 30-degrees to the rear subframe, as can been seen in previous pictures. To overcome this, custom-made HEL braided brake hoses were fitted to the rear with matching non-custom fronts.
At the front, Bilstein B8 shock absorbers coupled with the existing Eibach Pro Kit front springs were fitted, along with new top mounts. All four arms are new, with the brake reaction upper arm bushes replaced with Powerflex items. New M5 wheel bearings (like the rears have two grub screw holes plus two locating pins). And, as per the rear, new pads, discs and rebuilt callipers went on to complete the work under the arches.
The front-end came together nicely as the front subframe was bolted into position, while the M5 specific fuel filter and pressure regulator setup was plumbed in.
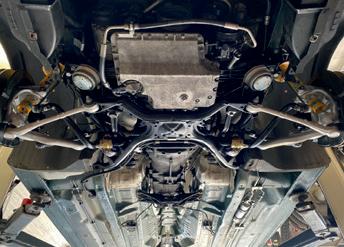
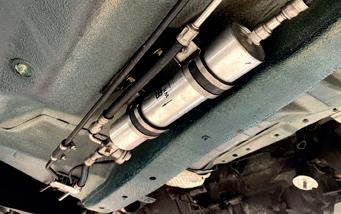
The front subframe was bolted into position and is now starting to look like an M5 Touring with the S62 sat nice and cosy above and the brakes and suspension, all ready for those 400 horses. I also plumbed in the M5-specific fuel filter and pressure regulator, that S62 is going to need plenty of Shell’s finest
And now onto one of the areas Barry enjoys with a build; the wiring. As mentioned at the beginning of the thread, there have been quite a few E39 M5 Touring builds, and having trawled the web to see others’ approaches, Barry found that people have taken one of two ways when it comes to the wiring alterations required. There’s a suspicion that their choices boil down to the base Touring they chose to convert as to the approach they have taken. The choices are to alter the existing Touring loom to suit, or use the M5’s loom and add in the Touring’s specific parts, such as tailgate, self-levelling rear suspension (if retained). The latter involves a lot more work. The following photos show the various looms and wiring Barry had to deal with.
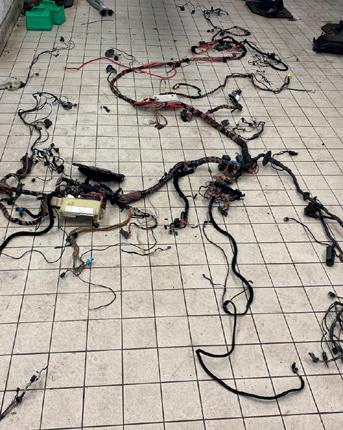

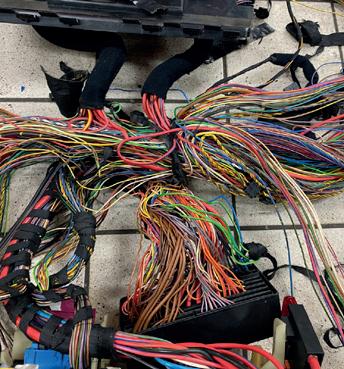

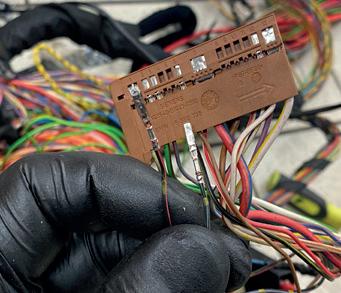
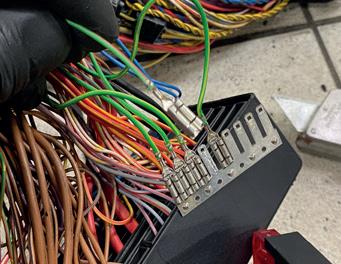

The first photo shows the M5 body loom laid out. With the wiring, you have to take into account if the Touring was equipped with ASC or DSC (all M5’s have DSC), whether the Touring was a diesel or petrol and, even more importantly, if the Touring was built before 09/98. This is particularly important because the E39 had a major technical update from this build date and all M5s were post 09/98, which also included a lot of the electrical components and wiring.
There are also differences between V8 and six cylinder cars and even after the 09/98 technical update there are a few slight differences. The upshot of this is that the easiest Touring to convert is a post 09/98 540i manual which has a similar build date to the M5 donor car. Nevertheless, using an 03/99 built 540i Auto Touring and an 09/99 M5 there was minimal wiring alterations needed to the Touring’s loom. Plenty of wires needed to be harvested from the M5 loom to integrate the Sport button (for different throttle map and steering), manual transmission and S65 vs M62 differences.
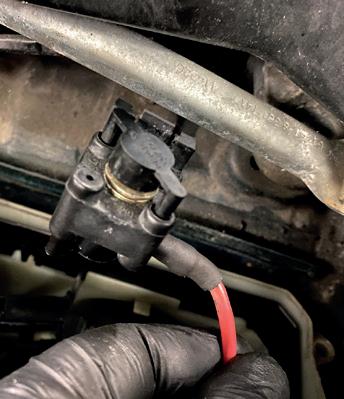
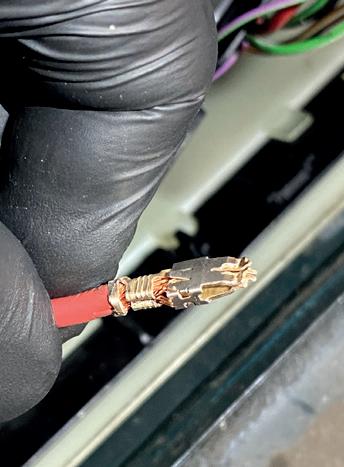
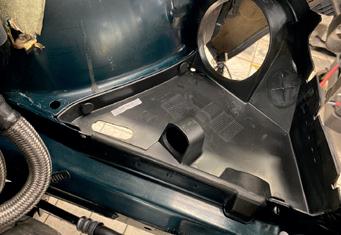
As with my previous E46 M3 Touring project, all wiring alterations were done without cutting and soldering so that all terminal numbers and wires colours corresponded with factory wiring diagrams. Photo No4 shows a close up of the engine’s main power supply connector that runs to the engine’s DME. Photo No5 shows just one of a number of connectors that one of the previous owners of the Touring had left during work they had carried out on the electrical system. I rooted all these out, see above regarding the E46 M3 Touring build. Photo No7 shows the brown Siemens connector switch pack that lives (hidden of course) in the centre console. The two extra wires are for the M5 Sport button. Finally, Photo No9 shows the wiring harvested from the M5 for using in the Touring. Next on my list of to-do jobs was to plumb in the oil filter housing and PAS reservoir. The top photo above shows the plastic fill in pork chop panels. Both the plastic panels from the 540i Touring were replaced to allow for the M5’s twin air intakes; both of these were damaged on the M5 donor so were purchased new and were some of the most expensive bits of plastic known to mankind. The second photo down shows the panels along with the last new undertray in Europe. This was a lucky find, they are now on backorder for at least eight months
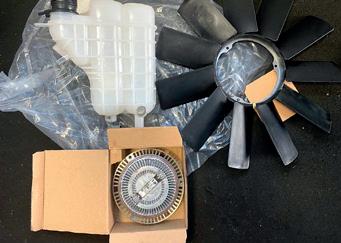
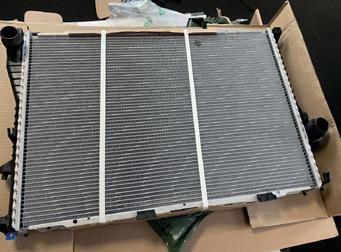
Due to the front end damage on the M5 donor car, a lot of the parts were scrap. The third photo down shows the new fan blade, viscous fan coupling and expansion tank, while the final photo shows the new radiator for the S62.
Both belt tensioners, belts and the top coolant hose were also replaced with OEM parts. Luckily the 540i shares the same front panel, PAS cooler, electric fan and AC condenser with an M5, so they could be reused.
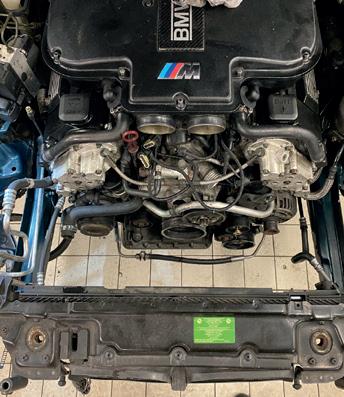
Wiring sorted (for now!) Barry’s attention then turned to the engine bay, this meant plumbing in the oil filter housing and PAS reservoir. These are located differently to the 540i and have their own bolt-on mounting bracket. Whereas, the 540i Touring has a welded-on bracket attached to the inner wing. The next set of five photos go through the work in the engine bay.
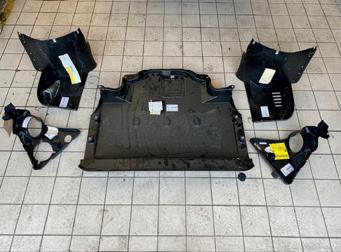
It was now time to fit the M5’s quad exhaust. This is a big part of the build because of the expense Barry went to to remove the Touring’s boot floor and graft in the floor from the M5 donor car. The following six photos plot the exhaust heat shields and pipework being fitted, before the engine bay is built up, fluids filled and it is fired up for the first time.
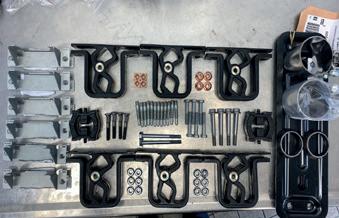
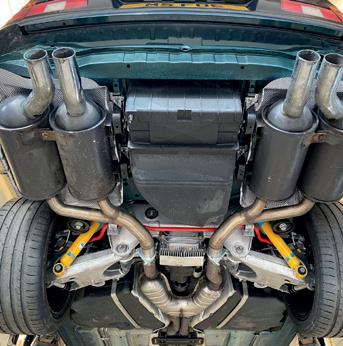
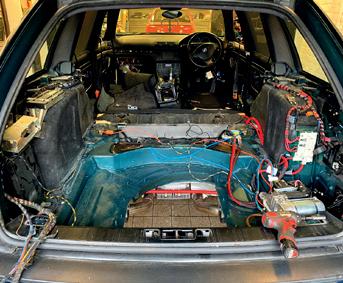
What you see in the top photo is all the hardware required to mount an M5 exhaust, which was all scrap on the M5 donor car. That pile of nuts, bolts and brackets cost approximately £500. That hurt. One of the photos show the rear silencer mounting studs all wound in after running a thread cleaner through the holes. A photo above shows the rear silencer heat shields have been fitted in place with all rear silencer six rubber mounts. The heat shields seem like a minor thing but both were missing from the donor M5 and had to be bought new at great expense for what they are. Finally, quad pipes on a wagon. Grafting in the M5 boot floor, relocating the battery, the expense of all the new M5 exhaust mounting hardware just be able to have four pipes like an M5 Saloon, could have all been avoided if I’d used an alternative method with a lot less work and expenditure. But it would have been a massive compromise and one most of the other M5 Touring builds have taken. But, as you are all well aware, my mantra was to build the car just like BMW would have built it. The 5th photo shows the donor M5 had been de-catted and had a rear silencer delete, all done quite poorly. I bought a pair of used rear silencers from ebay so I fitted those, but a pair of used M5 cats are quite expensive, now at circa £1200-1500. Ideally I wanted a complete, uncut system from the down pipes to tail pipes, so this unsightly exhaust is a temporary solution until a suitable system comes up. The final photo shows the engine bay now built with the intakes, fluids filled, petrol added to the tank, EWS, key barrel from the M5 fitted (for the time being) and it pretty much fired straight up! Time to get stuck into the interior refit, and time I didn’t have with the Caffeine & machine Meet looming large, so I cracked on with the refit. Looking at the first photo the job looks horrendous, but once you get the carpets in, trim, rear seats and front seats you are 99.9% finished. Talking about front seats, the second photo shows the M5 fronts, which were sent to a mate at The Polishing Company in East Anglia who recoloured the blue centres to black. Thankfully they were back in time to fit. The next photo shows a set of Michelin PS4s fitted, then onto the Hunter wheel alignment to set the car up to M5 spec Time was very limited for covering absolutely everything to finish the car, so to stand a chance of making the meet I had to prioritise what to do so it could be driven and so it looked complete. Pressing on last week after hours at work and all the way up to 11.30PM on Saturday, I just managed to achieve this.
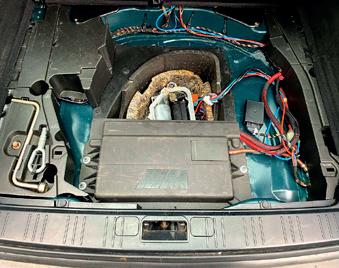
In the first photo you can see that keeping the self levelling rear air suspension meant some rerouting of the pneumatic lines, wiring and removal of the compressor from its tortoiseshell housing that locates it under the spare wheel. I ended up putting it in the forward compartment of the M5’s battery tray that normally houses a tyre inflation kit. One of the plastic trims (left hand side, it covers the BM54 radio unit) was already cracked and the ones on the right needed some cutting to allow routing of some wiring. This is an area that requires some finessing, so another set of plastic covers will be sourced and adapted to tidy this area up. Thankfully the boot floor carpet hides everything.
The photo above shows more of that gold plated plastic fitted up, the centre undertray specific to the Sport front bumper is often missing or damaged by speed bumps. In my case, it still has an SE one fitted along with ebay copies of the pork chop side pieces. I was initially told the centre piece was on backorder, with no stock in the UK or Germany. Then one turned up a couple of days later. Happy days I thought, but on closer inspection it had clearly been knocking about in a warehouse for some time as it was covered in dust and had (as can been seen in the pics) lots of scratches to the underside. Annoying, but I wasn’t going to be too choosy on something I would have to wait a long time for another. And that’s if they ever make another batch.
Barry then turned his attention to the interior refit. He was running out of time to make the M5 meet at Caffeine & Machine on 4th July, so apologies that not many photos were taken during the interior reassembly. Once the refit was complete, it was time for some new boots and a session on the wheel aligner to make sure the M5 Touring was running nice and true. Once the alignment was sorted, Barry ran the engine up to temp, checking for leaks. He did have to rectify a minor coolant leak. Then it was time to take it for its initial test drive. It passed with flying colours, driving like an E39 M5 but one with a lot more load space than standard!
Barry was really pushing it now and as the clock clicked round on the final day before the meet. He burned the midnight oil getting the car presentable for the show.



It wasn’t only the interior bits that required finishing, there was lots of exterior trim that needed fitting or replacing. New rear lights, an interior mirror had been sent away and had arrived back needed fitting. Plus, the M5 Touring needed a quick clean up both outside and under the bonnet for the show in the morning. Barry looks back now and wonders how he fitted all this work into one Saturday! If he’d been working at a main dealer he would have probably done 40 hours or more of chargeable work.
I’d noticed that the M5’s oval mirror was suffering from the usual bleeding of its auto dimming glass, plus mine was missing its clown nose alarm LED lens. So I put in an order with www.mirrorjohn. co.uk for a replacement glass and lens. Thankfully, the parts arrived in time so I fitted the mirror and it worked fine. I ordered a set of covers for the back of the mirror and a rain sensor, but they didn’t seem to fit, so that’s been added to the snag list to investigate.
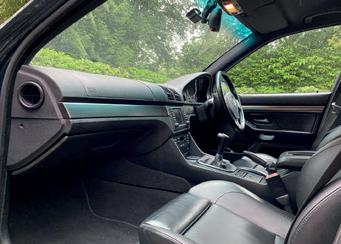
When I purchased the 540i, the previous owner had fitted a set of birch anthracite interior trim that was quite sought after. I do like them but I wanted the interior to have as much an M5 feel as possible, so I swapped the birch for a very good set of M5 specific titan shadow trim set.
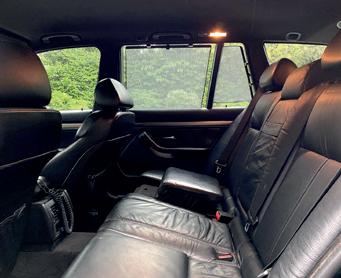
Another couple of options already retrofitted to the Touring were the built-in child booster seats and rear door blinds. Having owned several E39s over the years, I always wanted the booster seats for my kids to use. Now they are old enough not to need them anymore, typical. I also added M5 rear outer head rests to match the fronts.
The next photo of the switch panel shows the M5-specific Sport button that adjusts throttle map and steering assistance. This took a bit of time providing a feed to it (see the wiring section), but it’s worth it to give the factory M5 look.
Another retrofit carried over from the Touring is the widescreen Mk4 Nav unit (a bit antiquated now) and DSP audio system, which, although not great, is a step up from the very poor base spec audio most E39 owners have to put up with.
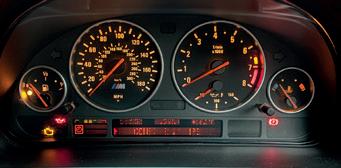
The donor M5 still had its original early black face instrument cluster, so that was swapped over. But, as you can see, it’s suffering from the usual dead pixels in the display. What isn’t noticeable in the photo are some other issues, such as the fuel gauge reading incorrectly and the warm up lights on occasion doing an impression of a crappy disco. I have tried another cluster to confirm that it is my dials at fault and not a dodgy sender or wiring issue. I now know I need to send mine away and see if it can be repaired.
During the week I had driven the car to and from work a couple of times to give it a short shakedown, so, with no issues, it was time for a longer run and at speed. A 40-mile round trip up the M23 then one junction of the M25 and back with (thankfully) no issues I was confident it would be okay for the 250-mile round trip on Sunday to the Caffeine & Machine M5 meet.
Fitting a fresh set of side mouldings was the next job on the tick list, with M5 badges, plus clear side repeaters to replace the body colour painted ones and ambers. Continuing with the amber-toclear theme, a set of mint condition facelift rear outer lamps, with clear indicators and new facelift inner lamps, were added to replace the faded ones. Plus, on went a pair of new outer bumper mouldings.
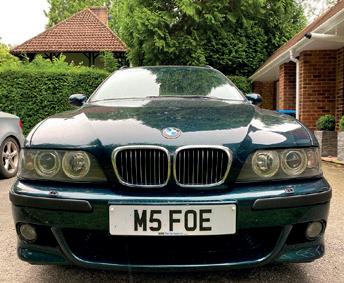
To finish off the clear indicator theme (all UK M5’s had clear indicators), the amber-shod halogens that had a cheap HID kit and broken adjusters were replaced with a set of OEM facelift Xenon headlights that had been refurbished with all new adjusters, polished lenses and new bulbs.
Also in the photos you can see the M Sport front bumper T-bar in the centre grill has been swapped out for the M5 mesh grill and the standard door mirrors have been replaced with M5 specific ones. A new motor and glass was required for the driver’s mirror as they had been damaged when the donor M5 was crashed.
The engine bay received a quick wipe down; it wouldn’t win a concours but it made it presentable. New headlight gaskets and some of the bolts that hold the lights, radiator supports and front panel were replaced with new to get rid of the old, rusty ones. That helped tidy the engine bay up a bit.
Finally a quick wash before the meet, then the last piece to go on at 11.30pm was the M5 rear badge.
The morning of the meet, Barry can’t believe he got out of bed just a few hours after finishing work on the Touring the night before. After a quick shower and into The M5 to fill up the beast with V-Power and a quick run around the M25 to meet up with a group of E39 M5 owners at Beaconsfield services, he then travelled up the M40 to Caffeine & Machine at Ettington, Warwickshire. It was an enjoyable morning out with some nice M5s in attendance, including plenty in some rare BMW Individual colours.
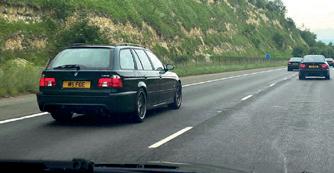
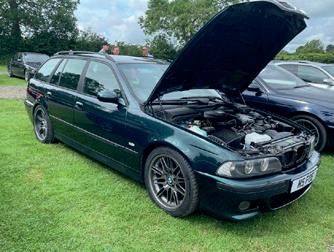
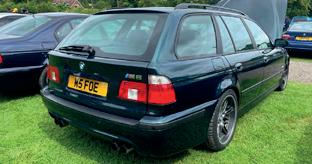
It’s 5.45am on Sunday 4th July and I’m filling up the M5 Touring with V-Power. I then travelled around the M25 with no dramas to meet up with a group of E39 M5 owners at Beaconsfield services. We then set off up the M40 to the E39 M5 Meet at Caffeine & Machine in Warwickshire. We all behaved on the run up the M40, honest officer! The Touring ran like a dream on the motorway, the suspension nice and compliant making the Touring a nice cruiser. Once at the show, we were parked together with over 100 M5s, which the forum guys are saying is some kind of record. I enjoyed a great day at the show, there were some pristine M5s on display, including some in rare BMW Individual colours. My Touring received plenty of attention and favourable comments. I’m glad I made the effort to attend, plus the show gave me a date to aim for.
Barry’s impressions
“It goes and stops just like an M5, it handles pretty much like an M5 with the Eibach rear anti-roll bar keeping the body roll in check, even with the extra weight. Ride is nice and compliant compared to my M4, despite the Bilstein B8 shock absorbers. With every bush, ball joint, mount, suspension arm and steering rod being new it’s as tight as can be.
The only downside is the third gear synchro crunch, which is annoying as it means a ‘box rebuild and I had no way of knowing this as I couldn’t drive the crashdamaged M5.
Overall though, I’m very happy with how the build has turned out so far. Despite there being a snag list, plus a few other changes I would like to make, I am looking forward to doing those as and when.”
Snag List
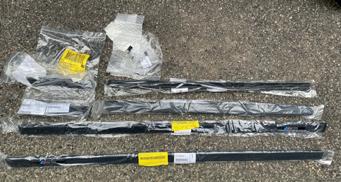
After a short break from all the late nights working on the M5 Touring to recharge his batteries, it was time to tackle the snag list. It contained items like the air conditioning, the instrument display, fixing an issue with the DME/MWE. Plus, hopefully finding some roof rails and bike racks, as the Touring was going to be pressed into family use. See the following photos, it gets interesting.
So there we have it, one BMW E39 M5 Touring build finished. Built just how BMW would have manufactured it at the Dingolfing factory, using as many OEM parts as possible and driving just like an M5 Saloon, only with far more loadspace. It has taken Barry the best part of six months to build the M5 Touring in his own spare time, when not running one of the UK’s most reputable BMW Specialists. An amazing achievement. Dare we broach upon the cost of a build like this? I asked the question while putting this final article together and Barry was quite open about it: “£23,000-ish, not including my time” came his reply. This might seem like a lot of wonga, but take into consideration Barry had to find a donor vehicle and then purchase an accident damaged E39 M5 to give up its M V8 and ‘box, plus lots of other bits and bobs, and the cost starts to make a lot more sense. Anyway, Barry is happy with the resulting build. Not only does he get to enjoy the Touring, so does the Sheward family. Next month, we’ll get to find out what it’s like to drive when we bring you a full MLife article covering Barry’s E39 M5 Touring, plus lots of amazing photos.
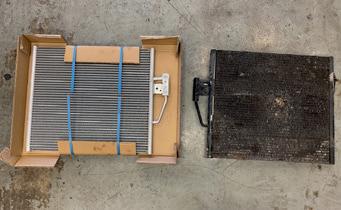
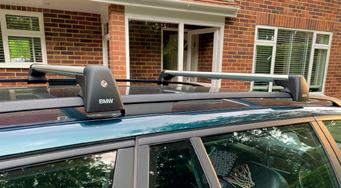

After a couple of weeks break, I started to work through the snag list. Quite an important one, with the tropical weather we are enjoying at the moment, is the AC or lack of. When it was in use, and before the 540i was pulled apart, the AC was working fine, so despite my usual modus operandi of replacing everything with new, the condenser was left to be reused but a new receiver drier was fitted after the system was exposed to atmosphere during the conversion. The moment the AC machine was attached to the car it was apparent there was a leak from the condenser, so a new one was ordered up last week and it became quite apparent when the old one was removed it was clearly past its best. With that fitted, the system was gassed up and it’s now blowing ice cold air as it should be. A lucky forum-find was a pair of genuine BMW accessory E39 Touring specific roof rails, so these were quickly fitted.
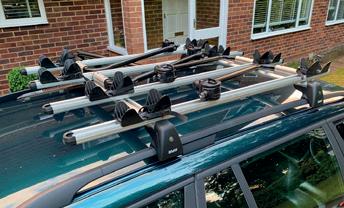
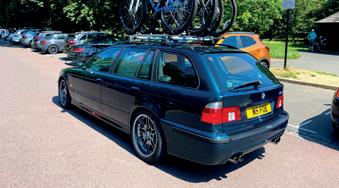
Another lucky find on ebay was a set of four genuine BMW accessory bike racks, which were attached to a pair of E46 and E39 Saloon roof rails which I swapped over to the new Touring rails. Result! All in aid of pressing the wagon into family use.
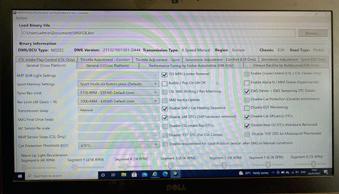
With the deadline to get the car on the road in time for the E39 M5 meet there were a few things that I left to address later that wouldn’t stop me using the car, but needed sorting. To get the engine up and running I used the donor M5’s EWS immobiliser module, ignition barrel and key to work with the M5 DME (engine ECU) which allowed it to fire up straight away. Obviously this isn’t ideal, having two different keys and using the M5 EWS with its VIN and VO (Vehicle order, list of options fitted to the car) stored when it’s a 540i. So, using the excellent binary modification tool from www.ecuworx. co.uk, I could switch off the EWS input on the M5’s DME and I could switch back to the 540i’s EWS and ignition barrel. That meant everything was now working off the original 540i key.
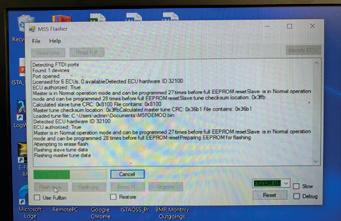
While using the tool I also removed the 155mph speed limiter, switched off the post cat O2 sensors (for now, as mine has no cats) and switched off the secondary air pump for quieter cold starts. The next photo shows the modified BIN file being flashed onto the DME using MSS flasher. Everything is working off one key now, no post-cat O2 sensor faults and hopefully less annoyed neighbours when setting off for early Sunday morning runs.
Going back to a previous picture I posted of the M5 cluster, it was not happy. Lots of dead pixels meant the mileage and check control messages were unreadable, the fuel and temp gauges weren’t correct, the rev counter was inaccurate, plus the ABS/DSC lights didn’t work. Something was seriously amiss inside that cluster.
After recommendation by a few people on one of the E39 Facebook pages and a chat with the man himself, I sent the cluster to Keith at AK Speedo to investigate what the problem was. Upon taking it apart, it was clear where the faults lie. Various parts of the circuit board and motors had corrosion, some of the worst he had seen. Who knows how this cluster ended up like this, but needless to say it was not saveable.
With it being an early black face M5 cluster, instead of the later grey face one, it would have been a shame to bin it as they are hard to find now and quite sought after. Keith came up with a solution and it meant finding a donor cluster with a suitable SW and HW number. After a call to a BMW breaker I know, a cluster turned up from a 2003 530d, which met the requirements. The cluster was sent to Keith to cannibalise the relevant parts and to make up a fully working black face M5 dial set. With the cluster now fully functional with no dead pixels, the next thing to do was program it with the 540i VIN number and mileage so everything tallied up with the cars physical VIN number, rather than have mismatched VINs in the cars control units and the incorrect mileage for the car (not the engine) stored.
Here’s the cluster fitted back into the car and coded up with the car’s VO matched to the EWS’s VO. Everything is now as it should be and working correctly with no tamper dot, mismatched VINs, VOs or incorrect mileages.
Expert Repair & Restoration of All Vehicles We Aim For Perfection Every Time
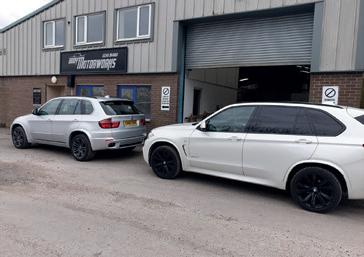
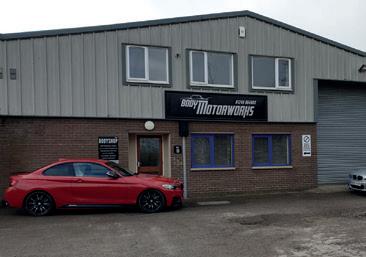
Body Motorworks have over 23 years experience, 14 years of which were spent in a BMW Approved Bodyshop.


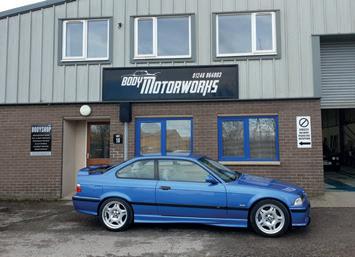
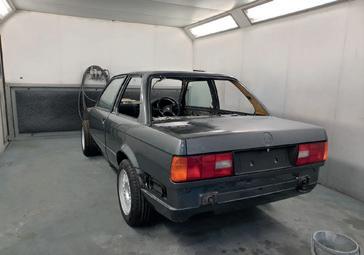
During the time in the BMW Approved Bodyshop, all available training was taken including: • Paint Expert • Paint Technician • BMW ATA

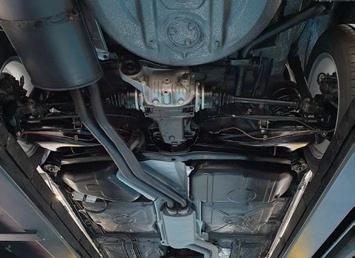
With that in mind, we feel we are in a strong position to deliver the high service that you require. Whether that be a simple SMART repair to remove the scuff on the front bumper or a full restoration project, removing all components, we aim to give 100% to ensure the highest quality workmanship can be achieved. With our unit based in Chesterfield, we have full facilities to conduct a high-quality, professional job including that of a spray bake to enable paint to cure as quickly as possible. This means that the high-quality work you have just paid for, is guaranteed.

Request more information or book one of our services by calling 01246 864803
