8 minute read
Equipment: The power of go
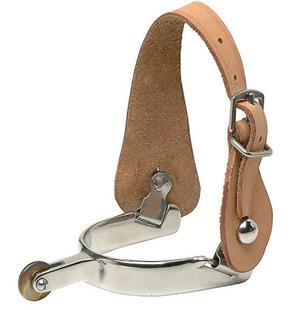
Western spur with ornamental strap and buckle.
EQUIPMENT
Advertisement
Fine tuning the forward button
Ever been dazzled by the apparently endless variety of whips, crops and spurs? Unsure what to use and when? CHRISTINE ARMISHAW is on a mission to clear up the confusion.
Whips, crops and spurs all have something in common, collectively they are artificial aids designed to improve your horse’s ‘go’ button. The former are carried in-hand, ready to encourage your horse forward with a touch or a flick. Spurs are worn around the heel of each foot, allowing pressure to be applied on both sides of your horse, keeping your hands whip-free and ready to do other things, like steer!
Sounds simple enough, but the challenge is down to the sheer number of choices available. How long should a whip be? When does a whip become a crop? Which spurs are best suited for what purpose? With an ocean of options, selecting the right tools to suit you, your horse and your chosen discipline can be quite the mission.
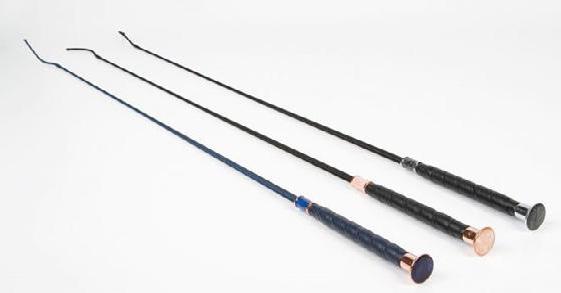
Let’s explore the world of movementenhancers in more detail. By the end of this article you’ll know when the Prince of Wales is required, what makes roller balls popular, and the maximum whip length you can use in the jumping ring without getting eliminated. Whips and crops Structurally, a whip features a length of stick, with a thicker area for gripping at the top, tapering down to a ‘tickler’ or ‘lash’ at the business end. By definition, a crop is technically a short whip, primarily for use while jumping. It usually has a leather flap or ‘popper’ at the end and a loop by the handle. However, it’s never advisable to put your hand right through this loop while on horseback as there’s a risk of damaging or breaking your wrist if you fall off. Instead, it’s best to put only your thumb through the loop, enabling the crop to come away freely if you happen to part ways with your mount.

Crops are commonly used in show jumping and the cross country phase of eventing. As per Equestrian Australia (EA)
Dressage whips: usually riders can carry a whip of up to 120cm on a horse, or up to 100cm on a pony – but check the rules first.
rules, they are not to exceed 75cm in length. If your whip is longer than that, you’ll be eliminated. You’re allowed to use a longer whip for dressage and working on the flat, but you are strictly forbidden to carry or use it when riding over poles or any other obstacle, even when you’re in the schooling area. In eventing, the horse should never be hit with your whip more than twice for one incident, or three times in a row for show jumping. Crops of up to 75cm are also allowed in the majority of show horse classes.
Most EA dressage tests, including para-dressage, allow the use of a whip. Riders can carry a whip of up to 120cm on a horse, or up to 100cm on a pony. It always pays to check the conditions of the test you are planning to ride first. Across all disciplines, you are never allowed to use a whip on your horse’s head or leave visible marks on your horse’s body - this is deemed excessive use. In the sports of endurance and reining, whips and crops are not allowed at all. Spurs Given that our aim should
A riding crop with leather flap or ‘popper’ at the end and a loop by the handle.
always be to use the least amount of force required to get the result we want from our horse, some riders hold the view that spurs are too harsh. However, in reality it’s more uncomfortable for the horse or, in many cases, stubborn pony, to be repeatedly kicked before it finally moves off - not to mention incredibly tiring for the legs of the rider! This habit also tends to make the horse lazier and even less responsive as time goes on: it switches off and becomes dull to the leg aid.
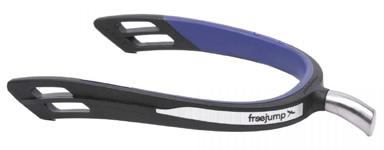
The difference between using your heel against your horse’s side versus a spur is like the difference between being pushed with a flat palm or a pointed finger. A spur delivers a more direct point of pressure into a smaller area and so will elicit a quicker response. This is a good thing. It means you should only need to squeeze once before the horse moves forward, then you can leave it alone and stop nagging. With the right pair of spurs, you can train your horse to become more responsive to your ‘go’ signal and thus become much lighter in your aids. This is essential if your intention is to move up through the grades. Which spurs to select In making the right spur choice, you need to take into account your own needs as well as those of the horse, and the discipline you compete in. Styles vary, as do the rules around them. Prince of Wales spurs are very traditional and commonplace in a variety of disciplines. Their shank is slightly curved with a flat end. In contrast, at the end of the shank of a roller ball spur there’s a rotating ball that pivots on either the

The ‘popper’ end of a riding crop.
vertical or horizontal plane. These can be a nice choice for a sensitive horse, or a horse that has never experienced spurs before as they exert a less concentrated pressure. They also reduce the possibility of leaving marks on your horse’s sides.

Swan-neck spurs are shaped as the name suggests, which allows them to reach higher than Prince of Wales spurs. These can be useful for reaching a specific spot on your horse’s flank, and can help prevent the need for a longlegged rider to pinch upwards with their heels. Hammerhead spurs are squared off rather than round at the end, which can give a stronger ‘go’ aid to a lazy horse. Rowel spurs feature a rotating flat disk at the end of the shank. The disk may be either smooth-edged or have serrated teeth or ‘tines’ around it. Dummy spurs have little to no shank and
rounded ends. These are great when your horse doesn’t really need spurs but they’re required as part of the dress code. Gently does it Thinking about your equine partner, aim to use the gentlest aid possible in order to achieve the required response. If you have a horse with sensitive flanks, like a thin-skinned Thoroughbred, you may only need to use a pair of softer roller ball spurs. However, if you are riding a ploddy type that has plenty of padding and not much forward inclination, then something a little more pointy and with extra persuasive power may be the answer.
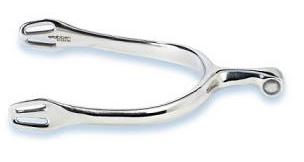
To choose the right pair for yourself, consider your leg position in relation to your horse’s barrel. Generally speaking, the closer to your horse your heel falls, the shorter the shank you’re likely to need. A longer leg with more space between horse and heel will require a longer shank (with potentially more curve) in order to reach the right ‘squeeze spot’. Rules can change Discipline rules can change annually. It always pays to check for updates before you enter a competition, but here are a few guidelines to help you along. Spurs must be a matching pair. Shanks should point directly back from the centre of the spur when on the boot, with the tip pointing neither up nor inward. In eventing
Stubben dynamic dressage spur.
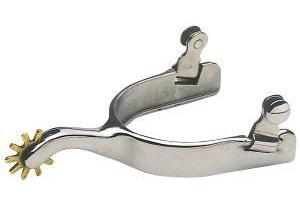
Gold cup campdraft spurs.
there is a spur length limit of four centimetres. This is from the actual boot to the end of the spur, so make sure your spurs are fitted well and sit right against the heel of your boot. Rowel spurs are primarily used in Western riding, but certain variations are legal in jumping, dressage and for show horses
Pro-Polo spurs with straps.
too, so long as the rowels are blunt, smooth and rotate freely. Interestingly, in endurance riding spurs are prohibited altogether.
Whichever style you opt for, be sure to regularly examine the horse-touching ends for any signs of rough edges or sharpness. There is absolutely no excuse for blood, or marks indicating excessive use of the spurs anywhere on the horse. You should keep this in mind if you clip your horse in the winter. Sometimes, a pair of spurs that are fine when used through your horse’s regular coat can become too harsh on the flanks of a clipped horse. It may be best to opt for a gentler pair, or remove your spurs and stay with a whip or crop.
While spurs have their place, like all equipment they are ultimately as kind or as harsh as the rider using them. For those still developing lower leg stability, a whip or crop carried in-hand may be a better choice. Final thoughts Remember, the point of using either a whip or spurs is to reinforce your leg aid. It’s often better to carry a whip and not need it, then to need one and not have it. If you have a good, steady leg you can treat your spurs in the same way. In many cases, employing the use of spurs for a few rides can help sharpen up your horse’s responsiveness, after which you may wish to remove them. The goal, after all, is to ride with the lightest aid possible.
Prince of
Wales spurs.
