24 minute read
PREVIEW
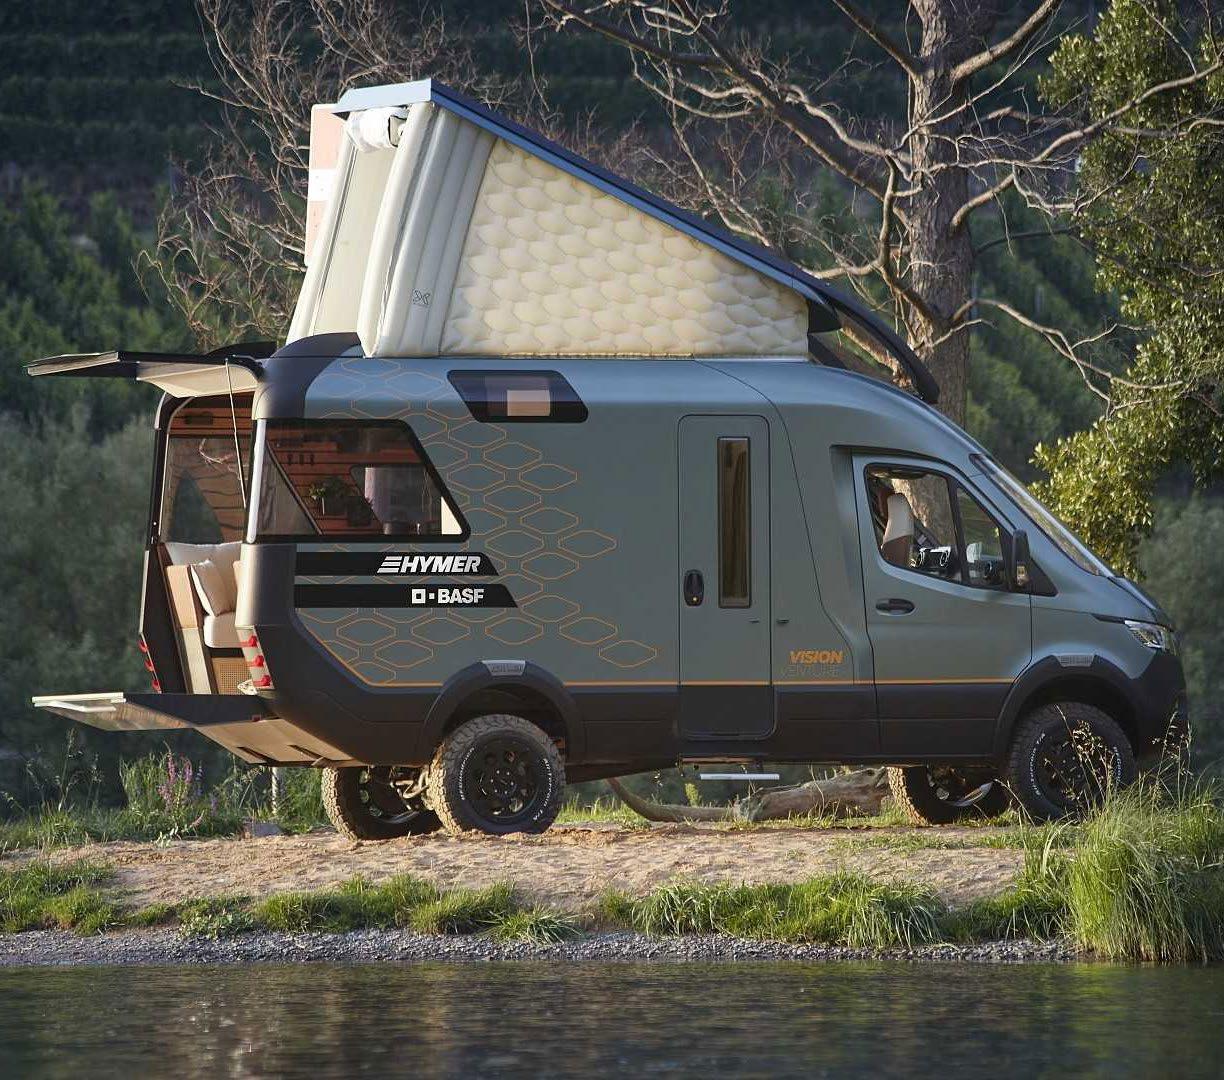
In 2019, Hymer impressed many with a groundbreaking Sprinter concept it called VisionVenture. Among the concept's many boundarypushing features were an inflatable pop-up roof, accessed by a staircase rather than a ladder.
Now, Bürstner is recapturing some of the innovative glory of the VisionVenture, integrating its inflatable roof and staircase into an ultra-modern C-Class motorhome called the Lyseo Gallery, which invites travellers to, “Travel small, live large.”
Advertisement

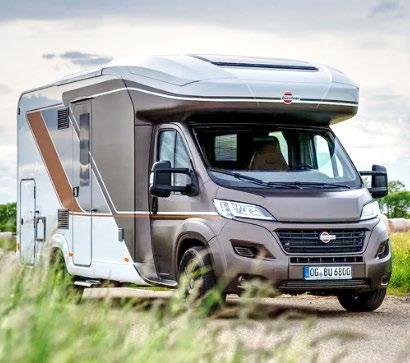
The roof on the new 6.89m Lyseo Gallery definitely sets it apart. Bürstner explains that the model's pop-up alcove gives it interior space like the manufacturer's hard-alcove C-Class motorhomes, but with the sleeker drive form of its ‘semiintegrated’ B-Class vehicles.
Bürstner's existing Lyseo motorhomes don't offer over-cab sleeping, using the compact space above the cab as storage. But in the Lyseo Gallery, that space transforms into a spacious bedroom courtesy of the pop-up Gallery Roof.
In place of gas struts, the Gallery Roof relies on a different type of gas-assisted setup: A built-in air compressor fills the vertical wall chambers, erecting the roof as they inflate into shape. It only takes about 90 seconds to go from lowered drive roof to upstairs bedroom. Once raised, a pressure sensor continuously monitors the inner air pressure, automatically filling the walls if it dips below a preset level. Bürstner promises near-silent operation, but we'd have to hear it doing an 02:00 refill to believe them.
When I first saw the inflatable pop-top in nearproduction form I wondered what happens if you accidentally tear one of the walls? Will you be squashed by the falling roof panel? Bürstner says the walls are reinforced to prevent damage and leaks, and also claims to have arranged the chambers in such a way that it will not suddenly collapse due to loss of pressure.
When Hymer first showed the inflatable roof concept on the VisionVenture, it pitched it as a way of increasing thermal insulation to create a more comfortable interior environment. Bürstner cites the same advantage again, stressing that the Gallery Roof boosts insulation by way of the air inside the walls while also holding up to UV light. And, of course, the waterproof material stands up to external moisture.
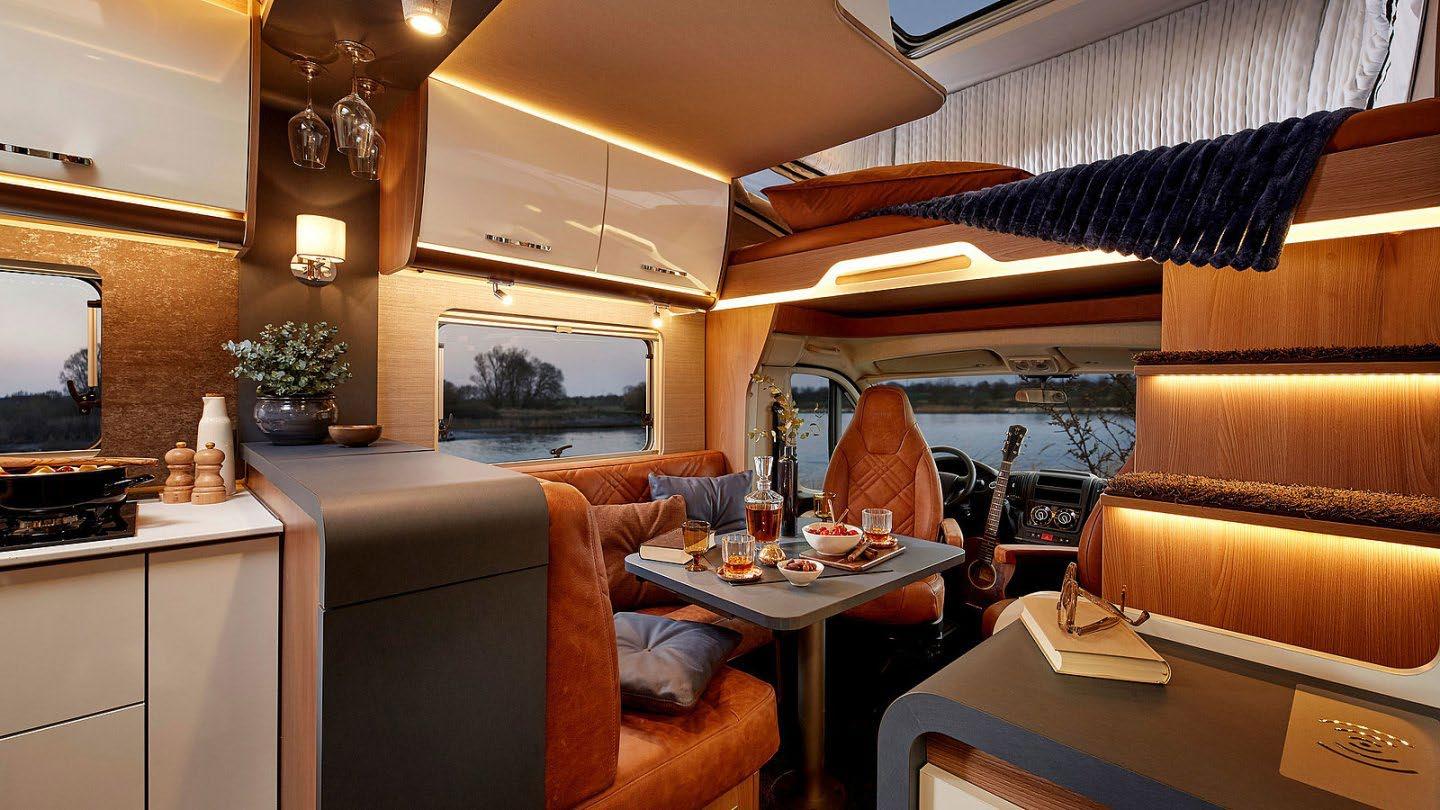
Beyond the various benefits of the walls themselves, the Gallery Roof lifts straight up into rather than tilting like many pop-tops. This creates vertical walls to increase internal volume and support a second-floor sitting height of one-point-one metres.
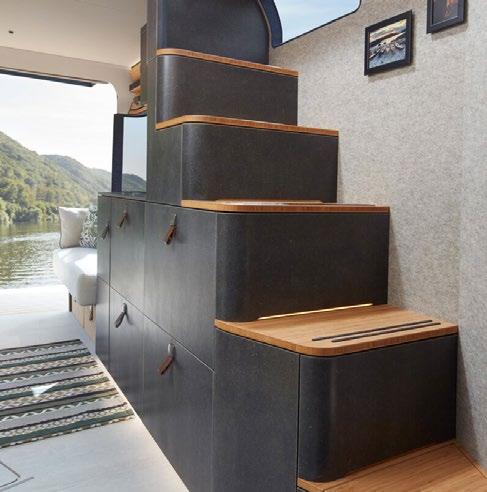
Bürstner adds to the appeal of the upper bedroom with a side table-cum-workstation, seat and device-charging station. And as mentioned, in place of a ladder, the Gallery is accessed via a unique staircase. Cabinets in the carpeted stair-treads ensure no space is wasted in the design.
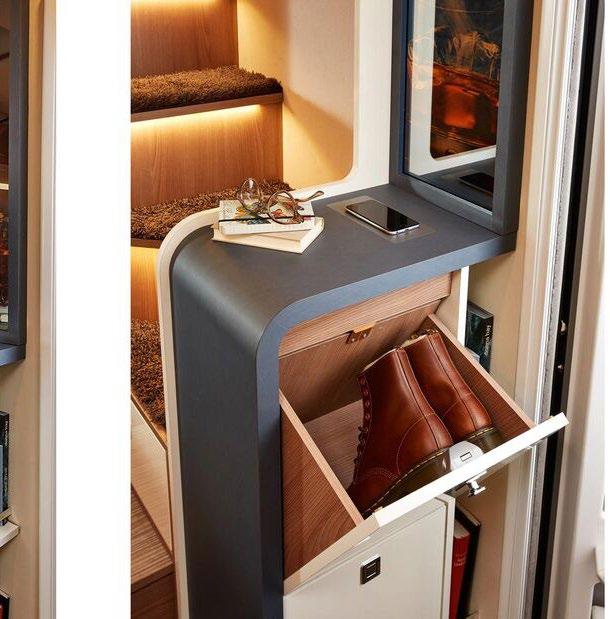
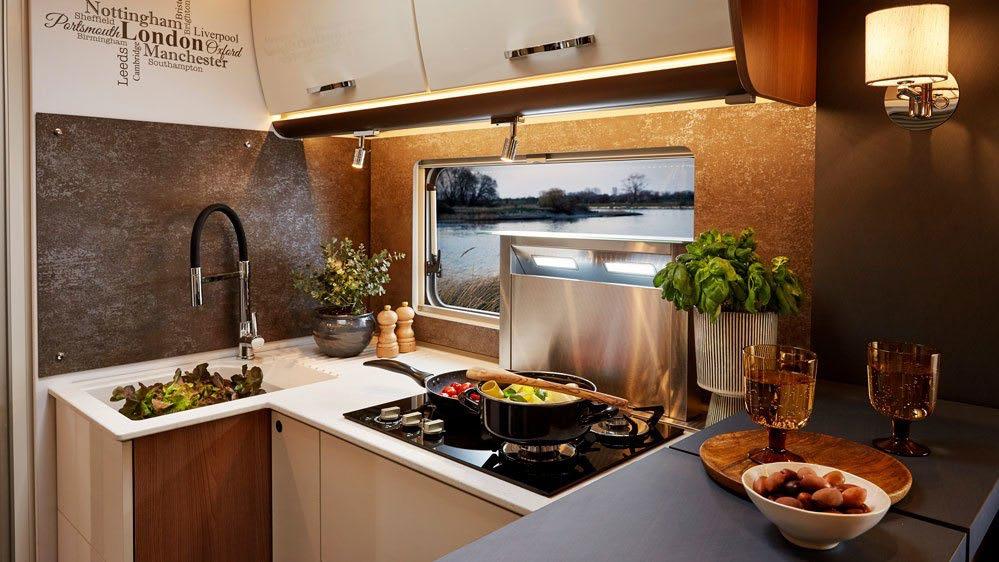
Bürstner's chic design continues throughout the rest of the interior, where its designers worked hard to create a true contemporary home feel. The design blends modern rounded furniture and fixtures with classic residential-grade equipment like wall lamps and a high-arched kitchen tap. The kitchen also includes a long sink basin with integrated drying rack, gas/ induction cooktop with retractable extractor hood, a pop-up coffee machine, electrically controlled drawers and a full side countertop.
The Lyseo Gallery also includes a large rear bathroom and a spacious front dinette. For now, the Lyseo Gallery remains a pre-production show vehicle, but Bürstner plans to put it into production in 2022.

How time flies when you are having fun! The original plan was that this project would take around six months from the first ‘action’. The reality is that it will take as long as it takes. If you are considering following the self-build road I’d certainly encourage it, as I am getting a lot of satisfaction as the project proceeds. I am also learning heaps as it goes, as every mistake is just an opportunity to learn.
The key of course is in the planning, and I certainly did a lot of that before I committed – even if a great deal of it was in my head. You sort of have to think in 3D if that makes sense. Quite a few inspirational ‘spirits’ have been imbibed whilst sitting in the back of Olivevan as I work out how it is all going to come together.
First you have to set a budget, then choose a vehicle base and work out your general layout. It is amazing how much difference there is between all those big white boxes on wheels. Then you should price your components and add a nice margin to allow for unplanned contingencies, that way you can endeavour to underperform and overdeliver.
“They never said everything would go smoothly!”
It is sage advise to work top-to-bottom (not that I particularly did it myself). The reason for this is that you will hold up other stages if what you want on the roof is not locked in, as you can’t complete the interior lining or finalise wiring until this is done.
Missions Accomplished
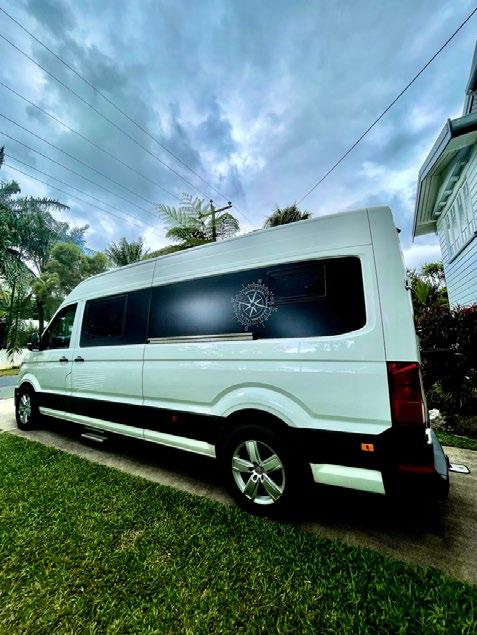
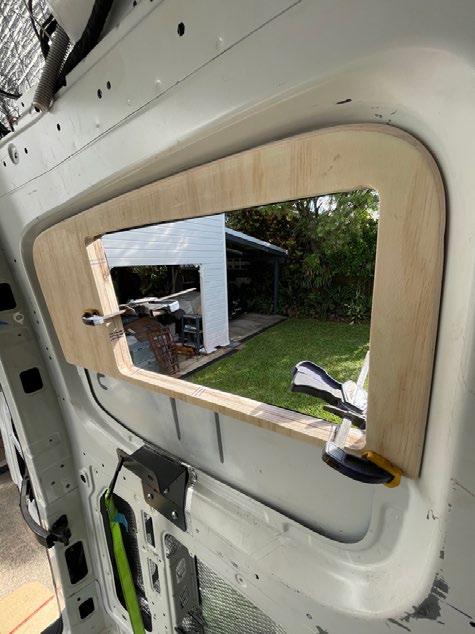
So, what have we accomplished over the last few months? As can be seen in the photos, the windows are now in. I chose to wrap the side panels, al la the ‘Trakka look’ as it breaks up the big slab of white. I matched the wrap to the satin of the Dometic slimline windows as it helps them blend in. Yes I’ve included the obligatory compass rose on each side and a flash of colour on the bonnet – racing stripes – that is the frustrated artist and adventure seeker in me.
Some much bigger rims and good quality tyres, going from 205/75/16s to 255/60/18s on genuine VW Amarok wheels that meet to the load spec requirements, has absolutely transformed the ride and handling. The 19mm composite board, with insulation underneath, rubber underlay on top, and commercial grade vinyl over that, all laid in a single piece (that is a funny time lapse video), completes the flooring. Wheel arches are boxed in too; one side has the Natures Head composting toilet vent through it, the other has the heavy-duty battery cable going forward to the vehicle battery for charging purposes. With the flooring down and all the insulation in, it is amazing how quiet the van now is on the road. Compared to the bare tin-box, anything would be an improvement.
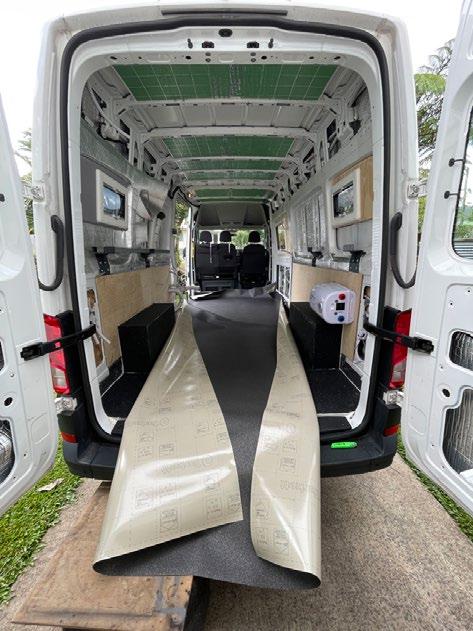

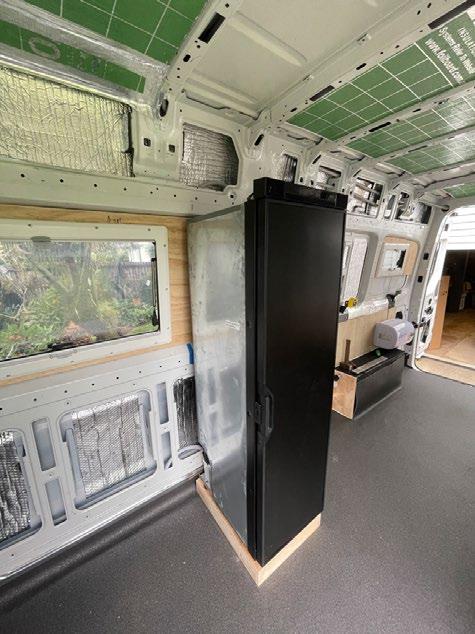
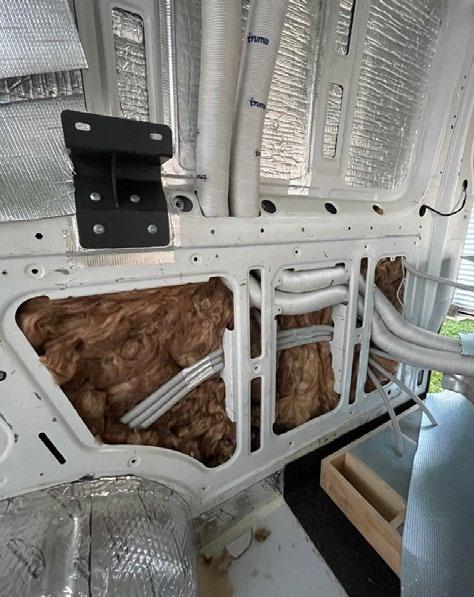
Iran non-split conduit through every panel to enable all the wiring and plumbing lines to feed through, this also offers protection for ‘rub through’ that could short things out. The 12/240-volt water heater is set into the side panel, as is the water pump and plumbing on one side, to ensure it doesn’t encroach on garage space. All the electrics are on the opposite side: I am going with a full Redarc Management system and a pair of 200Ah lithium batteries, backed up by around 600W of solar on the roof.
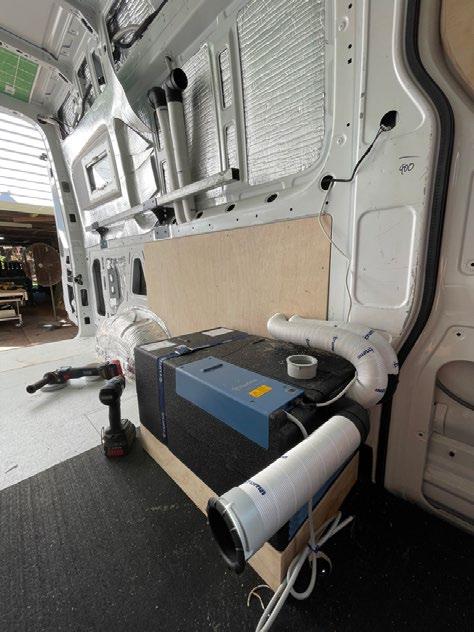
The slimline Dometic 155-litre fridge will keep the beer cold; the advantage of these modern 12-volt ones is that they don’t require venting outside, which would allow dust ingress. The Truma Saphir air-conditioning (bottom right) is now in place and it will take care of our hot summers. Water-wise, 143-litres of fresh and 52-litres of grey tanks are next on the install list, along with finalising the electrics, installing the Maxxair fan and working out all the lighting before I can move on to the rest of the interior.
What Hasn’t Gone Right?
The first window I installed didn’t fit as neatly as I would have liked and seemed to sit a bit proud at the top. You have to pack the opening to a minimum of 34 mm to ensure a tight seal as the window clamps from both sides. I was a few millimetres short on the top corner. As the rain continued to pour down (and fortunately, before the final fitment of the interior panels), I noticed a pin-hole leak on that corner. So that was a remove-and-refit.
I was about to cut the rear skylight in the centre of the roof, before realising that I wouldn’t be able to mount a surfboard on the racks and open it. The skylight will now be set to the side. I should also have run the electrical cabling before mounting some interior panels, as it was a challenge to push them through the conduit in some areas. I have also had to mount the fridge further forward than planned as it fouls a major internal structure, although this has resulted in a slightly larger bathroom as a bonus.
Although it is still only a weekend and occasional afternoon project, we are making great progress. I am taking long service leave soon, so will be on it full time in July, hoping to hit the road by the end of August.


The Future?

As to iMotorhome Magazine and the future – a big thank you to Richard and his team for all the entertaining articles and inspiration over the last four years. Okay, I know he was at it for nine and all credit to them; we came in late and had the pleasure of going through all the back issues over a four year period. What a great legacy they have left us, and a great reference to look back on. I can thank Richard for inspiring me to take on the build and I look forward to meeting up in person one day to show off my handiwork. I’ll bring the red!
I am keen to keep you all up-to-date via the website while this is still active. If you do Instagram, I am still a bit of a virgin there, but please follow me @ olivevanproject. Or is that #olivevanproject? I’m happy to answer emails too at olivevanproject@gmail.com
Hugo, Wendy and I wish Richard and the whole iMotorhome Magazine family all the best as their next adventures unfold. See you out on the road :) Cheers…IAN.
With a couple of extended trips on the horizon, we have taken the plunge and invested in 2 x 120 Ah LiFePO4 (Lithium) batteries to replace our 2 x 100 Ah AGM batteries.
Our two 100 Ah AGM batteries had a total ‘usable’ capacity of 100 Ah (50% of the total combined capacity), while each 120 Ah lithium battery has a ‘usable’ capacity of 96 Ah (80% of total capacity).
So, we could have saved some dollars by replacing the pair of 100 Ah AGM batteries with just one 120 Ah lithium battery. That would have provided us with around the same stored energy capacity as we had with the two AGM batteries, saved a lot of weight and given us the lithium advantage of steady and consistent voltage. However, it would have been a considerable effort and expense for only a minimal gain. And if making the effort to go to the well, why come back with a half empty bucket?
By replacing both 100 Ah AGM batteries with 120 Ah lithium batteries (connected in parallel) we have almost doubled our off-grid 12V energy capacity, while more than halving our battery weight. We now have a total usable battery capacity of 192 Ah, compared to 100 Ah with the AGM batteries.

Taking Charge
Lithium batteries are relatively expensive, but they are not the only expense involved in the battery exchange. AC-DC and DC-DC chargers also need to be considered, along with the battery monitoring system.
While some battery suppliers suggest that their lithium batteries can be directly swapped with AGM batteries without any other system upgrades, I feel that this may be more sales pitch than honest engineering advice. The battery management systems (BMS) built into lithium batteries may do a satisfactory job of modifying the output voltage of an AGM charger to suit the preferred maximum charging voltage of lithium batteries. However, I remain to be convinced that a BMS is able to adjust the overall charging stages of an AGM charger's output to suit the specific charging requirements of lithium batteries. I would also expect that installing charging devices with a tailored lithium profile will contribute to a better long term outcome for battery performance and lifespan. A bit like feeding an athlete a diet of takeaway food – they will survive, but not prosper. My opinion only, of course!
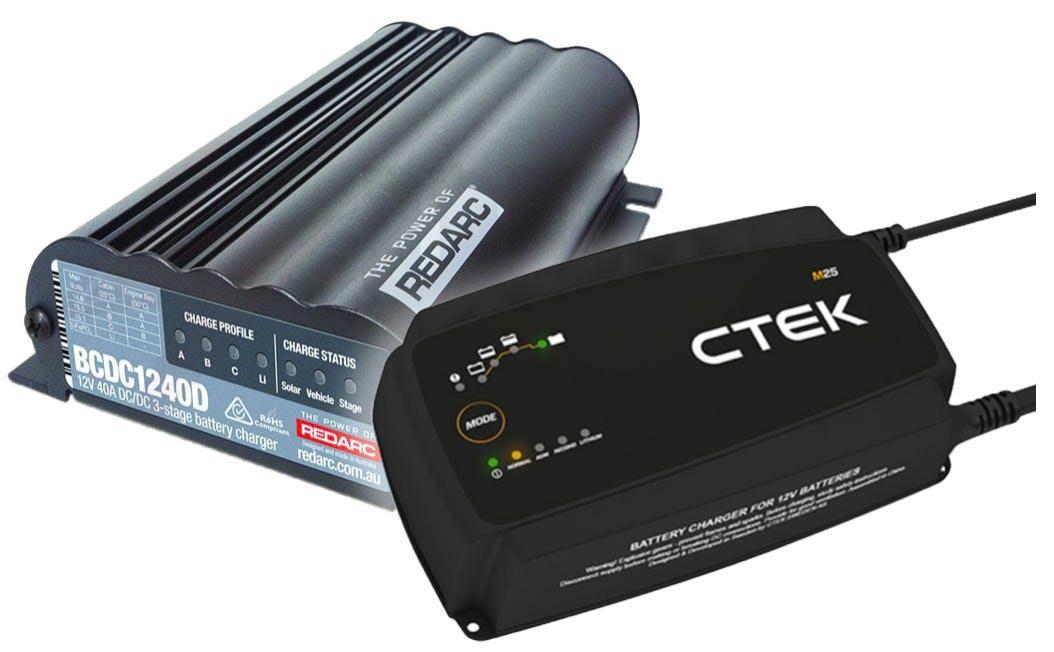
Our van was already fitted with a lithium-capable Redarc 1240D DC-DC charger. All that was required to activate the charger’s lithium profile was a change in the wiring at the rear of the charger – joining the green and orange wires. We replaced our AC-DC charger – a CTEK MXS 25 – with a CTEK M25 model that has a lithium profile. The new charger is exactly the same size as the old charger, which made for a very easy replacement. Even better, it auto-detected the lithium batteries and adjusted its profile appropriately.
Providing a neat conclusion to the exchange process, a neighbour who was fitting out their van with a fridge for weekends-away surfing offered us $200 for the AGM batteries and the AC-DC charger, which was a preferred outcome to a trip to the local recycling centre.
Other Considerations
Continuous Current: This is an important consideration if you will be running 240V equipment through an inverter. 120 Ah lithium batteries have the capacity to supply a comparatively high continuous current – 100 to 120 amps. Connecting two batteries in parallel increases the continuous current capacity of the battery bank to around 30%-50% more than the individual continuous current capacity of each battery.
Parallel Balance: Batteries in a parallel setup must be the same capacity and age as each other (even down to ideally being from the same production batch according to some gurus!). Before fitting the batteries in the van we fully charged each battery separately, so that they had the same level of charge when first connected.
Battery Monitor: Our control panel console used a voltmeter to display the voltage of the AGM batteries. As part of the battery exchange process we fitted a more comprehensive ‘Coulomb counter’ battery monitor, which is required to measure the State of Charge (SoC) of lithium batteries.
Which Battery?
There are plenty of lithium batteries from which to choose, these days. While budget is always going to be a consideration, I tend to keep in mind that quality will be remembered long after the price is forgotten.
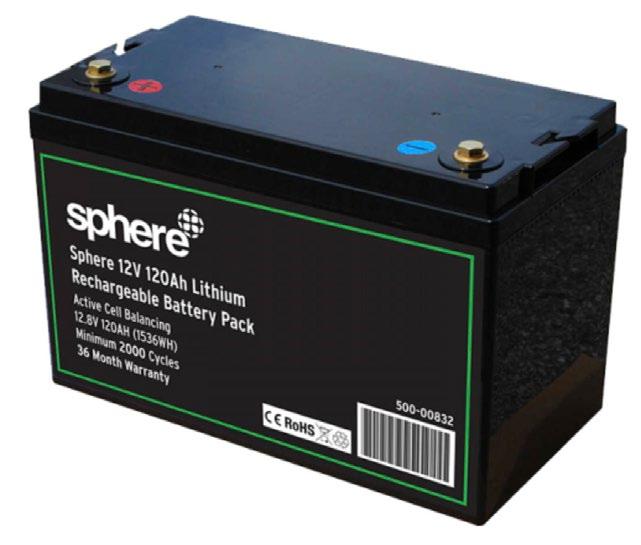
After much looking around, comparing pricing and spec sheets, our choice came down to two batteries: iTechWorld 120 Ah and Sphere 120 Ah. Both were around the same price and had appropriate specs – particularly relating to their battery management system, cell construction, cell balancing, and continuous current draw. We also considered a single 200 Ah battery, but the retro-fitting space availability was a restrictive factor.
iTechWorld had an ‘Show Special’ promotion for AUD $780 (normally $975), which was very tempting. At around the same time we spoke with a friend in the caravan fit-out business who has installed plenty of Sphere lithium batteries and recommends (and supports) them, and could supply them for $800 each (normally $1029). The local support aspect tipped the balance for us to go with the Sphere batteries.
Other Lithium Battery Options?
• Don’t bother with the China Cheapies on eBay.
Reports suggest that the published specs don’t always match reality. I expect they will end in tears or at least major disappointment
• • Redarc (and other reputable brands) have 120
Ah batteries for around $2000, but I couldn’t see enough difference in their specs, when compared to the $1000 batteries (from other equally reputable local suppliers), to justify the cost • • At the other end of the spectrum, Aussie Batteries have a 120 Ah ATLAS brand battery for $549, but digging into the specs they come up short in their maximum continuous current rating, at 60A (peak 90A). Ditto for VoltX batteries at 50A.
These batteries will struggle with the demands of appliances running through an inverter.
Cable Clutter
As is often the case with otherwise straightforward projects, one thing often leads to another and the battery swap provided an opportunity to tidy up our battery cabling and connections.
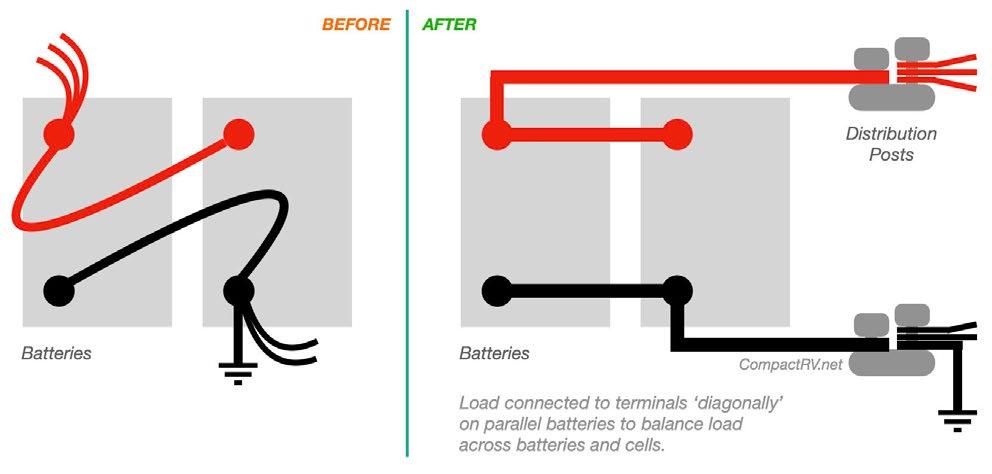
We replaced the cables between the two parallel batteries with heavier and shorter cables. We also installed a couple of dual distribution posts adjacent to the batteries (Jaycar, $12). All appliance and charger cabling is now connected to the distribution posts, which are connected to the batteries with heavy gauge (2 B&S) cables. These cables are readily available in various lengths in the battery section of your local auto parts store for around $20. Though for reasons unknown to me, red cables are difficult to find in local auto stores. Black and blue seem to be the popular colours. The AGM batteries were contained in two plastic battery boxes. We have replaced these boxes with a sturdier and much tidier laminated marine ply housing. The cable distribution posts mounted adjacent to the battery housing provide much easier access to existing cabling connections, and will simplify the connection of any additional cabling in the future, without requiring direct access to the battery terminals.
The new battery housing also provided a solid platform on which to mount a new power inverter, in an ideal location close to the batteries.
First Impressions
Weight: The first and most obvious change in the new installation is the weight of the batteries. Quite amazing. The two AGM batteries weighed in at a total of 62 kg – what a difference when installing the 2 x 12 kg lithium batteries. We have made an instant weight saving of 38 kg.
We will no doubt soak up that weight differential with other items – we have already purchased a flat-pack fire pit that checks in at 18 kg. I will be looking forward to a visit to the local weigh-bridge when we are loaded up for our next trip.
Battery monitor: The State of Charge (SoC) of an AGM battery can be measured with a voltmeter, thanks to the relationship between the SoC and the linear decline in AGM battery voltage. This measurement isn’t practicable with lithium batteries as their voltage remains reasonably constant across their discharge range. A lithium battery may be 50% discharged, but still maintain a voltage of 12.9V.

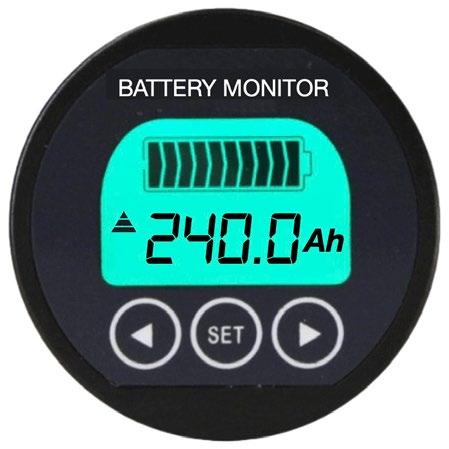
To measure the SoC of the lithium batteries we have fitted a new battery monitor – a Coulometer – that displays the remaining charge in the batteries by counting the amps in and out of the batteries.
I should have installed one of these monitors years ago (they work just fine with AGM batteries too). The monitor displays not only battery voltage, but also amps in, amps out, remaining Ah and the percentage charge remaining. No more battery anxiety – we now know exactly how much current each appliance is consuming, how much current is being returned to the battery from the solar panels, the alternator or the mains charger, and exactly how much Ah capacity remains in the batteries. These monitors are available online for around $60 from Amazon, etc, or from local suppliers for around $150. More details about the battery monitor installation soon.
Discharge Period: The new battery monitor indicates that with the 110L fridge running on its coldest setting, the lithium batteries are discharging around 27 Ah between 6:00 pm and 6:00 am. That's around 2.25 amps per hour.
During the following mostly sunny days (in autumn on the NSW South Coast) the batteries regain around a net 13 Ah from the 150W rooftop solar panel (with the fridge still running), creating a net 24 hour deficit of 14 Ah. I expect that this deficit would be reduced considerably during summer, but let's go with the autumn figures as a useful average number.

The maths says that at 14 Ah net consumption per sunny autumn day, our 192 Ah usable battery capacity will power our fridge for nearly 2 weeks, with charging from only the 150W rooftop solar panel. Applying the same calculations to the AGM batteries, we would have had around one week of 12V power available.
Re-charging: In theory, lithium batteries are able to re-charge much more quickly than AGM batteries. Lithium batteries can charge at a rate up to 100% of their capacity, while AGM batteries are limited to a re-charge current of up to 30% of their capacity.
All good in theory! However, lithium batteries achieving faster charging depends on a relatively high rate of charging current. Maybe 50 amps or more: A bit of a moot point if your solar panels are producing only a small amount of current that doesn’t take advantage of the potential higher recharge current capacity.
The reality is that with only around 6 amps per hour input from our 150W solar panel, 2 to 3 amps of which is consumed by the fridge, there will only be a small reduction in the recharge time of the lithium batteries compared to AGM batteries. With higher current input from the vehicle alternator or the 230V charger, the lithium batteries are likely to recharge more quickly than AGM batteries when these sources are generating current. This is especially true in the final stages of the charging period, which are quite markedly tapered for AGM batteries.
The battery monitor indicates that, when plugged in to power, the CTEK M25 AC-DC charger is feeding 25 amps into the batteries. When the engine is running, the vehicle alternator is pushing 40 amps into our energy storage, even when idling. The alternator charge rate is governed by the capacity of the DC-DC charger.
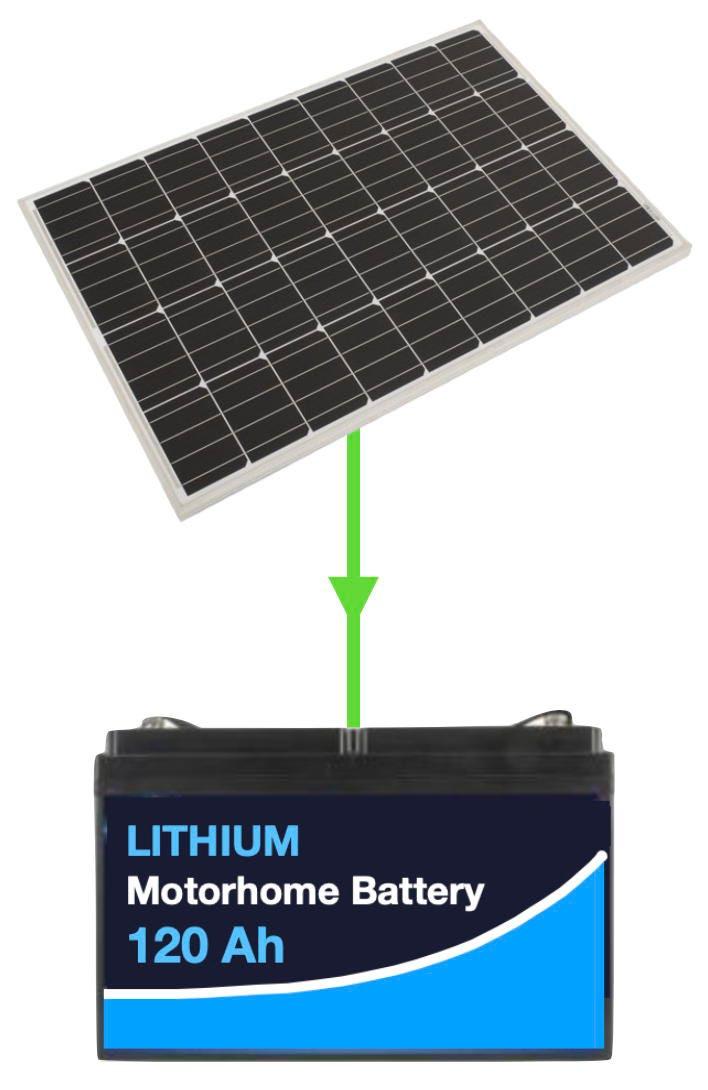

Appliance Options: The lithium batteries have given us the opportunity to install an inverter to power 230V AC appliances from the 12V DC batteries. We can now pull up for lunch and pop a couple of toasties in the sandwich press!
Lithium batteries are able to supply a high level of continuous current, compared to AGM batteries – in the order of a continuous 130-150 amps when connected in parallel.
The couple of toasties in the sandwich press for lunch pulls current at the rate of around 97 amps per hour, draining 5 Ah from the batteries’ storage to toast us up a treat. It only takes around 10 minutes of driving after lunch to recharge the current used for the toasties!
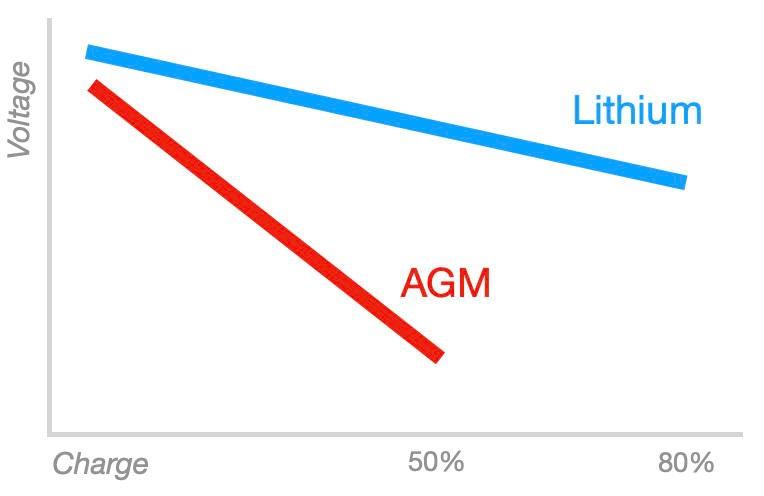
Voltage: After testing the lithium batteries for five consecutive days and nights, with the fridge running and no charging other than from the 150W solar panel, the voltage hasn't dropped below 13.0V. After a similar period our AGM batteries’ voltage would have been hovering around 12.2V.
Given the constant higher voltage, our fridge is likely to maintain a more reliable temperature over a longer period of time and will use slightly less current when operating at the higher voltage.
Life cycle: The label on the new lithium batteries indicates that they have a minimum 2000 charge cycles, which will last us forever! Well, maybe not quite forever, but longer than the AGM batteries. AGM batteries are able to be discharged/recharged around 500 to 800 times over their lifespan, if not discharged to below 50% capacity. Lithium batteries have at least 2000 recharge cycles if not discharged below 20% capacity; up to 6000 cycles if discharged to only 50% capacity.
Hopefully the new batteries will maintain their performance for 10 or more years, so I will feel more relaxed about the high up-front cost. However, I am not so naive to think that there won’t be something bigger and better available by then!
Links to more detailed information about batteries and upgrade options are available at CompactRV.net.
By Allan Whiting of OutbackTravelAustralia.com.au
Ultimate DIY Panel Vans...
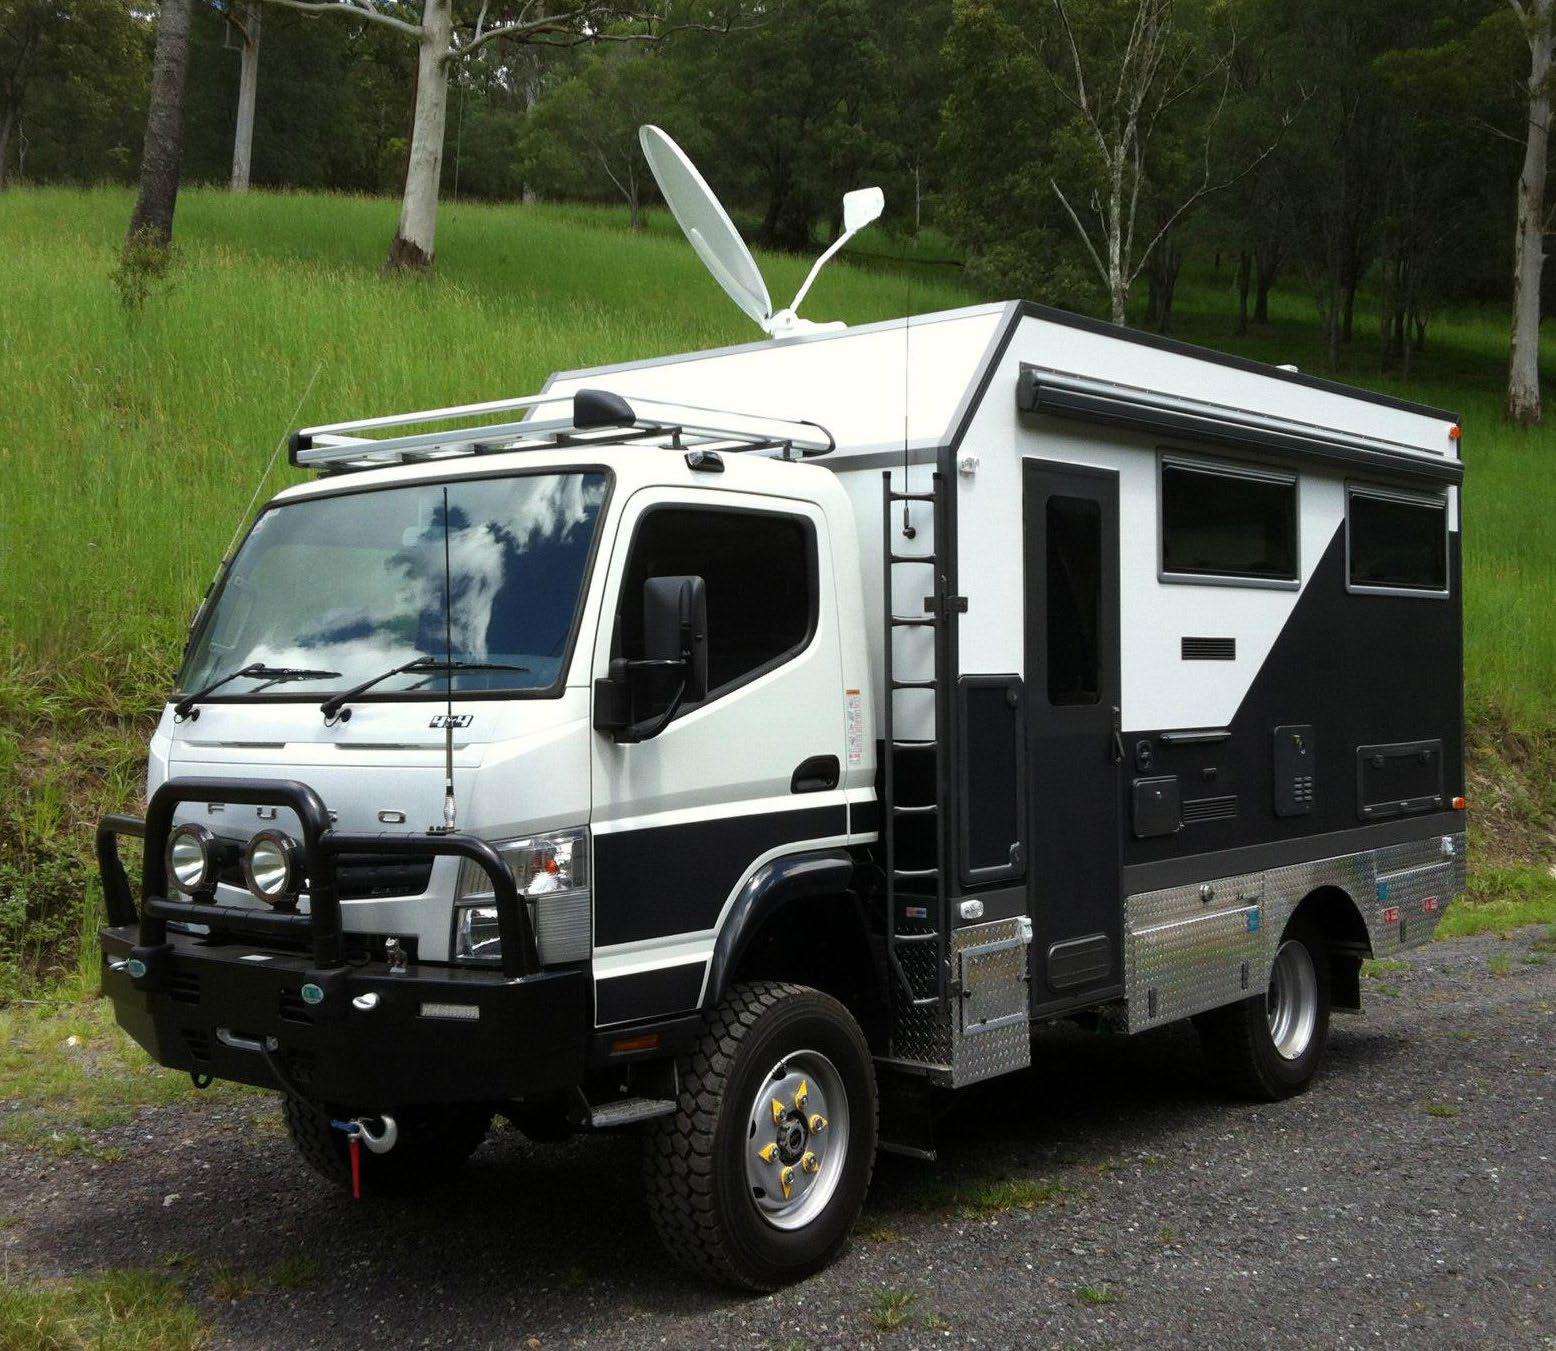
If you’ve priced a motorhome recently, you’re possibly still recovering from the shock. We’re not suggesting for a moment that the pricing isn’t justified in producing a skill-and-labour-intensive end-result, but there are quite a few of us capable of a DIY job.
The traditional method for producing a box-shaped motorhome or caravan body is using a wooden or metal frame, to which metal or fibreglass (fibrereinforced plastic or FRP) sheeting is fixed externally and an inner liner of wood or FRP is fitted to the interior. That remains the process for many RV makers today, but the road transport industry got away from that old-fashioned construction method many years ago.
All the refrigerated trucks and semi-trailers you see on
Australian roads have employed inner and outer FRP sheets bonded to internal, closed-cell plastic foam since the 1970s. Originally, those composite foamsandwich side and roof panels were bolted or riveted to aluminium-extrusion vertical and longitudinal beams, but in recent years, modern adhesives have made the aluminium beams redundant.
52

There’s no need for any framing, because the sandwich panels have more than enough strength for automotive purposes. They’re simply edge-glued together.
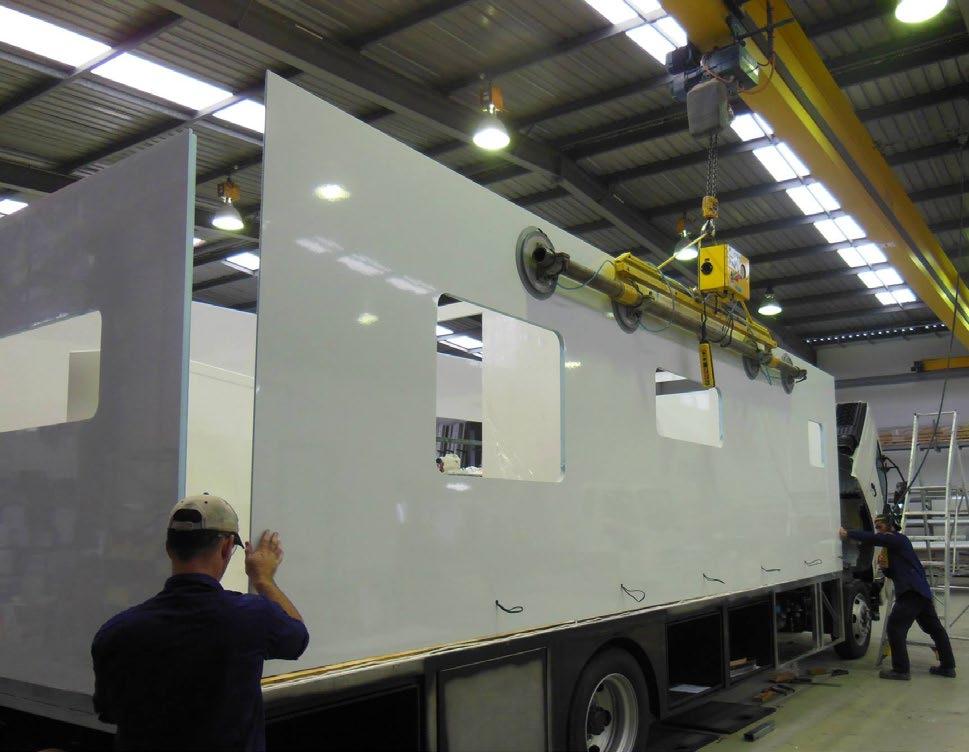
Parallel with the development of modern adhesives that now stick boats, aeroplanes and spacecraft together, has been the implementation of computerised numerical control (CNC) cutting machines. These precision tools have the ability to cut almost any shape, including window, hatch and door cut-outs, in FRP sandwich sheets.
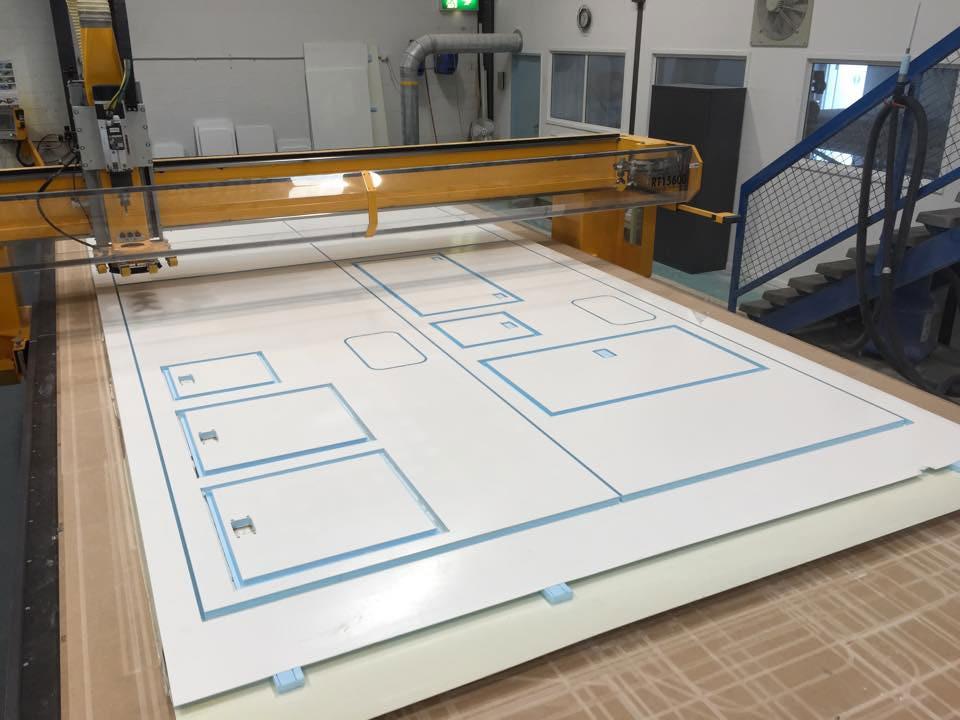
Once the plan has been completed in a computeraided design/computer aided manufacturing program (CAD/CAM) the machine cuts it out of blank sheets with absolute precision. Floor panels are also CNC cut, but are made of load-bearing composite material.
All the panels needed to make a camper trailer, caravan or motorhome body can be produced to plan in a matter of minutes. Mind you, it’ll take more than a couple of minutes to put the resulting flat pack together, plus put in the pre-cut interior furniture and fittings, but that’s where the fun and the savings are! There are several companies capable of producing such pre-cut panels, but the most active we’ve come across in aiding DIY people is Queensland-based StyroMAX.
This company has a planning process to help guide your design to real-world practicality, including prefitted wiring and plumbing conduits. StyroMAX has also filmed many videos that show how the assembly process should be carried out, as well as detailed videos covering fit out, window, hatch and door installation.
StyroMAX use top-quality Dow Styrofoam (rigid extruded polystyrene) as a core and lightweight European FRP sheeting. This combination offers industry leading strength to weight ratios, the company says. Dow’s Styrofoam is closed-cell, so it resists water and moisture penetration. It’s also a high-performance insulator, as its use in fridge truck bodies proves.
The StryoMAX panels are also UV stable, thanks to a top layer gelcoat that improves UV light and weathering resistance and they’re also easy to clean. Car wash and household cleaners can be used. Curved roof panelling can be done by a special ‘routing’ process that lays successive grooves on the inner face of the panel that need to be curved. It can then be bent to the required radius before assembly, when the grooving is covered by an impermeable plastic sheet.
In addition, RV-type entry doors, service doors, hatches and windows are available. Kits come with the required amount of Henkel Terostat MS939 adhesive for the build and there’s full back-up and support. Also, accident repair gel coat is always available.
