17 minute read
A Mark IV Restoration Story


By: Linsey Siede (Victoria) Looking to Buy a House, But Bought a Car Instead!
Early in 1994 I was looking in the suburb of Ringwood for an old house to buy as a rental property. I had looked at quite a few, and was eventually (and reluctantly) shown an old property on the high side of Loughnan Road. It was reluctantly, as the house was “totally filled” with old electrical appliances. The owner had been a repairman for an electrical retailer, and when he retired, he began doing work from home. When his wife passed away, he just kept inheriting people’s old electrical appliances, and now he had sadly passed away too. Anyway, back to the Mark IV Story. Near the end of the long and very overgrown driveway was an old MG Magnette, and then totally hidden under an old dilapidated carport behind the MG was a Mark IV Jaguar. My father was a retired motor mechanic, and at the time was between projects and driving my mother nuts. She had phoned me only a few days earlier and asked me to find him a new project, and I figured this was a good opportunity. I phoned him and he sounded interested, so he drove down from Euroa the next day to look at the Jaguar. My father loved the car, and as we walked around it I happened to notice the number plates, which I took to be a definite omen. They were “LS-665”, and with LS being my initials, I figured we had to buy it.
Mk IV - To Dads Place
Apparently, the car had an oil pressure problem, and was driven under the carport and just left; so the good news was that the car was complete. It also came with a spare engine and transmission, plus some other odds and sods. A princely sum on $5,000 was agreed upon, and in early June 1994 we transferred the car to my father’s workshop in Euroa - which had previously been an old Golden Fleece Roadhouse.
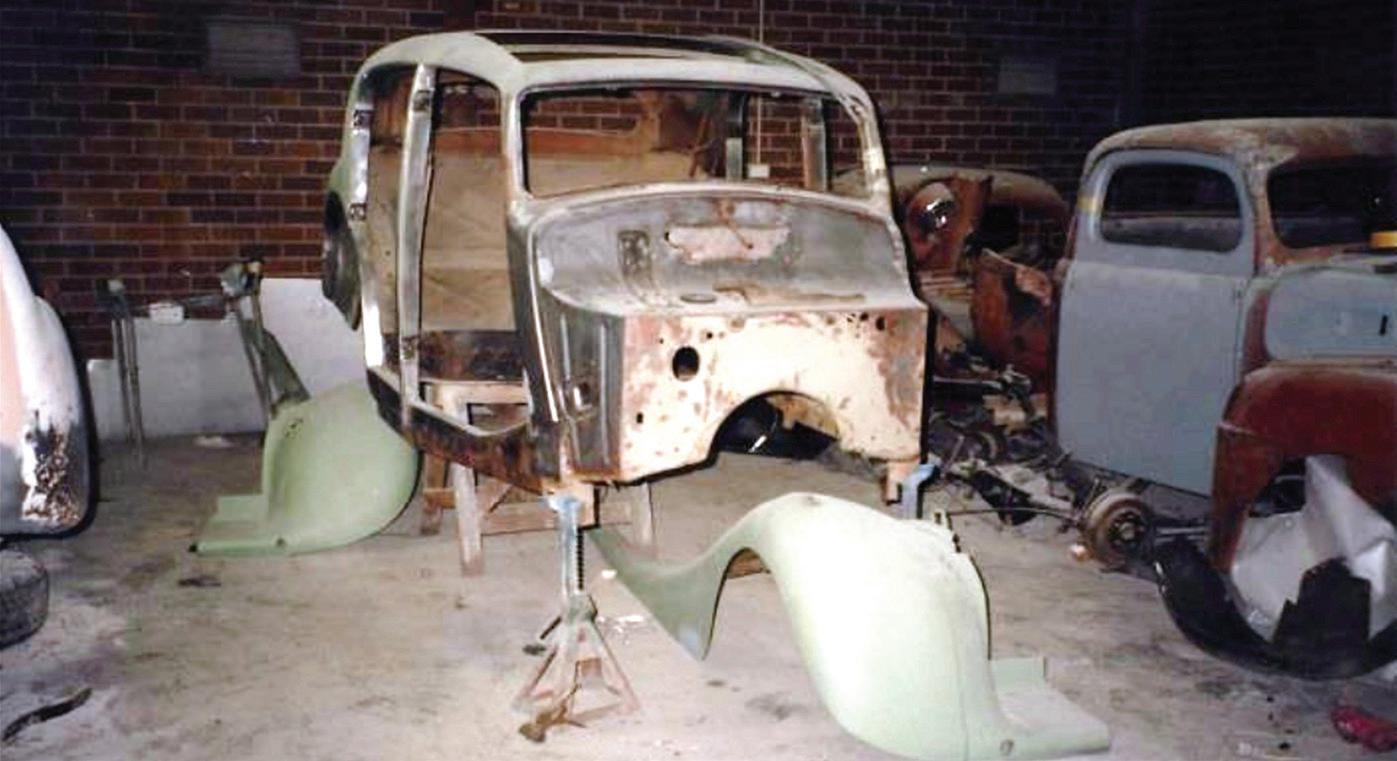
My father loved working on different challenges, so it didn’t surprise me that within a week the car had moved from being complete to being in many parts; and within the month it was nothing but a body with boxes of bits scattered everywhere around the workshop floor, and a rolling frame. I remember walking in one day, and telling him he’d better not get Alzheimer’s, as I’d never find where everything went. During July the rolling frame was dismantled, and within another month it was repaired, undercoated and repainted.


During September the brakes and a multitude of other parts on the frame were repaired and painted, before work on the drivetrain commenced.
October arrived, and when the engine was torn-down, the damage caused by the low oil pressure became clear. The bearings were completely shot, and new ones had to be found. My father discovered that bearings from another old English car were pretty close, and as was his way, he modified them to fit. By December (only 5 months after the teardown had begun), the engine and transmission had been completely dismantled and rebuilt; and it was time for them to be re-installed back onto the chassis.
Commence Re-assembly
Despite receiving many spare parts with the purchase of the vehicle (including a spare engine and transmission), everything that originally came off the car was re-installed back onto the car. This meant that all the original numbers from the vehicles’ build back in 1947 still matched.
The vehicle was built with an “S Pack” option and was first registered in 1948. According to the build plate it has: ▪ Chassis Number: 414229 ▪ Body Number: B9093 ▪ Engine Number: KB5347 January 1995 was a busy month (not that the previous six hadn’t been) with the re-assembly, as the underneath of the car started to take shape again. Wheel-rims were powder-coated twice (after they did them in black the first time); fuel tank and lines added, along with brake linkages, etc. Then as was the normal operating process; my parents went off on their annual 2 - 3 month caravanning holiday; so things kind of slowed down for a few months.
In May they ramped up again as the body was reattached to the frame and the engine was fired into life once more. A raft of other jobs were completed over the next few months, and after my father had completed the mechanical restoration in record time, it was now my turn to get the bodywork done and to get the interior restored.
Bodywork - Off to Panel Beater No. 1


do the bodywork, so all of the interior parts; mudguards, engine covers and running boards were loaded in, and in early October 1995 the car was delivered to his panel beating shop in Hawthorn.
My first job in the body restoration process was to completely strip all the interior parts from the car - but as this was my first ever restoration project - before I did that there was one other extremely important thing for me to do, and that was to photograph everything so I knew exactly where it had to go back, and how it was to go back. This detail even went down to photographing the cords and the eyehooks that operated the blind on the rear window. OMG!! Door-trims, hood lining, timberwork, chrome, windows, knobs, handles, armrests, sunroof, piping work, wiring, trim around the doors; the list seemed to be endless.
To make doubly sure of which trim parts went in which location, I then put labelled masking tape onto the back of each part before transferring them to my garage at home; firstly, so they wouldn’t get lost at the panel beaters; and secondly so I could take my time restoring them.
The good news was that there was only minimal rust in the body at the bottoms of the doors, and inside the wheel arches at the back. The bad news for me was that I now had to strip the paintwork using some toxic paste that the panel beater gave me. By late November I had begun the paintstripping process, but as I was working 12-hour days, it left only weekends, (which really meant Saturday mornings only as the panel beaters closed around 12:00 midday.) Other parts such as wooden trim, etc., I could do at home, and so the previous mechanical restoration process slowed to a snail’s pace. The good news was that annual holidays were due, so I combined them with the Christmas break and spent most of my holidays at the panel beaters removing the paint. The doors were removed, and the process of removing paint on the main body began. If the paint remover happened to get on your skin it stung like crazy, so it was love-hate relationship. I also discovered if you got it on your clothes, it soon ate holes in them; so it was pretty potent stuff. In January 1996 progress was being made, and the owner of the panel shop decided to show

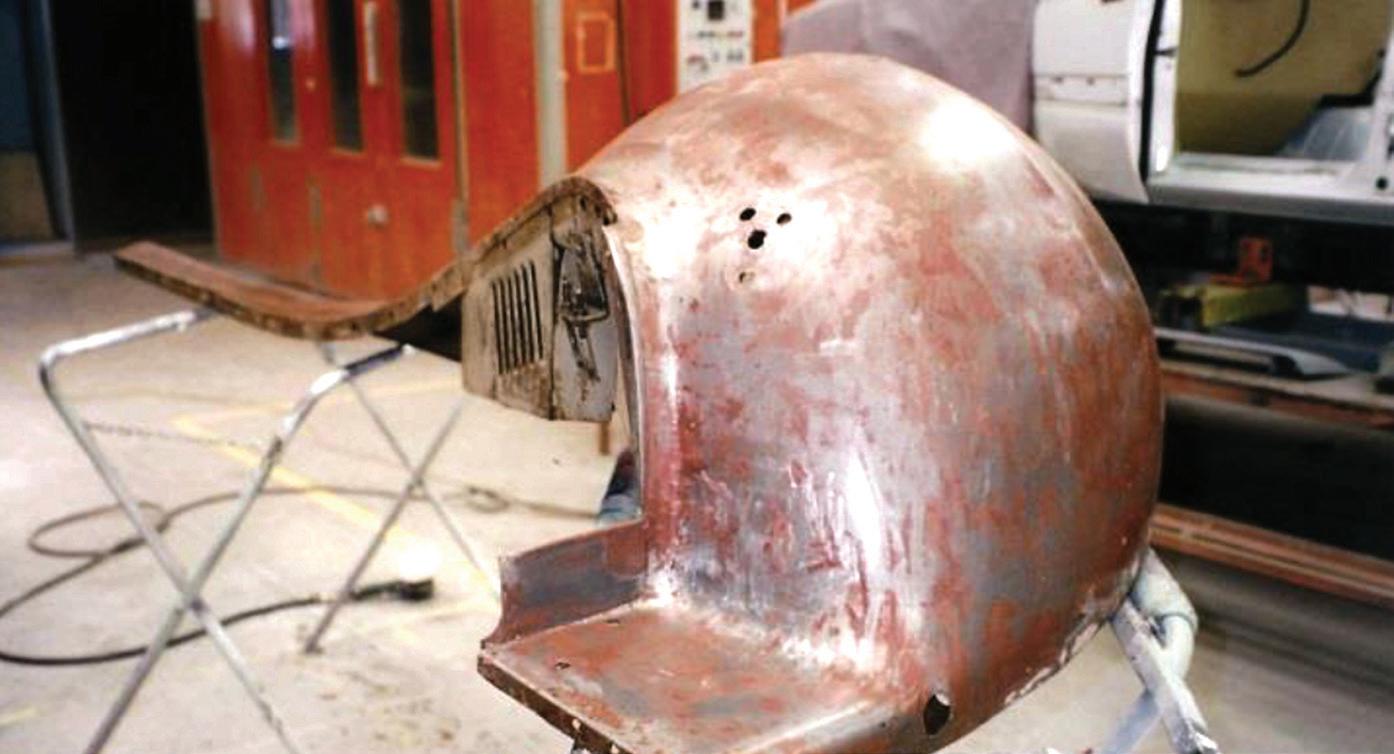

me how to restore the bottom of the doors. He hurriedly showed me how to do this by completing the first one, and then I did the other three. As it came to pass, all four had to be re-done, but I’m getting slightly ahead of myself. The good news was that the paint-stripper worked really well on getting “most” of the paint off, so to get the rest of it off, it was wire brushes, wet-and-dry, and elbow grease. A huge amount was accomplished during January 1996; however, my “holidays” came to an end, and it was back to Saturday mornings only. Obviously, things slowed down to a snail’s pace again. The driver’s side front mudguard and running board was next on the list, but by this time I had apparently used their complete stock of paint remover, and therefore had to resort to sanding the entire panel. This took considerably more time, although resulted in the same excellent finish.
In February it was door month, and new bottoms for all four doors were completed. In March, the doors looked great when reassembled to the body, however we should have assembled the running boards first, before jumping to any conclusions - but I’m getting ahead of myself yet again!! In April as the rear mudguards were put in place and the mismatch with the repairs on the rear door began to tell the story. It was also now 6 months since the car had been moved into the panel beaters, and his continual promises of “helping” me were wearing thin. He was focused on his own business and own projects, and things had basically stalled.
Bodywork - Off to Panel Beater No. 2
I decided that if things were to start moving again the car had to be moved to a new panel beater, and in late June the car and panels were transported to Mitcham Body Repairs. This Panel Beater actually focused on restoration work, and the Jaguar joined a number of other older vehicles in their workshop. Originally the vehicle was painted in a dull grey colour with a green interior. According to the Jaguar colour-code combinations for paint and interior colours, it was most likely “Lavender Grey”. I received many suggestions to lighten and brighten the colour of the car, and Old English White was suggested by multiple people. I wanted to keep the car as close to original as possible and noted that one of the


original external colours that was available with a green interior was Ivory. So, Ivory it was to be. Once all of the mudguards and other body parts were assembled onto the car, the mismatch between the earlier door repairs and the line of the running boards was obvious. Hence the first thing that had to be done (re-done) was to re-repair the bottoms of all the doors, so the clearance gaps were even and consistent.
Off With the Body Again
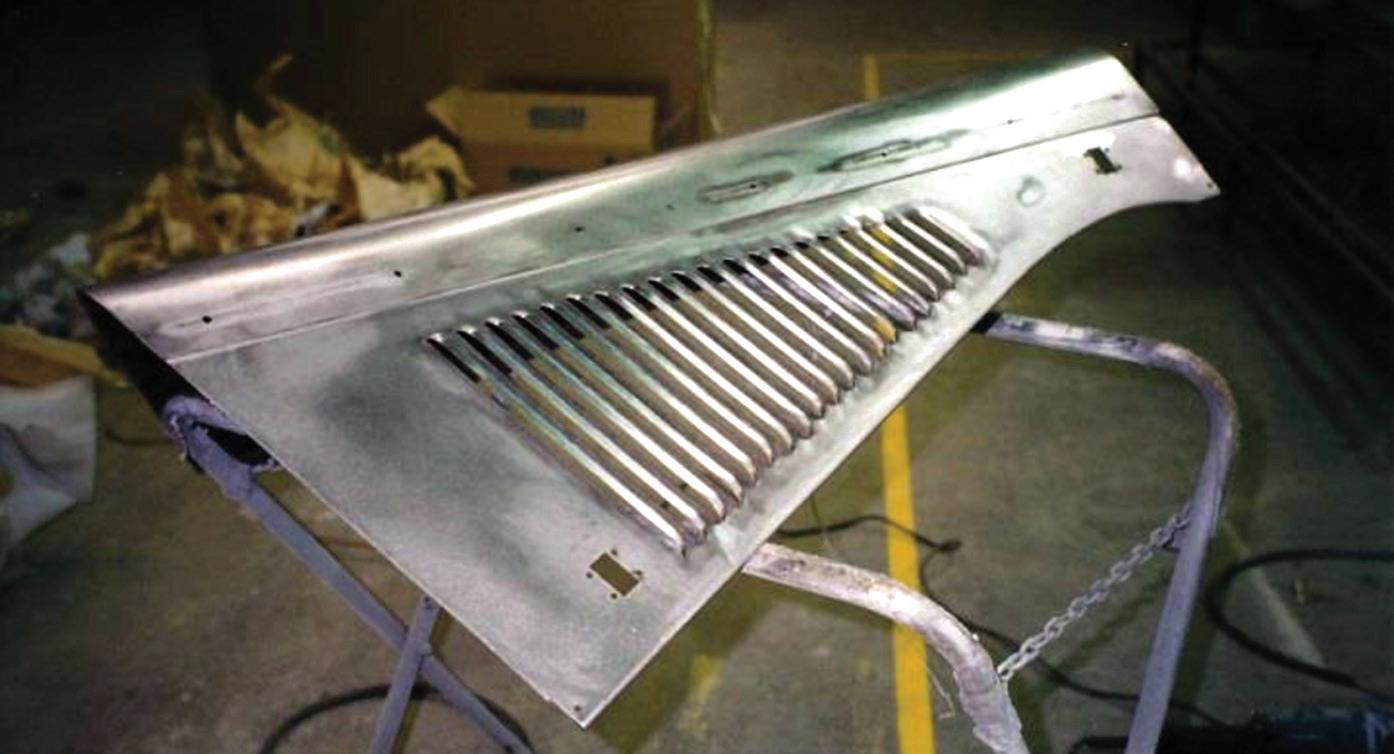
The body and panels were then separated again from the chassis, in preparation for any other body repairs, and then finally for painting. There was some repair work to be done on the passenger’s side rear quarter, a little on the driver’s side rear quarter, and the rear number plate panel, but the rest of the body was in pretty good shape. By late July all the body work had been completed, and the body and panels were ready for prep, undercoat, and final topcoats. Meanwhile at home, I was preparing all of the different parts from inside the boot, etc. The timber linings looked like they had borer in them at some time in the past; so, all of the paint was stripped from the metal work and all of the timber parts were replaced. This work was mainly completed in the driveway, as the garage was basically filled with “other stuff” lovingly referred to by my wife as “accumulated junk”. Obviously, the solution to this challenge (never a problem) was that the garage was too small, and needed to be larger, not that there was too much stuff. (See footnote). The idea was that when the vehicle was ready to leave the panel shop, the other bits and pieces such as interior woodwork, boot panels, etc., would be ready to mate with the finished body work.
Little did I realise just how little time I had. This new Body shop was progressing quickly, and by early-August the panels were already painted. Next to be prepared and made ready for paint was the main body frame, which was mounted on a mobile trolley ready to be wheeled around the shop, and finally into the paint booth. I had to extract the digit and get the boot panels back to them, so they could also be painted. I made it just in time, and by the end of August (less than 2 months after the car had entered their shop), it was reassembled again, and ready for the next stage.


Some of the newly chromed pieces were also added, with many others yet to be added.
To the Motor Trimmers
Less than 2 months from entering Mitcham Body Repairs, the Mk IV was on its way to Braymills for the hood-lining; lining for the toolbox lid; and the interior trim parts. From Braymills, it was back to Euroa again, for my father to install the brand-new cotton coated wiring harness, electricals, etc., and for me to add the interior bits and pieces, including the piping around the doors; wooden trim; the windows; chrome bits, etc. At this point I was extremely glad of the “before” photos I had taken, as I knew with certainty where all the various bits went. This was particularly important for the little things like the cord for the window blind, etc. By October, the front was starting to look complete again, but there was still a heap of work yet to do. Unfortunately, borers had also destroyed the bottom half of the wooden dash, but my father had a friend in Euroa that owed him a favour. So out of a solid piece of Mountain Ash, a new dash was made, and it matched so well, that the judges in the upcoming Concourse didn’t even pick it up! But there I go yet again, getting ahead of myself. All of the original glass from the car cleaned up well, and was reinstalled along with newly chromed trims.
Sunroof, woodwork, newly chromed hinges and knobs, mirrors, original indicators, bumpers, external chromed trim. The list just goes on. While I was doing the body and trim, my father was continuing with the wiring, the electricals, and the mechanicals. Inside all of the flooring was replaced, and the tunnel was renewed. By December 1996, externally the car looked pretty good. All the chrome trim was on, the three strips had been reinstalled onto each of the running boards along with new rubbers, and to make sure it was legal and could pass roadworthy, indicators from a Suzuki motor cycle were added to the bumpers front and rear. Internally, even the new dash had been reinstalled, and looked pretty damn good.
Deadline - Concours d’Elegance.


two Concours events coming up at the end of March, and neither of them were too far away. One was to be held in the Yarra Valley and the other was to be at Shepparton, and so I decided that it would be fun to enter both.
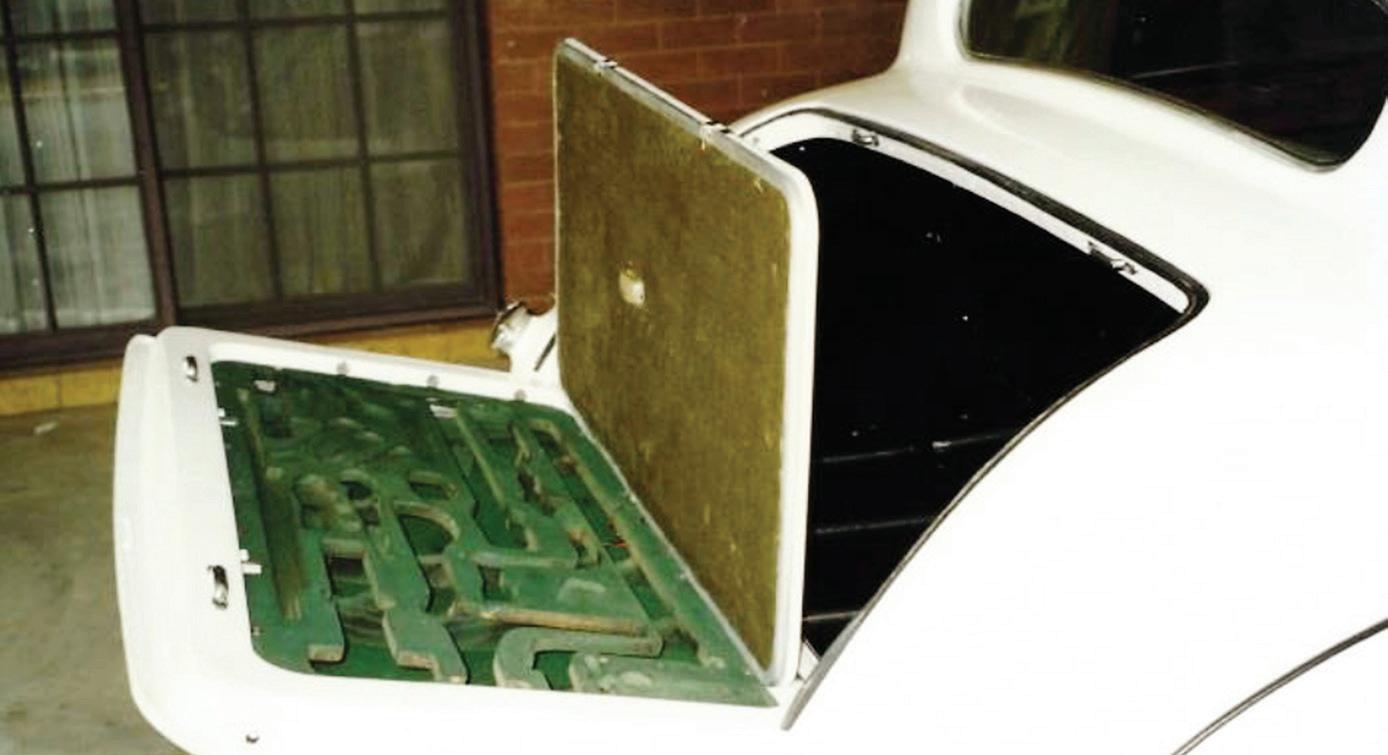
The first was the National Concours d’Elegance to be held at the Domaine Chandon winery on March 23rd, which meant that the car had to be finished by at least March 22nd. I had no absolutely idea what a Concours was; had never even been to one; and the car had never been built to compete in one. It was just a spur of the moment thing to do - with some consequences. So in January the door panels were added, along with other pieces of trim for the doors, etc. That finished the interior except for the carpet and the seats. The seats were in pretty good condition, and I discovered they could actually be “sprayed” to restore them. This process worked fantastically and wasn’t even that expensive. The final part of the restoration was the carpet, so the car was shipped off the Neil Litchfield to complete this task. This is where the story goes a bit off the rails, and where I unintentionally put my father under a huge amount of pressure. He had always liked a challenge, and I mentioned that it would be great to have a trailer to take the car to the Concourse events, as I couldn’t really drive it there. So, with the first Concourse event only 6 weeks away, he agreed to build a trailer to transport the car to the events. Now that I am 65, I realise now what a mammoth task this was, as he was 74 years old at the time. I purchased the axles, hubs and mudguards, etc., and he commenced the build. As well as being an outstanding mechanic, he was also an excellent welder – but to this day, I still don’t know how he accomplished the task within the time. In the meantime, finishing touches were being added to the car. The area for the tools in the boot-lid was painted, and finally the tools added. With a HUGE thanks to my father Cyril Siede, on March 15th, 1997 the car (and trailer) were both finished, and it was time to show the world. And so, to finish off this story…….
3rd Annual Concourse d’Elegance - Sunday 23/3/1997


of the entries showed up. Of those that did, it was really important to go where the Marshalls directed and to stay out of the boggy areas, as this Porsche owner so capably demonstrated. A huge amount of people showed up to look at the cars.
As this was my first event, I was amazed by the variety of people, but didn’t really get the full understanding of exactly how tough a “real” Concourse event could be. My Jaguar wasn’t the only one, but there was a huge variety of cars on show, including some very expensive ones.
Apart from some early morning drizzle, that day was excellent and we had a great spot. We were also delighted to get a visit from a long-time Jaguar fan in John Wood, who stopped for a photo with my mother-in-law next to our car. We finished up with a respectable score of 812 points, and easily finished in the top half of the entrants, well ahead of many of the other vehicles. It was an excellent day, and a good time was had by our family members.
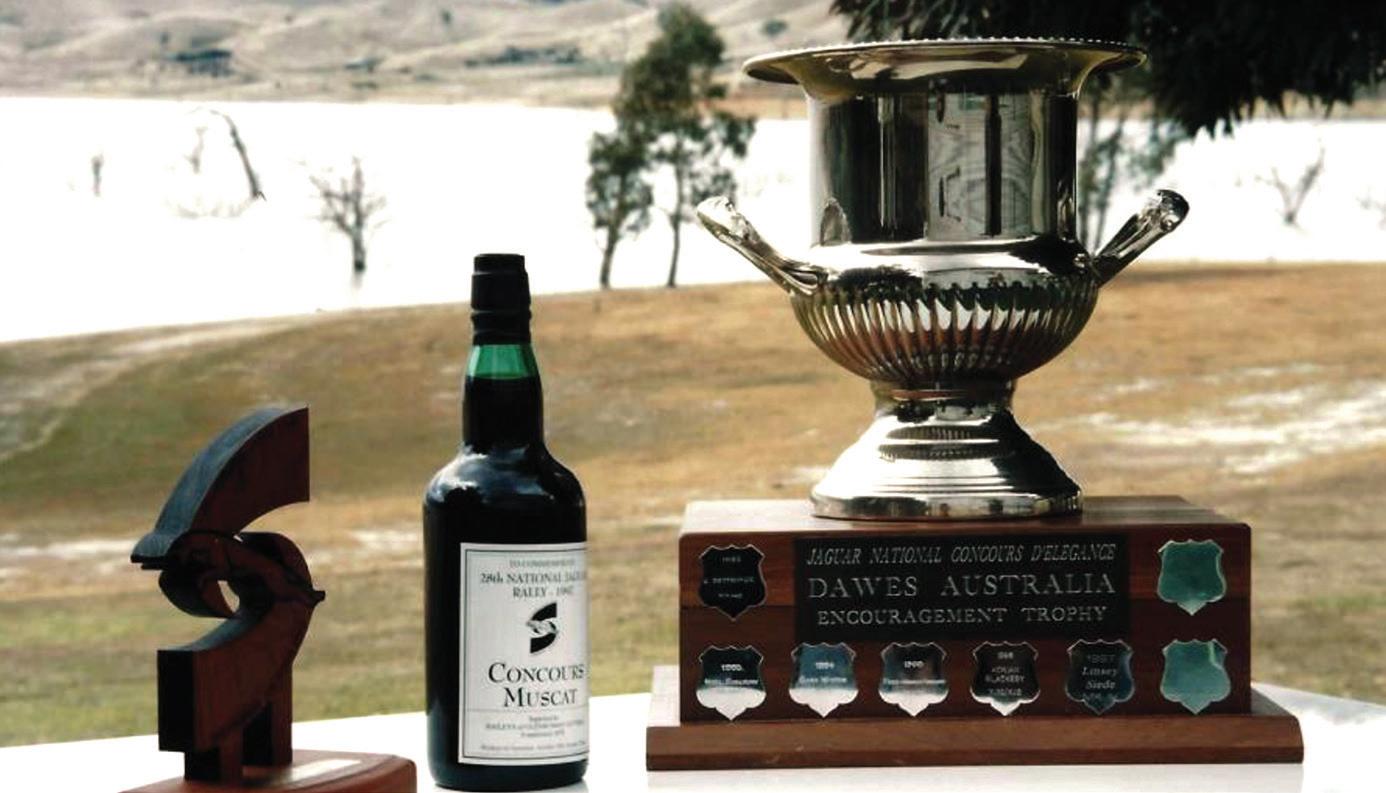
The 28th National Jaguar Rally Concourse D’Elegance - Saturday 29th March, 1997
This event was held around the lake at Shepparton, so my parents drove across from Euroa to attend. This is where I found out what a “real” Concourse event was like, including inspections under the car as well as on top and inside. It was considerably tougher than the previous week. The good news was that the sun was shining, and there were blue skies.
To provide a fitting finish to this story which commenced less than three years prior on June 1994, our lovingly restored car was awarded the Dawes Australia “Encouragement Award” for 1997. What an incredible way to finish this restoration that began as a “project” for my father Cyril Siede, and has become a forever reminder of the man who departed our earth in 2009. Footnote: The Mark IV now lives with us in a 10 x 15 metre garage, but is not running again. At least I now have enough room inside the garage for this new challenge!
Linsey Siede
Editor: Thank you Lindsey for a detailed and well written historical account. You will definitely have to get it running again.