4 minute read
The new sky replacement
NEW SKY REPLACEMENT
feature in Photoshop
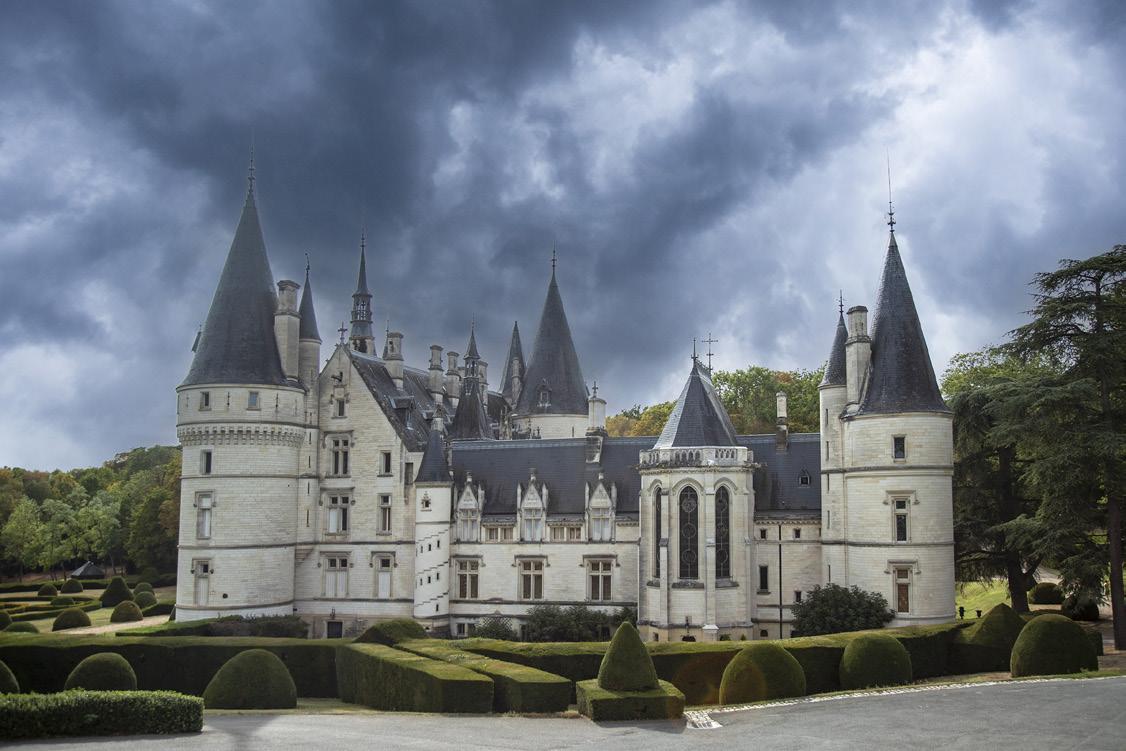
Photoshop 2021 was just released by new software development. In the photo beAdobe, and there are a number of low of a private home in France, the spires atop revolutionary changes that I would each of the conical terminations of the towers call brilliant. The one we’ve all been waiting are very fine and easy to lose when compositfor is an amazing tool for replacing the sky in a ing, and the trees behind the architecture have complex and challenging image. lots of detail. Using the simple options and slidMost of the tutorials that have already been able to replace the bland and boring original sky posted online show this tool being used on with one of my own stormy skies. This transvery simple sky-replacement situations such formed the shot, and the juncture between the as a distant mountain range, the horizon at new clouds and the house and forest is flawless. the ocean, or a modern cityscape with sharpers within the Sky Replacement feature, I was edged buildings. These scenarios are too easy, The procedure is easier than you might think: and they don’t show the real capability of this Open an image with a sky, and then use the
pulldown menu command Edit > sky replace-
ment.”
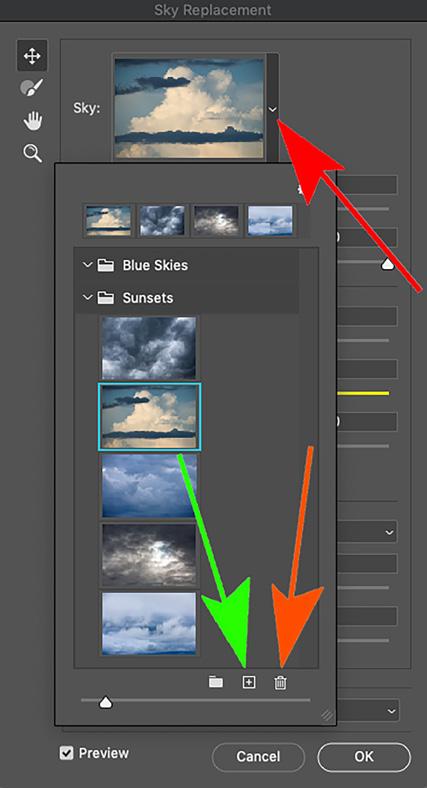
Photoshop includes some stock photos of skies you can use, but I never use anyone else’s pictures in my composites. Besides, millions of Photoshop users will be using these skies, and you really don’t want fellow photographers who see your composites to be familiar with those same sky pictures. To see the collection of sky images included with the new Photoshop 2021 (version 22), click on the down arrow in the top of the dialog box (indicated by the red arrow, right). The dropdown menu will show those images. I deleted all of Adobe’s stock photos by clicking on each of their skies and dragging them to the tiny trash can at the bottom of the dialog box (orange arrow, right).
To add your own sky photos, click on the + symbol (green arrow, right) and then browse your computer. They will be accessible in the
As soon as you choose Edit > sky replacement, the first sky in the list will be placed behind the subject, the landscape, or the cityscape. If you want another sky, simply click on another picture in the list of skies.
The artificial intelligence of the algorithm is amazing, and the composite in most cases is perfect.
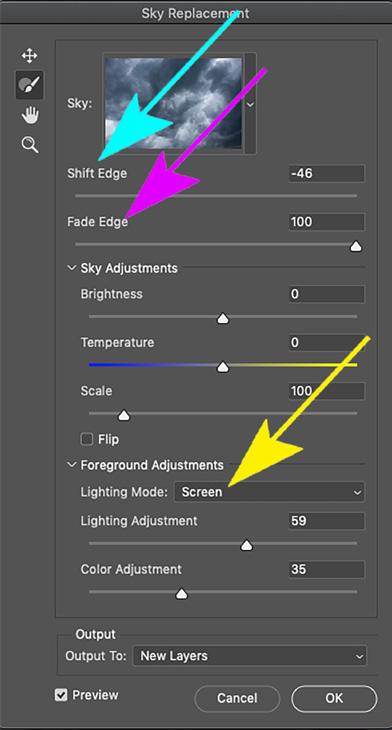
If the composite needs tweaking, you can do so in the dialog box shown at right. The first two sliders near the top, shift edge and fade edge, shown by the cyan and magenta arrows, respectively, are the most important. The colors, tones, and contrast in every image is different, and how the new sky blends with the foreground elements may need to be adjusted with these sliders.
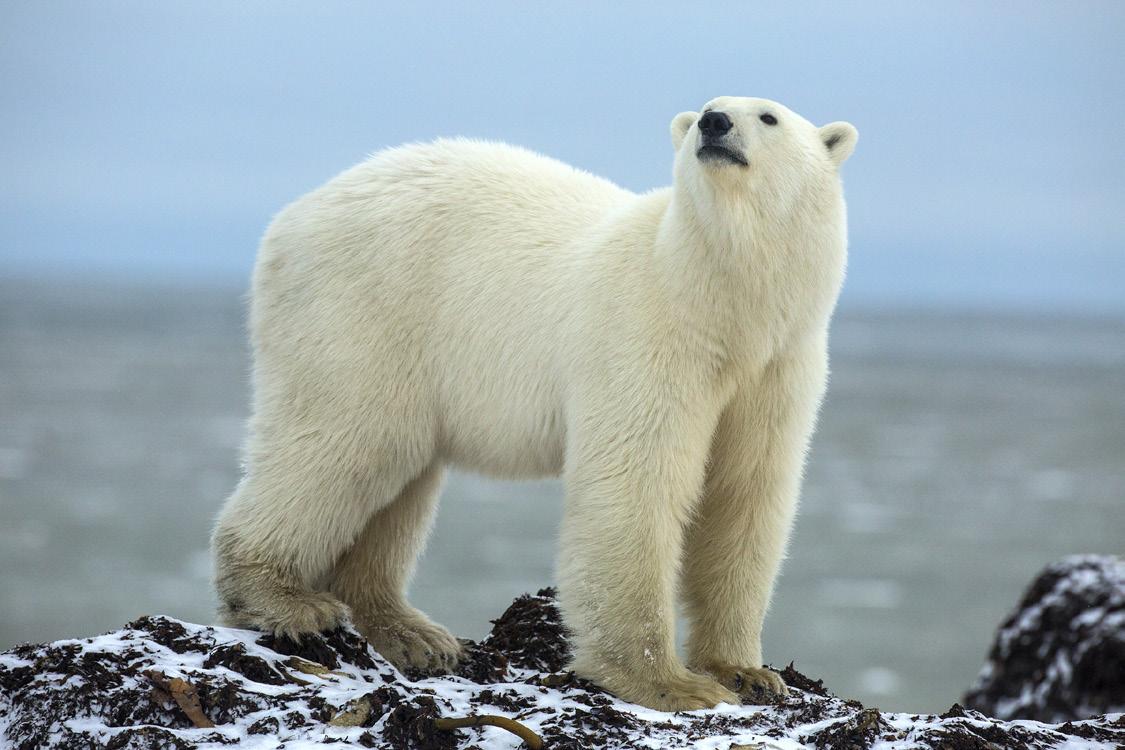
The yellow arrow on the previous page shows one of two choices -- screen and multiply -- and you’ll have to experiment to see which one looks best to you. I usually choose screen.
The brightness, temperature, and scale sliders are familiar to you and it’s obvious what they do.
The bottom one third of the dialog box offers sliders that allow you to tweak the foreground with color and lighting.
The ‘flip’ box enables you to flip the new sky horizontally.
When you are happy with the image, click OK. Photoshop saves all the changes you made as layers and layer masks, and you can see these controls in the layers palette. The polar bear photograph on the previous page presented a particularly interesting problem. Photoshop recognized the sky portion of the image, but the out of focus Hudson Bay in the background isn’t sky. I wanted to replace the entire background, including the water, but of course Photoshop couldn’t know that. The software ‘intelligently’ selected only the sky, so I had to use another approach such that both the sky and the bay were identified as the receiving area for the replacement sky. This is one of the problems with sky replacement. Photoshop may not realize that to make a better picture, more than the sky needs to be replaced.
Here are the steps I used:
1. Choose Select > subject
2. Choose Select > select and mask
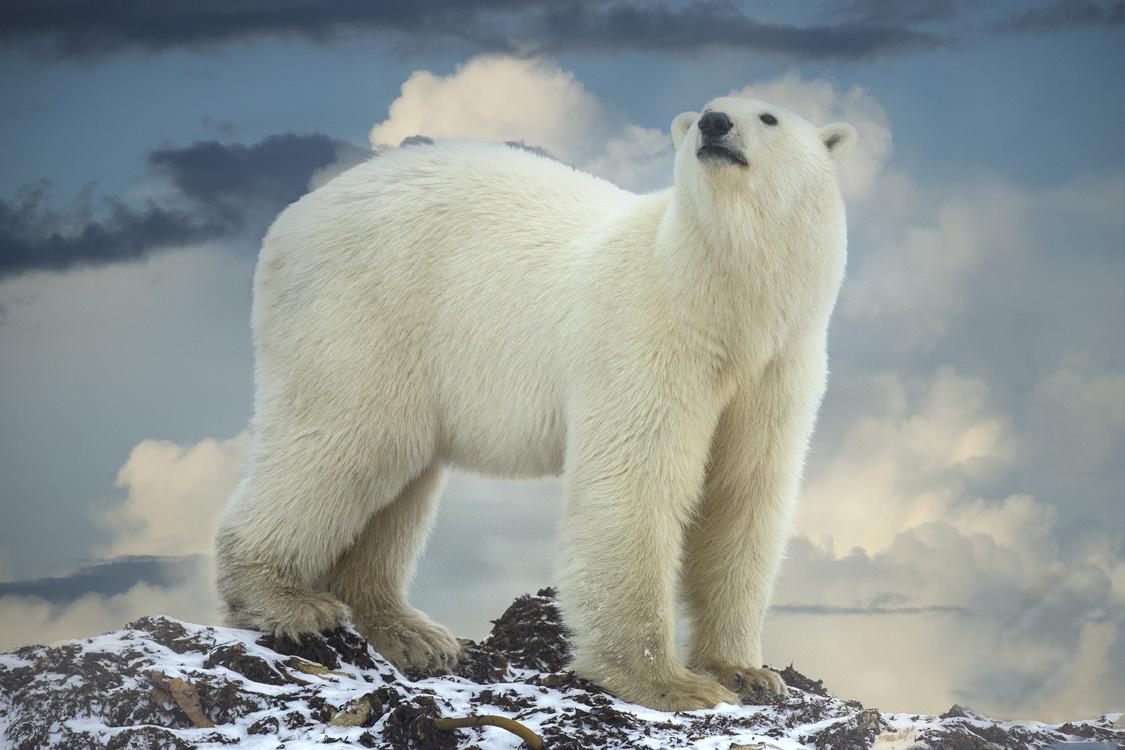
3. Choose Select > inverse. Now everything is selected except the polar bear and the ground, i.e. the entire background.
4. Make a duplicate layer with Command or Control J.
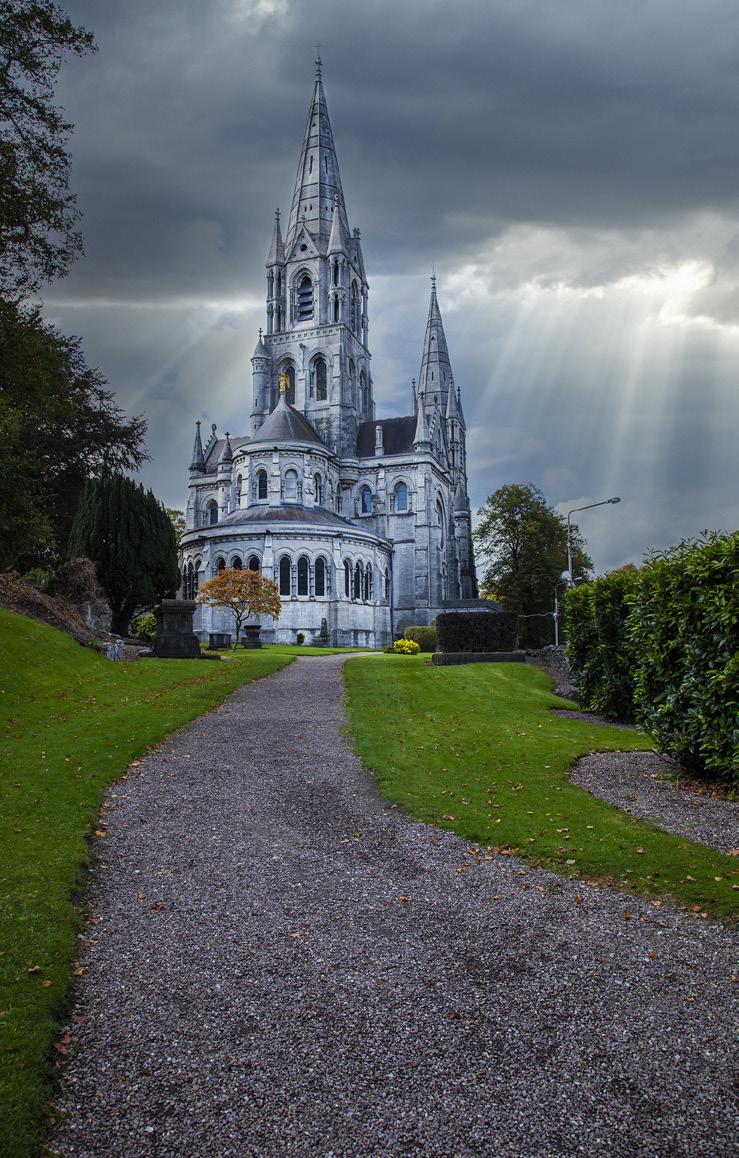
5. Now apply Edit > Sky Replacement and go through the steps as previously explained. The picture of Saint Fin Barre’s Cathedral in Cork, Ireland, below, presents another challenging foreground in which I replaced the sky using Photoshop’s new ability. Again, with little effort, the results are more than impressive. All of the detail in the trees met with the new sky perfectly. There is no evidence this is a replacement sky. §
