3 minute read
New Photoshop tool
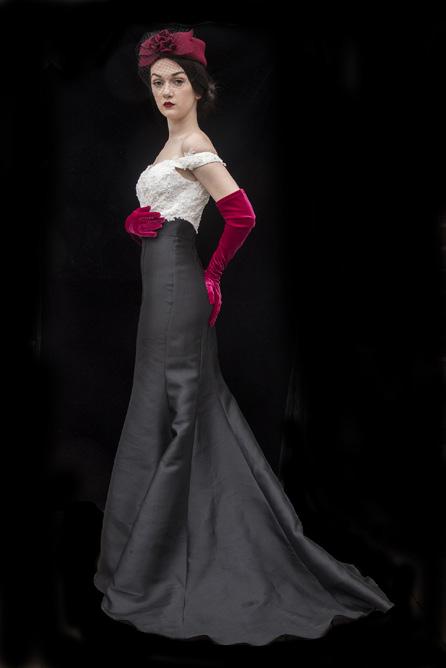
An update to Photoshop was just released -- the 21.1.2 version. There is a new background-replacing function I thought you would be interested in learning about. This applies only to images where the background is clean and easily distinguishable from the subject. This doesn’t involve any of the selection tools. The photo at right of a bald eagle and the portrait at the top of the next page are examples. Notice the software was able to perfectly separate the black dress from the black background in the shot of the model. The first step is to open two images: the New Photoshop Tool subject and the new background. Copy the image of the subject to the clipboard with Select > all, then Edit > copy.

Next, activate the background picture and chose Edit > paste. The subject photo is now pasted on top of the background and it shows

up as Layer 1 in the layers palette. The two photographs should be the same size or close to it. They should have the same dpi.
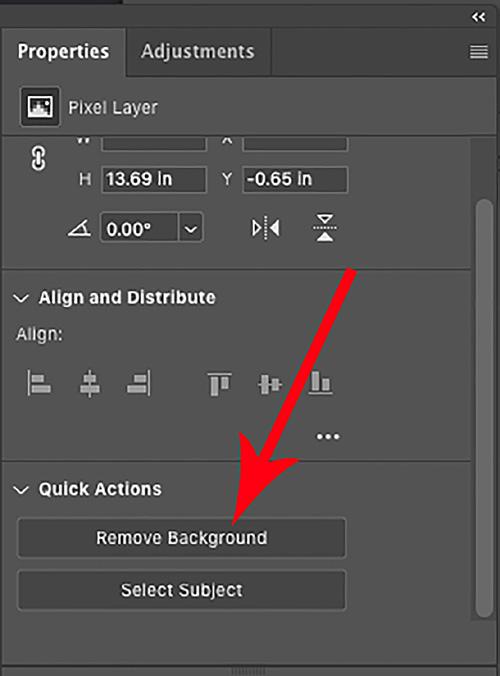
Now open the properties palette. It probably won’t be open at the moment, so go to the pulldown menu tab Window > properties. The dialog box that opens is shown on the next page. At the bottom of it are two buttons (they won’t be revealed when the properties palette opens; you have to scroll down a little to see them). Click Remove background, and within a few seconds Photoshop removes the background behind the subject revealing the new background beneath.
The edges of the subject are rendered very well and the composite looks believable in many, but not all, cases. If there are feathers, veils, or hair in the subject, this technique will not create an accurate selection.


An easy way to create a monochromatic back- ground specifically for use with this technique is to use flash at night. The background becomes black and that makes it easy for Photoshop to dis- tinguish between the subject and the background. That’s how I made this Venetian composite work.
If the software doesn’t replace small areas adjacent to the subject -- such as the open spaces within each hoop in the headpiece of the model, above -- you can simply add those to the background. Hold the option key on a Mac or the Alt key on a PC and, using the quick selection tool, eliminate those areas from the subject (when it comes to making selections, remember: ‘shift’ adds to the selection while ‘alt’ or ‘option’ subtracts).
tian model at right was standing in front of a blue stucco wall, while the ground was neutral colored stone. Photoshop had no trouble at all instantly eliminating the blue and replacing it with the wild facade from Burano Island near Venice.


If you will be photographing a subject for compositing with a new background, preplan the composite by shooting against a solid color with any texture. Even a white or blue sky works very well as you can see in the composite, below. §


