7 minute read
Joe's How-To


16
Joe’s How-To
“[T]he best 100,000 images on Earth that remain in their processing boxes might as well be toilet paper.” Galen Rowell, in Galen Rowell’s Inner Game of Outdoor Photography” to retrieve images from ten years ago; they’re in Adobe Lightroom. And I avoid having to scavenge in Lightroom by proactively (and sometimes retroactively) using keywords, ratings, and collections.
When I started shooting in the early 1970s my filing system was barely a system. Each roll of film was cut into 6-frame strips and stuffed into #10 envelopes. Maybe I scrawled something on the outside, maybe I didn’t, and photo paper was expensive so I rarely made contact sheets. Within a few years I began to store the negatives more carefully, but I still never captioned or cataloged anything. The same was true for boxes of slides. Kodak stamped each slide mount with the processing date, and the rest of the information I kept in my head. Once I began shooting for assignment I got a little better, but not much. Going back through my first 20 years as a shooter is an archeological dig and a treasure hunt.
It’s gotten better. Digital imaging, cheap computer storage, and cataloging software have made it much easier to keep track of my photographs. I don’t scavenge through boxes looking for envelopes or CDs
While this column is about using Lightroom, the principles are not unique to that software. Prior to Lightroom I kept my images organized in folders, and if a photo belonged in more than one folder I had to make a copy. That took up a lot of disk space, and was so tedious that I didn’t do it often. Since I’m a bit lazy and easily distracted by shiny things, I needed a system that made cataloging quick and painless. Lightroom is the closest I’ve come to accomplishing that.
There are at least two reasons why photographers should catalog their images. The first is that it makes you a better photographer because it requires you to think beyond the image itself. I find that by using keywords and collections at home I am more conceptual in the field. The words I use (i.e., fog, sunrise, birds) create themes that I carry with me when I shoot, and my work has become less reactive and more purposeful.
Editor’s Note: A new section for Focal Points Magazine! Each month our esteemed Member Joe Doherty will be writing various columns on how to do this and that. It’s time to learn something new...
The second reason is it makes you a better communicator because the images are more readily accessible. I want people to see what I make, and I want the fewest hurdles possible between the impulse to share and the execution. If I am submitting to a juried show, or Focal Points, or creating a portfolio, I use my catalog to quickly find a group of images from which I can select the finalists. For example, in my catalog a search that selects all 4 and 5 star images with the keywords “Yosemite” and “winter” brings up 140 images nearly instantly.
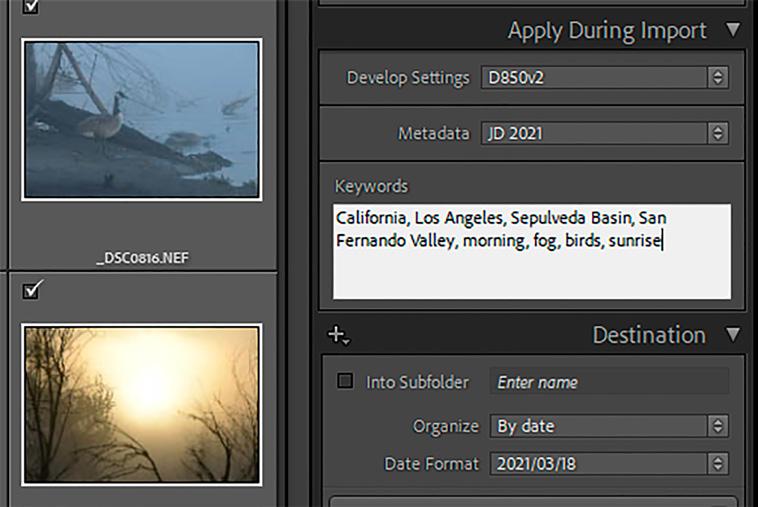
Cataloging begins when I import my photographs. My strategy for selecting keywords is to drill down
by geography (state, city, area, location), and then apply some general keywords that describe the subject (Figure 1). While I import I also apply some custom processing, and I add my copyright and contact info to the metadata. I use Import to copy files from my SD cards to the computer, into folders that sort them by the date.
After importing, I use thumbnail view to select groups of images that need custom keywords, like “Canada Geese” or “Egret,” depending on the subject. All of the selected images will get the same keywords. If a keyword has an asterisk (“*”) next to it, that means it applies to only some of the selected images; it can usually be ignored.
The keywords I use have evolved over time. Eleven years ago I was happy to use the word “flowers” on the Antelope Valley California Poppy Preserve. Just recently I returned to those photographs and added “phacelia,” “poppies,” and “tumbleweeds” to my keyword list for those images. I added these because, in the intervening years, I have photographed quite a few of each, and unlike in 2010 they are now significant enough to get their own keywords.
After cleaning up the keywords I make a quick pass through the shoot, awarding one star to frames that deserve a second look and hitting the “X” key to tag the mistakes for deletion. From here I go back through the one-stars, refining my selections while processing images, until the best ones end up with either a 4- or 5-star rating. What do those stars mean? Every rating system is idiosyncratic. To me, I’d be happy to have them in my annual calendar or a book, and a 5-star is worth hanging on my wall. These ratings are fluid. I have up- and down-graded images over time.
You can stop the cataloging process after keywording, grading, and processing. That’s enough to allow you to quickly search your images using Ctrl-F. Lightroom allows you to search for images using a number of different strategies, including keyword. Once you search for a keyword, you can limit your returns by choosing to view only those that have 4 or 5 stars, or some other

quality. Going a step beyond searching, Lightroom gives you the opportunity to create a Collection, which is on the left side of the Lightroom panel. I use these to keep track of submissions to juried exhibitions and Focal Points, and to sort and select images for books and calendars. I also use Collections to sort images by geographic area (state or country), and subject area (e.g., Winemaking). Create a collection by clicking on the “+” sign, where you’ll get three options: Create Collection, Create Smart Collection, and Create Collection Set (Figure 3). A Collection is like a file folder. You can drag one or many photos into one or more Collections, and add, remove, or sort files at will. Unlike a file folder, it doesn’t create a new file and doesn’t take up space on your hard drive. A Collection Set is a container inside which Collections can be kept. This is useful if you want to organize by geography or theme. For example, I have a Collection Set for “USA,” and the places for which I have a significant number of photos have their own collections inside it.
Perhaps the most powerful use of collections, though, is Smart Collections. Smart Collections allow you to create rules for selection that automatically add images to the collection. A Smart Collection will add images you shot before creating the collection, and it will also add new images that satisfy those rules. This is especially convenient when you return to a place regularly (like Yosemite), or when you’re working on a particular theme over a long period of

time (“dead trees”). It saves you from manually dragging them into a collection every time you find one.
In my example, I’ve created the collection “Smart Yosemite,” and told Lightroom to include images with 4+ stars and the word “Yosemite” in
the keywords (Figure 4). That strategy results in a collection with 322 images. Many of them are duplicates, either .tif or .psd files, or virtual copies. I don’t consider that a problem. I’m not using the Smart Collection to choose my images, but to create the group of images from which I can choose.
I concede that rigorous cataloging isn’t for everyone, but as Galen Rowell suggested, if you keep your images in boxes they might as well not exist. It would be like a personal library with no card catalog or shelving system, which is perhaps sufficient for the person who owns it but the ideas are locked away from anyone else. Cataloging unleashes my ideas, and makes me a better photographer. It disciplines me to think about my subjects and how they relate to my broader body of work, and it makes it easier for me to communicate with an audience by putting my images at my fingertips. - Joe Doherty

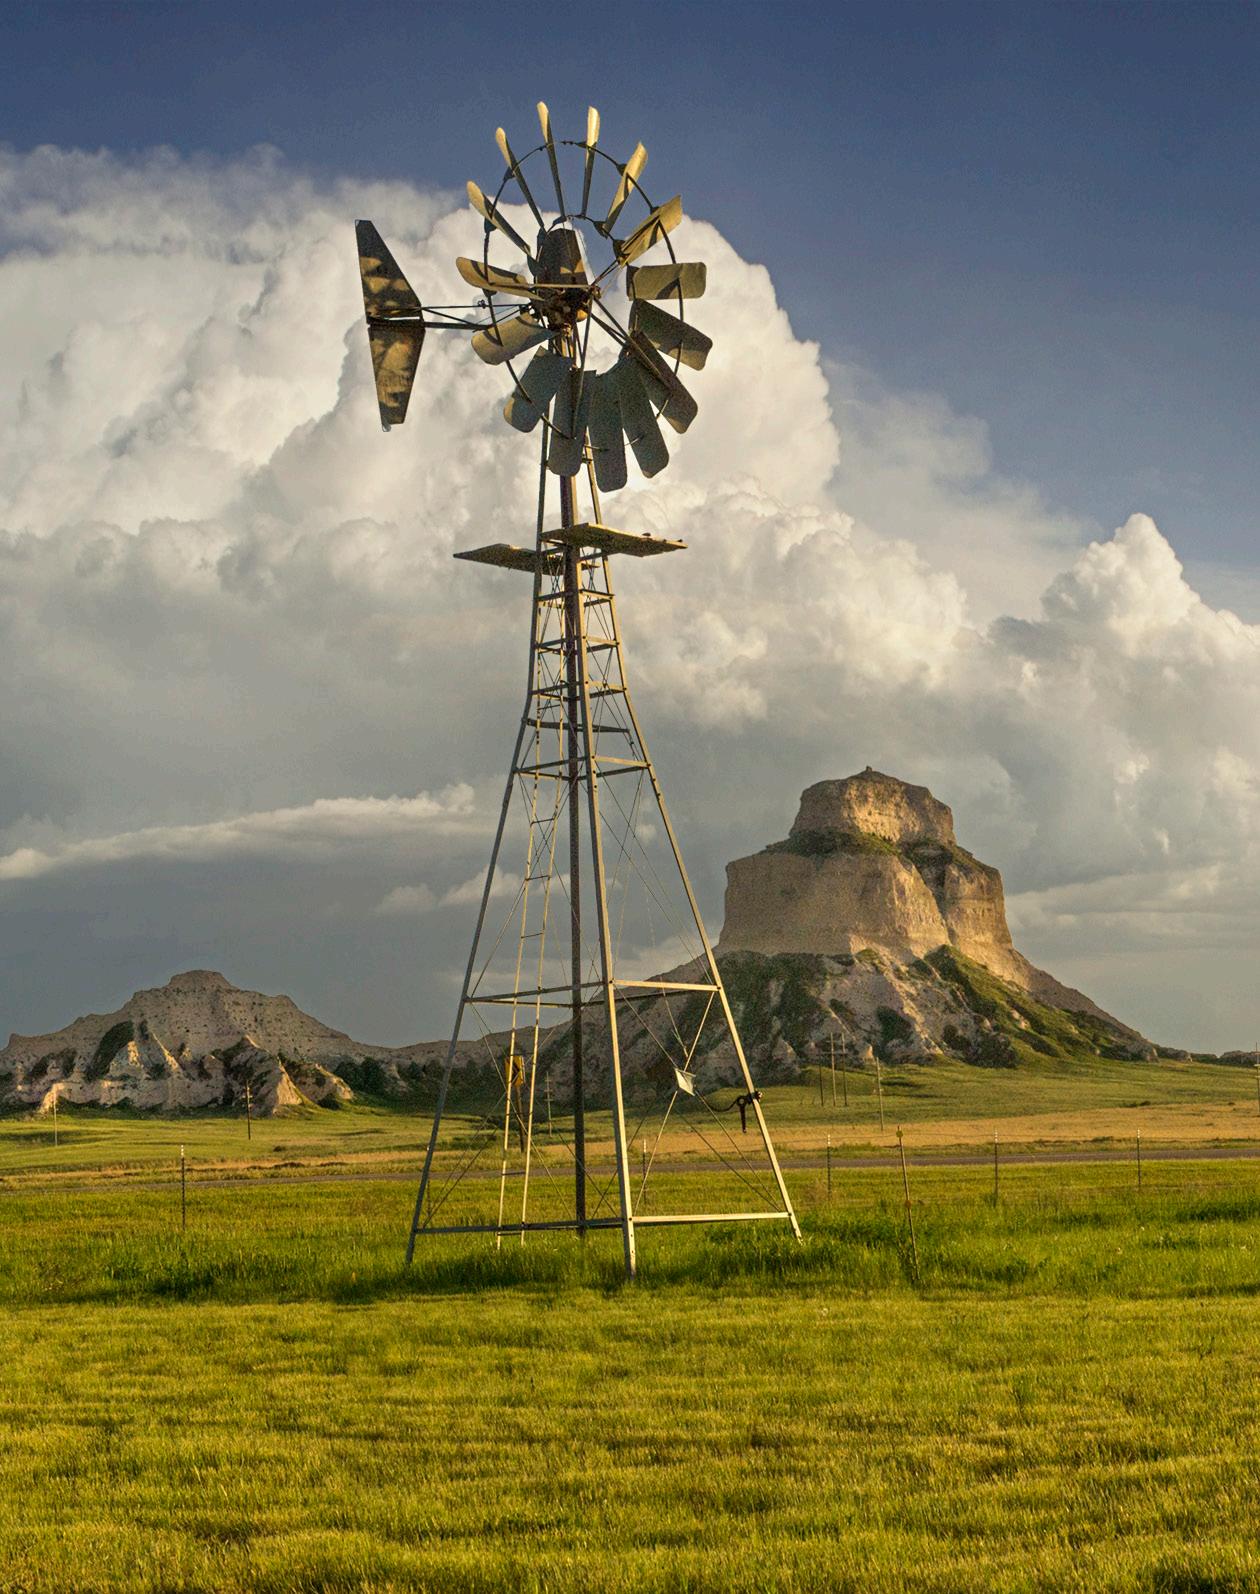
Scottsbluff Windmill