Before operating your KWA Airsoft Gun, read this manual in its entirety. Important safety topics and tips are discussed throughout all of the chapters. It’s important that the operator know the principles of gun handling, safety, and operation prior to firing the Airsoft gun.
Safety distance
The effective shooting range is approximately 75 feet. BBs fired from this Airsoft gun may travel farther than intended. Make certain that you have an adequate backstop.
Eye protection
Eye protection is crucial when operating your Airsoft gun. Always wear eye protection to protect your eyes from BBs, both during gameplay and while performing maintenance. Ensuring proper eye safety is essential to prevent injuries from BBs when in use.
Assume every gun is always loaded
Until you are certain the chamber is empty, treat every gun as if it were loaded. Do not assume the chamber is empty.
Beware of barrel obstructions
Ensure the Airsoft gun barrel is free of obstructions before you fire the gun. Even the smallest obstruction such as dirt, dust, or a stuck cleaning patch can cause a jam, misfire, or malfunction.
Muzzle control
Always keep the muzzle of the gun pointed in a safe direction. Never point the muzzle at a person or object that you do not intend to shoot.
WARNING:
Eye protection should always be used when operating to prevent injury.
Keep your safety on
Keep the gun’s safety on until your sights are aligned on your target and you are ready to fire.
Keep your finger off the trigger Identify your target and backstop
Keep your finger off the trigger and out of the trigger guard until your sights are aligned on your target and you are ready to fire.
Before you pull the trigger, make certain of your target and what is beyond it. The Airsoft gun should never be fired at surfaces such as rocks, glass, water, or other hard surfaces where BBs are likely to ricochet in unpredictable directions.
Failure to Fire
If the Airsoft gun fails to fire, misfires, or malfunctions, do not look into the gun barrel. BBs can become lodged into the chamber, and serious eye injury may occur.
Maintain your gun properly
Performing proper maintenance, as outlined in this manual, ensures that your Airsoft gun will be safe to shoot and will perform to its designed specifications for many years. Alterations, modifications or adjustments may damage your Airsoft gun, and make it unsafe to shoot.
Store your gun safely
Always store the Airsoft gun in a safe place, and out of reach of children. Always transport the Airsoft gun in a carrying case. Never display the Airsoft gun in a public place. Keep the safety engaged, and remove the magazine before storing the Airsoft gun.
NOTE: IT IS YOUR RESPONSIBILITY TO TAKE EVERY REASONABLE PRECAUTION TO ENSURE THE SAFE STORAGE AND TRANSPORTATION OF YOUR AIRSOFT GUN.
WARNING:
Airsoft BBs can be a choking hazard. Keep them away from children. Failure to follow safety guidelines may result in serious injury.
Orange tip
The orange tip on Airsoft guns helps Law Enforcement distinguish replica guns from their real firearm counterparts. Altering the coloration or markings required by state or Federal law so as to make the product look more like a firearm is dangerous and may be a crime. Operator assumes all risks and responsibility when doing so.
Hazards of being mistaken for a real firearm
Airsoft guns have been mistaken by Police and Law Enforcement as real firearms. A confrontation with law enforcement while carrying an Airsoft gun can result in serious injury or even death. It is strongly advised to operate the Airsoft gun at a safe and legal location. In the event that you are approached by Law Enforcement personnel, you must comply with their instructions immediately to avoid an incident.
Alcohol, medications, and drugs
Do not handle or operate your Airsoft gun while under the influence of alcohol, medication or drugs.
Your responsibility
Your KWA Airsoft Gun is well-engineered and manufactured to the highest standards. It was carefully inspected before it was packaged and shipped from our factory. Like many other devices, your Airsoft gun is safe unless handled in an irresponsible or uneducated manner.
WARNING:
Adult supervision is required for any person under the age of 18.
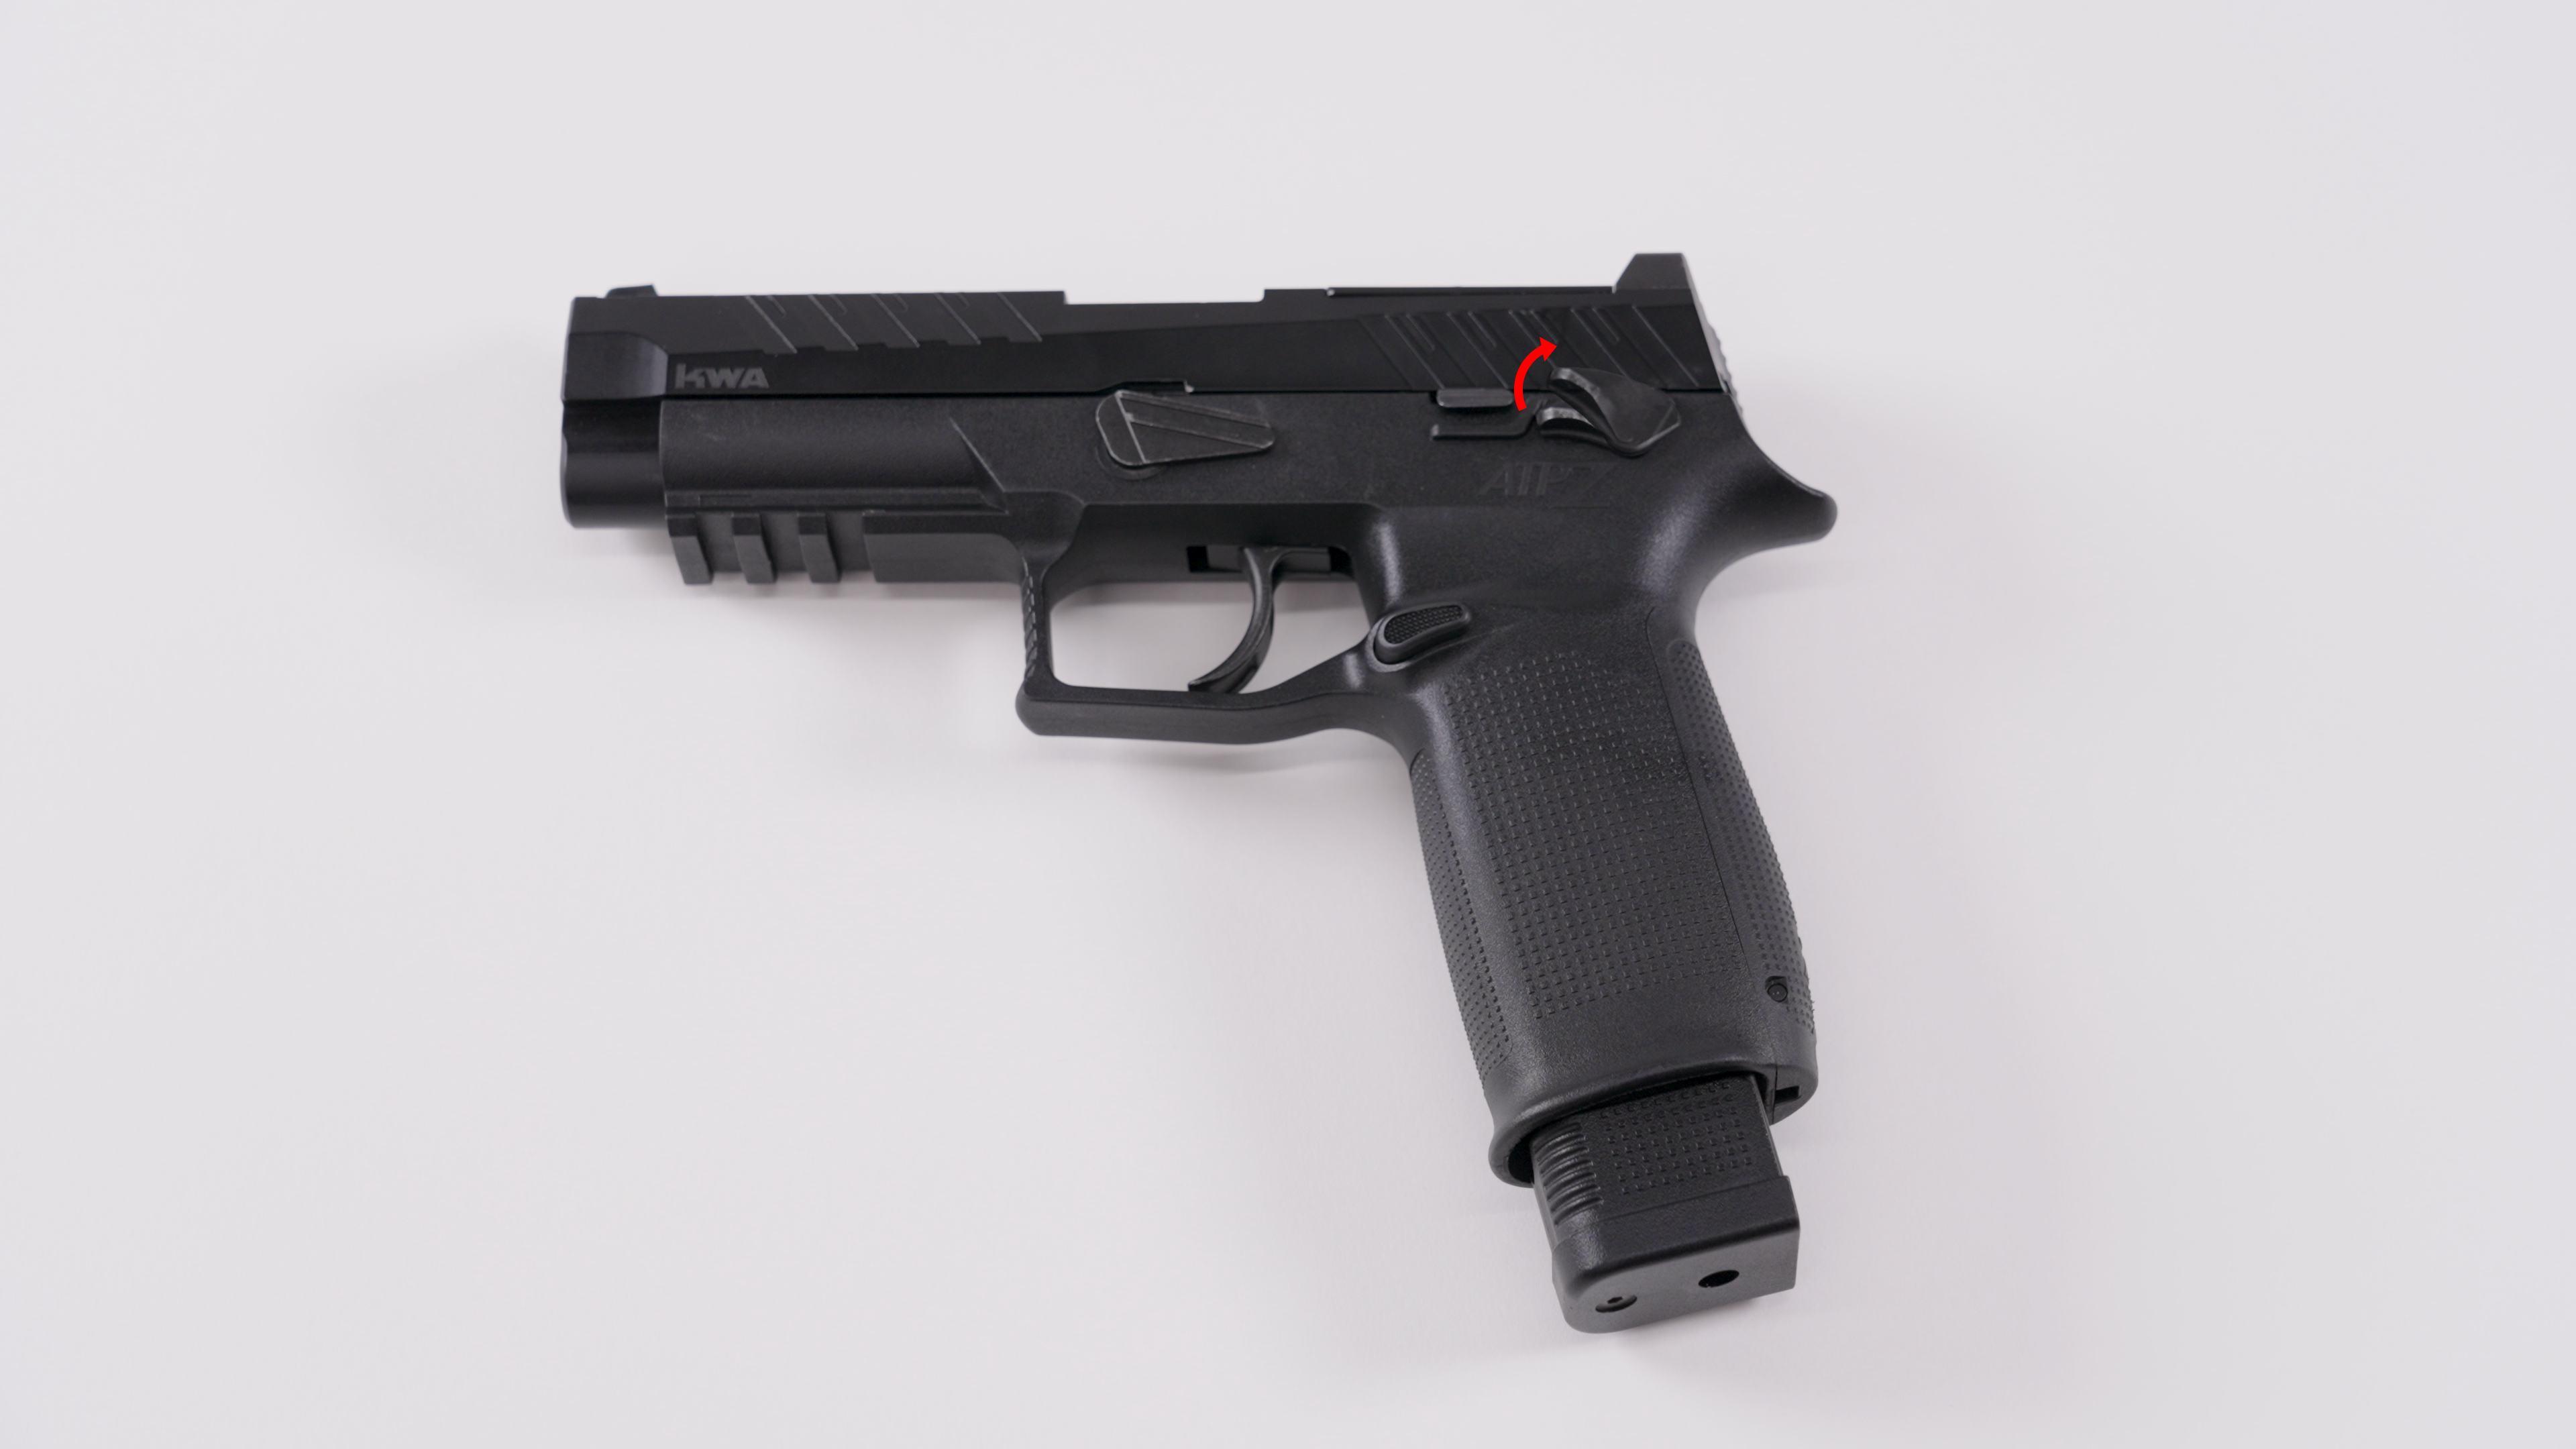
To engage the safety, push the safety lever upward. The gun is not ready for fire.

To disengage the safety, push the safety lever downward. The gun is now ready to fire.
WARNING:
When the pistol is not in use, always ensure it is placed in the "safe" position to prevent accidental discharge.
01 Release the magazine by pressing the magazine catch button.
02 Hold the magazine upside down.
03 Push the gas canister nozzle into the charging valve (Make sure both the canister and magazine are inverted and in the vertical position when charging).
04 Charge the magazine until gas overflows from the charging valve (Approximately 20 seconds).
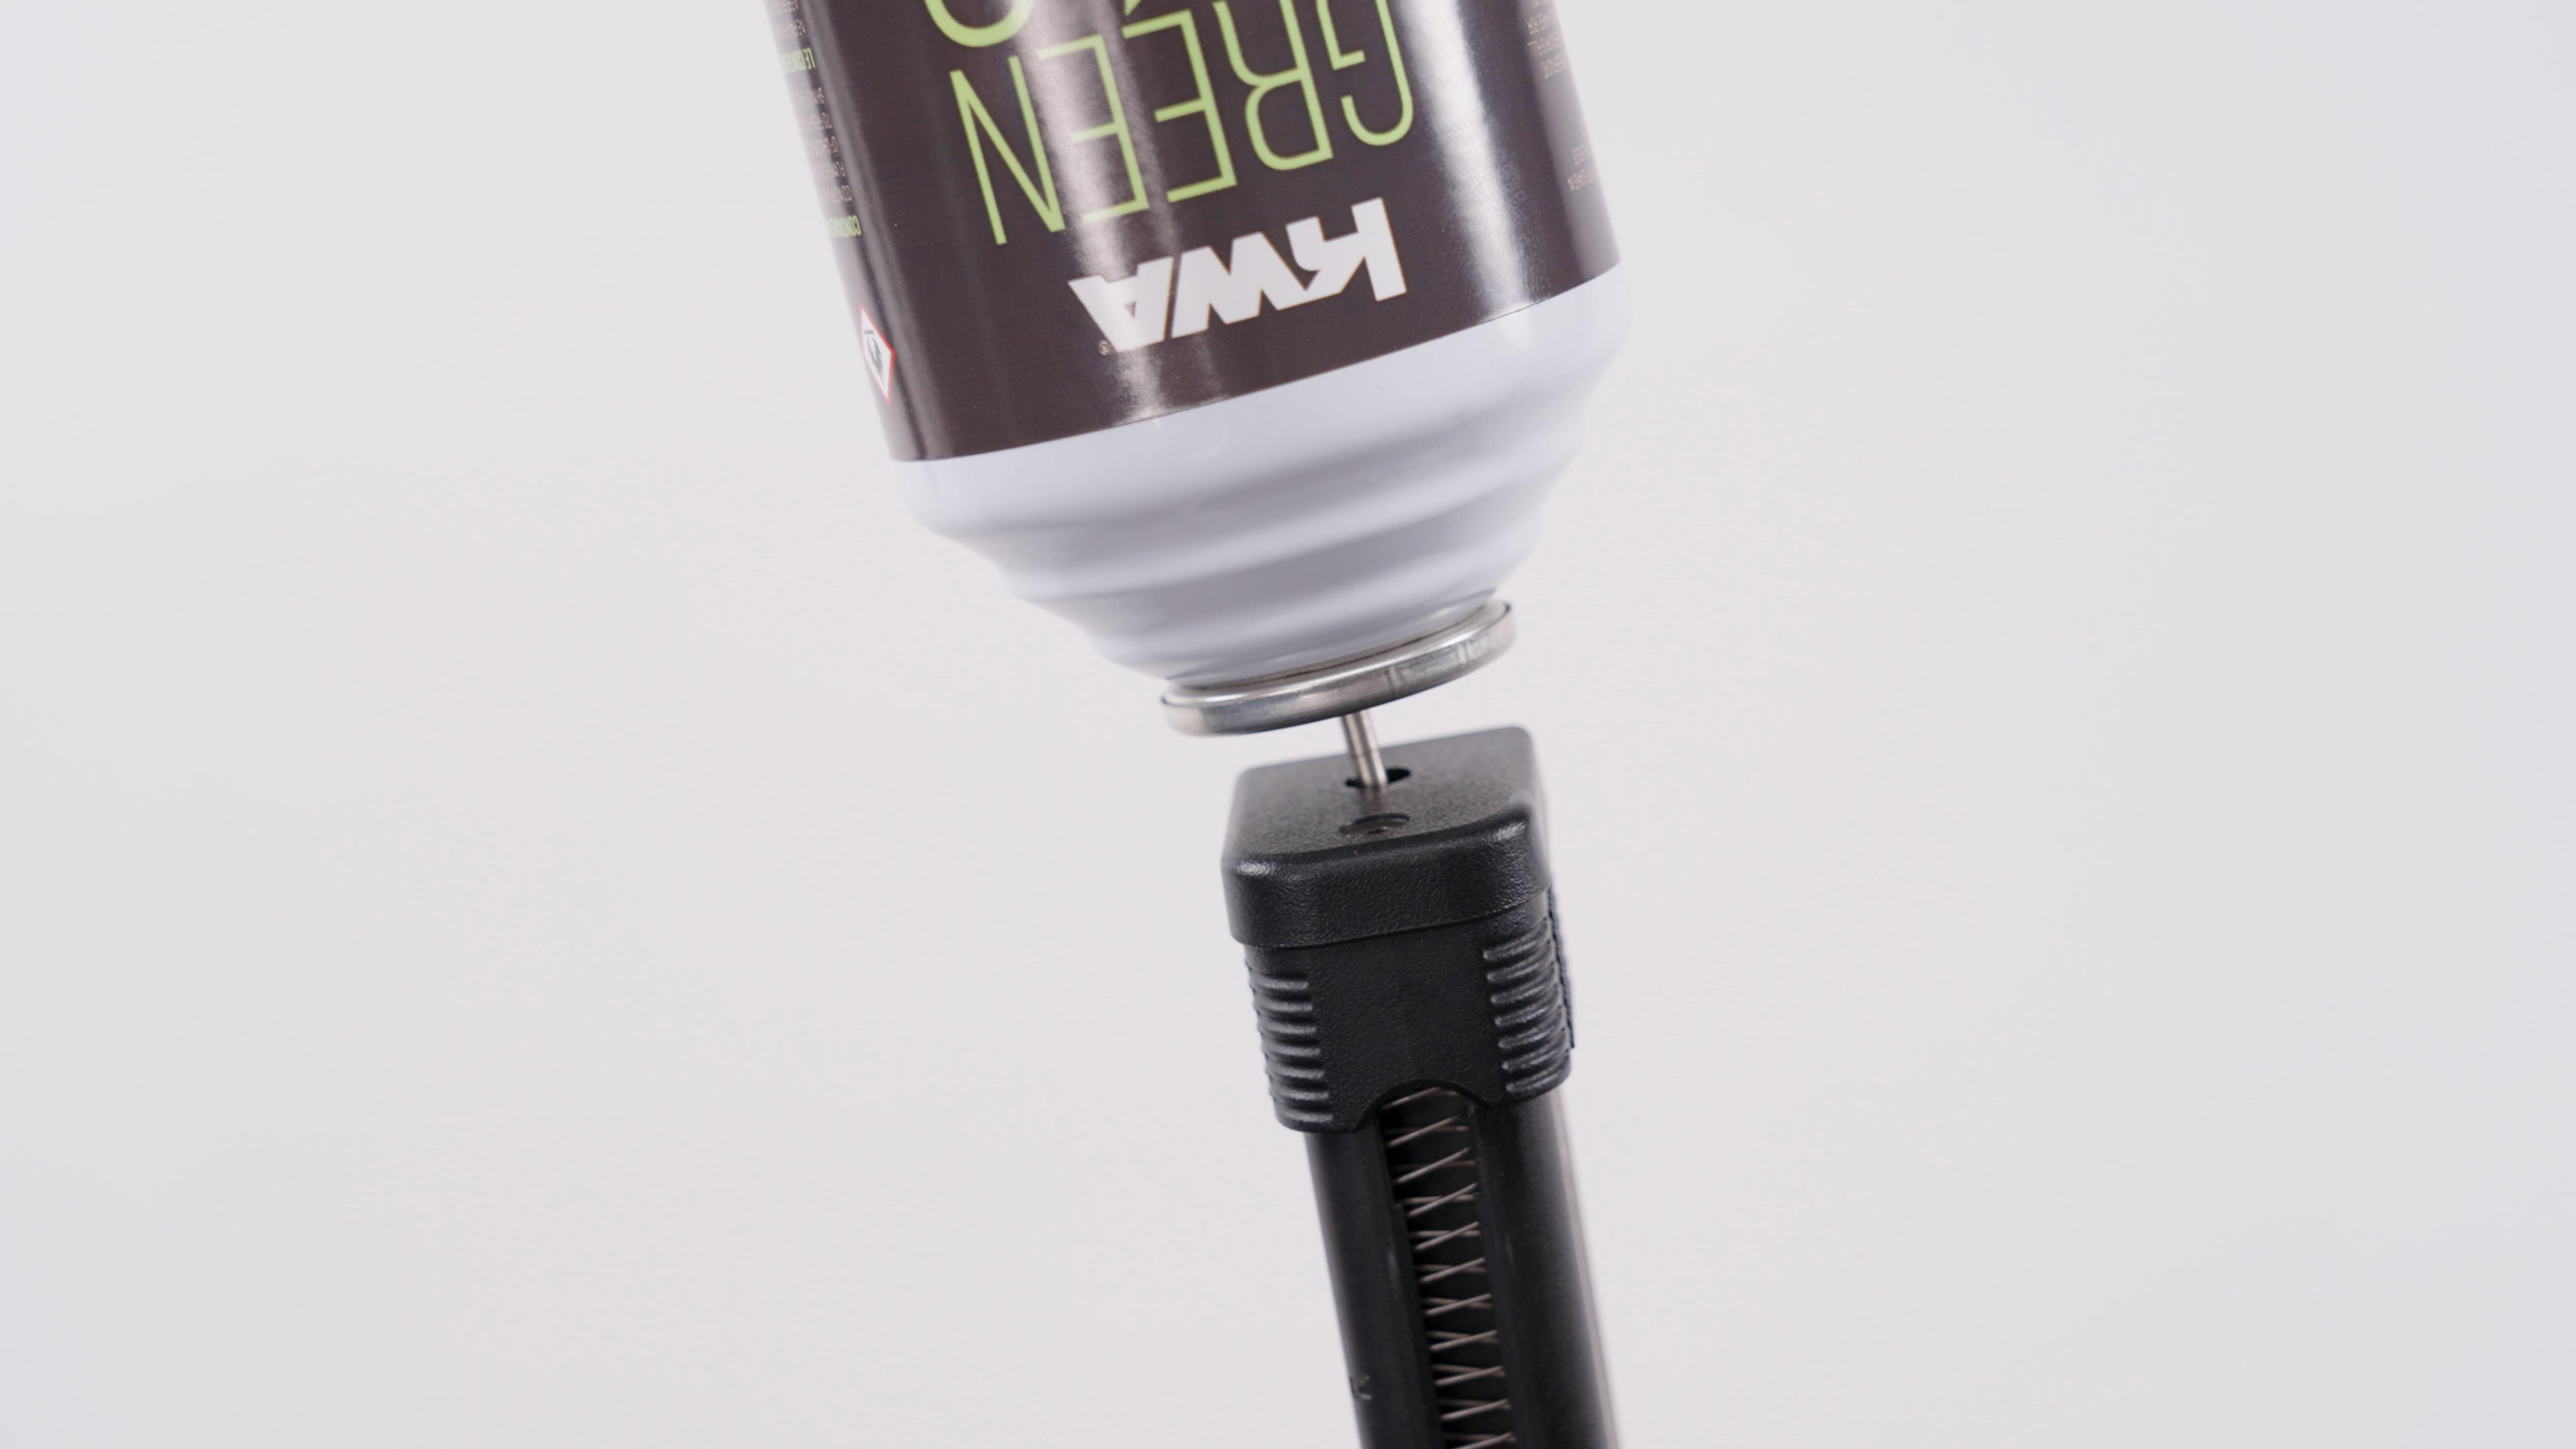
Note: It is normal to have minor leaking from the charging valve during charging due to high pressure built up inside the magazine. It is recommended to keep the gas releasevalve slightly oiled. Room temperature is the idealtemperature for shooting. You may experience a delayed action if the surrounding temperature drops below 68º F.
Note: Do not expose the magazine to direct sunlight or incinerate the magazine, as this may cause the magazine to burst. It is strongly recommended to empty the gas from the magazine after shooting. Be certain that the gas is not exposed to eyes or skin while being released, as any contact will cause cold burns.
WARNING:
Always use high quality 6mm BBs, weighing 0.2g or heavier. For best results use 0.25g KWA perfect BBs.
Never use recycled or low grade BBs to prevent damage to your gun.
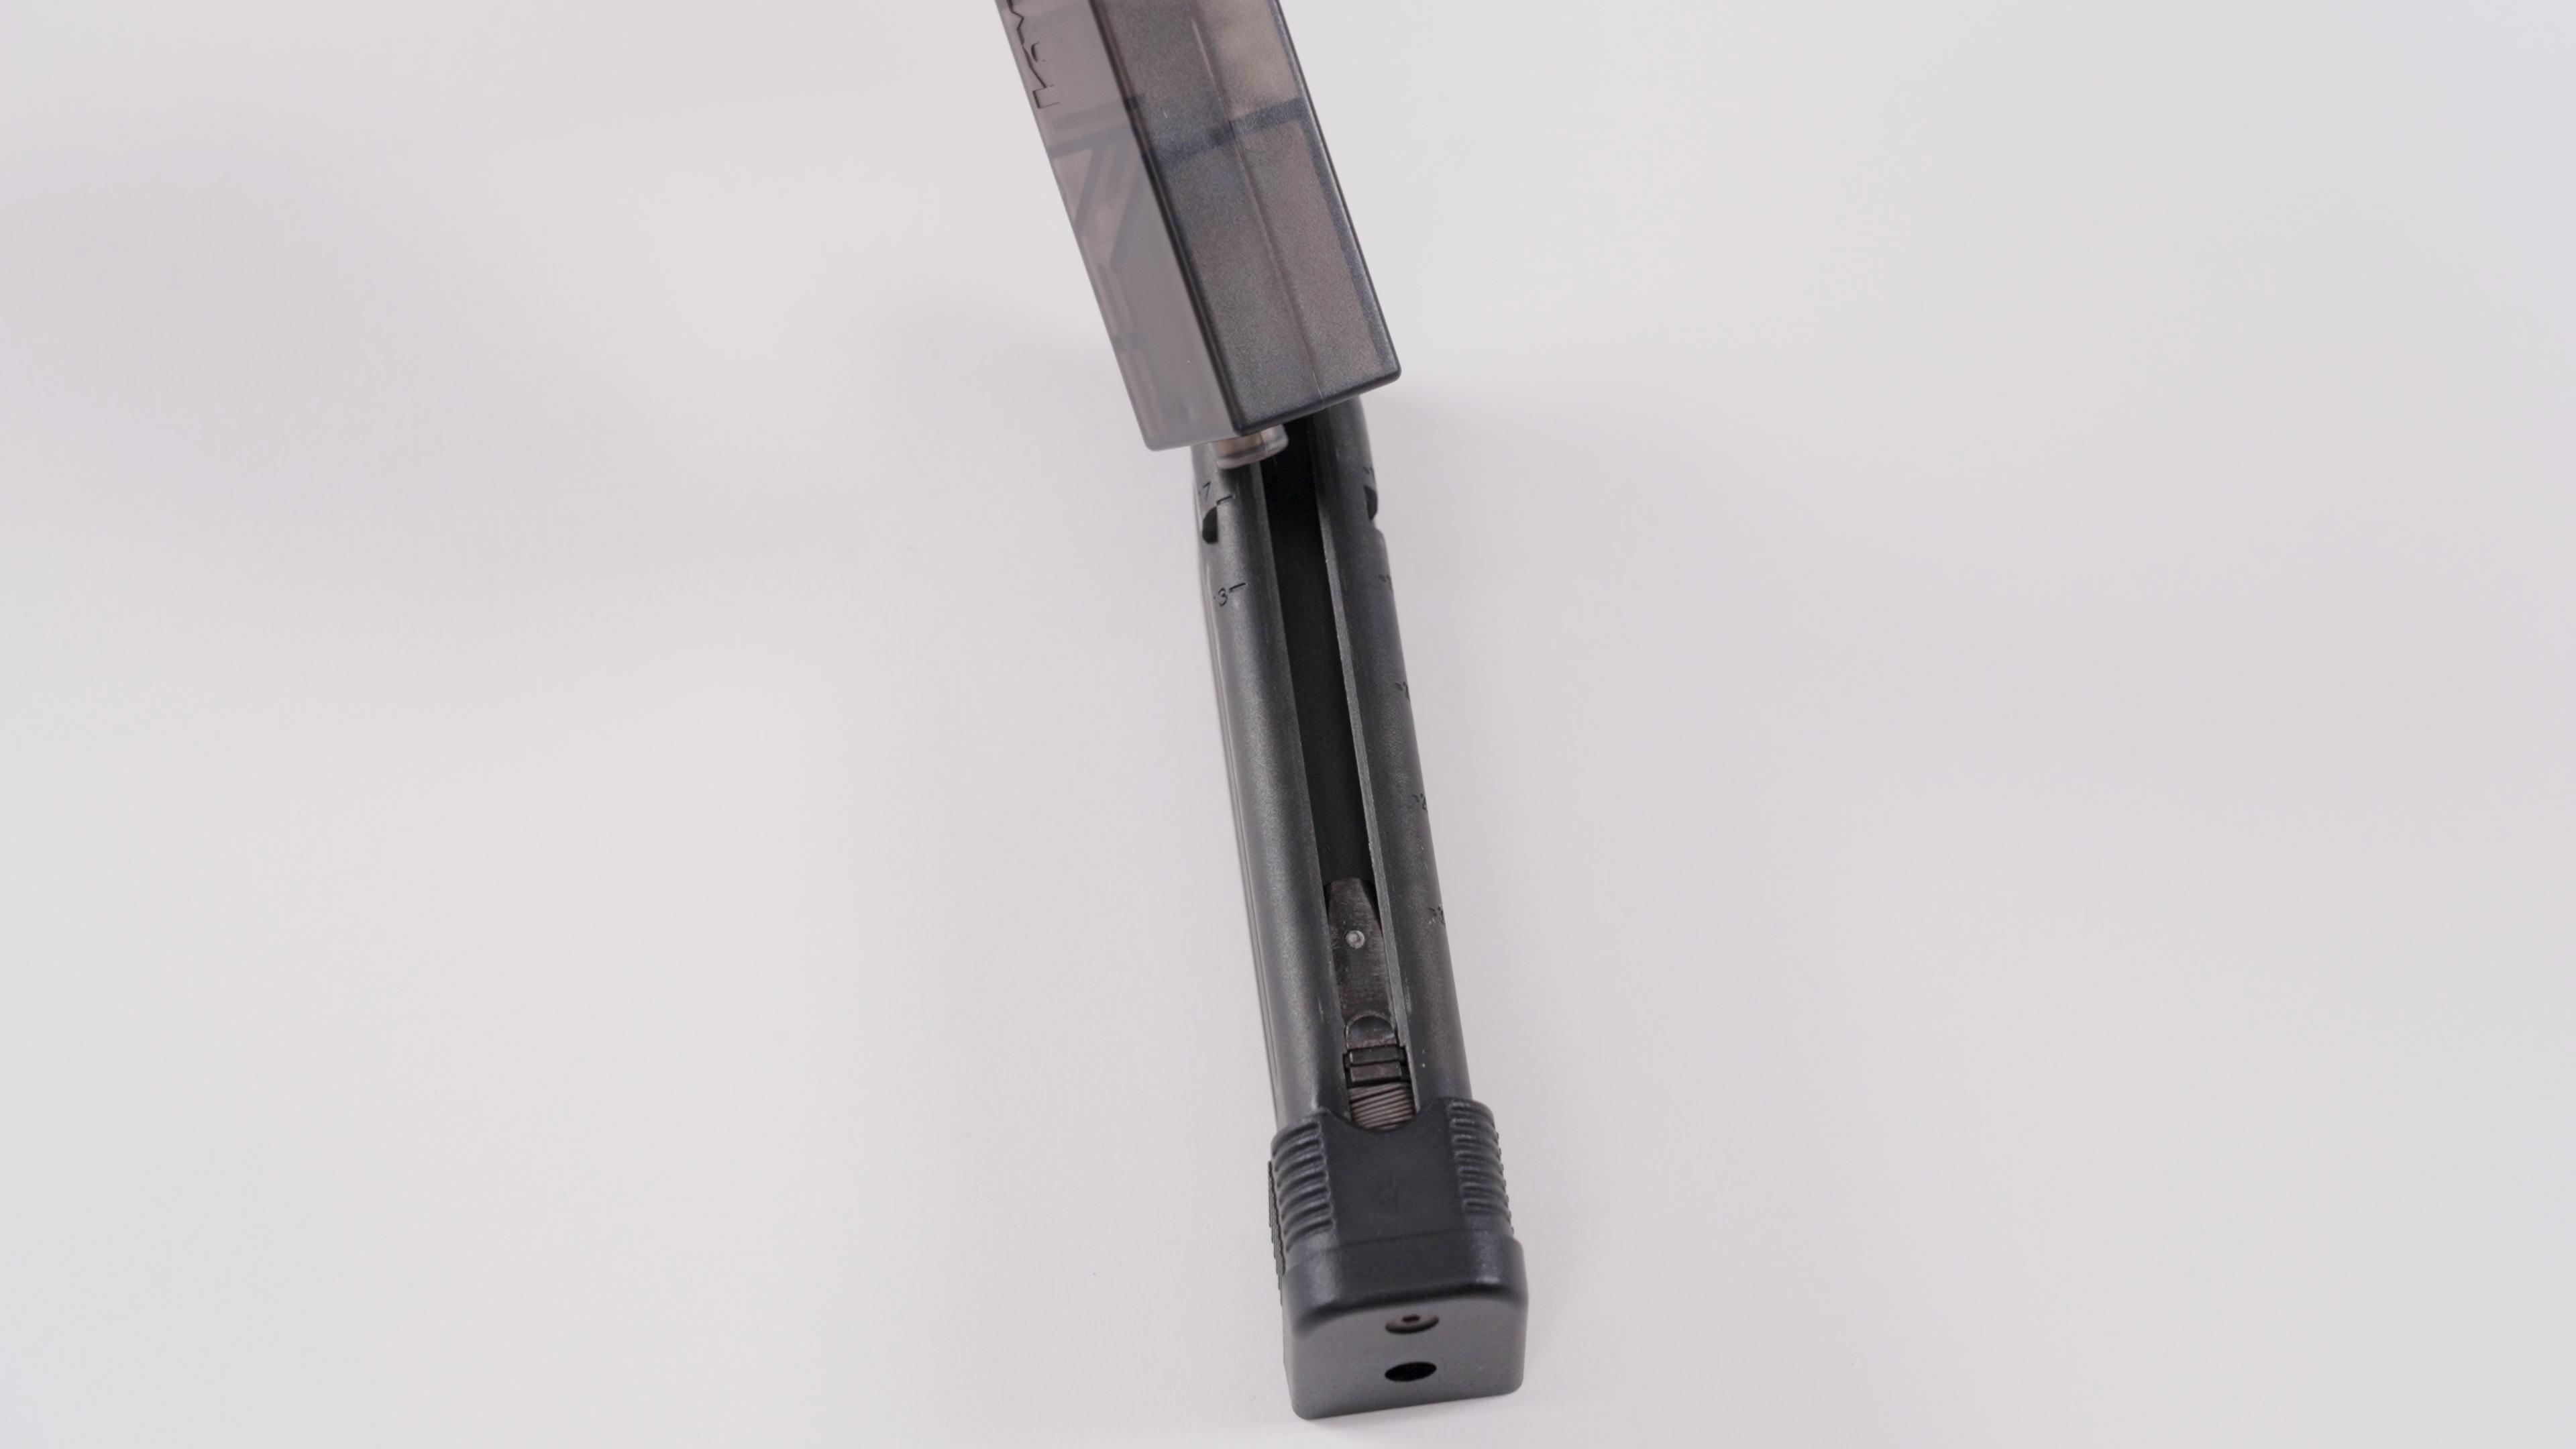
01 Pull the magazine follower down until it locks.
02 Insert BBs into the top magazine lip. Note: This magazine also features a front load option. You can load the BBs from the front of the magazine as well.
03 Make sure to have a 3mm clearance between BBs and the top lip of the magazine.
NOTE: Each side of the magazine features clear round count markers for convenient tracking.
04 Push the magazine follower lock to release.
01 Place the magazine back into the magazine well.
02 Push the magazine up until it clicks into a locked position.
03 Pull on the magazine to assure that it is locked in place.
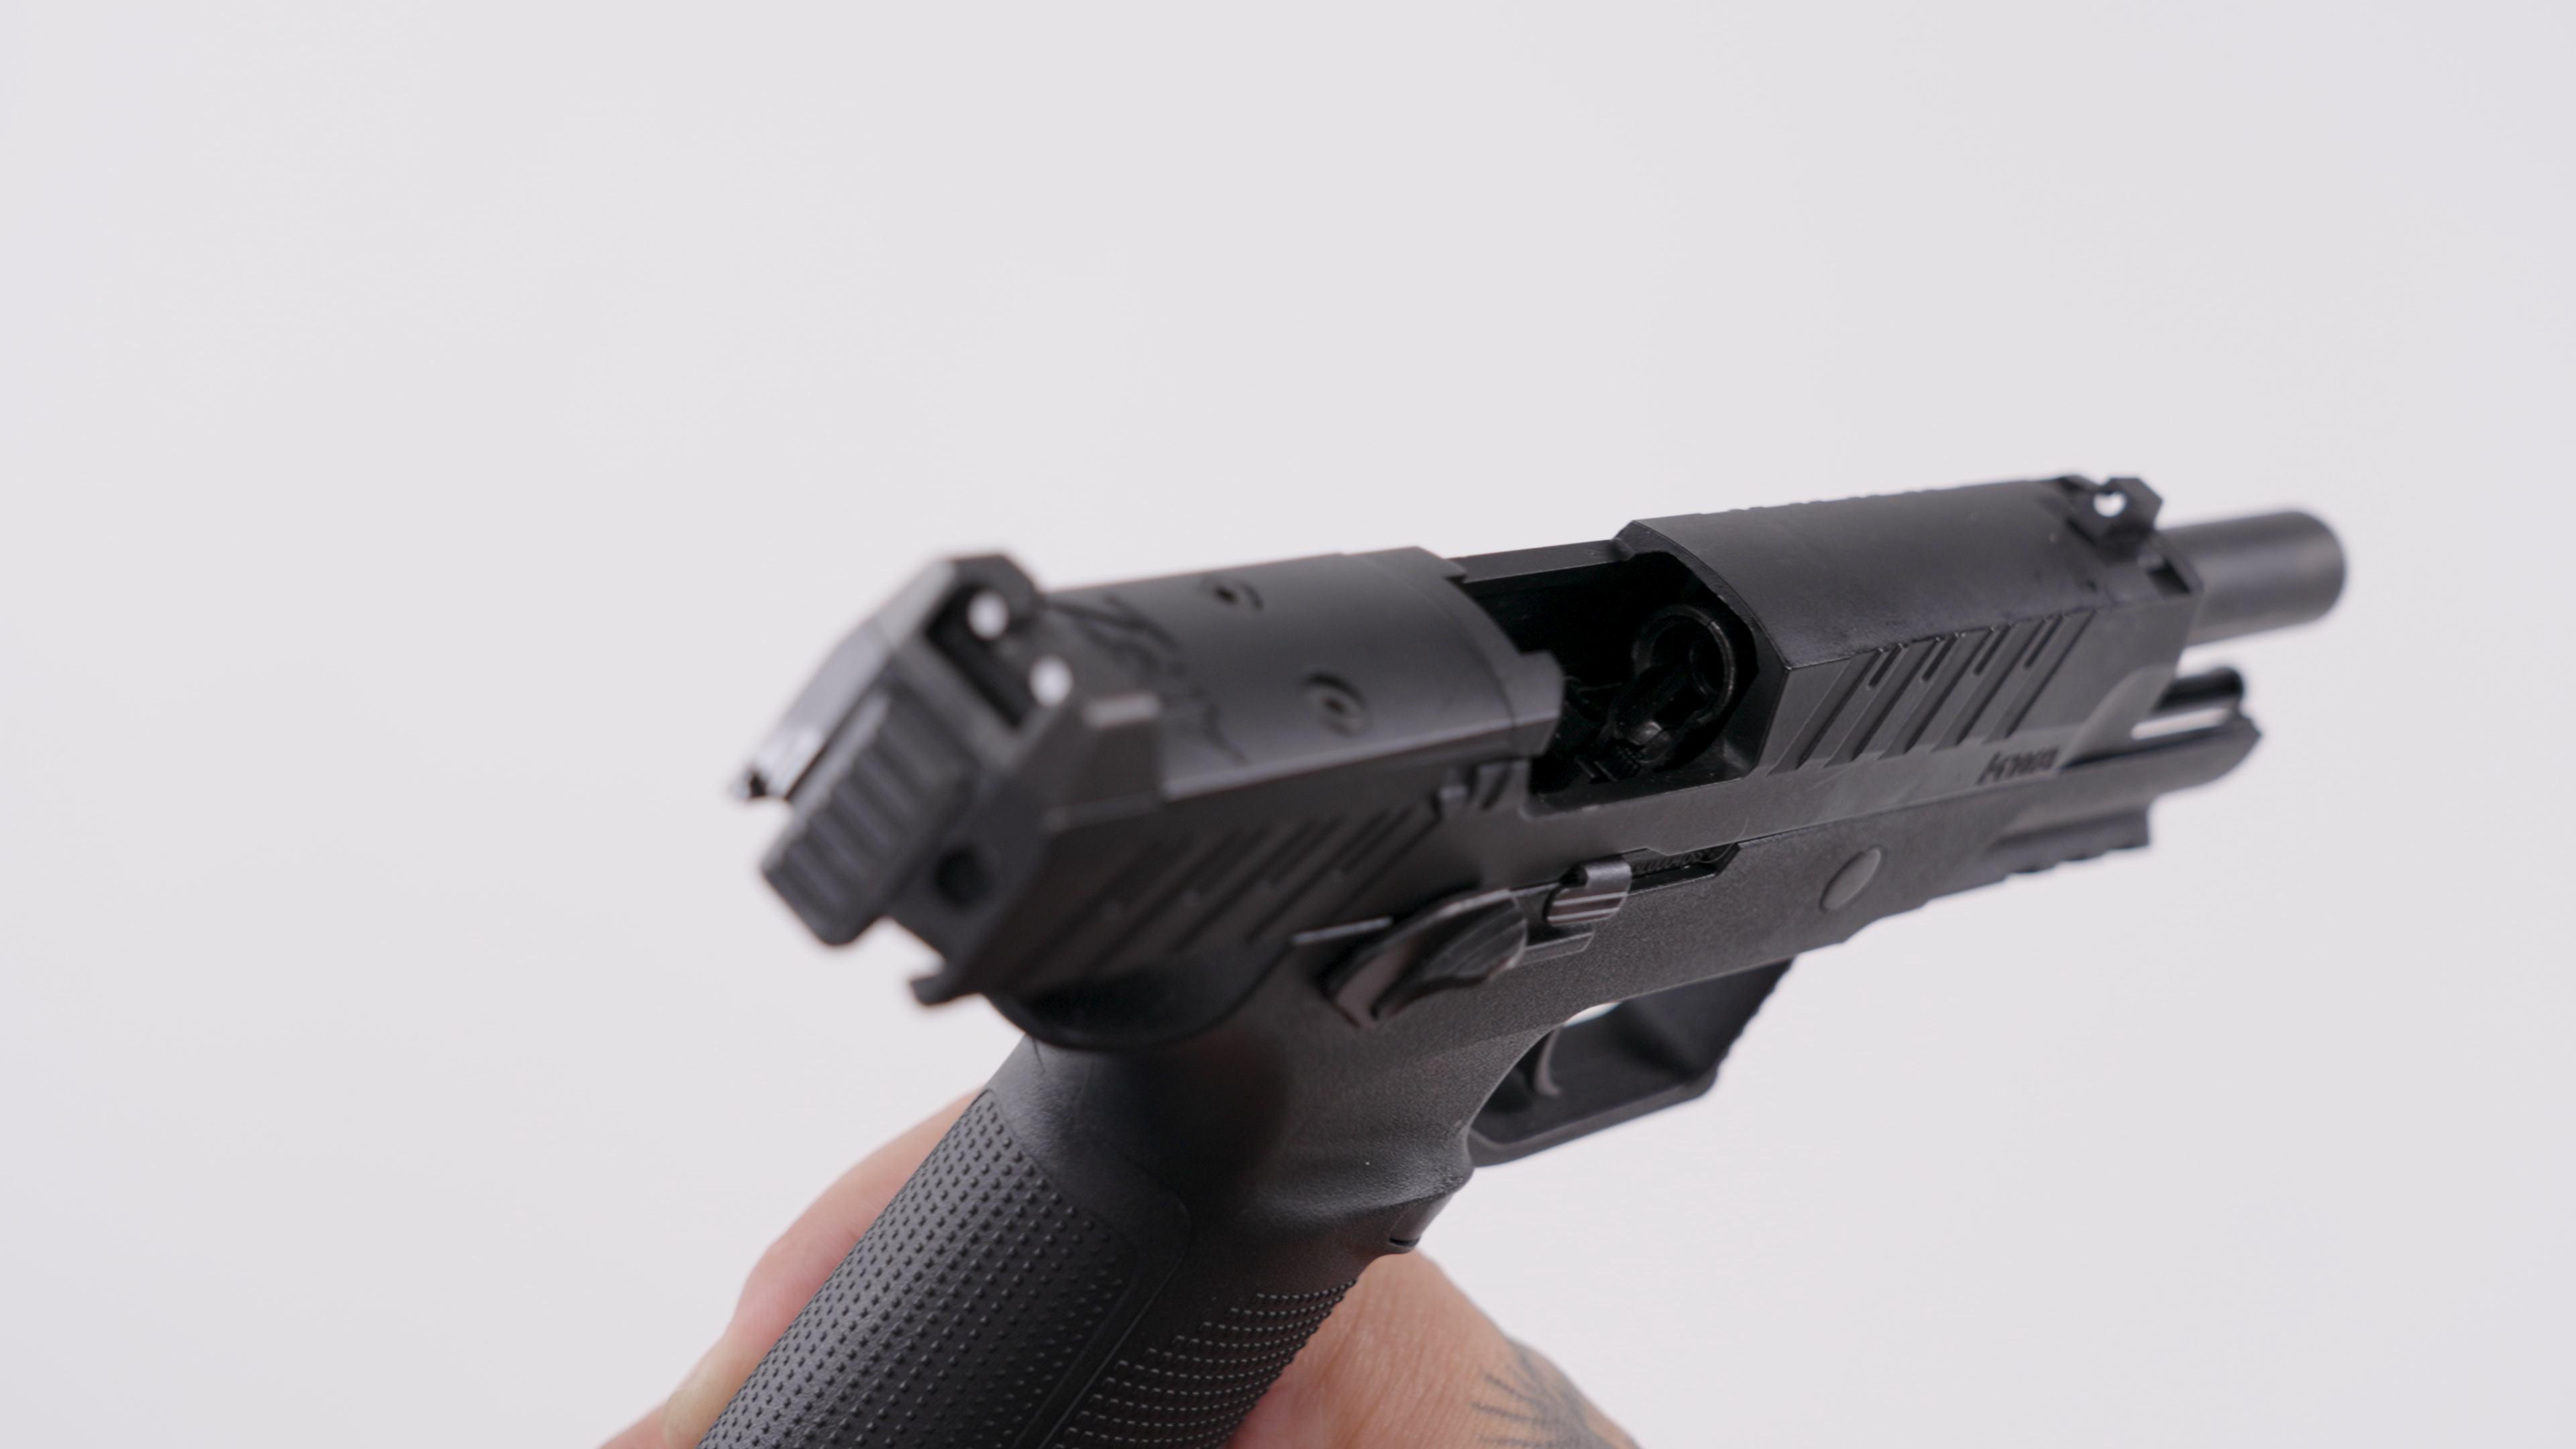
01 Pull the slide to the rear-most position and release the slide. This will automatically load the first BB into the chamber.
02 The internal hammer will be in a cocked position.
03 Make sure not to skip this procedure. Skipping this step will cause a misfire on the first pull of the trigger.
04 The slide will lock open when the last BB is fired.
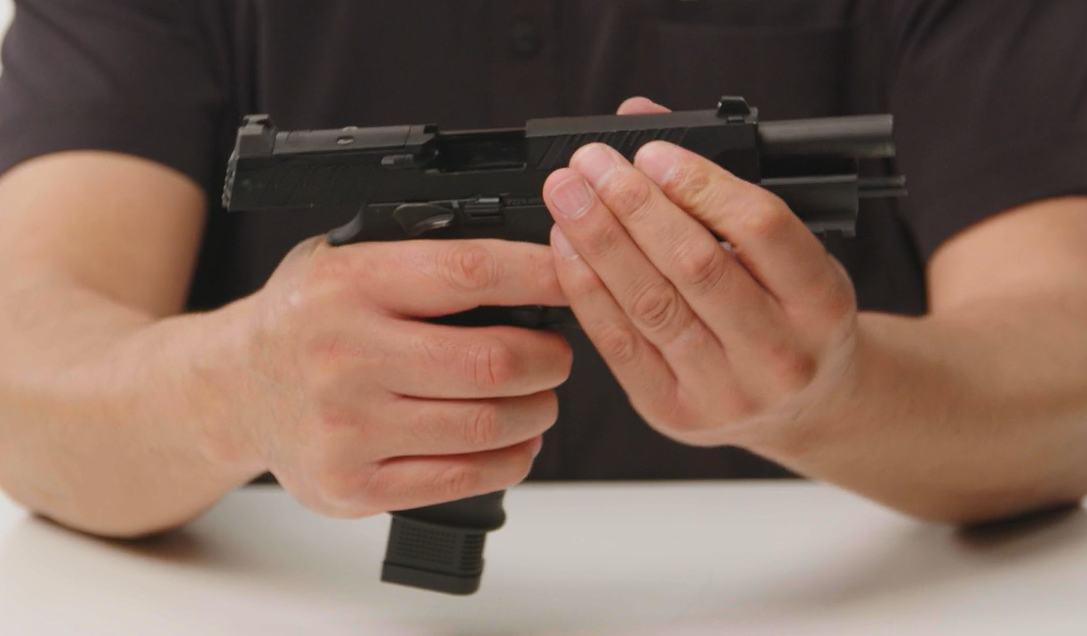
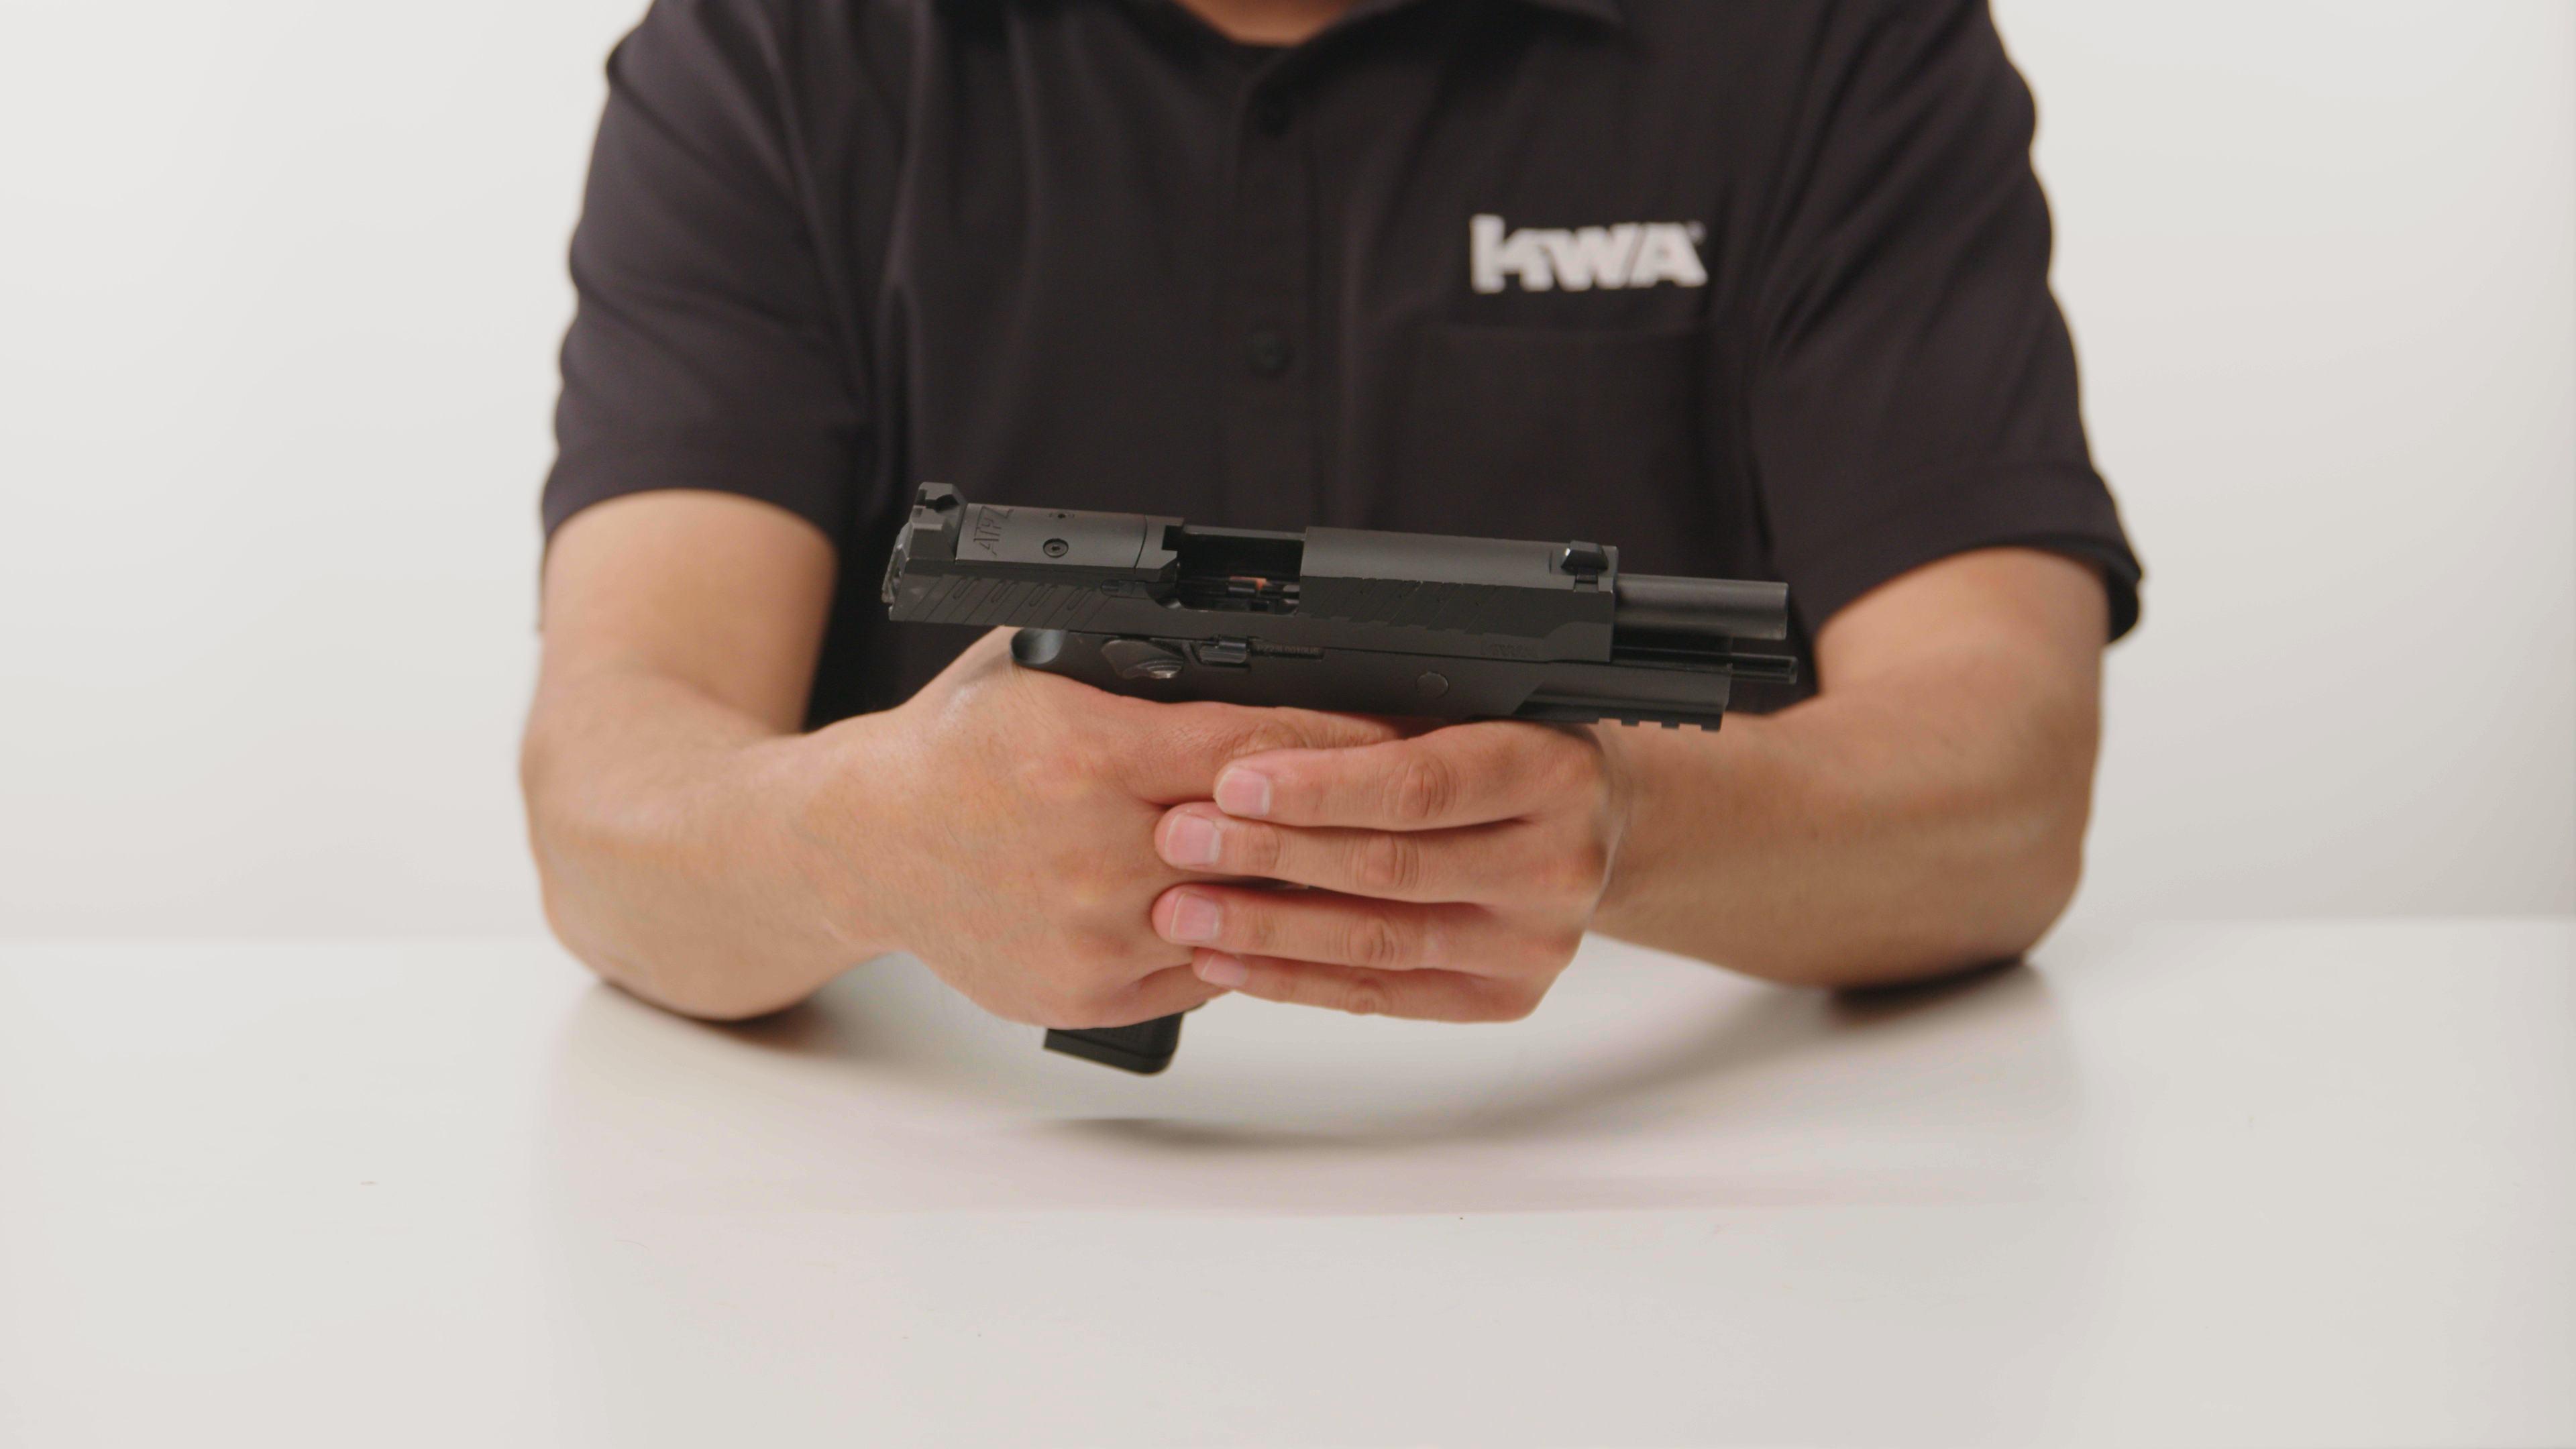
01 Make sure the gun is cocked.
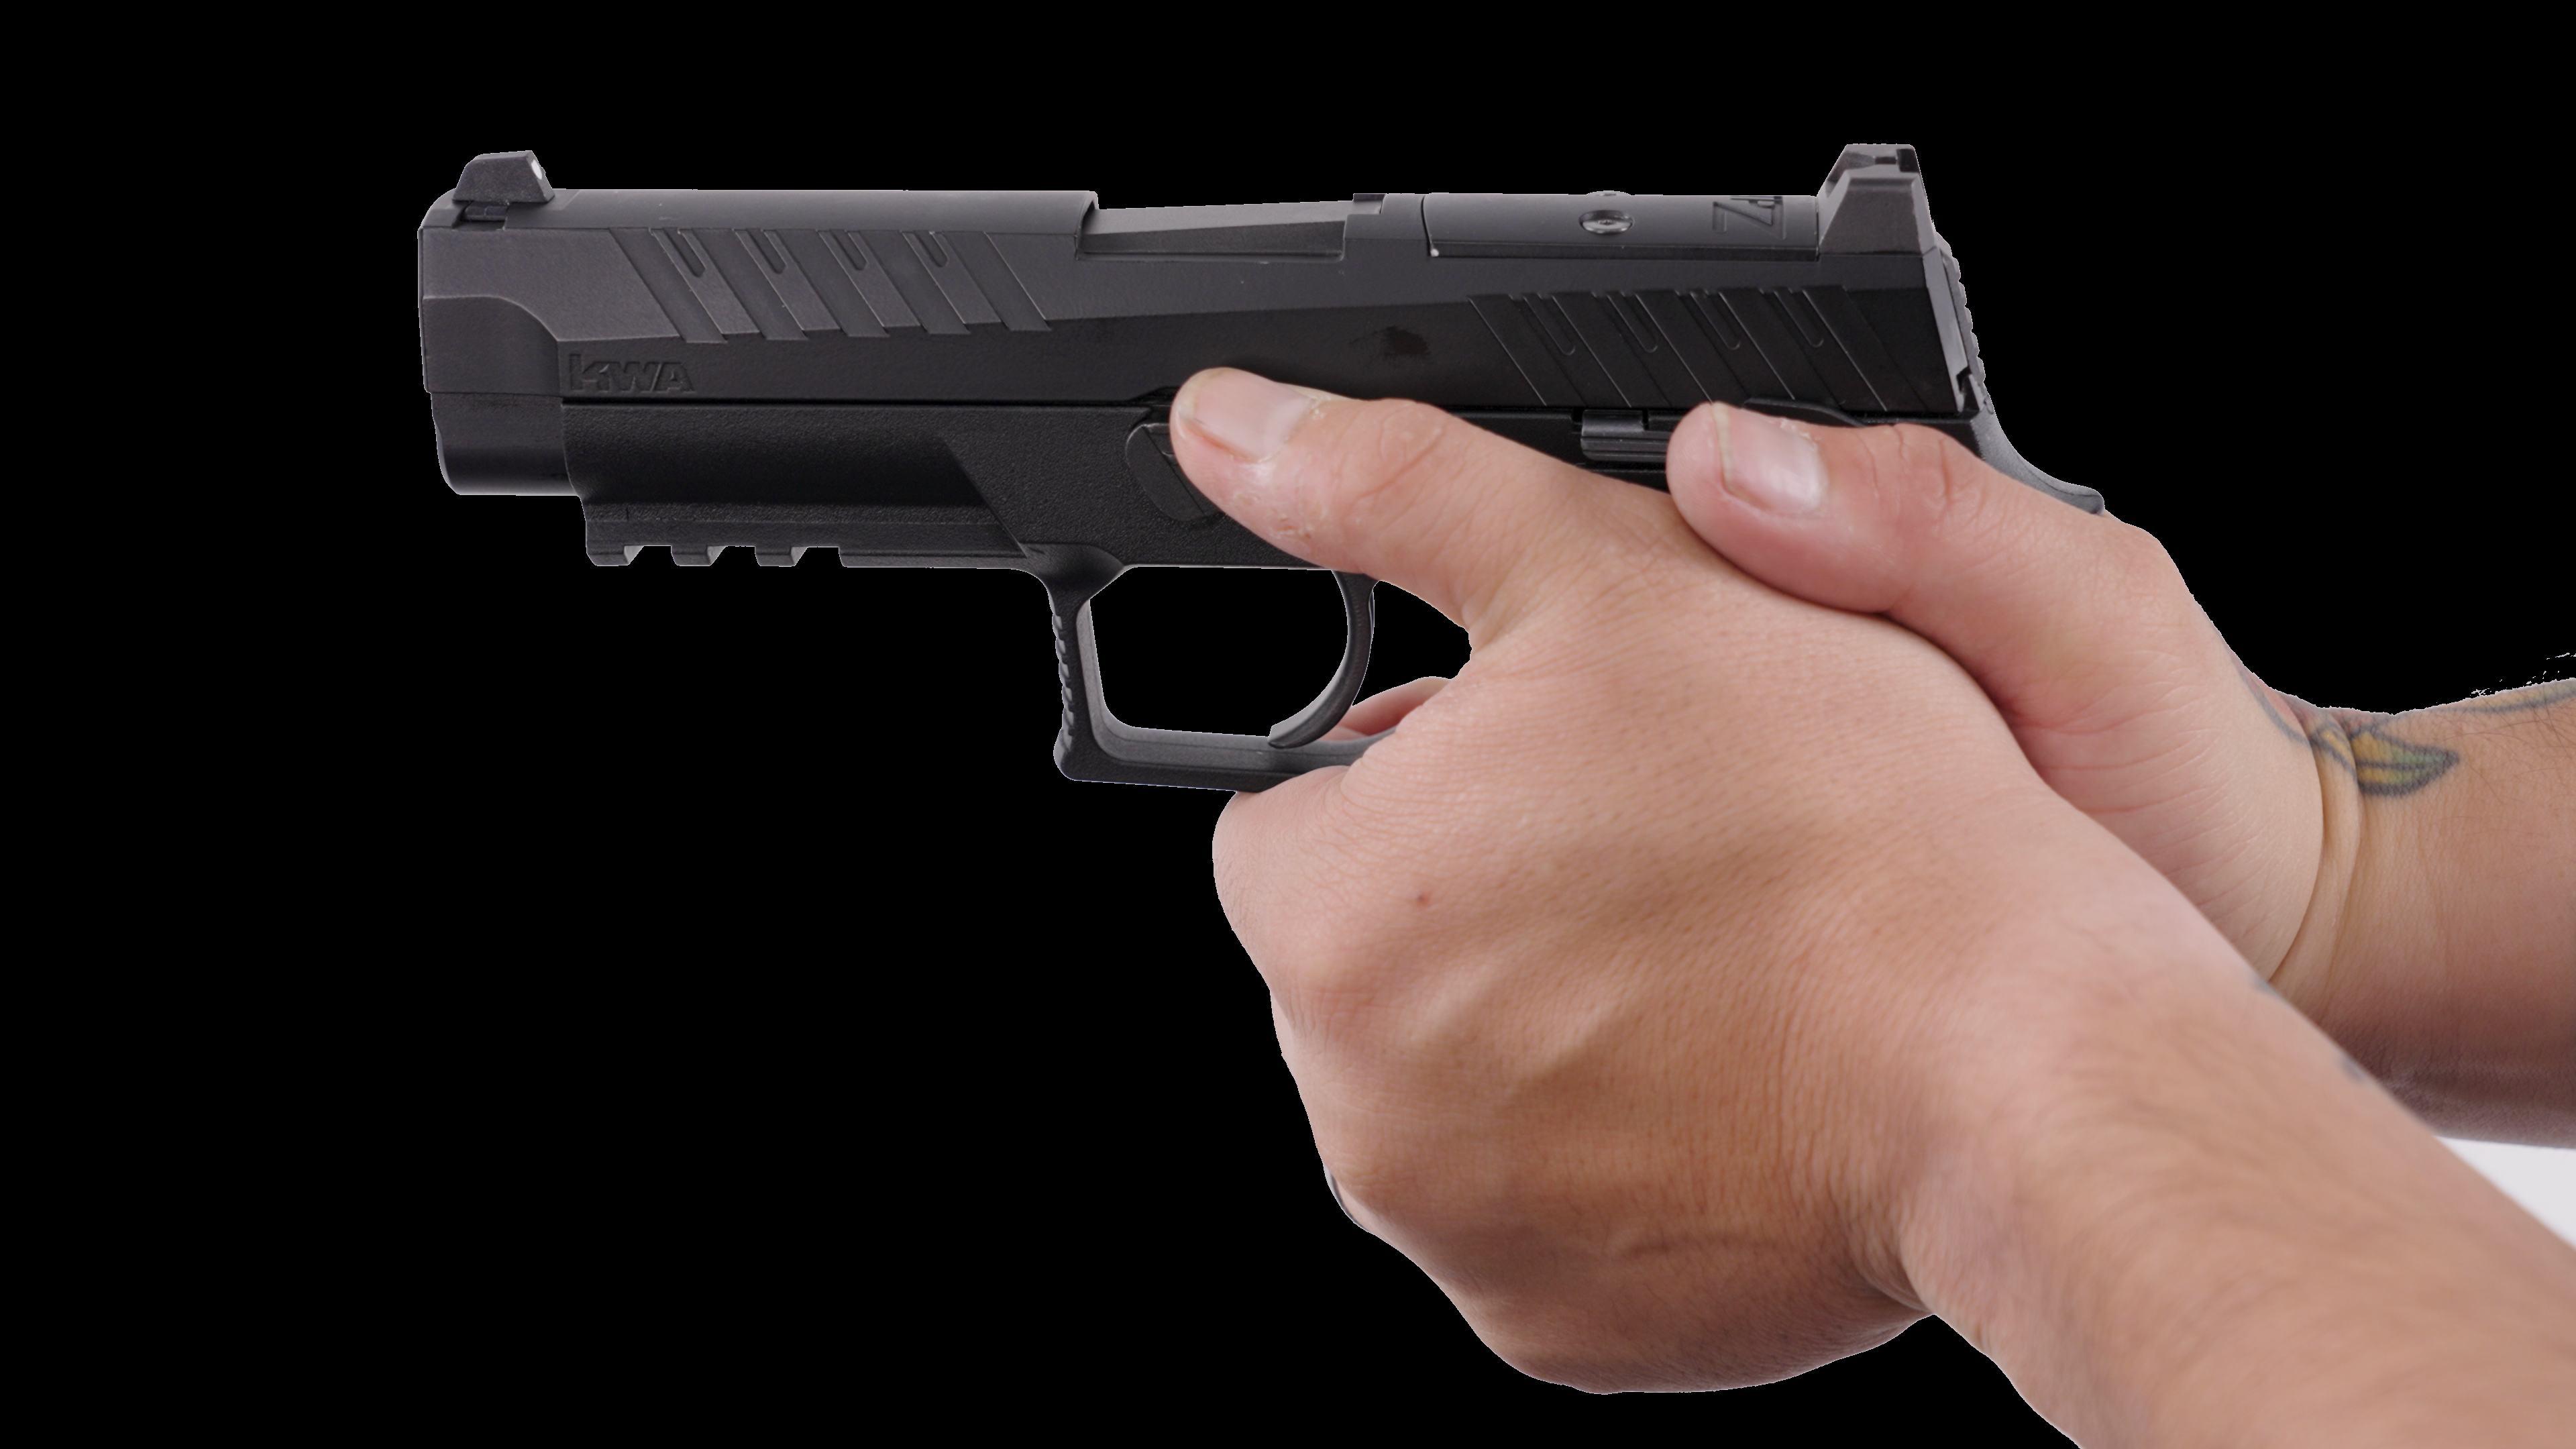
02 Grasp the Airsoft gun in your hand firmly. A two-hand hold with one hand wrapped around the other will help control the Airsoft gun.
03 Release the safety and squeeze the trigger. The blow back action will load the remaining BBs automatically as the slide cycles back and forth.
04 The slide will lock back in the open position when the last BB is fired.
01 Test fire the gun for 10 to 20 rounds and observe the BB’s Traveling pattern.
02 Press down the magazine release to remove magazine.
03 Follow the “Disassembly Page” (Page 12) to remove slide. (Step 4)
04 Adjust the hop up dial ¼ inch at a time.

05 If the BB’s are dropping too quickly, adjust the dial following the chart below.
BB TRAJECTORY PATTERN ADJUSTMENTS
BB DROPS FREELY
BB TRAVELS AT SHORT TRAJECTORY PATH
BB TRAVELS DISTANCE AT FLAT TRAJECTORY PATH
BB TRAVELS FLAT IN SHORT DISTANCE, THEN GOES UP IN CURVE AND DROPS FREELY
BB TRAVELS AT UNSTABLE SPEED AND IRREGULAR PATH
TURN DIAL COUNTER CLOCKWISE
TURN DIAL SLIGHTLY TO LEFT
NO ADJUSTMENT MADE
TURN DIAL SLIGHTLY TO RIGHT
TURN dial clockwise
The slide will remain open after the last BB has been fired.
Remove the empty magazine and replace it with a loaded magazine before releasing the slide catch lever.
The first BB will automatically load into the chamber.
After you are finished shooting, remove the magazine and visually examine the opened chamber to check for clearance. Make sure both the magazine and the chamber are clear, then release the slide.
01 Press down the magazine release to remove magazine.
02 Rack the slide backward to reset the trigger into “cock” position.
2
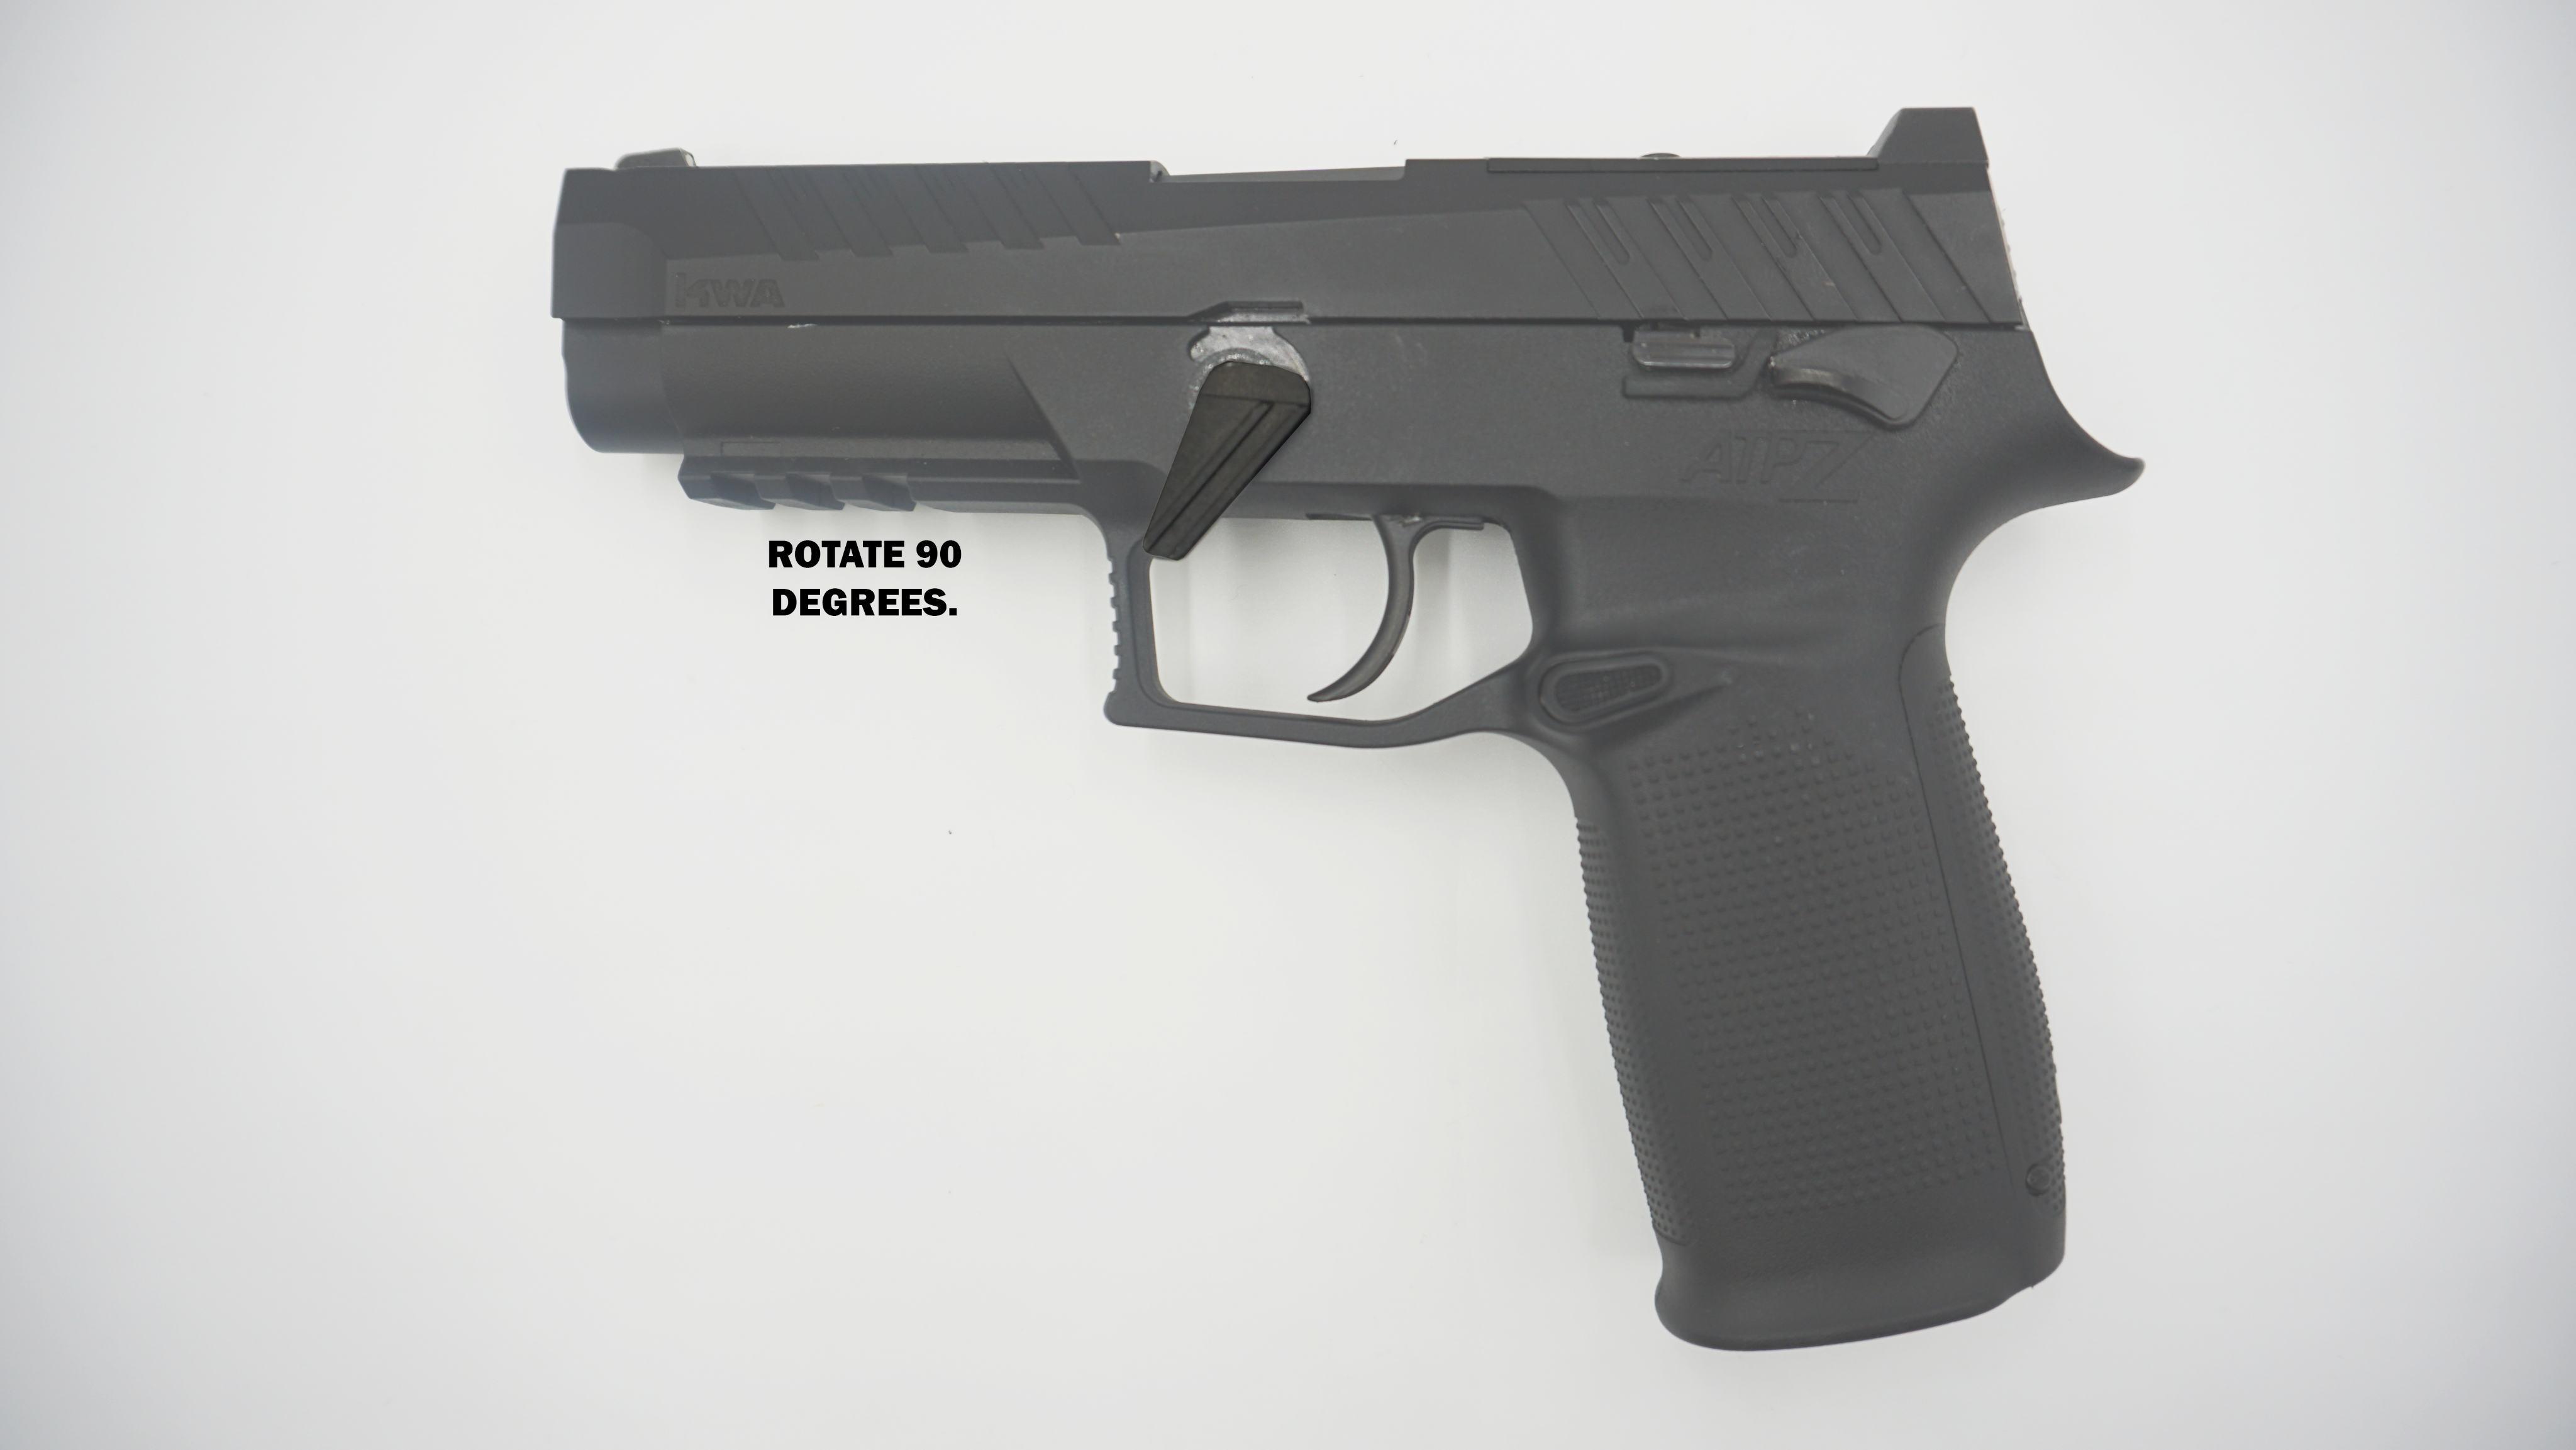
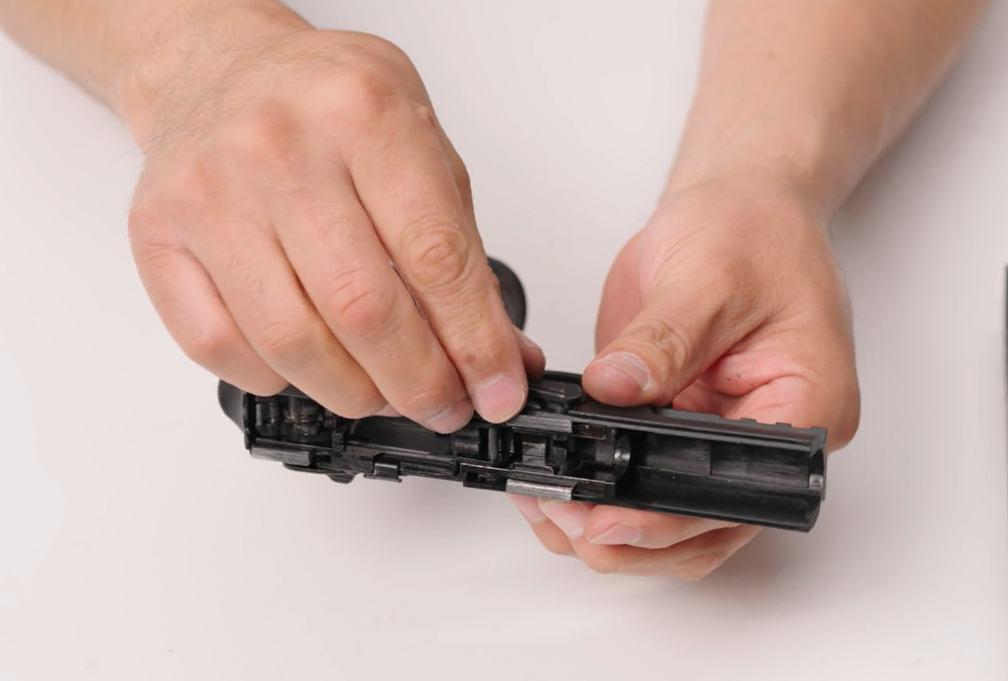
03 Rotate the takedown lever from the left side of the frame clockwise 90 degrees.

3 4 5 6
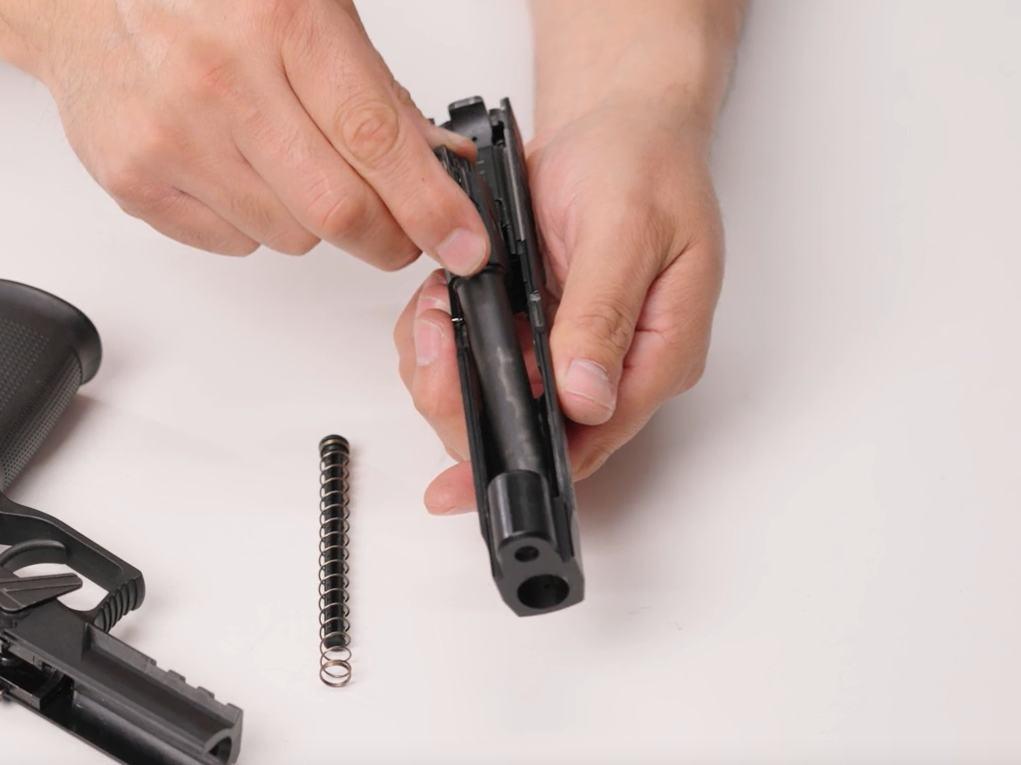
05 Remove the guide rod and the spring.
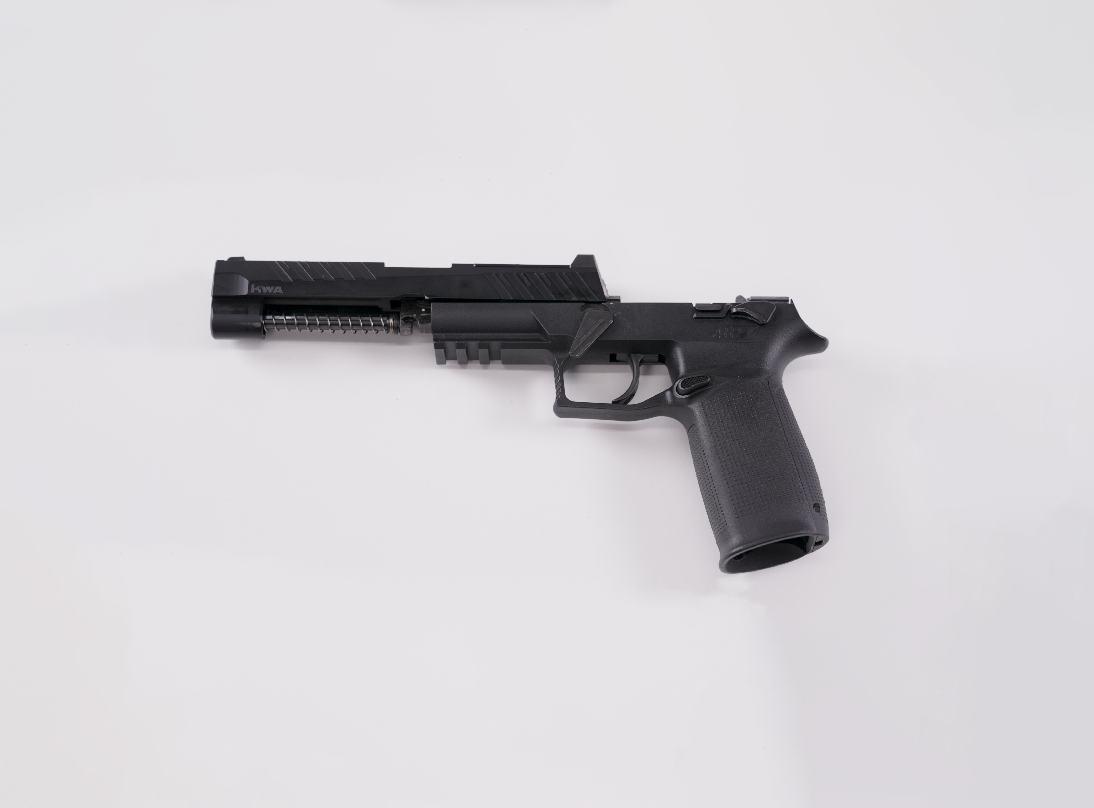
04 Push the slide forward away from the frame.
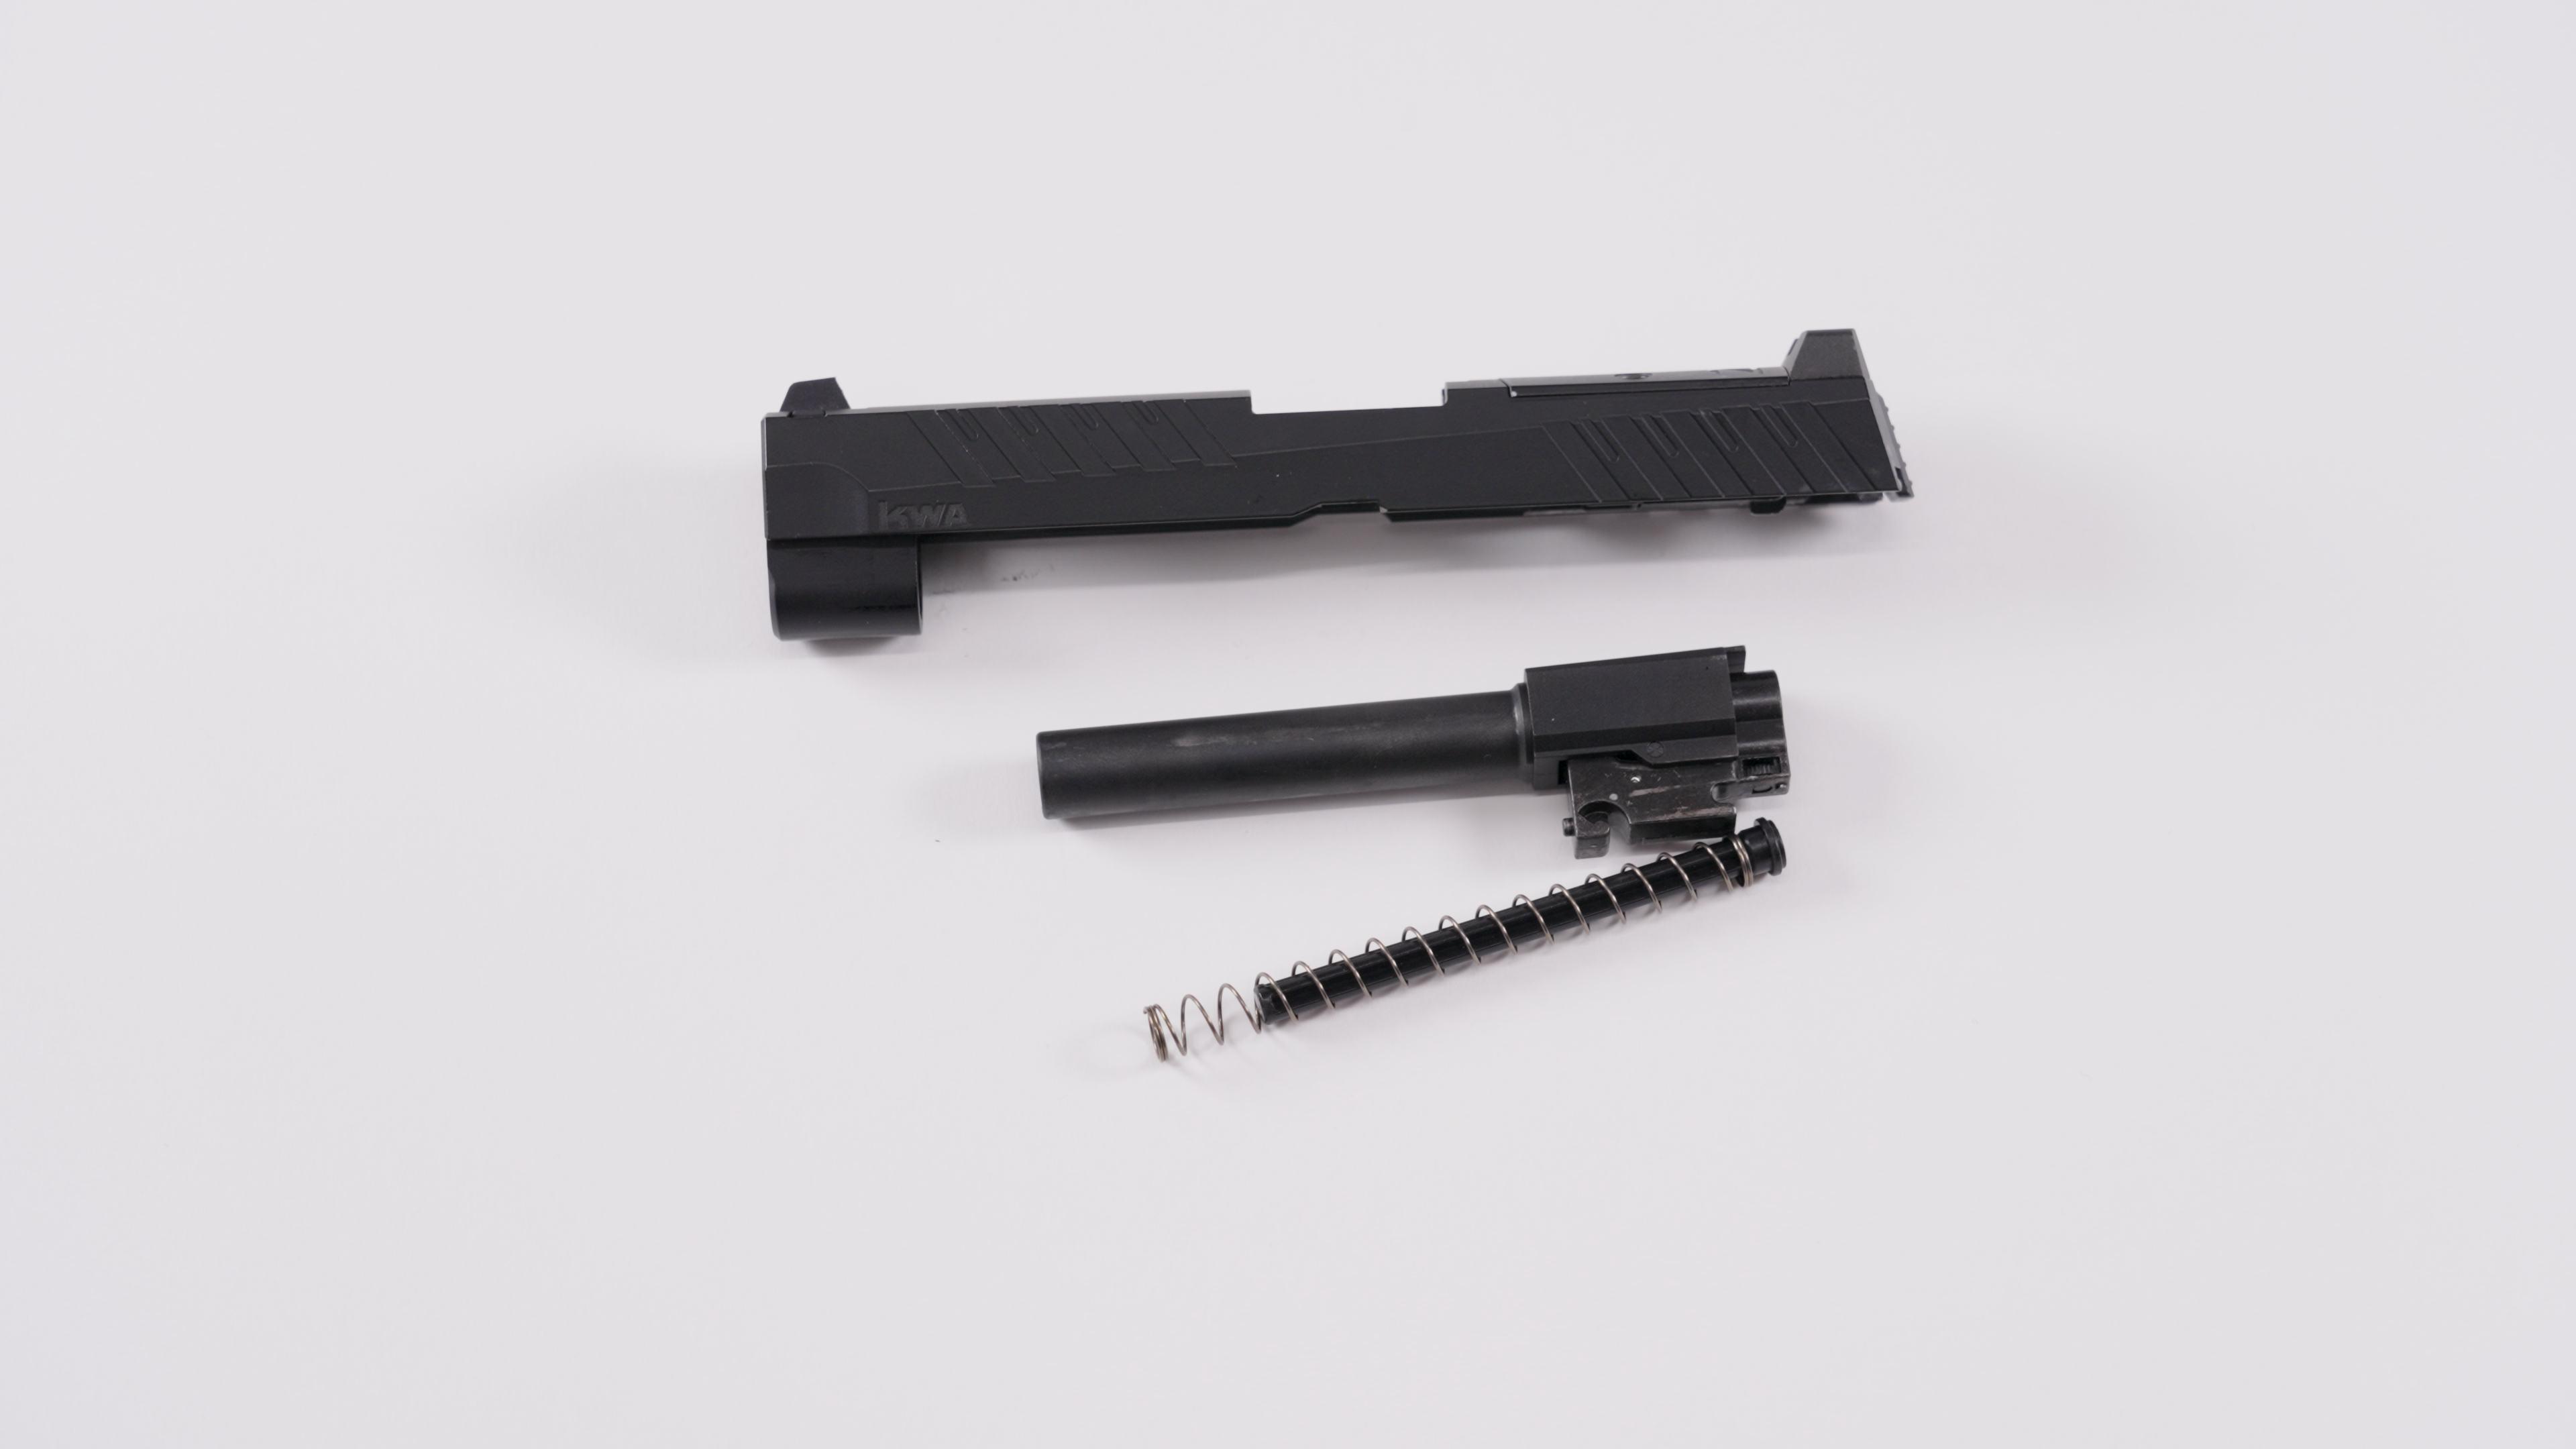
06 Slide the barrel assembly out from the slide.
01 Slide the barrel assembly back to the slide.
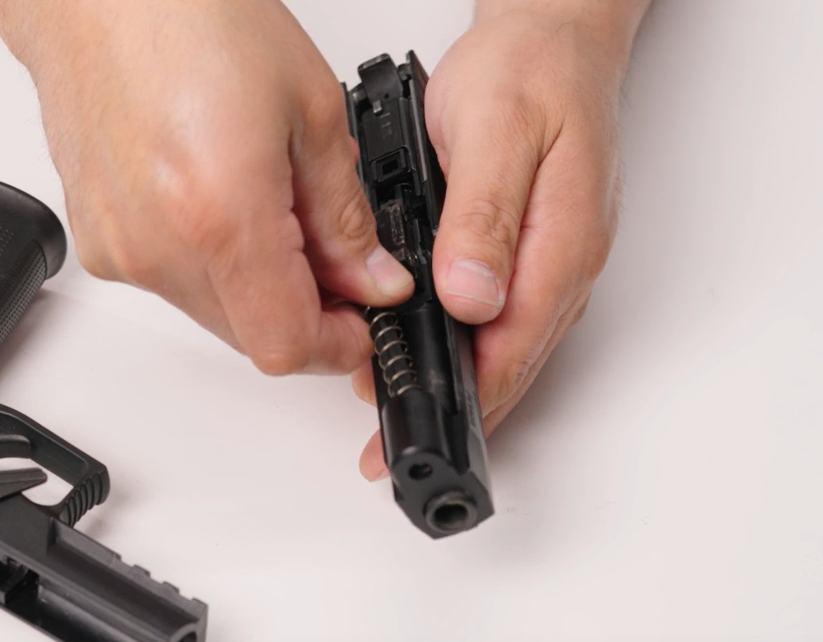
02 Install the guide rod and spring back into position.
03 Put the assembled slide onto the frame making sure it aligns with the rail, then glide the slide toward the rear of the gun.
04 Turn the takedown lever counterclockwise 90 degrees, back to the original position.
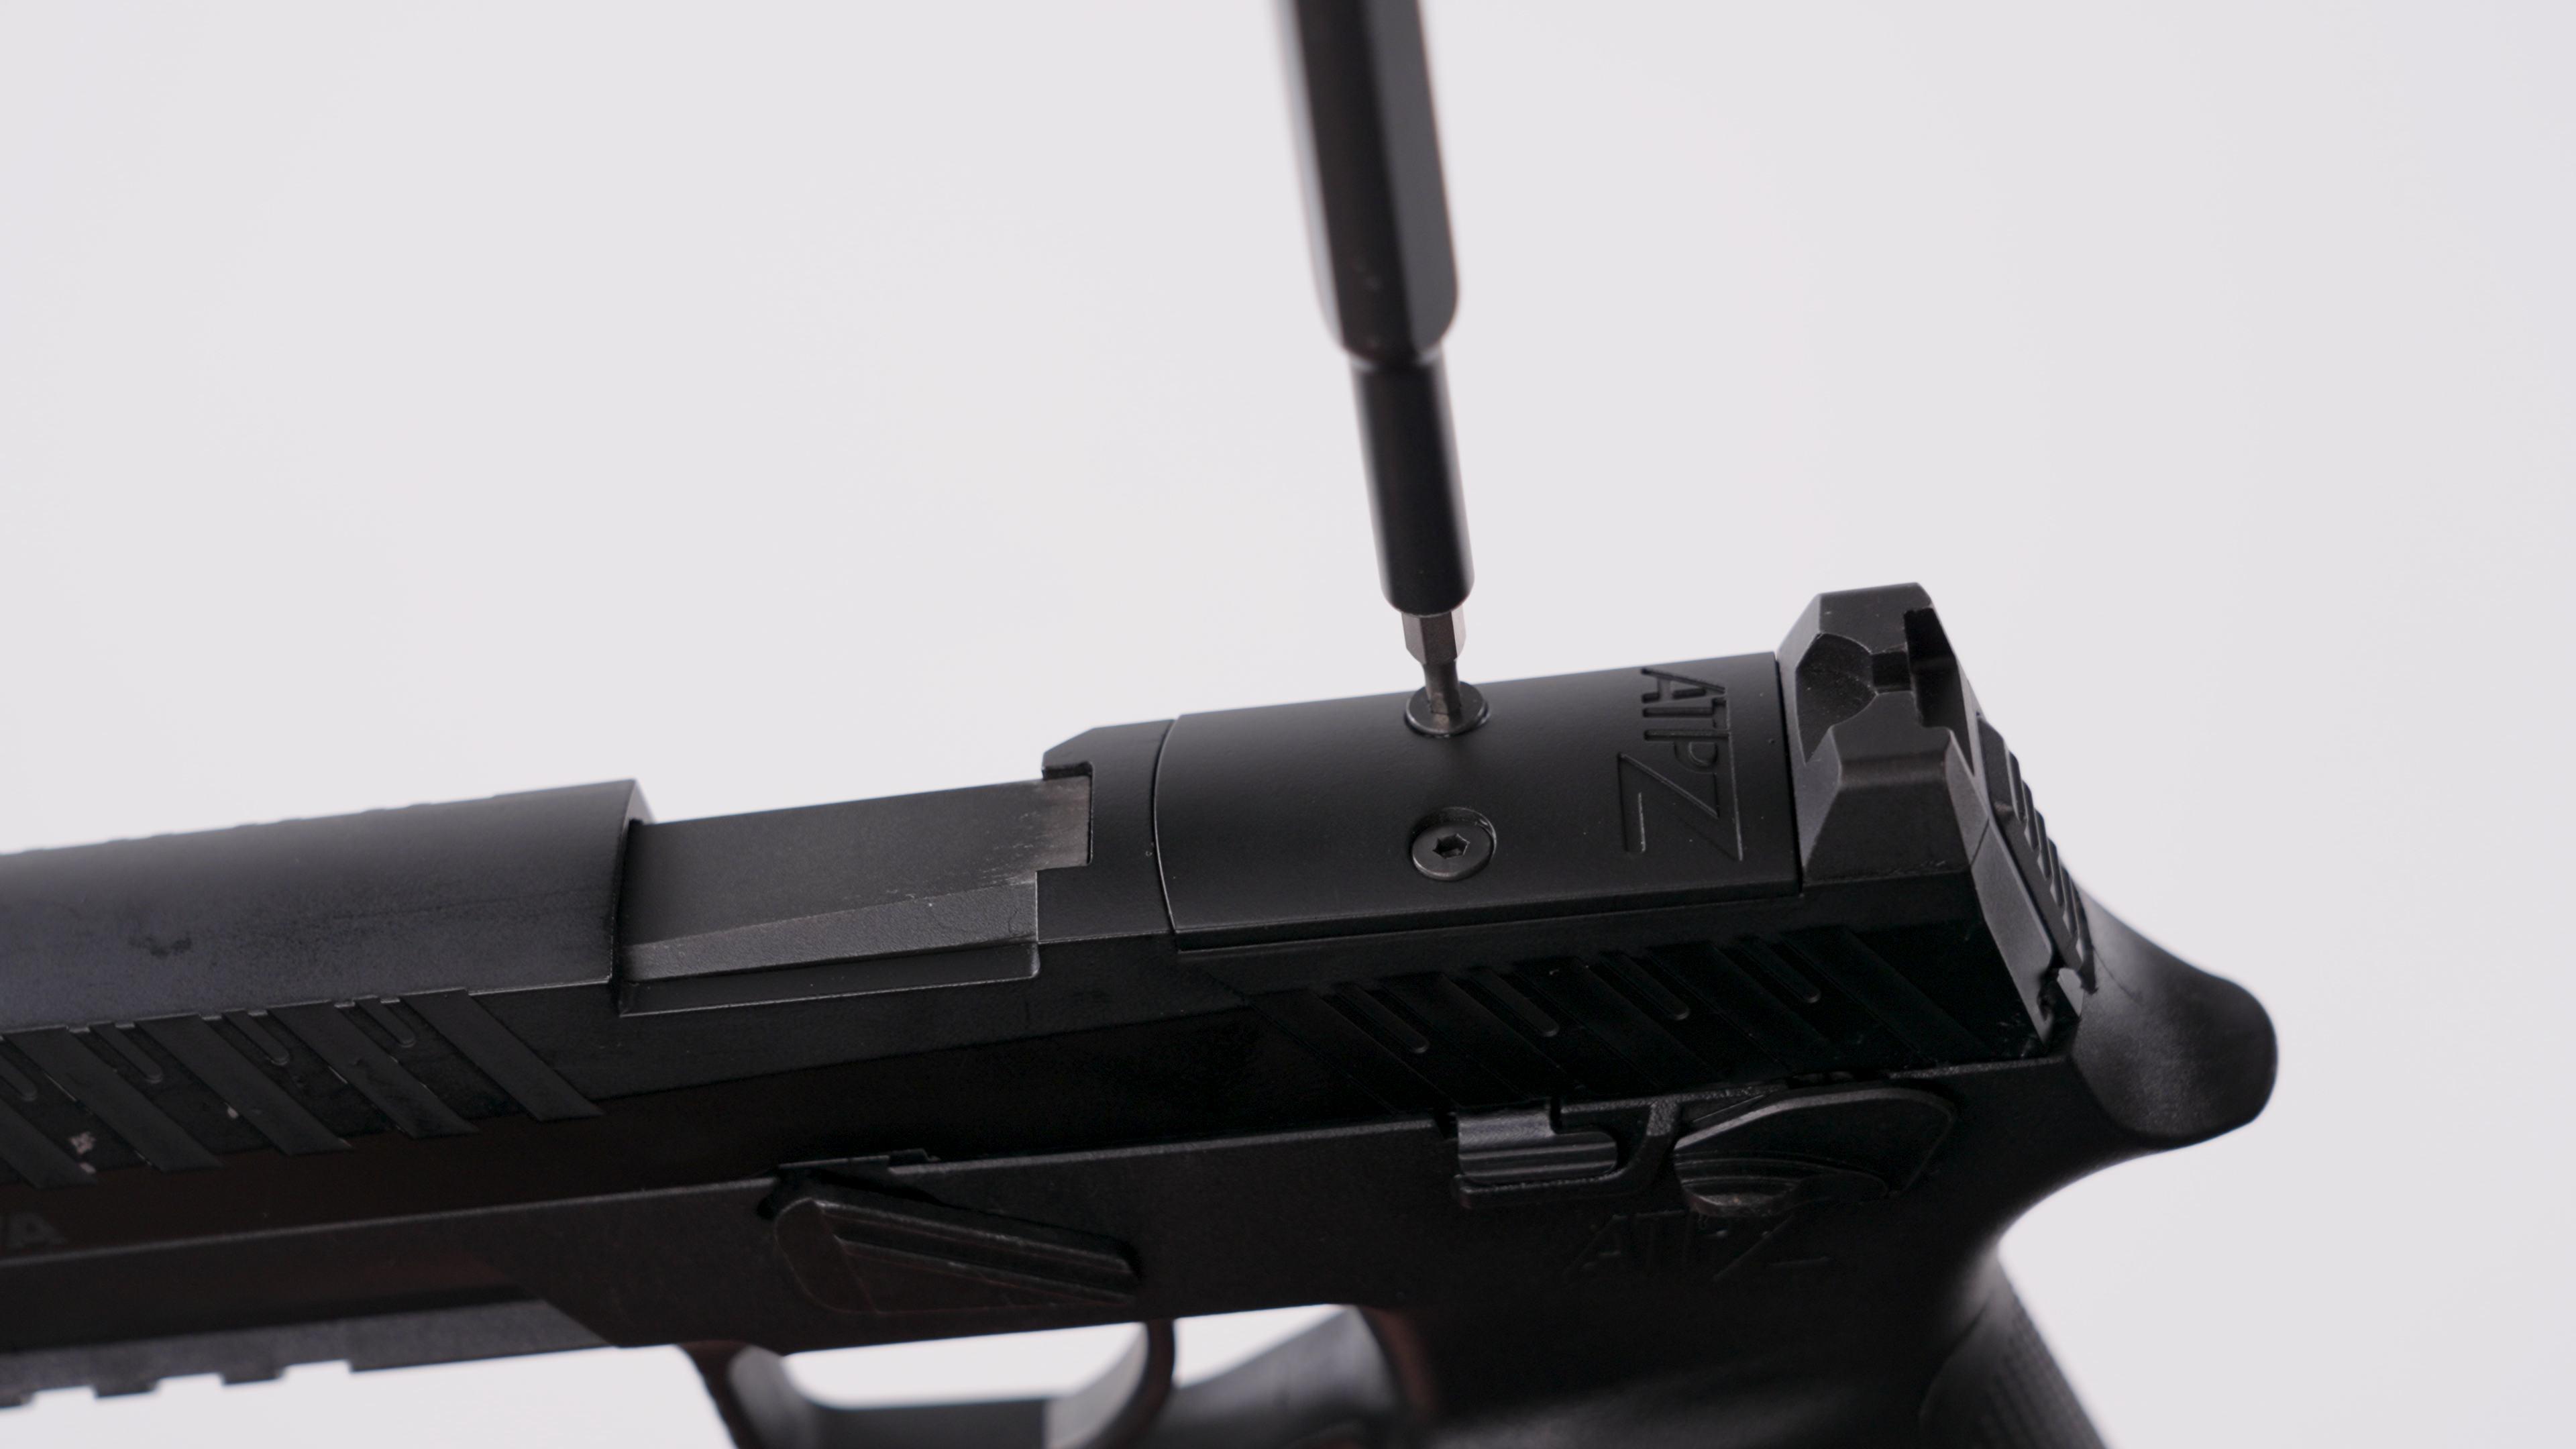
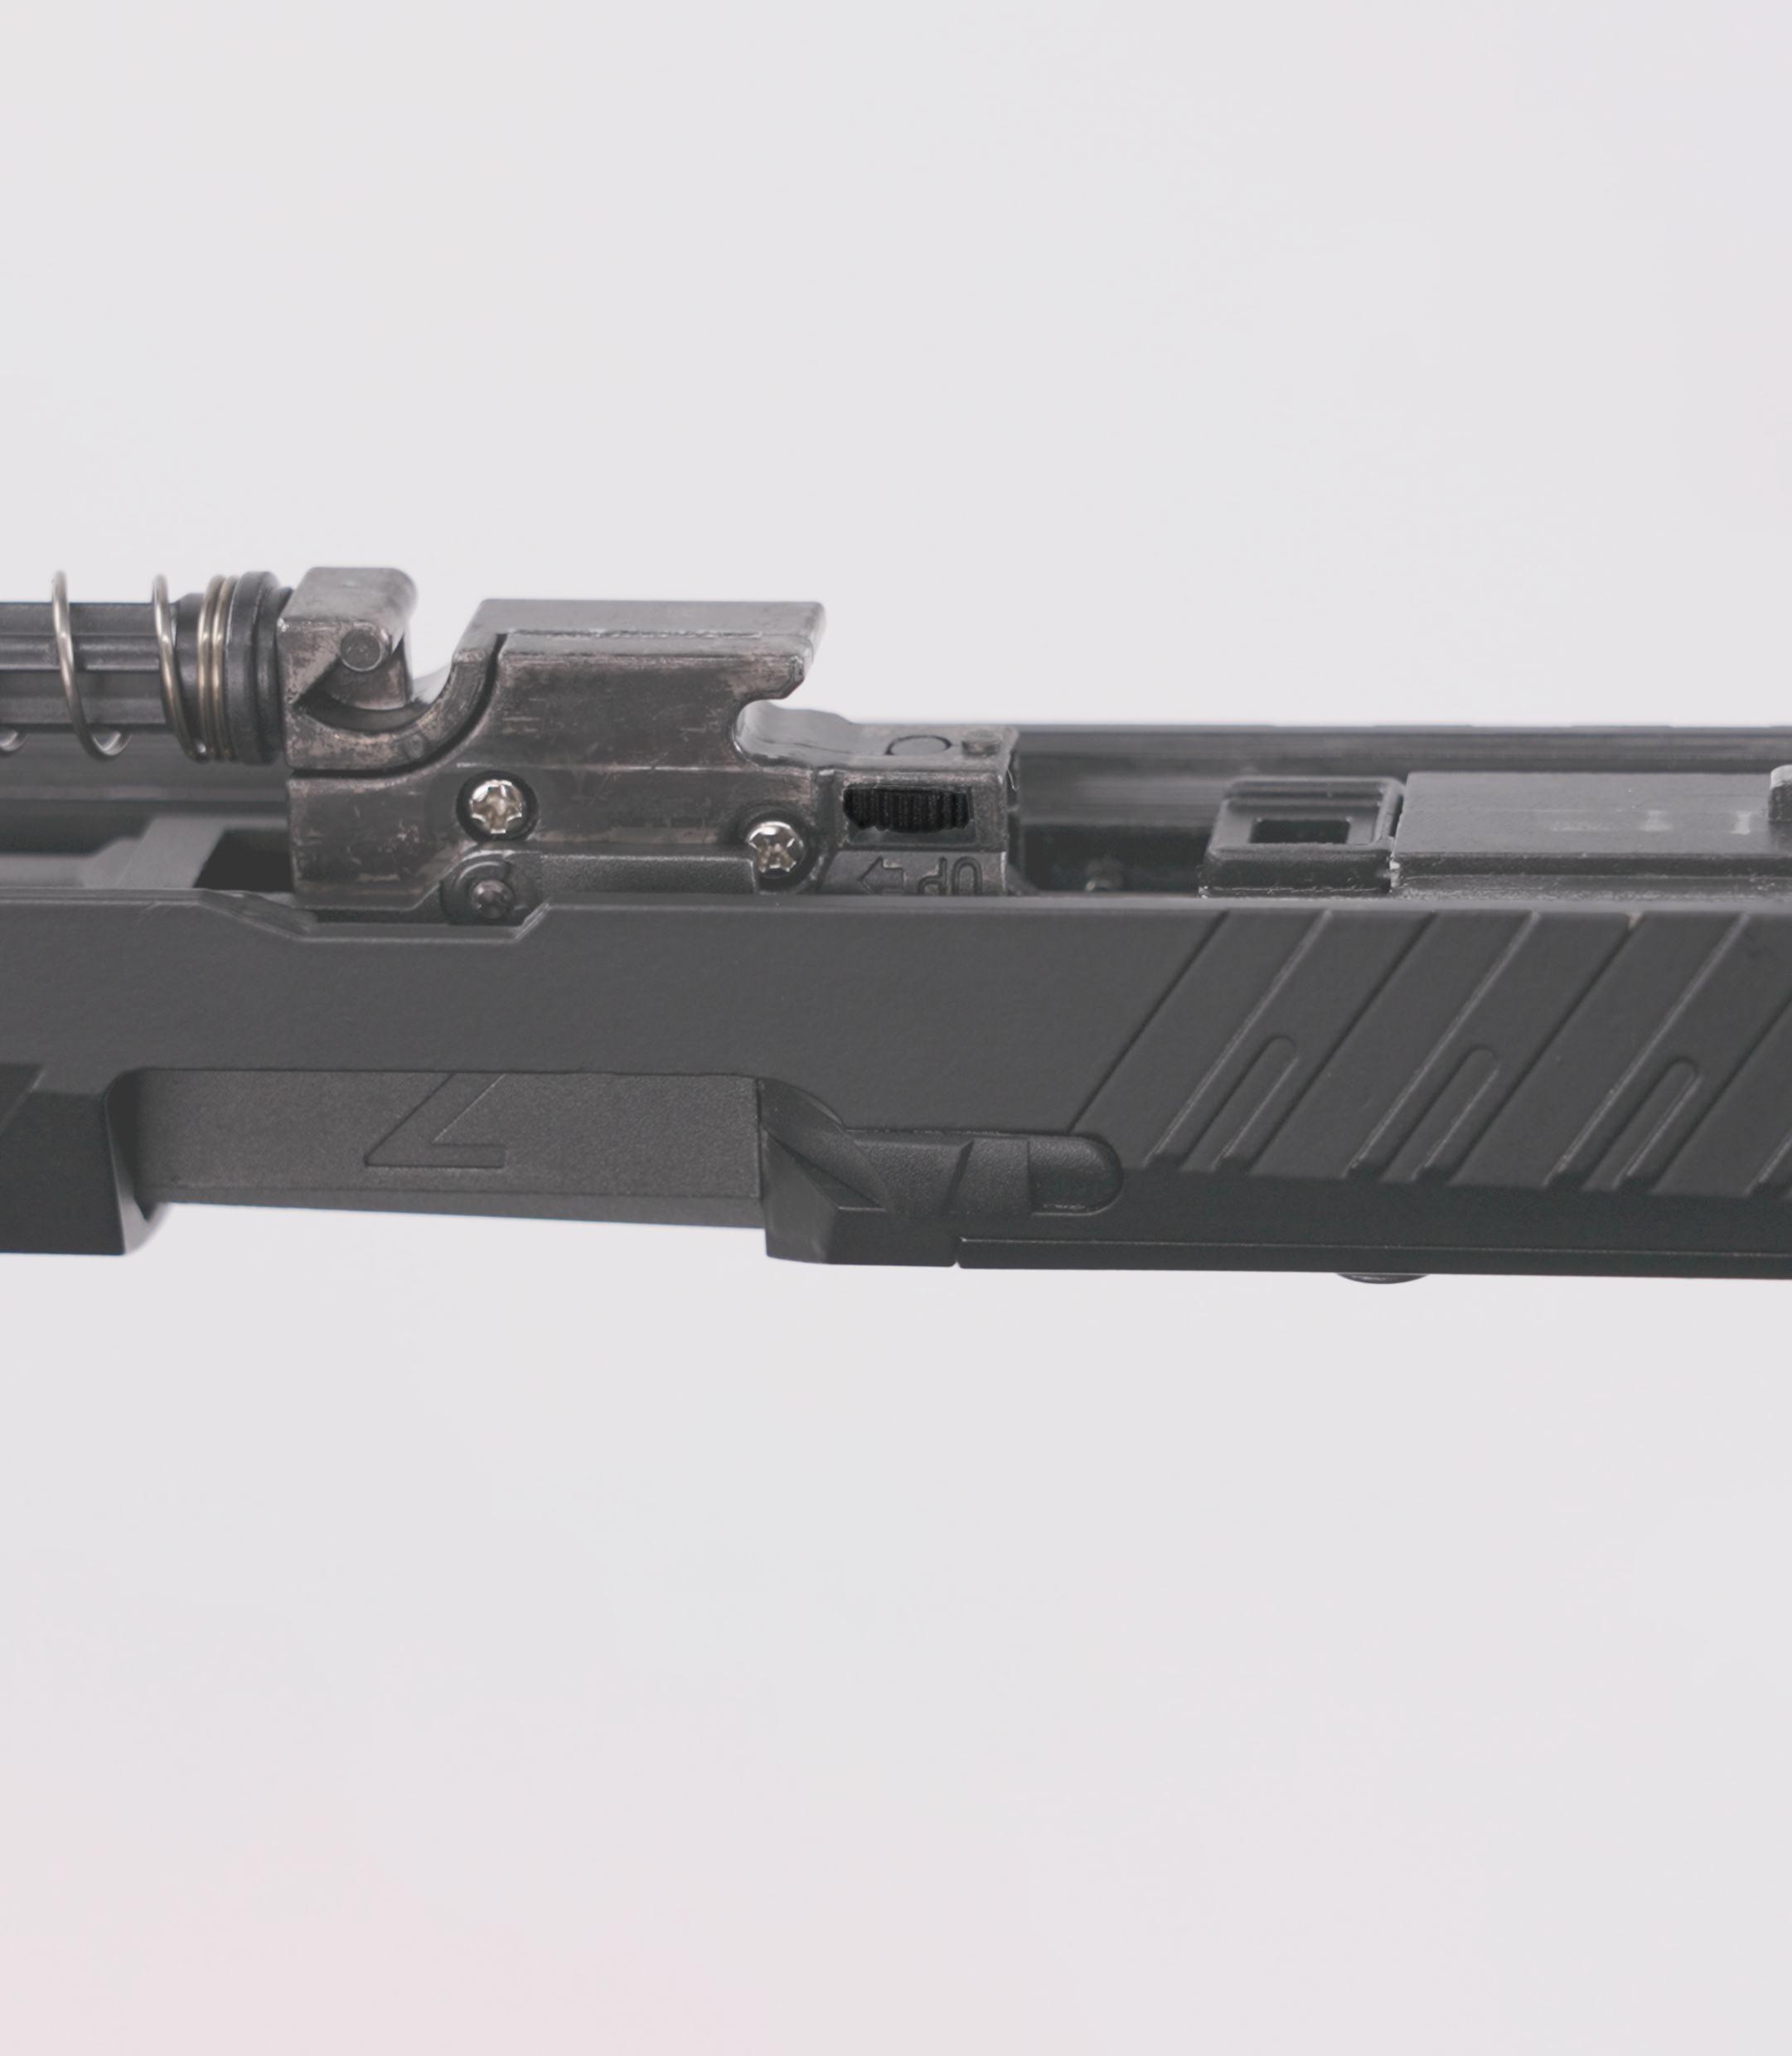
01 Unscrew both screws from the top of the cover plate to remove the cover plate.
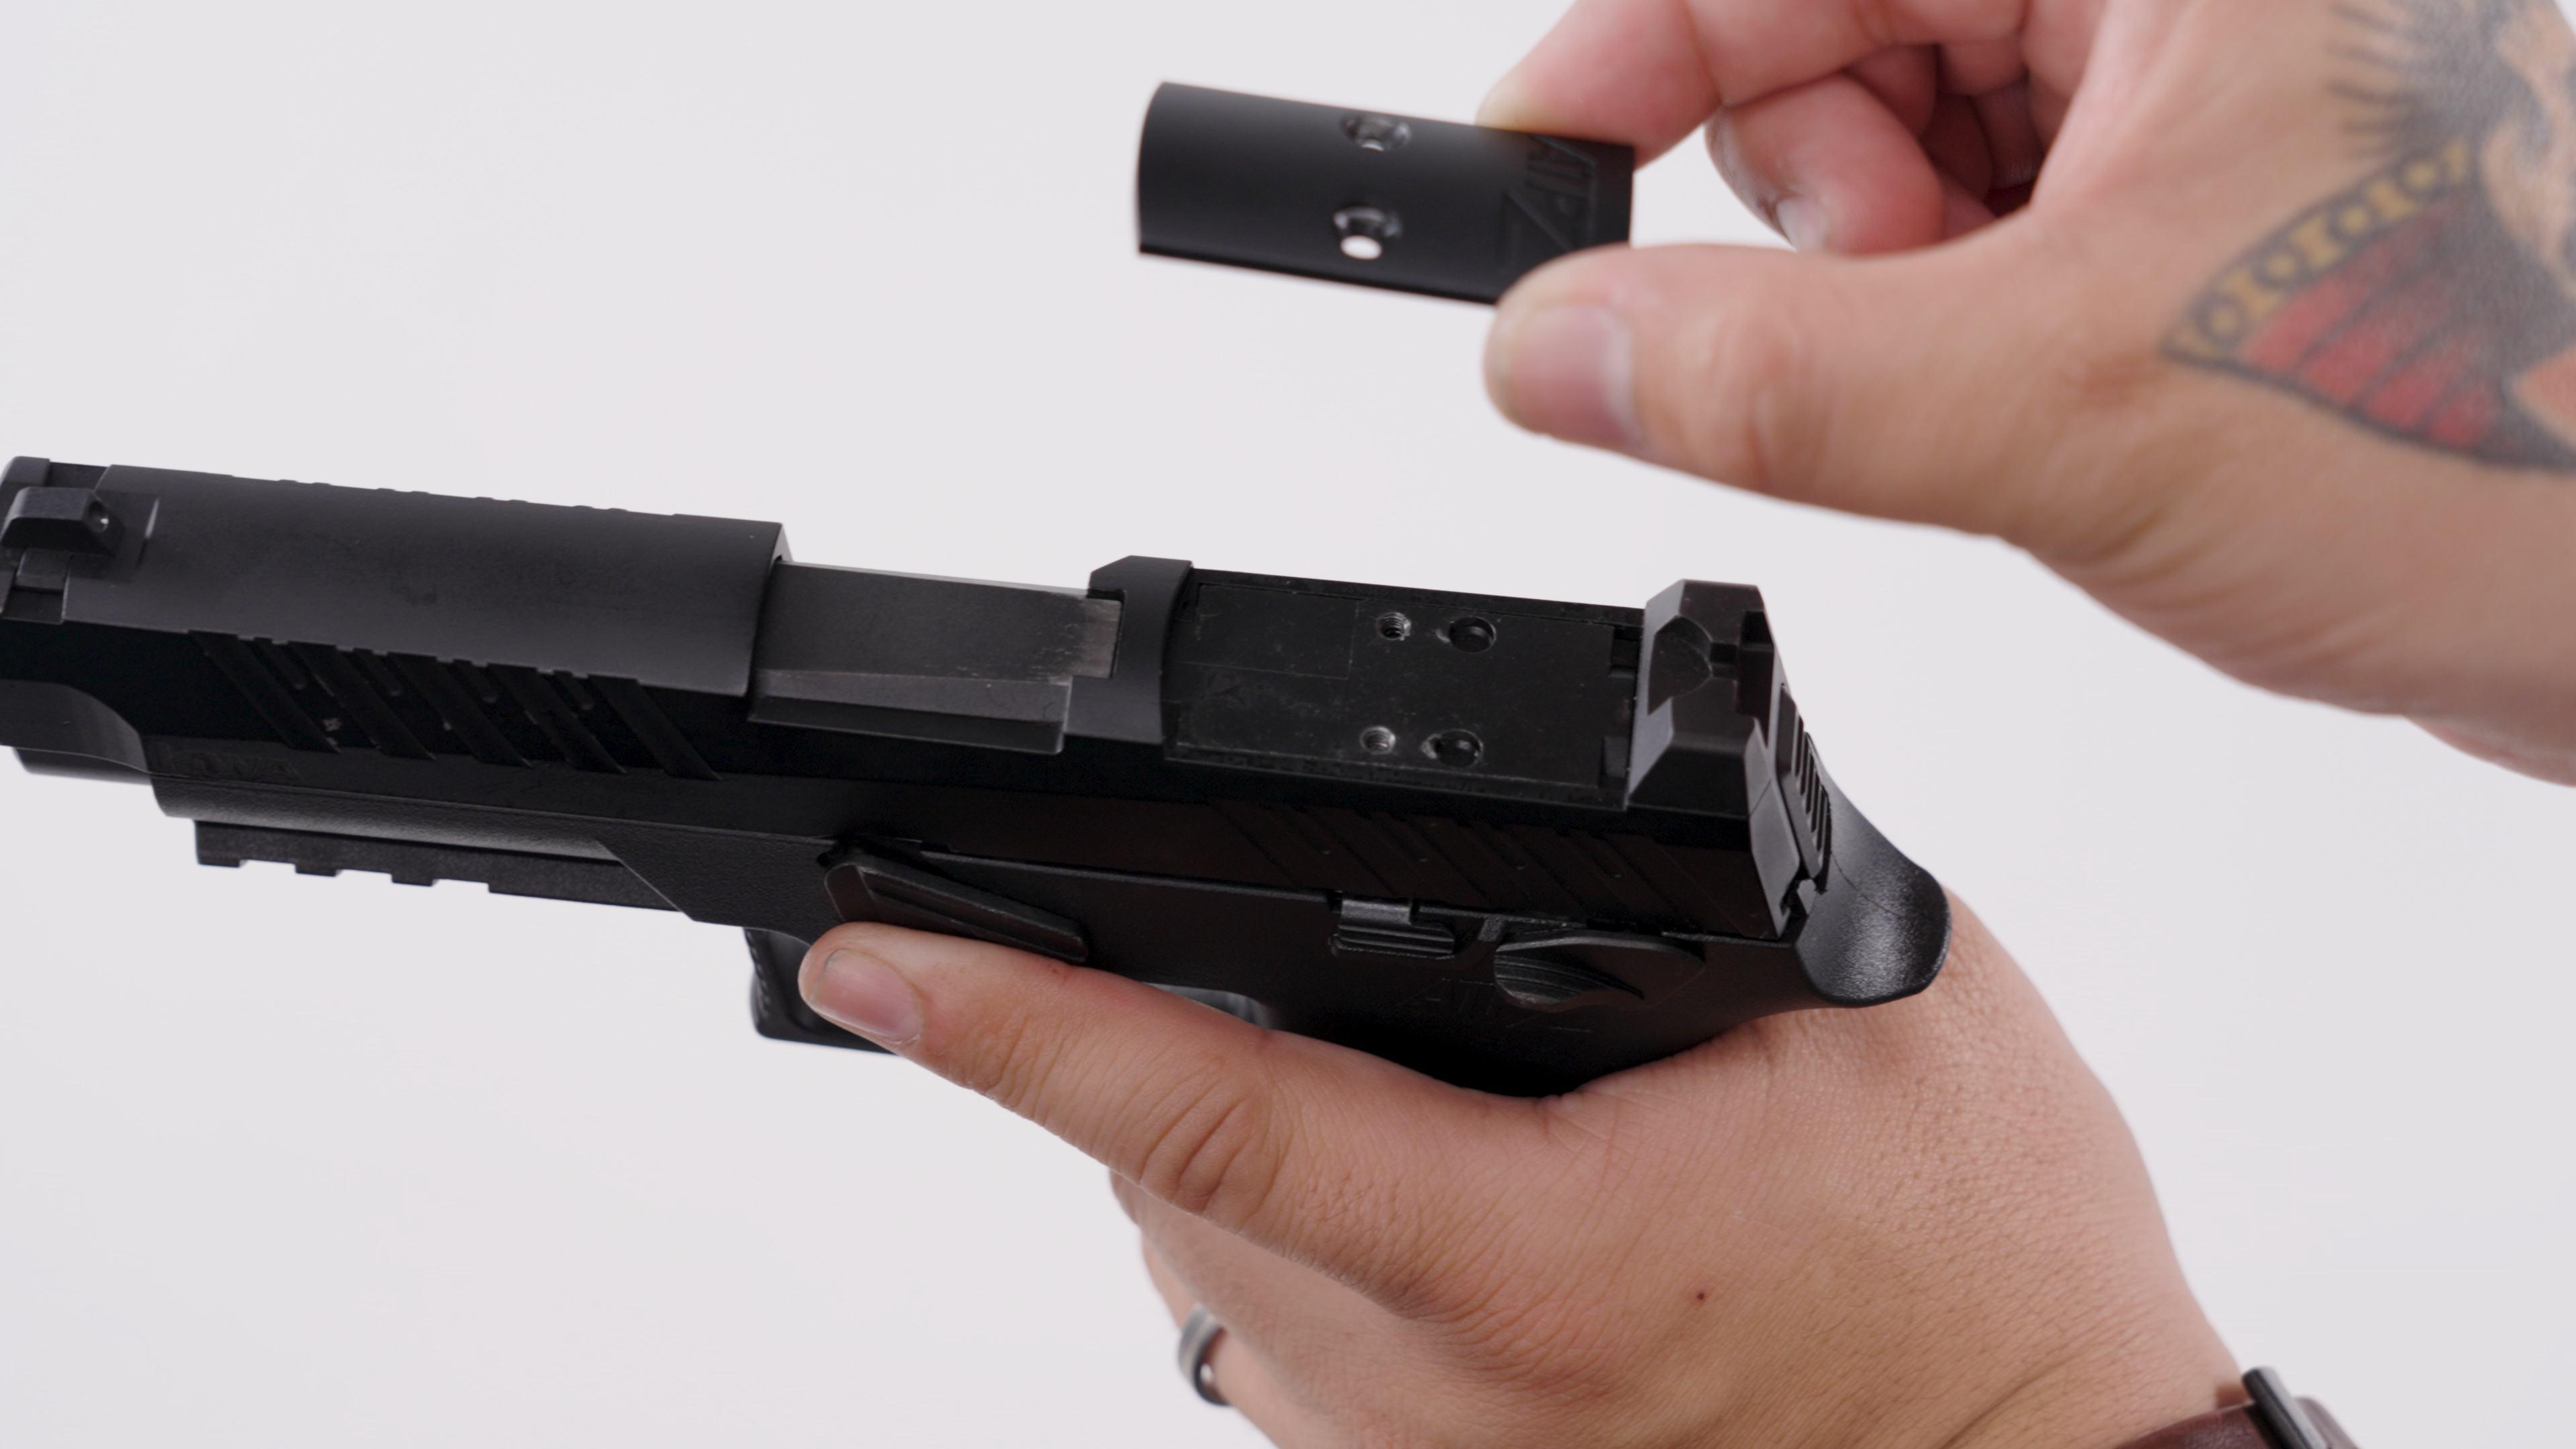
02 Once the cover is removed, place the optic adaptor plate (included in the box) onto the same spot and align with the screwing point.
03 Use the two previous screws to tighten it down, making sure the optic adapter plate is secured.
04 Place your choice of optic, making sure the optic is secured onto the plate.
* Note: Some optics may not fit properly unless you remove the rear sight due to the length of the optic. Optic Rear sights can be purchased separately.
** KWA Optic adaptor plate is design to fit C-more RTS/STS, Burris, Trijicon RMR pattern**
01 Press down the magazine release to remove magazine.
02 Ensure the safety has been engaged.
03 Rack the slide backward to reset the trigger into “cock” position.
04 Turn the takedown lever from the left side of the frame clockwise 90 degrees.
05 Push the slide forward away from the frame.
06 Then push the takedown lever from the right side of the frame while pulling from the left side of the frame to remove the take down lever.

*Tip: Firmly grab both sides of trigger to push up and loosen the trigger group unit from the frame. 6 7
07 Slowly pull the Trigger Group Unit upward.
01 Make sure there are no missing parts from the Trigger Group Unit. Then put the trigger group unit back to the frame.
02 Ensure the safety has been engaged.
4

3
03 Install the Trigger Group Unit until it is firmly into the frame.
04 Install the takedown lever back to the frame from the left side.
05 Turn the takedown lever clockwise 90 degrees.

6
06 Put the assembled slide onto the frame and glide it toward the rear of the gun.
7
07 Turn the takedown lever counterclockwise 90 degrees into original position.
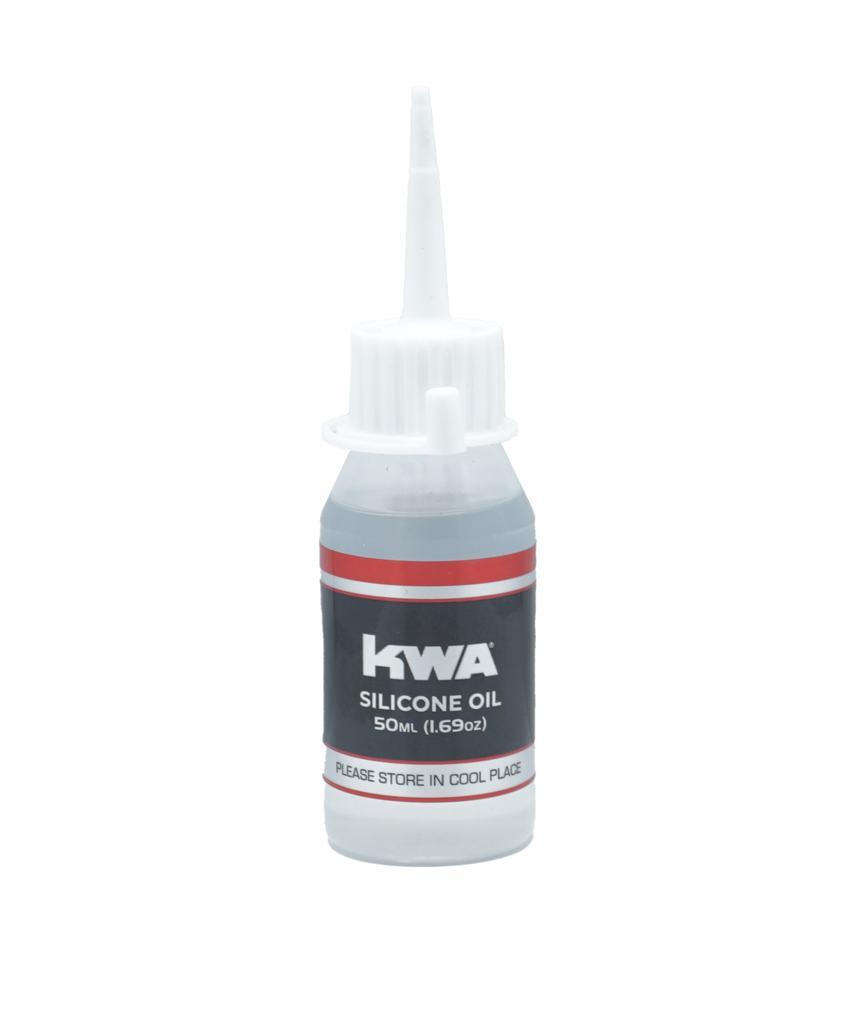
Green gas is a liquid propellant which tends to dry out the seals and O-rings. With lubricating silicone oil, it will extend the life of the seals and O-rings, and prevent gas leaks.
Use only the recommended 100% silicone oil, available for purchase at the Airsoft dealer where your KWA products were purchased. It's also available at store.kwausa.com Using any other type of lubricant may damage the products.
Lightly lubricate the recoil spring, cylinder, and moving parts with a few drops of oil. Lubricating the seals and O-rings are essential. Unload BBs from the magazine. Make sure the magazine is free of gas before lubricating the magazine’s charging valve and release valve.
The Airsoft gun inner barrel should be cleaned after each shooting session. Regular cleaning prevents damage that can be caused by excess oil, dirt, BB residue, and debris buildup.
Cleaning Procedure
1. Remove the magazine and clear the chamber of loaded BBs.
2. Disable Hop-Up by dialing to the OFF Position (see Hop-Up Section on page 10).
3. Disassemble the receiver (see Disassembly section on page 12).
4. Steps to use cleaning rod:
a. Cut a piece of clean cotton cloth to 1 inch by 0.5 inch size. Insert one end of the cloth into the hole in the cleaning rod (adjust the length of cloth for smooth entry into the barrel).
b. Wind the cloth around the cleaning rod.
c. Insert the cleaning rod into the inner barrel, and push the rod through.
d. Remove the cleaning rod and check the cotton cloth for dirt. Repeat steps 4a-4c when necessary.
Cleaning Rod
WARNING: Unload and clear the Airsoft gun before cleaning. DO NOT use spray silicone oil as a cleaning solution for the inner barrel.

You can download the diagram of the ATP Z and find all other support information on the KWA website.
You can find all items used in this manual and more on our website, including gas, BBs, and silicone oil.


For a video version of these instructions, scan the QR code below