


What can I say? Emily Caroline - That Mom With A Laser – is amazing! She is one of the first people I checked out on YouTube when I began my laser adventure I am tickled pink and honored to have her grace the November/December cover of Laser Focused. This woman started from ground zero, built a tremendous business to this point, and looks intent on building an empire! Make sure you read the article to see how she got started, the organic maturing of her business, what she's doing now, and how she continues to help others in the laser industry find their own path. She is the model of Givers Gain and Win-Win!
And the total goodness doesn't stop there! This issue is absolutely jam-packed with information: building new avenues of business, how to sell designs, teaching your laser tricks, a great holiday money-maker, and so much more! There is something here for everyone!
None of this would be possible without the fantastic guest contributors The articles they write for you are informative and helpful, hopefully answering some of those questions you have had in the back of your mind If you would like to be a guest contributor, please follow this link – even if it is just the beginning of an idea, send it Then, we can flesh it out together!
Right now, we have requests for articles on fiber lasers and intellectual property rights... and so many questions on marketing that we will be adding a seventh recurring column on marketing. From photo staging, to markets, to social media... so many topics! Let's face it that could be a magazine all by itself! So, whatever marketing topic you have a question on, please send it in. It will help the magazine grow in the direction you really want to see.

You will also receive an email soon that will invite you into a members area for all Laser Focused subscribers Once in the member area, you will have access to past issues and pieces that didn't quite make it into the magazine! And that's just to start I will follow Emily's lead and let that grow organically from the feedback and interest
May you have busy, happy, and prosperous holidays We will see you in the new year, late January, with our January/February issue of Laser Focused! Never miss an issue
Click Here to Subscribe


 Victor Havens
Excited Atom Designs
Sumita Patel Home Bound Custom Decor
Summer Shigley, The Spotless Forge Time2Travel
Chelsea Sauder Houston Acrylic
Matt Rise Talk Laser
Dan Shapiro Glowforge
Braden Todd GS2 Supplies
Will Louie Crazy Laser Dad
MDF also has resin. . . . Based on the resin, a molecular bond strength rating is achieved (resin and glue). MDF varies widely in internal bond ratings as these two elements have different strengths and weaknesses and are often presented as such by the mills. EI. Ranger High vs. Ranger premium vs. Ranger, Trupan Plus vs. Trupan, etc. The internal bond rating is important because it's inaccurate to say that MDF has no 'fibers' or fiber lift. While slightly different from natural wood fiber (traditional sense), MDF will have fiber rise when exposed to moisture, particularly in the air after sanding or with an introduction to paint finishes. This also explains the absorption rate of paint or shellac between MDF lot to lot. Some MDF will need four coats, others less than - based on the ability of the MDF to absorb and have room or moisture inside the paint. For instance, MedEX will not move in dimension with the introduction of moisture, whereas
Trupan plus will swell to three times its width and need three times more paint.
Ijustwantedtoreachoutandthankyouforthe fabulousmagazine,Itisfullofgreatcontent,Iam reallyenjoyingreadingitandlearningloads
Thanksforallyourhardworkonthis,Ilook forwardtothenextissue.
Because of the above, MDF can warp due to an imbalance in both itself and the veneer on top and bottom of it. This is particularly true when you have two competing veneer species (like an A4 scenario from the mill.) If a low-grade MDF is used as the core, the MDF will physically split when the material meets high or low moisture levels, because the inter-internal bond rating is not greater than the warp differential of the two species of wood veneers.
Lighter vs Darker MDF can also come as a result of the press (continuous vs press mold) rather than the components of the actual slurry of MDF raw ingredients. This can be true of material with the same MSDS and carrying the same badge, but created at different mills. For instance, the mill in St. Saute Marine is completely different from the mill in Malvern, Arkansas, even though both are producing Trupan Plus badged MDF. It will have almost no effect on the laser's ability to cut through the material. Color can also be a result of (for instance, from Montana) carrying a greater hardwood mix and look visibly different than that of a mill in Canada which carries a softwood mix. This can have some effect on the laser's ability to get through the material, but often it's not noticeable on material less than 1/2 in thickness.
Some MDF carries known red-listed agents, some do not. This is important to understand for the safety of your machine, and possibly as it relates to proper ventilation and exhaust.
 Walter Bubzey Operations Manager
Ian
Here's an easy way to determine what type of leather you have, Veg tanned or chrome tanned:
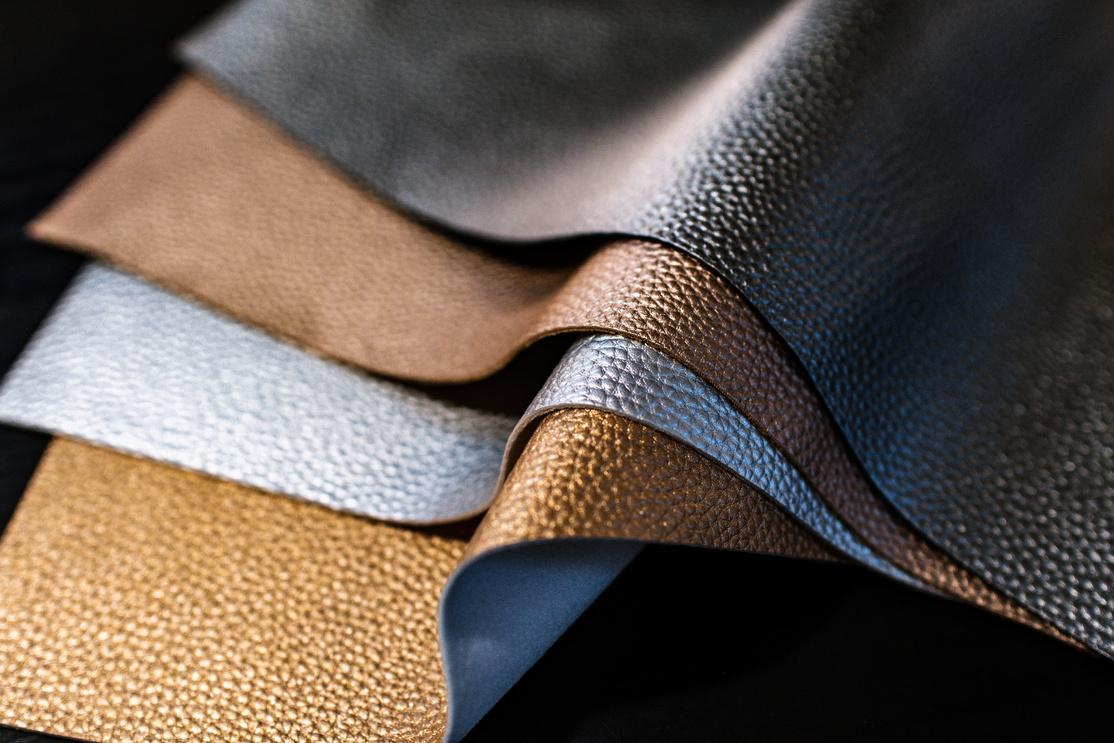
Boil water, place piece in, if it curls up it is safe to use in the laser - veg tanned. If it simply floats then do not put that in your laser as it is chrome tanned.
If you’re thinking of lasering new clothes, especially jeans, always wash them first! Often they are processed with formaldehyde. Formaldahyde plus lasering equals fire!
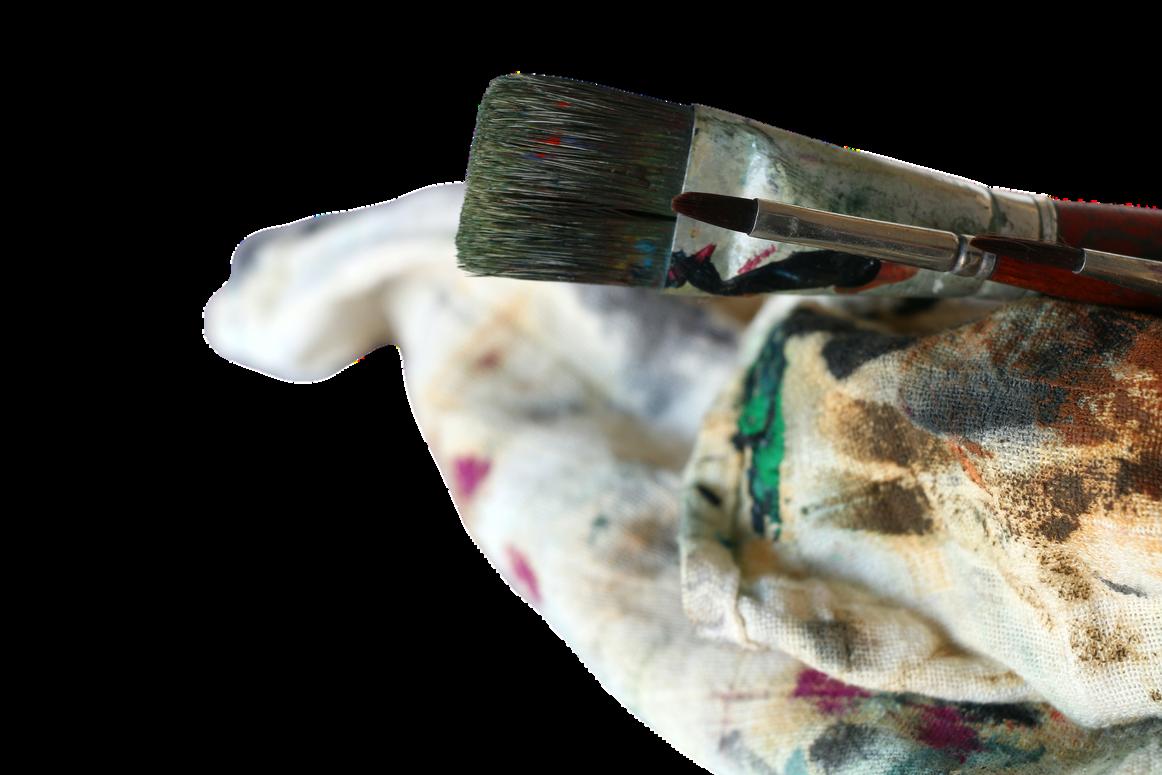
When you are working with oily rags - for example after staining or painting - DO NOT wad them up and throw them away! They can build up heat and break into a fire. Take the rags and lay them out to dry out. After they are completely dry you can throw them away!

Ever get flashback on your white acrylic piece and despair of getting it off? Break out the cleanerBartender’s Friend - and an old toothbrush! Just cover the damp brush with a small amount of the powder and brush it gently. Voila! The flashback is gone and now both sides are pristine!
 Robin Roberts
Jonathan Gleich
Susan Paul
Tips from other laser professionals - if you have one, submit it HERE
From Missa Braund-Allen’s class at The Next Level Laser Conference
We all know that ornaments sell like crazy for the holidays, but how can we use this selling frenzy to build sales and work for the inevitable downtime after
the holidays? The answer is with heirloom ornaments! These ornaments aren't the ones you need to scour Esty for files for either; these are simple pieces that barely require purchased materials!
To sell and capture these sales, all that is needed are pre-sales to lock in the orders, and then the needed production occurs in January when everything seems to slow down for about a month The special part of these ornaments is that they are made from your customer's actual Christmas Tree So instead of making a "Baby's First Christmas" ornament, you get to make a "First Christmas Tree" ornament! This will help invoke the holiday memories of setting up the tree for the first Christmas, and the customer gets to keep an engraved piece of art from that first memorable tree! If you don't want to limit sales, you can easily edit the phrase to include "Dillon's First Christmas Tree," "Our First Christmas Tree," "Our First Tree in Our New Home," and many more! Year after year, these ornaments will grow in value for your customer and become an heirloom for their families
Luckily everyone will want their tree for the holidays while you're already swamped, so all that is needed is to take the orders during the holidays, then have the customer bring over a piece of the tree trunk when they take their tree down after the holidays are over. This helps generate more sales that you may not have time to fulfill in November/December, and then start the actual work and fulfillment in January when sales always seem to slump.
As mentioned, you will need a piece of the tree trunk to make the actual ornament. Also

needed will be a handsaw or chop saw, orbital sander or sandpaper, and clear finish (Deft Semigloss from Home Depot works great), and an eye hook for attaching a ribbon.
We produced these ornaments by taking the tree trunk and slicing a semi-thick round from the wood piece. Once you have the round, you will sand it smoothly using an orbital sander or sandpaper. We always like to start with 80 grit and then work up to 220 grit to get a nice smooth surface. Once your surface is smooth and clean from dust, you can spray it with clear sealer. As you spray, you will see the sealer is not even and soaks in differently across your piece. With a few coats, the sealer will fully cover the round. We like to let this last coat fully dry, then sand lightly with 220 grit and spray the sealer one last time to leave a very smooth surface. This will need to be done to the front and backside, and the edges will need sprayed too but not sanded as the edges are meant to look more rustic. To mount the eye hook, we recommend pre-drilling a pilot hole and then attaching the eye hook. By pre-drilling a pilot hole, you will prevent splitting the round when adding the eye hook.

Now that the round is fully prepped, you’re ready to engrave the round. Generally, with pine, the laser engraving process produces a nice contrasting mark, but if desired, you can always add a paint fill to the text too. If paint filling, be sure to mask the round, then engrave, seal the engraving with your clear finish, and then fill with paint. By sealing the engraving, you will prevent the paint from wicking into the unengraved wood and making the engraving appear blurry.
Now that all the work is done, all that is left is to unveil the heirloom ornament to your customer.
I hope this helps to capture more sales this holiday season, good luck everyone!
Braden Todd, GS2 Awards
was a mom looking for an answer. Emily Caroline was then a stay-at-home mom, taking time off from her job as a high school history teacher to start her family. It was time to add a second income back into the family budget yet something urged her to seek a different path from teaching. Continuing to be available to her family was paramount so she prayed for an answer on how to use her talents in a new way to create income. [Video]

mom, 3 years ago,
Emily had always been creative and a crafter so she thought there must be a way to use her those skills and talents to create income for her family. Enter her good friend, Mindy. One day her friend shared her latest creation on Facebook; it was a sign. But it wasn't like any of the previous signs Emily had seen her make in her decade-long crafting business. It was threedimensional. And it was intriguing. [Video]
It turns out Mindy had added a laser cutter to her arsenal of crafting tools And with great excitement, Emily got her first, life-changing glimpse at what would manifest great success for her in the laser world


Mindy had a Glowforge, and Emily loved it It was the jumping-off point to researching lasers. She did her homework and, in the process, found Aeon Laser USA. The company was a short 3 hours from her home. After visiting their headquarters and getting a feel for the company, its lasers, and its customer service and support, she chose to start her journey with a Mira 7 [Video]
As Emily forged ahead with her laser, she created a thriving local base which kept her so busy that first Christmas season that she missed experiencing the holidays with her family! This was a big problem The whole reason she went into a business of her own was to be available as a mom and wife. Something had to give; changes had to be made.
It's interesting to note that her first solutions were not within the business itself. Her initial steps were to release some of the 'mom jobs' –for example, hiring a housekeeping service and
having food delivered These were great solutions that met the family's needs and freed up time so she could focus on family relationships, not tasks, and her business.
Emily openly admits that she was terrified of her laser in the beginning. As she says, "High anxiety and low comfort do not make for a great experience." While the intimidation factor of this big laser was real, there was one thing that Emily knew in her bones – no matter what, she would always rise to the challenge and be successful. With that in mind and her dogged determination, she set about figuring it out.
As she got started she spent time in the Glowforge communities on Facebook. The people, many if not most of them women, kept her inspired and current on trends but what she could not get from these communities was technical help. So she turned to YouTube, only to find no women in the commercial-grade laser space. The truth was that she was one of the only women with a commercial-grade laser. Yes, there were laserrelated videos available, but it was very much a male-dominated landscape And yes, there was a lot of information out there, but very little that was organized and easy to understand [Video]
It occurred to Emily, "If I am experiencing this, then I bet there are other women out there who are intimidated by a bigger laser " And with that thought in mind, she began to video her
journey, her YouTube adventure growing right alongside her laser adventure.
Three years and many videos later, the "That Mom With A Laser" (aka TMWAL) YouTube channel is over 20,000 subscribers strong and growing. The channel is definitely a stop for anyone researching and learning about all things laser. There are countless 'how-to' videos on techniques and products, others on maintaining your laser, and still, others featuring tools. In fact, TMWAL has three formal business partnerships; Aeon Laser USA, PiBurn (LensDigital), and Bear Woods Supply Company; all resulting from her YouTube success
In 2021 she expanded by offering more digital files than finished products and created a merch line And while it had been a glimmer from pretty early on, creating a more structured educational offering was coming into focus.

Starting in April 2021, Emily began the process
of creating her online course. There was lots of behind-thescenes work going on; researching, planning, writing, filming, and more; as she developed her educational vision.

One year later, Emily proudly introduced Laser Launch Academy (see insert ) She had nurtured the idea and here it was, now come to fruition

Also in 2021 Emily posted a video of her visit to the Aeon warehouse It went viral, and as a result, Emily began receiving hundreds of questions, and her relationship with Aeon grew even stronger She would spend time working with their team, helping them understand their customers' mindsets and needs. Effectively Emily was an important set of eyes and ears out in the field, bringing back much-appreciated data. This assisted Aeon in refining how they worked with their customers, something, for which, they are very well
known. Her support and presence within the Aeon community resulted in Emily becoming the official Brand Ambassador for Aeon in February 2022.
But with growth comes the need to release both control of specific tasks and even pieces of the business In January of 2022, with the course heavily in development and the relationship with Aeon becoming official, it became time for Emily to stop making products - at least temporarily. As much as she loved that part of the business, there needed to be more attention on these other areas. [Video]
Objective: shorten your laser learning curve with the most comprehensive guide on how to successfully operate your CO2 laser. Who: It is open to anyone with a commercialgrade laser (not just Aeon models.) The ideal student is focused and ready to get down to business, learning to capitalize on their machine's capabilities. The course has enrollment periods and is currently offering a waitlist. More details can be found HERE.
After 8 months of focus on lau course, being Aeon's Brand Amba even a public speaking engagemen Fusion, Emily's attention is retu again to the product business "Now a handle on this thing that morphe get back to making physical pro said. And three years to the day she laser adventure, Emily moved into a space to start this new phase of TM also added two new lasers (a Nova Mira 5), and will soon have a whole line launched
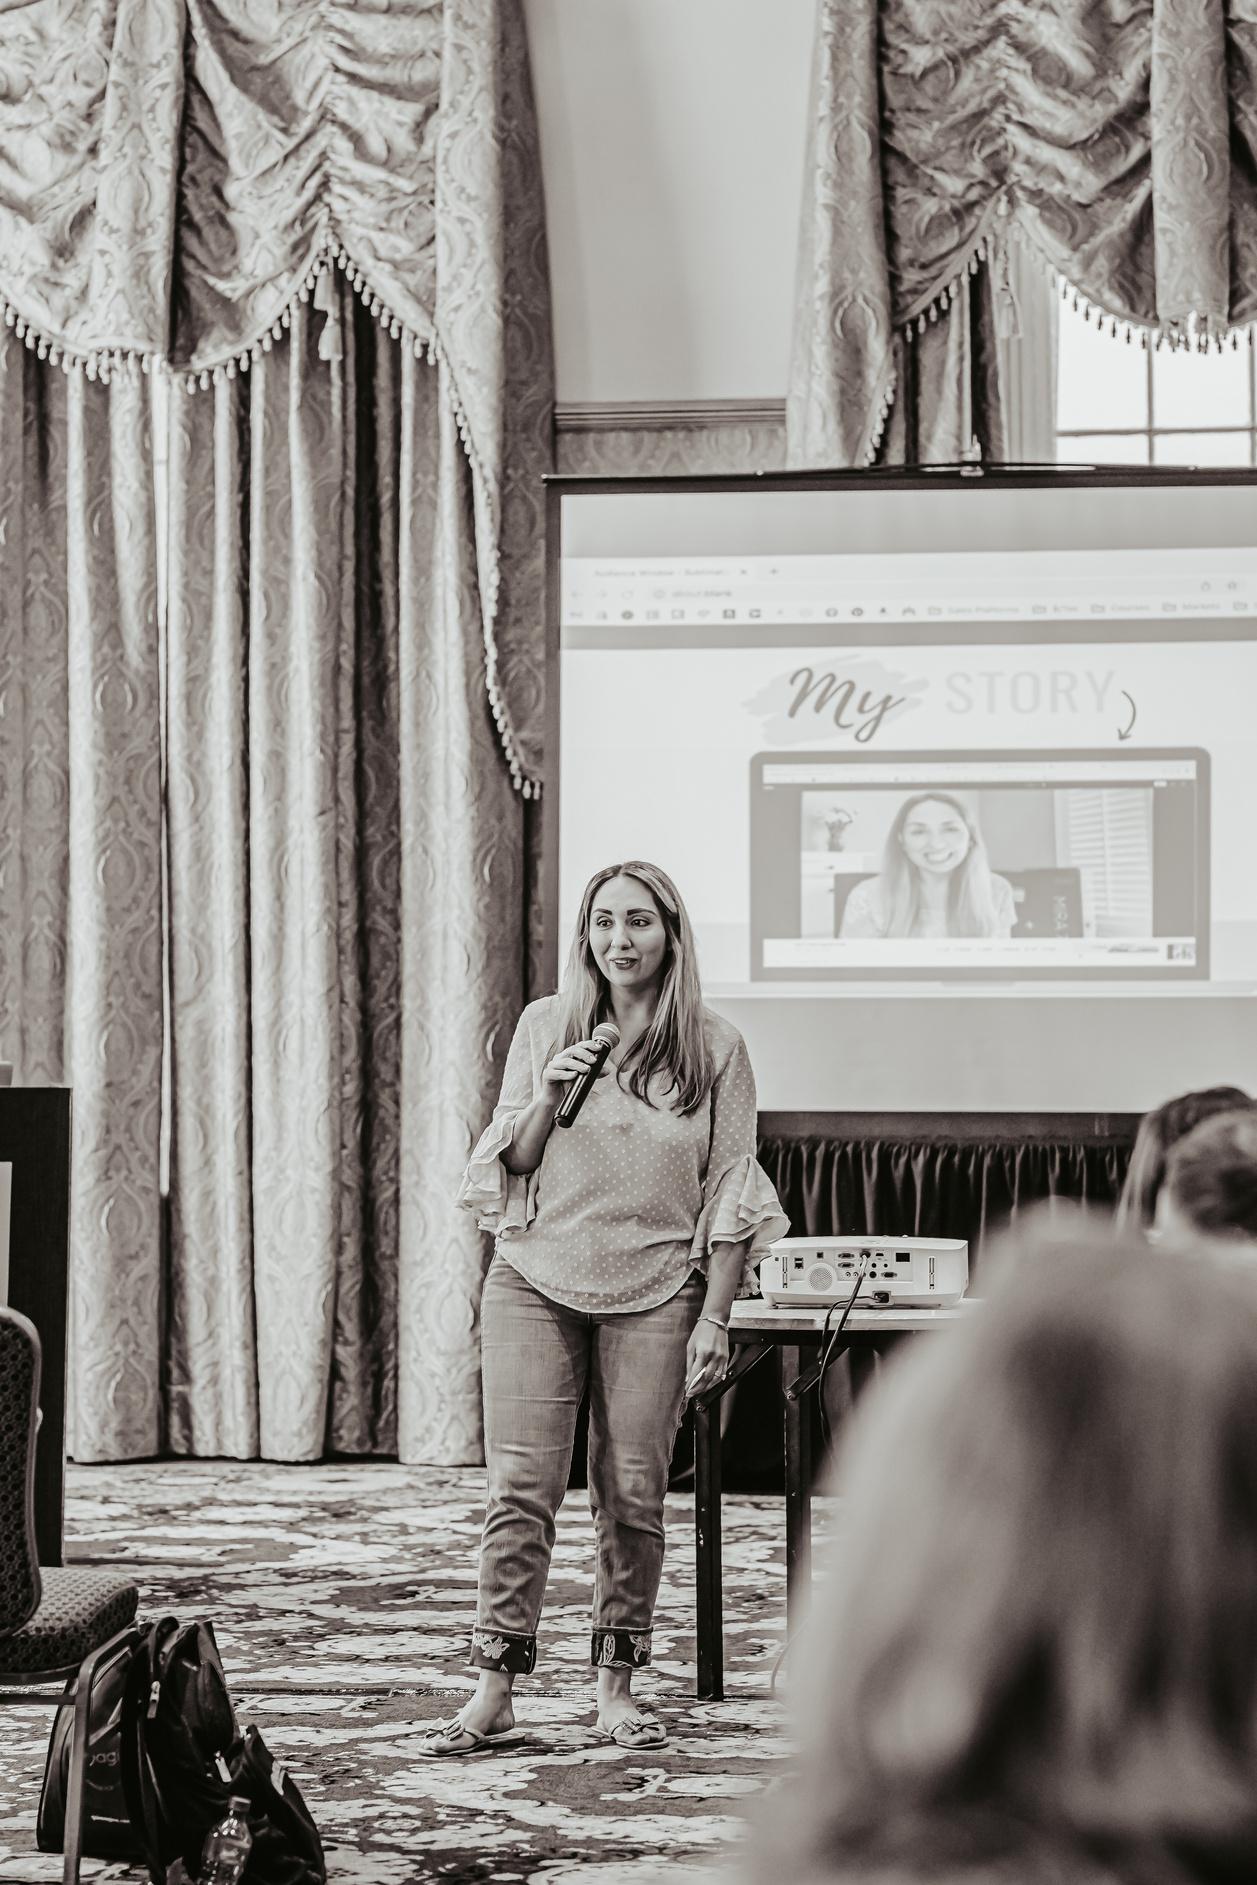
To prepare for this new product lin added a team of designers to h business. While she can create des growth was to stay in her zone of bring others in. They could take he with collaboration, make it happen then she could alone.


Finding and onboarding employees is the next step in Emily's adventure With the warehouse ready and 2 lasers waiting for work, this is the logical progression.
So why is Emily growing her business in this way? Witnessing many of her followers taking what they had learned and creating 6 and 7figure laser businesses has inspired her, and she is now ready to do the same And the great news for us is that she is prepared to take us along on her journey! [Video]

 How to Paint Engraved Acrylic
Emily speaking in New Orleans at the Flourish Fusion Conference
Emily on Laser Everything in September
Think and Grow Rich
Hill,
I asked Emily what the best advice she had ever received was. She responded that some of the best advice has come from the books she has read. "The game here is the mindset You can have the best laser on the planet. You can have the best product and the best business plan, but if you don't have the right mindset, I guarantee you will fail. You have to be intentional in what you allow into your mind... feed your mind the right fuel. Start reading and listening to businessrelated books and podcasts" [Video] Her millionaire one day – and now she is on her way!


I don't know about you, Reader, but I take great comfort from this photo!
Facebook Community - 34k
YouTube - 20.8k
Instagram - 11.5k TikTok - 15.7k
Etsy Sales - 5235, 5 Star Rating
Finally, I asked Emily what advice she had for our readers. [Video]

"Have faith in yourself. You have to move beyond the fear because great things lie on the other side for you. Believe in yourself, and don't let analysis paralysis stop you. Don't overthink it, just do it. Get it done. Go for it!"
To View All Emily Caroline Laser Focused Videos
by Napoleon The Slight Edge by Jeff Olson, Rich Dad, Poor Dad by Robert Kiyosaki



in the 80s, there was this kooky pitchman on late-night TV: Sy Sperling. He’d be on television at all hours trying to get men to buy wigs. At the end of his pitch, he’d always say: “I'm not only the Hair Club president, but I'm also a client.”
Well, I’m the Sy Sperling of lasers. I’m the founder and CEO of Glowforge, but I love lasers. I use my Glowforge to make stuff all the time.
Today I want to share my three favorite ideas for what you can do with your laser. And it doesn’t need to be one of ours - these ideas can work with just about any laser out there!
Let's jump right in!
12345Most people think of their laser cutters as onand-off, but one of the niftiest tricks you can do is use your laser like a carving machine and perform a 3d engraving.
12345They’re truly amazing: by continuously varying the power of the laser as it engraves back and forth, it can carve deep into the material, or use a gentler touch to create texture.

12345At instagram.com/thefairydoor, they use their Glowforge to 3D engrave their original works of art.
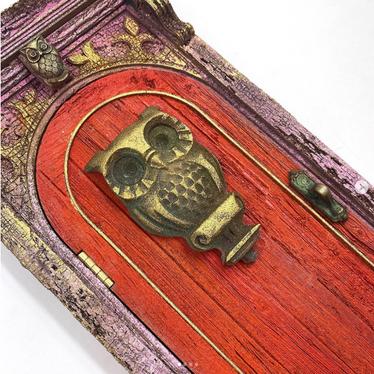
Designing a 3d engraving is a little counterintuitive. You use a bitmap, like a PNG file (preferred) or JPG file. Then, the color of each pixel represents depth. Black isn’t black: instead, each black area represents the deepest part of the engraving, where the laser is at maximum power. White is the opposite: white areas turn the laser off. Grey is in the middle; the darker the grey, the deeper the engraving there.
You can design your creation from scratch in software like Illustrator or Photoshop, using darker colors to carve deeper Alternatively, you can take a 3d model, and convert it to a grayscale depth map, as shown HERE
Once you do, you’ll need to find the right settings to 3D engrave. You’ll want to go slow, at medium power, and take full advantage of the maximum resolution. If you’re using a Glowforge, you can use the “3D engrave” preset. Otherwise, take your time and test something small until you dial in the settings just how you want them.

Personally, I was fascinated by the US Penny. I designed this from scratch in Adobe Illustrator, and engraved it in walnut.
You can see the results below. Warning: this is not tender for any debts, public or private!

CAD software can be intimidating, but the payoff is fantastic - you can create truly 3D objects that can transform your home.
Many laser creators get stuck in 2D, and there’s all sorts of things you can create. But once you start modeling with software like Fusion 360, you’ll find laser projects in every corner of your home.
If you like videos, a member of the Autodesk Fusion 360 team created this video series. If you prefer illustrated step-by-step, the “create a simple box” series here can’t be beat.
For example, this kind of lamp would be nearly impossible to design in Adobe Illustrator - but was easy to sketch up in Fusion 360. As a bonus, I could angle the louvers so that they lit up my side of the bed, without shining on my wife!

This messenger bag started out as a challenge: could I make something that would truly be used every day? I had no idea what I was doing, so I looked around online for patterns. I didn’t use any of them, but I got ideas from all of them.

The secret was that I designed the entire bag in paper. First, I cut sheets of paper and taped them together to get the shape. Then, I created the design in illustrator - but laser cut it out of big sheets of paper and used tape instead of thread. Finally, I lasered it out of leather, and got the shoulder bag you see here.
That was seven years ago - it’s still hanging in my closet!
is like Peter Parker getting his spider-superpowers. Suddenly you can do things you’ve never done before. And seven years later, I’m still learning new tricks!
I hope some of these inspire you to try something new. Please tag me if you do so I can see - I’m @danshapiro on twitter, and I’d love to see what you create!
Dan Shapiro is the founder and CEO of Glowforge. Prior to starting Glowforge, Dan launched a variety of companies, including the best-selling board game, Robot Turtles, where he learned the joys and challenges of using complicated laser technology to create unique prototypes. Dan saw the major potential of bringing a beautiful, user-friendly laser to the market, and the idea for Glowforge was born. Dan on Twitter

Imagine being able to focus on one large order vs. multiple small orders – this means less design time, easier processing, and higher efficiency. Doesn’t that sound ideal? That’s why we decided to shift our focus to securing wholesaling about a year into owning our laser machine.
When you think of wholesale, you may initially think of large retail stores. However, there has been a huge demand from smaller brick and mortar stores and online retailers who are looking for unique items to offer their customers.
Here are a few strategies we used to scale growth and increase revenue stream without having to change or modify our existing product line.

Start Local. Our first few wholesale orders came from boutiques that were in our hometown. We would spend Saturday afternoons window shopping storefronts in our area. If we thought our products would be a good fit, we would ask for the manager and request a meeting to discuss the products that we offer. Being able to chat with them in person helped build that initial relationship and they loved the idea of supporting a local business. Don’t be afraid! Alternatively, we also sent emails or direct messages on social media to a lot of local stores letting them know that we offer wholesale pricing on many of our products.
Create a Catalog. Initially, we kept pictures of our products on our phone for easy showing during a meeting and brought in samples of the items. However, we found that most retailers preferred if we also provided them with a price sheet that included pictures of the item, a short description, and the minimum quantities they had to order for wholesale pricing. This way, they were able to reference something after our meeting and didn’t have to rely on their own notes. They could also keep it on hand for future ordering cycles.
Keep It Simple. Items that we have had the most success with are often the simplest. We generally wholesale items like cutting boards, coasters, ornaments, bottle openers, hats, and tumblers. Popular quotes, local city/state names, zip codes, and sayings associated with major life occasions like weddings, birthdays, and anniversaries have often performed the best. The retailer is usually looking for items that their customers will buy as a need for an upcoming gifting opportunity. We also focus on items that do not require a lot of assembly or painting on our end – because these items are already being offered at a wholesale discount to the retailer, we want to be able to produce them quickly and efficiently, thereby maximizing our profit margins.
Think Outside the Box. Brick and Mortar stores aren’t the only option for wholesale orders. With eCommerce growing every day, Faire.com has become a great place to obtain wholesale orders. Faire is an online marketplace where retailers can go shopping other small businesses and see what they have to offer. This way, you aren’t limited to your local marketplace and now have access to boutiques across the nation. Faire is free to join, and you only pay a commission if Faire connects you with a new retailer through their marketplace. Start thinking of other businesses that may compliment your offerings – for example, we recently secured a wholesale order of charcuterie boards from a charcuterie company – that wanted to purchase our boards to build their cheese platters on with their logo engraved. This wasn’t a typical wholesale retailer, but it was a great opportunity and our boards were seen by so many new customers!
Wholesale is a great way to scale your laser business and get your product into the doors of retailers that don’t have the ability to produce items you may be offering on their own. With the right pricing strategy and a handful of products that are easy to produce in large quantities, you can be on your way to establishing wholesale relationships time and time again.
Sumita & Anuj Patel are the owners of Home Bound Custom Decor. Join their Laser Learning Group on Facebook – Home Bound Laser Learners. Follow on Instagram, and register for their class sharing tips and tricks on growing your laser business, available on their website




have a matte finish on one or both sides
Pros: Potential light diffusing properties and the appearance of surface imperfections is less noticeable

123Cons: It can be harder to polish/buff without disrupting the original matte finish
Great For: Signage, ornaments, décor
Fluorescent acrylic is a translucent acrylic that appears with a lit edge when exposed to light This effect can appear on the edges of your cut as well as any engraving It also has a neon glow when held under a black light
12345Pros: Widely available with very crisp engraves and popular with consumers
12345Cons: Limited color selection
12345Great For: LED Signs or accessories, engraved pieces, gaming accessories
#4
12345Mirror acrylic is a glass mirror alternative and comes in a variety of colors. Unlike other styles of acrylic, mirror acrylic can only be manufactured via the extrusion method. This means mirror acrylic is more delicate than cast acrylic and can crack more easily Mirror acrylic is also more susceptible to heat and can experience flashback if proper settings and masking are not used
12345Pros: Laser-friendly mirror alternative and highly popular
12345Cons: Less durable than cast acrylic and more susceptible to flashback and crazing
12345Great for: High-contrast engravings, wedding décor, and signage
#5 Metallic Acrylic
12345Metallic acrylic is a fully-cast doublesided mirror acrylic alternative While not as reflective as mirror acrylic, it has a similar sheen and aesthetic to mirror versus other glossy acrylic styles
12345Pros: Double-sided and more durable than mirror acrylic
12345Cons: More susceptible to flashback and crazing than other cast acrylic
12345Great for: 360˚ pieces such as cake toppers and earrings
#6
12345Iridescent acrylic has color-shifting properties and produces an iridescent effect either through an iridescent acrylic paste or a specially adhered film Opaque iridescent colors are commonly fully cast and created with a paste. Highly reflective or translucent iridescent styles are extruded acrylic sheets treated with a specialty film When sourcing, purchase from reputable suppliers. Film iridescent sheets can vary widely in quality due to the type of film and adhesive used during manufacturing.
12345Cast Iridescent Pros: Extremely eyecatching and popular with consumers
12345Cast Iridescent Cons: Cast iridescent is more susceptible to flashback and charring along edges
12345Film Iridescent Pros: Extremely eyecatching, creates a unique engraving effect
12345Film Iridescent Cons: More susceptible to scratching, cannot be buffed or polished to restore like other acrylic styles
12345Great for: Jewelry, Décor, engraved pieces
#7
12345Glitter acrylic is produced by casting an acrylic paste with various glitter particles or sequins. Glitter acrylic styles are offered in a variety of colors and styles. 12345Pros: Eye-catching and durable acrylic with a shine 12345Cons: Can warp more easily depending on the density of the confetti and vary in thickness creating cutting difficulties

12345Great for: Ornaments, earrings, and keychains
#8 UV-Printed
12345UV-printed acrylic is a printed acrylic sheet to create a unique pattern or design. UV-printed acrylic may feature a single-sided or double-sided pattern and is a cost-effective option when looking for a custom style of acrylic.
12345Pros: Low-cost option for custom and fad/seasonal trends 12345Cons: Quality issues in printing can result in excessive peeling or scratching of the ink when exposed to heat from laser 12345Great for: Due to scratching, UVprinted acrylic is great for static pieces like signs with limited wear and tear
#9 Two-Tone Acrylic
12345Two-tone acrylic, such as the Houston Acrylic Two-Tone and ColorCarve line, is double-layered acrylic made especially for laser-engraving. When engraved, the top layer is removed to reveal the contrasting color of the core layer. This acrylic lets you avoid the hassle and mess of paint-filling your engravings.
Continued Here:
Never miss an issue Click Here to Subscribe





Many of us spend an inordinate amount of time trying to come up with the ‘next best thing’ or chasing sales. What if I told you that you don’t have to do that? What if I told you that to make (or design) truly amazing pieces starts with not asking someone else “what’s your best seller?” it starts with making something you love.
We are inundated daily with media in the many groups we follow. We see others making amazing things and want to be that person. Shocker…you already are! Stop comparing your apples to someone else’s apples.
As a designer and maker, early on, I spent a ton of time designing files that I hated because I thought everyone would love them and they would sell. Truth is, the reason I spent a ton of time on them was that I didn’t like what I was doing so it took longer for me to do it. I also found that they didn’t get the response I expected. There’s a good reason for that, I didn’t put effort into making them special. I just finished them to get them done. Never do a design you can’t feel passionate about.
The moment you let go and create something you love, you will see a difference in how you treat the process. I am also betting, you will see a difference in what others say about your pieces. The worst thing you can do is make a piece that you don’t like, then have to make 200 of them. This will sap every ounce of energy and inspiration you have. Will you make money? Absolutely. But at what cost to you?
Each of us has something we love, and chances are, others love it too Instead of trying to fit into a market, create one of your own Someone once told me, if you do one thing well, you don’t have to do everything. Truth is, I still try to do everything, but I found the one thing I LOVE and I try my best to do it well.
You can have a lot of variation in something you design. A lot of things I design are just boxes and then I add embellishments to those boxes to make them something else.
They are still just boxes, but each one is different and speaks to different people I also believe that if you go beyond pure aesthetics and give your design a purpose, the market for your piece just opened up to a wider audience
Here are some tips for creating the things you love and building your own market.
Make a list of all the things you love. They don’t have to be physical things. Don’t limit yourself, you can associate things with feelings. Start with the feeling if you can’t come up with an actual object. Then just start listing all the things that make you feel that. There are no wrong answers when you do this Just write everything you can think of
When you buy something for yourself or someone else, take note of what it is You can get an idea of how/what to make Let’s
be real, there is nothing new under the sun. We just find new ways to present it. Find your way.
Put your ideas somewhere. Get a notepad, or even use your notes on your phone When you have an idea, Put it down Then you can start to think of how you are going to make it
I spend a lot of time staring off into nothingness when I am trying to create a new piece I have a strange ability to put it together in my head and see it then take it apart piece by piece. I fix what is wrong, then I just draw the pieces. If you can do that, then do it, if you can’t, get out a piece of paper and a pencil and draw it. It doesn’t have to be a DaVinci. Just get it so you don’t forget it.
Make something that solves a problem for you
We all have thought about creating something that will solve a problem I don’t know how many times during the day I say, “I should make such-and-such so I don’t have to do this anymore ” There are tons of files for sale that hold things, dispense things, or even do a task that fills a need. Chances are if you are having that problem, someone else is too!
Market to people you know. Everyone talks about getting out there and having an online presence, DEFINITELY do that. But remember, AVON became a multinational corporation by having people sell stuff to their friends The best part is, that they will [should] feel comfortable enough to tell you if they like the pieces you
are making. Does this work in every case? No. But it is definitely a great place to start.
Don’t be afraid to go minimal or overboard. You should never limit yourself to how much material, or time, something takes. Let’s face it, I am the king of “If one board is good, twenty is better!” The piece you create takes exactly how much material it takes until you say ‘I’m done!’
Learn the tools you use. Let’s face it, there are many different design applications for you to use I use Illustrator because when I started designing in the dark ages of computers, it was the only one. Now you have choices!
I always tell people that they should download the trial for the program they want to use and make something. Then download another trial for another program and make that same thing. This will help you see which one fits your design style and processes. Once you decide, learn everything you can about that program
Don’t be afraid to make mistakes. The time you think you waste trying to figure out how to do something is actually quite valuable You now know how not to do it And in the process probably found about three ways to do something else Remember, you are not going to break the program. If you screw something up on your design ‘Undo’ is your best friend!
If you have questions, ask someone that uses that program. People have a fierce loyalty to their design programs and are more than happy to help.
Continued Here:


continued here......
Never delete a file or design you don’t like. Save those files and later go back to them. You may find that there is something in the design that you can use for something else I have a folder on my hard drive called ‘MEH’ These are completed files that I finished but didn’t really like I have gone back to that folder repeatedly when I am working on something and remembered I have something in there that would help with what I am working on now.
And finally…Know when you are finished. No one can tell you when your piece is finished. I sometimes “finish” a piece, then leave it alone for a couple of days. When I come back to it, I can then decide if it needs something else, or if it’s finished. Most times I make minor (sometimes major) tweaks and then I repeat the process leave it alone and come back to it I never feel rushed to get it done I always have two or three projects going at once so I have something else to work on
As makers and designers, we have a unique ability to take what we see in our minds and make actual objects Do not ever take that lightly. Not everyone can do that. Revel in it and continue to push yourself to learn new things, try new techniques, and most importantly never doubt yourself.
Make. Every. Day.
by Victor Havens of Excited Atom Design Find Victor on Facebook, Etsy, and YouTube
Never miss an issue
Click Here to Subscribe
Whether you have an established online presence or are just starting to map one out, it's time to meet Builderall, the world's largest digital marketing platform. You will have access to many tools, such as: Website Builders, Autoresponder, Email Marketing, Sales Funnel Builder, eCommerce, Members Area, eLearning, and much more. The whole digital marketing package is cheaper than taking the family out to dinner. We got your attention, right? Come to the digital marketing world and stay ahead of the competition with the best tools available! Tell me more about Builderall

This column is designed to reach all laser owners which, given the drastic differences between laser models, can sometimes be hard to do The one thing that is absolutely universal to all laser owners is that, if the environment your laser is in doesn’t work, your laser doesn’t work. So let's talk about what the best environment for your laser looks like.
In the last issue we talked about things that you can do to keep the working temperature of your laser ideal with air flow, but what can we do about the ambient temperature and humidity for your laser? For some, that means the garage, for others it may be a shop, and for others, myself included, it may look like your laser has its own bedroom with air conditioning and humidity moderation The long term housing of your laser is something that you will need to consider when thinking about projects you take on, maintenance needs in the future, and expansion plans in the long run.
Let’s start with the temperature. All major manufacturers of lasers recommend that you keep your laser in a well ventilated, temperature controlled area. This means that unless your garage or shop has an air conditioner for the summer and a heater for the winter, or you live in an area where walking into it does not feel like walking onto the surface of the sun, your garage or shop may not be the best option for your laser
What does it mean to be well ventilated? Well, I am so glad you asked! Vocabulary com gives the definition of ventilated to mean exposed to air or a room that is aired, airy, and open to or abounding in, fresh air. This can mean opening the windows in cooler temperatures or using an air filter and fans to keep the air moving in the warmer months.
Now to address what it means to be temperature controlled. Temperature, or climate-controlled means that you have a space that has or provides artificial control of air temperature, humidity, and movement Humidity can be a big one here Most of us have the temperature (recommended between 59-77º F) well under control but humidity can absolutely ravage your laser Having too much or too little humidity can severely damage or even kill your laser.
So how can we, as the caretakers of these beautiful machines, make sure that they are in the ideal environment? Well, I’ll tell you! The ideal room will have indirect sunlight, air conditioning, heating, ventilation (whether that be through filtration or venting to the outside), and enough space to allow for easy cleaning and maintenance of your laser
If you do not have the space available in your home and you must place your machine in a garage or shop, a portable
 er Shigley, The Spotless Forge
heating and air conditioning unit is a must Your laser will not work to the best of its ability if it’s overheating or too cold. Maintaining the temperature between 59º F and 77º F is vital.
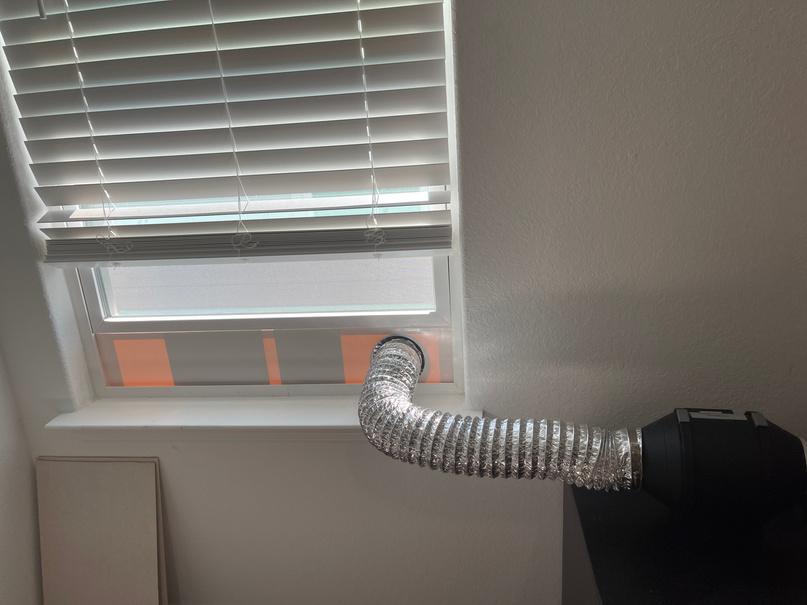

Next, let’s talk about humidity. I have seen so many lasers with humidity damage. They are left exposed to the natural humidity of the air overnight or during a storm and the machine can end up a beautiful brick Let’s avoid that
If you are venting to an air filter this may are, i ose y ay” venting can let humidity into your machine.
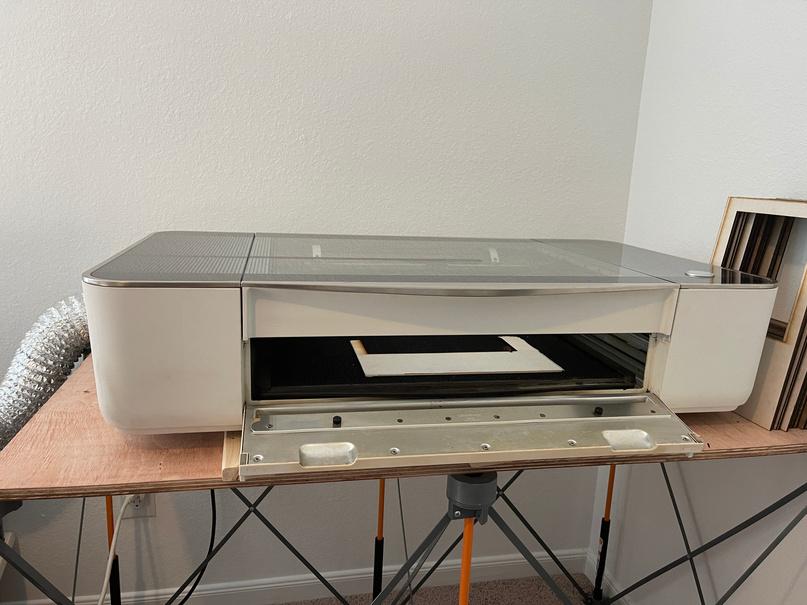
For those of you who cannot remove the vent hose nightly, leaving your laser lid open enough to balance the interior and exterior air can save your bacon As p le
simply a way to vent your machine to allow for air to move and therefore not allow the moisture of the humidity to settle in your laser. I have pictured the Glowforge because that is the laser I own. For lasers, such as the Thunder or OmTech, I recommend opening your maintenance panel on the rear or side of your machine as applicable.
Now, what can you do if you forgot to pull the vent or the ambient moisture has those little beads of water in your laser? First, DO NOT turn on your laser Unplug your machine, open your lid and all panels that you can, and place a fan pointing at your laser to allow it to air dry You can take a dry microfiber cloth and wipe up any moisture on solid surfaces such as your glass or laser tube. After you can not see any moisture, use isopropyl alcohol on your fans and Zeiss wipes on your lenses to make sure there is no residual moisture remaining. For those in especially humid climates, this can be a daily ordeal.
With these simple steps, your laser should be a mainstay of your business for years to come As always, I am always happy to answer specific maintenance questions you may have I promise you that if I don’t have the answer, I’ll connect you with someone who does

Summer Shigley is the co-owner of Your Content Creations LLC with her husband Les Your Content Creations LLC is the parent company of The Spotless Forge and Time2Travel Vacations Find out more about her by going to her Linktree site.
online. In this article y
You already have a killer design, but you need to “package” it to sell online The expectation from both customers and marketplaces is that your designs must be contained in a zip file Here is what to include in the file and how to zip it.

First, create a folder and name it how you want your customer to see it. Add your design files to the folder; at least an SVG but also DXF, PDF, EPS, or AI Include product photos, promotions, and instructions (optional ) Include a License Agreement (optional but encouraged )
OneNow that you have your files zipped, you need a place to sell your files You can make your own website or sell them on a marketplace It is highly recommended you start selling on a marketplace Marketplaces require no technical skills, no website maintenance, and provide free traffic While there are many marketplaces to pick from, here are four platforms to consider and some pros/cons It is up to you to pick the best marketplace for your designs. You typically can post on multiple marketplaces but make sure to check each website's terms & conditions. Posting on multiple marketplaces is a great way to reach more customers and is highly recommended.
Your selling designs is a great way to bring in additional revenue for your takes a few easy steps to start selling your designs

but take very little time.


All marketplaces work basically the same way. You need photos, a price, a title, a product description, product tags, and product categories. Here is what you need to do.


Add your product photos High-quality photos are critical Use your best photo as the main image and add supporting photos to show multiple angles
*PRO TIP* Use real photos! Customers greatly prefer this to digital mock-ups.
Write a product description. Your product description is all about the details. Feel free to add your product pitch, social media info, and any other important information you want to share with your customer. Here is a brief outline on how to structure your description:
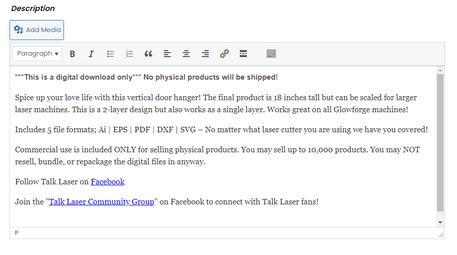
Click here to access a larger copy of the description
Add product tags Product tags are another tool that help customers find your products Unlike categories, product tags are primarily used in search results
*PRO TIP* Search similar designs for popular keyword ideas to include in your product tags.


Now take the leap of faith and hit submit Make sure to check your listing for any spelling errors. You can always go back and edit your listing if you find a mistake.

Congrats on your first listing! Your designs are now available for sale You can sit back, relax, and wait for all that extra dough to roll in well not always, but that is for the next issue of Laser Focused, where you will learn about: Marketing! If you have any questions about how to start selling your designs online, you can send me an email at matt@talklaser.com.
Matt Rise is the owner of Talklaser.com Talk Laser is the only open marketplace just for laser designs. Please visit and open your FREE shop! We promise to love and respect your designs like no other marketplace.
Have you ever found that perfect piece of plywood at a big box retailer, just to be disappointed when you start your project and it doesn’t cut? That is due to how the plywood is
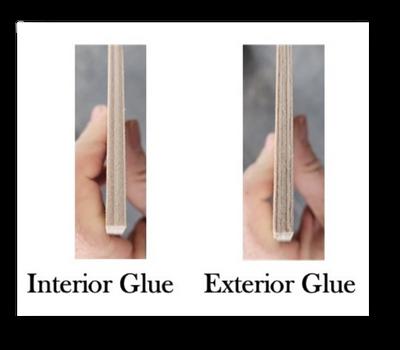
All plywood is composed of layers of wood veneer that are glued together The key is what type of glue is used to attach the layers Domestic/Import plywood, with a wood core that you get from a big box retailer, is manufactured using an exterior glue. Imported plywood, for example, Baltic Birch, is manufactured using interior glue. It is easy to identify when you know what you are looking for.
When you look at the edge of the plywood, does it have a dark line between the layers, or is it a light line? If it is a dark line, that is interior glue which does not cut well in laser machines When it comes to purchasing Baltic Birch, another indicator is the size of the plywood sheet If the Baltic Birch you are looking at is a 4’x8’ sheet, it is made with exterior glue Baltic Birch with interior glue only comes in 5’x5’ sheets
Take our advice; when you are looking at material, look at the edge, it will save you a lot of time and frustration.
Did you know there are differences in the grades of Baltic Birch that are offered? Baltic Birch's grading differs from domestic plywood, so be knowledgeable about what you get when purchasing Baltic Birch Understanding the meaning of the grading letters:

"B" – Solid one-piece sanded front with even color There will be no patches, voids, and a minimal amount of mineral streaks.
"BB" – One-piece sanded face with generally even color. There will be slight pin knots and mineral streaks. Open knots and defects are cut out and replaced with oval patches, commonly known as footballs.
"CP" – There is a distinctive difference between CP and BB gradings CP will have patches on the front or back, the color will not be matched, and splits less than 0 5mm are allowed
"C" – Has an un-sanded face that allows patches There will be open knots and splits in the veneer
Baltic Birch is graded on the front of the sheet as well as the back of the sheet. When you are researching Baltic Birch and see a grading of B/BB, the "B" refers to the grading on the front of the sheet of plywood, and the "BB" refers to the grading on the back side of the sheet of plywood If the grading is BB/BB, then you are getting the
same grade on both sides of the sheet Most Baltic Birch available has the grade of B/BB or BB/BB One letter doesn’t seem like it should make a big difference, but it does! As Baltic Birch becomes harder to find, ensure you get the quality you are looking for

buying B/BB If you are in a production setting, time is money and the time spent cutting around patches usually costs more than spending the extra 20% However, in other settings, such as a part-time crafter or hobbyist, saving 20% and taking a few extra minutes to cut around the defects is not much of an issue
12345Costs are a big factor in determining what type of wood you are going to use for a project Will the client pay a little more for a nicer piece of material and appreciate the quality, or do they want it fast and cheap? These are the struggles we all deal with daily “Can I get “$XX” for this project by using a nicer piece of material, or should I use a less expensive material and keep the price point lower?” B/BB Baltic Birch is about 20% more than BB/BB Baltic Birch When looking at the differences between B/BB Grade Baltic vs BB/BB Grade Baltic, there are a few things to determine
If I use BB/BB, can I cut around the patches and still have a nice-looking project? Or is it going to take me longer because of the planning to cut around the patches?

Time: How much is your time worth by saving 20% on the BB/BB material vs
Selling price: Will you be able to get the profit you want out of a project by using B/BB over BB/BB? Just because “ABC company” is doing it cheaper doesn’t mean you have to match their prices Being unique, along with using quality materials, will help you create your own niche
Is Baltic still available 12345Baltic Birch is still available, but it is getting harder to find across the country The majority of the Baltic Birch comes from Russia, but it is also manufactured in Estonia, Lithuania, and Latvia With everything going on overseas, many large suppliers are steering away from importing it The import taxes are extremely high right now due to the sanctions A few suppliers are still bringing it into the country, but it is taking much longer to get here Previously Baltic was coming in by the container loads to several ports across the country and distributed throughout the USA Now there are only a few ports that will accept anything from Russia

Even though it’s getting harder to find, Baltic Birch is still one of the most preferred wood species in the laser community
Brian and Kristina Agan are the owners of H & H Creations Tampa located in sunny Tampa, FL. Their family-owned business name is inspired by their 2 daughters, Heather and Haley. Find them at www.hhcreationstampa.com

What a glorious day, you finally got your laser, and you have begun your journey of creating all the wonderful items that you’ve had swirling in your head But boy can it become overwhelming when trying to decide what materials you need, which are laser safe, and even more confusing on where to buy them. Today I’m going to help you find those perfect material vendors to get you on your way to no longer thinking about, but actually creating projects. I will talk about 10 things you should look at and evaluate on selecting which vendors to use. These are in no particular order but what I feel are some of the most critical things to look at when deciding whom to give your hard-earned money to
This one is a no-brainer but finding a reliable supplier is vital You as a business owner need to have confidence that the companies you order from will do as promised. If they do what they say and you do not have to worry about it, your business will be so much easier. Look for suppliers that have a proven track record of delivering what they promise. Do the shipping times match what they say? Are the products the same quality as you expected? Is their customer service where it needs to be? These are all factors in determining if a supplier is reliable enough to warrant your business
We as small business owners very often get last-minute orders We always try to be prepared but that is often not the reality
Knowing that we can get our supplies quickly gives us peace of mind, knowing our customers will be taken care of Also, as small business owners, the lifeline of our business is cash flow If money is tied up in inventory we can not sell, it hampers growth.

At the end of the day, our business is here to make a profit, and one way we can maximize our profit is by bringing down the cost of goods sold. Now I'm not saying that cheapest is best, as you often get what you pay for But if you take the time to find reliable suppliers that also have great prices, that is a huge advantage to you Also, look for suppliers that offer free shipping after you hit a certain threshold, shipping costs can add up quickly, and if you plan ahead and order in bulk, that money saved goes directly into your bottom line.
You buy an item not knowing if it will sell or not, and, low and behold, it becomes a huge hit for you. Congratulations, but the problem is you can not get the same product again, and now you lose all those potential sales. So finding suppliers that can supply you with the items you need is critical Find suppliers that have enough inventory that you can, in confidence, offer them to your customers without fear of not being able to fulfill orders When building our businesses, consistency is vital, and part of that consistency is proving the same product time and time again Often times the suppliers with large inventory are also
the ones with the most competitive prices as they buy in bulk which keeps prices down for the consumer. Always keep open communication with your suppliers, and if it's items you know you will need a constant supply of, make sure to communicate it to them and see if they can provide those items consistently

You are inevitably going to encounter problems with any items you buy, but what will make the difference is how the company supports you when it does happen You want a company that stands behind its product and service. Also, support is not just when something goes wrong but being available to answer questions when needed, troubleshoot, and do any of the 1000 other things that come up every day. Find suppliers who take a general interest in seeing you succeed and are willing to help you achieve that.
What is that old saying? Give a man a fish, and he is not hungry today, but teach a man to fish, and he will never go hungry Same when looking at suppliers, anyone can give settings on their product, but the ones who separate themselves are the ones who really teach you. We are all learning, and if we cannot only get a good product but learn as well, that will only benefit us more. Knowing that a supplier is giving us the materials and the knowledge to maximize their product separates good from great.
Great service, fast shipping, and amazing price mean nothing if the product is trash. Look for quality items, and don’t be afraid to pay a little more to get the level of product you want. At the end of the day, the product you send to your customers is a reflection of you so make sure you are represented by the best product available
When I talk about compatibility I am speaking to whether the products you carry match what the supplier sells. You want to find a supplier who carries the most items that you need. With so many suppliers out there you might end up ordering from multiple places but if you can find the ones who carry the most items you need to try and use them the most frequently. Some of the advantages are grouping multiple items will probably save you a lot on shipping and will save you time from having to go to multiple places
Look for those companies that are active in helping in the laser community Anyone can sell but which ones take the time not to just sell but actually be supporters in the community? Who seems to actually care that others succeed vs. just looking for the next sale? Which companies are giving back and trying to build a community - not just a business. By supporting them we are supporting the community as it comes full circle. So look for those suppliers who stand out as companies that give as much as they take

