SPIN UP YOUR ROTARY BUSINESS
CRAFTING YOUR DIGITAL PORTFOLIO
SELLING ON ETSY BENDING ACRYLIC PROTECTING INTELLECTUAL PROPERTY

SPIN UP YOUR ROTARY BUSINESS
CRAFTING YOUR DIGITAL PORTFOLIO
SELLING ON ETSY BENDING ACRYLIC PROTECTING INTELLECTUAL PROPERTY

Builderall
Creative Cut Supplies
Cuttle
Glowforge
Houston Acrylic Johnsons Plastics Plus Laser Craft Fest
LensDigital Shop Review Crew
The Hands That Shape
Welcome to the first issue of Laser Focused’s second year. As you begin to check out all the goodness inside, I’m sure you will notice some significant changes. Laser Focused now has a Creative Director; the evidence can be seen on every page!
I am excited to announce that Victor Havens is now the Creative Director for the magazine. You can see his style and artistic eye’s impact on every page, and I’m so very thrilled that this talented and kind individual has stepped into this role. He is a gift!
Many of you might know Victor as the owner of Excited Atom Design or the generous maker hosting Vectors with Victor in his Facebook group on Saturday mornings. If you don’t know him, hang on because you are in for a treat. His talent brings a contemporary and clean aesthetic to Laser Focused, enhancing the read for all of you.
I’m so grateful and energized to see my original idea grow! It just gets better and better, taking it beyond anything I could ever have done on my own.
We are working to have the website reflect the new aesthetic as well. Soon there will be more capabilities there for feedback, between issue goodies, contribution information, and more. It is still in process, but you can check it out here.
One of the benefits of the free subscription to Laser Focused is that you can access all back issues. Only subscribers have access to them through the website. You simply go to the home page, log in, and it will bring you to the access page for the previous issues. We are working on an index which will also be there shortly, so you can easily find information already published – such as Michael Horton’s article covering the various types of lasers and the best application of each (March/April ‘23.)
Editor Robin Roberts
Creative Director
Victor HavensCover photo by Bex Wood
Insta: @bexwoodphoto
Copyright ©2023
Laser Focused Magazine
As always, please support the advertisers who are supporting this magazine being available for you. Consider joining our Patreon membership which also helps the magazine and gives extra benefits to those who actively support Laser Focused. (Check here for more details.) These two resources keep the magazine published, and we appreciate your belief in what we are doing here by your participation in those programs.
Read through the excellent articles in this issue, enjoy the new look, and share your feedback with us so we can continue to make Laser Focused THE read in the laser world.
Laser On...


In this issue, we are catching up with Alisha Pate, our March/April cover guest, and what has happened in her world!
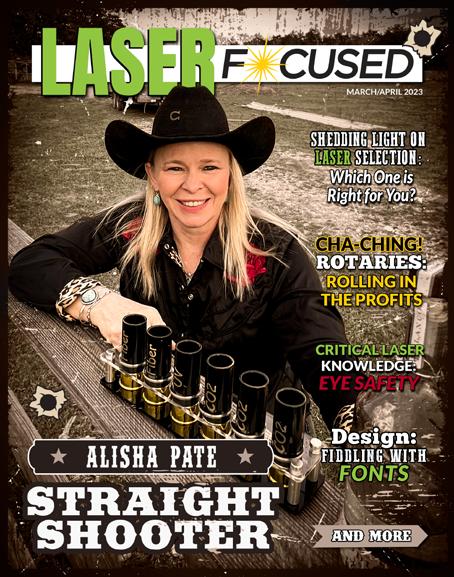
First, Congratulations to Alisha on retiring from her 9-to-5 to focus on her own endeavor! This big goal was realized shortly after the issue’s publication, and she is now full-time in her business, Pate Ranch Creations. She and James, her husband, are a dynamic duo, making this dream a reality. It is done with teamwork and a division of duties that suits each of their skill sets. They are working it like the full-time business they want to create, pursuing it with focus and persistence.
With this new energy, the business’s target is shifting from working with individual customers to collaborating with larger clients, doing bigger jobs, and creating strategic partnerships. Having set clear goals of how many of these clients they want to add over a specific period, they are already rocking and rolling and have quickly met 60% of their goal.
This quick ramp-up isn’t so much of an overnight success as it results from laying the groundwork over the last five years. Alisha touts the importance of networking, getting out there, talking to people, and seeing what they need. She especially encourages entrepreneurs to talk to those working at a higher level than they are, listen, ask questions, and be willing to learn.
Another project she has been working on is a digital portfolio of their products. She
credits this with being able to land big clients. In fact, in this issue, Alisha has contributed an article laying out what a digital portfolio is, how to create it, and how to use it to grow your business. Make sure you check that out here.
And what would progress be without adding more lasers into the mix? Currently, she is at eight lasers and counting!
Finally, check out The Laser Lounge, the group Alisha started on Facebook. She spearheads an advanced line of conversations focused on business issues and laser questions. It is leveled up and geared toward those wrangling with the concerns of building businesses into full-time, thriving enterprises. Check it out!

Here’s how to paint fill engraved acrylic. With the masking on, spray a coat of lacquer on the piece, when it is dry fill in with your paint in whatever method you use (spray, pens, etc) and after that dries, spray on more coat of lacquer. When it is completely dry – BE PATIENT – remove the masking and enjoy! The lacquer seals the edges of the masking so that no paint bleeds underneath.
Engraving on rock and stone can be dangerous due to moisture. If the stone is wet or contains a lot of moisture it can explode. I use rocks sometimes but I put them in the oven overnight at 150 degrees to get the moisture out to be safe for lasering.
- Brian Carroll, Keith SchlotthauerHave a Tip or Trick you want to share? Let us know! Click Here!


When it comes to wood, I always get my species confused. Not sure why I didn’t think of this soonermark the side with the wood name. It's not like we ever use the edges!
- Allison Scott SchalitzWhen lasering on glass bottles with liquid in them, put a tray underneath to catch any of the liquid, should the bottle break. No need to damage your laser bed too!

 - Alex Gerrard
When working on an existing design (for example, adjusting for kerf,) change the line color of pieces you are working with to easily identify them. When you are finished adjusting a piece of the design, change that piece to a new color to signify they are done and correct (I normally use green.) When everything is completed change all the lines to the appropriate colors for cut, engrave, and score.
- Victor Havens
Here’s how to get logos perfectly centered on cups with handles when lasering. Divide the circumference by 4. Use that number to measure towards the back starting at the center of the handle. Mark the area with a small piece of painters tape.
 - JoAnna Shipp
Necessity is the Mother of all Invention. This timeless philosophical phrase is why you are reading Laser Focused today! In 375 BC, Plato wasn’t talking about or even imagining lasers, of course, but his words encapsulate why this publication exists.
It all began after Robin viewed a YouTube ad for the Glowforge. She kept asking Sam, her partner, “Tell me why I do not need this.” That video had immediately engaged her imagination, and the ideas just kept coming to her about all the different things she could create with it and how she would market her products. Weeks passed, and finally, after listening to this daily, Sam responded, “Just go ahead and buy the darn thing!” She still had not stopped talking and (literally) dreaming about it in all that time. That ad had inspired her crafty side and appealed to her business acumen.
As her laser journey began, she began to make a reality of some of the visions that danced in her head. She tried things out as
she started and watched many videos to learn techniques. Only then did she realize that there are a lot of different lasers out there, lots of materials, and lots of random advice! Was she successful with her projects? Yes and no. “I joined Facebook groups and would ask questions, and that’s when I ran into problems. There was no answer to my question, or there were 12 answers, and they would contradict each other.” She had no mentor and did not personally know anyone else with a laser to turn to. She felt lost and overwhelmed in a sea of random and sometimes well-meaning but flat-out wrong advice.
Realizing a need for a central repository of information, Laser Focused was born. Taking her frustration and drawing from a lifetime of business experience, Robin created this magazine. She had basic skills and the software from having previously created an online magazine for her hypnosis practice, so she set out to make her contribution to the laser community.


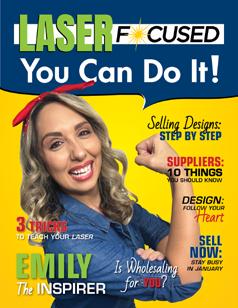
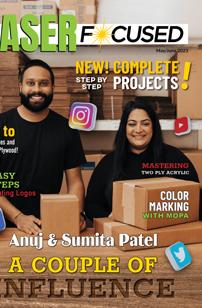


An unstoppable entrepreneur, Robin loves to study business problems and think up solutions. “I love business. I am always amazed by the things people come up with. I think about how to tie it together and help people succeed in business.” Laser Focused is a way to help educate in several areas, especially in entrepreneurship.
Robin describes it as a woodworking magazine meets People magazine. “We talk about people in the laser community, but we also present information on skills, techniques, and materials.” Every issue of Laser Focused Magazine addresses two separate topics: Skills/Techniques and Business. The magazine has also included step-by-step projects in the last two issues.
Currently, there are five primary recurring columns covering; wood, acrylic, design, business, and marketing. Robin says the enormity of business information, in which she originally included marketing, made her realize early on that she needed to treat these topics individually. Marketing is a vast topic with many choices, and everyone’s marketing model differs. There’s so much to say in this one area alone!
“In the magazine, what I bring to my readers is: Here is a marketing model. Do you like it? Do you want some of it? Do you want all of it? Do you want none of it at all? You may find a fresh marketing idea that you did not already consider. Entrepreneurs need to look at who they are trying to reach, what they are trying to sell, and what works best for their business. All these things are your choices, but Laser Focused magazine brings information to you so you can do what you choose to do better.”
“There may be more recurring columns in the future as we expand. We are considering adding at least one other materials column (metal, anyone?) and one covering software. Suggestions are always welcome, so you’re invited to share with us ‘that one topic’ that would make Laser Focused even better!”
The process of putting the magazine together has morphed in the last year. Robin created the first

issue in Canva and published it in Designrr, which was successful. Still, it needed to gather statistical information on how many people read the magazine and what they looked at. Designrr did not do that, and, as superb as Canva is for many things, it was difficult to lay out a whole magazine.
Laser Focused moved with the January/February 2023 publication to a platform called Issuu, which gives information that can, in turn, tell how many
people have read Laser Focused and what they are clicking on. After moving to Issuu, Robin started using InDesign, an Adobe product, to layout the magazine. “It’s been a year, and we are still learning. Adobe is so powerful and amazing, but the learning curve was steep!” she explained.
Robin is excited to be starting the second year out right. This issue has Victor Havens, a gifted designer, coming on board as Creative Director, giving
Laser Focused a fresh look and feel. “We are fortunate that Victor has taken over the design aspect of the magazine, and we’re working in tandem to create the best magazine ever! He has fresh eyes and provides enthusiasm and innovative ideas for growth and expansion as we move forward.”
As Editor, Robin usually writes the lead article (but not this one!), the Editor’s notes, and Tips & Tricks. Different guest contributors write recurring columns for each issue; these are laser users sharing their experiences. It is essential to Robin that the magazine’s overall content not be laser-brand exclusive. The idea is that readers can apply much of the information regardless of the specific laser used. “We do include contact information for anyone who writes an article. We want readers to contact, follow, and buy from our contributors. The goal is that the article content is valuable information and expertise that serves the reader while giving awareness to the marketplace of these knowledgeable community members.” Robin adds: “If anyone has an idea that they want to write about, I want to hear it. I cannot think of everything on my own!” (Please check the information at the end of the article for how to reach out to her.)
She says it’s been fun to choose someone for the cover of each issue of Laser Focused. Over the past year, she interviewed people who were mostly familiar faces in the laser community for the cover article. Moving forward, Robin plans to bring people to the cover, some who might not be as well known as others, and hopes that the reader’s curiosity will draw them in to meet these people and continue expanding the community.
Whereas the magazine is free, a Patreon subscription is now available so people can support Laser Focused for as little as $5 a month. Patreon is one of the most popular methods of supporting content creators today. Robin says the advertising and Patreon work together to keep the magazine available for readers, covering the expenses of an ongoing publication without flooding it with ads. As Editor, while she appreciates Laser Focused’s loyal advertisers, Robin strives to keep the ratio of advertising to articles content heavy, allowing

readers to enjoy a significant amount of valuable information.
Readers can become a Laser Focused Supporter for $5 per month. Readers may instead choose to become Laser Learners for $15 per month and get access to monthly live-stream classes by business and laser experts.
Or there is the Laser VIP subscription. These members get their company’s name and logo on the sponsorship page in every issue and access to two monthly live-stream classes by business and laser experts for $25 per month.
As for her personal life, Robin is a mom to two grown sons, Adam and Skylar, who live in Nashville. She and Sam, her partner of seven years, are living happily just outside Houston, in Spring, Texas. They met while networking at a Chamber of Commerce meeting back in 2015. (Never underestimate the power of networking!) While each has their own business, they support each other with ideas and extra hands when needed. By the way, Sam is great at weeding!



Robin is also a Certified Consulting Hypnotist and has had her private practice for 16 years. She still sees clients and can be persuaded to do one of her comedy hypnosis shows on occasion!
She is a lifelong crafter, enjoying projects from knitting to card making. She says she is not an artist who creates beautiful original art but a ‘constructionist’ who likes to figure out how things fit and then put them together - realizing her ideas in 3D. She likes the mechanics of it. When asked what inspires her, Robin replies: “Creating something that did not exist.” That is how her own laser business and the magazine came to be.
She may not have all the answers, but she works to figure it out as she goes along. Laser Focused readers also inspire her. I get comments like, “This is such great information,” and just such feedback keeps her going. She does not want to disappoint the readers and strives to find new things to show them. “Occasionally, I cannot even think what is next, and the next day, I see three new things that I never heard of before. Then, I am off and running, talking with the people doing the work and persuading them to write articles on these topics, which is a lot of fun.”
Dividing her time between two jobs and publishing a magazine gets hectic. What does Robin do to reboot and refresh? When she feels frustrated, she takes a step back, and as a real treat, she goes out and creates something on her laser. Likewise, when stressed with the laser business, she will switch focus and work on the magazine. Stopping, allowing for creativity, and thinking of how to put things together gets her back on track.
When asked for her best life advice, Robin says it was not
so much advice in words but a good example. Robin watched her mom, a single mother with three children, go back to school and do the work to get her Nursing Degree. “I saw her just keep going; she is a great role model. She’s 97 now, and I am blessed to have her,” Robin adds. She received her best business advice while in college: talk to people. You must understand that not every conversation means ‘I am going to do business with you,’ but every conversation is a connection. Every connection is an opportunity to know, like, and trust each other and to help grow each other’s business.

As for what’s next, Robin is excited about fiber lasers. She has just received her first one - an 80W JPT M7. Once again, her imagination is working overtime with ideas for projects she can create with metal.

Last thoughts for readers: Take action. Many people have a great idea, whether it is ‘I should talk to that person about doing this’ or ‘I should create this piece.’ Then they take a long time to get around to it, and when they finally do, it is suc cessful. They wonder why did I wait? Or they never get around to it, and that is a shame because if the idea came to you, people needed that. Take action, even if it is imperfect. Stop trying to make it perfect. Stop waiting for the right time. Stop overthinking it. Just get to it. Because you know what the most remarkable thing is? People will tell you, “This a great widget, but what would be even greater is if I could do XYZ with it.” And then you go back, and you make that fantastic widget. You can do that, but you must interact to get feedback to take it to the next level. You need help to think of everything. The magazine has taught me that. It has been a year, and I am still learning. I may not know it all, but I will figure it out as I go along.


that the Tumblers market hit $3 Billion in sales last year and is projected to almost double by 2028? Sales of custom tumblers and drinkware have benefited from a growing customization trend in America, and there are no signs of it slowing down. The demand is driven by individuals and a growing small business industry that needs to build strong connections with customers. As of this year, there are a whopping 32 million small businesses in the US, and each one of them needs to connect with their customers. Tumblers offer a unique way to do that. Some businesses choose to add tumblers to their product lineup, while others use them as promotional material, sending them to their clients and partners. When a customer takes a sip of their favorite beverage from the tumbler, they have a personal touchpoint with the logo, reminding them of the company that sent it to them.
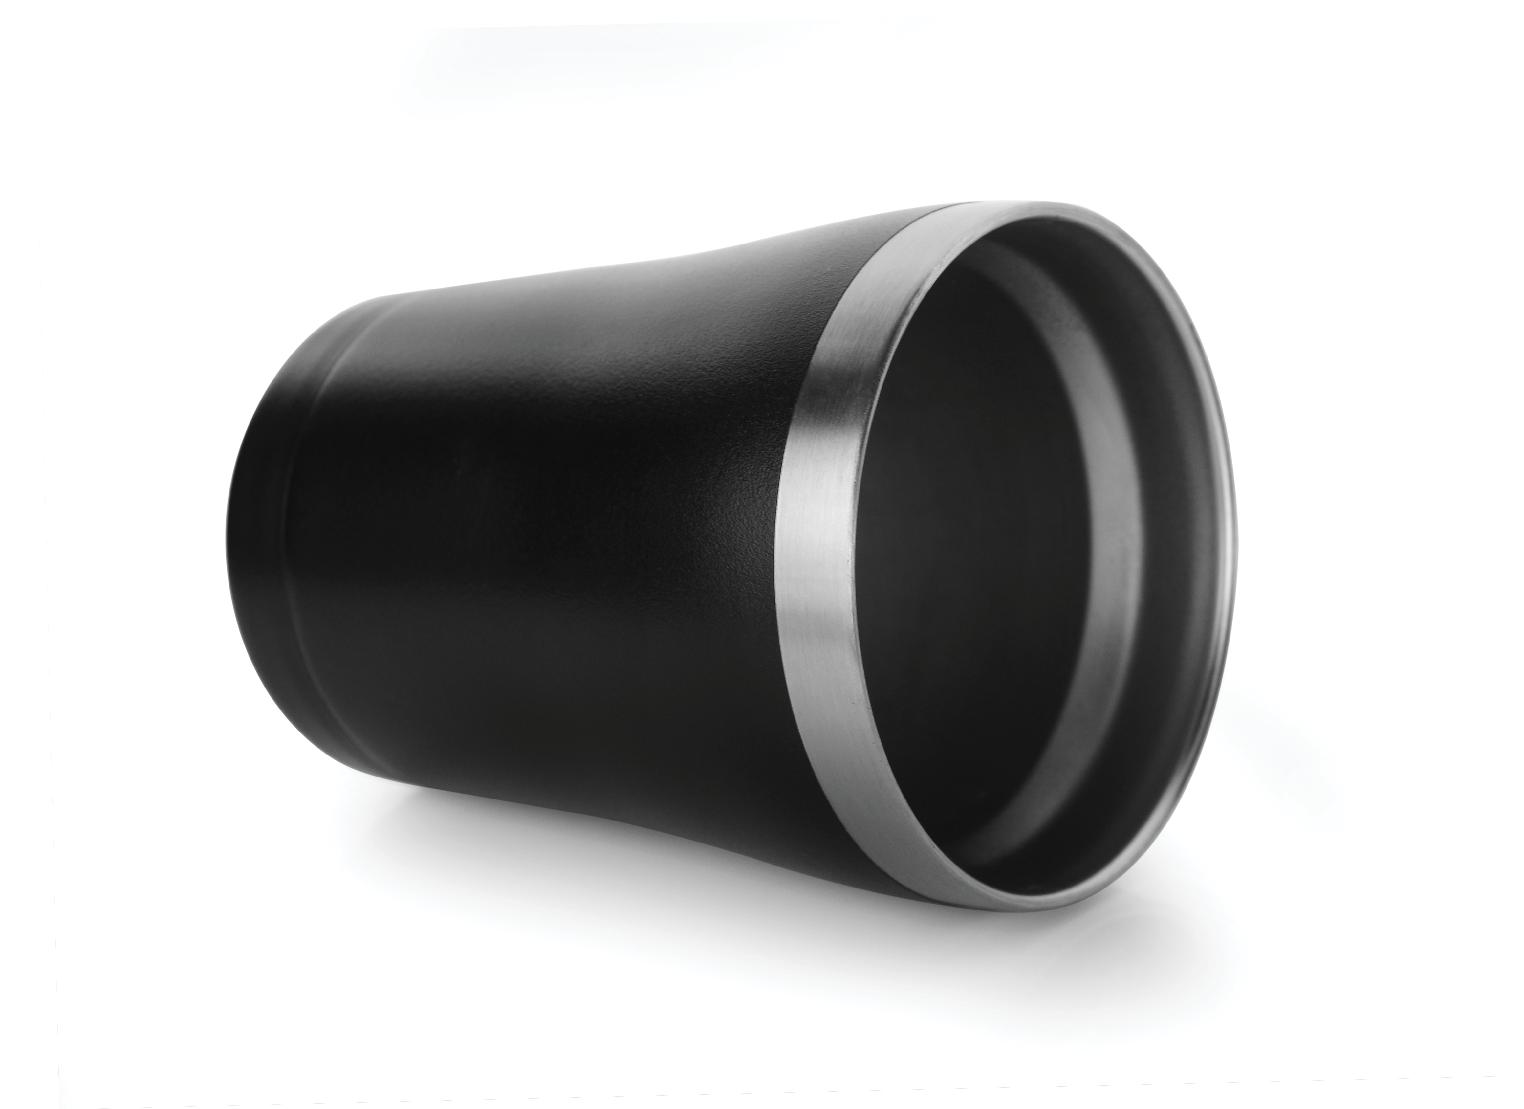

Selling to individuals on Etsy or your own storefront is another great way to build revenue. Who doesn’t love to express themselves with their favorite picture, logo, or catchphrase? Personalized tumblers make incredibly thoughtful gifts for family and loved ones, and sales of custom tumblers have been going through the roof.
This market dynamic offers an incredible opportunity for you to get in on the action. Some makers started by selling tumblers as a small side hustle that grew into a six- or seven-figure-ayear business in under a year.
Want a piece of the action? The market is big, in fact, it’s HUGE, growing, and just waiting for you to fill the massive demand.
Here are three simple steps you can take to get started and grow your side hustle into a consistent and meaningful revenue producer for you and your family.
If you are serious about leveling up your tumbler game, you will need the right tools for the job. For your laser, choose one with a CO2 tube; Fiber lasers are great for engraving on metal, but CO2 lasers will grant you the most flexibility to engrave on powder-coated tumblers. Also, make sure your laser has enough z-travel to do the items you want. For instance, some smaller machines can only fit a low-profile rotary attachment and will not be able to accommodate large-diameter


items such as dog bowls. Ask your laser manufacturer about z-depth and if your honeycomb can be removed to accommodate larger items.
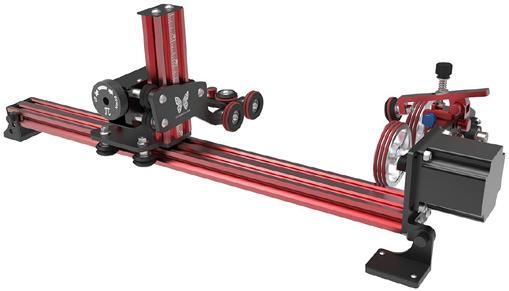
Once you are set on your laser, it’s time to choose your rotary attachment. The most important consideration is the type of work you want to be doing and the budget you have for the rotary. If you are going to engrave tumblers in scale and will need to accommodate intricate designs – precision and quality of build are important.
The second consideration is the style of rotary you will want to get. There are two main styles of rotaries, the Chuck and the Roller styles. There was an article in the March/April 23 issue of Laser Focused, and we have also written an article that is linked at the end of this story. In short, the Chuck rotary (or Jaw Chuck) has a metal clamping system, the same as you see on any drill – holding the drill bit secure. But in this case, it holds the cup or mug secure while rotating it around its axis so that your laser can engrave on it, line by line.
The roller, on the other hand, works on the principle of friction between the motorized wheel and the object you are engraving.

The beauty of the roller is its versatility and ease of use. The problem that can often arise, however, is you don’t have enough friction to perfectly rotate an object with unbalanced weight distribution, like a mug with a heavy handle. Also, if you are planning on doing full wraps (where the design wraps around the whole cup meeting on the back) then a chuck will be your best friend.
Another important consideration is compatibility. It is frustrating to buy a rotary only to later learn it is not compatible with your laser. Arg! Make sure your laser has a rotary port (or that you can use the Y-axis for a rotary). Make sure that the motor and plug of the rotary are compatible with your machine. Finally, make sure that the rotary fits in your machine – a real consideration for smaller lasers.
Also, consider the ROI (return on investment) that you will get on your rotary. We have seen customers make their cost back in one large order or in two weeks with micro-orders! Remember, this is an investment, and a premium tool will not only save you time and money on botched tumblers but will also expand your repertoire and let you offer more unique items. The more different and unique items you can offer, the more you are likely to carve out a sustainable niche for your business.
Finally, before you make a purchase, consider if you may require support and help getting started. At the bare minimum, make sure your rotary comes with a good user manual and has some good reviews from other makers.
Have you heard the top entrepreneurs’ advice? Always have a plan. It’s true, making a plan and sticking to it will help you reach success faster and with less frustration. Here are the three possible paths to choose from to maximize your chances of success with a rotary business. Pick one and GO!
Going after huge orders from corporations based on relationships
One way to bring in big numbers quickly is to score mega-orders from corporate buyers.
Going after large corporate orders can be an immensely profitable strategy if approached correctly. It is often referred to as “elephant hunting” because the potential rewards are significantmuch like the size of an elephant.
However, it’s also a strategy that requires considerable patience, persistence, and relationship-building skills. You need to understand the corporate culture and its specific needs. Customizing your product to meet these needs is crucial, and you should be prepared to offer comprehensive after-sales service as well. Additionally, networking is vital in this strategy; attending industry conferences, participating in business forums, and leveraging LinkedIn can be effective ways to build relationships. A single successful relationship with a corporation can lead to repeat business, making the time and effort invested worth it.
This is the preferred method of generating big dollars for about 15-20% of our customer base. Even though the right approach is crucial, one common way businesses get large orders is by just being at the right place at the right time. When you are at a gala or a business event, have a custom engraved tumbler with you and plenty of cards. You never know who is going to notice it and say, “Hey, I wish I had that for my organization.”
Running a shop on Etsy or similar for micro-orders
I don’t have to tell you how e-commerce has exploded in the past few years, and customized tumblers are no different. In fact, Mugs and Wine Tumblers are among the best-selling items on Etsy. The platform makes it simple to start selling your items and to collect information for customized orders.
This is generally a good strategy for managing micro-orders, especially for products like personalized tumblers and mugs. It’s essential to focus on building a strong brand, including a well-designed store, high-quality product photos, and compelling descriptions. Good customer service, including prompt responses to queries and quick, reliable shipping, is also key to success. It’s also worth noting that optimizing your product listings for SEO can drive more traffic to your store. To expand your reach even further, consider leveraging social media channels to promote your products.
We estimate around 50% of our customers sell micro-orders through their own storefront or through a large marketplace. Both have their advantages and drawbacks, but the main benefit of a marketplace is the large customer base they offer – you will get eyeballs on your product and can tweak prices accordingly.
This is the most surefire way to spin up business and FAST.
Establishing a strong presence in your local community can be a powerful way to build a customer base for your budding laser rotary business. This strategy involves reaching out to local small businesses that could benefit from your services, such
as restaurants needing custom-engraved glasses with their logo, retail shops wanting unique drinkware or real estate agencies looking for personalized gifts for clients.
Networking events and local business associations can be beneficial in identifying potential customers. Offering competitive pricing, excellent customer service, and fast turnaround times can set you apart from the competition. Finally, the simple strategy of driving down Main Street and handing out free logo-engraved tumblers to local businesses has historically resulted in 50-70% hit rates on return orders!
Here’s how to do this. Find a small business near you (a local real estate agent, ice cream shop, car wash, a woodworking shop, anything!) and take a picture of their logo. Trace the logo in Lightburn and make them a free tumbler as a sample. Try to match their style and character for an extra bonus. Then stroll in, ask for the owner, and hand them the tumbler with a compliment on their business. This will strike up a conversation, and before you know it, you will have multiple orders.
Now that you have a plan, you must execute and iterate on your product offering and strategy. Joining a community helps!
Your laser rotary journey holds immense potential for profitability and growth, but it requires strategy and action. From “elephant hunting” to e-commerce platforms, and local business engagement, each approach presents unique opportunities that can be aligned with your entrepreneurial goals and strengths.
However, always remember that while the journey to success may seem daunting, you are never alone. There’s a vast network of resources and communities out there ready to provide support











 By Alisha Pate, Pate Ranch Creations
The laser engraving industry offers a dazzling array of possibilities, from personalized gifts to industrial applications. As a laser engraving professional, you possess a unique skill set that deserves to be showcased to potential clients. A well-designed digital portfolio can be your beacon in the vast sea of creative artisans, allowing you to highlight your expertise, creativity, and the stunning results of your craft. In this blog, we will
explore the essential steps to create a compelling digital portfolio that not only showcases your laser engraving talents but also entices clients to choose you for their projects. Absolutely, having a readily accessible and up-to-date digital portfolio is essential for any professional, freelancer, or business owner. It allows you to showcase your skills, expertise, and previous work to potential clients or employers at a moment’s notice.
Aim to display a diverse range of laser engraving projects in your portfolio. This may include personalized items like engraved jewelry, custom-made wooden signs, glassware with intricate engravings, and even engraved metal plaques for industrial purposes. Diversifying your portfolio demonstrates your versatility and ability to cater to various client needs. Potential clients will be more likely to choose you if they see that you can handle a wide range of materials and products.

Give potential clients insights into your expertise and laser engraving techniques. Explain the different types of lasers you use, such as CO2 or fiber lasers, and how each one affects the final results. Showcase your mastery in raster engraving, vector cutting, and 3D engraving techniques. Providing this information not only educates clients but also instills confidence in your skills.

Visuals play a pivotal role in your portfolio. Invest in high-resolution images and, if possible, include videos to showcase the engraving process. Ensure that the lighting is adequate to capture the finer details of your work. Use before-and-after images to illustrate the transformation your laser engravings bring to various products.

Accompany each project with detailed descriptions that highlight the client’s requirements. Providing context helps potential clients understand the scope of your capabilities and problem-solving skills.

Testimonials from satisfied clients act as powerful testimonials to your skills. Reach out to past clients and request their feedback. Include these glowing testimonials in your portfolio to build trust and credibility with potential clients. When clients see positive experiences shared by others, they’ll be more inclined to trust you with their laser engraving needs.
PORTFOLIO Continued on P 20
Part of the Adobe Creative Cloud suite, this tool allows you to create a professional portfolio using customizable templates and integrates seamlessly with Adobe products.


Behance


Also owned by Adobe, Behance is a widely used platform for creative professionals to showcase their work. It’s a social media platform for creatives, but it also allows you to create an online portfolio.
This platform is specifically designed for artists, designers, and other creative professionals to build visually stunning portfolios.
WordPress
While initially known as a blogging platform, WordPress has evolved into a powerful content management system (CMS) that many professionals use for building portfolios.
Format
Format is designed specifically for photographers, designers, and other creatives, providing modern portfolio templates.
Crevado
Crevado offers an easyto-use portfolio builder with customizable templates for creatives.
Mozello

Mozello is a simple and free portfolio builder, with the option to upgrade to a premium version for additional features.

Organize your laser engraving portfolio in a logical and intuitive manner. Consider categorizing your projects based on materials, industries, or types of products. This arrangement allows potential clients to find relevant examples of your work more easily. Additionally, a well-structured portfolio exhibits professionalism and attention to detail.
One of the key selling points of laser engraving is the ability to create custom and personalized items. Dedicate a section of your portfolio to showcase unique projects you’ve completed based on specific client requests. Highlight the emotional appeal of personalized gifts and demonstrate how your engravings added sentimental value to the products.


In today’s mobile-centric world, ensure that your digital portfolio is fully responsive and mobile-friendly. Many clients might browse your work on their smartphones or tablets, so a seamless mobile experience is crucial for capturing their attention.
A captivating digital portfolio is your gateway to success in the laser engraving industry. By showcasing your diverse projects, explaining your techniques, and incorporating client testimonials, you’ll entice potential clients to choose you for their laser engraving needs. Remember, your portfolio is a dynamic tool that should be updated regularly to reflect your latest and most impressive work. With a well-crafted digital portfolio, you’ll illuminate your path to winning over clients and flourishing in the world of laser engraving.
In summary, a digital portfolio is highly beneficial in the laser industry due to its ability to visually showcase expertise, projects, and skills. It demonstrates professionalism, aids networking, and reaches a larger audience. By creating a digital portfolio for your business, it enhances your credibility and personal branding, making it a valuable tool for standing out and attracting opportunities within the industry.
Alisha Pate is a partner, along with her husband, James, in Pate Ranch Creations. You can find them on Facebook and Instagram.
and guidance. From fellow entrepreneurs and business forums to industry-specific groups and more, don’t hesitate to reach out and connect with others. After all, entrepreneurship isn’t just about creating a profitable business; it’s about being part of a vibrant, supportive community where collaboration and shared success are just as valued as individual achievements.
Whether you’re just starting or looking to scale your operations, remain consistent in your efforts and stay open to new opportunities. Never lose sight of your passion and the reasons you ventured into this business, and be patient with your progress. The world of entrepreneurship is a marathon, not a sprint. Remember, success doesn’t come overnight. It’s the culmination of repeated effort, learning from failures, and a relentless pursuit of your goals.
There is no better time to go ahead and execute your plans. Embrace the challenges and cherish the victories. Don’t fret about a messed-up tumbler but embrace your mistake and use it to improve! Let your laser rotary business be the canvas where you paint your entrepreneurial story. And throughout this journey, remember, you’re not alone. Each step you take brings you closer to your goals, with an entire community cheering you on. Keep forging ahead, keep innovating, and above all else, keep creating.
Stan Altshuller is a partner in LensDigital. You can reach out to him at Stan@lensdigital.com. Read more about the Pros and Cons of both rotary styles in detail here, and check out the dedicated Blog for finding business at PiBurn Gigs.
Did you know that acrylic can be bent and shaped into different things?! Read on and discover different ways to bend acrylic. And no worries, we will give you a link to a file that you can make to get your creativity flowing!
To start with you will need a heat gun, heat press or some way to heat the acrylic up. I have used different things to heat it with but find that the easiest and cheapest is the heat gun. I don’t have a favorite brand. As long as it heats up acrylic it will work well.

You will also want different things to bend the heated acrylic on. For this you can use several different items from around the house or from your workshop. I like using things like glass cups, bottles, molds for other things, pencils or even wood! Experiment using different things to see how it makes the acrylic look.
It is also important to have a pair of heat resistant gloves because the acrylic gets really hot. Needle nose pliers are very helpful for shaping the acrylic.
Here is how I make a lotus candle holder by cutting and bending acrylic.
To start I cut out the different layer shapes of the flowers on my laser. I use the heat press to heat up the large Lilly pad pieces first because it is faster, but you can also do this with a heat gun. Once they are pliable, drape them over a bumpy mold. You want to just give them a tiny bit of texture.
For the next pieces of the candle holder, the flower parts, use a small parfait glass that is the right size for the hole you want in the middle to
hold a tea candle. Place the flower acrylic piece on top of the glass and heat it up using the heat gun. This takes about 1 minute to become totally pliable. Then push the acrylic down over the top of the glass.
I found that also using the bottom of the glass and bending the acrylic up helped to keep the space for the candle just right. Continue this until all the flower pieces are bent the way you would like them to be.
The acrylic can get really hot so make sure you use heat resistant gloves to bend and hold it!

After all the pieces are bent use glue to hold it all together. Weld-on acrylic adhesive gel is perfect for this project since you are gluing acrylic to acrylic . It makes a great seal when adhering acrylic to acrylic.
That is all there is too it! You now have a great Lotus Flower Candle Holder! Flameless candles work great for these kind of candle holders.

Is also known as polymethyl methacrylate (PMMA), is versatile and renowned for its exceptional ability to be bent with the application of heat. This unique characteristic is primarily attributed to its low glass transition temperature, typically around 105°C to 160°C (221°F to 320°F), which can be easily achieved using common heat sources like a heat gun or a strip heater. When acrylic is heated its molecular structure becomes more pliable, allowing it to be molded into desired shapes without losing its inherent strength and transparency. Once the desired bend is achieved, the acrylic can be rapidly cooled to lock it into the new shape. Acrylic is an ideal material for laser projects, enabling hobbyists and professionals alike to create intricate and captivating designs with relative ease and precision.
Kris Mayberry is an owner of Craft Closet and loves helping with laser material questions. You can reach her at info@craftcloset.com.
Candle
Holder you can get the file free: Click Here. Just use this code at checkout: LOTUS
Make sure you tag us on social media @craftclosetsupply when you make it, so that we can see!
In the last issue, we talked about how powerful the Etsy platform is for small business owners. However, in a vast sea of creativity, how can a seller ensure their products receive the attention they deserve? The answer lies in mastering Etsy SEO, a powerful tool for enhancing product visibility and driving sales. Guided by insights from the Etsy Seller Handbook, we will explore Etsy SEO and how it can be harnessed for success.


Simply, Search Engine Optimization (SEO) is a strategy aimed at improving a website’s visibility in search engine results. But what does that even mean? On Etsy, basically, it’s how buyers find you on the Etsy platform. Etsy is like a large search engine! So, when a shopper searches for a product on Etsy, the search algorithm works to match their query with relevant listings. Optimizing product listings using keywords, tags, and other elements helps sellers get a prime spot on the search results page.

Keywords are the most important parts of Etsy SEO. They are the words and phrases that potential buyers type into the search bar when looking for specific items. The Etsy Seller Handbook suggests thorough keyword research as the starting point. Sellers should brainstorm a list of potential keywords related to their product, consider synonyms and variations, and evaluate their popularity. There are third-party tools out there, but the best resource is the Etsy Search bar – and it’s FREE!
Title: The title holds the most weight in Etsy’s search algorithm. It’s crucial to include the most important keywords here while maintaining a readable and engaging title. The best titles include multi-word phrases. So not just the words ‘wall art”, as it has millions of results on Etsy, but “baby room wall art woodland” has way fewer results and helps narrow down specifically what kind of wall art and where it goes!
• Fill the entire space! We get 144 characters, so use them all.
• Use multi-word phrases (no single words)
• No need to include plurals and singles of a word (like book and books)
• Use proper spelling
• Use proper terms for where you live (so if its “mum” in your country, use that. Etsy will interchange “Mum” with “mom” for US buyers)
• Include phrases that describe:
– What the item is
– Who is it for
– When is it for, why would someone buy it
Type your keywords into the search bar and look for ones that “auto-populate”, meaning they pop up down below as you type. Those are the most popular keywords that buyers are using!
Tags: Tags are additional keywords that reinforce a listing’s relevance. Etsy allows sellers to input up to 13 tags per listing. It’s recommended to use all available tags, focusing on both broad and specific terms. According to the handbook, sellers get the best match when titles and tags match. A best practice is to copy your Etsy title and paste it into tags, splitting longer phrases up. So, “nursery wall art woodland” becomes two tags: “nursery wall” and “art woodland” and it’s ok if those phrases don’t make sense as tags.

Product Descriptions: While keywords should naturally appear in the description, the emphasis should be on providing valuable information to potential buyers. Including keywords in bullet points or paragraphs helps improve readability and searchability. The most important keywords should appear at the top of the description.
Attributes: Attributes such as size, color, and material also play a role in search results. These should align with the product and the terms customers might use to find it.
Pricing and Shipping Optimization: Etsy’s algorithm also considers pricing and shipping factors. Competitive pricing and transparent shipping costs can positively influence a listing’s visibility. The Etsy Seller Handbook recommends factoring in all costs when determining prices to avoid surprises for both the seller and the buyer. Offering free shipping or providing accurate shipping times can further enhance a listing’s appeal. A good tip is if you’re not sure if you should offer free or paid shipping, try one way for a bit and then try the other way. See if one brings more sales!
Measuring and Adapting: Regularly monitoring the performance of listings is crucial. Etsy’s analytics provide insights into how customers are finding and interacting with products. Monitoring metrics such as views, favorites, and conversion rates can offer valuable feedback on the effectiveness of the SEO strategy. Based on these insights, sellers can adapt their approach and refine their keyword choices.
Wow, that’s a lot to consider. How do I manage everything? Etsy’s algorithms and best practices evolve over time. Sellers must stay updated on changes to the platform’s search algorithm and SEO guidelines. The Etsy Seller Handbook is a great resource, and its insights serve as a reliable guide for navigating the intricate world of Etsy SEO. However, you’ll get the most experience by trial and error! Make sure to join the Etsy Underachiev-

1-2 sentences at top with best keywords Bullets that share details. Size, material, weight, etc.
Who is it for?
Occasions, people, etc.
Social Media
Back link to your main shop
ers Group on Facebook to stay up to date on the algorithm! We give feedback and offer tips and tricks for Etsy Sellers every day.
Etsy SEO is a potent tool that empowers sellers to get in front of buyers with unique creations. By strategically implementing keywords and staying informed about Etsy’s guidelines, sellers can maximize their chances of reaching the right audience.
In the third installment of this Etsy series, appearing in the November/December issue, we’ll delve into product photography and how to shine on the platform.
Jessica Trueblood is an Etsy coach and strategist. She is the owner of Shop Review Crew, founder of the Etsy Underachievers group on Facebook, which provides free resources to Etsy sellers. She teaches using only Etsy best practices to ensure her students get the best information possible! She lives in Colorado with her husband, son and her Glowforge, Maxine. You can connect with her at www.shopreviewcrew.com
their wares for the upcoming holidays at craft shows
and markets. When organizing events or exhibitions, one of the most important factors to consider is
ByNickiPiland,TheLaserChickIt’s that time of year when many laser creators sell
the appeal of your display. Exhibits that are visu-
ally appealing and eye-catching are more likely to attract customers and leave a lasting impression.

Onekey aspect to remember when setting up your event displays is to keep them at eye level. In this article, we will explore the importance of maintaining eye-level exhibits and provide some tips to enhance the appeal of your displays.
The position of your event displays play a crucial role in grabbing the attention of potential customers. When people walk around an event or exhibition, they usually skim through the area at eye level. Placing your displays within this line of sight ensures that they are easily noticeable, increasing the chances of engagement and interaction.

Keeping your displays at eye level ensures maximum visibility. When your exhibits are positioned too high or too low, they may go unnoticed or fail to grab the attention of passersby. Placing them at eye level provides an optimal viewing angle, allowing people to easily see and interact with your displays.
When displays are too high, customers might strain their necks or stand on tiptoes to get a better look. Conversely, if the displays are too low, customers might have to crouch or bend down, causing discomfort. Keeping your pieces at eye level creates a comfortable and convenient experience for your customers, encouraging more prolonged engagement and potentially generating more sales.
1. Understand Your Audience: Consider the demographics of your target audience. Determine the average height of your potential customers and adjust your displays accordingly. This will help ensure that your exhibits are easily viewable to a majority of attendees.
2. Use Adjustable Stands or Shelving: Utilize adjustable stands or shelving systems that allow you to modify the height of your displays easily. This flexibility allows you to accommodate various audience heights and preferences.
3. Create Varied Heights: While maintaining eye level is crucial, you can also experiment with different heights within the eye level range. Creating varied heights adds visual interest and makes your displays stand out from the crowd.
4. Optimize Signage Placement: Make sure any important signs or messages are placed at eye level. This includes your company
name, logo, and key information you want customers to see. By ensuring that these elements are easily visible, you increase the chances of effectively communicating your brand and message.

5. Regularly Monitor and Adjust: During the event or exhibition, periodically monitor your displays and make any necessary adjustments. This could include repositioning items that have shifted, ensuring signage remains intact, or making modifications based on customer feedback. By staying vigilant, you can maintain optimal eye-level displays throughout the duration of your event.
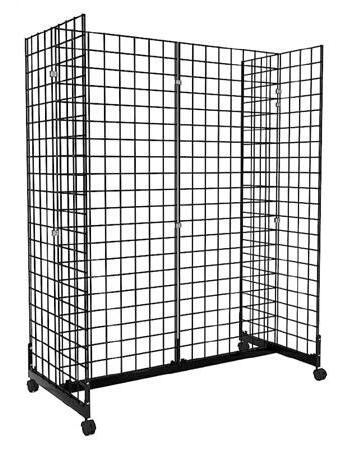
In conclusion, maintaining eye-level displays is essential for maximizing the appeal and success of your event or exhibition. Keeping your exhibits in this prime viewing area increases visibility, accessibility, and convenience for your customers.
Remember to understand your audience, utilize adjustable stands, create varied heights, optimize signage placement, and regularly monitor and adjust. With these tips, you can create captivating displays that leave a lasting impression on your customers and elevate the overall experience of your event.


In future issues, we will dive into the criteria for choosing what shows to participate in and how to make the most of your time in front of attendees, making them customers for life.
Nicki Piland, also known as The Laser Chick, is a graphic designer and laser community influencer. She shares her knowledge and experiences with others through various platforms, including social media, workshops, and tutorials. You can follow her here. https://linktr.ee/thelaserchick
Having the right equipment before diving in is a necessity.


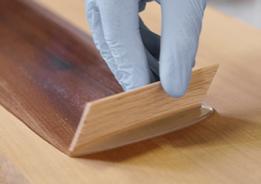

 By Robin Roberts, Robin’s BirdBrain Designs
How hard can it be to sand something? Agreed, but there are still basic practices you need to know to sand correctly. The same goes for staining and finishing. Often it’s assumed that everyone knows the fundamental rules. The truth is that while non-woodworking people may have a general idea about what to do, they need help. At least I did! So I thought you might too. So grab your beverage of choice, and let’s explore the basic dos, don’ts, and expert tips for the sanding, oiling, and staining processes.
The Foundation of a Smooth Finish
Sanding is the first and most critical step in wood finishing. It prepares the surface for subsequent treatments, ensuring a smooth and even result. Start with coarse-grit sandpaper (around 80 or 100 grit) to remove rough surfaces, milling marks, or imperfections. Gradually progress to finer grits (150, 220, and even higher) to achieve a glass-like finish. Always sand in the direction of the wood grain to avoid unsightly scratches.
Specifically for laser work, sanding after cutting or engraving may also be necessary, as you may notice some rough edges or burn marks on the wood. Sanding the surface with fine-grit sandpaper (220 grit +) can help smoothen the edges and remove residual burn marks.
Do’s:
• Invest in high-quality sandpaper to minimize tearing and ensure longevity.
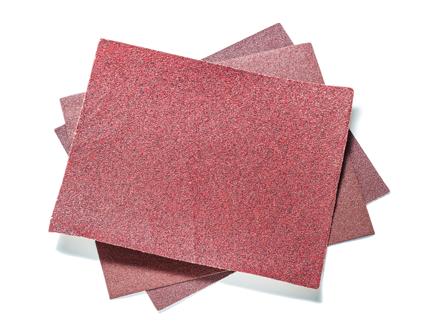
• Use a sanding block or an orbital sander for even pressure and consistent results.
• Clean the wood thoroughly after each sanding step to remove dust and debris.
Don’ts:
• Avoid sanding with too fine grit of sandpaper too soon, as it can clog the wood’s pores and inhibit stain absorption.
• Don’t skip grits during sanding; each step is essential for achieving a professional finish. Remember, the lower the number, the coarser the sandpaper.
Wood staining is an excellent way to enhance the natural beauty of the wood while adding depth and color to your project. Stains come in many colors, not just wood tones. You can also add dyes to existing stains to get the color you want for the project you are working on. Before applying the stain, always test it on a small, inconspicuous area or a scrap piece of the same wood to ensure it achieves the desired color.
Do’s:
• Consider using a wood conditioner for more even absorption of the stain.
• Stir (don’t shake) the stain thoroughly before application to achieve consistent color.

• Wipe the surface with a tack cloth to remove any dust before staining.
• Apply the stain in the direction of the wood grain for an even finish.
Don’ts:
• Don’t let the stain sit on the surface for too long, as it may result in uneven coloring or blotching.
• Avoid using too much stain; excess stain will not improve the color and may cause the finish to dry unevenly.

Enhancing Wood’s Natural Beauty
Oiling is a popular wood finishing method that enhances the wood’s natural beauty and provides a protective layer against moisture and wear.
Do’s:
• Choose the correct type of wood oil based on your project’s needs; popular options include linseed, tung, and Danish oil.
• Apply a thin coat of oil with a clean cloth, brush, or foam applicator, following the wood grain.
• Allow the oil to soak into the wood for a few minutes before wiping off any excess with a clean cloth.
Don’ts:
• Don’t apply too much oil; excess oil will result in a sticky surface that won’t dry properly.
• Avoid using a synthetic brush for oil application, as it may leave unsightly brush marks.
Adding Protection and Sheen
Varnishing is an excellent way to add a protective layer to your wood project while enhancing its natural color and providing a beautiful sheen.


There it is - the fundamentals of wood preparation in a nutshell. Next time you consider starting from scratch, you will have a clear idea of the work and time it takes to prepare your woodbefore you ever begin to laser. If you read this and decide it is too much work to do - you’re in luck! More and more material suppliers are now giving you prefinished options of a wide variety of woods. Either way, you now have a deeper knowledge of wood and how to show off its natural beauty.
Do’s:
• Choose the correct type of varnish based on the intended use of your project (polyurethane, shellac, lacquer, etc.).

• Apply thin and even coats, allowing each coat to dry before applying the next.
• Sand lightly between coats to achieve a smooth and flawless finish.
• Oil-based products take longer to dry and leave wood a warmer tone. Water-based products dry quickly and, although they can be milky upon application, dry absolutely clear.
Don’ts:
• Don’t shake the varnish can vigorously; it may introduce air bubbles into the liquid, leading to an uneven application.
• Avoid applying thick coats of varnish.
I always wondered why it was ok to use an orbital sander when you are supposed to sand with the wood grain. Here’s the answer! An orbital sander moves the sandpaper in an orbital or circular motion while simultaneously rotating it. This combination of movements creates a random pattern of sanding marks on the wood surface. While the sanding motion itself might not follow the wood grain linearly, the random pattern of sanding marks created by the orbital sander helps minimize the visibility of scratches or sanding lines that might occur if you were sanding directly against the grain.
As a small business owner, you invest a significant amount of time, energy, and effort into your products and services. Naturally, you want to protect your business. This two-part series provides an overview of the main types of intellectual property (IP) your business could have, and discusses some best practices to avoid infringing on the IP rights of others. In the second part, we’ll discuss trade secrets and how you can protect the competitive advantage your trade secrets give you.


Most businesses own three types of property: real property (office building and parking lot), personal property (office equipment, computers, furniture, inventory), and intellectual property (information, technologies, formulas, brands, logos, designs, photos, and music).
Real and personal property are rights in tangible things – the right to physical possession of a building (real property) or a book (personal property). IP rights are rights in intangible “things” – the design of a building or the expressive content in a book.

The four main types of IP are patents (protecting rights in useful inventions and discoveries, like machines and processes), copyrights (protecting expressive works, like art, music, dance, and literature), trademarks (protecting brands, logos, and package designs), and trade secrets (protecting commercially valuable confidential information, like business and financial plans, formulas, recipes, and customer information). We’ll discuss trade secrets in the second part of this series, so tuck it away for now while we focus on the other types of IP.
Infringement occurs when a person uses another person’s IP without permission. The infringement doesn’t need to be an exact copy, or intentional. When you infringe on someone else’s IP, the consequences can be severe, and you may have to pay the IP owner damages as well as attorney’s fees.
Inventors obtain patents for their new inventions. Patents grant exclusive rights to the inventor, and companies often seek patents to keep competitors from producing “copycat” versions of their inventions. I will leave discussion of patents to the experts. If you think you have a novel invention you want to protect, here’s the most important piece of advice I can share: DON’T TELL ANYONE ABOUT IT. Protect the secrecy of your invention by consulting with a patent attorney FIRST, and avoid any type of disclosure until you’ve secured legal protection for your invention.
A trademark indicates which company is the source of a product, and distinguish the trademarked items from those made by others. Trademarks can include names (GEORGE FOREMAN ® grills), brands (COKE® soft drinks), designs and symbols (Nike’s “Swoosh” design), and slogans (De Beers’ slogan A DIAMOND IS FOREVER ®). They can also take the form of colors (Owens-Corning’s pink fiberglass insulation), sound (NBC Universal Media’s chimes), IP
scents (the smell of Play-Doh), and package, product, or store design (typically known as “trade dress,” the shape of a COKE® bottle or the interior design of a restaurant).
Trademarks are protected through state or federal law. Federal protections apply only to federally registered trademarks, which use the ® symbol, while unregistered or state marks use ™. Federal trademark protection lasts for 10 years and can be renewed indefinitely as long as the mark remains active in commerce.
Before using a mark, follow these steps to avoid infringing on someone else’s protected material:
• Conduct an internet search to find businesses using the same name or slogan.
• Check state and federal trademark registers, paying close attention to the states where you operate.
• Search the USPTO database (https://www. uspto.gov/trademarks/search) for federally protected marks. Keep in mind that the database will only display exact matches.
• Use the likelihood of confusion checklist ( https://www.uspto.gov/trademarks/search/ likelihood-confusion) to assess the potential for infringement. Even if not identical, a mark is similar if it sounds or looks like another mark for the same goods or services. For example, if “Blue Bell” is federally trademarked for ice cream, another ice cream company named “Blew Bell” could be considered trademark infringement. However, a referee whistle company could use the name “Blew Bell” without infringing on Blue Bell’s rights.
Remember: You don’t need to exactly copy a trademark to infringe on it! Infringement can be remote, so it’s essential to avoid using anything resembling another business’s trademark without permission. This includes team logos and mascots, corporate logos and designs, famous cartoon characters, and
anything similar to protected and well-recognized brands. IP is valuable, and companies invest millions of dollars to develop distinctive brands. They have an obligation to protect their IP, and they will vigorously do so! Don’t make yourself a target.
Copyright protects an author’s original works in tangible mediums, such as art, novels, motion pictures, screenplays, sound recordings, and even social media content. This protection happens automatically; registration is not required to establish federal copyright ownership. The “author” may be one or more person. When a work is specially ordered or commissioned by another person, then it’s considered a “work made for hire” and the person who commissions the work is the owner of the copyright. For example, if you hire a graphic designer to develop a social media campaign for your business, the copyright in the layout, text, and design belongs to you.
Copyright infringement is rarely unintentional and is commonly known as plagiarism. Copying and pasting text from a website you do not own to your own website, using someone else’s photos, using music in a promotional video – these are all examples of copyright infringement. Some exceptions exist, such as free-use websites like Creative Commons (https://creativecommons.org/ ), and the Getty Research Institute (https://www.getty. edu/research/ ).
The second part of this series will focus on trade secrets: what they are and how you can protect them. We’re also hosting a live Q&A session (Sept. 14, 2:00 PM (ET), 1:00 PM (CT), 11:00 AM (PT) for anyone who wants to learn more about the interesting and complex topic of intellectual property protections.
CLICK HERE TO REGISTER .




The process of photo editing can seem daunting, but fear not; it isn’t as difficult as it may seem. With a little testing and a little patience, you will be a photo engraving pro in no time!

There are a handful of programs that work great, but my personal favorite is GIMP. What is GIMP, and why should I use it? GIMP is a free and open-source raster graphics editor used for image manipulation and image editing. It is easy to navigate and is a great tool whether you are a beginner or a pro! Best part; it’s free.


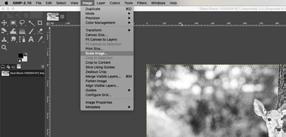


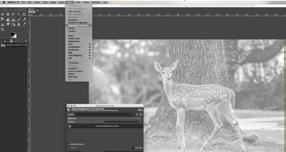

First step is to be sure to use an image that is clear. Remember, the better the quality, the better the outcome! You may come across a request to engrave a photo that is of poor quality and some photos just won’t work, so it is best to ask your client for multiple images in order to provide them the best result. A great tool to give a photo a bit of enhancing is the Remini app. Web and phone versions are available for download.
Next step is to choose your material. The lighter the wood species, the better the engrave. Some of my favorites are maple and birch. Clear acrylic, slate tile, and glass produce a great end result as well.
Once you’ve downloaded the GIMP program, you’ll want to open and load the image of your choice. The first step will be to convert to gray-
scale which can be found on the “image tab”. Next step is where the work comes in. From the “colors” tab, choose “Brightness-Contrast”; this is where you’ll want to produce a light-muted grayscale image. My sweet spot is 110 on brightness and 3 on contrast, but you may have to test this a bit to get your preferred look. Start with my settings and go from there. Next, we will want to head over to the Filters tab and choose “Sharpen (Unsharp Mask)”. Again, my sweet spot is radius to 1.00 and amount at 1.0 while keeping the threshold at 0. Once you input these settings, you’ll see how much more detail your image has. This allows your laser to create defined areas within the image.

The last step in the editing process is to apply a newsprint filter. This can be found in the “Filters” tab. Make sure “black on white is highlighted within the “channels section” and “circle” is highlighted within the “pattern” section. Then bring period to 3, angle to 22 and oversample to 16. After testing, if you feel as though these are your target settings, you can save these settings by clicking the plus sign to the right of “Presets”.
Remember, if you are using acrylic or glass, you’ll want to invert your image before exporting.


Once your image is ready, you can use the scale section to scale to your desired size. You can now export your image. The best file type to use is a PNG.

If you are uploading your image for use on a Glowforge, you will need to use the following settings: 1000/90/270 LPI. With this editing process, we will choose “Vary Power” instead of “Convert to Dots”. At the top of the settings menu, click on the + sign to save these settings for future use.
If you are using Lightburn, be sure to check off the “Passthrough” option to save editing settings. While most Glowforge machines have the same general settings in terms of engraving, other, larger

C02’s and diodes will need more testing to learn what settings your machine needs in order to produce the best engrave.
Research your unit, and complete multiple test runs until you’ve found the best results. Keep in mind, some units may need specific lenses in order to produce finer detail.

If you’d like to take your photo game to the next level, consider adding some color to your engrave! Choose some areas that you would like to highlight and get creative! Some may laugh, but my favorite way to add some pizzazz to an engrave is to use Crayola colored pencils! I like to highlight areas such as eyes and hair on portraits and grass and skies on landscape photos. Watercolor is also a great option. Just remember, less is more!
Photo engraving is a great addition to any personalized laser service and once you get the hang of it, it is an easy way to add income to your business.

MJ Torres is a laser owner, owner of Craft and Carry Custom, LLC and Vice President of Toms River Artist Community. She has taught the editing process via The Next Level Laser Conference as well as across multiple social media channels. She is always happy to help with your questions! You can reach her at hello@craftandcarrycustom.com.


 By Federico Tobon Cuttle.xyz
 By Amy Coe Snark Heart


 By Federico Tobon , Cuttle.xyz
Materials
• Plywood (1/8 in or 3mm)
• Nice paper for printing the picture, e.g. 32 lb premium paper
• 3M Spray Adhesive
• Large masking tape
• Krylon Clear Craft Finish (optional)
This tutorial walks you through making a laser cut plywood jigsaw puzzle with any picture or photo.
We’ll use a free Cuttle template that lets you upload your own image and customize the size and number of pieces.
It will automatically generate the SVG cut file for your laser and a correctly sized PDF for printing on your inkjet or laser printer.
There’s also a YouTube version of this tutorial here.
Go to the Cuttle Jigsaw Puzzle template. (You can click here.)
Download the files
1. Upload your picture by clicking the image box (top right).

2. Select the number of columns and rows you would like in the puzzle.
3. Optionally change the piece size. The default of 1 inch is a typical size for commercial puzzles.
4. Note the green box at the bottom which shows the dimensions of your final puzzle.
Now scroll down and download the following 3 files:
1. **Picture Print**: this is a properly scaled PDF of the picture
2. **Blank Cut**: an SVG for laser cutting the base piece
3. **Jigsaw Puzzle Cut**: an SVG for cutting all the puzzle pieces

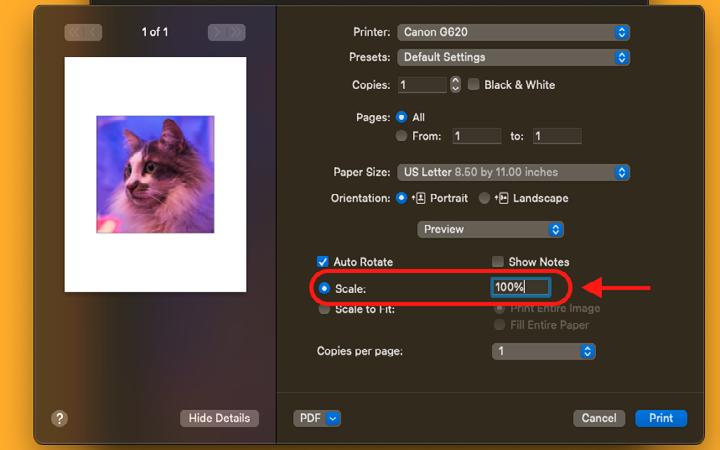
When printing the picture make sure it is scaled to **100%** so it matches the size of the **blank**
When you place the uncut sheet of plywood on the laser cutter make sure it stays in place by taping it or pinning it down. You want to cut the blank and have a way to place it back on the same spot after gluing the picture on it.
This step will vary depending on your laser cutter and software workflow.
If you are using a Glowforge you can place the blank cut on the interface and take note of the position, this way it can be placed back in the same position after gluing the picture.

Take the blank out of the laser cutter and glue the picture on it.
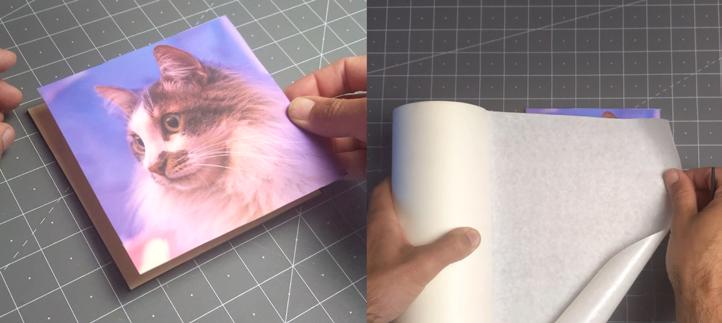
If your plywood has a finish, it’s a good idea to sand it lightly so the glue will stick to it.
Follow the directions on your spray adhesive, and make sure to work outdoors or in a well ventilated place.
After gluing the picture cover it with masking tape.
Place the prepared blank back on the laser cutter bed, then upload the final **Jigsaw Puzzle Cut** SVG


