
5 minute read
Fill a Wall With Art You Make Yourself! It’s easier

from 3990

1 2 3
4 5
Advertisement
6
7 8 9 gallery wall key
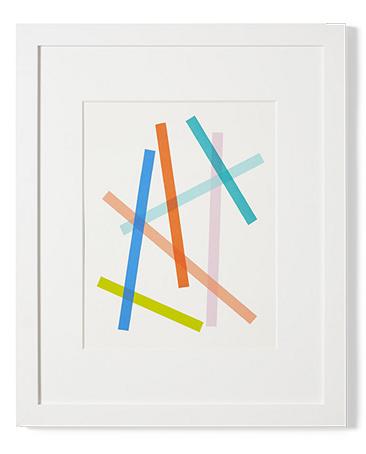
Display your DIY masterpieces in the arrangement shown above to create the ultimate floor-to-ceiling collection. 1 washi tape lines
1. Cut pieces of washi tape in varying lengths. 2. Stick each piece of tape to white heavyweight mixed-media paper at an angle, overlapping some of the pieces.
WASHI TAPE Masking tape in assorted colors, $4 per roll, mt-tape.us
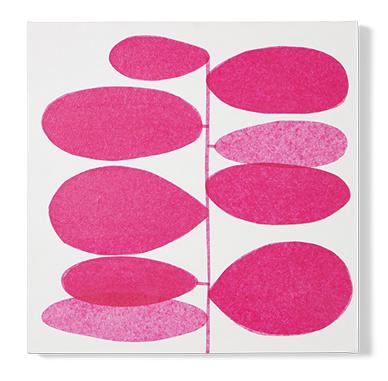
2 abstract leaves
1. Cut rounded leaf shapes out of tissue paper (for opaque leaves, use two pieces of paper; for sheer leaves, use one). Cut out a stem and a few mini stems. 2. Adhere the tissue paper to a pre-stretched canvas using decoupage medium and a foam brush. 3. Coat the entire canvas with a thin layer of decoupage medium. Let dry.
TISSUE PAPER 20" x 30" paper in fuchsia, $3 for a set of 8 sheets, papersource.com DECOUPAGE MEDIUM Martha Stewart Crafts decoupage in gloss finish, $10 for 8 ounces, michaels.com
5 geometric watercolor

1. Using a pencil, lightly sketch a design of pentagons and hexagons on a piece of white mixed-media paper. 2. Tape off a third of the shapes—they shouldn’t be ones that touch each other— with narrow delicate-surface painter’s tape. Fill in the shapes with watercolor paints. Remove the tape while the paint is still slightly wet, and let dry. 3. Repeat step 2 two more times, taping off another third of the shapes each time.
WATERCOLOR PAINT Angora 36-pan watercolor set, $29, amazon.com
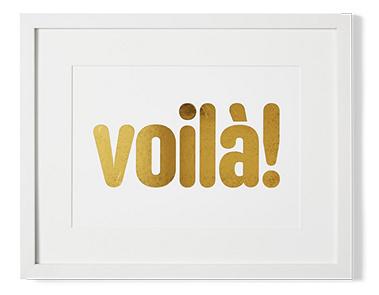
6 gold word
1. Type a word you like, and print it onto white copy paper using a laser printer (if you don’t have one, a copy shop can print it for you). 2. Apply reactive gold foil over the letters, following the package instructions (the instructions require a laminator; if you don’t have one, you can use one at a copy shop).
FOIL Heidi Swapp Minc 12 1/4" x 120" reactive foil roll in gold, $10, michaels.com

7 splatters and stripes
1. Tape off the edges of two pre-stretched canvases. 2. To make the splatters, pour high-flow acrylic paint in a bowl. Put on a rubber glove, then dip your fingers into the paint, and flick the paint onto one canvas. Let dry. 3. To make the stripes, dip a dry paintbrush into high-flow acrylic paint, and brush it across the other canvas. Let dry.
HIGH-FLOW ACRYLIC PAINT Golden high-flow acrylic in carbon black, $15 for 4 ounces, aifriedman.com
FOR ADDITIONAL SHOPPING SOURCES, SEE PAGE 112.
CRAFTING BY KYLIE FIFE
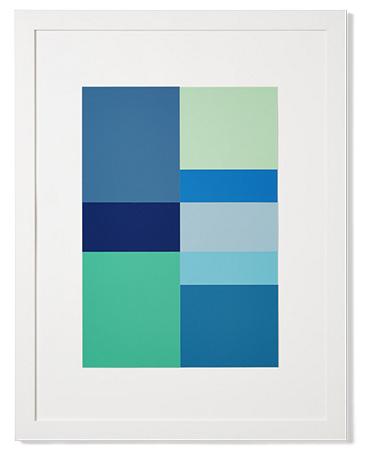
3 color blocking
1. Using a pencil, draw a rectangle in the center of a piece of white heavyweight mixed-media paper. 2. Cut colored paper into enough small rectangles to fill the large rectangle. Adhere the colored rectangles to the white paper with a glue stick.
COLORED PAPER Color-Aid 4 1/2" x 6" paper, $59.50 for a set of 220 sheets, dickblick.com

8 shibori-style print
1. Cut a piece of indigo-color rice paper into a square. Affix a stencil to the paper with repositionable spray mount. 2. Using a pouncer, fill in the stencil with crafts paint. Remove the stencil while the paint is still slightly wet, and let dry.
STENCIL Resonance wall art stencil, $40, cuttingedge stencils.com RICE PAPER 25" x 37" Thai unryu paper in blue, $3.50, mulberrypaperandmore.com CRAFTS PAINT Wedding Cake by Martha Stewart Crafts
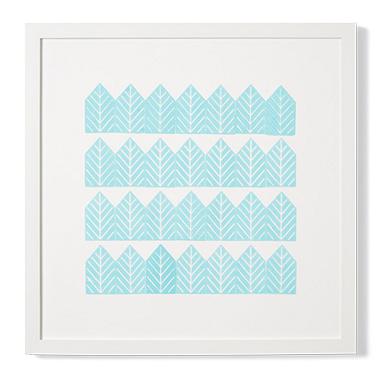
4 graphic stamps
1. Use a pouncer to coat a stamp with crafts paint. Stamp four rows of your design in the center of a piece of white printmaking paper. Let dry.
STAMP 1 1/2" x 2 1/2" leaf-pattern rubber stamp, $18, creatiate.etsy.com CRAFTS PAINT Pool by Martha Stewart Crafts

9 marbled paper
1. Cut white printmaking paper into three pieces. 2. Fill a large rectangular plastic container halfway with water, and let it sit until it reaches room temperature. Pour several drops of two or three colors of nail polish into the water. Immediately drag a toothpick through the polishes to marbleize them. 3. Wearing rubber gloves, place a piece of the cut paper flat on the marbled water, and quickly pick it up. Let it dry flat. 4. Repeat steps 2 and 3 with the other two pieces of paper. 5. Have a mat cut with three windows. Trim the papers to fit, and tape them behind the mat.
NAIL POLISH Maybelline New York Color Show Nail Lacquer in assorted colors, $4 each, maybelline.com
Hang a g reat gallery wall
Emily Henderson, HGTV designer and author
of the new book Styled,
shares her best tricks.
•Anchor your wall with at least one large piece that commands attention. Save the smaller, bitsier pieces to fill in the space around it. • Keep your rivers (the spaces between frames) even. They don’t have to be exactly the same, just not too close together—which makes the art look crammed—or too far apart—which makes it look random. About two inches between frames is a no-fail measurement. • Go for variety in the art size, medium, and orientation (vertical, horizontal, and square). • Keep a consistent color palette, but don’t get obsessive about it. It’s OK to introduce small hits of other colors so your collection doesn’t look uptight. • Not a fan of random holes in your wall? Before hanging anything, trace the frames on paper. Cut them out and tape them up so you know where to put the nails. FYI: Many frames come with a template on the white backing paper that tells you where the nail hole should go.
HGTV Magazine 59


