3 minute read
YOUR SIX ESSENTIAL MAKEUP BRUSHES
from CL - April 2015
STYLE
ANTI-AGING | DENIM, 24-7 | HOW TO WEAR PASTEL
Advertisement
Your 4
Six
ESSENTIAL MAKEUP BRUSHES 2
6
1
An artist is only as good as her tools, but that doesn’t mean having a ton of them will make her great. According to pro makeup artists, the right brushes make all the difference when creating a striking look. Toronto-based editorial makeup ace Jukka walks us through the six essential brushes you need, plus how to wield them like an expert. BY JULIA MCEWEN
PHOTOGRAPHY BY GEOFFREY ROSS
3 5
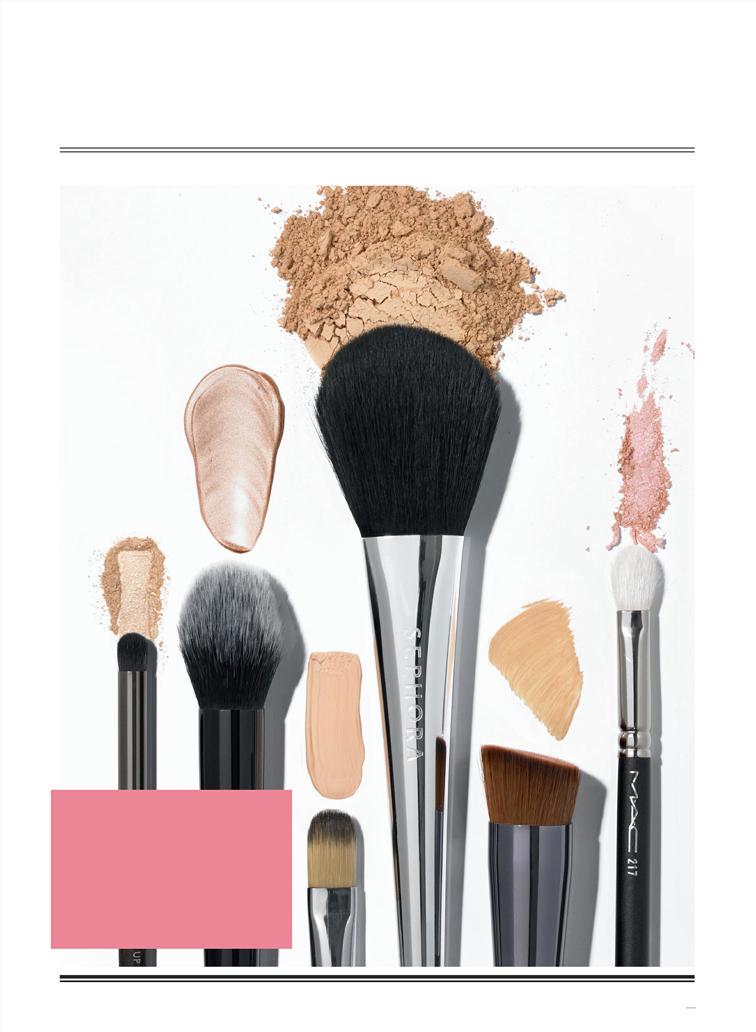
Use this dual-ended brush to apply blush, highlighter, bronzer and contour powder.
Make Up For Ever Precision Blender Brush, $32, sephora.ca. Kat Von D Shade + Light Contour Face Brush, $43, sephora.ca. Cover FX Concealer Brush, $20, coverfx.ca.
CREASE EYESHADOW BRUSH
Use your regular shadow brush for blending; this specialized brush smudges eyeshadow into the eyelid crease and along the lash line, adding dimension. “You want this brush to have a little more tension,” says Jukka. “The bristles should gather into a pencil-shaped tip.” It doesn’t matter if they’re natural, synthetic or a blend, as long as the shape is small, rounded and densely packed. Sephora Collection Pro Visionary Precise Natural Powder Brush #121, $48, sephora.ca.
POWDER BRUSH
Attempting to get a silky sheer finish but winding up with too much product on your face? Don’t blame your makeup; it’s likely the brush you’re using. “For powder, I tend to favour a natural-bristled brush,” says Jukka. Try a domed goat-hair brush or a high-grade synthetic fibre. Thicker bristles are great at picking up product, while the ample size of the brush covers a lot of surface with each pass.
BLUSH BRUSH
For a natural finish, use a slightly angled brush that’s not too big, not too small and not overly dense. We love this dual-ended version with soft synthetic bristles. Its ergonomic design includes an angled brush with feathery tips on one end that just skim the cheekbones, so you can’t overdo it. On the opposite side is a domed brush to highlight and illuminate when you really want your cheeks to pop.
FOUNDATION BRUSH
There are two camps when it comes to foundation brushes: those who swear by the classic style (large, fanned and ovaltipped); and those who favour the new kid on the block (flat top with stiff bristles). We prefer the latter because it blends any type of foundation—liquid, cream or powder—seamlessly. Apply in halfcircular motions for medium coverage or pat and press for full coverage.
CONCEALER BRUSH
Fine densely packed bristles help cover redness around the nose, undereye darkness and blemishes. Both mixed bristles and synthetic offerings easily blend concealers into skin. Although a brush is usually preferred, Jukka admits that a finger is sometimes the best applicator. “In certain cases, I like to use my pinkie for applying concealer. There’s a little bit of magic in

— JUKKA, EDITORIAL MAKEUP ARTIST
the warmth of skin-to-skin contact.” Shiseido Perfect Foundation Brush, $35, shiseido.ca.
M.A.C Cosmetics 217 Blending Brush, $29,
maccosmetics.com.
EYESHADOW BRUSH
Toss out those little foam-tipped applicators that come with your eyeshadow compacts; they make blending challenging and create harsh lines. For ultimate accuracy, look for a brush with fine densely packed fibres arranged in an oval. “Every woman should have an eyeshadow blender brush,” says Jukka. Use a tapping motion when depositing colour for the most control.


