
6 minute read
Handmade and Ready to Hang!


A
C B
Advertisement
D
A. Folding the Dough As you make the Sweet Dough (this page), you’ll fold the dough over itself several times between rises to help eliminate air pockets. B. Rolling Out the Dough When you’re ready to make the rolls, roll out the dough into a rectangle. C. Filling and Rolling After sprinkling on the filling (a good job for kids), you’ll roll the dough into a tight cylinder. D. Slicing the Dough You can use scissors or a sharp knife. E. Letting the Rolls Rise Before being baked, they’ll double in size in the pan.
E
tucking tail of each cinnamon roll underneath itself. Cover pan loosely with towel or plastic wrap and let the dough rise until doubled in size, 1 to 1½ hours.
5. Preheat oven to 350°F with rack in middle position. Uncover rolls and bake, rotating the pan about halfway through baking, until light golden brown, 27 to 32 minutes.
6. While rolls are baking, make the icing: Beat butter and cream cheese on medium speed in the bowl of a stand mixer fitted with a paddle, until smooth. Mix in vanilla and salt on low speed. Mix in confectioners’ sugar. Scrape down sides of bowl and mix on medium speed until icing is light and fluffy, 3 to 4 minutes.
7. Transfer pan to a wire rack and let cool for 5 minutes. Using an offset spatula or table knife, apply a thin layer of the icing, using about one third of it. Let rolls cool 15 to 20 minutes more. Top with rest of the icing and serve. Cinnamon rolls are best eaten the day they are made.
Sweet Dough
Active Time 20 minutes Total Time 2 hours 20 minutes, plus overnight (12 hours) chilling Makes about 2½ lbs. of dough
I N G R E DI E N T S
10 Tbs. unsalted butter, at room temperature, cut into 1-in. pieces, plus more for bowl ¾ cup whole milk 4 large eggs, at room temperature ¼ cup honey 4 cups all-purpose flour 2¼ tsp. instant yeast 2 tsp. salt
M A K E I T
1. Grease a large bowl with butter and set aside. Warm milk in a small saucepan until it reaches 100°F to 110°F. Combine eggs, milk, and honey in a large liquid measuring cup.
2. Mix together flour, yeast, and salt on low speed in the bowl of a stand mixer fitted with a paddle attachment. Add egg mixture and mix to combine. With mixer still on low speed, add butter, 1 piece at a time, then increase speed to medium and beat until all butter is incorporated, about 1 minute. Scrape into prepared bowl; dough will be very sticky. Cover bowl with a tea towel and let dough rise 30 minutes.
3. Place fingers under dough and gently pull it up and over itself. Turn bowl slightly and repeat. Repeat six to eight times. Cover bowl and let rise 30 minutes more.
4. Repeat folding series three more times, for a rise time of 2 hours and a total of four foldings. Tightly cover bowl and refrigerate overnight or up to 72 hours.
T I P S F O R S W E E T S U C C E S S
* It’s worth getting started at least a day ahead: The Sweet Dough needs to chill overnight (or up to three days) before you make either classic or giant rolls. * That long chilling time makes the dough easier to roll out when it’s time to prep the Cinnamon Rolls. (If you skip this step, the dough will be sticky!) * If you don’t have instant yeast, active yeast can be used instead. The granules are larger, so dissolve it in the warm milk instead of adding it to the f lour mixture.
Giant Cinnamon Roll
Active Time 40 minutes Total Time 4 hours 15 minutes, plus 12 hours chilling Makes 1 giant cinnamon roll
I N G R E DI E N T S
Nonstick cooking spray ½ cup packed light-brown sugar 1 Tbs. ground cinnamon Pinch of salt All-purpose flour, for dusting ½ recipe Sweet Dough (opposite) 2 Tbs. unsalted butter, melted and cooled Icing (see Classic Cinnamon
Rolls, Step 6)
M A K E I T
1. Coat an 8-in. cake pan with cooking spray, line with parchment paper, then coat with cooking spray again. Combine brown sugar, cinnamon, and salt in a small bowl.
2. Lightly flour a work surface and roll dough into a 14x12-in. rectangle. Brush with melted butter. Sprinkle with cinnamonsugar mixture, pressing evenly and lightly to adhere.

3. Cut dough into 7 equal 2x12-in. strips. Roll first strip into a tight coil. Wrap next strip around coil, winding it around completely. Repeat with remaining strips to make a giant coil.
4. Place dough in prepared pan. Cover with a tea towel and let rise until doubled in size, about 1 hour. Bake in a 350°F oven until golden brown and set in middle, 20 to 28 minutes. Let cool on a wire rack for 5 minutes, then cover with icing.
A B
A. ROLLING THE STRIPS After adding the filling and cutting the dough into strips, you’ll roll one strip into a tight coil.
B. MAKING A GIANT ROLL
You’ll wrap the next strip around the first—and so on—until you have one giant roll.
C
C. LETTING IT RISE AGAIN Before you put the roll in the oven to bake, you’ll let it rise in the pan one last time.
Excerpted with permission from Baking for the Holidays: 50+ Treats for a Festive Season (Chronicle Books, 2021), by Sarah Kieffer. Copyright ©2021 by Sarah Kieffer.
Ha nd made a nd Ready t o Ha ng!
These fun and festive upcycled ornaments are a cinch to make with the kids.
by A M A N D A K I N G L O F F / photographs by A A R O N DY E R
S H E LV E S A R E G R E AT, B U T T H E T R E E I S B E S T !

Elf Buddies
Hooray , a cute way to reuse the wine corks.
1. B O D Y Wrap a wine cork in felt, and secure with glue. Then glue a 1-in. wooden bead on top. 2. S C A R F Tie a ½x3-in. strip of felt where the bead meets the cork. 3 . H AT Roll and glue a 2½x1-in. triangle of felt into a cone; glue to top of bead. 4. A R M S Cut small slits in sides of body felt and press two 1½-in. pieces of craft wire into cork. Slip small beads over wire ends and twist to make hands. 5. L E G S Insert two 3-in. pieces of wire into cork bottom and slip barrel beads over ends and twist for feet. 6. F A C E Draw on facial features with paint markers.
T I P An adult can get things started by cutting out the shapes, then the kids can apply the Glue Dots and have at it with the yarn.
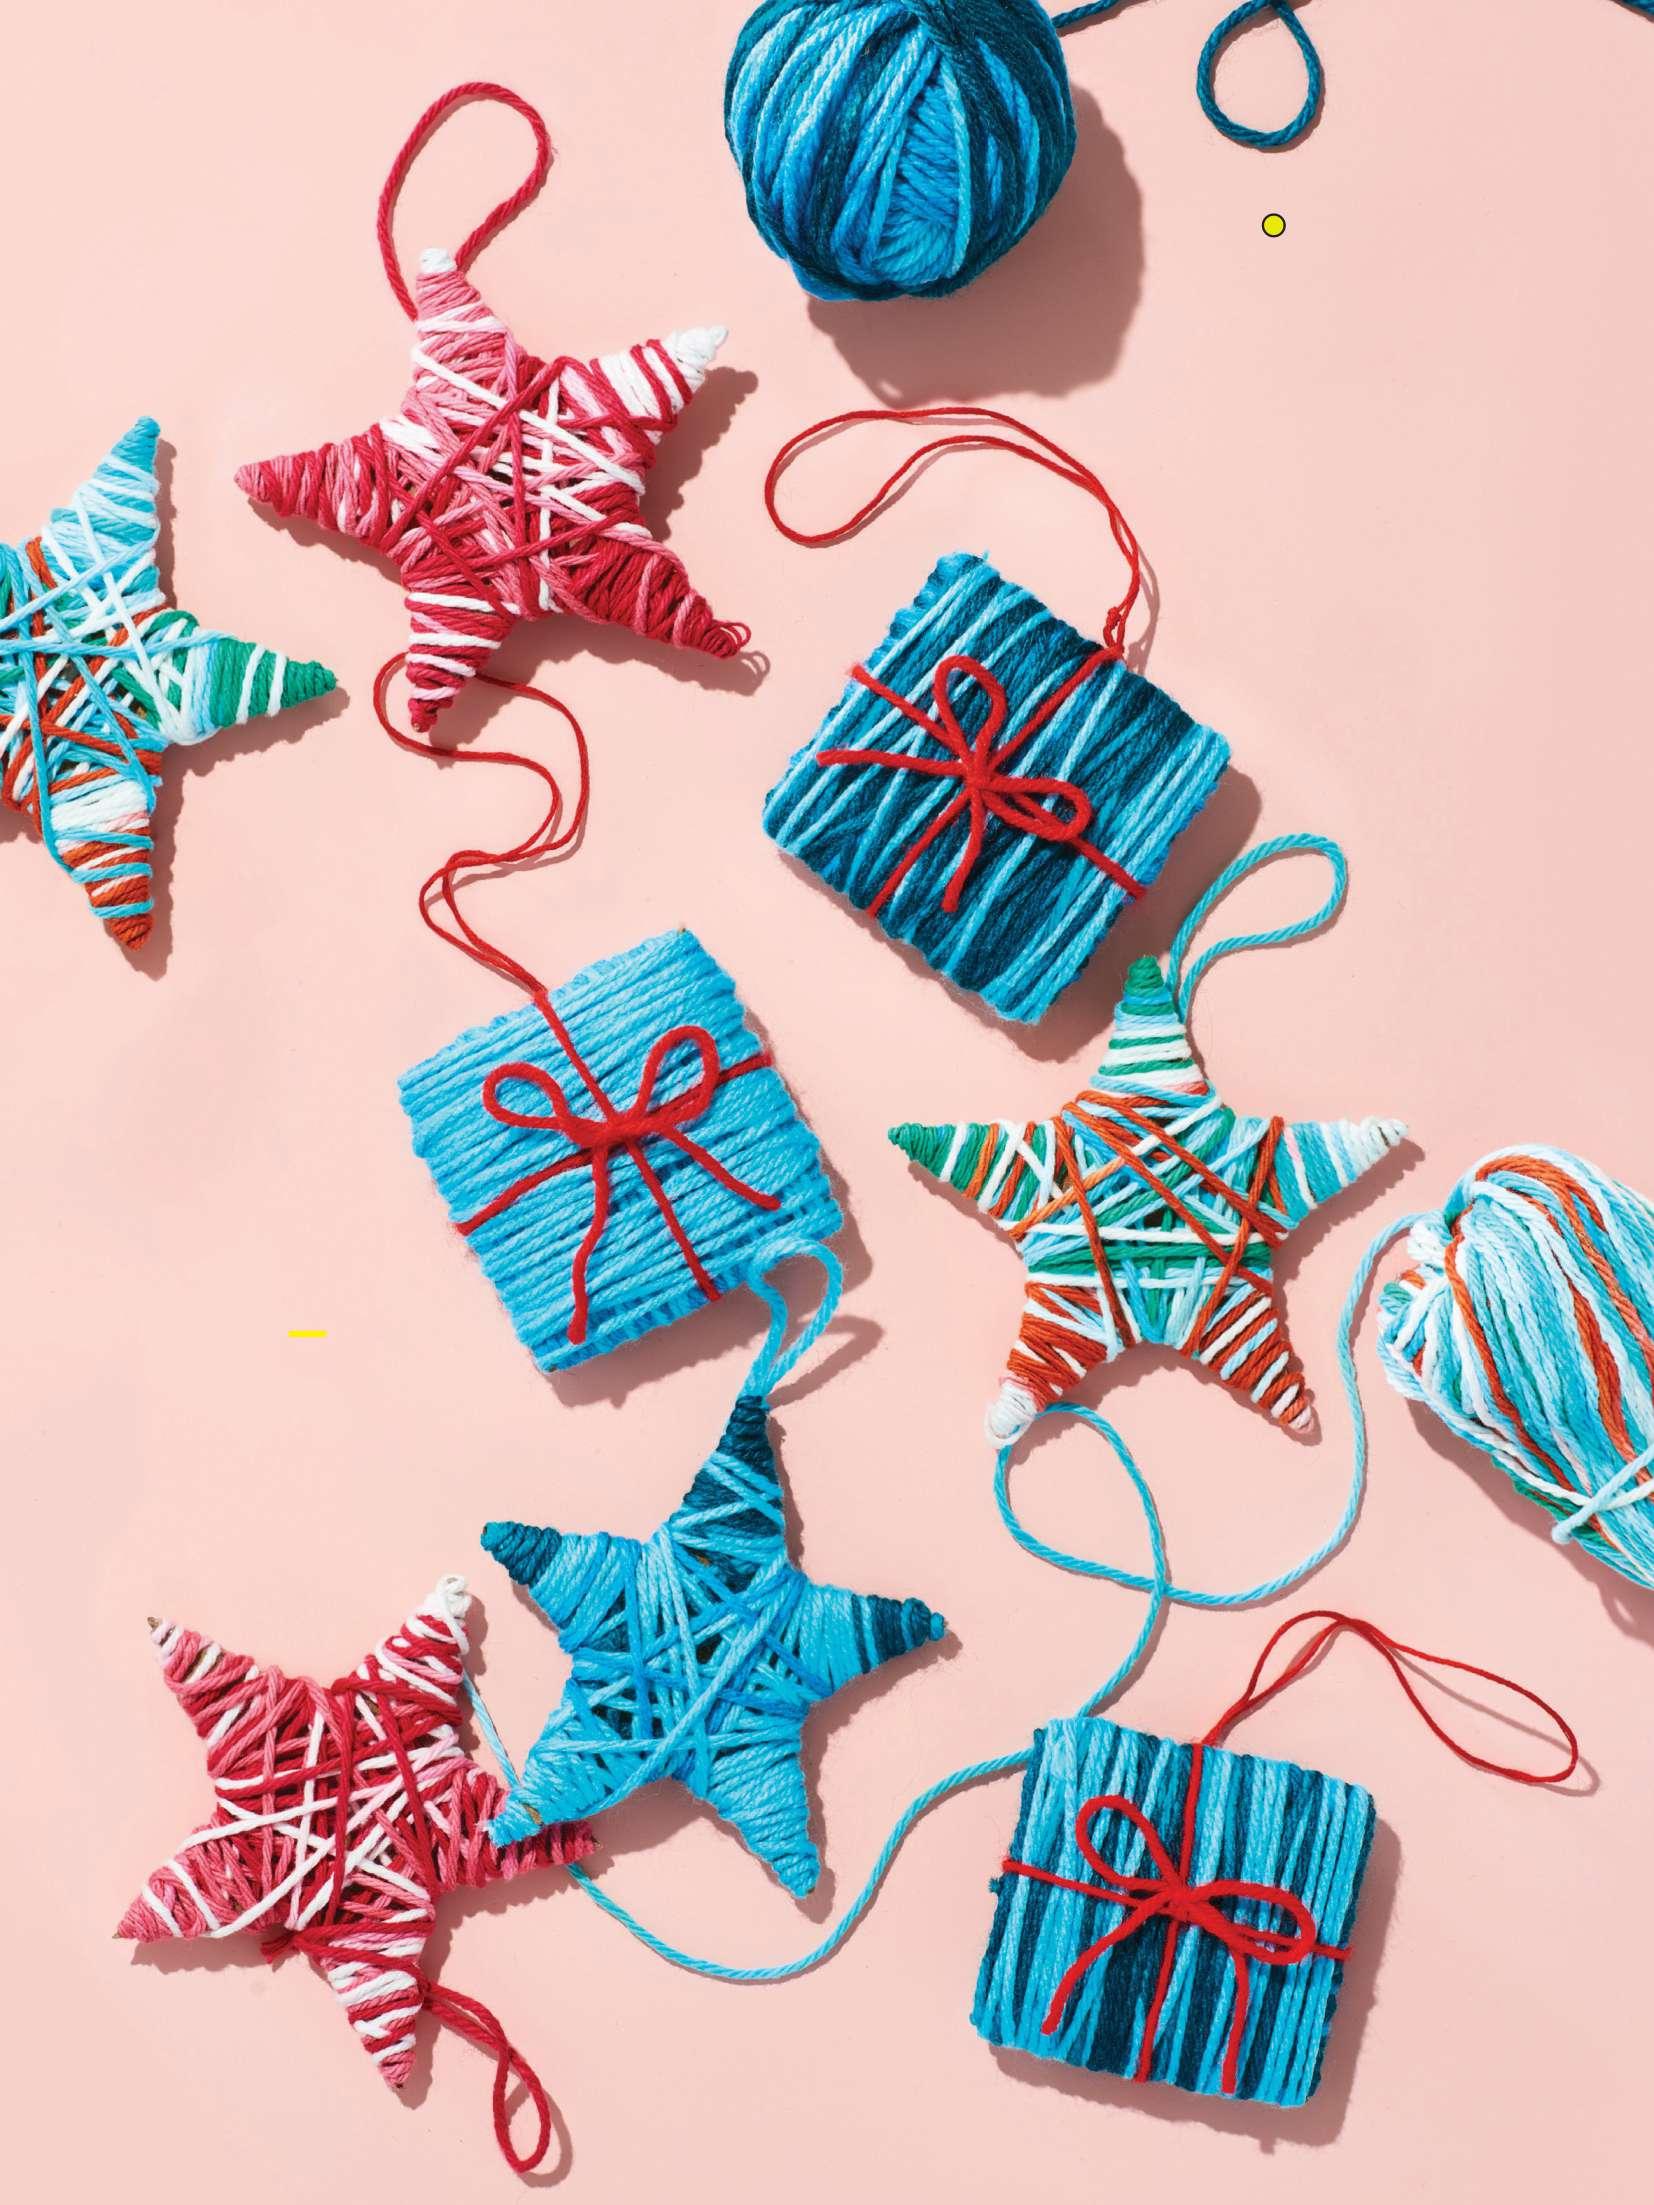
Good Yarns
Variegated yarn that changes color in a single strand (often called print yarn) is the secret to these ornaments. (The bases are cardboard.) 1. Cut 3-in. stars or 2-in. squares from cardboard. 2. Stick Glue Dots to corners. 3. Wrap yarn around shapes, crossing Glue Dots when turning corners, until fully covered. Knot end when finished. 4. For star shapes, tie on yarn or string for hangers. 5. For gift-box shapes , tie yarn bows around squares, and add a loop for hangers.


