
7 minute read
5 Steps to Creating A Pollinator-Friendly Habitat in Landscapes and Golf Courses


Dr. Terri Billeisen, Extension Associate, Turfgrass Entomology, Department of Entomology and Plant Pathology, NC State University
Dr. Danesha Seth Carley, Associate Professor, Sustainable Managed Landscapes, Department of Horticultural Science, NC State University
Advertisement
Insects are the most common and abundant pollinators in the world. Although bees may be the most well-known insect pollinators, there are many other insect species, including butterflies, moths, wasps, flies and beetles, which also play an important role in plant pollination. Due to increased interest in pollinator and wildlife communities in turfgrass environments, a study was conducted a study in North Carolina to examine how pollinator-friendly habitats could be implemented on established golf courses to impact pollinator populations. Findings from this study have applications for aiding pollinator populations in landscape settings, too.
In the spring and summer of 2018, we set out across North Carolina, sampling for pollinators in managed turfgrass environments to determine which insects were already present prior to establishing refuge areas the following season. In the fall of 2019, we returned to these sites to plant pollinator-friendly seed mixes. After some trial and error, we have identified a few key things to know prior to establishing pollinator habitat. Our five summarized key steps to creating pollinator-friendly habitat in landscapes and golf courses are as follows:
1. Identify suitable location and prep the site
Select a site on your golf course or landscape that is visible but that is out of the way of foot traffic or errant golf balls. For our research, we selected areas lining cart paths and natural rough areas, especially around tees and along tree lines. If you have a lot of trees on your course or in your landscape, be sure to choose a site that gets at least 6–8 hours of direct sunlight a day.
Eliminate plant competition by removing shrubs, small trees and unwanted plants either by hand cultivation or selective herbicide application. If a controlled spring burn is an option for your site, it can help to eliminate brush cover and undesirable weeds. After all weed roots are dead, switch to shallow cultivations timed to eliminate freshly germinated weed seedlings — generally two weeks after the first cultivation. If you are planting a large site with pollinator-friendly seeds in the fall, use a harrow or drag to produce a smooth, clod-free seed bed. If your soil is subject to erosion, consider deferring planting until spring and first plant a winter cover crop in the fall. If necessary, a rototiller can be used to break up the ground and soften the soil. It is important to “till” only as deep as necessary to remove old roots. Four to six inches deep should do the trick. Drag the area to break up any large clumps. After a final dragging, the soil will be ready to plant.
2. Seed the prepped area
Seeds of pollinator friendly plants (there are many regionallyadapted seed mixtures available commercially) can be applied either by hand or spreader (Fig. 1). Scatter the seeds slowly to ensure an even distribution. Sand, compost, peat moss, or moistened sawdust can be added to the seed mix to increase the volume of what you are spreading for small areas. For large sites, dividing your planting area and seed mix into smaller parts can facilitate even seed distribution. Keep in mind that sand may be too heavy of a filler for very large areas.

FIGURE 1: Seed application with spreader

FIGURE 2: Install signs or barriers indicating newly-planted areas to prevent accidental mowing or spraying
A surefire method of sowing seeds that encourages an even application: separate the seed you’re planting, no matter the amount, into roughly two equal parts. Put the first half in a clean bucket (or coffee can, or anything else handy), and then add in roughly eight parts of dry filler to one part of seed. (Always make sure that your filler is dry — especially if it has been stored outdoors. Wet filler tends to clump and can cause your seed to be applied unevenly.)
You’ll have the best chance of an even application if you scatter your seeds in two sowings. To do this, take the container with one half of your seeds and sow them as evenly as possible while walking across your site from north to south. Then take the other half and apply in a similar manner, this time walking from east to west.
Post-seeding: it is a good idea to pack or roll the newly-seeded area to firm the soil around the seed, reduce moisture loss and discourage weed growth. For small-sized patches, you can use your feet to compress seeds into the soil. For medium-sized gardens and beds, lay a piece of cardboard or plywood over the soil and walk all over it. This will evenly distribute your weight across the soil, giving the same compression effect as using a professional roller. For large, meadow-sized plantings, you can use a Seed Roller – either as a tractor attachment or as a walk-behind tool.
No matter if you’re planting in spring or fall, there is generally no need to cover the seed. Wildflower seeds are often very tiny, and many require light to germinate. Unlike vegetable seeds, which are typically planted in holes and buried within the soil, wildflower seeds are scattered on top of the soil and left exposed.

FIGURE 3: Native Longhorned bee on Rudbeckia hirta (black-eyed Susan), at Pinehurst on No. 2
3. Irrigation
Wildflower seeds and seedlings must stay moist until they are four to six inches tall (usually four to six weeks). Prior to reaching this height, the seedlings are unable to access enough groundwater via their roots to grow. Monitor the seeded area for the first few weeks, especially if the site has not received any rainfall, and wet the soil as needed (1/8 in. should be sufficient).
4. Mowing
Unlike other flower beds, wildflower areas can be mowed, which will help prevent quick-growing weeds from excessively shading the new native seedlings. Mow if weedy growth reaches 8–10 inches and cut everything to a height of 4–5 inches. Don’t worry too much about trimming your wildflowers. The plants should be ok, especially if competition from other weed species is reduced. Stop mowing at the end of the first season. If weeds are thick in the beginning of the second season, mow or spot-mow once or twice. If you choose to mow again to knock back any remaining weeds, raise the cutting height to 10–12 inches.
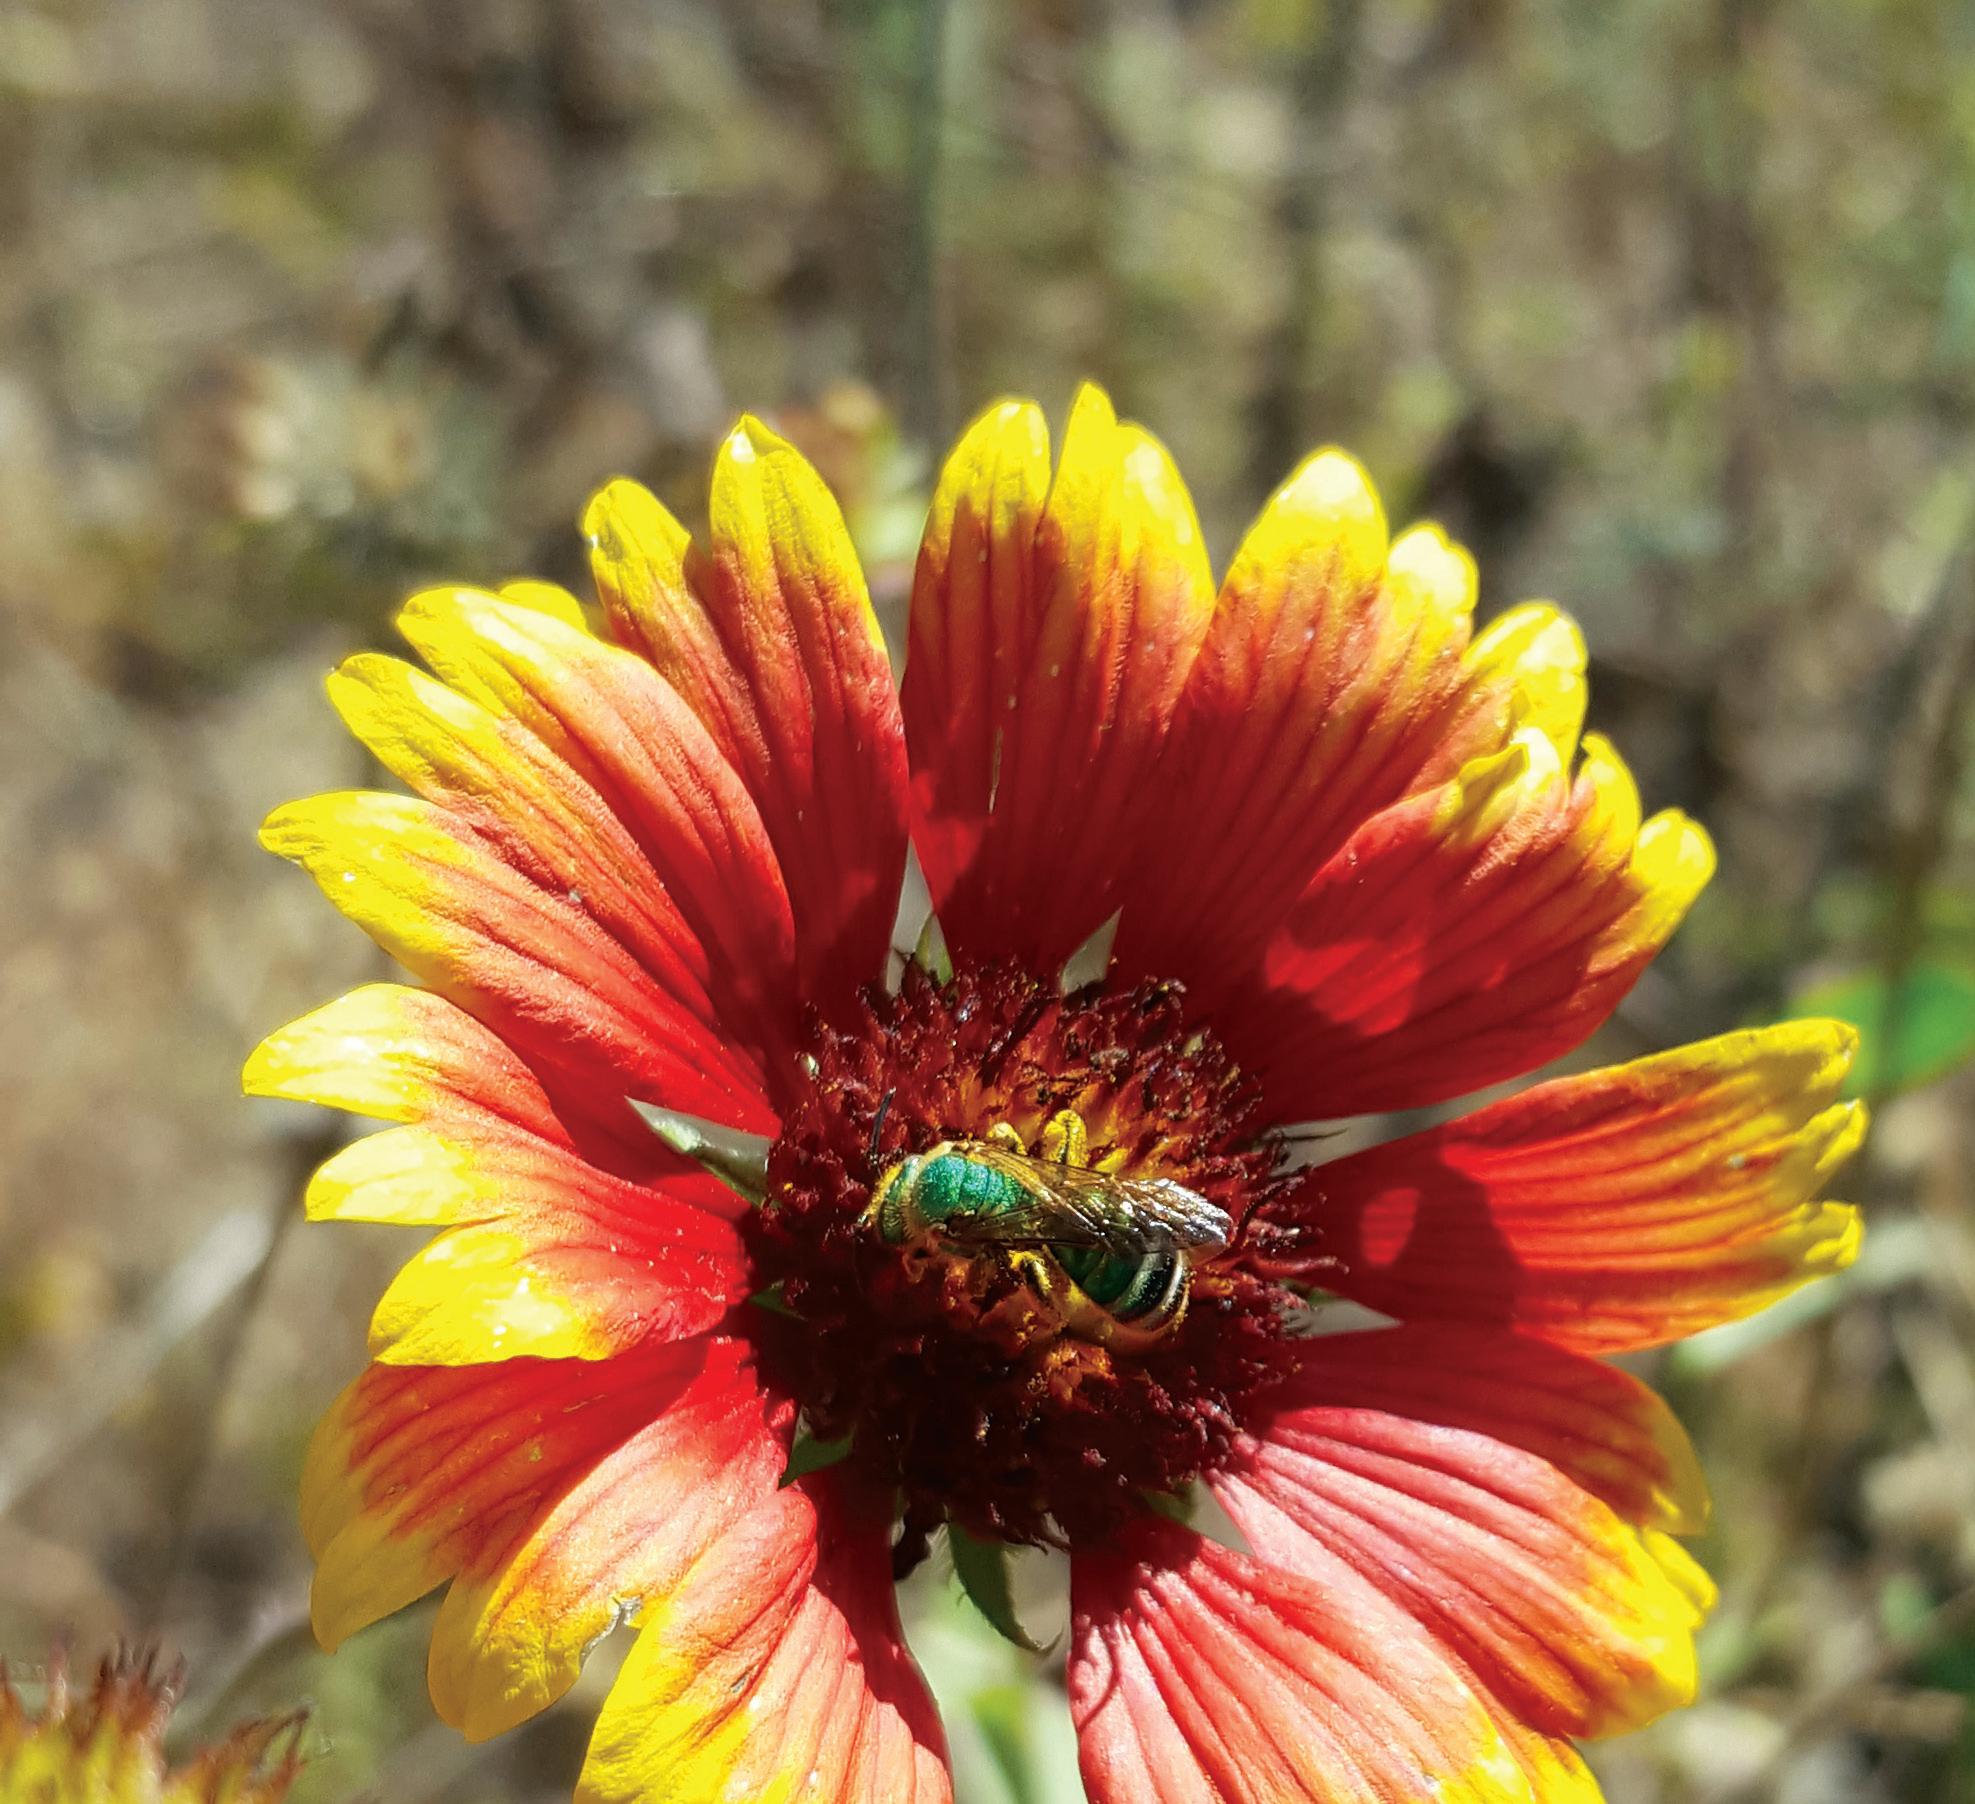
FIGURE 4: A native Agapostemon bee on Gaillardia, a blanket flower which is native to the southeastern U.S.
5. Long-term Management
After two or three growing seasons, most native plantings, need to be burned annually for the next five or more years to become well established. Although the practice of controlled burns (prescriptive fire) may not be suitable, or permitted, for many residential and commercial landscape settings, under closely monitored conditions, burning can yield better plant growth and more flowers. If a planting is not periodically burned, a thatch layer can build up over the years, causing some native species to grow poorly or even to die out completely. When this happens, it may be necessary to re-establish the planting. Where allowed and feasible, burning can serve as the single most important management practice for native plantings. Burning in March or April will stimulate growth of native plants and give them a competitive edge over weeds. Always use caution and common sense when burning. Follow local fire regulations, obtain permits and have plenty of water, tools, and help on hand.
If burning is not permitted at your site or if you prefer not to use this method, you can mow or manually remove thatch in early spring (late February to mid-April). Last year’s dead stems will not hide the new growth and flowers, and the sun’s rays still will be able to warm the soil.
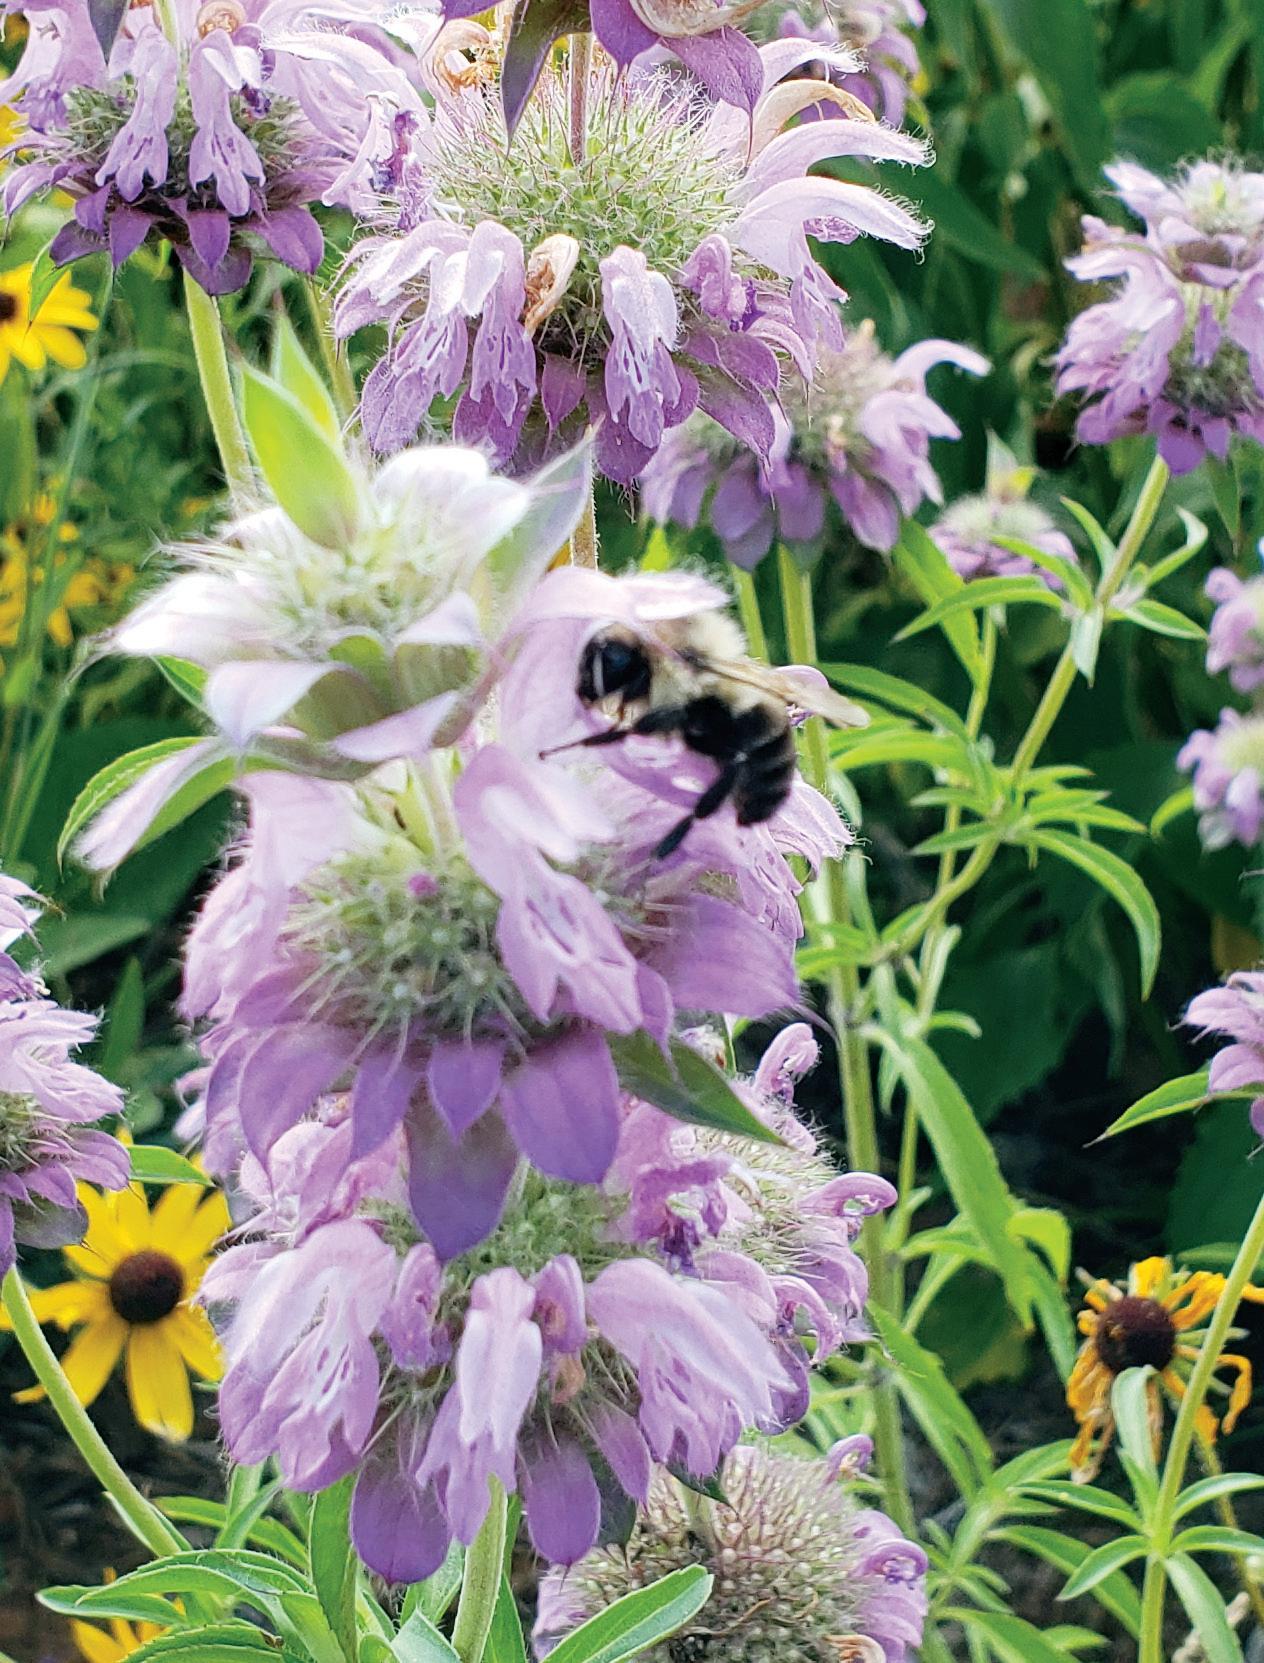
FIGURE 5: Bumblebee on wildflowers at Pinehurst No. 2
Of course, there are always challenges when establishing new managed wildflower or native areas. Be sure to mark newly planted sites with flags, a border, or a sign (Fig. 2) to alert maintenance personnel and the public that the area should not be mowed or sprayed. Be sure to monitor the site each week to check for seedling sprouting and growth, adequate soil moisture and any signs of mechanical disruption. It may be useful to take pictures of flowering plants in the spring and summer, along with visiting pollinator species, to include in newsletters to members or communities.
Remember, attracting beneficial insects to a managed turfgrass or landscaped area is easier than you think. Golf courses and managed landscapes provide so many resources in terms of irrigation, fertilizer, and other inputs to encourage healthy turfgrass growth that adding some wildflowers to the environment takes minimal additional effort. The result will be a beautiful, site-enhancing feature that not only provides important refuge for beneficial, pollinating insect species, but an additional conversation piece for your members and community residents as well.


