

your taste, whatever the space ...


your taste, whatever the space ...


At KlickFloor we create stunning designs, inspired by nature and current trends.


Our unique flooring system ensures pure comfort, soft and silent, with a look of class and desirability.
Exceed expectation with KlickFloor innovation.

FEATURES
WOODS
TILES
PLUS WOODS
PLUS TILES
STONE WOODS
STONE TILES
WOODS
TILES


Klickfloor reduces reflective walking sounds and transmission noise to a very comfortable level.


One of the main benefits of a KlickFloor floor is its acoustic comfort. Vinyl is resilient, so it reduces reflective walking sound and transmission sound to a very comfortable level. That’s a valuable asset for both you and your neighbours below. If you want to avoid any annoying noises inside, KlickFloor simply offers you the ultimate flooring solution.
Do you want to please your neighbours even more? Use a KlickFloor underlay for even better transmission sound reduction.


Without knowing it, your feeling of wellbeing increases when walking over a KlickFloor floor. The resilient layer anticipates your body weight, offering you that soft feel underfoot. And what’s more, it feels naturally warm too. Because a KlickFloor floor has great insulating qualities, its temperature remains comfortable in every season.


Not that big a fan of household chores? The protective top layer repels dirt, dust mites and other allergens. Any stains can be removed in seconds. Simply sweep, mop or vacuum your KlickFloor floor to keep it spotless and hygienic – saving you time for fun.
No Indentation
Although a KlickFloor floor is resilient, it has no indentation issues. The floor returns to its original state when weight or pressure (from heels or furniture legs for example) is educed, this is what we call the memory effect.

Vinyl repels water, making a KlickFloor floor the perfect solution for kitchens and bathrooms – and for every space at home for that matter. Water balloon fight inside? No problem. The floor is water and slip resistant, and easy to maintain.


Did you know a KlickFloor floor is one of the most durable flooring solutions available? The in-line calendered lamination of the different layers prevents the floor from delaminating due to moisture, so you’ll enjoy the floor for years.
Your KlickFloor floor can take a beating –that’s very reassuring, don’t you think? It is wear, scratch and stain resistant. The wear layer and patented Protectonite PU coating protect the design, prevent wear and limit scratches. A KlickFloor floor can grace any place. Intensive use allowed. Even a big crowd is no problem.

The patented system with extra strong glass fibre layer guarantees the high dimensional stability of every KlickFloor floor, resulting in minimal shrinkage and expansion due to variations in temperature or humidity.

When properly cared for, a KlickFloor floor is extremely durable. That’s why we gladly offer you long-lasting warranties up to 20 years and a LIFETIME warranty in our Engineered Range!
The planks and tiles are installed as floating floors on a sturdy, even surface or underfloor. This makes gluing superfluous.

Our angle-angle click system has the best technical performance on the market: the click ensures a super strong and watertight joint connection and an easy, convenient installation. A floating installation makes glue un-necessary. You can easily click the planks or tiles together.
Go for extra comfort with a KlickFloor underlay. You can smooth out small irregularities and reduce environmental noise up to 21 dB.
With a light-coloured KlickFloor floor, you bring a sense of serenity into your home: a clean look with a Scandinavian touch.

Should you be afraid that a white floor couldn’t handle the hazards of everyday life, rest assured, KlickFloor floor is stain resistant and easy to maintain.


It’s White. Light. Bright. Pure. Open. Airy.
Discover different whites, ranging from soft tones to weathered woods. One by one refreshing as spring. Everything you need to create an oasis of calm in your home, a space of pure and personal comfort where you’ll most certainly find your peace of mind.


Grey is on-trend, and it won’t be going out of style any time soon. Weathered wood in muted tones of grey gives a room a relaxed,even beachy feel. The planks look like they have aged for years. For a surprisingly refreshing yet very sophisticated interior.
Who said anything about boring?
Grey is neutral. It represents quiet confidence. Grey floors keep any interior light and fresh. They are timeless and bring balance. They match soft whites perfectly, but work really well with almost every palette.
The decorating possibilities are endless... give grey a chance.
 Cedros Grey Oak
When the design feels like coming home.
Genuine look and feel, natural to the touch.

Nature is the greatest designer of all – no question about that. At KlickFloor we always try to reproduce nature’s beauty down to the last detail. With stunning success. You don’t have to believe what we say, just take a look around and convince yourself.
tEvery plank design is inspired by nature, from beige and brown to camel and caramel. The Impress collection even includes a registered emboss texture: you can actually see and feel the grains and knots, just like genuine wood. In a way, it looks like KlickFloor meets and even beats reality.

 Hickory Oak
The best thing about it: a KlickFloor floor with natural wood effect requires no sanding, polishing or lacquering. It’s a wonderfully durable flooring solution. Just a quick vacuum or mop will keep your floor’s natural appearance for years. Enjoy it.


Dark interiors are super trendy right now. A dark design floor in your home maybe isn’t the most obvious choice, but it’s definitely a surprisingly smart solution to create a sense of inrimacy inside.


Now does a dark floor make a room look smaller? Not necessarily. It’s actually a beautiful way to brighten up an interior. The trick is to find the right balance between dark and light elements. Let a dark floor contrast with bright colours in your furniture, walls and ceiling. And repeat a darker accent here and there.
Sometimes beauty hides in the shadows.
Did you notice that the different shades in a dark KlickFloor floor accentuate the lively grains and knots? Each design is richly detailed. The wood features come out much better in a dark KlickFloor floor.


So maybe it’s time to discover your dark side?

Imagine the look of natural stone. And think of tiles with beautiful organic colours and soft shades for a minimalistic approach to your interior. Find your personal favourite in a wide range of choice. Opt for a light-coloured design tile floor if you prefer a clean but strong look inside.


The look that counts.
The look that’s Pure.
While stone design floors display the realism of natural stone, what sets them apart is the comfort factor. Unlike the hard and cold surface of ceramic tiles, KlickFloor floors feel softer, warmer and more comfortable underfoot.


Reality check? KlickFloor tiles look as if they are harvested from nature, for a roughlooking floor with a cloudy or blazed design. And the best thing is they can handle the rough side of life just fine: your vinyl tile floor is fully waterproof and wear resistant.

 Pizarra Negra Slate


The KlickFloor Starstones are stunning designs with a playful mixture of darker and lighter tones combining to create a design that is perfect, luxurious, full of glamour and pizzazz.

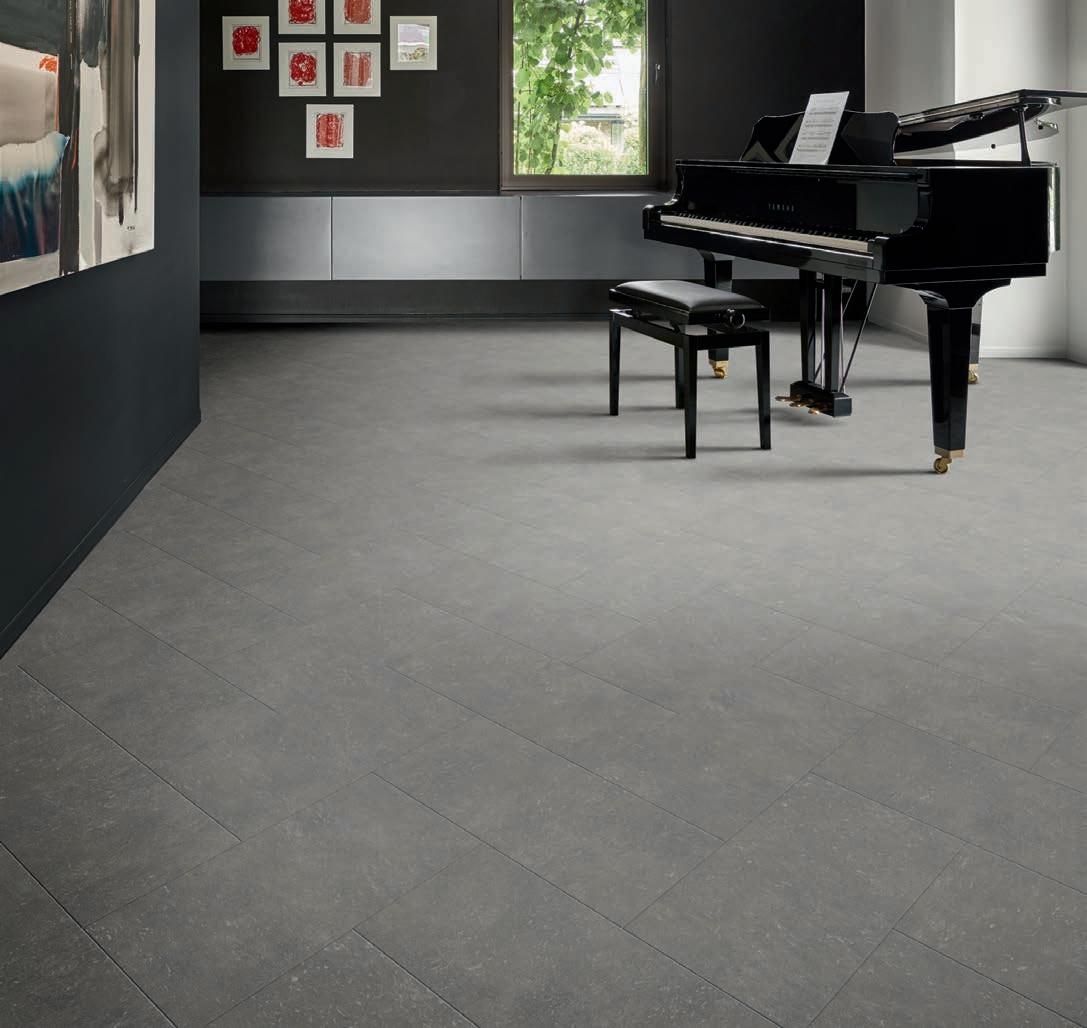


Imagine the look of natural stone. And think of tiles with beautiful organic colours and soft shades for a minimalistic approach to your interior. Find your personal favourite in a wide range of choice. Opt for a light-coloured design tile floor if you prefer a clean but strong look inside.
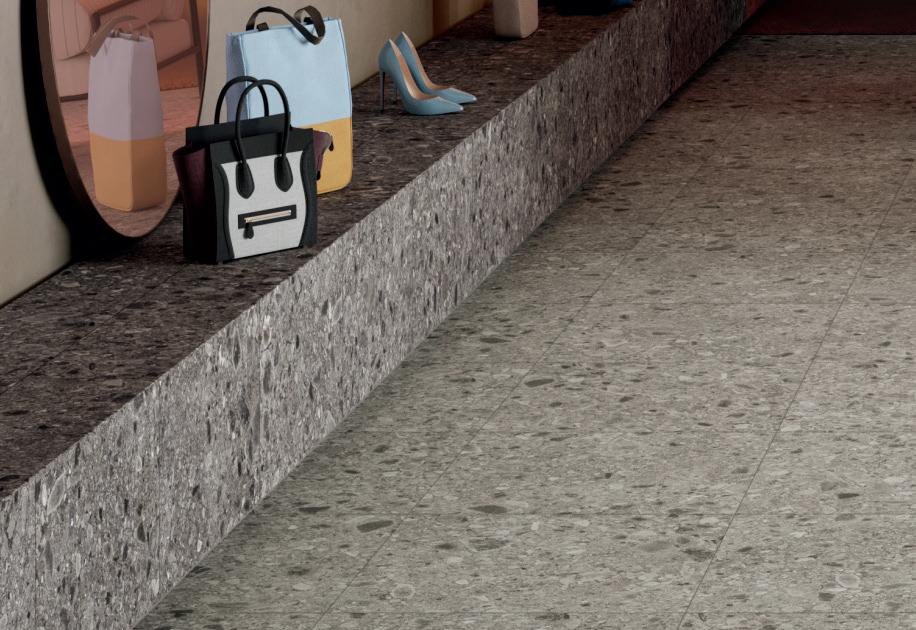


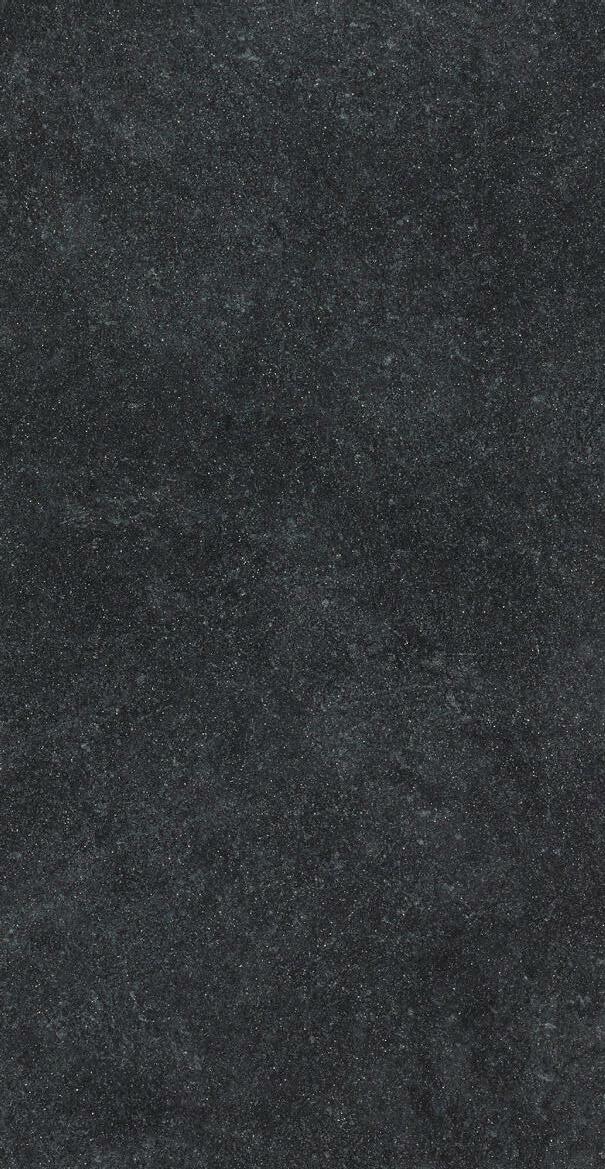


 Pizarra Antracita Slate
Starstone Orion Black
The KlickFloor Starstones are stunning designs with a playful mixture of darker and lighter tones combining with a hint of sparkle, to create a design that is perfect, luxurious, full of glamour and pizzazz.


Spanish White Oak
STONE
Shumard Oak
STONE
Shingle Oak
STONE
Oak
STONE
Sessile Grey Oak


STONE
Persian Oak
The Klickfloor Engineered STONE Range features an 80% limestone and 20% acrylic composition, offering a more rigid alternative. It provides enhanced heat resistance and rigid enhanced uneven floor performance. It also comes with an integrated underlay featureallowing for easier installation.
Oak
STONE


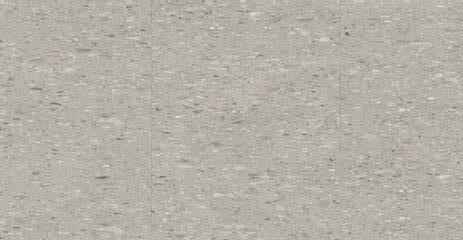


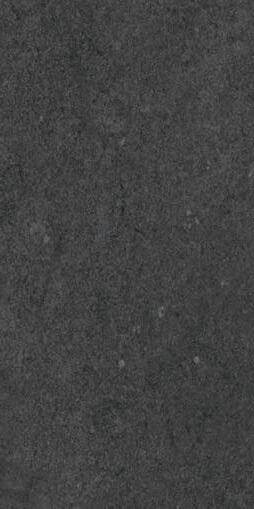


Authentic and natural vinyl tiles. Exactly what you need when you step out of bed in the morning, or on your way to a nice bath. Dive in... don’t mind the splash.


range of cleaning products
been specifically formulated for use with luxury vinyl floors and most vinyl, rubber and linoleum floors.


Underlay is designed to be the perfect partner with Klickfloor. Our underlay provides a fantastic foundation to your floor and is particularly suited for the floating installation under Klickfloor.


and maintenance products from Klickfloor help you to enhance and protect luxury vinyl floors, keeping them at their best for years to come.


Cartons should be stored and transported on a flat surface in neat stacks, always store the cartons flat and never put them on-end. Do not store the cartons in very cold (less than 2C°) or very warm (more than 40°C) or humid places.
Please inspect product prior to installation. Check that the colours correspond to those ordered, the quantities are correct and there is no visible damage to the boxes. Check the vinyl planks or tiles during installation for any visible defects. Do not install any planks or tiles that display any imperfections.
We recommend that you always use materials from a single production batch for each installation, as we cannot guarantee a shade match between different batches.
• Kompact KlickFloor design floors can be laid on concrete, cementitious screed, anhydrite (calcium sulphate), timber, plywood, particleboard and ceramic tiles, which have been suitably prepared (see Floor Preparation).
• Kompact KlickFloor design floors can be used with traditional waterbased underfloor heating and cooling systems. Electric wire systems are not recommended unless the system is encased in a minimum of 9mm of suitable levelling compound. Direct contact with wired heating systems must be avoided. If in doubt seek further advice.
• Kompact KlickFloor design floors is
only suitable for indoor installation.
• Seasonal temperature conditions: Kompact KlickFloor design floors can be used in any indoor situation, such as temperature controlled conservatories and holiday homes. Keep under all conditions the temperature between 6C° and 35C°. Avoid rapid temperature increases of more than 5C° per 12 hours.
• For commercial applications where roller castor chairs or heavy rolling loads are to be used we strongly recommend the use of Kompact KlickFloor HD+. However, if you do want to use Kompact KlickFloor, please contact the Kompact Technical Support Team.
Knowledge of the composition and construction provides valuable information that allows you to correctly check the acceptable humidity, compressive and tensile strength of the subfloor. In addition it tells you what type of floor preparation, levelling compound, and possible moister barrier you may need during the installation process.
When there is ambiguity or doubt about the quality or composition of your subfloor check with your floor preparation, levelling compound manufacturer/supplier.
design floors will only be as good as the quality of the base over which it is installed. Any irregularities in the subfloor will show through the finished floor and must be suitably prepared before installation.
The subfloor must be hard, smooth, clean and dry, as well as being free from defects and fit for purpose. When required, scrape off and remove old adhesives and loose laying levelling compound. Make sure the subfloor is flat and free from chemical substances and other contamination.
Unevenness of the subfloor may not be greater than 2mm measured over a width of 200cm.

A suitable plywood/levelling compound should be selected to ensure that no irregularities show through to the surface of the finished floor. However, the selection of suitable materials, including plywood, smoothing/ levelling compounds and any ancillary products, is dependent upon the occupational use of the area and must be agreed by the supplier of the preparative materials and the flooring contractor.
All floor preparation materials used must be used in accordance with the manufacturer’s recommendations and in accordance with the national standards for resilient floor coverings.
Good preparation is essential for trouble-free installation. It is vital for an excellent Kompact KlickFloor design floors finish. The appearance of Kompact KlickFloor
Kompact KlickFloor design floors must acclimatise in the room of installation, or an equivalent area for at least 24 hours prior to installation, or until such time as the product has achieved an ambient temperature. Again, this is a minimum temperature of 18°C and a maximum of 27°C.
• Unpack the Kompact KlickFloor design floors and check all planks or tiles in daylight for possible defects or discrepancies in colour.
• Stack the plank or tiles in straight piles away from heating, cooling or windows with direct intense sunlight. This is to achieve a gradual acclimatisation.

Kompact KlickFloor design floors should be installed with a room temperature of between 18°C and 27°C and a floor temperature of

above 15°C.
Installations in areas colder than recommended will influence the installation properties of Kompact KlickFloor design floors. The planks or tiles will be less flexible, cutting will be harder and small pieces difficult to cut out. The lower the temperature, the more difficult the installation.
For installation in areas warmer than recommended, we advise consultation with your local retailer/ installer on how to create the appropriate installation conditions.
A constant temperature, fluctuating no more than 5°C per day, not below the required 18°C room temperature and 15°C subfloor temperature, should be maintained 24 hours before, during and 72 hours after installation.
Kompact KlickFloor design floors can be used with traditional water based underfloor heating systems, provided there is a constant room temperature of 18°C for the acclimatisation period, installation and for 72 hours after installation. 24 hours after installation the underfloor heating must be gradually increased by increments of 5°C per day until it reaches the standard operating temperature conditions, with a maximum operating temperature of 27°C. For the suitability of the system please check the manufacturer’s instructions.
We do not recommend the use of any electric mat heating systems with KlickFloor.
Kompact KlickFloor design floors can also be installed over floor cooling systems. However, the supply temperature of the cooling water must not be reduced below the dew point temperature. Temperatures below this point will produce condensation and can therefore damage the floor covering. Thermostats in the room must never be set at a temperature which is more than 5°C lower than the room temperature.
Installing the correct underlay is paramount. Whether you require excellent sound control, a solution in a heavy duty environment or a base for general purposes, Xtrafloor™ has an underlay suitable for your requirements.
1. Xtrafloor™ Base: Residential Use
• Improved sound insulation (ΔLw=13 dB with 4.5 mm Kompact KlickFloor)
• Protective foil and lightly tackified
film for easy installation.
• Suitable for underfloor heating and cooling
• Provides excellent dimensional stability
• Not suitable for roller castor chairs or heavy duty use

• Improved sound insulation (ΔLw=13 dB with 4.5 mm Kompact KlickFloor)
• Protective foil and pressure sensitive adhesive film for easy installation.
• Suitable for underfloor heating and cooling
• Provides excellent dimensional stability
• Suitable for roller castor chairs & rolling loads up to 250kg
3. Xtrafloor™ Silent : Superior Sound Insulation for Residential Use
• Improved sound insulation (ΔLw=21 dB and ΔLlin=10 dB with 4.5 mm Kompact KlickFloor)
• Anti-slip coating for quick and easy installation
• Suited for underfloor heating and cooling
• Not suitable for roller castor chairs or heavy duty use and areas with exposure to direct sunlight e.g. conservatories or excessive fluctuations in temperature.
Lay the sheets butted, edge-toedge, at a 90 angle to the laying direction of the new floorcovering. Xtrafloor™ Base and Xtrafloor™
Flex-Pro is to be laid PET Film side up and Xtrafloor™ Silent is to be laid anti-slip side up. There is no need to fix one sheet to another.
A section at a time, separate the PET-film from the underlay sheet (not applicable for Xtrafloor™ Silent) and begin laying your new floor according to the fitting instructions. Do not use primer or other adhesive.
• KlickFloor is a “floating” floor. The panels should not be glued or fixed to the subfloor below.

• For areas larger than 50 m2, a 5mm expansion joint must be incorporated at the perimeter of the room/area.


• For areas larger than 200 m2, it is recommended to create an expansion joint of 10mm around the perimeter of the room/area.
• In addition, should a single wall or run be longer than 20 linear meters, then a 5mm expansion gap should be allowed within the floor surface.
• It is recommended that an expansion gap is left between doorways, especially where there are temperature differences between different areas.
1. The Kompact KlickFloor system panels can be joined in two different ways, either tongue-ingroove or groove-under-tongue. The simplest procedure, however, is groove-under-tongue, working from left to right.
The advantage of the Kompact KlickFloor system is that it allows you to choose your own starting position. You can start in the middle of the room/area and work to both sides, or start at the wall and work your way in.
Determine the installation direction of the Kompact KlickFloor design floor. Measure the room carefully to determine whether the first row of panels needs to be narrowed. If not, the lower groove lip of the first row of panels needs to be removed. Use a utility knife to neatly cut off the lower groove lip.
2. Begin by laying the first row in the corner of the room on your left hand side as you are looking at the wall. Always work from left to right and with the tongue towards yourself.
3. Lay the first row in a straight line and click the head ends together. Put the short side of the profile into the head end of the previous panel and press the panel downwards. It is recommended to use a hand roller for connecting the head ends so that the joint fits securely. We advise to use the Xtrafloor™ roller.
Use the spacers to fill out the contour of the wall so that the panels do not move and are 100% installed.
4. For the last piece, measure the last plank so that the required expansion gap is maintained. Do not lay the panel completely tight to the wall. Cut away the marked
piece and fit the end panel in the same way as the previous panels. When cutting the panel with a utility knife, make sure that you cut through the wear layer before breaking the panel.
For an attractive and natural appearance, we advise to use the piece left over from row 1 as the first piece in the following rows.
5. For the second/next row, take a new panel and decide how big the first piece must be (or use one of the left overs from previous rows). Make sure that the front seam is at least 20-30 cm different from the previous rows.
6. Fit the second row as you did for the first: start on the left hand side and slide the groove of the panel under an angle of about 25°over the tongue of the previous row, clicking the groove into the tongue by laying down the panel while pushing it firmly against the first row. Along the long edge, it is advisable to use a recoil or rubber hammer and tapping block, or cut piece of panel profile to tap the panels tightly together and to ensure the click mechanism is firmly locked.
7. Next, fit the second panel by sliding the groove under, at an angle of 25°, into the tongue of the previous row. Position the left corner of the head end against the previous panel and then drop the short side of the profile into the head end of the previous panel, push downward and press into place using a hand roller. Repeat until you reach the end of the row. Do not hammer the end joints into place.
Repeat steps 5, 6 & 7 until all rows are complete, and only the last
row needs to be placed.
8. To fit the last row of panels you will usually need to narrow them. Do this as follows: lay a panel on top of the previous row with the groove towards the wall, lay another panel upside down up to the
edge of the wall and mark the panel underneath. Cut the panel to size and fit the last row.
Door-jambs and heating pipes also need to be individually fitted. First cut the panel to the right length, then place the panel next to the object and draw the correct fitting. Next, cut the panel to size. Doorjambs can also be sawn (undercut) to size if necessary. The Kompact KlickFloor can them be neatly installed underneath.


Appropriate maintenance procedures will help to preserve the appearance and will extend the life of a Kompact KlickFloor design floor. The frequency of maintenance will depend on the amount and type of traffic, degree of soiling, the floor colour and type. Kompact KlickFloor design floors have a Protectonite-PU lacquer on top of the resistant wear layer. This lacquer protects against soiling and makes overall maintenance easier. Protectonite also makes any posttreatment with protection polish unnecessary.
The appropriate management of external conditions can help to protect the flooring, which saves time and expenses on cleaning and maintenance, and also extends its lifespan. Most soiling comes from an external source and is transported indoors by foot and rolling traffic. If dirt lodges under sliding furniture, the flooring will not only be soiled but will also suffer (light) damage in the form of scratches.
A proper clean-off zone/mat is strongly recommended. It will reduce the soiling of the flooring by as much as 70%. Entrance mats, when properly serviced, can effectively remove abrasive materials from foot traffic and reduce the amount of transferred water. Kompact KlickFloor design floors recommends a minimum of two full strides of entrance matting. Where possible, prevent dirt from reaching the floor. A suitable barrier matting system will help prevent soiling and abrasive material from entering a building, assisting cleaning and
maintenance.
Regularly clean the clean-off zone matting so that it functions optimally. Replace the clean-off mat when necessary.
Avoid rubber or latex backed mats, rubber furniture feet and castors, as these may leave permanent stains.
Place good quality protective felt pads under chair and table legs. Furniture cups should be used to avoid high point loading.
leakerdirect.co.uk. For heavy domestic / commercial users, a 2.5ltr container is also available. Use of any other cleaning product may invalidate your warranty.
Can my KlickFloor be used with underfloor heating?
Yes, but we recommend that KlickFloor must be acclimatised to the room and that the underfloor heating be on before and during installation (preferably around 18°C). Use of KlickFloor XtraFloor underlay will enhance the performance of your floor with underfloor heating. We do not recommend the use of any electric mat heating systems with KlickFloor.
Do I need to use underlay with KlickFloor?
Kompact only recommends the use of KlickFloor Xtrafloor Underlay, which has been specifically designed for use with this product. XtraFloor Underlay will always enhance the performance of your KlickFloor, providing increased comfort, sound & heat insulation and will smooth out any irregularities in your subfloor. Use of any other underlay not designed for KlickFloor may invalidate your warranty.
Your new KlickFloor should be swept / mopped or vacuumed regularly. Occasionally KlickFloor should be damp mopped using XtraFloor Routine cleaner. Kompact only recommend the use of KlickFloor XtraFloor Routine Cleaner & Maintainer. This will maintain the finish of your KlickFloor and maintain the SupaGuard coating on your KlickFloor. This should be supplied by your Retailer / Installer after installation or can be purchased online at www.
How level does my floor need to be to install KlickFloor?
The finished appearance of your new KlickFloor will only be as good as the quality of the subfloor it is installed onto. Your installer should ensure that the subfloor has no irregularities greater than 5mm wide or 2mm deep. Use of XtraFloor underlay will smooth out small irregularities in your floor.
Can I fit KlickFloor over existing ceramic tiles?
Yes, but as above , your installer should ensure that the subfloor is suitable, and use of XtraFloor underlay will enhance the installation.
How do I cut my KlickFloor?
KlickFloor can be easily cut using a utility type knife. Once the surface is scored, a clean break snap apart.
Klickfloor must always be stored flat on an even surface to avoid damage to the joint system.
Do NOT use any rubber backed / latex mats on top of KlickFloor, to prevent plasticisation which can discolour your KlickFloor.
Do not use abrasive cleaners of any type on your KlickFloor to prevent surface scratching.

the moisture disappears.
If using products with different batch numbers, please ensure that your installer mixes the tiles /planks to ensure uniformity of colour.
Always use the furniture protection pads supplied in your XtraFloor Consumer Kit to prevent damage to your KlickFloor.

Always acclimatise your KlickFloor for at least 24 hours to the room before installation.
Always use an entrance mat to act as a clean-off area to protect the surface of your KlickFloor. Avoid use of rubber or latex backed mats as these may discolour your KlickFloor.
My KlickFloor joints are coming apart in certain areas – This is normally caused by either an uneven subfloor or the joint system not being correctly locked on installation. Please contact your installer to rectify
My KlickFloor has a ‘whitish bloom’ on the surface after contact with water - This is a harmless effect caused by a reaction with water by the SupaGuard surface coating. Once the water / damp contact is removed your KlickFloor will return to normal over a period of days, as
My KlickFloor is showing some scratching on the surface – This is normal for any hard floor, and can be alleviated by use of XtraFloor Routine Cleaner to maintain the SupaGuard surface of your KlickFloor
KlickFloor floors contain up to 50% recycled material of verified origin, and are themselves recyclable. Post-industrial recycling also enables us to obtain an especially pure type of PVC with a limited impact on the environment. Furthermore, we are always looking for new ways to package products and limit waste


By manufacturing our products as close to the customer as possible, we minimise the impact transportation has on the environment. This helps to keep CO2 emissions and our ecological footprint to a minimum.


With a diverse range of durable, stylish products and the convenience of an all-in floor solution, as well as excellent customer service and unparalleled ‘green’ credentials, KlickFloor is proud to be different.
KlickFloor is produced in our vertically integrated factory in Avelgem, Belgium, which is specially constructed to enable us to produce flooring in a responsible manner. In addition, we have a fully automated warehouse on site with the capacity to store 2,000,000 m2 of KlickFloor flooring. Not only are a large number of energy-saving and waste reduction measures in place in our factory, unlike other producers we have full control over the design, production and logistics process. This allows us to retain total control, every step of the way.

KlickFloor is the residential luxury design floor manufactured by IVC Group, a world leader in the development and manufacture of design floors.
Since 2015, the IVC Group has been part of Mohawk Industries Inc., the world’s market leader in flooring.

KlickFloor sets the standard for future generations of luxury design floors. On the one hand, it combines sustainable production with the ease of installation andmaintenance of vinyl floors.

On the other, KlickFloor truly stands out because of its range of designs and innovations.


