12 minute read
Activities
Arts Activities
Fun Things to Make and Do
Advertisement
See the resources section of this booklet for internet links on step-by-step instructions of these activities. ‘Young children feel a sense of emotional satisfaction when they are involved in making art, whether they are modelling with clay, drawing with crayons, or making a collage from recycled scraps. This satisfaction comes from the control children have over the materials they use and the autonomy they have in the decisions they make. Deciding what they will make and what materials they will use may be the first opportunity children have to make independent choices and decisions.’
Art in Early Childhood: Curriculum Connections Jill Englebright Fox, Ph.D., and Stacey Berry, M.Ed.
Setting up a Gallery
Setting aside a gallery space in your classroom for students or children at home to display their artwork, develops a sense of pride and self-esteem for children around the artwork they create. It is also a great way to teach children about galleries and the ways art is exhibited. You could visit a local art gallery to see the ways that curators hang artworks on the walls or place sculptures and other kinds of artwork within the gallery space.
Have children give their works a title and create labels with artist statements.
Make frames from black or coloured cardboard, buy or collect frames (put a call out to families and the community for old frames) that can be used to temporarily frame artworks till they are taken home by the children or changed exchanged for different artworks.
Hold an annual exhibition for families and friends of the children’s favourite artworks of the year, curated by the children.
Setting up an Art Space
In your classroom art area or at home set up an accessible art station for children where they can make choices about the materials they will use to create their artworks.
Your art station might have a selection of different art materials or be changed as you do different projects and to give students a choice of different materials to use.
It may be a shelf, table or trolley, stocked with paper, and drawing materials. Magazines and coloured papers, fabric, glue and scissors for collage. Recycled boxes and other materials for creating sculptures. Paint, ink, brushes and other painting tools. As well as assorted found objects and materials, such as bark, rocks, sticks, and leaves to incorporate into art making activities.
Your Brain is a Camera.
An exercise to enhance children’s visual memory.
Ask children to use their senses and brain like a camera to record events that you would like them to remember for later art activities.
Encourage the children to use all their sense organs to record events or re-call memories, for example sounds they hear, textures they feel, smells they experience and things they see.
Recently at the Lismore Regional Gallery’s exhibition of the Northern Rivers Portrait Prize, during the Peggy Popart Tour, I asked the kids to lie down on the ground, close their eyes and think about someone very important to them.
I asked them to imagine what they looked like, their face, clothes, how tall they were, the colour of their hair and the fine details of the person.
I then asked them to take a picture with their Brain Camera of the person in their head. Later the kids recalled the memory and made a portrait of this important person. You could use this exercise to start a portrait or self-portrait project, a landscape or still life painting activity.
Activities based on Art Genres
Portraits
Ask children to draw or paint a picture of one of their friends or family members. The friend or family member can model for the artist or they might prefer to use a photograph.
Offer different kinds or art materials, such as pencils, ink, paint, chalk and oil pastels. The children will gain an understanding of how different art materials can create different images, moods and finishes.
Landscape
Create a landscape painting or drawing of a place the children have visited or take the children outside and have them draw the landscape around them. Talk with them about the different things they see around them, the colours, textures and sizes.
Children can also create a landscape collage using cut outs from magazines creating an imaginary landscape from different pictures being stuck together.
Still life
Set up a still life scene on a table in your classroom or home. You can use different objects such as pots and pans, flowers in a vase and cups and saucers.
Ask the children to draw these objects, they can choose what angle or direction they want to start their drawing from.
Ask them to look the different colours, the angles and shapes the objects make together. Talk to them about the way the light hits the objects, reflects or casts shadows. Representing reflection and shadows in still life paintings or drawings shows viewers the 3 dimensional aspects of the objects in the still life set up.
Other Fun Things to Make and Do
Create a Collagraph
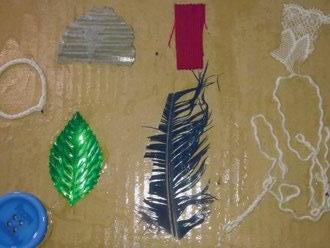
A collagraph is a very simple form of printing that uses collage techniques to produce a textured surface on a flat plate that is then inked and printed onto another surface.
It is a project that takes a number of steps and processes and can happen over a few sessions. It is a good way to introduce children to the art of printmaking.
Children can use materials they have collected in the playground or different textured materials available in your art materials supply. You can use recycled cardboard or plywood as the collagraph surface and craft glue to stick on the textured materials.
When the glue has dried, a teacher should lacquer the surface or paint with some layers of watered down craft glue to seal the surface.
When surface has dried children can roll water based ink onto the collagraph and make prints onto pieces of paper. The collagraph boards are also great for using as texture boards for children to learn about different textures and sensations. They are also an excellent tool for turning visual artworks into textural representations for children who may have a visual impairment or other sensory disabilities.

Collograph Scratch Board

Heads Bodies and Legs
Make your own Scratch Board
Create your own scratchboard with your class. Using card ask the children to colour the card in with different coloured oil pastels like a rainbow of colours.
When they are finished, they can paint the surface of the card with some black poster or acrylic paint that you have added a little washing up liquid to. (A foam brush or roller is best to use but a soft bristle paint brush will also work) When the black paint has dried the children can start scratching the paint surface off to unveil the colour underneath.
Provide them with scratching tools that have different widths and shapes, so that they can create different kinds of lines and textures in their drawing. You can guide the students’ drawing with a theme or let the children free draw.
Heads Bodies and Legs
Two or more players take turns in drawing a head, a body, and a pair of legs, without letting the other player see them. The point of the game is the fun of seeing the resulting pictures.
Each player starts with a blank piece of paper — A4 paper is fine. Each player begins by drawing a head in the top third of the sheet, and then folds over the paper so just the neck is showing. The players then exchange pieces of paper, taking care not to let the other player see their drawing.
Players then draw a body in the centre third of the paper, joining the neck lines, folding over the paper so just the legs are showing. Again, the players exchange pieces of paper.
Each player draws legs and feet, joining the leg lines, and folds the paper so nothing is visible.
Finally, after exchanging again, each player opens their piece of paper to reveal the whole drawing.
Variations. An amusing addition is to add an extra stage in which each player folds the page to leave a blank strip at the bottom of the paper. After exchanging, each player writes a name for the drawing in the blank space.
DUO: learning the ropes 2014 studio shots. From left to right: Jesse Mackintosh & Corey Bruggy, Joanna Kambourian & Audrey Bush, Christine Willcocks & Katie Hunter, Michelle Dawson & Lucy Murray, Michael Moynihan & Alby Moran. All images Michael Moynihan & Alby Moran, Michael & Alby photograph by Katie Hunter
DUO
Learning the ropes mentoring program, 2014
In 2014 we ran an art mentoring program for children and young people culminating in an exhibition. Pairs spent 4 months working together, sharing knowledge and creating amazing artworks. Artists Michelle Dawson and Lucy Murray (7), Christine Willcocks and Katie Hunter (11), Joanna Kambourian & Audrey Bush (11), Jesse Mackintosh & Corey Bruggy (12), Michael Moynihan & Alby Moran (14) worked together in the artist’s studios creating prints, paintings, drawings, sculptures and photographs that explored their common interests and shared skills. It was wonderful to see young people learn new skills, gain confidence and create outstanding works of art, while professional artists communicated how DUO gave them opportunity to engage in the play of art and see their work in a new light. Strong connections and artworks were produced for the final exhibition.
Activities to encourage collaboration and intergenerational exchange
Create activities that encourage collaboration and side by side work. This is a great way for kids to learn through osmosis and be inspired by those around them.
Invite artists in your family or community to do projects or activities with your class or children.
Ask children to collaborate on a group work, such as a mural.
Play drawing games like ‘heads, bodies and legs’ (page 23) requiring 3 people to work together.
Nominate a child to bring an artwork to school, scaffold questions for the child about the artwork then ask others to make their own artwork inspired by the work.
Invite Aboriginal elders and artists from your region to talk to your class about the art and stories of your region.
Visit your local Gallery and learn about different artists and how they create artworks. Try experimenting with the artists’ techniques and styles.
Look at programs such as the Reggio Emilia-Atlelier program which engages atelierista, a “teacher” with an arts background in residence within the preschool setting.

Peggy Popart, Tuntable Falls Community School

Peggy Popart, Tuntable Falls Community School

Peggy Popart, photograph: Abby Turner
Not Quite Square The Story of Northern Rivers Architecture
Exhibition, 2013
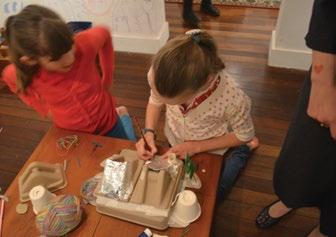
Not Quite Square was an exhibition of photographs, film, mementos and stories of alternative home owner builders of the Northern Rivers from the 1970s onwards. The exhibition included a space for young people and the general public to draw on the walls and leave messages about their life in the Northern Rivers region and a space to building model houses from cardboard, recycled objects and craft materials. Some models created by children had water tanks, solar panels and some futuristic inventions. After visiting Tuntable Falls Community School, students were inspired to create structures from recycled materials in their playground.
Activity: Design your Dream Home
Materials: Paper, drawing materials, scissors, cardboard, sticky tape
Discuss with children the homes they live in.
Did their family build or design their house? What are their houses made from? What does their home look like?
Introduce the concept of architects, designers, blueprints and design plans. Stick up pictures of different houses in your art space.
Talk about the different materials people build their homes with. Look at environmentally friendly renewable materials and energy saving designs.
Ask children to describe what their dream home would look like. It might be a futuristic house or environmentally friendly house built from renewable materials.
Ask children to draw their dream home and then build a model of their home. Materials such as aluminium foil make for great solar panels, toilet rolls create excellent water tanks. Cellophane can be used to make beautiful stain glass windows and paddle pop sticks are great for giving the house a wood finish.
Exhibit the dream houses in a special place in your art room.
This exercise can also assist in the development of cognitive skills such as it incorporates shape and spatial recognition, construction, memory and mapping skills. It also helps to develop personal decision making skills while engaging children’s imaginations.
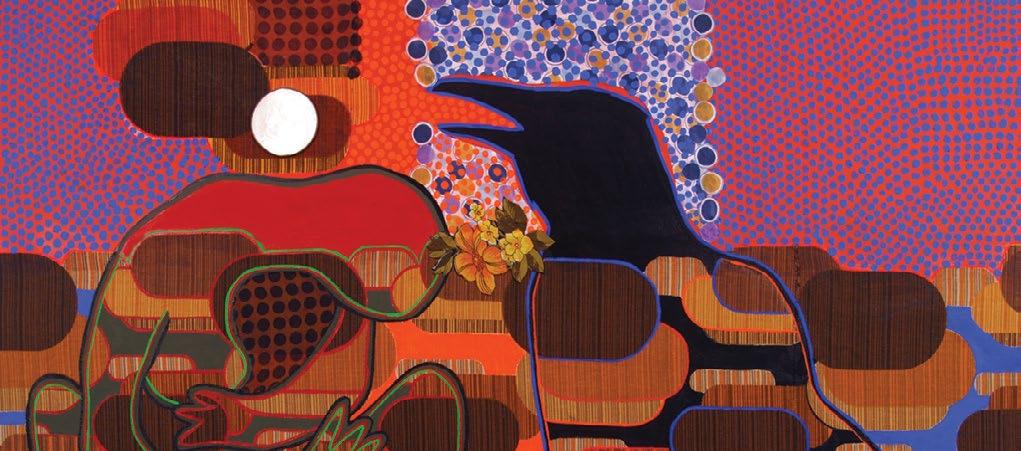
Image: Karla Dickens, Forever in my arms

(detail), 2008
In Loving Memory
Karla Dickens, 2008 Collage/ Painting/Mixed Media
Contemporary Indigenous artist Karla Dickens lives and works in the Northern Rivers. She is a mixed media artist who creates colourful artworks with fabric, paper, beads, glue, and paint on canvas and board. She also weaves fabric and other materials together to create sculptural works. Her work told stories of important life moments.
A Drawing and Collage of a Happy Memory
Ask children to think about a happy memory in their life and draw a picture of this time on a piece of paper with coloured pencils. They may also want to write or tell the story of the happy memory or have you write it for them. Children then make a collage version of this picture, using images cut from magazines, coloured papers, fabric, beads and found natural materials such as bark and feathers.

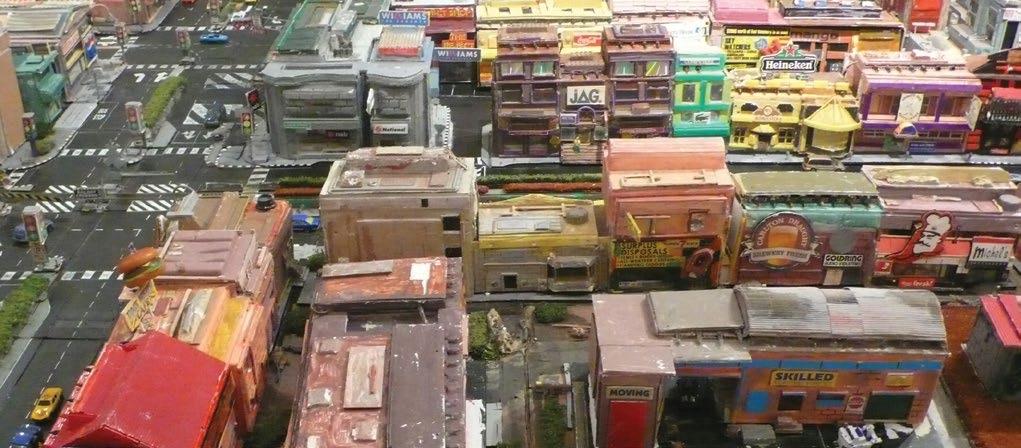
Image: Warren Thomas, Box World, 2011
Box World
Warren Thomas, 2011 Sculpture
This exhibition showed the artwork of Warren Thomas who spent two years building a model city out of boxes; using recycled and found objects he constructed and painted. His amazing Box World included shops, roads, signs and cars and covered the floor and viewers towered over the box city like giants gazing upon a detailed miniature city.
Make a Box World
Ask children to construct their own town from boxes, recycled and found materials. They can paint and draw signs, make cars, people and animals. They could add elements from their own home town and make their own house and suburb. This is a great ongoing project that can be added to over time.
This activity can be beneficial for a child’s gross and fine motor-skills through the use of tools such as scissors, paint brushes and pencils and engaging different building and construction techniques.
Talk with children about shapes, colours and the way they work together to create different structures.
This exercise can also assist in the development of cognitive skills such as it incorporates shape and spatial recognition, construction, memory and mapping skills. It also helps to develop personal decision making skills while engaging children’s imaginations.


