
11 minute read
Tech Today: Starlight Headliners


Using these installation tips, you can create Rolls-Royce effects in any vehicle.
WORDS BY JOEY KNAPP
Over the years we have covered a number of different topics in this column. Some of the things we’ve learned are vital to our roles of integrators, and some are less important. This month we’ll look at something on the lighter side of things. I recently had a client request a starlight headliner installation in his Camaro. I had never installed one before, but I knew I had seen some of my 12-volt friends post photos of them on the Internet. I looked through a few Facebook groups, noted some installs and contacted a few of the installers. Thirteen Fortenberry did a great job documenting starlight headliner installation in a Toyota Tacoma. After referencing that build, along with some questions answered by Justin Marks, I scheduled the Camaro for the installation. Keep in mind as we go through this tutorial that this was my first attempt at one of these, and my knowledge on the subject was a combination of aggregated Internet research and installation common sense.
Doing the Prep-Work
There are a few things that have to be considered before booking one of these installations. It’s important to think about routing the fibers and mounting the lighting box. Depending on how many fibers you chose to go with, the bundle, and the required box to light them might be fairly large. The installation in the Camaro consisted of 300 strands of mixed thickness fiber. The kit I purchased divided the strands into two bundles, which made routing easier. Each bundle of fibers was about ¾-inch in diameter. Since the bundles need to terminate at a lighting box, most likely the box will be located at the rear of the vehicle. The one for this Camaro was mounted under the rear deck. The 9.8-foot-long fibers provided just enough length to make the
runs. Some vehicles have C-pillar panels that fit very tightly to the C pillars. Make sure you have a plan for routing them if space is limited.
The Camaro headliner was fairly small, so I felt comfortable doing a minimal amount of fibers—300. I don’t think fewer could be used and still get a good result. After talking with Justin Marks, I learned he’d used 4,000 in a large SUV. I would say the decision for how many fibers you use should be balanced on the client’s expectation for lighting, the room you have in the pillars and the client’s budget.
When it comes to the parts for the installation, there are two common directions you can take. The first is to buy a ready-made kit from a vendor on the Internet. These kits typically have pre-terminated fiber bundles, and a light box and remote, all together. The second route involves buying a light box and bulk lengths of fiber and terminating them yourself. I think either way works fine. If you can’t find a kit with the length you need, you might consider the bulk route.
The final thing to note is the headliner removal. When I researched this Camaro, I found that some people said the front windshield had to be removed to take out the headliner. As I looked around for more opinions, I found the same thing. I did find one person, in all of my searching, who said they were able to get the headliner out with a few specific steps and pieces removed. Luckily for me, I was able to duplicate their results and remove the headliner with the windshield in place.

I first wrapped the headliner in black suede fabric.
Considering the Headliner
Our client’s headliner was not in bad shape, but he wanted to upgrade it to suede. When we looked around at other starlight installations, it seemed first upholstering in suede is a common trend. I believe it might be because the suede fibers can help the lighting fibers blend in with the roof. Also, be prepared for possible support spacers on the back side of the headliner. Many manufacturers use some sort of plastic, foam or fiber spacers to position the headliner. These might be great for keeping the headliner properly placed, but they are not so good if you are trying to poke a bunch of fibers through the headliner material. In our case, there were plastic spacers that had to be removed from the fiberglass headliner. I purchased some 1.5-inch foam to be glued on after the fiber routing, to take the place of the spacers.

I used chalk to mark the perimeter lines on the headliner.
Fiber Spacing
Once I had the headliner covered in suede, I started to realize that placing 300 fibers in the headliner in an even, yet random, manner would be a challenge. I decided to break down the headliner into even blocks and randomly plot the correct number of fibers per block. The first step in this process was to determine how far out the fibers could safely go on the headliner. In this Camaro, the headliner wraps down, toward the door glass. The two to three inches from the door glass sit flat on metal, so these were areas in which I couldn’t have fibers.
Then I drew six more lines to divide the headliner space into 16 blocks. As I mentioned before, the kit I purchased had three different fiber sizes. I divided each set of fiber quantities by 16 to determine how many of each fiber should be in each block. With the math done, I used a different color piece of chalk to randomly place the correct amount of each size in the 16 different blocks. Preplanning the fiber locations made it easy to stand back and look at the spacing to ensure even coverage.
Fiber Installation
A fiber installation trick I had seen mentioned online was to purchase body piercing needles with interior diameter that matches the fibers. The needle is pushed through the headliner, then removed after the fiber is inserted. This is how I chose to install the fibers in the headliner I was working on. The original reference suggested using pliers to help push the needles through. I ended up using a thimble on my finger and just pushing the needle in. Sometimes I could just push the needle through by hand, depending on which part of the headliner I happened to be working on. The difficult parts were areas that still had some glue on them from where the plastic headliner spacers were installed.
Because I had two groups of fibers, I logically used one group for the right half and one for the left half. This would help reduce any longer runs of fiber, while also letting me run one group down each C pillar. This Camaro offered plenty of room for the fibers to run inside the C pillar trim. I could see, however, that it could be a problem in some cars.

Body piercing needles were used to penetrate the headliner.
Superior Mobile by 13 used an additional bit of lighting that provided a shooting star effect.
Organizing the Installation
Up until this point in the installation, I thought I was pretty organized. I had a good plan on distribution of the fibers, I had clear paths for both bundles down from the roof, and I had a mounting location for the light box. I planned on the same level of organization when I started sorting and placing the fibers, but I quickly saw how futile that would be. I can’t imagine what Marks went through with 4,000 fibers. Three hundred turned out to be quite overwhelming when it came to organization.
I decided to do one half at a time. I started with the thicker fibers and moved down to the thin fibers. I knew the length would work, so to make sure I gave myself the most fiber to work with, I worked with locations farthest away from the bundle end. I left about four inches hanging out on the other side to start with. As I got closer to the bundle end, I began to leave more and more hanging out on the headliner side. About halfway through the first half, I stopped the insertion process to see if I could somehow organize the wires a bit. The best I could do was group the wires in small bundles.
Fiber Management Once I was well underway with the project, things were going well. So far, other than removing the headliner from the car, there hadn’t been any surprises. Once I started trying to organize my fiber bundles, I found the first real challenge— fiber length. As much as I tried to keep the amount I pulled through the headliner uniform, I kept losing length on my bundle ends. At one point, I clamped the bundle end to the bench I had the headliner leaning on, to try to keep it from getting shorter. I ended up having to slowly pull sections of the bundles out of the head- liner to gain more length. For those of you who might try this without pre-terminated fibers, this would be no problem. If you are terminating your own fibers, you could leave extra length, then end the bundle at the perfect length.
My back and forth pulling and organizing became a bit comical. I pulled out sections at a time, knowing I would gain a few inches on the bundle length, but then discovered I hadn’t gained any length. The cables were entering into the headliner perpendicular to its surface. The cable arches over to the direction of the bundle. The arch posed a new challenge. Depending on how tight or loose it was pulled, the length could very an inch or two. I didn’t want to pull too tightly, because I didn’t want the fiber to angle in the headliner. After quite a bit of give and take on the different bundles, I finally had half of the headliner done. The second half was less eventful because I knew what to expect, and had a better under- standing of how the fibers moved.
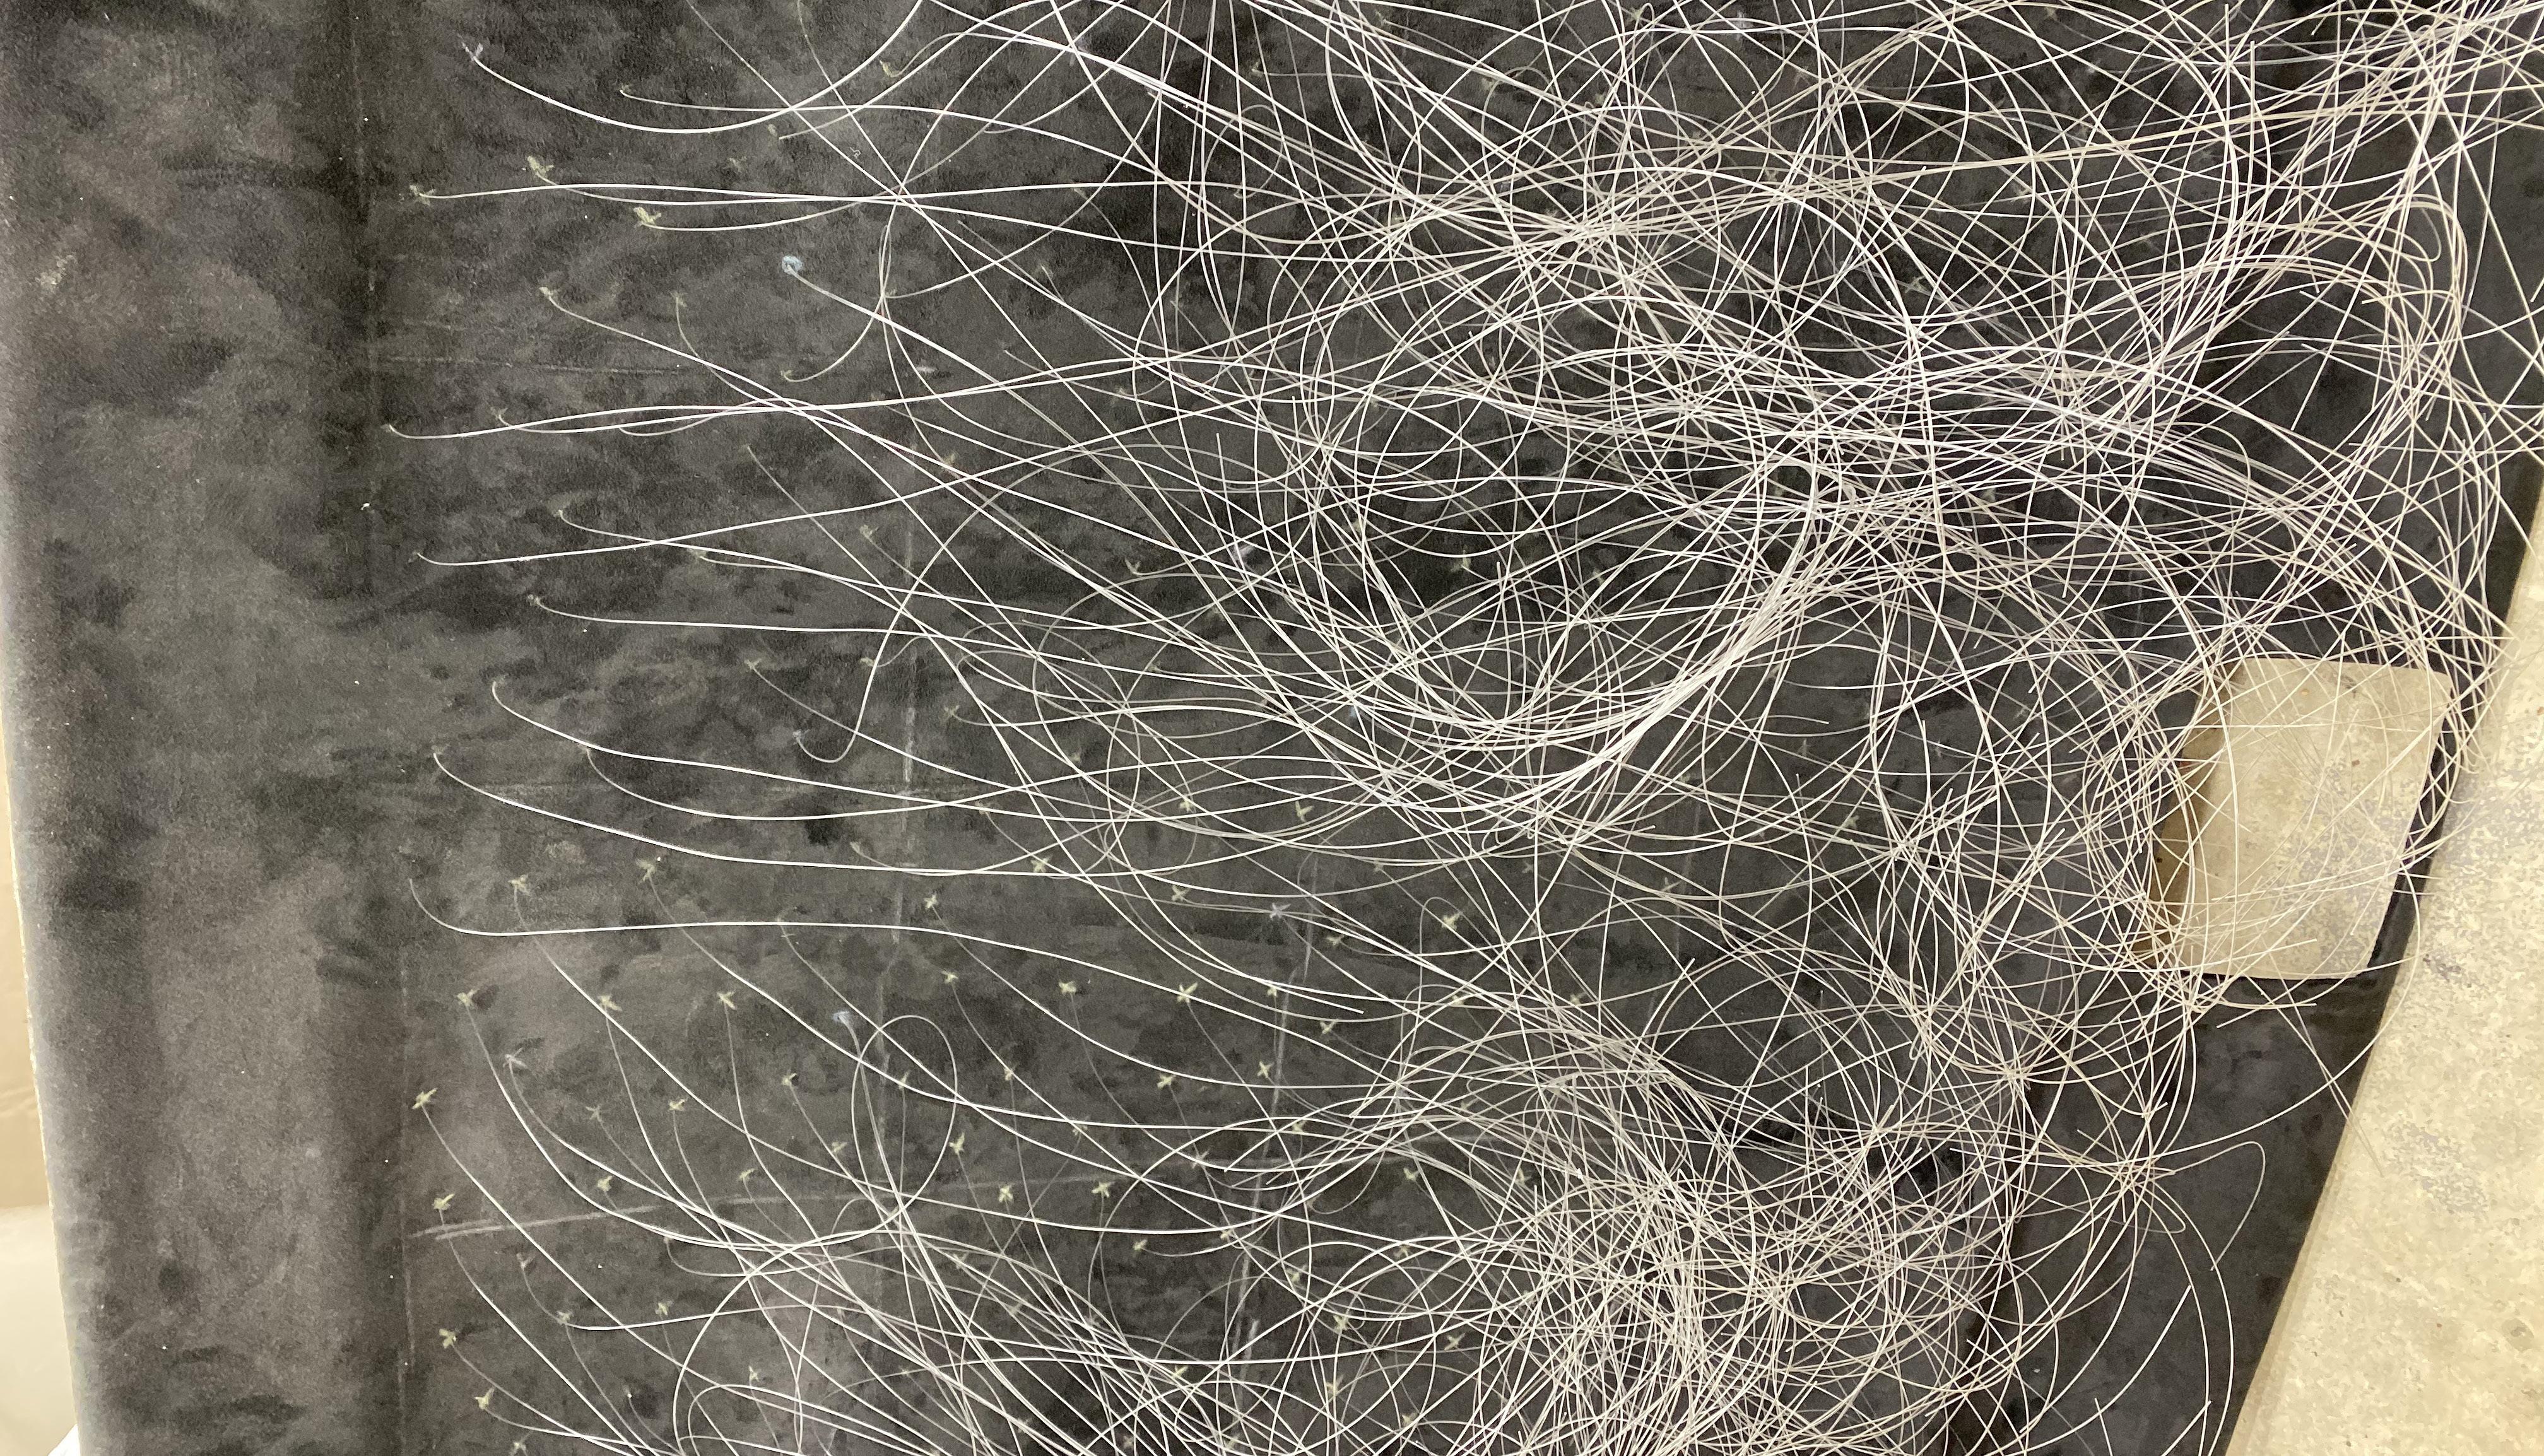
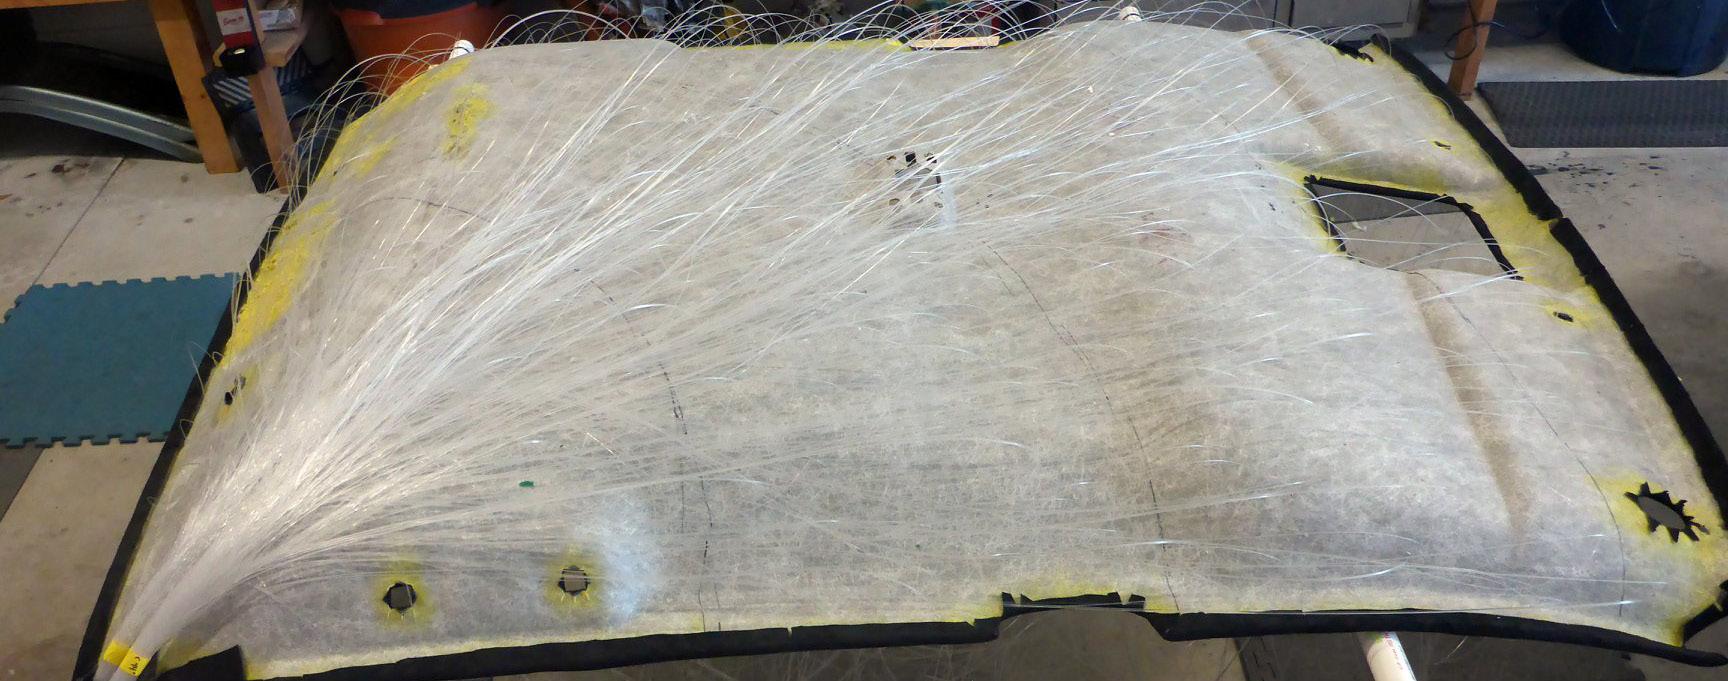
The result of poking 300 wires through the fabric

I used a soldering iron to heat and flatten the ends of the fibers.

A hot glue gun with the temperature set low was used to secure the fibers.
Fiber Securing and Termination
While researching these headliner modifications, I found two different methods for terminating fibers. You can leave all the pieces hanging, install the headliner and then trim the fibers flush to the headliner. The other method is done pre-installation. The fiber is trimmed an inch from the headliner, and then the end of the fiber is melted slightly to flatten it out. The fiber is then pulled from the back side and secured. From what I read, the melting technique also helped make the fibers a bit brighter, because there was more surface area to shine. I decided to use this route.
Trimming the fibers, heating the ends and pulling them through took a bit of time. The faster way would definitely be the trim after the install method. Another downside to the heated ends method is that the fibers are visible on the headliner when the lights are off. The Camaro headliner was re-covered in black, so the white ends were definitely visible. I think if the headliner had been covered in a lighter colored fabric, the fiber ends would be less visible.
The final step I had to take before installing the headliner in the car was to secure all of the pieces of fiber. I wanted to use hot glue for this because I knew it would dry relatively quickly and hold securely. Alternately, I noticed that Fortenberry used Elmer’s glue for his. I worried that hot glue would melt through and separate the fibers. I did a few sample tests and found if I turned my glue gun almost all the way down that the fiber would get somewhat soft, but the heat was not high enough to damage the fiber. While testing, I found that in hot-gluing the fibers, the heat made them pliable enough to lay flat. I was concerned about light transmission with a 90-degree angle, but I found no perceivable reduction in output. Fortunately, none of my fibers needed to be at such a tight angle to fit.

The finished headliner was ready for installation.

The time spent laying out the pattern was well worth it, as the result was a nice, even, light distribution.

Oscar Rodriguez of Oscar’s Audio Designs went so far as to lay out real constellations in his headliner.

Thirteen Fortenberry of Superior Mobile by 13 made a special jig for working on a headliner he modified.
Finishing and Installation
Once all of the fibers were terminated and hot-glued into place I only needed to tidy up the fibers a little more before installation. I went back and further grouped the fibers so the back side of the panel wasn’t quite as messy. Marks finished his installation by gluing a piece of trunk liner carpet over the fibers. I believe this also allowed him to not have to individually glue his fibers (since he cut them once they were in the vehicle). With everything relatively neat, I installed the headliner back into the Camaro. The fibers easily fit down each of the C-pillars and I had just enough length for each side to run to the light box.
All in all, this project wasn’t too bad. I spent maybe two full days working on it. I initially spent a bit of time trying to get the headliner removed, but the actual lighting part went smoothly. There seems to be some amount of variance in what people charge for these, but the general consensus shows the cost starting somewhere in the $2,000 to $2,500 price range.


