7 minute read
Tech Today: Designing Installs Using Procreate for iPad
Designing Installs Using Procreate for iPad
Have you tried your hand at drawing? Start using Procreate today to plan projects without having to cut a single piece of material.
WORDS BY BRANDON GREEN

When I was younger, I did a lot of sketching. I got my inspiration from aircraft or car-related books I borrowed from the library, and I went through countless notebooks trying to recreate what I saw in books. I am still fascinated with design and how the lines of a vehicle flow together. I got to the point where I could draw an F-14 or a Porsche 911 from memory, although I never mastered human faces or live subjects.
Over the years as I turned my mobile electronics obsession into a hobby, I relied on some of those skills for sketching enclosure designs, but I never really put a whole lot of stock into how valuable and useful it could be—kind of like the math we thought we’d never use when we were growing up, yet we use it daily as adults.
People like Tom Miller and Randy Kunin were drawing designs to show clients, and I got to see their amazing results. I wondered whether I could also use drawing to better serve clients in my own business—and what would I need in order to make that happen?
Getting Started With Design Using Procreate
I have always been comfortable with a pencil, but Tom gave me some advice and helped me start with pens. After seeing what he was able to do with Procreate, I knew I had to start learning to use the program. I do not want to get into the “why” behind designs; Tom teaches that in parts of his courses at Mobile Solutions, which I highly recommend attending. What I want to do is give you some general knowledge you can use to start drawing today, and I’ll share how we’ve used this skill here at The Car Audio Shop.
While I’ve always been able to create what I saw in my head, I couldn’t build it if I had no idea where it was supposed to be placed. Sometimes a sketch is helpful to get the ideas flowing. And although that’s been great for me, conveying what’s in my head to clients—or to others helping me with a build—has proven a bit more challenging. It’s hard for a client to justify cost or approve an elaborate design you only have in your head. This is where drawing can be a game changer.


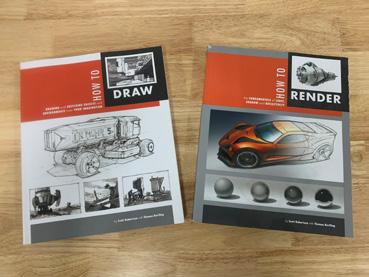
Most of what I had done in the past involved orthographic views (2D) with no real shape or depth, so I purchased a couple of recommended books to help me improve on it. How to Draw, and the follow-up, How to Render, by Scott Robertson and Thomas Bertling, offer step-by-step instructions and provide several exercises that will help anyone become more efficient at putting ideas on paper.
Moving on from the standard pen and paper, there are quite a few drawing and design programs available. Although they require quite a bit of practice to become proficient, they allow many more opportunities to adjust designs. For the

purpose of this article, I will refer to Procreate on iPad, as it seems to be the most widely known and used in our industry. It’s also easy to get started using it, and there’s a lot of support available beyond basic applications. There are also many hours of helpful tips and videos available through the “help” tab in the program.
A few things I really like about Procreate are the autocorrect options for different lines and shapes, the ability to import pictures (such as a client’s actual vehicle door or trunk) and using the multiple layers available. Autocorrection ensures lines are straight, other shapes are exact, and it offers the option to edit and move.
Importing a picture and adjusting the opacity settings as well as adding grid lines are extremely helpful for ensuring your design works and gives you a good idea of the final product in the vehicle when the design is finished. The use of multiple layers and being able to turn them on or off as needed, or to add or eliminate ideas as you create is also a very useful. Just remember to use them. (When I first started, I often forgot.)
Applying Design Techniques to a Tesla Model 3
I have a client from Colorado who recently purchased a Tesla Model 3. This

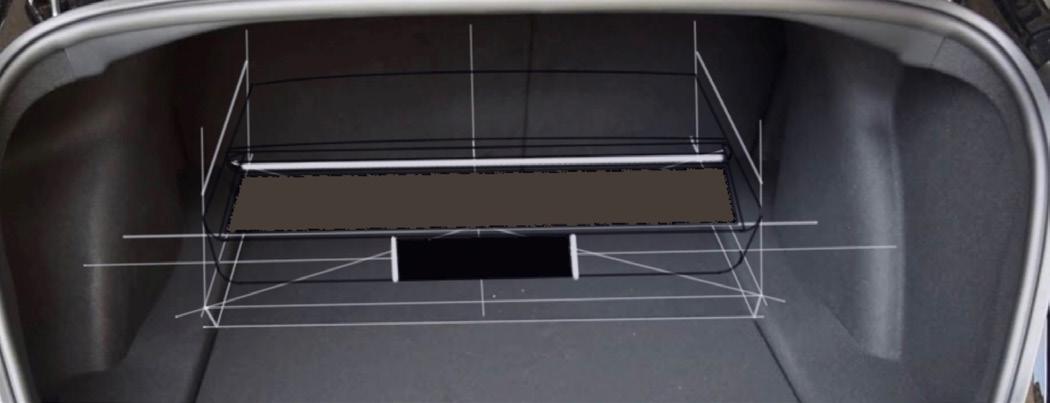
Lightening some of the colors help give the design a physical appearance so the client can really envision it in the trunk of the vehicle.
client looks at all the builds from installers like Matt Schaeffer, Tom Miller and many others. He knew he wanted something similar to Doug Dobson’s Audi, which was designed by Tom. Obviously, I was not going to steal a design. However, I have seen Tom’s video on how he did that particular enclosure, and I have seen it in the actual vehicle, so I had good direction from the client regarding what they wanted. I am by no means that talented or experienced, but providing a design for the client is the point of this story.

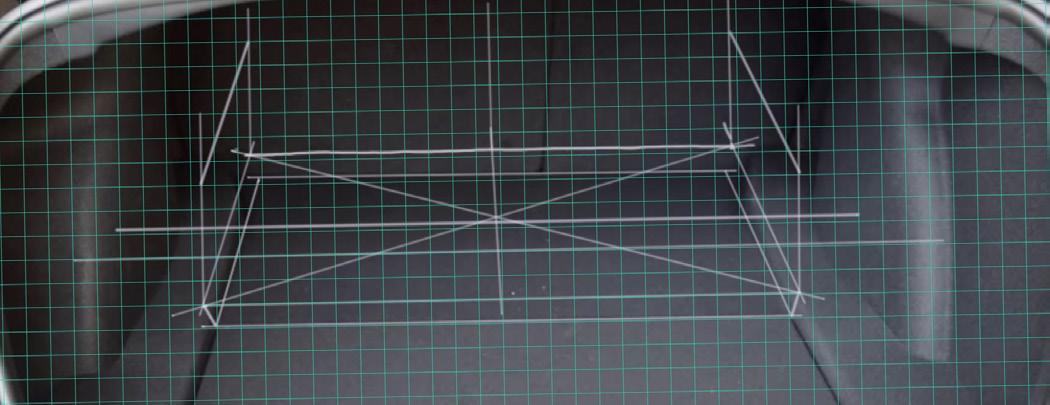
I imported images into Procreate and started there. I did a quick sketch on paper to decide on the design, and then lined my grid up with the vehicle lines in the picture. I adjusted the size of the grid to match what I would need. From there, I added some guidelines to work from. These lines would be removed for the finished drawing.
Creating an Enclosure Using Layering Tools
To begin the enclosure design, I used a combination of straight lines, arcs and curves to get the outline and overall size and shape using the guidelines I made previously. For me, this part is usually trial and error. As you become more familiar with Procreate, it will get easier. Getting this right is important to the rest of rendering, so take your time and use the guidelines from the previous step. I did this in three layers and then combined the layers to get the final result.
The next layer is where I added what would be the wood and acrylic inserts as well as the aluminum trim to divide the materials. With this shape and the angles back on the bottom and top, I worked off the outline to keep the symmetry of each side. I tried several different color combinations and these can always be
changed very easily in the program by choosing the color and dragging it from the top right to the enclosed area you wish to change (if the area is not closed, then it will color your whole screen, so make sure all boundaries are closed). The following layer involved trying a few different brush and color combinations to get the “wood” look.
Using Colors and Fill to Create Life-Like Appearance
Following the accent layer, I turned those layers off and tried a few different brushes and colors to fill in the enclosure itself. I am working hard to practice this technique, which is something I have yet to master. Using colors and the fill-in tool helps create a life-like appearance, and it comes with practice. Layers 12 and 13 are simply some accent lighting thrown in to show where and how it could be done for the client.
Notice how the arrangement of layers has changed in order to have certain pieces overlap the lighting effect. You can always move things around and try different configurations to achieve an effect; this allows you to get the main parts done and then go back and finalize the desired look. The next two layers involve lightening some parts to help give it a more physical appearance. Finally, we add our logo and remove the original guidelines. Logos and symbols can be imported, cropped and resized to fit your project.
A Visual Example of Possibilities Helps Close the Sale
As you can see, there are many uses for this in the install bay as well as on the sales floor. Showing the client a drawing to demonstrate what’s possible can help close the sale, and takes away a lot of the guesswork. It also allows for design revisions before ever needing to cut a piece of material.
If there are multiple technicians working on a project, making this part of the work order for the vehicle ensures everyone knows what needs to be achieved. The end goal is clear, which will improve overall project efficiency. Plus, it’s fun. I even draw with my 11-year-old daughter, who has starting using Procreate on her iPad.
As you take time to learn and practice, drawing in Procreate will become a quicker process which will help your overall goal. And let’s face it—we all want to build more, so let’s use this to help justify cost to our clients.
Brandon Green is owner of The Car Audio Shop in High Ridge, Mo.


