
8 minute read
Strategy & Tactics


10 Tips for Marine Audio
“Industry Best Practices for Marine Installation” at KnowledgeFest Indy covered everything from how much to charge to which supplies and tools are best for the job.
WORDS BY ROSA SOPHIA
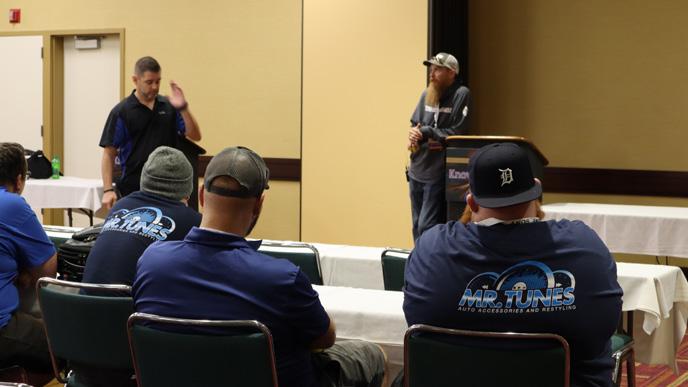
At KnowledgeFest Indianapolis, Brandon Green of The Car Audio Shop in St. Louis, Mo. and Luke Fidler of Audio Expert Auto & Marine in Clearwater, Fla. presented a detailed workshop entitled “Industry Best Practices for Marine Installation.”
The class was well-attended and interactive, with numerous attendees posing questions throughout. For retailers who hope to increase revenue in marine, Fidler and Green assured the audience that there’s more to the category than audio. Here are 10 key takeaways from the presentation that retailers can begin applying today.
#1: Decide How Much to Charge
When a shop is just getting into marine work and isn’t sure how much to charge, Fidler said to start by researching the local demographic.
“Find out the going rate in your area, then match it or go higher,” he said, adding that retailers should resist comparing prices to car audio. “People will be willing to pay you a lot. We do everything except engine servicing,” he explained. “My area is very boat-centric, and we have a lot of competition, so we’re around $150 an hour or over that.”
Fidler said his business charges more whenever they have to travel to a job site. If a shop finds there are very few businesses in their local area offering these services, they can generally charge more, and shouldn’t be afraid to do so. Especially since, he added, “People like it when you come out and mess with your boat.”
#2: Explore Simple Marine Add-Ons to Increase Revenue
Fidler said there are a number of simple ways shops can increase revenue through add-ons. He underscored the popularity of marine lighting with boaters, reminding the audience that if a shop sells a boater six speakers, but fails to sell them twelve lights, they’ve missed out on a sale. But how do you know what to charge?
Retailers can also get into installing VHF marine radios, which Fidler said is similar to a CB radio, using power, ground and antenna. His shop will also install chart plotters and fish finders. “Remember that you’re drilling into the back of the boat, so you have to take the same considerations you would with underwater lighting,” he added.
Often, people with older boats will be sentimentally attached to them, and may want a more modern-looking panel installed, according to Fidler. It’s not difficult to switch out an older-style panel for the modern push-button type, he said. But during the planning and designing process, it’s important to consider how the boat will be utilized.
#3: Plan According to the Client’s Power Needs
For systems that draw a lot of power, Fidler said technicians should use big batteries, while keeping weight in mind. How much weight the installer can add depends upon the boat—a 60-foot yacht, for example, will allow for more added weight than a 20- to 30-foot pleasure boat. “You have to balance it very carefully,” he said. If alternators are used, he advised ensuring that the alternator is marine-certified.
Additionally, he explained that manufacturers are beginning to make boats with a “house setup,” something that’s typical for yachts, but can also be found on smaller boats. “One battery is just for the engine, and the other is for everything else. That’s my preferred setup, so if we do get a boat with one battery, we set up the second one as a house battery.” This way, Fidler said, the boater simply turns off the engine once they reach the sand bar, and the house battery handles the rest.
If a boater plans to hang out at a sand bar for hours on end, playing music, he won’t want to try to start the boat and discover the battery has been drained, Fidler said. “You need to figure out if the boat has one battery, two batteries or three batteries, and figure out how much current you’re going to draw on the system.” Then, he added, the system
should be designed to handle more, so the owner never has an issue.
#4: Recommend Trickle Chargers for Home Charging
For boats primarily used for leisurely cruising, which aren’t parked and shut off, the approach is different: “It’s always charging.”
However, he said, technicians should be prepared to explain to customers the importance of putting a boat on a charger while at home. “Every single boat should have a trickle charger on it,” he said. “If it doesn’t, sell them one.”
A separate battery is added, he said, “If you’re doing more than 1,000 watts. It’s just part of the system design.” It’s important that the system designer take energy usage into consideration, he explained, adding, “You don’t want your system to kill the customer’s battery.”
#5: Choose Only the Best MarineGrade Materials
Fidler and Green reminded attendees to avoid using wood in any build. While marine-grade plywood is available, Fidler said even though it’s marine-grade, it isn’t waterproof, so shops should still avoid this. MDF, too, won’t last: “It isn’t designed to be in a wet environment,” Fidler explained. “Even if you seal it, the instant you run a screw into it, you’ve broken that seal.”
Because plastics must be used—such as Starboard marine material—he said technicians and salespeople should keep the materials in mind during the bidding process since plastics are much more expensive than wood. Of late, it’s also been hard to acquire due to supply chain issues, so shops should make sure they can get it in a timely manner.
#6: Decide on the Right Adhesive for the Job
While techs should avoid wood in their builds, many boats still feature wooden stringers enclosed in fiberglass. The stringer is a part of the hull which strengthens the boat. Fidler said a technician should never drill into a stringer. If bare wood or foam is spotted, it means a drill was used where it shouldn’t have been.
“You need to seal that hole back up,” he said, adding that it’s meant to be completely watertight.
The hole can be sealed using 3M Marine Adhesive Sealant 5200, which is essentially permanent and will cure underwater. However, attempting to remove it will likely cause damage, according to Fidler.
Depending on the application, there are a few options when it comes to adhesives and sealants. “3M 4200 is less permanent, and it is waterproof,” he said, adding that it’s useful for applications such as underwater lighting.
Loctite adhesive, he noted, has a “flowing” consistency and can be used anywhere. “It will glue PVC together, but not Starboard,” he cautioned. “4200 and 5200 cures underwater. Loctite won’t. We keep it out of the water for 24 hours if we can.” For sealing very small areas, only 100 percent silicone should be used.

#7: Only Use Marine-Grade Stainless Fasteners
Additionally, Fidler stressed using 316 marine-grade stainless fasteners in any boat installation. Anything less— such as Grade 308 stainless—will rust and corrode. “On the Gulf Coast where I’m located, the salinity of the water is higher than anywhere in the country,” he explained, “so when you buy your hardware, you need to find a good marine supply store or bolt fastener store. They’ll know the difference and can sell you good 316 stainless.” He added that stainless steel found at Home Depot is generally cheaper Grade 308, which isn’t reliable for marine applications.
#8: Don’t Carry Expensive Tools in a Mobile Kit
Because it’s so easy to drop tools in the water, Fidler advised not to bother with expensive brands like Snap-On. “I have an entire kit of Harbor Freight tools that go in our mobile kit,” he said, adding that if he drops a tool in the water, he hasn’t lost anything expensive. He applies the same rule to drills.
For cutting holes, Fidler relies on a 12-amp Dewalt sawzall, preferring not to carry an air saw out to a mobile job site.
#9: Follow Marine Wiring Best Practices
When wiring, the best thing to do is follow OEM paths, Fidler said. “It probably goes that way for a reason. You might

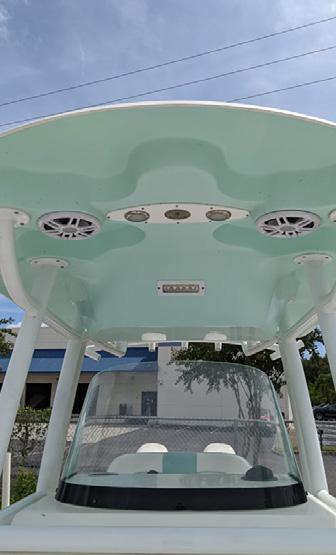

Luke Fidler applies these marine audio techniques at his shop, Audio Expert Auto & Marine in Clearwater, Fla. The builds pictured here are from two recent projects.
wonder why. For the most part, follow where the OEM wires go, because they’re routed in a way that meets Coast Guard requirements.”
According to the American Boat & Yacht Council standards, soldering shouldn’t be the “sole means of electrical connection.” Fidler said it can lead to corrosion.
“Most of the time, we use heat-shrink crimps,” he explained. “Get the good ones with adhesive lining inside. Hit them with a torch and it’s 100 percent waterproof.”
Fidler also advised greasing battery terminals to keep them from getting corroded, and said he uses Yamalube anti-corrosion spray. “Anything you spray with it won’t corrode as long as you spray it heavily,” he said. Fidler’s shop uses Stinger products and Ancor marinegrade wire.
#10: Take the Time to Know What You’re Getting Into
Before cutting into a boat, Fidler advised snaking an inspection camera into the area to find out what’s back there. “You never know for certain, even if you’ve worked on the same type of boat ten times,” he said, adding that boats aren’t 100 percent standardized, which means you can’t count on each one being exactly alike.
He cited an example: “Someone might’ve decided the fuel filter line was too long, and instead of cutting it, they looped it. Next thing you know, in the same place where you’ve put speakers in 10 other boats, there’s a fuel line.”
Without meaning to, such an assumption can lead to a cut fuel line. Which is why, Fidler said, it’s important for the technician to take the time to ensure they know what they’re getting into: “Don’t be overconfident,” he added.


