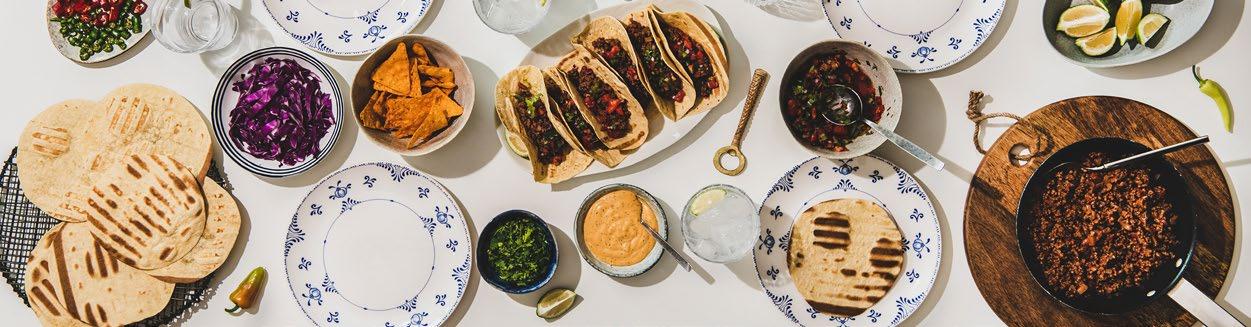
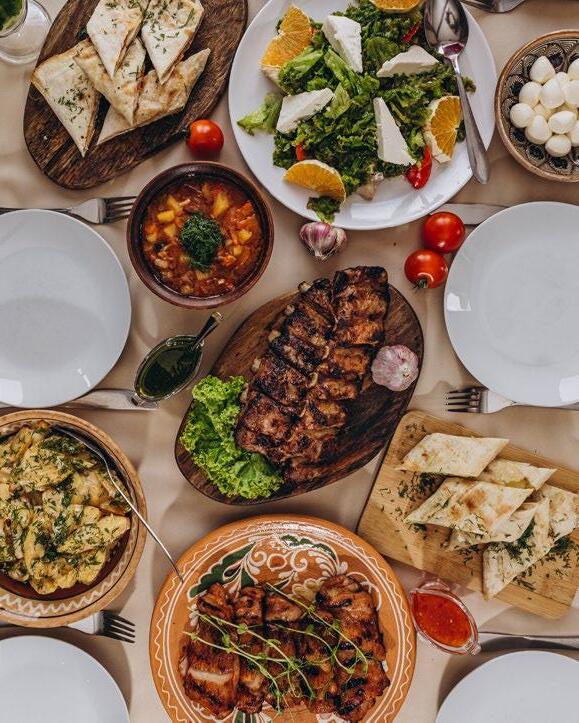
A COLLECTION OF FAVORITE RECIPES, CURATED BY OUR CHEFS, RESIDENTS, AND COMMUNITIES
CCL Hospitality Group is a national leader in culinary and support services, operating through four distinct companies: Morrison Living, Coreworks, Unidine, and The Hub. We deliver world-class hospitality infrastructure, backed by top talent and innovation.
Our mission is to enhance the lives of those we serve through exceptional food, professional service, and an unwavering commitment to quality. We’re shaping the industry’s future leaders with a culture of service dedicated to elevated hospitality experiences for communities across the country.
At CCL, we see ourselves as partners, not just vendors. We form relationships based on dedication, loyalty, hard work, and transparency, driving meaningful results for our clients.
Our people are our greatest asset, and our diverse, people-driven culture propels our growth, establishing us as an industry leader. Although we are a large organization, we remain nimble, proactive, and forward-thinking, assessing, recommending, and implementing innovative operations and programming swiftly to deliver maximum impact.
CCL HOSPITALITY GROUP
One Marina Park Drive
Boston, MA 02210
www.ccl-hg.com
833 422 5484
INTRODUCTION BY CHEF RANDY EMERT x ACKNOWLEDGMENTS xi
DIET & ALLERGY KEY xv
CHAPTER 1 Basics 1
CHAPTER 2 Drinks 21
CHAPTER 3 Snacks & Appetizers 43
CHAPTER 4 Salads 65
CHAPTER 5 Soups 83
CHAPTER 6 Pasta & Grains 95
CHAPTER 7 Seafood 117
CHAPTER 8 Poultry & Pork 137
CHAPTER 9 Beef & Lamb 165
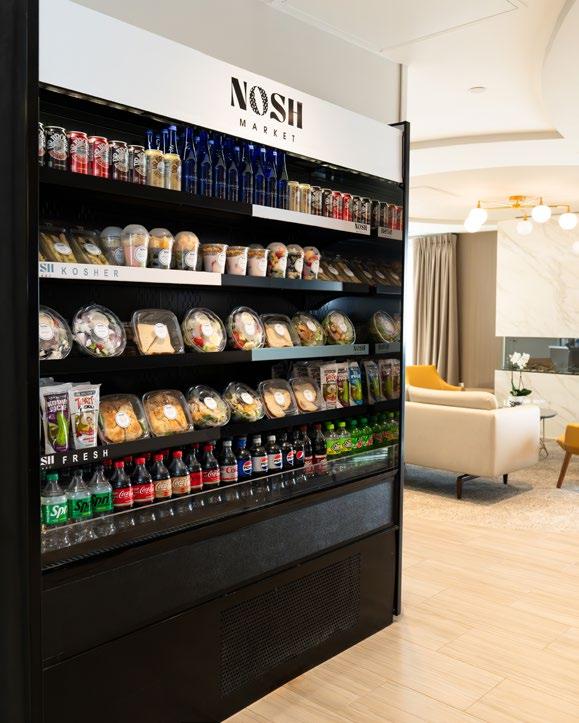
CHAPTER 10 Nosh: Kosher Dining 189
CHAPTER 11 Sides & Vegetables 211
CHAPTER 12 Desserts 235
AT CCL HOSPITALITY GROUP, WELLNESS IS MORE THAN A TREND—IT’S A COMMITMENT TO ENHANCING
THE LIVES OF THE RESIDENTS WE SERVE.
Throughout my career, I’ve seen firsthand how prioritizing nutrition and wellness transforms communities, fostering vitality and connection. From innovative dining options to collaborative programs, we continually seek ways to promote healthier lifestyles. This year, I’m especially proud of the strides we’ve made in expanding our nutrition and wellness initiatives.
Collaboration is at the heart of everything we do. Our chefs and registered dietitians work together to ensure that every dish meets nutritional needs while delivering exceptional flavor. Whether we’re reducing salt and fat, incorporating fresh, local ingredients, or introducing new culinary techniques, the recipes in this book reflect the teamwork that drives our kitchens. Each dish is designed not only to nourish but also to inspire healthier choices and meaningful conversations around food.
This mission is deeply personal to me. A few years ago, I transitioned to a vegan diet to address ongoing health concerns. Within just 30 days, my cholesterol dropped, my energy levels increased, and my arthritis symptoms disappeared. This experience reinforced my belief in the power of food to heal, energize, and bring people together.
But wellness isn’t about a single approach—it’s about offering options that support every individual’s health journey. Whether plant-based, Kosher, allergenconscious, or heart-healthy, our menus prioritize nutrition without compromising on taste, ensuring that every resident has access to meals that align with their needs.
That philosophy is reflected in From the CCL Kitchen.
Inside, you’ll find wellness-focused dishes, allergen information, and a glossary to help you navigate ingredients and techniques with confidence. Whether you’re cooking with family, exploring new flavors, or simply looking for inspiration, this book is designed for you.
We hope this cookbook encourages you to embrace wellness, discover something new, and share the joy of cooking with those you love.
RANDY EMERT CEC, CCA, CDM, CFPP, PCII
SVP, CHIEF CULINARY OFFICER
CCL HOSPITALITY GROUP
HASSAN ABERCHAH
REGIONAL EXECUTIVE CHEF
ION AGUINAGALDE
CORPORATE EXECUTIVE CHEF
JAMES CONNOLLY
CORPORATE EXECUTIVE CHEF
CHRIS GARRAND
CORPORATE EXECUTIVE CHEF
ERIC GOLDBERG
SENIOR DIRECTOR
STEVEN GORMLEY
CULINARY PROJECT MANAGER
NICHOLAS HUNTER
REGIONAL EXECUTIVE CHEF
DONNA HOLLINGSWORTH
CORPORATE EXECUTIVE CHEF
RYAN MCCOY
CULINARY INNOVATION DIRECTOR
RYAN MCNULTY
SENIOR DIRECTOR
GINA PALMACCI
CORPORATE EXECUTIVE CHEF
ANTHONY QUINTANA
REGIONAL EXECUTIVE CHEF
TIM REARDON
CORPORATE EXECUTIVE CHEF
DAVID R. STOLTZFUS
SENIOR DIRECTOR
DAVID THORNTON
DINING SERVICES DIRECTOR
JAMES VOLK
SENIOR DIRECTOR
OUR DIET & ALLERGY KEY
Below, you'll find icons representing common food allergies and dietary preferences featured throughout this cookbook.
A food allergy occurs when certain foods trigger an abnormal immune response. According to Food Allergy Research and Education (FARE), approximately 33 million people in the United States live with food allergies.
While any food can cause a reaction, the Food and Drug Administration identifies seven foods as accounting for 90% of all allergic reactions.
At CCL Hospitality Group, we take great care in meeting the diverse dietary needs of our residents. Our nutrition and wellness team ensures every detail is considered, from managing allergies to honoring personal dietary preferences.
Beyond this, we’re proud to offer cultural and faithbased menu customization. Our skilled culinary team thoughtfully crafts menus and diets that celebrate the rich traditions and unique backgrounds of each resident, helping to preserve a sense of identity and belonging.
Through this personalized approach, we strive to create an environment where residents feel truly cared for and connected.
By embracing the tastes and traditions that matter most, we deliver not just meals, but meaningful experiences that bring comfort and joy to every table.
Cooking techniques form the foundation of a culinary journey, enabling the creation of delicious and visually appealing dishes. Below are 15 techniques that will appear throughout this book, ranging from classic methods like roasting and poaching to innovative approaches such as sous-vide and emulsifying. Understanding these techniques empowers both novice and seasoned cooks to elevate their skills and unleash their creativity in the kitchen.
Sautéing
Sautéing involves cooking small, bite-sized pieces of food in a shallow pan with a small amount of oil over high heat. It's perfect for quickly preparing dishes like stir-fries, where you want to preserve the natural flavors and textures of vegetables and proteins.
Roasting
Roasting is a dry-heat method that's ideal for enhancing the flavor of meats and vegetables. This technique is often used for Sunday roasts, turkey dinners, or roasted root vegetables with a drizzle of olive oil and herbs.
Poaching
Poaching is a gentle cooking technique that involves simmering food in a flavorful liquid. It's perfect for delicate foods like eggs (for Eggs Benedict) or seafood like salmon.
Blanching
Blanching is a quick boil-and-cool method used to prepare vegetables for freezing or to preserve their vibrant colors and crispness for salads or stir-fries.
Smoking
Smoking is a traditional cooking technique that involves exposing food to smoke from burning wood chips, herbs, or spices. This method infuses a distinctive smoky flavor into various ingredients, enhancing their taste and adding complexity. It's commonly used for items like smoked meats, fish, vegetables, and even cheese.
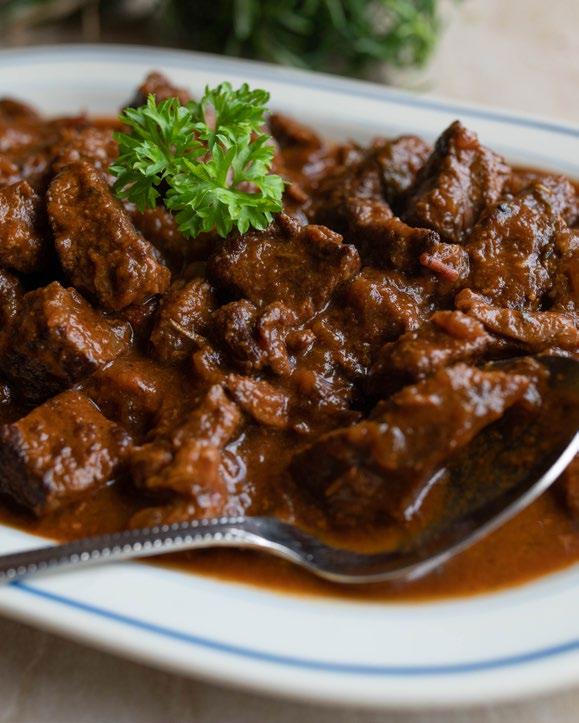
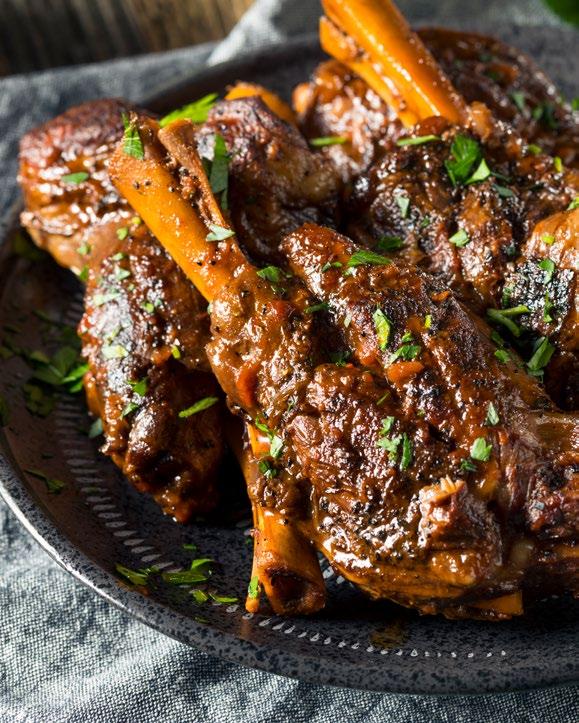
Braising
Braising involves slow-cooking food in a covered pot with a small amount of liquid, making it ideal for tenderizing tougher cuts of meat in dishes like beef stew.
Caramelizing
Caramelizing sugar involves heating it until it melts and turns golden brown. This technique is used to sweeten and add depth of flavor to dishes like crème brûlée or tarte Tatin.
Deglazing
Deglazing is the process of adding liquid to a hot pan to dissolve and incorporate flavorful bits stuck to the bottom after sautéing or roasting. It's commonly used in making pan sauces, such as for a juicy steak.
Fermenting
Fermentation utilizes bacteria or yeast to break down sugars and transform them into alcohol or acids. It's essential in making foods like yogurt, bread, and pickles.
Curing
Curing is a technique that involves preserving food by using salt, sugar, or a combination of both. It enhances flavor and extends the shelf life of ingredients, especially meats and fish. Common applications include making gravlax, corned beef, and bacon, adding depth of flavor and texture to dishes.
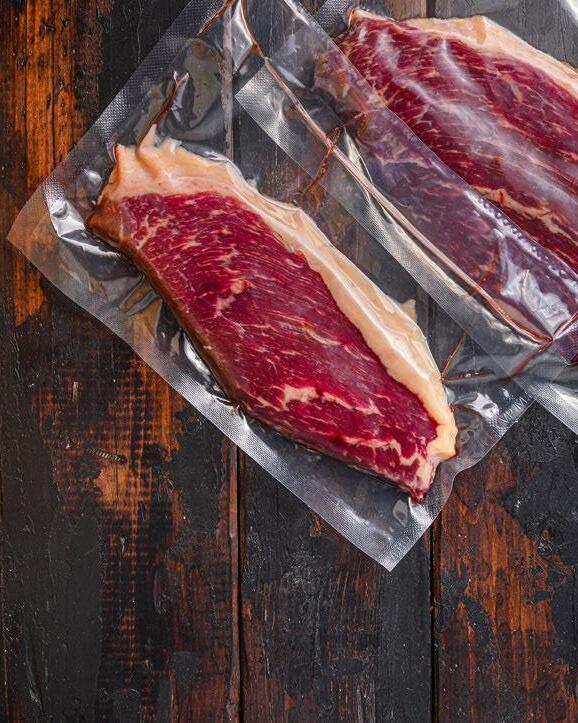
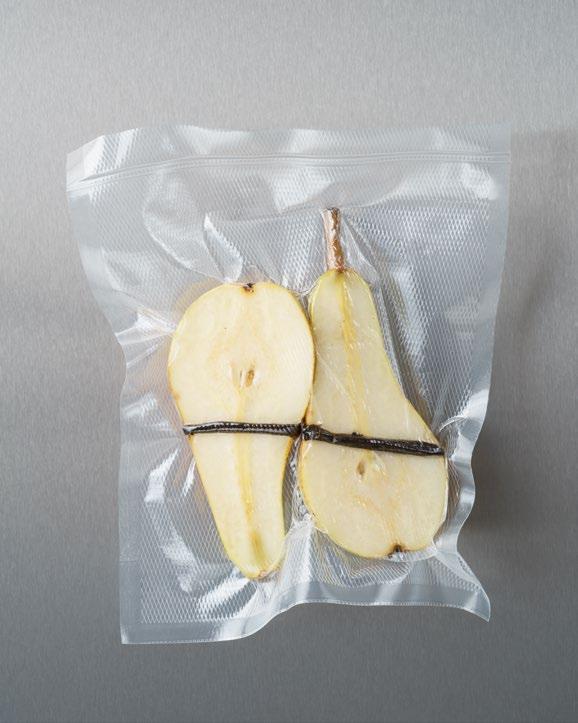
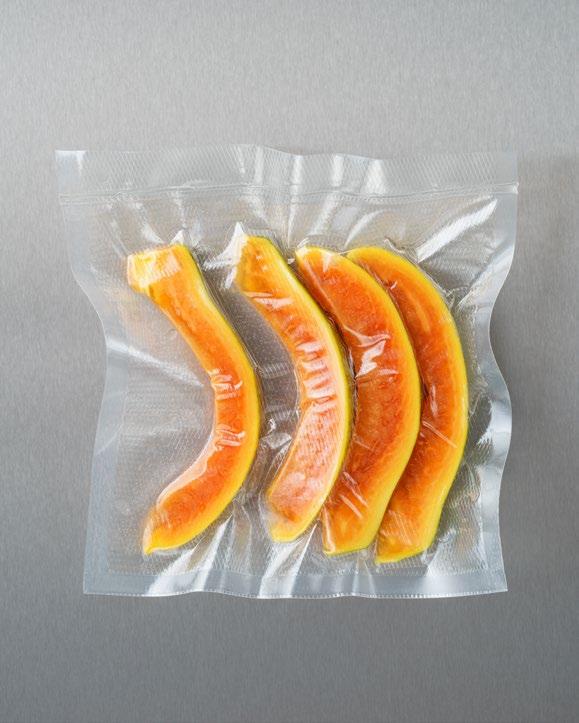
Sous-Vide
Sous-vide involves precisely cooking vacuum-sealed food in a water bath at a controlled temperature. It's excellent for achieving the perfect doneness in steaks, chicken breasts, and even desserts like crème brûlée.
Julienne
Julienne is a precise cutting technique where vegetables are sliced into thin, matchstick-sized strips. Use this for garnishing salads or creating uniformly sized ingredients for stir-fries.
Emulsifying
Emulsifying is the process of combining two liquids that don't typically mix, like oil and vinegar, into a stable mixture, as in vinaigrettes and mayonnaise.
Confit
Confit is the preservation of food, usually meat, by slow-cooking it in its own fat. Duck confit is a classic example, resulting in tender, flavorful meat.
Tempering
Tempering gradually raises the temperature of an ingredient, often eggs or chocolate, to avoid curdling or seizing. It's essential in making custards, chocolate truffles, or tempered chocolate decorations.
MAKES 3 QUARTS
1 tablespoon olive oil
1 large onion, peeled, halved, and sliced
1 carrot, peeled and chopped
1 celery stalk, chopped, including the leaves
1 whole head of garlic, cut in half horizontally
4 bay leaves
½ teaspoon dried basil
½ teaspoon dried thyme
½ teaspoon dried oregano
2 pounds raw chicken bones, rinsed thoroughly
½ teaspoon whole black peppercorns
1 tablespoon kosher salt
4 quarts water, cold
Chicken Stock
While making this is an all-day project, the extra effort is definitely worth the end result. The difference between store-bought chicken stock and homemade is very much apparent when crafting soups and other dishes.
Heat the oil in a large stockpot over high heat. Add the onion, carrot, celery, and garlic, and sauté, stirring occasionally, for about 2 to 3 minutes.
Add the remaining ingredients and bring to a boil, skimming off the foam that rises to the surface. (Be careful not to skim off the herbs and peppercorns when you do this.) Reduce the heat to low and simmer, uncovered, for about 2 hours.
Skim the surface of the stock, strain through a large fine-mesh sieve, and allow to cool thoroughly. Discard the bones and vegetables.
Refrigerate overnight. The next day, use a spoon to remove any congealed fat from the surface.
For later use, freeze the stock in 2 or 4-cup containers or ice-cube trays for use in individual dishes. Keeps for 1 month.
whole heads of garlic, cut in half horizontally
green bell pepper, seeded and chopped
Vegetable Stock
Who claimed vegetable stock to be uninspiring?
We appreciate the nuanced richness that mushroom stems and corn contribute to the flavor. Use it as a substitute for chicken stock to create a vegetarian-friendly version, or savor a bowl on its own!
Heat the oil in a large stockpot over high heat. Add the onions, carrots, celery, and garlic, and sauté, stirring occasionally, until the onions are translucent, for about 3 to 4 minutes.
Add the remaining ingredients and bring to a boil. Reduce the heat to low and simmer, uncovered, for about 1 ¾ hours.
Remove from the heat, strain the stock, and allow it to cool thoroughly.
For later use, freeze the stock in 2- or 4-cup containers or ice-cube trays for use in individual dishes. Keeps for 2 months.
ears of corn, kernels and cobs separate
MAKES 2 QUARTS
6 pounds beef bones and trimmings
2 medium onions, peeled, quartered
2 large carrots, peeled and cut into 2" pieces
2 celery stalks, chopped, including the leaves
2 tablespoons olive oil
1 tablespoon tomato paste
3 ½ quarts water, cold, divided
1 bay leaf
2 fresh thyme sprigs
4 fresh parsley stems
½ teaspoon black peppercorns
1 tablespoon kosher salt
Beef Stock
Although it takes several hours for the stock to simmer to perfection, the hands-on preparation time is under 30 minutes, meaning that without much effort you will have a rich beef stock to use for a variety of recipes.
Trim larger pieces of beef from the bones and cut into 1-inch pieces. Position a rack in the center of the oven and heat to 400°F. Put the bones and beef pieces in an extra-large roasting pan. Roast, turning a few times so the beef browns evenly, about 40 minutes.
Add the onions, carrots, and celery to the pan. Stir in the oil into the pan being sure to coat the mixture. Roast for an additional hour, turning a few times so the mixture roasts evenly.
Transfer the beef and vegetables to a large stockpot and set aside.
Pour off any excess grease from the roasting pan and place over medium heat. Add the tomato paste and cook for 2 minutes, stirring constantly. Add 2 cups of the water and bring to a boil over high heat. Reduce the heat to low and simmer, scraping the brown bits from the bottom and sides of the pan.
Add the tomato-water mixture to the stockpot with the beef, bones, and vegetables. Add the additional 3 quarts of water, or until all ingredients are submerged. Add the bay leaf, parsley, thyme, and peppercorns. Bring to a boil over medium-high heat.
Reduce the heat to a simmer, partially cover, and simmer for 4 to 6 hours, or until the flavors become rich and concentrated.
Strain through a cheesecloth-lined strainer into a large bowl. Discard the solids. Let the liquid come to room temperature before covering and transferring to the refrigerator.
For later use, freeze the stock in 2 or 4-cup containers or ice-cube trays for use in individual dishes. Keeps for 1 month.
MAKES 2 QUARTS
1 bay leaf
4 fresh thyme sprigs
4 fresh parsley stems
8 black peppercorns
2 tablespoons unsalted butter
2 tablespoons all purpose flour
1 yellow onion, diced
¼ cup carrot, diced
¼ cup celery, diced
3 cups Beef Stock (previous page)
2 tablespoons tomato paste
Espagnole (Brown Sauce)
Espagnole (pronounced like the word for Spanish: Español) is a basic brown sauce that is one of the five mother sauces of classical cuisine. It's also the starting point for a rich and deeply flavorful sauce called demi-glace, which is traditionally served with red meats.
To make the sachet, place the bay leaf, thyme, parsley, and peppercorns in a square of cheesecloth and tie the corners with a piece of kitchen twine.
In a medium saucepan, melt the butter over medium heat until it becomes frothy. Add the mirepoix - onions, carrots, and celery - and sauté until lightly browned, about 6 minutes.
Stir the flour into the mirepoix a little bit at a time until it is fully incorporated and forms a thick paste; this is your roux. Lower the heat to low and cook the roux until it just starts to take on a very light brown color, 4 to 5 minutes.
Slowly add the stock and tomato purée, whisking vigorously to make sure it's free of lumps. Bring to a boil.
Lower the heat to low, and add the sachet. Simmer until the total volume has reduced by ⅓ (you'll have about 2 cups), stirring frequently.
Remove the sauce from the heat, retrieve and discard the sachet.
MAKES 1 ¼ CUPS
4 cups pomegranate juice
½ cup and 2 tablespoons white sugar
¼ cup fresh lemon juice
Pomegranate Molasses
The term "molasses" here is quite misleading. While its color is similar to molasses made of sugar cane or sugar beets, pomegranate molasses is not a sweetener but a condiment, and as such added to dishes in small amounts.
Boil the pomegranate juice, sugar, and lemon juice in a saucepan over medium-high heat. When the juice boils, reduce the heat to a mediumlow. You should see the liquid boiling very gently in the middle.
Let the mixture simmer for about an hour, uncovered. Stir occasionally to make sure that the sugars don't stick to the bottom of the saucepan.
After 45 minutes of simmering, you'll notice that a lot of liquid has burned off. Reduce the heat very slightly and let it simmer for another 15 minutes or so. Take a spoon and dip it into the molasses. If it coats the spoon, the molasses is done cooking
Turn off the heat and let it cool for 30 minutes before pouring it into a jar. The mixture will still be runny but don't worry. The molasses thickens as it cools.
Store in an airtight container in the refrigerator for up to 6 months.
MAKES 6 CUPS
1 pint fresh blueberries
¼ cup granulated sugar
2 cups tomato sauce
2 cups ketchup
1 ¼ cups brown sugar
1 ¼ cups red wine vinegar
½ cup molasses, unsulfured
2 tablespoons unsalted butter
4 teaspoons hickory flavored liquid smoke
1 teaspoon kosher salt
1 teaspoon coarsely ground black pepper
1 teaspoon paprika
½ teaspoon dehydrated garlic
½ teaspoon dehydrated onion
½ teaspoon celery seed
½ teaspoon cayenne pepper
¼ teaspoon chili powder
¼ teaspoon ground cinnamon
Michigan Blueberry BBQ Sauce
Homemade BBQ sauce is much tastier than any BBQ sauce you can buy in the grocery stores, and the delicious fresh blueberries are a perfect addition to add natural sweetness.
In a small saucepan over medium-low heat, combine blueberries and granulated sugar. Cook until sugar is dissolved and blueberries start to burst. Take off heat and gently mash the blueberries. Reserve for later.
In a large saucepan over medium heat, mix together ketchup, tomato sauce, brown sugar, vinegar, molasses, butter, and liquid smoke. Season with salt, black pepper, paprika, garlic, onion, celery seed, cayenne, chili powder, and cinnamon.
Reduce heat to low and simmer for up to 20 minutes. For a thicker sauce, simmer longer, and for thinner, less time is needed. Sauce can also be thinned using a bit of water if necessary.
Fold the blueberry mixture into the BBQ sauce. Sauce can be stored in the refrigerator for up to one month when covered.
MAKES 2 ¾ CUPS
1 cup black sesame seeds
1 cup white sesame seeds
¼ cup dehydrated onion
¼ cup dehydrated garlic
1 tablespoon truffle salt
1 teaspoon crushed red pepper
2 tablespoons nutritional yeast
"EBB" Truffle Crunch
A twist on the classic "Everything But the Bagel" seasoning, the sophistication here comes from the earthiness of the black and white sesame seeds, the umami from the truffle salt, and a hint of fiery warmth from crushed red pepper.
Combine all ingredients in a measuring bowl until well incorporated. You can adjust the red pepper to your preferred level of spiciness. Store in an airtight container in a cool, dark place for up to 6 months.
We have a preference for truffle salt brands like San Francisco Salt Co and Sabatino Tartufi, which utilize authentic truffle ingredients rather than artificial flavorings.
Below are 5 ways to use this spice blend:
1. Roasted Vegetables: Toss your favorite vegetables in olive oil and then coat them with the spice blend before roasting. The sesame seeds will add a nice crunch, and the truffle salt and nutritional yeast will provide a savory umami flavor.
2. Popcorn: Take your popcorn to the next level by sprinkling this spice blend on top. The nutritional yeast will give it a cheesy flavor, and the other spices will add complexity.
3. Bread & Crackers: Mix the spice blend with olive oil and use it as a dip for bread or drizzle it on crackers. It's a fantastic, easy appetizer.
4. Salads: Sprinkle this blend on your salad for added crunch and flavor. It can be particularly great on salads with Asian-inspired dressings.
5. Hummus: Mix it into hummus for a unique, bold flavor. It'll make a great dip for veggies or pita bread.
MAKES 2 ¼ CUPS
1 cup brown sugar
¼ cup paprika
¼ cup chili powder
¼ cup dehydrated garlic
¼ cup celery salt
1 tablespoon black pepper
1 tablespoon dehydrated onion
Carolina BBQ Rub
A fusion of smoky, sweet, and savory flavors, this mouthwatering BBQ dry-rub is perfect for grilling enthusiasts. Elevate your dishes with this perfectly balanced blend, delivering heat and richness to every bite.
Combine all ingredients in a measuring bowl until well incorporated. Store in an airtight container in a cool, dark place for up to 6 months.
Below are 5 ways to use this spice blend:
1. Smoky Ribs: Coat your ribs generously with the blend before grilling (or smoking) them to achieve a tender, smoky, and flavorful masterpiece that will have everyone coming back for seconds.
2. Turkey Burgers: Mix the BBQ spice blend into your burger patties for a unique twist. Top with cheese, pickles, and your favorite hot sauce for a taste explosion.
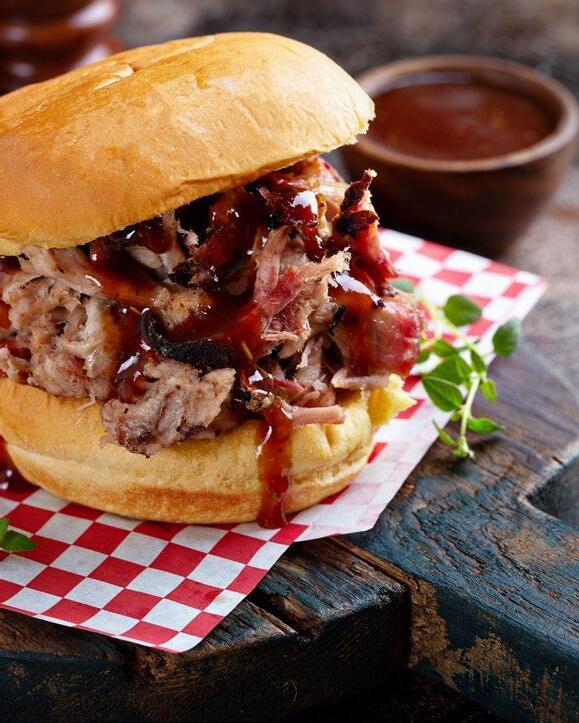
3. BBQ Pulled Pork: Rub this blend onto a pork shoulder, slowcook until it's fall-apart tender, and then shred it for succulent pulled pork sandwiches or tacos that are dripping with flavor.
4. Grilled Vegetables: Don't limit this blend to just meat – sprinkle it on vegetables like corn on the cob, sweet potatoes, or bell peppers before grilling to give your veggie side dishes a smoky kick.
5. Spicy Snack Mix: Toss this blend with mixed nuts, pretzels, and your favorite snack items for a spicy snack mix that's perfect for game day or movie night.
MAKES 3 ½ CUPS
¾ cup dehydrated onion
¾ cup oregano
½ cup dehydrated garlic
½ cup ground cumin
½ cup kosher salt
¼ cup paprika
¼ cup chili powder
Traditional Adobo Seasoning
Adobo seasoning, a staple in Latin and Spanish cuisine, is a versatile and aromatic blend of spices that includes garlic, oregano, paprika, and other herbs and spices. Its smoky, savory, and slightly tangy profile adds depth and a burst of flavor to a wide range of dishes.
Combine all ingredients in a measuring bowl until well incorporated. Store in an airtight container in a cool, dark place for up to 6 months.
Below are 5 ways to use this spice blend:
1. Marinades: Create a delicious marinade by mixing adobo seasoning with olive oil, vinegar, and a touch of citrus juice. Marinate chicken, pork, or beef for a few hours or overnight before grilling, roasting, or pan-frying for a flavorful and tender result.
2. Rice & Grains: Sprinkle adobo seasoning on rice, quinoa, or couscous during cooking to infuse your grains with a savory, aromatic flavor. It's an excellent way to elevate simple side dishes.
3. Dry Rub: Use adobo seasoning as a dry rub for roasts like pork shoulder or whole chicken. Apply it generously to the meat before roasting, slow-cooking, or barbecuing to create a tasty, crispy crust.
4. Soups & Stews: Add a teaspoon or two of adobo seasoning to soups, stews, and chili for an extra layer of depth and complexity in the flavor. It's particularly good in bean soups and hearty winter stews.
5. Mexican-Inspired Dishes: Sprinkle adobo seasoning on tacos, burritos, and other Mexican-inspired dishes. You can also mix it into sour cream or yogurt for a quick and flavorful taco sauce or dip for tortilla chips.
MAKES 1 ½ CUPS
¼ cup freshly ground black pepper
¼ cup ground allspice
¼ cup dehydrated garlic
2 tablespoons ground clove
2 tablespoons ground cinnamon
2 tablespoons ground nutmeg
2 tablespoons ground cardamom
1 tablespoon chili powder
1 tablespoon dried oregano
1 tablespoon kosher salt
Shawarma Seasoning
No matter the main ingredient, shawarma is traditionally made by stacking thin slices of well-seasoned meat on a large rotating skewer. It is then slowly cooked for hours in front of a heat source, rotating continuously.
Combine all ingredients in a measuring bowl until well incorporated. Store in an airtight container in a cool, dark place for up to 6 months.
Below are 5 ways to use this spice blend:
1. Grilled Pineapple: Sprinkle the spice blend on pineapple slices before grilling them. The combination of sweet and spicy will make for a tantalizing dessert or side dish.
2. Coconut Rice: Mix the spice blend with coconut milk into your rice before cooking. The aromatic spices will infuse the rice with a rich, complex flavor, perfect as a side dish or base for various curries.
3. Guacamole: Stir the spice blend into your guacamole for a unique twist. It complements the creamy avocado and gives your dip an unexpected kick.
4. Rice Pilaf: Use the spice blend to season a rice and lentil pilaf for a hearty and flavorful side dish. It adds depth and character to an otherwise simple dish.
5. Shawarma: This list wouldn't be complete without shawarma. Generously coat your protein of choice (sliced thin) before slow cooking for hours.
MAKES 2 CUPS
⅔ cup ground turmeric
¼ cup Five Chinese Spice
⅓ cup ground annatto seed
2 tablespoons ground coriander
2 tablespoons ground star anise
2 teaspoons chili powder
2 teaspoons ground cumin
2 teaspoon ground cinnamon
Bánh-Mì Rub
Annatto seed comes from the tropical achiote tree, and its' bright orange hue lends itself to use as a food dye in addition to it's sweet, peppery taste. If you can't find any in your grocery store, you can substitute sweet paprika.
Combine all ingredients in a measuring bowl until well incorporated. Store in an airtight container in a cool, dark place for up to 6 months.
Below are 5 ways to use this spice blend:
1. Tofu Marinade: Create a flavorful marinade by mixing the spice blend with some yogurt or oil. Marinate tofu, or your preferred protein for a few hours, then grill for a delicious and aromatic dish.
2. Curry Sauce: Create a delicious curry sauce by sautéing onions, garlic, and ginger, then adding your spice blend along with coconut milk or tomato sauce. Simmer until the sauce thickens and serve it over your choice of protein or vegetables.
3. Spiced Nuts: Toss a handful of mixed nuts in a mixture of melted butter or olive oil and the spice blend. Roast them in the oven until they're fragrant and slightly crispy.
4. Roasted Chickpeas: Toss cooked chickpeas with the spice blend and a drizzle of olive oil, then roast them in the oven until they're crispy. Spiced chickpeas make a delicious and healthy snack.
5. Breakfast Scramble: Add a pinch of the spice blend to your morning scrambled eggs or tofu scramble.
MAKES 2 ¼ CUPS
1 cup dried thyme leaves
½ cup white sesame seeds
⅓ cup sumac
⅓ cup dried oregano or marjoram
¼ cup kosher salt
Israeli Za'atar
The best thing about za'atar is how incredibly versatile it is. You can use za'atar to brighten up simple salads, yogurts, or sprinkle it on meat. You can even just mix za'atar with some olive oil and have the perfect dip for pita bread.
Combine all ingredients in a measuring bowl until well incorporated. Store in an airtight container in a cool, dark place for up to 6 months.
Below are 5 ways to use this spice blend:
1. Salad Seasoning: Sprinkle the blend on your favorite salads to add a burst of flavor. It works well with both leafy green salads and grain-based salads like tabbouleh. Combine it with olive oil and lemon juice for a zesty dressing.
2. Grilled Meats: Use the blend as a dry rub for grilled meats such as chicken, lamb, or even fish. The combination of herbs and spices will infuse your meat with a delicious Mediterranean flavor
3. Roasted Vegetables: Toss your favorite vegetables in olive oil and the spice blend, then roast them in the oven. This will add a delightful Mediterranean twist to your roasted vegetables, making them a perfect side dish.
4. Homemade Bread: Mix the blend into your bread dough for a unique and flavorful homemade bread. You can make flatbreads, focaccia, or any bread of your choice. The spices and herbs will permeate the bread as it bakes.
5. Dips & Spreads: Create a flavorful dip or spread by blending the spice mixture with yogurt, sour cream, or cream cheese. This can be a fantastic accompaniment for pita bread, crackers, or vegetable sticks.
SERVES 4
Ginger Syrup
1 cup finely chopped, peeled ginger
1 pineapple, peeled and cut into chunks
¼ cup sliced lime peel, pith discarded
½ cup brown sugar
Assembly
1 liter club soda
8 pieces candied ginger
Aloha Ginger Sparkler
Crafted with the tropical flair of fresh ginger, pineapple, and a hint of lime, this effervescent beverage is a delightful twist on the classic ginger ale. Perfectly balanced, it's a sweet and spicy concoction that'll transport your taste buds to the shores of Hawaii.
In a small saucepan, bring ginger, lime peel, pineapple chunks, sugar, and 2 cups of water to a boil. Once it reaches a boil, remove from heat, cover, and allow it to steep for 30 minutes. Afterward, strain the syrup through a fine-mesh sieve into a bowl or jar, discarding the ginger lime peel, and pineapple, and let it cool completely. You should end up with approximately 2 cups of syrup.
To make 1 drink, mix 2 oz ginger syrup into a rocks glass with icewe opt for one large cube (see image) but smaller ice works just as well. Top with club soda and give it a gentle stir to blend the flavors. Garnish with 1-2 pieces of candied ginger.
Do ahead: You can prepare the ginger syrup in advance; it can be stored in the refrigerator for up to one month when covered.
Cocktail Version: Add 1-1 ½ oz of your favorite dark rum. Our Choice: Plantation 5 Year.
Chai Chai Real Smooth
Get ready to groove with our Chai Chai Real Smooth! This cozy concoction combines chai-lime syrup, seltzer, and a touch of cinnamon for a sip that's as smooth as a jazz melody.
Combine tea bags and 1 cup boiling water in a small bowl; cover and let sit for 8–10 minutes. Add sugar; stir to dissolve. Discard tea bags and let cool. Combine cooled chai syrup and lime juice in a measuring glass.
To make 1 drink, mix 2 oz chai-lime syrup into a rocks glass with ice, and top with club soda. Give it a gentle stir to blend the flavors. Garnish with a cinnamon stick and lemon twist.
Do ahead: You can prepare the chai syrup in advance; it can be stored in the refrigerator for up to 1 week when covered.
Cocktail Version: Add 1-1 ½ oz of your favorite bourbon. Our Choice: Buffalo Trace.
SERVES 4
Beet-Sumac Tonic
Beet the heat with this zesty and refreshing drink. Sweet sumac syrup meets tangy lemon and the earthy kick of beet juice, all topped off with a splash of fizzy club soda.
Finely grate beet on small holes of a box grater directly onto a piece of cheesecloth. Gather up sides of cheesecloth to make a bundle and squeeze beet tightly over a small bowl to extract as much juice as you can. Transfer 2 tablespoons of beet juice to a small bowl and set aside.
Bring sugar, sumac, and 1 cup water to a boil in a small saucepan. Reduce heat and simmer, stirring, until sugar dissolves, about 5 minutes. Let sumac syrup cool. Strain sumac syrup, lemon juice, and reserved beet juice through a fine-mesh sieve into a measuring glass and give it a good stir.
To make 1 drink, mix 2 oz beet syrup into a wine glass with ice, and top with club soda. Give it a gentle stir to blend the flavors. Garnish with a lemon wheel.
Do ahead: You can prepare the ginger syrup in advance; it can be stored in the refrigerator for up to 1 week when covered.
Cocktail Version: Add 1-1 ½ oz of your favorite gin. Our Choice: Plymouth.
SERVES 4
Pineapple Syrup
½ tablespoon pink peppercorns
¼ cup sliced lime peel, pith discarded
1 jalapeño, sliced into ¼" rounds
1 ½ cups fresh pineapple juice
¼ cup white sugar
Pinch of kosher salt
Assembly
1 liter club soda
4 lime wheels
Pink Pepper Pineapple Fizz
Crushed peppercorns, fresh lime, and a kick of jalapeño come together in a tropical delight, perfect for a refreshing twist on your favorite cocktail. Just mix, chill, and pour over ice for a taste of paradise.
Crush peppercorns with a mortar and pestle or pulse in a spice grinder.
In a medium bowl, add lime peel, peppercorns, jalapeño rounds, pineapple juice, sugar, and salt, and stir until most of the sugar is dissolved. Cover and chill for 8 hours, or overnight.
Strain juice through a fine-mesh sieve into another medium bowl (you should have about 1 ½ cups); discard solids.
To make 1 drink, mix 2 oz juice into a highball glass with ice, and top with club soda. Give it a gentle stir to blend the flavors, adding more juice if you want it sweeter. Garnish with a lime wheel.
Do ahead: Juice can be infused and strained in advance; it can be stored in the refrigerator for up to 3 days when covered.
Cocktail Version: Add 1-1 ½ oz of your favorite silver tequila. Our Choice: Cazadores.
SERVES 4
3 cups ginger ale
1 ½ cups fresh pineapple juice
1 ½ cups orange juice
1 ½ tablespoons fresh lime juice
2 teaspoons maraschino cherry juice
1 orange, sliced into ⅛" thick wheels
1 lime, sliced into ⅛" thick wheels
Ginger-Citrus Punch
A simple, yet delicious punch that's enjoyable yearround. This punch is frequently requested by residents and makes a perfect addition to any party.
In a punch bowl or pitcher, mix together ginger ale, pineapple juice, orange juice, lime juice, and maraschino cherry juice. Stir to incorporate.
Add 2-3 cups of ice. Float orange and lime wheels on top.
For an individual serving, reserve additional fresh ice and citrus wheels for garnish.
SERVES 1
1 cup frozen, peeled, chopped banana
1 cup frozen blueberries
½ cup frozen strawberries
1 cup oat milk (or alternative nut milk)
¼ cup tahini
½ teaspoon vanilla extract
Additional Garnish
Ground cinnamon
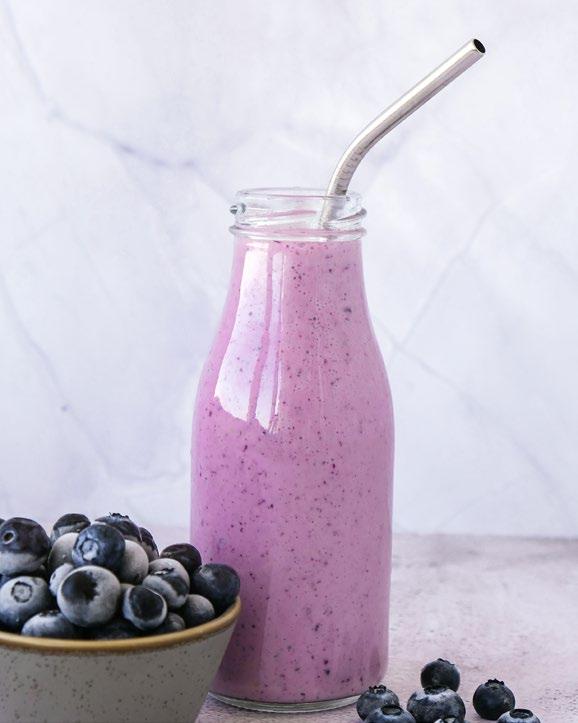
Berry-Tahini Smoothie
Indulge in a creamy and versatile frozen berry smoothie with banana, tahini, and a hint of cinnamon. Customize it to your heart's content with protein, yogurt, healthy fats, or greens for a delicious and nourishing blend.
Purée frozen berries, banana, oat milk, tahini, pinch of ground cinnamon, and vanilla extract in a blender until smooth.
Pour smoothie into a glass. Garnish with a light sprinkle of cinnamon.
This smoothie, although sounding complex, acts as the perfect backdrop for any add-ins you can think of!
You can incorporate a scoop of collagen or vanilla protein powder for an extra protein boost. Alternatively, amp up the protein and tanginess by adding a dollop of Greek yogurt.
If you're looking to increase your healthy fats, toss in some hemp seeds, chia seeds, or flaxseed. To transform your smoothie into a subtly green delight, throw in a handful of spinach or kale.
SERVES 1
1 cup frozen, peeled, chopped banana
1 cup frozen mango
1 cup packed spinach or kale
1 cup coconut water
The Green Smoothie
We love this refreshing blend of mango and leafy greens in this vibrant morning smoothie recipe. Add creamy almond butter, protein-packed Greek yogurt, or a touch of natural sweetness – the possibilities are endless!
Purée frozen banana, mango, spinach or kale, and coconut water in a blender until smooth.
Pour the smoothie into a glass. Garnish with fresh banana slices.
Feel free to play with this base recipe to concoct your favorite breakfast smoothie.
Add in a dose of healthy fats with a dollop of almond butter, mixed nut butter, or half an avocado. Make it a high-protein smoothie with some Greek yogurt or a scoop of your favorite protein powder. Spoon in some chia seeds for fiber. Adjust the taste with the sweetener of your choice (honey, agave, etc.).
Prefer a creamier smoothie? Swap out the coconut water for unsweetened almond milk or the dairy of your choice.
SERVES 1
1 cup frozen, peeled, chopped banana
1 cup fresh strawberries, plus more for garnish
¼ cup oat milk (or alternative nut milk)
¼ cup Greek Yogurt
1 tablespoon honey
The Pink Smoothie
Is it possible to make the classic strawberry-banana smoothie even better? We like to think so. Opt-in for frozen banana instead of fresh for an even creamier, almost milkshake-like texture.
Purée frozen banana, strawberries, oat milk, Greek yogurt, honey, and 1 cup of ice in a blender until smooth.
Pour the smoothie into a glass. Garnish with fresh strawberry slices.
Stick with natural sweeteners like honey—or agave or maple syrup to make it vegan—and dial the amount up or down depending on your taste and how ripe your fruit is. (A ripe banana will register as much sweeter than an under-ripe one.)
Our truly innovative program, Hydrate for Health uses clear, easy-to-operate dispensers at stations that include signage explaining the benefits of hydration to guests, residents, patients, and team members. The water is infused with fresh fruit, vegetables, or herbs and the flavors change daily to keep interest high. Peering through the containers, guests can actually see the fresh water and fruit, a visual cue to hydrate more often.
Water Does the Body Good
Without any unnecessary calories, water helps your muscles and brain stay hydrated for optimal physical and mental performance. How much water you need depends on your body height, weight, and activity level; larger, more active people need more fluids. As a rule of thumb, drink at least 8 glasses of water daily. The lighter the color and odor of your urine, the better hydrated you are. Not sold on more frequent trips to the restroom? Here is of why it is important to stay hydrated:
60 Percent of our Body is Water
Water is a major component of the muscles and organs. Your body cannot survive without sufficient water as it is the solvent for biochemical reactions -it constantly moves through your cells. About 4 to 10 percent of your body-water gets replaced every day.
Staying Hydrated Helps Controlling Weight
We can easily confuse feelings of hunger with feelings of thirst as feeling hungry is a side effect of dehydration. Many times, when we are thirsty we "feel" hungry and grab a snack to eat when instead you should have drank a large glass of water.
Water Helps Your Digestion
Water is required to moisten food (saliva), digest (gastric secretions), transport nutrients to and from cells (blood) and discard waste (urine). Water can reduce constipation and help with urinary tract infections.
Drink Up!
According to the Center for Science in the Public Interest, nearly half of bottled waters come from municipal water supplies-not from the mountain streams pictured on the labels. So rather than spending money on bottled water, turn on your tap. This will help stop the flood of 95 million plastic water bottles that get discarded each day, of which only 20 percent get recycled.
Infuse Boring Water
If you have trouble drinking plain water, infused water might be the solution for you. Making your own is easy, calorie-free and a flavorful way to stay hydrated.
Americans are realizing that several generations have consumed countless empty calories in sugary sodas and juices, and this behavior is contributing to an epidemic of obesity and diabetes. Another reason for the renewed interest is that in senior communities and hospitals, patients and residents are more at risk for dehydration.
This may be the result of medication, physical limitations that make it difficult to access drinks, or it may be due to decreased mental acuity that causes seniors and patients to forget to hydrate if they are not reminded frequently.
Hydration stations are a great solution to these challenges, but not all hydration stations are created equal. Some facilities have responded to this challenge by placing bulky, camping-style coolers in public areas, but this doesn't help patients and residents with motor skill limitations, nor does it communicate anything about what is in the cooler or remind them why it is important to stay hydrated.
How to Infuse Water
Use only fresh vegetables, fruits, and whole herb leaves. Spices are best if fresh but dried work as well. Wash ingredients thoroughly under running cold water. Slice fruit and veggies into ¼" to ½" slices, cubes or rings. Fill a glass bottle or pitcher with layers of ice cubes and flavor elements. Fill with fresh filtered water and refrigerate for at least an hour to allow the flavors to fully develop. Refill with ice and water as needed. You'll need one pound of vegetables or fruit and¼ cup of herbs and/or spices per gallon water.
Drinking water sounds like an easy task, but the truth is that many of us are dehydrated right now. Meeting daily hydration needs can be easily missed, and unfortunately dehydration can lead to medical complications if it goes unnoticed.
EACH MAKES 1 GALLON
Cucumber & Basil
1 pound cucumber, peeled and sliced into 1/16" slices
¼ cup whole basil leaves
Pomegranate & Orange
1 pound pomegranate, sliced into wedges
1 pound oranges, sliced into wheels
Peach & Ginger
1 pound peaches, sliced into wedges
¼ cup ginger, peeled and sliced thin on a bias
Pineapple & Sage
1 pound pineapple, cut into ¼" wedges
¼ cup whole sage leaves
Assembly
1 gallon filtered water, plus more
Ice
Hydrate for Health: Infused Water
The following are some of the most popular infused water amongst our residents and team members. The sky is the limit when it comes to infusing water. Follow some of the recipes, or mix and match any fruits, herbs, spices, or even flowers you'd like!
Wash all needed flavor elements for the Hydration Station, along with any serving container that can hold 2.5 gallons.
Cut all ingredients into ¼" to ½" slices, ½" cubes, or sprigs. Fill the Hydration Station with ice ⅓ up from the bottom. Make sure that the bottom layer of ice is above the spout.
Layer flavor elements flat around the inside edge of the Hydration Station. Make sure that each piece slightly overlaps each other. To garnish, stand a row of ingredients against the container wall facing outward.
Fill the next ⅓ with ice, and repeat layering the garnish around the outside of the container. Fill the Hydration Station with ice within 1 ½ inches from the top.
Top with filtered water.
MAKES 4 CUPS
1 cup raw walnut halves
1 cup raw pecan halves
1 cup almonds, dry roasted
1 cup cashews, dry roasted
1 teaspoon salt
½ teaspoon freshly ground black pepper
½ teaspoon ground cumin
½ teaspoon cayenne pepper
½ cup granulated sugar
1 tablespoon unsalted butter
Signature Mixed Nuts
Famous at Spring Lake Village in California, our signature mixed nuts recipe has been a favorite amongst residents for years. Now, you get to try our secret recipe yourself!
Preheat oven to 350°F. Line a baking sheet with aluminum foil and lightly coat with cooking spray, set aside.
Combine walnuts, pecans, almonds, and cashews in large bowl. Add salt, pepper, cumin, and cayenne, toss to coat.
In a small saucepan over medium heat, melt the butter, sugar, and ¼ cup of water. Cook for 1-2 minutes, or until sugar has dissolved. Slowly pour the melted butter mixture over the bowl of nuts and stir to incorporate.
Transfer nuts to the prepared baking sheet and spread into a single layer.
Bake in oven for 10 minutes. Carefully remove the baking sheet and mix the nuts with a spatula. Bake in the oven for an additional 5-7 minutes, or until the nuts are golden brown and fully roasted.
Allow to cool before serving.
MAKES 4 CUPS
4 cups mixed olives (Kalamata, black, green)
3 tablespoons extravirgin olive oil
1 tablespoon fresh lemon juice
½ teaspoon Aleppo pepper
1 teaspoon dried oregano
1 teaspoon dried basil ¼ teaspoon smoked paprika
Marinated Olives with Aleppo Pepper
This is like having an olive bar in your own fridge! These spicy marinated olives are so easy to make and the heat can be adjusted to your taste.
In a large bowl, combine the mixed olives, extra-virgin olive oil, fresh lemon juice, Aleppo pepper, dried oregano, dried basil, and smoked paprika.
Toss all the ingredients together thoroughly, ensuring the olives are evenly coated with the flavorful mixture.
Marinate the olives by covering and placing in the refrigerator for at least overnight, although the flavors are best when allowed to marinate for 48 hours.
To serve, remove the marinated olives from the refrigerator approximately 2 hours before serving to allow them to reach room temperature. This enhances the fullness of their flavors.
Get creative by considering additional mix-ins to tailor the dish to your preferences. Options like citrus zest, red pepper flakes, fresh rosemary, or thinly sliced garlic cloves can add extra depth and character to your olives.
MAKES 3 CUPS
1 can chickpeas (15 ounces), rinsed and drained
½ teaspoon baking soda
¼ cup fresh lemon juice, more as needed
1 garlic clove, roughly chopped
½ teaspoon kosher salt
½ cup tahini
2-4 tablespoons ice water, more as needed
½ teaspoon ground cumin
2 tablespoons extravirgin olive oil, plus more
Pita Chips
4 pita rounds
¼ cup extra-virgin olive oil
2 tablespoons Israeli Za'atar (page 17)
1 tablespoon fresh thyme leaves
Kosher salt
Freshly ground black pepper
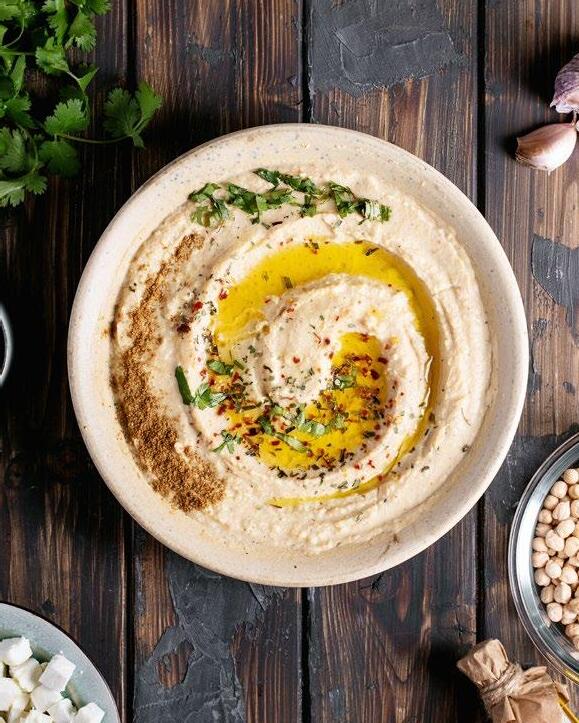
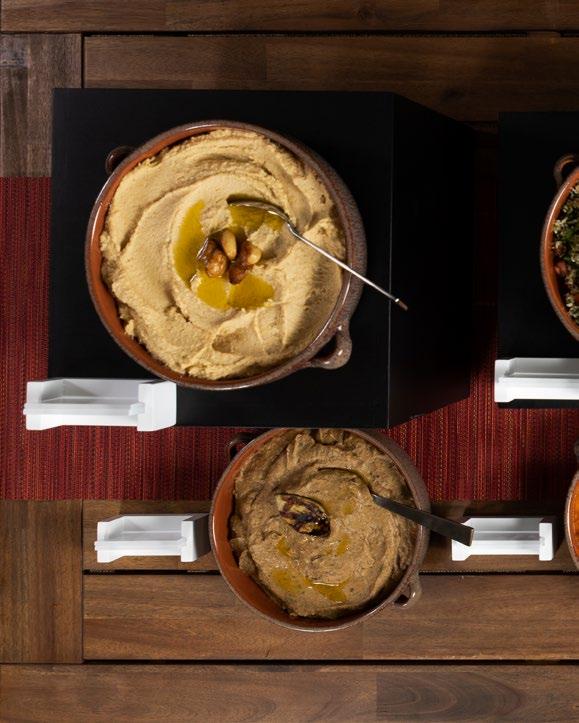
Israeli-Style Hummus with Za’atar Pita Chips
We recommend topping with extra-virgin olive oil and cumin for a simple presentation, but the sky's the limit! This hummus acts as the perfect canvas for roasted red peppers and toasted pine nuts, crispy-fried chickpeas, or even spiced, ground lamb.
Place the chickpeas in a medium saucepan and add the baking soda. Cover the chickpeas with several inches of water, then bring the mixture to a boil over high heat. Continue boiling, reducing heat if necessary to prevent overflow, for about 20 minutes, or until their skins are falling off and they’re quite soft. In a fine-mesh strainer, drain the chickpeas and run cool water over them for about 30 seconds. Set aside.
Meanwhile in a food processor combine the lemon juice, garlic and salt. Process until the garlic is very finely chopped, then let the mixture rest so the garlic flavor can mellow, ideally 10 minutes or longer.
Add the tahini to the food processor and blend until the mixture is thick and creamy. While running the food processor, drizzle in ice water. Scrape down the food processor and blend until the mixture is ultra smooth, pale and creamy. Add the cumin and the drained chickpeas to the food processor. While blending, drizzle in the olive oil until smooth.
Taste and adjust for additional salt and lemon.
Spoon hummus into a shallow bowl, making a well in the center, and drizzle liberally with oil. Sprinkle additional cumin on top if desired.
Preheat oven to 400°F. Split pitas and place on a rimmed baking sheet. Brush with oil and sprinkle with Israeli Za’atar and additional thyme; season with salt and pepper. Bake until golden brown and crisp, 10–12 minutes. Let cool, then break into bite-size pieces.
Serve hummus with pita chips.
MAKES 4 CUPS
2 pounds tomatoes, cored, cut in half crosswise
1 medium white onion, sliced into ¼"-thick rounds
3 Serrano chiles
3 garlic cloves, unpeeled
2 tablespoons fresh lime juice
2 tablespoons finely chopped cilantro
Kosher salt
Tortilla chips
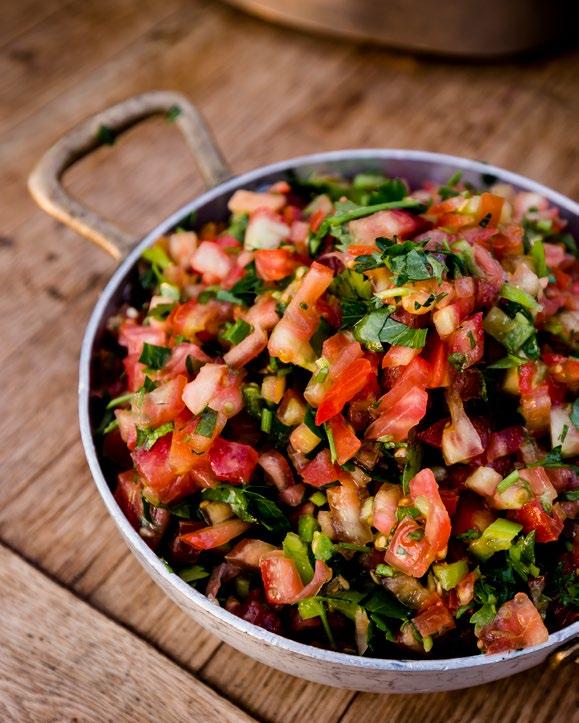
Roasted Pico de Gallo
This easy salsa recipe is a roasted riff on pico de gallo, which is normally fresh. The key is to char the tomatoes, onion, Serrano chiles, and garlic under the broiler for a roasty and intensified flavor, then blitz the vegetables in batches for a texture that’s right in between smooth and chunky.
Heat broiler to 500°F+.
Place tomatoes cut side down on a foil-lined rimmed baking sheet. Fit onion, chiles, and garlic around tomatoes so everything is snug but not overlapping. Broil, turning onion and chiles once, until lightly charred, about 6 minutes for chiles and garlic and 15–18 minutes for tomatoes and onion.
Peel garlic and place in a food processor along with half of the tomatoes. Pulse until very smooth. Add remaining tomatoes and pulse until tomatoes are mostly broken up but mixture still has some texture. Transfer to a medium bowl.
Finely chop onion and chiles and mix into purée; season with salt. Let cool and stir in the lime juice and cilantro. Season salsa with more salt if needed.
Serve with tortilla chips.
SERVES 6
6 large eggs
3 tablespoons mayonnaise
1 teaspoon Dijon mustard
2 teaspoons seeded chipotle peppers in adobo sauce
½ teaspoon extra adobo sauce
¼ teaspoon champagne vinegar
2 tablespoons Spanish chorizo, minced
Kosher salt
Freshly ground black pepper
Additional Garnish
Fresh dill, finely chopped
Traditional Adobo Seasoning (page 14)
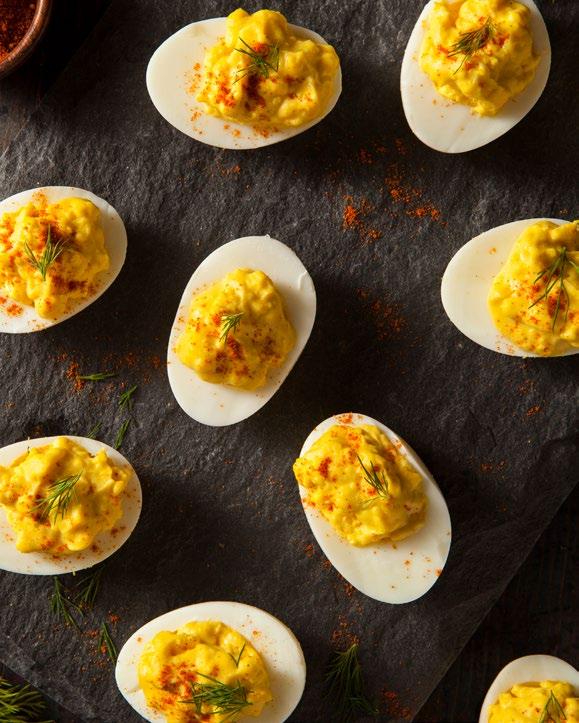
Chipotle Deviled Eggs with Chorizo
Chipotle peppers can pack a punch, so it’s best to start conservatively with your chili and sauce quantities, adding additional to your spice and tang preferences.
Place the eggs in a heavy-bottomed pot and cover them with cool water, leaving 1 to 2 inches of water above the eggs. Vent the lid, bring the water to a boil, then cover the pot completely. Reduce the heat and simmer for 30 seconds. Remove from heat and let the eggs stand, covered, for 12 minutes.
Transfer the eggs to a bowl of ice water and let them stand for 10 minutes. Peel the eggs under cool running water. Once peeled, pat dry and slice eggs in half lengthwise.
Gently scoop out the yolks into a bowl and mash them with a fork or wire whisk. Add mayonnaise, Dijon mustard, adobo sauce, and vinegar. Whisk until smooth. For the smoothest, creamiest filling, use a hand mixer (preferred method). Stir in the minced chipotle peppers by hand.
Season the mixture with salt, pepper, and additional adobo sauce and vinegar to taste.
Fill each egg white half with a portion of the yolk mixture. You can use a spoon, pastry bag with a plain piping tip, or a zip-lock bag with the corner snipped off.
Top each deviled egg with diced chorizo, dill, and dust with Adobo seasoning.
Serve eggs immediately or within a few hours of assembling. If not serving right away, store them covered in the refrigerator.
SERVES 8
2 tablespoons light brown sugar
1 package active dry yeast (2 ¼ teaspoons)
3 ounces melted unsalted butter
2 ½ teaspoons kosher salt
4 cups all-purpose flour
⅓ cup baking soda
1 whole egg, beaten with 1 tablespoon cold water
1 recipe Cheese-Ale Sauce (next page)
Coarse sea salt
Soft Pretzel Bites with Cheese-Ale Sauce
We love making homemade pretzels, the big ones, but there is something extra fun and special about the bites! The pretzels are soft, chewy, salty, and perfectly paired with our Cheese-Ale Sauce.
Preheat oven to 425°F. In a stand mixer's bowl, combine 1 ½ cups warm water, light brown sugar, yeast, and melted butter using a dough hook. Allow to rest for 5 minutes.
Add kosher salt and all-purpose flour. Mix until combined. Knead until the dough is smooth and pulls away from the sides of the bowl, about 3-4 minutes. If the dough is too wet, add more flour, one tablespoon at a time.
Remove the dough, form it into a ball, and place it in an oiled bowl. Cover and let it rise until doubled, about 1 hour.
In a pot, bring 3 quarts of water to a boil, carefully adding baking soda. Be cautious of potential bubbling.
Divide the dough into 8 equal pieces, roll each piece into a 20-inch rope, and cut into 1-inch pieces for the pretzel bites.
Boil the bites in batches (about 15 at a time) for around 30 seconds, remove with a slotted spoon, and place on a greased baking sheet.
Brush with the beaten egg wash and sprinkle with coarse sea salt. Bake for 15-18 minutes until golden. Rest for 5 minutes before serving with the Cheese-Ale Sauce.
MAKES 2 CUPS
¼ cup unsalted butter
¼ cup flour
½ teaspoon onion powder
½ teaspoon garlic powder
⅛ teaspoon cayenne pepper
1 cup whole milk
⅔ cup beer
1 teaspoon Dijon mustard
1 teaspoon Worcestershire sauce
2 cups sharp cheddar cheese, shredded
1 cup Gruyere or Swiss cheese, shredded
Cheese-Ale Sauce
In a saucepan over medium heat, melt the butter. Add the flour, onion powder, garlic powder, and cayenne pepper. Cook for 1 minute.
Gradually stir in the milk and beer, whisking until smooth after each addition. Continue to cook over medium heat, and add the Dijon mustard and Worcestershire sauce. Cook the sauce until it thickens and becomes bubbly.
Reduce the heat to low, add the shredded sharp cheddar and Gruyere (or Swiss) cheese. Stir just until the cheeses melt and the sauce becomes smooth.
Note: Light beers like ales will lend a smoother flavor (this is our personal preference). You can substitute dark beers like stouts, or even malts, for a rich, bolder flavor.
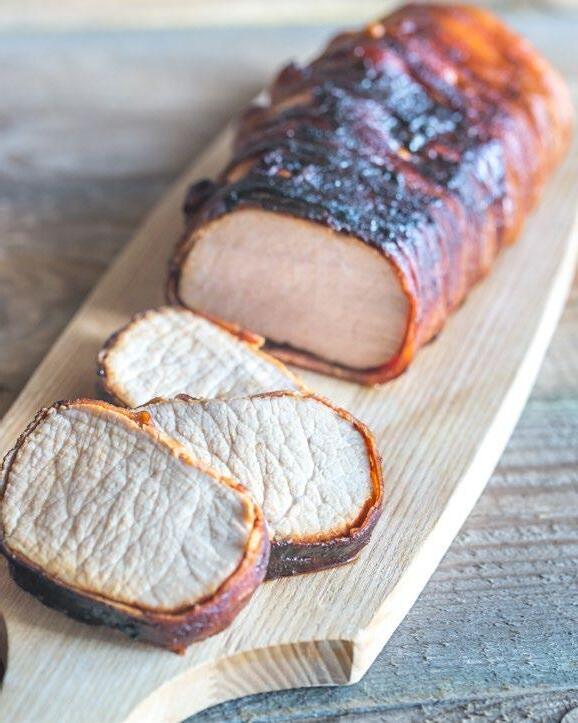
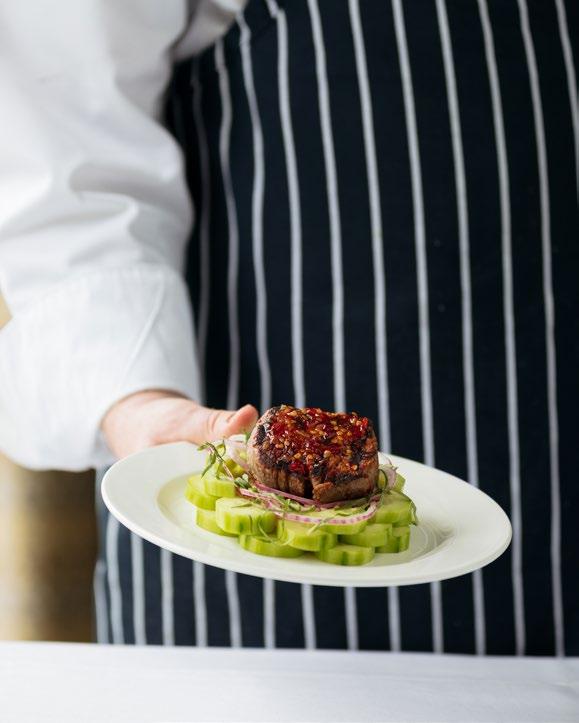
4-8
Smoked Carrot "Pastrami" Reuben with Pickled Kohlrabi Slaw
This plant-based rendition of a New York deli classic is good enough to satisfy even the pickiest of meat eaters. To make this sandwich fully vegan, substitute the butter for olive oil, and use vegan mayo in the dressing.
In a very large container, dissolve salt and brown sugar into 2 gallons of water. Add coriander, mustard seeds, peppercorns, fennel, cinnamon stick, juniper, red pepper, whole cloves, and bay leaves. Mix well to combine. Chill brine to below 40°F.
Add whole, unpeeled carrots to brine and brine for 24 to 48 hours. Once fully brined, drain carrots and pat dry.
To make the molasses glaze, combine molasses, bay leaves, cayenne, and paprika in a small pot and simmer for 10 minutes, stirring frequently.
In a sauté pan toast the caraway, coriander seeds, and peppercorns over low heat until fragrant. Cool and coarsely grind in a spice grinder or mortar and pestle. Fold toasted spices into the molasses mixture and set aside.
Heat smoker to 275°F. Place the carrots on a grill rack, and place the rack on the smoker grate. Cover the smoker and cook in indirect heat for 2-4 hours, or until carrots are tender. Rotate carrots every 20-30 minutes and brush the carrots with the Spiced Molasses Glaze. Remove carrots and let cool. Slice lengthwise on a mandoline.
Butter 2 slices of rye bread and place into skillet buttered side down. Spread the Not-So-Russian Dressing on each slice of bread. Evenly spread the Pickled Kohlrabi Slaw over each slice of bread. Pile pastrami carrots on one side, then press sandwich together. Place skillet over medium-low heat and grill until bread is browned and crisped. Flip sandwich over to grill the other side. Repeat with remaining rye bread.
Slice sandwich in half and serve with a deli pickle.
MAKES 1 CUP
½ cup rice vinegar
¼ cup granulated sugar
2 garlic cloves, thinly sliced
1 1" piece of ginger, thinly sliced
1 3" piece of lemongrass, thinly sliced
2 teaspoons yellow mustard seeds
1 teaspoon crushed red
pepper flakes
1 cup kohlrabi, peeled and julienned
½ cup radish tops and greens, julienned
½ cup kale, thinly sliced
1 ½ teaspoon parsley stems, minced
Kosher salt
Freshly ground black pepper
Pickled Kohlrabi Slaw
Combine vinegar, sugar, garlic, ginger, lemongrass, spices, and 1⁄4 cup water in a saucepan over high heat and bring to a boil.
Add remaining slaw ingredients and immediately remove from heat. Season with salt and pepper to taste. Cool to room temperature and refrigerate overnight.
Do ahead: You can prepare the slaw in advance; it can be stored in the refrigerator for up to 1 month when covered.
MAKES ½ CUP
6 ancho chiles, dried
2 tablespoons white vinegar
1 egg yolk
⅔ cup canola oil
¼ cup ketchup
3 tablespoons dill pickles, diced
1 ½ teaspoon cayenne
Kosher salt
Freshly ground black pepper
Not-So-Russian Dressing
Cover chiles in boiling water and soak until soft, about 10 minutes. Drain and purée in a food processor until smooth and set aside.
Mix vinegar and egg yolk in a bowl. While whisking constantly, slowly drizzle in oil until emulsified and resembles aioli. Stir in reserved chile purée, ketchup, pickles, and cayenne. Season with salt and pepper to taste. Refrigerate dressing, covered, until ready to use.
Do ahead: You can prepare the slaw in advance; it can be stored in the refrigerator for up to 1 week when covered.
SERVES 2
2 slices sourdough bread, cut thick
1 avocado, pitted & peeled
1 Roma tomato, diced
2 large eggs
½ tablespoon lime juice
2 tablespoons mayonnaise
1 teaspoon chili powder
2 tablespoons sweet onion, diced
1 ½ tablespoons "EBB"
Truffle Crunch (page 12)
1 tablespoon Cotija cheese, crumbled
Additional Garnish
Fresh cilantro, finely chopped
Texas Pete® Hot sauce
Ultimate Avocado Toast
Although this is technically served for breakfast, we think it's good enough for any time of day. Creamy avocado with Cotija, citrus, and truffle all come together for an amazing, textured bite.
Place both slices of sourdough bread in a toaster, or on a griddle, and toast them until they are golden brown and crispy. Set aside.
In a bowl, mash the ripe avocado with a fork until smooth. Add the lime juice, diced Roma tomato, sweet onion, chili powder, and mayonnaise to the mashed avocado. Mix everything together until well combined.
Heat a non-stick skillet over medium heat with oil. Crack the eggs into the skillet and cook them over easy, leaving the yolks slightly runny. Once done, remove them from the heat and set them aside for plating.
Take the toasted sourdough bread slices and spread the avocado mixture evenly on each slice. Carefully place a fried egg on top of each avocado-covered toast slice.
Sprinkle truffle crunch over the eggs. Garnish the toast with fresh cilantro, crumbled Cotija cheese, and a drizzle of hot sauce, adjusting to your preferred level of spiciness.
SERVES 2
2 pre-made flatbreads or naan
1 ½ cups cherry tomatoes
½ cup fresh basil, chopped
8 ounces fresh mozzarella
½ cup Parmesan cheese, grated
¼ cup balsamic vinegar
Kosher salt
Freshly ground black pepper
Smashed Tomato Flatbread
While the classic trio of tomatoes, mozzarella, and basil reigns supreme, feel free to experiment with alternative toppings, all following the same measurements. This flatbread is a canvas for creativity, as versatile as it is straightforward.
Preheat oven to 350°F. Place the flatbreads on a sheet pan and bake for 5 minutes, or until they become slightly crisp and golden.
While the flatbreads are in the oven, combine the cherry tomatoes, balsamic vinegar, and chopped basil in a mixing bowl. Use a rubber spatula to gently smash and mix these ingredients together. Slice the fresh mozzarella into thin pieces, preparing it for topping the flatbreads.
When the flatbreads have been pre-baked, remove them from the oven.
Spread the smashed tomato sauce evenly over each flatbread. Layer the sliced mozzarella over the tomato sauce. Sprinkle the grated Parmesan cheese generously over the mozzarella.
Return the flatbreads to the oven and bake for an additional 10 minutes to melt the cheeses. Once the flatbreads are golden brown and melted, remove from oven.
Allow your flatbreads to cool for about 5 minutes before slicing and serving. Garnish with whole basil leaves.
SERVES 2
1 piece naan flatbread
2 tablespoons unsalted butter, melted
1 pint fresh blackberries, washed and dried
8 ounces Brie cheese
½ cup arugula, washed and dried
Course sea salt
Lavender Honey
½ cup organic, local honey
1 sprig fresh lavender
Blackberry Brie Flatbread with Lavender Honey
Creamy, tart, and aromatic, this flatbread makes for an incredible before -or- after-dinner snack for your next party or event. 10x the recipe and cut the naan into bite-sized pieces to feed a crowd.
Heat honey over low heat until it forms a thinner consistency, add the fresh lavender sprig and stir. Steep to incorporate, about 10 minutes. Strain honey through a fine mesh sieve. Cover and refrigerate overnight. Before serving, reheat honey over low heat.
Preheat oven to 350°F. Place the naan flatbread on a parchment-lined pan and brush with melted butter.
Prepare brie by slicing into ⅛” slices and arrange on the prepared flatbread. Add the blackberries and sprinkle with coarse sea salt.
Bake flatbread for 8-10 minutes, or until the brie is fully melted and the blackberries have begun to burst.
Take out of oven and allow flatbreads to cool, about 5 minutes.
Top with fresh arugula and drizzle with the lavender honey.
Cut flatbread into wedges for service.
SERVES 4
5 ounces baby arugula, washed
2 red beets, scrubbed
2 golden beets, scrubbed
2 large oranges, peeled and cut in segments
1 fennel bulb, shaved
3 large dates, julienned
Kosher salt
Freshly ground black pepper
Honey-Cardamom Vinaigrette
1 cup extra-virgin olive oil
2 tablespoons honey
2 lemons, juiced
2 tablespoons apple cider vinegar
1 tablespoon Dijon mustard
1 teaspoon freshly ground cardamom
¼ teaspoon kosher salt
¼ teaspoon freshly ground black pepper
Arugula & Beets with Honey-Cardamom Vinaigrette
You can usually find pre-cooked and chilled beets at your local supermarket, but if you're able to find freshly-picked beets from a local farm, the difference in flavor is truly night and day.
In a medium bowl, whisk together lemon juice, vinegar, mustard, cardamom, salt, and pepper. While whisking, slowly drizzle in olive oil in a steady stream to obtain a creamy consistency. Taste and adjust seasonings if necessary.
Do Ahead: The dressing can be made 1 day ahead. Cover and chill.
Remove the greens and the tail from the beetroots. Leave about 1 inch of the greens intact, this will help the color not bleed into the water when boiling.
Place beets in a large pot and add water to cover. Bring to a boil and cook for 30 minutes, or until tender.
Tip: Cook the red and golden beets separately from each other. This will help keep their colors vibrant.
Once cooked, remove beets and submerge in an ice bath of equal parts water and ice. Trim off what's left of the greens and peel off the beet skin; you can easily do this with paper towels. Thinly slice the prepped beets into half-circles and set aside.
In a large mixing bowl, combine the arugula, beets, orange segments, shaved fennel, and dates. Dress the salad in the vinaigrette, tossing to combine. Season with salt and pepper to taste.
SERVES 4
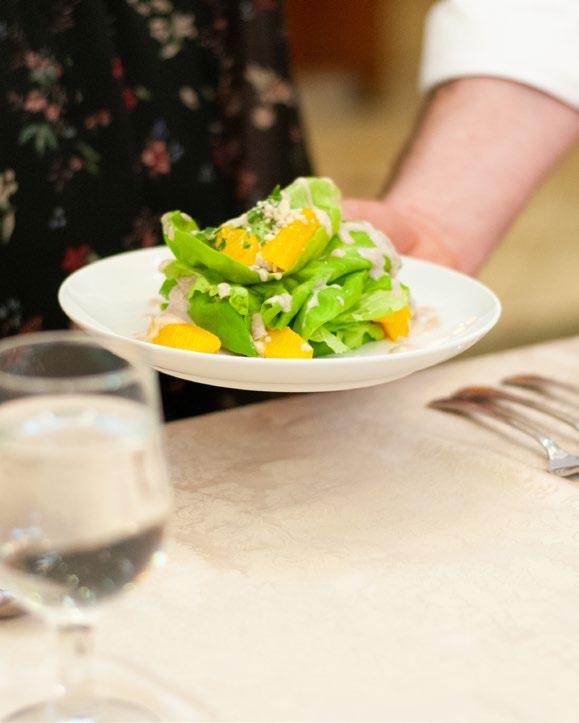
2 heads Boston bibb lettuce, cored and quartered
2 heirloom tomatoes, cut into wedges Green Goddess Dressing
1 large egg yolk
1 teaspoon Dijon mustard
2 tablespoons fresh lemon juice
1 cup olive oil
½ bunch fresh parsley, minced
½ bunch fresh chives, minced
2 tablespoons fresh tarragon, minced
1 garlic clove, minced
½ medium-sized cucumber, skin on, roughly chopped
½ avocado, peeled and pitted
¾ cup sour cream or plain yogurt
Kosher salt
Freshly ground black pepper
Boston Bibb Salad with Green Goddess Dressing
The origins of this classic herb-loaded dressing points to the Palace Hotel in San Francisco in 1923. The hotel's executive chef Philip Roemer wanted to create something to pay tribute to actor George Arliss and his hit play, The Green Goddess.
Pulse the egg yolk, mustard, and lemon juice in a blender with a few, quick pulses. Turn the blender on medium-high and slowly drizzle in the oil in a thin, steady stream. Continue to blend until the mixture is light in color, with a thick consistency.
Scrape down the sides of the blender and add the cucumber, avocado, parsley, chives, tarragon, and garlic. Blend until smooth and vibrant green.
In a medium bowl, fold in sour cream, or yogurt, into the herbed mayonnaise. Season with salt and pepper to taste and set aside.
Do Ahead: The dressing can be made 1 day ahead. Cover and chill.
On a chilled plate, build salad with arugula, roulade wheels, and tomatoes. Drizzle extra-virgin olive oil, pesto, and balsamic vinegar on top of salad.
To serve, place 2 bibb lettuce quarters on a chilled salad plate. Add a few tomato wedges and drizzle the green goddess dressing over.
SERVES 4
½ bunch fresh cilantro
1 small shallot, finely chopped
1 garlic clove, finely grated
2 Thai chiles, finely chopped
¼ cup tamarind concentrate
2 tablespoons fresh lime juice
2 teaspoons fish sauce
6 medium Persian cucumbers, half-peeled, halved lengthwise, thinly sliced on a bias
1 cup cherry tomatoes, halved
Kosher salt
Additional Garnish
Fresh cilantro, finely chopped
Dry-roasted peanuts, coarsely chopped
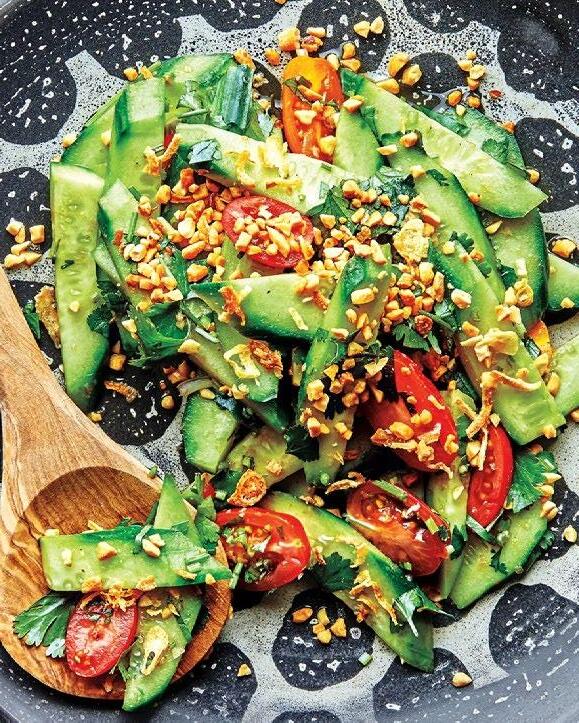
Thai Cucumber Salad
Tamarind concentrate, often labeled “concentrate cooking tamarind” can be found at Asian and Thai markets, or online.
Thinly slice the cilantro stems until you have about 2 tablespoons and place them in a large bowl. Coarsely chop the remaining cilantro; set it aside for serving.
Add shallot, garlic, chiles, tamarind concentrate, lime juice, and fish sauce to the bowl with cilantro stems and mix well.
Add cucumbers and tomatoes, season with salt, and toss until everything is nicely dressed.
Transfer the salad to a platter and top with the reserved chopped cilantro and peanuts.
Do Ahead: The dressing can be made 1 day ahead. Cover and chill.
3 tablespoons fresh lemon juice, divided Kosher salt
Freshly ground black pepper
Garlic-Lemon Dressing
1 teaspoon finely grated lemon zest
½ cup whole milk yogurt
¼ cup mayonnaise
1 garlic clove, finely grated
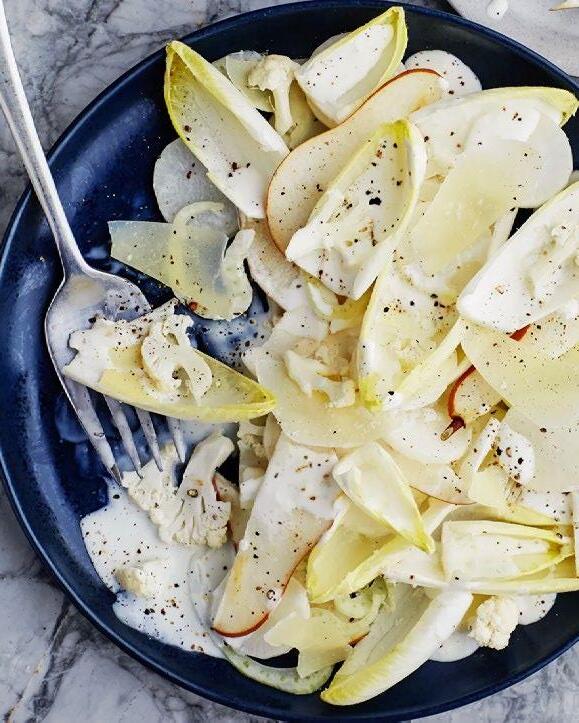
Winter Fennel Salad with Garlic-Lemon Dressing
This salad is as refreshing as it is comforting. The all-white bouquet of vegetables is definitely a visual stand-out for your next dinner party, just make sure to serve in a colorful bowl!
Thinly slice the fennel and cauliflower crosswise, about ¼" thick. Toss the fennel, cauliflower, endive, pear, and Parmesan in a large bowl. Add olive oil and 1 tablespoon of lemon juice, reserving 2 tablespoons for the dressing. Season with sea salt and freshly ground black pepper. Using your hands, toss the salad until well coated. Chill in the refrigerator while you prepare the dressing.
In a small bowl, whisk together the yogurt, mayonnaise, finely grated garlic, lemon zest, and the remaining 2 tablespoons of lemon juice. Season with kosher salt.
Arrange about one-quarter of the salad on a large platter. Drizzle some dressing over, letting it fall into the vegetables. Add another one-quarter of the salad and drizzle with the dressing. Repeat with the remaining salad and dressing in layers. Season with kosher salt and freshly ground black pepper.
Do Ahead: The dressing can be made 1 day ahead. Cover and chill.
Panzanella is a Tuscan-style chopped salad of soaked "stale" bread, onions, and tomatoes that is popular in the summer. Our version swaps the tomatoes for watermelon, offering a refreshing and addicting side dish.
Preheat the oven to 300°F. Place the cubed bread in a bowl and toss with 2 tablespoons of olive oil and the Kosher salt. Lay the bread cubes on a baking sheet in a single layer and bake for about 15 minutes, until the bread is crispy. Let it cool.
In a large bowl, place the watermelon, cucumber, red onion, jalapeño, feta cheese, and mint. Add the cooled bread cubes and toss until well combined.
Drizzle the remaining 2 tablespoons of olive oil, lime juice, and black pepper over the salad. Toss again to ensure everything is well combined.
SERVES 4
1 pound Brussels sprouts, ends trimmed and halved
3 garlic cloves, minced
1 tablespoon olive oil
⅓ cup pecans, chopped
¼ cup dried cherries
¼ cup Parmesan cheese, shaved into ribbons
1 cup cooked quinoa, chilled
Orange-Thyme Vinaigrette
2 tablespoons extra-virgin olive oil
¼ cup fresh orange juice
½ teaspoon orange zest
2 teaspoons apple cider vinegar
1 teaspoon Dijon mustard
1 teaspoon pure maple syrup
1 teaspoon fresh thyme leaves
Kosher salt
Freshly ground black pepper
Brussels Sprouts & Quinoa
Brussels sprouts, pecans, cherries, and thyme are a match made in autumn heaven. Try this salad at your next Thanksgiving - just be sure to double the recipe as it goes fast!
Preheat the oven to 400°F. On a sheet pan, combine the Brussels sprouts and minced garlic. Toss with olive oil and sprinkle with salt and pepper. Arrange the Brussels sprouts so they are all cut-side down on the baking sheet. Tip: This helps them roast better and get more evenly browned.
Roast in the oven until the Brussels sprouts are tender and golden brown, about 15-20 minutes.
While the Brussels sprouts are cooking, in a small bowl, combine the 2 tablespoons of extra-virgin olive oil, orange juice, zest, vinegar, mustard, maple syrup, and thyme; whisk to combine. Season with salt and pepper to taste.
Add pecans to a dry, hot skillet over medium heat, and then cook until the nuts give off a toasted aroma, 4-6 minutes.
In a serving bowl, combine the roasted Brussels sprouts, cooked quinoa, toasted pecans, and dried cherries. Pour the vinaigrette over all and gently toss to combine. Sprinkle with Parmesan cheese.
Serve warm or cold.
SERVES 4
¼ cup raw pistachios
1 small shallot, finely chopped
1 Thai chili pepper, finely chopped
6 cups broccoli florets, finely chopped
1 cup fresh cilantro, finely chopped
½ cup pomegranate arils
Shawarma Vinaigrette
6 tablespoons neutral oil (grapeseed or avocado)
2 teaspoons Shawarma Seasoning (page 15)
1 garlic clove, finely grated
2 tablespoons fresh lemon juice
2 tablespoons champagne vinegar
1 tablespoon Pomegranate Molasses (page 8)
Kosher salt
Freshly ground black pepper
Broccoli Pomegranate Salad with Shawarma Vinaigrette
You can serve this chilled as a salad or serve warm after making for an incredible side dish. Not a fan of broccoli? You can easily substitute Brussels sprouts, or even sugar snap peas for a refreshing summer salad.
Heat neutral oil, Shawarma Seasoning, and garlic in a small saucepan over medium-high heat until fragrant, about 2 minutes. Remove from heat and whisk in lemon juice, champagne vinegar, and pomegranate molasses. Season the vinaigrette with salt and pepper if needed; set aside.
Toast pistachios in a dry, small skillet over medium-low heat until golden brown, about 4 minutes. Transfer to a cutting board and let cool; then finely chop.
In a medium bowl, toss the chopped pistachios, shallot, chili, broccoli, cilantro, and pomegranate arils. Drizzle the dressing over the salad and toss to coat. Taste and season with more salt and pepper if needed.
Do Ahead: The salad can be made 1 day ahead. Cover and chill.
SERVES 4
2 romaine lettuce hearts, cut into 1 ½" pieces, washed, dried, and chilled
1 egg yolk
2 tablespoons anchovy paste
1 large garlic clove, peeled
1 recipe Parmesan Crisps (next page)
Coarse sea salt
Freshly ground black pepper
Parmesan cheese, for grating
Vinaigrette Base
¼ cup extra-virgin olive oil
2 teaspoons fresh lemon juice
1 ¼ teaspoons Banyuls (or sherry) vinegar
½ teaspoon Worcestershire sauce
Classic Caesar Salad with Parmesan Crisps
For us, anchovies can make or break a classic Caesar salad. We also understand these preserved, salty fish aren't for everyone. You can easily substitute an extra tablespoon of Worcestershire sauce, or Dijon mustard for a vegetarian version.
In a bowl, combine the extra-virgin olive oil, fresh lemon juice, vinegar, and Worcestershire sauce. Set the vinaigrette base aside.
In a small bowl, or using a mortar and pestle, combine the peeled garlic clove with a pinch of coarse salt. Crush and mix until a thick, consistent paste has formed.
In a large bowl, combine the garlic paste, egg yolk, and anchovy paste. Whisk vigorously. Slowly stream the vinaigrette base into the yolk mixture, stirring quickly. Pour the base slowly to ensure the emulsion forms. The result should be a thick, creamy emulsified dressing.
Add the romaine lettuce to the dressing and toss until the leaves are evenly coated.
Season the salad with freshly ground black pepper and generously grate Parmesan cheese on top. Add the Parmesan crisps and gently toss a few times.
Serve the salad in chilled bowls.
MAKES 8 CRISPS
1 cup Parmesan cheese, finely grated
1 teaspoon all-purpose flour
Parmesan Crisps
Preheat oven to 400°F.
Grate the Parmesan into a small mixing bowl. It is best to grate the cheese at the last minute so that it maintains its moisture and melts together well. Toss the cheese with the flour to evenly distribute it.
Pour a heaping tablespoon of the Parmesan-flour mixture onto a silicone (recommended) or parchment-lined baking sheet and lightly pat down. The Parmesan-flour mixture should be about ⅛" thick across.
Repeat with the remaining, spacing the spoonfuls about a ½ inch apart. Bake for 3 to 5 minutes or until golden and crisp.
Cool before serving.
SERVES 8
1 pound fresh cheese curd
2 tablespoons kosher salt
6 ounces sliced prosciutto
1 cup tear-drop tomatoes (or cherry heirloom), sliced in half lengthwise
4 cups baby arugula, washed
Kosher salt
Freshly ground black pepper
Extra-virgin olive oil
Aged Balsamic vinegar
Basil Pesto
2 cups fresh basil leaves, packed
½ cup Parmesan cheese, freshly grated
½ cup extra-virgin olive oil
⅓ cup pine nuts, toasted
3 garlic cloves, minced
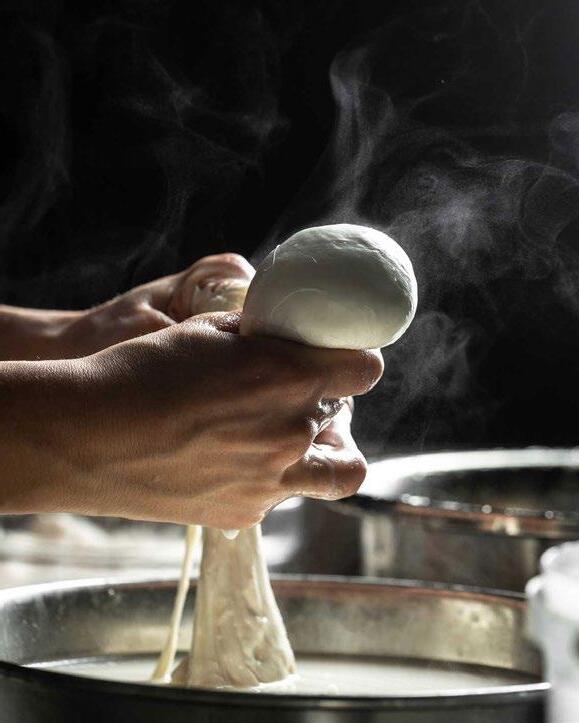
Hand-Pulled Mozzarella and Prosciutto Roulade
Nothing beats hand-pulled mozzarella, especially when it's the main ingredient. If you can't find any cheese curd, you can use store-bought. Just be careful not to tear the cheese when rolling the roulade.
To make the basil pesto, add all ingredients except the olive oil to a blender and blend on medium speed, gradually adding the oil until it forms a smooth paste. Set aside.
Dice cheese curd and place in a large bowl.
In a large pot, heat a gallon of heavily salted water until it registers 165°F. Find the right stove settings to ensure it remains at this temperature. Ladle hot salted water over curd and let sit for about 2 minutes until they begin to soften and melt.
Using a wooden spoon to start, gently fold the curds over each other in the bowl. Remove curd mass and gently fold under itself until a smooth ball is presented. It is best to use your hands (see image). If water is too hot to handle, keep a bowl of ice water nearby to submerge your hands in between pullings.
Flatten curd out into a thin rectangular shape. Add thin slices of Prosciutto and roll evenly to form the roulade. Slice in 1-inch pieces and set aside.
Toss arugula with a drizzle of oil, season with salt and pepper to taste, and set aside.
On a chilled plate, build salad with arugula, roulade wheels, and tomatoes. Drizzle extra-virgin olive oil, pesto, and balsamic vinegar on top of salad.
SERVES 6
¾ cup white rice, rinsed
1 ¼ cups boneless skinless chicken breast (large), diced
2 ½ tablespoons canola oil
1 ¼ cups yellow onions, finely chopped
½ cup fresh celery, finely chopped
2 tablespoons garlic, minced
¼ cup fresh lemon juice
6 cups Chicken Stock (page 4)
1 tablespoon kosher salt
2 teaspoons black pepper, freshly ground
2 large eggs
Additional Garnish
Fresh parsley, finely chopped
Lemon wedges
Avgolemono Chicken Soup
Silky, rich, fragrant chicken soup, prepared Greek-style with avgolemono sauce, which is a Greek lemon-egg sauce with warm broth. The best part, this weeknight version comes together in just over 30 minutes.
Heat the canola oil in a large stockpot over medium heat. Add the finely chopped onions and celery to the pot and gently sauté until they turn translucent. Stir in the minced garlic and continue to sauté for 1 to 2 minutes, allowing the flavors to meld.
Pour in the lemon juice, and simmer until it reduces by half.
Add the diced chicken to the pot, followed by the Chicken Stock and white rice. Gradually raise the heat until the mixture begins to simmer. Add kosher salt and freshly ground black pepper.
Turn the heat to medium-low and simmer for 20 minutes or until the rice is tender.
In a large, separate bowl, whisk the eggs. Gently temper the eggs by slowly whisking 1 cup of the hot soup into the egg mixture, ensuring a smooth incorporation. Gradually introduce this tempered egg mixture back into the hot soup to thicken the base. Remove from heat immediately.
Serve the soup in bowls and garnish with fresh parsley and lemon wedges.
SERVES 6
1 yellow onion, diced
1 teaspoon garlic, minced
1 tablespoon ginger, minced
2 cups Vegetable Stock (page 5)
2 cups gold potatoes, peeled and diced
1 cup unsweetened coconut milk
1 tablespoon Thai Red Curry paste
2 teaspoons ground turmeric
½ teaspoon ground cumin
¼ teaspoon ground cinnamon
2 tablespoons fresh lime juice
1 cup canned chickpeas, rinsed and drained
1 cup frozen peas
½ cup red bell pepper, diced
1 cup fresh spinach, chopped
½ cup broccoli, chopped
Additional Garnish
Fresh cilantro, finely chopped
Lime wedges
Potato Coconut-Curry Soup
This soup is full of Thai-inspired creamy flavors, and with the addition of potatoes, you’ll have a hearty, filling soup that is perfect for cold weather. It's also versatile! Substitute the pepper, spinach, and broccoli for whatever vegetables are in season.
In a medium pot, combine the diced onion, minced garlic, and ½ cup vegetable Stock. Sauté over medium heat for 5 minutes, stirring frequently. Add more vegetable broth if necessary to prevent sticking.
Add the potatoes, along with turmeric, ginger, cumin, and cinnamon. Cook for an additional 2-3 minutes, stirring frequently and gradually adding more Vegetable Stock (additional ½ cup)
Incorporate the coconut milk, the remaining Vegetable Stock, Thai Red Curry paste, canned chickpeas, peas, and red bell pepper. Stir to combine, then cover with a lid and bring everything to a boil over medium heat.
Let the curry simmer for 15 minutes over low heat. Then, add the fresh broccoli and spinach, and cook for another 5 minutes.
Turn off the heat, and add fresh lime juice. Mix to combine.
Serve the soup in bowls and garnish with fresh cilantro and lime wedges.
SERVES 4
2 tablespoons olive oil
1 teaspoon garlic, minced
2 yellow onions, diced
1 ½ cups Vegetable Stock (page 5)
1 green peppers bell pepper chopped
1 carrot, peeled and chopped
1 zucchini, finely chopped
16 ounces diced tomatoes
6 tablespoons tomato paste
1 cup corn kernels
2 cups kidney beans, rinsed and drained
1 cup chickpeas, rinsed and drained
3 tablespoons soy sauce
1 tablespoon paprika
1 teaspoon cayenne pepper
Kosher salt
Freshly ground black pepper
Game-Day Vegan Chili
This vegan chili is incredibly rich and velvety and packed with layers of complex flavor, just like a classic chili should be. Make sure you don't skip the simmer time- the longer you wait, the better the flavor.
In a large pot, heat olive oil over medium heat. Add the minced garlic and diced onions, sautéing until the onions are translucent, about 5 minutes.
Add the chopped green peppers, carrots, and finely chopped zucchini to the pot. Stir until the vegetables begin to soften. Add the tomato paste and cook an additional 5 minutes.
Pour in the Vegetable Stock and diced tomatoes, and bring to a simmer.
Stir in the corn, kidney beans, and chickpeas into the chili. Season with soy sauce, paprika, and cayenne pepper. Adjust the seasoning to your taste and spice preferences.
Let the chili simmer for an additional 25-30 minutes, ensuring all ingredients are well-cooked and the flavors have developed. Add salt and pepper if needed.
Serve the chili in bowls and garnish with your favorite vegan toppings, or enjoy it as is!
SERVES 4
1 yellow onion, diced
2 celery stalks, diced
1 carrot, diced
¼ cup unsalted butter
1 ½ tablespoons all-
purpose flour
1 ½ teaspoons curry powder
4 cups Chicken Stock (page 4)
½ red apple, cored and chopped
¼ cup white rice
1 skinless, boneless chicken breast, cubed
1 pinch dried thyme
½ cup heavy cream, heated
Kosher salt
Freshly ground black pepper
Optional Garnish
Fresh cilantro, finely chopped
Scallion greens, chopped
Mulligatawny
Mulligatawny is a classic soup originating from South Indian cuisine. The name originates from the Tamil words milagu, and tanni; translating to "pepper-water".
Melt butter in a large soup pot over medium heat. Add onions, celery, and carrots, and sauté until soft, approximately 5 to 7 minutes.
Add flour and curry powder, and cook for an additional 5 minutes, stirring frequently.
Add chicken broth, mix well, and bring to a boil. Reduce heat and simmer for about 30 minutes.
Add apple, white rice, chicken, thyme, and season with salt and pepper. Simmer until the rice is tender, which usually takes 15 to 20 minutes.
Just before serving, stir in the hot cream. You can garnish with fresh cilantro and scallion greens, but this soup is just as good without!
SERVES 4
2 live lobsters, weighing around 3 pounds total
3 tablespoons unsalted butter
3 tablespoons all-purpose flour
1 carrot, chopped
2 celery stalks, chopped
1 medium yellow onion, chopped
2 cloves garlic, crushed
2 sprigs fresh thyme
2 sprigs fresh tarragon
2 tablespoons tomato paste
1 cup medium sherry
2 cups fish stock
1 cup heavy cream
Additional Garnish Cayenne pepper
Lobster Bisque
Smooth and creamy, our lobster bisque is always a crowd pleaser and has never been easier! Using lobster shells guarantees a rich and decadent bisque. We like to serve this with toasted French bread and butter.
Fill a large pot with water and a generous amount of salt. Add the live lobsters, cover with a tight-fitting lid, and return the water to a boil. Once boiling, lower the heat to a gentle boil and cook the lobsters until they are bright red, about 12 minutes.
Remove the lobsters, reserving the liquid. When the lobsters have cooled slightly, place them in a bowl and remove the meat from the claws and tail, again reserving any liquid that comes out of the shells. Chop the meat and refrigerate. Roughly chop the shells into small pieces and reserve, along with all the lobster remains.
Add the butter to a large pot over medium heat, then add the onion, celery, carrot, garlic, and herbs. Sweat until the onions are translucent, about 5 minutes, then add the tomato paste and flour, and cook for an additional 3 to 4 minutes, or until the roux cooks all the way. Deglaze with sherry and cook until the alcohol has evaporated.
Add fish stock, lobster shells, and 1 cup of the lobster-cooking liquid. Bring to a simmer and cook, covered, for 1 hour.
Strain the broth through a colander, pressing down hard on the solids to extract as much liquid as possible. Blend the bisque in a food processor or blender, then pass through a fine sieve, again pressing down hard on any solids that remain. Add the cream and bring to a low simmer for an additional 5-10 minutes.
Add the chopped lobster meat to a bowl. Ladle in bisque and dust with cayenne.
SERVES 4
1 pound farfalle pasta
1 ½ pounds cherry tomatoes
¼ cup extra-virgin olive oil
¾ teaspoon kosher salt
½ teaspoon freshly ground black pepper
½ teaspoon fresh thyme leaves, chopped
4 garlic cloves, whole
½ cup salami, thinly sliced
2 tablespoons balsamic vinegar
1 ½ tablespoons fresh oregano, chopped
1 shallot, minced
5 ounces fresh mozzarella pearls
2 cups baby spinach, washed
¼ cup fresh basil, thinly sliced
Additional Garnish
Freshly ground black pepper
Whole basil leaves
Extra-virgin olive oil
Blistered Tomato Caprese Pasta
The perfect dinner for a hot summer night, this pasta dish relies on fresh, simple ingredients. Pro tip: use high-quality olive oil and balsamic vinegar to enhance the flavor.
Preheat your oven to 425°F. Line a sheet pan with aluminum foil or parchment paper. Place the cherry tomatoes on the sheet pan and drizzle with the olive oil. Season the tomatoes with salt and freshly ground black pepper. Scatter the fresh thyme leaves and garlic cloves among the tomatoes and toss everything well to coat.
Transfer the sheet pan to the oven and roast the tomatoes for about 20 minutes, or until they're caramelized on top and have burst.
Remove from the oven and transfer the roasted garlic cloves to a cutting board. Using the side of your knife, carefully smash the garlic into a smooth paste.
In a large bowl, combine the salami, balsamic vinegar, a drizzle of olive oil, oregano, shallot, mozzarella pearls, and baby spinach.
Bring a large pot of salted water to a boil and cook the pasta until it's al dente. Once the pasta is done, strain it and add it to the bowl, along with the smashed garlic and roasted tomatoes. It's best to wait until the pasta has cooled slightly so the cheese doesn't melt.
Add the fresh basil to the mixture and toss to combine. Season with salt and pepper to taste.
Serve hot or warm, garnish with whole basil leaves, freshly ground black pepper, and a drizzle of extra virgin olive oil if desired.
SERVES 4
1 pound orecchiette pasta
2 tablespoons olive oil
½ cup chorizo sausage, chopped
1 tablespoon scallion (whites), chopped
1 tablespoon shallots, chopped
1 teaspoon garlic, minced
1 pound shiitake mushrooms, chopped
2 ½ cups heavy cream
2 teaspoons Worcestershire sauce
1 teaspoon Cholula Hot Sauce
½ teaspoon kosher salt
½ cup Parmesan cheese, finely grated
2 tablespoons cold unsalted butter
Additional Garnish Italian parsley, chopped
Creamy Orecchiette with Chorizo and Shiitake Mushrooms
Orecchiette is a pasta typical of Apulia, a region of Southern Italy. Their name comes from their shape, which resembles a small ear.
Bring a pot of salted water to a boil. Add the orecchiette and cook until just al dente. Drain in a colander, return to the pot, and toss with 1 tablespoon of the olive oil.
Meanwhile, heat the remaining tablespoon of olive oil in a large skillet over medium-high heat. Add the chorizo and cook, stirring, for about 5 minutes.
Add the chopped scallion whites, shallots, and garlic to the skillet. Cook until fragrant, for about 30 seconds. Stir in the shiitake mushrooms, ensuring they are well-coated, and cook for 2 minutes.
Pour in the heavy cream and cook until it's reduced by half, approximately 10 minutes. Add the Worcestershire sauce, hot sauce, salt, ½ cup of Parmesan cheese, and cold butter. Stir well to incorporate.
Divide the cooked orecchiette among 4 plates and spoon the creamy sauce evenly over the top. Garnish each serving with chopped Italian parsley and the remaining grated Parmesan cheese.
SERVES 4
6 scallions
¼ cup extra-virgin olive oil, plus more for drizzling
5 cups Chicken Stock (page 4)
3 ounces pancetta, finely chopped
1 medium onion, finely chopped
2 garlic cloves, thinly sliced
1 cup Arborio rice
½ cup dry white wine
2 cups fresh peas, shelled
3 tablespoons finely chopped mint
2 tablespoons unsalted butter
1 teaspoon finely grated lemon zest
1 cup Parmesan, shaved, plus more, for serving Kosher salt
Freshly ground black pepper
Risi e Bisi
The classic Venetian dish of rice and peas, known as risi e bisi, makes for a perfect springtime dinner. The desired final consistency is loose, almost brothy, not tight and creamy like risotto.
Cut the scallions into pieces and slice them lengthwise into thin strips Heat oil in a large saucepan over medium-high heat. Add the scallions and cook until they become crisped and golden brown in spots. Transfer the scallions to paper towels to drain and season them with salt. Reserve the oil in a small bowl for later.
Bring the Chicken Stock to a simmer in a medium pot and keep it warm over medium-low heat. Return the saucepan to the stove and add the pancetta and oil. Cook over medium heat, stirring occasionally until the fat begins to cook out.
Add the chopped onion, stirring often until softened and golden. Add the garlic and continue cooking, stirring until softened. Stir in the rice and season with salt. Cook until some grains become translucent.
Add the wine and cook while stirring continuously until the pan is almost dry. Begin to ladle in stock and simmer while stirring occasionally until the broth is absorbed. Ladle in more stock and continue to cook, stirring yet again until the rice is cooked through and most of the stock is absorbed. Add the peas and the remaining broth. Continue to cook and stir until the peas are tender (if using frozen peas, add them at the end and cook to warm through.)
Stir in mint, butter, lemon zest, and Parmesan cheese. Taste and season with salt and pepper.
Divide the Risi e Bisi among bowls. Top with shaved Parmesan and the reserved crunchy scallions. Drizzle with the reserved scallion oil and season with pepper.
Serve alongside crunchy bread and enjoy!
SERVES 6
1 cup basmati rice, rinsed
2 tablespoons unsalted butter
¾ cup angel hair pasta, broken into 1" pieces
¾ teaspoon kosher salt
½ cup brown lentils
2 medium onions, thinly sliced
1 ½ teaspoons cornstarch
½ cup extra-virgin olive oil
1 tablespoon ground cumin
2 teaspoons ground cinnamon
½ teaspoon ground turmeric
1 cup plain whole-milk
Greek yogurt
Kosher salt
Freshly ground black pepper
Additional Garnish
Fresh chives, thinly sliced
Mujaddara
The first recorded recipe for mujaddara appears in a cookbook compiled way back in 1226. Because of its cultural significance, a common saying in the Middle East is "a hungry man would be willing to sell his soul for a dish of mujaddara."
Place basmati rice in a medium bowl and pour in cold water to cover. Swish the rice around with your fingers, then drain in a fine-mesh sieve. Repeat this process until the water runs clear, 3–5 more times (do not skip this step!) Drain and set aside.
Heat butter in a medium saucepan over medium-high heat. Add angel hair pasta and cook, stirring often, until lightly browned, about 2 minutes. Add rice, kosher salt, and 2 cups water, then stir to combine. Cover the pan and bring it to a boil. Reduce the heat to low and cook for 15 minutes.
Meanwhile, place brown lentils in a separate, medium saucepan and pour in water to cover by about 1". Season with salt and bring to a boil, then reduce the heat to medium-low and cook until the lentils are tender but still hold their shape, 12–15 minutes. Drain and set aside.
In a bowl, toss onions, cornstarch, cumin, cinnamon, and turmeric until well coated.
Heat extra-virgin olive oil in a large pan over high heat. Carefully add the onions to the pan and adjust the heat as needed, until the onions are golden brown and fragrant. Transfer onions to a plate and season with salt and pepper to taste.
Fluff the rice-pasta mixture with a fork. Gently mix in the cooked lentils and spiced onions, reserving a few.
Divide the mujaddara among 6 bowls and spoon a dollop of Greek yogurt over each. Top with the reserved crispy onions and garnish with thinly sliced chives and a drizzle of extra-virgin olive oil.
SERVES 6
1 cup green lentils
1 pound orecchiette pasta
1 large yellow onion, thinly sliced
3 tablespoons extra-virgin olive oil
½ teaspoon fresh mint, thinly sliced
2 teaspoons sumac
1 teaspoon kosher salt
1 tablespoon fresh lemon juice
¾ cup fresh cilantro, chopped
1 tablespoon fresh mint, chopped
3 cloves garlic, minced
2 tablespoons Pomegranate Molasses (page 8)
Pita Chips
2 pita rounds
1-2 tablespoons olive oil
Kosher salt
Pasta with Caramelized Onions and Lentils (Horaa Osbao)
Horaa Osbao is a high protein Syrian stew, chock full of flavor and brimming with nutritious ingredients, naturally vegan, and incredibly comforting.
Preheat your oven to 400°F. Rinse and drain the lentils. Place the lentils in a pot with water over medium-high heat and bring them to a simmer. Reduce the heat to medium-low and cook for 20-30 minutes, or until they are just cooked or al dente. Note: water should remain about 1" above lentils during the cooking process. Add more if needed.
Cut the pita rounds into small squares and toss them in olive oil and salt. Place the pita squares onto a baking sheet lined with parchment paper and sprinkle with kosher salt. Bake for 10 minutes, or until they become crispy.
In a saucepan, sauté the onions in extra-virgin olive oil over mediumhigh heat. Cook the onions until they are crispy, caramelized, and browned on the edges. This should take about 20 minutes.
Add sumac, 1 teaspoon of kosher salt, and the orecchiette pasta to the pot with the lentils and their cooking liquid. Bring it to a simmer over medium heat. There should be enough liquid left in the pot to cook the pasta. Cook the pasta until it's just al dente.
Drain the caramelized onions, reserving the remaining oil, and place the onions on a plate lined with paper towels. Add half of the onions to the pasta and lentil mixture and reserve the remaining onions for topping. Sauté cilantro, mint, and garlic until fragrant in the remaining oil, for about 2-3 minutes. Add half of this mixture to the pasta and lentil mixture, reserving the remainder for topping. Add lemon juice and Pomegranate Molasses to the pasta and lentils, and stir to combine.
To serve, top with the remaining cilantro and garlic, crispy onions, and pita chips. Drizzle with some extra Pomegranate Molasses, sumac, and fresh lemon juice.
SERVES 12
1 ¼ pounds dried lasagna noodles
2 pounds ground pork
1 pound ground beef
2 tablespoons extra-virgin olive oil
2 ounces bacon, chopped
1 medium onion, finely chopped
1 celery stalk, finely chopped
1 medium carrot, peeled, finely chopped
6 garlic cloves, sliced
2 tablespoons tomato paste
¾ cup dry white wine
1 28-ounce can whole peeled tomatoes
1 cup Chicken Stock (page 4)
1 cup whole milk
1 recipe Béchamel (next page)
Kosher salt
Freshly ground black pepper
Parmesan cheese, coarsely grated
Nonna's Lasagna
Ok so this probably isn't as good as your Nonna's, but it's pretty close! This classic Sunday night dinner truly is a labor of love with its multiple steps, but it's well worth it in the end.
Preheat your oven to 225°F. In a large bowl, combine the ground pork and beef. Season generously with salt and pepper, then mix thoroughly. Heat the olive oil in a large pot over medium-high heat. Cook the meat in two batches, stirring occasionally, until they're browned all over. Transfer to a rimmed baking sheet.
Reduce the heat to medium. Add bacon and cook, stirring often, until it's lightly browned and beginning to crisp, around 5 minutes. Add the chopped onion, celery, carrot, and garlic. Cook, stirring occasionally, until they soften. Stir in the tomato paste and cook, stirring constantly, until the paste darkens, and then add the white wine and cook, stirring occasionally, until it's almost completely evaporated.
Add the canned tomatoes, crushing them with your hands, and increase the heat to medium-high. Cook, stirring occasionally, until the liquid is jammy and reduced by about half, about 10 minutes. Pour in the Chicken Stock and milk, then return meat to the pot. Bring it to a simmer. Cover the pot, leaving the lid slightly ajar, and transfer it to the oven for 3 hours. Season with salt and pepper to taste.
Preheat your oven to 325°F. Cook the lasagna noodles in a large pot of boiling salted water until they start to soften but still snap in half, rather than bend when folded, approximately 3 minutes. Transfer the noodles to a large bowl of cold water to cool.
Lightly oil a 13x9" glass or ceramic baking dish. Spread 1 ½ cups of the ragù in the dish. Lay a single layer of noodles over the ragù. Spoon 1 cup of the béchamel over the noodles, spreading it evenly. Repeat until baking dish is full, about 4-5 layers, ending with béchamel and a heaping pile of grated Parmesan cheese.
Bake lasagna until bubbling gently around the edges, about 1 hour. Wait 10 minutes before serving.
MAKES 6 CUPS
7 tablespoons unsalted butter
¼ cup plus 3 tablespoons
all-purpose flour
6 cups whole milk
1 cup Parmesan cheese, coarsely grated
Pinch of cayenne pepper
Pinch of ground nutmeg
Kosher salt
Freshly ground black pepper
Béchamel
In a saucepan, melt the butter over medium heat.
Whisk in the flour and cook, whisking occasionally, until the flour starts to smell a bit nutty, about 5 minutes.
Whisk in the milk and increase the heat to medium-high. Bring the mixture to a simmer and cook until the béchamel thickens.
Reduce the heat to medium-low and continue to cook, whisking occasionally, until the sauce is smooth and velvety, about 10 minutes.
Remove the saucepan from heat and whisk in the Parmesan cheese, cayenne, and nutmeg. Season with salt and pepper to taste.
Lasagna AN ITALIAN HISTORY OF
BOLOGNESE
The origins of the Bolognese ragù are related to those of the French ragout, a stew of ingredients reduced to small pieces, which became popular in the 18th century. The earliest documented recipe for a ragù served with pasta comes from late 18th century Imola, near Bologna, from Alberto Alvisi, cook of the local Cardinal Barnaba Chiaramonti, later Pope Pius VII.
BÉCHAMEL
Is bechamel sauce French or Italian? The answer is a little bit of both! The origins of béchamel sauce can be traced back to the 17th century, when it was first developed in France. However, the Italian cookbook writer Bartolomeo Scappi mentions a similar sauce in his book L’Opera, which was published in 1570.
PARMESAN
An Italian cheese produced from cows' milk and aged at least 12 months. It is named after two of the areas which produce it, the provinces of Parma and Reggio Emilia. In addition to Reggio Emilia and Parma, it is also produced in the part of Bologna west of the River Reno and in Modena, as well as in the part of Mantua which is on the south bank of the River Po.
LASAGNA NOODLES
In Emilia Romagna during the Renaissance, the recipe for egg pasta started to spread, becoming the basis for lasagna noodles with meat sauce, a recipe perfected in the seventeenth century and still found in present-day cookbooks. It's considered one of the oldest recipes still in rotation in modern cooking.
2 pounds penne pasta
3 tablespoons olive oil
½ medium onion, finely chopped
2 garlic cloves, thinly sliced
1 zucchini, diced
1 summer squash, diced
1 green bell pepper, diced
½ cup sun-dried tomatoes, thinly sliced
½ cup roasted red peppers, drained and chopped
½ cup canned artichokes, drained and chopped
½ cup fresh basil, finely chopped
2 tablespoons fresh
oregano, finely chopped
4 tablespoons unsalted butter
2 tablespoons all-purpose
flour
3 cups whole milk
¼ cup Parmesan cheese, shredded
¼ cup cheddar cheese, shredded, plus more for topping
Kosher salt
Freshly ground black pepper
Pasta del Sol
Pasta del Sol is a classic casserole that was made popular in the 1950s. The key to this dish is ensuring all vegetables are cut to the same size for even, consistent bites.
In a large pot, bring salted water to a boil. Cook the penne pasta until al dente, about 8 minutes. Drain in a colander, return to the pot, and toss with 1 tablespoon of the olive oil.
Meanwhile, heat the remaining 2 tablespoons of olive oil in a large skillet over medium-high heat. Add onion and cook for about 5 minutes, or until they become translucent. Add garlic, zucchini, squash, green bell pepper, and sun-dried tomatoes, and continue cooking, stirring until softened. Add in the roasted red peppers, artichokes, basil, and oregano. Cook for an additional 5 minutes, season with salt and pepper to taste.
In a saucepan, melt the butter over medium heat. Whisk in the flour and cook, whisking occasionally, until the flour starts to smell a bit nutty, about 5 minutes. Whisk in the milk and increase the heat to medium-high. Bring the mixture to a simmer and cook until the sauce begins to thickens. Reduce the heat to medium-low and continue to cook, whisking occasionally, until the sauce is smooth and velvety, about 10 minutes. Remove the saucepan from heat and whisk in the Parmesan and cheddar cheeses. Season with salt and pepper to taste and set aside.
Preheat your oven to 325°F. Lightly oil a 13x9" glass or ceramic baking dish. Add in penne pasta and sautéed vegetables, stirring to combine. Pour over the cheese sauce and lightly mix. Top with reserved cheddar cheese, or until there is a light layer covering the entire dish.
Bake for 20-30 minutes, or until the cheese starts to bubble and crisp along the edges.
Wait 10 minutes before serving.
SERVES 6
½ stick unsalted butter
¼ cup all-purpose flour
2 cups whole milk
2 ½ cups Parmesan cheese, grated
1 cup Gruyere cheese, grated
½ cup Fontina cheese, grated
6 cups Chicken Stock (page 4)
2 cups farro, rinsed and drained
1 teaspoon fresh thyme leaves, chopped
½ cup plain dried bread crumbs
Extra-virgin olive oil
Kosher salt
Freshly ground black pepper
Cheesy Baked Farro
It’s like the sophisticated, grown-up version of everyone’s favorite mac n' cheese. Only this version uses farro instead of pasta. What is farro? It’s a grain, similar to barley, and is absolutely delicious smothered in cheese.
Preheat your oven to 400°F. Lightly oil a 13x9" glass or ceramic baking dish and set aside.
In a medium saucepan, melt the butter over medium heat. Add the flour and whisk until smooth. Gradually add the milk, whisking constantly to prevent lumps. Simmer over medium heat, whisking constantly, until the sauce is thick and smooth, about 8 minutes (do not allow the mixture to boil). Remove from the heat and season with salt and pepper to taste.
In a large bowl, add the grated Parmesan, Gruyere, and Fontina cheeses. Stir to combine. Remove ½ cup of the cheese mixture and reserve.
In a large stockpot, add the Chicken Stock and bring to a boil over medium-high heat. Add the farro, reduce the heat, and simmer, stirring occasionally, until the farro is tender, about 20 minutes. Drain if necessary.
Add the cooked farro, thyme, and the sauce to the bowl with the cheese mixture. Stir until everything is well combined. Season with salt and pepper to taste.
Pour the mixture into the prepared baking dish and top the with the reserved ½ cup of cheese. Sprinkle with bread crumbs in an even layer and drizzle with extra-virgin olive oil.
Bake until the top is golden brown and forms a crust, about 25 to 30 minutes.
Remove from the oven and let it stand for 5 minutes before serving.
SERVES 2
12 ounces spaghetti pasta
1 20oz can of San Marzano tomatoes
¼ cup non-pareil capers
¾ cup kalamata olives
2 teaspoons crushed red pepper
4 garlic cloves, minced
1 tablespoon extra-virgin olive oil
2 tablespoons fresh oregano, chopped
Kosher salt
Freshly ground black pepper
Additional Garnish
Fresh basil, roughly chopped
Spaghetti Puttanesca
Some believe puttanesca was created by a chef who, for lack of fresh ingredients, was able to design this comforting dish with a handful of pantry items he had on hand. Our take on the classic sauce is anchovy-free and vegetarian.
In a large, deep pan, add olive oil over medium heat. Once the oil begins to shimmer (5 minutes) add red pepper flakes, capers, and garlic, stirring to ensure garlic doesn’t burn.
Once the oil is fragrant, add the San Marzano tomatoes with their juices, whole olives, and oregano. Use a spoon to break up the tomatoes; stir to incorporate. Lower heat, partially cover pan, and simmer for 30 minutes. Add salt and pepper to taste.
While the sauce is simmering, cook the spaghetti according to package instructions (al dente is recommended.) Strain, reserving ¼ cup of pasta water.
Add the cooked pasta to the sauce, tossing to combine. Add pasta water a little at a time to help the sauce stick to the penne.
Divide pasta between 2 plates and garnish with fresh basil.
SERVES 4
1 pound shrimp, raw, tail on
1 cup fresh orange juice
1 cup fresh lime juice
1 cup white wine
½ cup honey
3 fresh tarragon sprigs
1 recipe Mango Horseradish Salsa (next page)
1 recipe Herbed Couscous (next page)
Kosher salt
Freshly ground white pepper
Additional Garnish
Fresh tarragon leaves, chopped
Lime wedges
Citrus & Tarragon Poached Shrimp with Mango Horseradish Salsa and Herbed Couscous
Poaching is the ideal technique when you want chilled shrimp with a ton of flavor - think shrimp cocktail or spring rolls. With this recipe, we pair shrimp with salsa and couscous, which can both be served cold. For an appetizer-friendly version, remove the couscous.
In a large metal bowl, create an ice bath with 3 cups cold water and 3 cups ice. Set aside.
In a large pot, combine the orange and lime juices, white wine, honey, and tarragon, bring to a boil. Cook until the alcohol has evaporated, about 5 minutes - you should be able to tell from smelling the steam. Lower heat and simmer the poaching liquid. Season with salt and white pepper to taste.
Add the shrimp and poach until they're are cooked through, about 5-8 minutes. Remove immediately and place in the ice bath until completely cool. Remove and pat dry, set aside.
To serve, place a scoop of the Herbed Couscous on a plate. Add a dollop of the Mango Horseradish Salsa on top of the couscous and add 4-5 shrimp per plate (should serve 4). Garnish with fresh tarragon leaves and lime wedges for squeezing over.
MAKES 2 CUPS
2 cups fresh mango, finely diced
1 tablespoon prepared, ground horseradish
1 tablespoon fresh lime juice
⅓ cup honey
1 teaspoon fresh tarragon, minced
1 Fresno chile, seeded and finely diced
Kosher salt
Freshly ground white pepper
Mango Horseradish Salsa
In a medium sized mixing bowl, combine all ingredients. Season with salt and white pepper to taste. Cover and refrigerate for at least 1 hour before serving. The key is to make sure the mango is cut in very even, ¼" bite-sized pieces.
Do ahead: You can prepare the salsa in advance; it can be stored in the refrigerator for up to 3 days when covered.
SERVES 4
2 tablespoons olive oil
½ large onion, diced
2 Fresno chiles, seeded
and finely diced
2 garlic cloves, minced
¾ teaspoon kosher salt
¼ teaspoon freshly ground black pepper
1 cup Vegetable Stock (page 5)
1 ½ cups couscous
¼ cup roughly chopped roasted, salted pistachios
3 tablespoons fresh mint, roughly chopped
3 tablespoons fresh parsley, roughly chopped
Herbed Couscous
In a large sauté pan (with a lid), heat olive oil over medium-low and sauté onion until softened and translucent, about 8 minutes. Add Fresno chiles and garlic; continue to cook until softened, about 3 minutes more. Season with salt and pepper.
Add Vegetable Stock and bring to a simmer. Add couscous, stir and immediately cover with lid and remove from heat. Allow to sit 5 minutes.
Remove lid and fluff the couscous with a fork. Stir in pistachios, mint, and parsley. Let couscous cool to room temperature.
SERVES 4
1 pound shrimp, peeled and de-veined
2 garlic cloves, minced
2 garlic cloves, thinly sliced, divided
3 tablespoons extra-virgin olive oil, divided
¼ teaspoon crushed red
pepper flakes
¼ cup dry white wine
1 tablespoon fresh lemon juice
½ stick unsalted butter
Kosher salt
Freshly ground black pepper
Additional Garnish
Fresh parsley, chopped
Nonno's Shrimp Scampi
The key to a great shrimp scampi is great shrimp. Unless you have access to a fishmonger, frozen wild-caught or frozen farmed shrimp are likely to be fresher than the frozen-then-thawed shrimp sitting on ice at your local supermarket.
Whisk the 2 minced garlic cloves and 1 tablespoon extra-virgin olive oil in a medium bowl. Season with salt and black pepper. Add the shrimp and toss to coat. Chill in the refrigerator, uncovered, for at least 30 minutes and up to 1 hour.
Heat remaining 2 tablespoons extra-virgin olive oil in a large skillet over medium heat and cook the shrimp mixture, being careful not to let shrimp or garlic brown, until shrimp is pink but still slightly underdone, about 1 minute per side.
Transfer to a plate, leaving as much oil in pan as possible. Add the 2 thinly sliced garlic cloves and crushed red pepper flakes to the skillet and cook until fragrant, about 1 minute. Add white wine and 1 lemon juice and cook, stirring occasionally, until reduced by half, about 2 minutes.
Add butter and cook, stirring and swirling pan occasionally, until butter is melted and sauce is thickened, about 5 minutes.
Scrape shrimp along with any accumulated juices into skillet. Toss to coat and cook until shrimp are fully cooked through, about 2 minutes.
Transfer to a platter, garnish with fresh parsley, and serve with warm crusty bread.
Scallops Florinada
If you've ever tuned into Hell's Kitchen, you're well aware that the first offense to trigger Gordon is an improperly cooked scallop. While this might seem daunting for novice chefs, we've outlined a straightforward method that nearly anyone can confidently master in the kitchen. SERVES 6
1 ½ pounds u/10 or u/15 scallops, cleaned
1 tablespoons vegetable olive oil
1 tablespoons unsalted butter
1 orange, peeled, cut into ½" pieces
¼ pineapple, cored, cut into ½" pieces
½ cup fresh orange juice
½ cup fresh pineapple juice
½ cup cremini mushrooms, thinly sliced
2 tablespoons arrowroot powder
⅛ teaspoon ground white pepper
Kosher salt
Freshly ground black pepper
Scallops 101: Similar to shrimp, retailers describe scallop sizes by a range of numbers indicating how many of them there are in a pound. Designating scallops as "20/30" means that it would take between 20 and 30 of them to make up a pound. U/10 means it would take under 10 scallops to equal 1 pound.
Scallops are sold both fresh and frozen. Fresh scallops can be sold in the shell or shucked. Be sure to smell the scallops before purchase; they should smell clean and sweet. If they have a strong fishy smell, give them a pass. Scallops are perishable, so it's best to use them the same day you buy them, if possible. Once a scallop is shucked, it requires only a good rinse with cool water. Be sure to remove the little side muscle, an oblong flap of tissue that's easily cut or pulled away Always pat scallops bone-dry before cooking.
The recipe: Season scallops on both sides with kosher salt and black pepper. Heat a sauté pan until it's very hot, but not smoking. Add a tablespoon each of vegetable oil and butter (EVOO doesn't have a high enough smoke point for this job).
Place scallops in the hot fat and don't move them for at least 2 minutes so they can develop that perfect crust. Turn the scallops over and cook for another 2 minutes. Once you have a crust on both sides, remove from pan and set aside.
In the same pan, add fruits, mushrooms, and white pepper, sauté 1-2 minutes. Add fruit juices and simmer for another 5 minutes. In a small bowl, mix arrowroot with 3 tablespoons of cold water. Add to pan and stir until the sauce has thickened. Add scallops back to pan and dress with sauce immediately before serving.
Serve alongside rice, quinoa, or your grain of choice.
SERVES 4
4 6-ounce skin-on red
snapper fillets, patted dry
1 tablespoon vegetable oil
Lemon-Pistachio Sauce
4 tablespoons unsalted butter, cut into pieces
2 tablespoons pistachios, coarsely chopped
4 garlic cloves, finely chopped
3 tablespoons lemon peel, finely chopped
2 tablespoons fresh lemon juice
Kosher salt
Freshly ground black pepper
Additional Garnish
Fresh parsley, whole leaves
Red Snapper with Lemon–Pistachio Sauce
As much as we love snapper, the star here is the sauce. It takes less than 10 minutes to make and goes just as well with poached or grilled chicken breast, seared scallops, and roasted cauliflower or butternut squash.
Season the snapper fillets on both sides with salt and black pepper
Heat vegetable oil in a large skillet over medium-high heat. Arrange fish, skin side down in pan and cook, pressing down lightly on fillets with a spatula, until skin is browned and crisp, and flesh is nearly opaque, 5–7 minutes. Turn fish and cook just until flesh is opaque throughout, about 1 minute. Transfer skin side up to a platter.
While the fish is cooking, cook the butter and pistachios in a small pan over medium-high heat, stirring occasionally, until the pistachios are golden and butter solids are browned, about 5 minutes.
Add garlic cloves and cook until fragrant, about 30 seconds. Remove from heat and add lemon peel and lemon juice, along with 1 tablespoon of water. Stir vigorously and swirl pan to emulsify sauce. Season with salt and pepper.
Pour sauce over fish and top with parsley leaves.
SERVES 4
4 4-6 ounce skinless cod
(or sablefish) fillets
8 tablespoons unsalted butter, cut into cubes
Kosher salt
Freshly ground black pepper
Miso Broth
2 cups Chicken Stock (page 4)
3 tablespoons white miso paste
½ tablespoon finely grated ginger
Lemon Coulis
1 teaspoon grated lemon zest
½ cup fresh lemon juice
½ cup granulated sugar
1 tablespoon cornstarch
1 teaspoon fresh orange juice
Additional Garnish
Lemon zest
Scallion greens, julienned on a bias
Miso-Butter Poached Black Cod
Cod is such a versatile fish, thanks to its' flaky texture and mild flavor. That’s why we like to braise it in an umami-rich miso broth. The end result? Perfectly caramelized fillets packed with flavor and balanced with the brightness of lemon coulis.
To make the lemon coulis, bring lemon rind, lemon juice, sugar, and cornstarch to a boil in a saucepan over medium heat. Stir constantly to prevent clumping. Reduce heat to simmer and cook 2 to 3 minutes, or until sauce is thick. Remove from heat and stir in 1 teaspoon orange juice. Do ahead: You can prepare the lemon coulis in advance; it can be stored in the refrigerator for up to 1 week when covered.
In a medium saucepan combine 1 cup of water, Chicken Stock, white miso paste, and ginger. Whisk to combine and bring heat to mediumhigh. Keep whisking until the miso paste is fully incorporated. Bring to a simmer and let cook for 15 minutes. Remove from heat and let cool. Do ahead: You can prepare the miso broth in advance; it can be stored in the refrigerator for up to 1 week when covered.
Preheat oven to 350°F.
On a flat surface, pat the cod fillets dry. Season with salt and pepper on both sides, set aside.
Heat oil in a medium pan over medium-high heat. Sear the cod fillets on side for 5-7 minutes, or until a nice crust has formed. Flip the fillets and remove the pan from heat. Slowly pour in half the miso broth and butter.
Place pan in the oven and bake for 4-8 minutes, or until center of fish reaches 145°F.
Remove from oven and drizzle fillets with the lemon coulis, zest, and scallion greens.
SERVES 4-6
¼ cup raisins
¼ cup dry white wine
2 pounds skinless, boneless
cod fillets
½ cup extra-virgin olive oil, divided
½ cup breadcrumbs, unseasoned
¼ cup pine nuts
1 tablespoon finely grated lemon zest
1 teaspoon dried oregano
1 garlic clove, minced
Kosher salt
Freshly ground black pepper
Additional Garnish
Fresh parsley, chopped 4-6 lemon wedges
Cod Arracanato
This dish has its origins in Molise, Italy, dating back to the 1930s. It earned its name, "embroidered cod," due to the resemblance of the finished plate's texture to that of a decorative napkin. While traditionally reserved for Christmas Eve dinner, this classic seafood dish is now commonly enjoyed throughout the winter season.
Preheat oven to 350°F.
Place raisins in a small bowl and pour wine over (wine should cover raisins). Let soak for at least 30 minutes, up to 1 hour.
Mix breadcrumbs, pine nuts, lemon zest, oregano, and garlic in a small bowl. Season with salt and pepper.
Pat fish dry with paper towels and season on both sides with salt and pepper. Drizzle bottom of a baking dish large enough to fit fish with 3 tablespoons olive oil. Arrange fish in baking dish.
Strain the raisins in a separate bowl, reserving the wine. Drizzle wine evenly over the cod. Mix the wine-soaked raisins into the breadcrumb mixture, and spoon evenly over the cod. Drizzle remaining olive oil over top.
Bake fish until flesh is opaque and beginning to flake, about 15 minutes.
Heat broiler and broil fish until breadcrumbs are crisp and golden brown, about 2 minutes.
Scatter parsley over fish and serve with lemon wedges.
Optional: Sprinkle finished dish with coarse sea salt for extra flavor and texture.
SERVES 4
1 ½ pounds skinless mahi-mahi, cut into 1x3" strips
1 cup rice flour
¾ cup all-purpose flour
¾ cup masa harina
1 tablespoon baking powder
1 cup lager beer
½ cup vodka
1 recipe Adobo Crema (next page)
1 recipe Cherry-Tomato Salsa (next page)
Warmed corn tortillas
Vegetable oil (for frying)
Kosher salt
Additional Garnish
Cabbage, thinly sliced
Fresh cilantro, chopped Lime wedges
Mahi-Mahi Tacos with Adobo Crema and Cherry Tomato Salsa
When it comes to beer-battered fish, especially for tacos, it's best to find a lager that's bold enough to carry over flavor, but light enough to not overpower the fish. We prefer Mexican-style lagers, like Modelo or Tecate.
Pour vegetable oil into a large Dutch over or heavy pot until it reaches 3" high (about 8 cups of oil) Heat over medium-high heat until the oil registers 350°F.
In a large bowl, whisk both flours, masa, and baking powder until well incorporated. Transfer ½ cup of the dry mixture to a separate bowl for dredging the fish.
Add the lager and vodka to the remaining dry mixture and whisk until consistency is similar to pancake batter.
Pat the mahi-mahi strips dry and season with kosher salt. Working in batches, dredge the fish in the flour mixture, shaking off any excess. Dip into the beer batter to coat, letting excess drip back into bowl.
Fry the fish in small batches, not to crowd the pot. Fry and turn halfway through until crisp and golden brown, about 5 minutes per batch. Transfer to a wire rack, allowing excess oil to drip. While fish is hot, immediately season with salt. Repeat with remaining fish, ensuring you continue to work in small batches at a time.
Note: If you plan on increasing serving size, it may be necessary to clean or even replenish oil.
Build tacos with warmed corn tortillas, mahi-mahi, Cherry Tomato Salsa, cabbage, Adobo Crema, cilantro, and lime wedges for squeezing over.
MAKES 1 CUP
¾ cup sour cream
2 tablespoons mayonnaise
2 chipotle peppers in adobo sauce
1 ½ tablespoons Adobo Seasoning (page 14)
½ small white onion, finely chopped
2 tablespoons fresh lime juice
1 garlic clove, peeled Kosher salt
Adobo Crema
Pulse all ingredients in a food processor until smooth. Season with salt to taste.
Transfer to a small bowl or squeeze bottle (our preference for garnish) and serve immediately, or refrigerate until ready to serve.
The crema can be stored in the refrigerator for up to 5 days when covered. The texture will naturally thicken over time in the refrigerator. To thin, stir in a squeeze of fresh lime juice or water.
MAKES 1 CUP
8 ounces cherry tomatoes, halved
½ small white onion, finely chopped
1 small Serrano chile, finely chopped
2 tablespoons fresh lime juice
1 tablespoon extra-virgin olive oil
⅓ cup fresh cilantro, finely chopped Kosher salt
Cherry Tomato Salsa
Pulse cherry tomatoes in a food processor until coarsely puréed. Transfer to a small bowl and stir in onion, Serrano chile, cilantro, lime juice, and olive oil.
Season with salt to taste.
SERVES 4-6
1 ½ pounds skinless, boneless
cod (or haddock) fillets
4 tablespoons extra-virgin olive oil divided
3 medium onions, thinly sliced
2 cups basmati rice
1 teaspoon turmeric
½ teaspoon coriander
½ teaspoon cinnamon
¼ teaspoon ground ginger
Kosher salt
Freshly ground black pepper
Additional Garnish
Slivered almonds, toasted
Fresh parsley, chopped
2-4 lemon halves
Lebanese Fish and Rice (Sayadieh)
The word sayadieh roughly translates to “catch” referring to a fisherman's catch, and was considered a staple along the Lebanese and Syrian coast. Today, it has transcended those boundaries and is enjoyed in countries throughout the Mediterranean, featuring variations in Italy and Greece.
In a large, deep skillet, heat 2 tablespoons of the olive oil on medium heat and saute the onions until deeply caramelized, about 25-30 minutes. Tip: You want to develop a rich, caramel color. Patience is key.
Thoroughly rinse the rice until the water runs clear, then transfer to the pan of onions. Season with salt, pepper, turmeric, coriander, cinnamon, and ginger. Toss well to combine and toast the rice lightly with the spices, about 5 minutes.
Add 4 cups water and bring to a boil. Reduce to a simmer and cook covered until the rice is tender, about 15 minutes.
Remove the pot from the heat and allow the rice to rest in the pot for about 5 minutes, without opening the lid, ensuring the liquid has been absorbed.
While the rice is cooking, season the fish with salt and pepper on both sides. Fry on a skillet with the remaining 2 tablespoons of olive oil, working in batches. Cook until cod flesh is opaque and beginning to flake about 5-8 minutes on each side.
Serve the cooked fish broken up in chunks or whole on top of the rice mixture. Add toasted almond and parsley on top, alongside lemon halves.
Optional: Char the lemon halves by heating a skillet over medium-high heat and cook lemons, cut side down, until edges are deeply charred (they should be almost black), about 5 minutes. Add the charred lemon halves with their juices to the finished dish.
SERVES 2-4
Lemon-Aleppo Chicken Thighs
Who doesn't love crispy chicken thighs? This one-skillet method is capped off with a punchy and bittersweet lemon vinaigrette built on the brown bits left in the skillet.
Pat chicken thighs dry and season well with salt and pepper. Place in a large resealable plastic bag and add vinegar. Seal bag and gently massage chicken to ensure all thighs are coated in vinegar. Chill 1 hour.
Preheat oven to 400°F. Remove chicken thighs from bag and pat dry with paper towels. Tip: the drier the skin, the crispier it will be when cooked.
Kosher
Place chicken thighs, skin side down, in a dry large cast-iron skillet and set over medium heat. Cook undisturbed until they easily release from the pan, about 5 minutes. After an additional 10 minutes, flip the chicken over, skin-side up and add garlic. Bake until chicken is cooked through, 10-15 minutes. Transfer chicken and garlic to a plate.
Set skillet over medium-high heat and cook lemons, cut side down, until edges are deeply charred (they should be almost black), about 5 minutes. Transfer to plate with chicken and garlic and let cool slightly.
Squeeze lemon juice into a small bowl; add garlic, honey, and Aleppo pepper and whisk to combine. Whisk in oil and season with salt and black pepper.
Drizzle half of vinaigrette on a platter and set chicken on top. Serve with remaining vinaigrette.
SERVES 4-6
2 pounds cauliflower, riced or finely shredded
1 1⁄2 pounds chicken breasts, skinless, boneless
½ cup extra-virgin olive oil
1 Vidalia onion, diced
1 yellow pepper, diced
2 celery stalks, diced
½ cup peas, frozen
1 8-ounce can diced tomatoes, in juice
1 teaspoon fresh garlic, minced
1 teaspoon cumin, ground
1 teaspoon coriander, ground
1 teaspoon turmeric, ground
½ teaspoon cayenne pepper
Kosher salt
Freshly ground black pepper
Additional Garnish
Lime wedges
Fresh cilantro, finely chopped
Tata's "Arroz" Con Pollo with Fried Riced-Cauliflower
Arroz Con Pollo is a classic Latin American dish consisting of, as the name suggests, chicken and rice. Tata's version swaps out the rice for riced-cauliflower, an effective way to get your daily dose of vegetables and fiber.
Preheat oven to 400°F. Place chicken breasts on a baking sheet and season generously with salt, pepper, and olive oil. Roast the chicken until just cooked through, about 20 minutes.
Remove the chicken and set it on a cutting board. Cover with parchment or butcher paper and let rest for 30 minutes. This traps additional moisture and makes shredding the meat easier. Unwrap the chicken and place in a large bowl, shredding the meat with 2 forks. Set aside.
Heat a pan on medium-high heat. Add ½ cup of the oil and stir to coat pan. Add onion, pepper, and celery. Cook until onions are translucent and other vegetables are lightly softened but still crisp, about 3 minutes.
Add cumin, coriander, turmeric, cayenne pepper, and ½ teaspoon of kosher salt. Sauté for an additional 2 minutes, stirring frequently.
Add the tomato, chicken, and cauliflower, stirring to incorporate, until cauliflower is cooked, about 5 minutes.
Add the arroz con pollo to a bowl and garnish with fresh cilantro and a lime wedge.
SERVES 4
1 whole chicken, cut into 8 pieces
2 tablespoons olive oil
3 shallots, thinly sliced
2 garlic cloves, minced
1 cup Madeira wine
1 cup Chicken Stock (page 4)
1 orange, juiced and zested
1 orange, cut into 6 wedges, peel on
½ cup Spanish olives (manzanilla or gordal)
1 tablespoon honey
Kosher salt
Freshly ground black pepper
Spanish Chicken with Oranges and Olives
If you've ever cooked with Madeira wine, you're familiar with it's bold, rich flavor that lends itself to velvety-smooth sauces, perfect alongside any protein. For this dish, we suggest using Sercial or Bual, as both varieties complement the acidity and sweetness of the dish.
Preheat oven to 425°F. Place chicken pieces on a flat surface and pat dry with paper towels, season generously with salt and pepper.
Heat oil in a large, oven proof skillet over high heat. Once hot, place chicken pieces skin side down, working in batches to ensure you dont overcrowd the skillet. Cook until skin is golden and crisp, about 6 minutes per side. Transfer chicken to a plate and reduce heat to medium.
To the skillet, add shallots and cook until they begin to brown, about 4-5 minutes. Add the minced garlic and cook for an additional minute. Carefully add the Madeira wine and cook until liquid has reduced by half, about 10 minutes. Add the orange juice and zest, and Chicken Stock, boil for 1 minute.
Add the chicken pieces back to the skillet, skin side up. Add the orange wedges and olives around the chicken. Bake, uncovered, for 20 minutes, or until internal temperature reaches 165°F.
Place chicken on a serving plate and bring the pan juices back to a simmer over medium-high heat. Stir in honey to thicken the liquid, season with salt and pepper to taste.
Pour pan juices, orange wedges, and olives over the plated chicken.
SERVES 8
2 5 pound ducks
2 tablespoons whole allspice berries
1 whole nutmeg
16 habanero chiles, stems removed
1 cup soy sauce
½ cup spiced rum
½ cup rice vinegar
4 teaspoons sugar
4 tablespoons ginger, minced
16 small, flour tortillas
1 ½ cups hoisin sauce
Kosher salt
Additional Garnish
Napa cabbage, shredded
Serrano chiles, thinly sliced
Scallion greens, thinly sliced
Fresh cilantro, finely chopped
Lime wedges
Jerk-Spiced Duck Platter
A New Year's Eve favorite, this make-your-own duck platter will surely be a hit. We find the spiced and spicy jerk marinade works wonders with the duck's high fat content, so be sure not to discard all of the habanero seeds.
Lightly score the skin of both ducks using a very sharp knife, cutting most of the way through skin and fat but not into the flesh. Season ducks generously with salt and place each one in a large zip-lock bag.
Finely grind allspice berries with a mortar and pestle, and place in a blender. Finely grate nutmeg into blender. Add habanero chiles with seeds, soy sauce, rum, vinegar, and sugar. Purée until smooth. Divide marinade between bags; add 2 tablespoons of ginger to each. Seal bags, pressing out air, and massage marinade into the ducks. Chill, breast side down for 8 hours, or overnight.
Preheat oven to 450°F. Remove ducks from marinade and place breast side up on a wire rack, set inside a foil-lined rimmed baking sheet. Roast ducks just until they begin to brown, about 10 minutes. Reduce oven temperature to 250°F and continue to roast until ducks are very dark brown, and an instant-read thermometer inserted into the thickest part of breasts registers 165°F-170°F, 4–4½ hours.
Typically filled with pork, baozi, also known as bao buns, is made from a dumpling dough with yeast. This means that when the buns are steamed they rise into fluffy bread.
XIAO LONG BAO
Also known as soup dumplings and lovingly referred to as XLB by true fanatics, is a dim sum staple. The secret to this dumpling, which originates from the Chinese province of Jiangnan, is in the soup, usually made from pork gelatin and collagen.
Dumplings THE MANY SHAPES OF
RAVIOLI
Usually served in broth or with a sauce, Ravioli originated as a traditional food in Italian cuisine. Although they're most commonly square, other forms are also used, including circular (right) and semi-circular.
PELMENI
Although similar in looks, the Russian Pelmeni is actually closer to the Mongolian Bansh dumpling than it is to the Pierogi. The difference here is the dough thickness. Pelmeni are rolled as thin as possible before steaming.
PIEROGI
Originating from Poland, with look-alikes in Ukraine, Russia, and other eastern European countries, Pierogis are made of wheat, filled with meat, potatoes, or vegetables, and typically served with sour cream.
MAKES 75 DUMPLINGS
2 pounds ground chicken
¾ teaspoon kosher salt
¼ teaspoon freshly ground black pepper
2 tablespoons olive oil
1 medium onion, finely chopped
3 garlic cloves, minced
2 tablespoons fresh parsley, finely chopped
1 recipe Pelmeni Dough (next page)
1 recipe Brown Butter Sage Sauce (next page)
Additional Garnish
Fresh parsley, chopped
Freshly ground black pepper
Chicken Pelmeni with Brown Butter Sage Sauce
Although they're largely considered the national dish, it is unclear when pelmeni first appeared in Russian cuisine. One theory suggests the bite-sized dumplings originated in Siberia, possibly a simplified adaptation of the Chinese jiaozi dumpling.
Heat olive oil in a pan over medium-high heat. Add onion and sauté until soft, about 5 minutes. Add garlic and sauté another minute, remove from heat and let cool.
In a large bowl, mix together ground chicken, salt, black pepper, fresh parsley, and sautéed onion and garlic. Mix well to incorporate.
Shape a portion of the Pelmeni Dough into a 2" thick log. Cut off 1 piece at a time (about gum ball sized) and roll into disks to form a 1 ½" circle using a rolling pin. Sprinkle rolling pin and surface with flour if needed.
Place 1 teaspoon of the pelmeni filling in the center and fold the dough in half over the meat. Pinch the edges tightly to seal the dough.
You should have a shape somewhere between a circle and a half-moon. Pinch the two corners together to form your classic ravioli shape.
Boil: Bring a pot of salted water to boil. In batches, add the pelmeni and return to a boil. They should float to the top, then boil for 3-5 minutes longer (or until meat is fully cooked). Drain the dumplings and place in a clean bowl.
To serve, add 10-12 dumplings in a bowl and drizzle with the Brown Butter Sage Sauce. Garnish with parsley and freshly ground black pepper.
MAKES 2 ½ POUNDS
⅔ cup buttermilk
1 tablespoon sour cream
2 cups warm water
2 large eggs
½ tablespoon kosher salt
8 cups all-purpose flour, divided, plus more for surface
Pelmeni Dough
On a stand mixer, using the whisk attachment on medium speed, beat together: 2 cups water, buttermilk, eggs, sour cream, and salt until well blended.
Replace the whisk attachment with a dough hook and blend on low, slowly adding in 4 cups of flour a little at a time. Add 3 more cups of flour, one cup at a time, allowing the dough to become well blended with each cup.
Add the remaining cup slowly, until dough is smooth and no longer sticking to the bowl. You may need to add a few additional tablespoons.
Your dough should be soft and elastic. Cover your dough with plastic wrap or a towel to keep it from drying out. Dough can be made a few days in advance.
MAKES 1 CUP
1 stick (½ cup) unsalted butter
10 fresh sage leaves
Kosher salt
Freshly ground black pepper
Brown Butter Sage Sauce
Cut butter into 8 pieces and place in a small pan over medium heat. As the butter melts, it will begin to foam. Continue to cook, swirling the pan occasionally, until the color goes from yellow to golden-brown, about 8 minutes. Be sure not to over cook the butter.
Pat the sage leaves dry and add to the brown butter. Cook until they crisp up, which will take a few seconds. Immediately scrape the mixture into a heatproof bowl. Let cool slightly, then taste and season with kosher salt and pepper as needed. Once cool, remove the sage leaves.
Note: the crisped sage leaves are fully edible and delicious! Feel free to use them as a garnsih or reserve for later.
MAKES 50 DUMPLINGS
50 round wonton wrappers
2 tablespoons olive oil
1 pound ground chicken
1 cup frozen peas
½ cup fresh ricotta
2 garlic cloves, minced
2 tablespoons fresh chives, finely chopped
3 tablespoons vegetable oil, divided
Kosher salt
Freshly ground black pepper
Italian Chili Oil
2 cups extra-virgin olive oil
¾ cup dried chili peppers, with seeds
Flaky sea salt
Chicken and Ricotta Wontons with Italian Chili Oil
We love this Italian take on a classic pot-sticker. To make a just-as-good vegetarian version, swap out the chicken for an extra cup of frozen peas (2 cups total) and add a tablespoon of honey to the filling.
To make the Italian chili oil, finely chop the dried chilis, removing and discarding the stems. Add the chopped chilis with their seeds and a pinch of sea salt to a jar with an airtight seal. Pour the olive oil on top to infuse. Store in a cool, dark place for at least 2 weeks to fully infuse.
Heat olive oil in a pan over medium-high heat. Add ground chicken and cook until slightly browned, about 5 minutes. Set aside and let cool.
In a large bowl, combine ground chicken, ricotta, peas, chives, and garlic. Season with salt and pepper.
Dust a baking tray with cornstarch or flour. Place 2 teaspoons of the chicken filling onto each dumpling skin. Moisten edges with water and fold edges over. Pinch edges to seal the dumpling. Place on the tray and repeat with the remaining wrappers.
Steam-Fry: Heat 1 tablespoon vegetable oil in a large pan over medium-high heat. Place 5-7 wontons in the pan, slightly overlapping each other. Cook until the underside is golden brown, then pour ⅓ cup of water around the wontons and immediately place the lid on.
Cook until the water has completely evaporated and the wrapper is slightly translucent on top – about 3 to 4 minutes. Set aside and repeat with the remaining wontons, working in batches with the oil.
Serve wontons alongside the chili oil, with additional drizzled on top.
1 chili pepper, minced ½ teaspoon freshly ground black pepper
Pork & Kimchi Dumplings with Yangnyeom Jang
Yangnyeom Jang, or Korean dumpling sauce, is so good and versatile it can be used for almost anything, especially a marinade. The star of this sauce is Gochukaru, or Korean chili flakes, which can be found in the global section of most grocery stores.
To make the yangnyeom jang, combine the soy sauce, water, vinegar, and sugar in a small bowl. Whisk until the sugar has dissolved. Add the gochukaru, sesame seeds,sesame oil, garlic, green onion, chili, and black pepper, stirring well to combine. The yangnyeom jang can be stored in the refrigerator for up to 5 days when covered.
In a large bowl, combine the ground pork, ginger, garlic, green onion, soy sauce, sesame oil, egg, and kimchi. Stir until well mixed.
Dust a baking tray with cornstarch or flour. Place 1 heaping teaspoon of the pork filling onto each dumpling skin. Moisten edges with water and fold edges over. Pinch edges to seal the dumpling. Place on the tray and repeat with the remaining wrappers.
Set dumplings aside on parchment paper or a lightly floured surface until ready to cook.
Steam: Arrange dumplings in a covered bamboo or metal steamer so they don't touch, preventing them from sticking together. Steam for 15 minutes, or until pork is cooked through.
Serve dumplings with the yangnyeom jang.
MAKES 40 DUMPLINGS
40 round wonton wrappers
1 ½ cups green cabbage, finely chopped
1 teaspoon kosher salt, separated
1 pound ground pork
1 cup scallion greens, finely chopped
1 garlic clove, minced
1 teaspoon ginger, minced
1 teaspoon sesame oil
1 tablespoon cornstarch, plus extra for assembly
2 teaspoons soy sauce
3 tablespoons vegetable oil, divided Gyoza Sauce
1 tablespoon rice vinegar
2 teaspoon soy sauce
½ teaspoon chili oil
¼ teaspoon freshly ground black pepper
Pork & Scallion Gyoza
Gyoza was first introduced to Japan in the early 1800s from mainland China, but wasn't widely eaten in Japan until after World War II. Japanese soldiers, returning home after the war, missed eating the popular Chinese street food, so many restaurants started making their own uniquely Japanese version of gyoza.
To make the gyoza sauce, combine all ingredients in a small bowl and whisk until well incorporated. Set aside.
Combine cabbage and ½ teaspoon salt in a small bowl, then set aside for 20 minutes to allow the cabbage to release moisture.
Place remaining ½ teaspoon salt, pork, scallion greens, garlic, ginger, sesame oil, 1 tablespoon cornstarch, and soy sauce in a large bowl. Squeeze out any excess water from the cabbage and add to the bowl. Mix well to incorporate.
Dust a baking tray with cornstarch or flour. Place 1 tablespoon of the pork filling onto each dumpling skin. Moisten edges with water and fold edges over. Pinch edges to seal the dumpling. Place on the tray and repeat with the remaining wrappers.
Steam-Fry: Heat 1 tablespoon vegetable oil in a large pan over medium-high heat. Place 12-15 gyoza in the pan, slightly overlapping each other. Cook until the underside is golden brown, then pour ⅓ cup of water around the gyoza and immediately place the lid on.
Cook until the water has completely evaporated and the wrapper is slightly translucent on top – about 3 to 4 minutes. Set aside and repeat with the remaining gyoza, working in batches with the oil.
Serve gyoza alongside the sauce.
MAKES 50 DUMPLINGS
1 tablespoon olive oil
5 ounces bacon, chopped
1 shallot, finely chopped
1 pound crimini
mushrooms, chopped
10 cups spinach leaves, coarsely chopped
1 large egg, beaten
1 stick (½ cup) unsalted butter, divided
Kosher salt
Freshly ground black pepper
Pierogi Dough
2 large eggs
½ cup whole milk
¼ cup sour cream
2 teaspoons kosher salt
4 cups all-purpose flour, divided, plus more for surface
Bacon, Mushroom, and Spinach Pierogies
A simple, yet delicious pierogi recipe. Substitute the bacon with diced onion for a wonderful vegetarian version.
Whisk eggs, milk, sour cream, salt, and ½ cup water in a large bowl until combined. Add 3 ¾ cups flour and mix until a shaggy dough forms. Knead in bowl with your hands until dough starts to stick together. Turn out dough to a work surface and continue to knead, adding ¼ cup flour as needed if dough sticks to surface, until smooth. Transfer dough to a lightly floured surface and cover with plastic wrap; let rest 1–2 hours.
Heat oil in a medium skillet over medium-low. Cook bacon, stirring often, until browned and crisp. Transfer to a medium bowl with a slotted spoon. Return skillet to medium heat and cook shallot, stirring, until golden brown, about 3 minutes. Add mushrooms, until browned and tender. Add spinach in batches, tossing to wilt before adding more. Transfer to bowl with bacon, toss to combine, and let cool.
Divide dough into fourths and place 1 piece on a lightly floured surface. Dust remaining pieces with flour and cover with plastic. Roll out dough to a ⅛" thickness. Punch out circles with cutter. Working with 1 round at a time, dip fingertips in egg wash and coat edges of round. Transfer about 1 tablespoon of the filling to 1 side of round. Grasp dough from opposite side and pull up and over filling, pressing down to seal edges together, and creating a semicircle. Crimp rounded edge with tines of a fork that have been dipped in flour. Repeat with remaining rounds- you should have 50 total.
Boil: Working in batches, gently lower 5 pierogies into a large pot of boiling salted water. Cook until the pierogis float, about 2 minutes. Meanwhile, heat 1 tablespoon butter in a medium skillet over medium heat, just until it starts to brown. Transfer pierogies directly from water to browned butter and cook, turning once, until golden brown and crisp on both sides, about 3 minutes.
Transfer to a plate, drizzle with remaining brown butter from the skillet. Serve with a dollop of sour cream.
SERVES 4
2 pounds pork tenderloin, fat trimmed
2 garlic cloves, minced
2 teaspoons fresh
rosemary, finely chopped
8 slices thick-cut bacon
½ cup Michigan Blueberry BBQ Sauce (page 9)
Kosher salt
Freshly ground black pepper
Bacon Wrapped Pork Tenderloin with
Michigan Blueberry BBQ Sauce
This bacon-wrapped pork tenderloin is the perfect, nohassle dinner. It’s easy to make and delivers succulent, juicy pork every time. Great any time of year, and an excellent addition to a summer barbecue.
Preheat oven to 350°F.
Combine the garlic and rosemary until a smooth paste has formed (adding coarse salt will help) Rub the paste generously over the pork tenderloin. Season with salt and pepper.
Lay the bacon slices crosswise over the pork, overlapping slightly, tucking the ends of the bacon underneath the loin.
Roast in the oven for 30 minutes, or until internal temperature reaches 145°F. Remove from the oven and brush half of the BBQ sauce over the bacon. Place the pork back in the oven and cook for an additional 15 minutes, checking to make sure the sauce does not burn.
Final internal temperature should hold at 165°F for 15 seconds.
Let cool slightly and transfer to a cutting board. Slice the tenderloin on a bias and drizzle with the remaining BBQ sauce.
SERVES 6-8
1 10-12 pounds bone-in pork shoulder
1 cup Carolina BBQ Rub (page 13)
8 brioche or Kaiser rolls
Vinegar-BBQ Sauce
1 cup apple cider vinegar
1 cup white vinegar
¼ cup brown sugar
3 tablespoons yellow mustard
¼ cup tomato paste
2 tablespoons crushed red pepper
Additional Garnish Bread & Butter pickles
Carolina Pulled Pork
We prefer bone-in pork shoulder, but if you can’t find one locally, boneless will work too. The bone adds some moisture, fat, and flavor to the meat when it’s cooked low and slow. If it's boneless, you'll want to tie the meat with some butcher's twine to help it retain moisture.
Place pork shoulder on a wire rack and rub generously with the Carolina BBQ Rub (the more the better). Wrap the pork in plastic wrap and refrigerate for several hours, or preferably overnight.
Make the vinegar-BBQ sauce by combining all ingredients in a medium saucepan and bring to a boil. Reduce heat and simmer for 10 minutes. Remove sauce from the stove and let cool completely before storing. Sauce can be stored in the refrigerator for up to one month when covered.
Smoker: Heat smoker to 225°F. Place the pork on a grill rack, and place the rack on the smoker grate. Cover the smoker and cook in indirect heat for 10 hours. It's important not to open the smoker for the first 5 hours.
Tip: To add even more moisture, you can prepare a spray bottle with apple juice to spritz the meat once every 30 minutes. Do this from hours 5-10.
Oven: Preheat oven to 250°F. Place the pork in a large pot and roast until fork-tender and falling apart, about 9 hours.
Remove the pork from heat (oven or smoker) and set it on a cutting board. Cover pork entirely in parchment or butcher paper and let rest for 1 hour. This traps additional moisture and makes shredding the meat easier. Unwrap the pork and place in a large bowl. Shred the meat with 2 forks, adding the sauce to generously coat the meat.
Build sandwiches with the pickles, pulled pork, and additional sauce.
SERVES 4-6
2 pounds pork tenderloin, trimmed, butterflied, and pounded thin
1 recipe Creole Mustard (next page)
1 recipe Demi-Glace (next page)
2 teaspoons fresh
rosemary, finely chopped
4 slices provolone cheese
4 slices prosciutto ham
¼ cup roasted red pepper, drained and julienned
½ cup olive oil, divided
2 Spanish onions, thinly sliced
½ cup shiitake mushrooms, sliced
2 garlic cloves, minced
½ cup A-1® sauce
1 large egg, well beaten
1 sheet frozen puff pastry, thawed
¼ cup brandy
Kosher salt
Freshly ground black pepper
All-purpose flour
Pork Tenderloin Cordon Bleu En Croute
A cordon bleu, or schnitzel cordon bleu, is a dish of pork or chicken wrapped around cheese, then breaded and panfried. We've combined this concept with the classic pork wellington to create a resident favorite.
Lay pounded pork tenderloin out on a flat surface. Spread with the Creole Mustard and chopped rosemary. Layer with the prosciutto, provolone cheese, and roasted red peppers. Roll the pork tightly into itself, and tie with a kitchen string. Place in a deep pan and chill in the refrigerator for 2-4 hours.
Add ¼ cup olive oil to a large skillet over medium heat. Add the sliced onions and stir so they evenly become soft and brown. Keep cooking the onions down until they form a rich, caramel color, about 20 minutes. Set aside.
Heat the remaining olive oil in large pan and brown pork on all sides. Remove from pan and let cool. Cut kitchen string.
In the same pan, add the shiitake mushrooms and sauté until tender, about 5 minutes. Add the garlic and cook for an additional 2-3 minutes. Deglaze the pan with brandy, cooking off all of the alcohol, about 2 minutes. Add the Demi-Glace, A-1®, and caramelized onions, stir and simmer for 5 minutes. Set sauce aside.
Preheat the oven to 400°F. On a well-floured surface, roll out the puff pastry to ⅛" thickness. Add the tenderloin to one side of the pastry, and carefully wrap the pork into the puff pastry until fully covered. Place the pork in an oven pan with a rack and brush with the beaten egg.
Roast the pork for 10 minutes, or until it starts to turn golden-brown. Reduce oven temperature to 350°F and bake for an additional 10 minutes, or until internal temperature reaches 155°F.
To serve, slice the pork en croute thin on a bias and serve on top of the Demi-Glace-onion sauce.
teaspoon creole
2 teaspoons prepared,
horseradish
teaspoon Worcestershire sauce
teaspoon molasses 1 teaspoon Tobasco® Hot Sauce
Creole Mustard
Stir all the ingredients together in a small bowl until smooth.
Transfer to a container with a lid and store in the refrigerate for at least 24 hours before using, allowing the flavors time to meld.
The Creole Mustard can be stored in the refrigerator for up to 1 month when covered.
MAKES 2 CUPS
MAKES ½ CUP 1 bay leaf
Demi-Glace
To make the sachet, place the bay leaf, thyme, parsley, and peppercorns in a square of cheesecloth, and tie the corners with a piece of kitchen twine.
2 cups Espagnole (page 7)
2 cups Beef Stock (page 6)
Kosher salt
Freshly ground black pepper
In a heavy-bottomed saucepan, combine the Espagnole and the beef stock, and bring to a boil over medium-high heat. Lower heat to a simmer. Add the sachet, tying the string to the pot handle for easy retrieval. Cook the liquid until the total volume has reduced by half, about 45 minutes.
Remove pan from heat, retrieve and discard the sachet. Carefully pour the Demi-Glace through a mesh strainer lined with a piece of cheesecloth. Season with salt and pepper to taste.
Tip: You can make Demi-Glace with chicken stock instead of beef stock. As a matter of fact, the original Demi-Glace, which was called demi-Espagnole, was made using white stock (veal or chicken) in place of brown.
SERVES 4
¼ cup walnuts
¾ cup olive oil, divided
1 ½ pounds pork tenderloin
2 medium onions, coarsely chopped
3 medium golden beets, scrubbed, cut into bitesize pieces
4 garlic cloves, chopped
2 cups sauerkraut, plus ½ cup brine
1 cup Chicken Stock (page 4)
½ cup dry white wine
4 tablespoons fresh lemon juice, divided
½ cup fresh mint, finely chopped
½ cup fresh parsley, finely chopped
¼ cup dried apricots, finely chopped
Kosher salt
Freshly ground black pepper
Pork Tenderloin with Golden Beets and Walnuts
All three of these dish elements go great together, on their own, or paired with other sides and proteins. Feel free to mix-and-match and get creative! This truly is an easy weeknight meal.
Preheat oven to 350°F.
Toast walnuts on a rimmed baking sheet, tossing once, until golden brown, 7–10 minutes. Let cool, then chop.
Heat 3 tablespoons olive oil in a large skillet over medium-high heat. Season pork loin with salt and cook until browned on all sides, 10–15 minutes. Transfer pork to a platter.
Add onions and beets to same skillet and cook, stirring often, until onions are slightly translucent and browned, 10 Minutes, and season with salt and pepper. Add garlic, sauerkraut, brine, broth, wine, and 2 tablespoons lemon juice and bring to a simmer. Cover skillet, reduce heat to low, and cook until beets are fork-tender, 25–30 minutes.
Return pork to skillet and push down into liquid. Turn heat up to medium and simmer, uncovered, turning meat occasionally until an instant-read thermometer inserted into the thickest part of loin registers 150°F, 20–30 minutes. Transfer pork to a cutting board and let rest 5 minutes before slicing.
Meanwhile, mix walnuts, mint, parsley, apricots, remaining 2 tablespoons of lemon juice, and remaining ½ cup olive oil in a small bowl; season with salt and pepper to taste.
Spoon beet mixture onto plates and arrange sliced pork on top. Spoon a generous amount of walnut sauce over.
SERVES 4
Sauce 1 tablespoon prepared, ground horseradish
cup mayonnaise ½ teaspoon dehydrated garlic
Beef On Weck with Horseradish Sauce
Beef on weck is a classic Buffalo, New York sandwich. It’s thinly sliced roast beef served on a Kummelweck - or "weck" - roll, which is a Kaiser roll coated in caraway seeds and coarse salt.
Preheat oven to 400°F.
Cut ½" slits all around the roast. Insert the garlic slices into the slits. Coat the roast with olive oil, salt, pepper, and thyme.
Place the roast fat-side up in a roasting pan and place it in a preheated oven. Pour the beef broth into the bottom of the roasting pan, ensuring not to pour it over the roast. Bake for 15 minutes and then turn the heat down to 250°F. Cook until the meat reaches an internal temperature of 135°F, about 20-30 minutes.
Remove the roast from the oven and allow it to rest for about 10 minutes. Place the beef drippings from the bottom of the pan into a small saucepan and keep them warm; this is your beef jus.
In a small bowl, whisk together the mayonnaise, horseradish, and garlic powder. Set aside.
In a large, shallow bowl, mix together the caraway seeds and the salt. Brush the top of each Kaiser roll with the egg wash and dip the top of the roll into the salt mixture. Place the rolls on a baking sheet and bake in the preheated oven for 2 to 5 minutes or until the egg wash is set and the rolls are just slightly browned. Remove and allow to cool.
Thinly slice the roast beef and dip quickly into the jus. Place on a plate for assembly.
Cut the rolls in half and dip the top into the warm jus. Top the bottom of the rolls with roast beef. Spread the horseradish sauce on top of the beef and then top with the dipped roll.
SERVES 4
1 ½ pounds tri-tip beef
2 tablespoons Báhn-Mì Rub (page 16)
4 6” baguettes
2 cups pickled vegetables
1 cup pâté (mushroom or chicken)
2 tablespoons olive oil
Báhn-Mì Sauce
1 cup mayonnaise
½ cup Thai chili sauce
½ cup Sriracha
2 tablespoons fresh lime juice
1 teaspoon kosher salt
1 teaspoon granulated garlic
Additional Garnish
Fresh cilantro, finely chopped
Tri-Tip Báhn-Mì Sandwiches
The word bánh mì, meaning "bread", is a staple in Vietnamese cuisine and can be traced back as early as the 1830s when the French introduced the baguette to Vietnam.
Preheat oven to 425°F.
Prepare the báhn-mì sauce by whisking all ingredients in a bowl and set aside.
Rub the tri-tip beef on both sides with the Báhn-Mì Rub. Heat oil in a heavy bottom pan or cast iron skillet and sear the beef for 3 minutes on each side, or until dark brown. Place in the oven and cook for an additional 10 minutes.
Slice the baguette ¾ of the way-through lengthwise, leaving it attached on one side. With 3 minutes left on the timer, place your baguettes in the oven alongside the meat.
Remove both bread and meat from the oven and place the beef on a cutting board, allowing it to rest for 10 minutes. Slice the beef against the grain into thin, bite-size pieces.
To build the bánh mì, spread the pâté on the bottom of the baguette, along with a drizzle of the báhn-mì sauce. Place the beef on top of the pâté and sauce and top with pickled vegetables and fresh cilantro.
SERVES 8
2 pounds ground beef chuck
6 thin strips bacon
1 tablespoon olive oil
1 medium onion, minced
1 garlic clove, finely chopped
¾ cup ketchup
¼ cup apple cider vinegar
3 tablespoons dark brown sugar
¼ teaspoon cayenne pepper
¾ cup Chicken Stock (page 4)
½ cup fresh parsley, chopped
2 large eggs
⅔ cup breadcrumbs, unseasoned
½ cup Parmesan cheese, finely grated
Kosher salt
Freshly ground black pepper
Bacon-Wrapped Meatloaf
The addition of homemade chicken stock helps keep this meatloaf flavorful and juicy, even if you reheat the next day for sandwiches. Want a bolder flavor? Try swapping out for homemade Beef Stock (page 6).
Preheat oven to 350°F. Line a rimmed baking sheet with foil, then parchment paper (this will help with clean up).
Heat oil in a small pan over medium heat. Cook onion and garlic, stirring occasionally, until very soft, about 4 minutes. Transfer to a large bowl.
Meanwhile, bring ketchup, vinegar, brown sugar, and cayenne to a boil in a small saucepan, reduce heat, and simmer, stirring occasionally, until slightly reduced and syrupy, about 5 minutes.
Transfer 2 tablespoons ketchup mixture to a blender; add broth and parsley and blend until smooth. Set remaining ketchup mixture aside.
Add broth mixture, eggs, breadcrumbs, Parmesan, salt, and pepper to the onion and garlic mixture, and mix to combine. Add the beef and mix well with your hands.
Transfer meatloaf mixture to the prepared pan and form into a long log, smoothing the surface. Spread reserved ketchup mixture over top and drape bacon in a crisscross pattern over loaf, tucking underneath.
Bake until an instant-read thermometer inserted into the center registers 165°F and bacon is crisp, 70–80 minutes.
Let rest 10 minutes before slicing.
3 tablespoons olive oil
½ cup plus 1 tablespoon all purpose flour, plus more 1 ½ pounds boneless beef chuck, cut into 2" pieces
3 slices bacon cut into ¼" pieces
1 medium onion, finely chopped
1 medium leek, halved lengthwise, thinly sliced
1 carrot, finely chopped
1 garlic clove, finely chopped
½ cup fresh parsley, finely chopped
2 tablespoons brandy 4 sprigs fresh thyme, leaves stripped 1 star anise pod 1 bay leaf
2 cups Beef Stock Page 6) 1 cup red wine 4 tablespoons unsalted butter
1 cup crimini mushrooms, stems removed
1 cup pearl onions, peeled
1 tablespoon fresh lemon juice
2 sheets frozen puff pastry, thawed
1 large egg, beaten Kosher salt
Freshly ground black pepper
Bœuf Bourguignon Pot Pie
We took the classic French dish, bœuf bourguignon, which is a stew made of beef, red wine, and vegetables, and threw it in a pie. What's not to love?
Preheat oven to 400°F. Heat oil in a large heavy pot over mediumhigh. Season ½ cup flour with salt and pepper. Add beef and toss to coat; shake off excess. Working in batches as needed to avoid steaming meat, cook beef, turning often, until browned all over, 8–10 minutes per batch. Transfer to a plate.
Cook bacon in same pot until brown and crisp. Add ¼ cup water, scraping up browned bits, then add onion, leek, and carrot and cook, until vegetables soften, about 5 minutes. Stir in garlic, parsley, and return beef to pot. Add brandy and simmer until liquid is almost evaporated, about 1 minute. Add thyme leaves, star anise, bay leaf, stock, and wine, and season with salt and pepper; bring to a simmer. Cover pot with lid and braise in oven until beef is very tender, 1–1½ hours.
Melt butter in a large skillet over medium-high heat. Add mushrooms and pearl onions and cook, stirring, until browned, 8–10 minutes. Stir in lemon juice; season with salt and pepper. Add mushrooms and onions to stew, cover pot, and return to oven. Cook until onions are very tender, 25–30 minutes. Let stew cool.
Meanwhile, working with one at a time, roll out pastry sheets on a lightly floured surface until about 4” larger than baking dish (use a 9" round). Place 1 sheet on a parchment-lined baking sheet and chill. Transfer remaining sheet to baking dish. Lift up edge and let dough slump down into dish. Trim, leaving about 1” overhang. Transfer stew to baking dish. Brush edge of pastry with egg.
Cut a circle in the center of chilled pastry. Drape pastry over filling and trim to a 1” overhang. Press edges of dough together to seal and fold overhang under. Crimp edge, then brush top of pastry with egg.
Bake until crust is deep golden brown, 30–35 minutes. Let pie cool slightly before serving.
When you think about all the various things that can go wrong in the kitchen, a significant proportion of them are caused, in one way or another, by overcooking.
If only there were a cooking technique that guaranteed you would never overcook your food ever again—without having to worry about timing. Even if you forget about it and let it cook too long, it would still be perfectly cooked.
Sounds too good to be true, right? Wrong. This, essentially, is sous vide cooking.
Sous vide takes all the guesswork out of cooking meats, poultry, vegetables, and eggs. For some, knowing that their food is guaranteed to be cooked perfectly is worth the additional complexity that comes with sous vide cooking.
Sous vide (pronounced "soo-VEED") is a technique that involves vacuum sealing food in bags, then immersing the packet in a hot water bath set to a specific constant temperature using a device called an immersion circulator.
The circulator is essentially a stick you can place into any vessel of water to heat the water to the desired temperature. The device maintains that exact temperature, while also circulating the water around the vessel so that the food cooks evenly.
Maintaining a constant, specific temperature ensures that your food is heated to a precise temperature. In other words, if you want your steak cooked to 135°F, just set the temperature of the water to 135°F. That's how hot it will get, and not one degree hotter.
Sous Vide Saves Time
While sous vide cooking may take longer than traditional cooking methods, it actually saves time in the long run. Since you can prepare your food in advance, all you need to do is place it in the water bath and let it cook. This frees up time for you to do other things, such as prepare side dishes or spend time with your family.
Another advantage of sous vide cooking is that it allows chefs to prepare food in advance and then finish it off just before serving. This is particularly useful in high-end restaurants, where timing is crucial.
By using sous vide cooking, chefs can prepare the food ahead of time and then simply sear it or finish it off in a pan just before serving. This means that the food is always fresh and hot when it reaches the table.
Searing After Cooking
One thing the sous vide method will not do is produce a brown crust on the outside of your meat, nor will it turn chicken skin crispy.
The solution is to sear it afterward. You don't want to skip this step, because while your steak might be perfectly cooked on the inside, there is nothing perfect about a gray-colored steak. Sear it for a couple of minutes on each side in a hot skillet right before serving.
As long as the skillet is super-hot, you shouldn't have to worry about the extra cooking time raising the temperature of the interior. Plus, you can always set your immersion circulator to 125 or 130 F instead of 135 if you're concerned about maintaining that medium-rare.
What You'll Need to Get Started:
The Sous Vide Circulator
This is the heart of the system, and there are a wide range of models available (next page) and even some equipped with Bluetooth. In theory, you could sous vide on the stove-top with a pot of water, using a candy thermometer to monitor the water temperature. You'd have to make ongoing micro-adjustments to the heat to keep the water at a constant temperature, however, which might be more trouble than it's worth.
A Vacuum Sealer (or Zip-Top Freezer Bags)
A vacuum sealer is preferable, since it removes all the air from around the food, helping water surround the food more closely. On the other hand, freezer bags allow you to check the temperature of the item with an instantread thermometer, then re-close the bag to return to cooking.
A Water Container
You can use a pot, of course, even though it's the circulator and not the stove that provides the heat. A Dutch oven works well since its cast-iron construction helps maintain a consistent temperature. You can use any container that is safe up to a temperature of 212°F, but be sure to consult your manual.
The Benefits of Sous Vide Cooking
Learn how CCL utilizes this culinary technology not only for incredible dining experiences, but operational efficiencies. Sous vide precision cooking offers unparalleled control over your proteins, sauces, and more.
SERVES 4
2 pounds flank steak
½ medium onion, diced
1 cup cold brew coffee
1 cup soy sauce
1 teaspoon freshly ground black pepper
2 tablespoons Worcestershire sauce
2 tablespoons dark brown sugar
4 tablespoons olive oil, divided
2 tablespoons rice wine vinegar Kosher salt
Sous Vide Coffee Flank Steak
Flank steak is one of the cheapest cuts of meat available. With the sous vide method, however, it can taste as exceptional as a filet. It’s also the easiest way to get a perfectly cooked steak edge to edge and end to end.
In a large bowl, combine onion, coffee, soy sauce, black pepper, Worcestershire sauce, brown sugar, 2 tablespoons of olive oil, and vinegar. Whisk until sugar has dissolved.
Place the flank steaks in a vacuum bag and cover with marinade. Massage marinade into the steak, ensuring everything is well incorporated. Vacuum-seal the bags and place in the refrigerator for at least 2 hours, preferably overnight.
Heat your sous vide circulator to 135°F. Add your vacuum-sealed flank steaks and cook for 7 hours. Once done, remove the bags from the circulator. Open the bags and remove from the marinade. Pat the steaks dry with paper towels and set aside.
Add the remaining olive oil to a cast iron skillet over high heat. Once hot, add the steaks and sear for 2-3 minutes per side, developing a nice crust.
Place finished steaks on a cutting board and let sit for 5 minutes. Slice steak on a bias and serve.
SERVES 8
3 pounds boneless leg of lamb
cup ground mustard seed
tablespoon kosher salt 1 tablespoon freshly ground black pepper
2 cups balsamic vinegar
Sous Vide Boneless Leg of Lamb
The 24-hour cook time may seem intimidating, but that's one of the benefits of sous vide cooking. You can "set it and forget it" while you prep other dishes, making this perfect for a large dinner party.
Clean and prep the leg of lamb, leaving some of the fat. Cut the meat into 6-ounce cubes, about 3" x 3".
In a small bowl, mix the mustard, salt, and pepper. Massage the spices into the lamb cubes liberally, making sure it's evenly coated. Place the lamb in a vacuum bag, add the balsamic vinegar, and vacuum seal.
Heat your sous vide circulator to 140°F. Add your vacuum-sealed lamb and cook for 24 hours. Once done, remove the bags from the circulator. Open the bags and remove the lamb from the marinade and set aside, reserving marinade.
Add the balsamic marinade to a small pot over medium-high heat. Cook until marinade is reduced by half, about 1 hour.
Preheat oven to 450°F.
Add the lamb to a roasting pan and brush the balsamic reduction. Roast for 5 minutes, or until a rich color develops from the glaze.
Serve with roast potatoes or rice.
SERVES 4
4 large lamb shanks, French trimmed (about 2 pounds)
2 tablespoons olive oil
1 medium onion, sliced
2 tomatoes, roughly diced
1 cinnamon stick
2 tablespoons honey
Kosher salt
Freshly ground black pepper
Chermoula
1 tablespoon cumin
½ tablespoon ground coriander
1 tablespoon smoked paprika
1 onion quartered
¼ bunch fresh cilantro, stems and leaves included
4 garlic cloves
½ knob ginger, finely grated
½ teaspoon kosher salt
1 cup olive oil
Lamb Shanks Chermoula
Chermoula is a marinade and relish used in North African cooking and is traditionally used in seafood dishes, but it can be used on other meats or vegetables. It is somewhat similar to the Latin American chimichurri.
In a food processor on high, blend all Chermoula ingredients until it forms a smooth consistency.
Place the lamb shanks in a deep baking dish. Pour the Chermoula over the lamb and lightly massage into the meat. Cover and marinate in refrigerator for at least 2 hours, preferably overnight. After the lamb has marinated, remove the lamb wipe off any excess marinade, reserve remaining.
In a large, deep pan, add olive oil over medium-high heat. Add the lamb shanks and brown on each side, about 5-8 minutes. You may need to work in batches. Once browned on all sides, remove the lamb and set aside.
In the same pan, add the sliced onion, tomatoes, and cinnamon stick. Cook until the onions have softened, about 5-8 minutes. Add the reserved Chermoula to the pan and cook until the color has darkened and spices are fragrant, about 10 minutes.
Add the lamb back to the pan and add the honey with 2 cups of water. Bring to a boil and then lower to heat to simmer. Season with salt and pepper to taste, and cover the pan with a lid. Cook for 2-3 hours, or until the lamb is falling off the bone.
Lamb chermoula is typically served alongside cous-cous and olives.
SERVES 6
¼ cup olive oil
1 5 pound bone-in lamb shoulder
2 cups dry white wine
1 14 ounce can whole, peeled tomatoes
1 head garlic, halved crosswise
¼ teaspoon crushed red
pepper flakes
2 lemons, halved crosswise
6 baby artichokes
1 recipe Anchovy-Herb Oil (next page)
1 recipe Garlic Fried Rice (next page)
Kosher salt
Freshly ground black pepper
Roast Lamb with Lemony-Artichokes and Garlic Fried Rice
Lamb shoulder is fattier, tougher, and more flavorful than lamb leg. It needs long, slow, and moist cooking to break down the fibers and properly render the fat, hence the almost 5-hour cooking time.
Preheat oven to 325°F.
Heat oil in a large skillet over medium-high heat. Generously season lamb on all sides with salt and pepper and cook, turning often, until well browned, 12–15 minutes. Transfer lamb and oil to a roasting pan.
Carefully add wine to skillet, scraping up browned bits. Bring to a simmer and cook until reduced by one-third, about 5 minutes. Add tomatoes, crushing with your hands as you go, garlic, red pepper flakes, and 2 cups water and pour into roasting pan. Squeeze lemons over lamb and add to pan. Roast for 3 hours.
Remove the tough dark outer leaves from the artichokes, using a serrated knife. Trim stems and remove tough outer layer with a vegetable peeler. Halve artichokes lengthwise.
After the 3-hour roast time, remove lamb from the oven. Toss in the artichokes and coat with the pan juices, tucking under and around the lamb. Return to oven and roast, turning artichokes occasionally, until artichokes are tender and meat is falling off the bone, another 1½–2 hours. (Remove artichokes if they become too soft before meat is done.)
When done, place lamb in a large bowl, then transfer artichokes, lemons, and garlic with a slotted spoon to bowl. Pour Anchovy-Herb Oil over lamb.
Serve lamb on top of the Garlic Fried Rice and top with the artichoke mixture and pan juices.
MAKES 4 CUPS
¼ cup vegetable oil
8 garlic cloves, finely chopped
4 cups cooked jasmine rice, chilled
1 teaspoon cayenne
½ teaspoon ground cumin
Kosher salt
Freshly ground black pepper
Garlic Fried Rice
Heat oil in a large wok, or nonstick skillet, over medium-high heat. Cook garlic, stirring, until golden brown, about 1 minute. Using a spider or slotted spoon, transfer garlic to a small plate, reserving oil in the skillet.
Add the cooked rice to the same skillet; add cayenne, cumin, and salt and pepper to taste. Cook, tossing occasionally, until rice is warmed through and crispy in spots.
MAKES ½ CUP
½ cup olive oil
4 anchovy fillets, drained
1 clove garlic finely chopped
¼ cup fresh flat-leaf parsley leaves
2 tablespoons fresh mint leaves
¼ teaspoon crushed red pepper flakes
Anchovy-Herb Oil
Pulse oil, anchovies, garlic, parsley, mint, and red pepper flakes in a food processor until smooth.
Season with salt to taste.
In Jewish culture, food is so much more than sustenance—it is a mitzvah, a sacred act of hospitality rooted in joy and connection. Growing up in an Orthodox Jewish household (with a twist), my earliest culinary memories come from our kitchen, a mikdash ma’at, or small sanctuary, where my mother wove together the flavors of her Louisiana roots with the traditions of Eastern European kosher cooking. Her meals were a reflection of heritage and creativity, blending the deep warmth of Southern comfort food with the reverence of Jewish dietary laws.
As the years passed, her repertoire grew, incorporating influences from Sephardic and Mizrahi traditions, each dish imbued with the vibrant spices and aromas of Spanish and North African cuisines. From holiday feasts to weeknight dinners, every meal became a celebration of cultural diversity, bound by the unifying thread of our Jewish faith.
These experiences shaped not only my childhood but also my career in the culinary arts, inspiring me to honor and preserve these traditions in everything I create.
Today, as a chef and leader in the culinary world, I carry those lessons with me. Through our Nosh culinary concepts, my team and I are dedicated to creating menus and spaces that celebrate the rich history and heritage of the Jewish people.
Every dish we craft is an opportunity to honor the religious, cultural, and national elements that make our cuisine so meaningful. We aim to uphold the values of faith-based inclusivity and authentic hospitality, ensuring that every meal resonates with the cultural and spiritual roots it represents.
This chapter is a reflection of that mission, bringing together cherished kosher recipes and Jewish lifestyle dishes that embody community and connection. These recipes, inspired by the flavors of my childhood and the culinary creativity of our chefs, represent a bridge between tradition and innovation.
In the communities we serve, food becomes a mitzvah once again—a way to connect, to celebrate, and to foster a sense of belonging. It is our hope that these recipes bring the same joy, comfort, and tradition to your table as they do to ours, keeping the vibrant heritage of Jewish cuisine alive with every bite.
ERIC GOLDBERG SENIOR DIRECTOR CCL HOSPITALITY GROUP
SERVES 6
3 cups cooked quinoa
1 pint cherry tomatoes, quartered
½ English cucumber, diced
2 tablespoons fresh basil, chopped
2 tablespoons fresh mint, chopped
2 tablespoons fresh parsley, chopped
1 tablespoon olive oil
1 tablespoon fresh lemon juice, or to taste
Kosher salt
Freshly ground black pepper
Quinoa Tabbouleh with Basil and Mint
This vibrant and refreshing tabbouleh combines cherry tomatoes, cucumber, herbs, and quinoa, resulting in a flavorful and nutritious side dish.
In a bowl, combine the quartered cherry tomatoes, diced cucumber, fresh basil, mint, parsley, olive oil, or lemon juice, and a pinch of salt and pepper. Mix these ingredients well while the quinoa is cooking.
When the quinoa is done and slightly cooled, gently stir it into the tomato and cucumber mixture. Ensure that everything is evenly distributed.
Taste the salad and adjust the salt, pepper, and lemon juice as needed. Refrigerate the tabbouleh for at least an hour before serving.
SERVES 8
cup vegetable oil
tablespoons Chicken Stock (page 4)
tablespoons fresh dill, chopped
½ teaspoons kosher salt
teaspoon black pepper, freshly ground 1 ½ cups matzo meal
& Assembly
chicken legs (thigh and drumstick)
cups Chicken Stock (page 4) 1 ½ teaspoons kosher salt, plus more to taste
medium carrots, thinly sliced
bunch fresh Italian parsley
tablespoon black peppercorns
Bubbie's Matzo Ball Soup
The key to this soup is patience. Although the cooking time can take an entire afternoon - the pay-off (and amazing smells) is well worth it in the end!
Whisk the eggs in a medium bowl. Add vegetable oil, Chicken Stock, dill, salt, and pepper. Whisk vigorously to combine. Add matzo meal and whisk until incorporated. Cover and chill the dough for at least 35 minutes (this is essential as it gives the matzo meal time to hydrate). Do ahead: Dough can be made 2 days ahead. Keep chilled.
While the matzo dough is chilling, place a rack in the top third of the oven and preheat to 450°F. Place chicken legs on a rimmed baking sheet or a large plate, sprinkle with 1 ½ teaspoons salt, and let sit at room temperature until ready to use.
Bring the Chicken Stock to a simmer until the stock is slightly reduced, 40–50 minutes. Add chicken legs and simmer until the legs are very tender, another 40–50 minutes.
While the chicken legs cook, bring 3 quarts of water with a generous amount of salt to a boil in a medium pot. Using damp hands, divide the matzo mixture into 16 pieces and roll each into about 1 ½"-diameter ball. Using a slotted spoon, carefully lower the matzo balls into the pot.
Reduce the heat to low, cover the pot, and simmer gently, checking occasionally and adjusting the heat if boiling too rapidly, until the balls are puffed and light in color, 30–40 minutes.
Transfer chicken legs to a plate and let sit until cool enough to handle. Remove meat from legs; discard skin and bones. Tear the meat into bite-size pieces and return to the stock. Add the remaining thinly sliced carrots. Return stock to a simmer and cook until carrots are just tender, about 4 minutes. Taste and season the soup with more salt and pepper if needed.
Using a slotted spoon, place 2-3 matzo balls in each bowl. Ladle in soup and garnish with chopped dill and freshly ground pepper.
SERVES 8
4 cups sweet potatoes, peeled and diced
2 cups carrots, sliced
2 cups dried apricots
1 cup prunes, pitted
½ cup honey
¼ cup orange juice
1 teaspoon ground cinnamon
½ teaspoon ground nutmeg
Kosher salt
Additional Garnish
Fresh mint, finely chopped
Tzimmes
If it’s a Jewish holiday, tzimmes is sure to make an appearance! This traditional root vegetable dish is lightly sweet and pairs well with a variety of meals. It’s a comforting addition to any Shabbat table, served alongside fresh-baked challah and matzo ball soup.
In a large baking dish, combine sweet potatoes, sliced carrots, dried apricots, and pitted prunes.
In a small bowl, mix honey, orange juice, ground cinnamon, and ground nutmeg. Pour the mixture over the fruit and vegetables, tossing to coat evenly. Season with salt to taste.
Cover the baking dish with foil and bake for 40–45 minutes, or until the sweet potatoes are tender.
Garnish with chopped fresh mint before serving.
SERVES 8
2 tablespoons extra virgin olive oil
1 large yellow onion, finely chopped
2 red bell peppers, diced
4 garlic cloves, minced
2 teaspoons ground cumin
1 teaspoon smoked paprika
1 teaspoon chili powder
2 28-ounce cans crushed tomatoes
6-8 large eggs
Kosher salt
Freshly ground black pepper
Additional Garnish
Fresh parsley, chopped
Shakshuka
Shakshuka, a dish of poached eggs in a flavorful tomato and bell pepper sauce, is believed to have originated in Tunisia. Popular across North Africa and the Middle East, it's a versatile and satisfying meal for breakfast, lunch, or dinner.
Preheat your oven to 375°F.
In an oven-safe skillet, heat olive oil over medium heat. Add the chopped onion and bell peppers, and sauté until softened. Stir in the minced garlic, cumin, smoked paprika, and chili powder, cooking for another 2 minutes.
Pour in the crushed tomatoes, season with salt and pepper, and let simmer for 10–15 minutes.
Create small wells in the tomato mixture and crack an egg into each. Transfer the skillet to the oven and bake for 10–12 minutes, or until the egg whites are set but the yolks remain runny.
Garnish with parsley and serve with crusty bread.
SERVES 8
2 cups asparagus, trimmed and cut into 1-inch pieces
1 cup cherry tomatoes, halved
12 large eggs
½ cup whole milk
½ cup Parmesan cheese, grated
1 tablespoon fresh basil, chopped
1 tablespoon fresh chives, chopped
2 tablespoons olive oil
Kosher salt
Freshly ground black pepper
Asparagus and Tomato Frittata
Frittatas are closer to a savory breakfast casserole than a quiche and can be enjoyed at any meal. Serve a slice with fruit and whole-grain toast for breakfast, or pair it with a green salad for lunch or dinner.
Preheat your oven to 375°F.
In a bowl, whisk together eggs, milk, grated Parmesan, chopped basil, chopped chives, salt, and pepper.
Heat olive oil in an oven-safe skillet over medium heat. Add the asparagus and cook for 2–3 minutes until slightly tender. Stir in the cherry tomatoes, then pour the egg mixture over the vegetables.
Cook on the stovetop for 3–4 minutes, then transfer the skillet to the oven.
Bake for 15–20 minutes, or until the frittata is set and the top is lightly browned. Slice into squares and serve warm.
SERVES 4
4 Cornish game hens
¼ cup olive oil
2 tablespoons fresh rosemary, chopped
2 tablespoons fresh thyme, chopped
4 garlic cloves, minced
1 lemon, sliced in wheels
1 cup Chicken Stock (page 4)
Kosher salt Freshly ground black pepper
Herbed Cornish Game Hen
Rosh Hashana, one of the holiest days of the year, marks the start of the new year for Jewish communities worldwide. This popular holiday recipe features Cornish game hens for convenient individual servings, but the flavorful rub pairs beautifully with other poultry, like roasting chickens or turkey.
Preheat your oven to 375°F.
Rinse the Cornish hens and pat them dry with paper towels. In a small bowl, combine olive oil, chopped rosemary, chopped thyme, minced garlic, salt, and pepper.
Rub the herb mixture all over each hen, both inside and outside. Place a slice of lemon inside each hen.
Arrange the hens in a roasting pan and pour chicken broth into the bottom of the pan. Baste the hens with the juices occasionally during cooking.
Roast for 50–60 minutes, or until the internal temperature reaches 165°F.
SERVES 12
2 ½ pounds small red potatoes, whole
2 white onions, chopped
2 ½ pounds beef brisket, cubed
2 marrow bones
1 cup pinto beans or chickpeas
½ cup coarse-grain kasha
3 garlic cloves, minced
½ teaspoon freshly ground black pepper
4 cups Beef Stock (page 6)
1 tablespoon kosher salt
1 ½ teaspoons paprika
1 ½ teaspoons turmeric
1 teaspoon cumin
¼ teaspoon cayenne
Kosher salt
Freshly ground black pepper
Beef Cholent
Beef cholent, a traditional Shabbat stew, has roots in medieval Ashkenazi Jewish communities, where slowcooked dishes allowed for observance of cooking restrictions. Today, it remains a beloved symbol of cultural heritage and communal meals.
In a large slow cooker, layer the potatoes on the bottom. Add the onions, beef brisket, and marrow bones on top, followed by the rinsed beans and kasha. Add the garlic, black pepper, and salt, tossing to coat everything evenly.
In a large bowl, mix the beef stock with paprika, turmeric, cumin, and cayenne. Pour the stock into the slow cooker, stirring to combine with the other ingredients. Add 1–2 cups of water, just enough to submerge the ingredients.
Cover and cook on low heat for 16 hours. Check occasionally, adding water and stirring if it looks too dry.
Once done, set the slow cooker to warm until ready to serve.
SERVES 4
½ cup whole milk
3 large eggs
1 cup all-purpose flour
4 tablespoons salted butter, divided
2 tablespoons vegatable oil
Sour cream or plain yogurt
Cherry Filling
½ cup dried cherries
¼ pound cream cheese
½ vanilla bean, scraped
2 tablespoons white sugar
1 large egg
1 pound cottage cheese
Cherry Vanilla Blintzes
Blintzes, derived from the Yiddish word 'blintze' and the Russian 'blin' (pancake), are sweet crepes filled with a creamy, sweet mixture, folded, rolled, and fried until golden. Blintzes are traditionally served on Shavuot, a holiday that celebrates all things dairy.
Put the milk, ½ cup water, eggs, and flour into a food processor or blender and blend until smooth, about 10 seconds. Scrape down any solids on the sides if needed. Add 2 tablespoons of butter and blend briefly to combine. Cover and refrigerate the batter for at least 2 hours or overnight.
Heat a 10-inch non-stick crepe pan over medium-high heat and spray lightly with non-stick vegetable spray. Once hot, remove the pan from the heat and add 2 tablespoons of batter, swirling to coat the bottom evenly. Cook for about 2 minutes, or until lightly browned. Transfer to a plate, cooked side up, and repeat with the remaining batter.
In a small saucepan, cover the cherries with water and bring to a boil. Remove from the heat and let them rest. In a bowl, mix together the cream cheese, vanilla, sugar, and egg until smooth. Fold in the cottage cheese, then drain the cherries and gently fold them into the mixture.
To assemble, place 2 tablespoons of cherry filling in the lower center of a crepe. Fold the bottom edge up over the filling, then fold in the sides, and roll up tightly. Repeat with the remaining crepes and filling.
Heat 1 tablespoon of vegetable oil and 1 tablespoon of butter in a pan over medium heat. Working in batches, fry the blintzes seam-side down until golden brown. Serve warm alongside yogurt or sour cream, and extra cherry filling.
LEARN MORE
Want to Bring Nosh to Your Community?
Contact us to learn about our Nosh kosher dining program, markets, and bistros, and discover how we can seamlessly bring them to your community.
SERVES 6
1 head of cauliflower
3 tablespoons olive oil
1 teaspoon ground cumin
1 teaspoon ground coriander
1 teaspoon smoked paprika
2 teaspoons Israeli Za'atar (page 17)
Flaky sea salt
Freshly ground black pepper
Additional Garnish
Fresh parsley, chopped
Lemon wedges
Middle Eastern Cauliflower
Something magical happens to cauliflower when it's roasted. It starts out raw and crisp, becomes soft and tender, and ends up caramelized and delectable—simply put, it's flavor transformed.
Preheat your oven to 425°F.
In a small bowl, mix the olive oil, Israeli Za'atar, cumin, coriander, and smoked paprika,. Add salt and pepper to taste.
Prepare a steam bucket over a large pot of boiling water. Steam the cauliflower until they are just tender but still have a bit of firmness. This usually takes about 5-7 minutes.
Remove and place the steamed cauliflower in a large bowl and drizzle the spice mix over it. Toss the cauliflower until evenly coated with the spices.
Place the seasoned cauliflower on a lined baking sheet. Roast in the preheated oven for 20-25 minutes or until the edges are golden brown, turning halfway through for even roasting.
Once roasted, transfer the cauliflower to a serving dish. Garnish with freshly chopped parsley and serve with lemon wedges on the side for squeezing over.
Additional Garnish Cayenne pepper Lemon wedges, or halves
Yogurt-Roasted Broccoli
If you know a picky eater who hates broccoli, make them this recipe. Bright and spicy with the right amount of char. Additionally, the caramelization from the roasted yogurt takes this dish to the next level.
Preheat to 425°F.
Bring a small pot of salted water to a boil over high heat. Cut broccoli in half lengthwise, then cut on a bias into 2" - 3" pieces, leaving tips of florets intact. Working in batches, cook broccoli just until bright green, about 30 seconds. Drain well and pat broccoli dry.
Meanwhile, whisk yogurt, oil, paprika, coriander, turmeric, garlic, and cayenne in a medium bowl. Season with salt to taste. Add broccoli and toss to coat.
Transfer broccoli mixture to a foil-lined rimmed baking sheet and arrange in a single layer. Roast broccoli until browned and stalks are tender, 15–20 minutes.
Serve with an additional pinch of cayenne pepper and lemon wedges for squeezing over.
SERVES 6
2 pounds Brussels sprouts, trimmed and halved
¼ cup extra-virgin olive oil
3 tablespoons balsamic vinegar
1 tablespoon honey
1 teaspoon kosher salt
3 large garlic cloves, minced
Flaky sea salt
Freshly ground black pepper
Balsamic-Roasted Brussels Sprouts
This balsamic-roasted Brussels sprouts recipe is designed to deliver deeply caramelized, tender, flavorful sprouts - and it couldn’t be easier to throw together. Be sure to thoroughly dry your sprouts after washing to prevent water-logging and sogginess, and to maximize their crispy potential.
Place a rimmed baking, oiled baking sheet on the middle rack in the oven and then preheat oven to 425°F.
In a medium bowl, stir together olive oil, balsamic vinegar, honey, 2 kosher salt, and garlic cloves; season with black pepper. Taste mixture and add more honey and salt if needed.
Add the Brussels sprouts along with any loose leaves and toss to coat.
Carefully remove the hot baking sheet from oven. Using tongs, arrange Brussels sprouts cut side down on baking sheet. Roast until deeply browned underneath and tender, 25–30 minutes.
Sprinkle with flaky sea salt.
SERVES 4
2 pounds medium carrots, scrubbed
6 tablespoons unsalted butter, cut into pieces
⅓ cup light brown sugar, packed
⅓ cup honey
¾ teaspoon crushed red
pepper flakes
Kosher salt
Freshly ground black pepper
Honey-Roasted Carrots
This easy recipe requires minimal prep time and tending to, making it a strong choice for a lazy weekend supper or as a side dish during a holiday feast - whether it’s Easter, Rosh Hashanah, Christmas, or Thanksgiving.
Preheat oven to 400°F.
Line a rimmed baking sheet with foil. Cut carrots on a bias into 3" pieces (halved or quartered lengthwise if large).
Spread out carrots on foil. Evenly top with butter, brown sugar, honey, and red pepper flakes. Season with salt and pepper, tossing to combine.
Bake carrots, tossing every 20 minutes, until tender and browned around the edges, about 1 hour.
Transfer to a platter and sprinkle with kosher or coarse sea salt.
SERVES 4
4 cups cooked jasmine rice, chilled
3 tablespoons vegetable oil
1 pound chicken livers, finely chopped
½ pound pork sausage, removed from casings and crumbled
1 yellow onion, finely chopped
1 green bell pepper, finely chopped
2 celery stalks, finely chopped
2 garlic cloves, minced
1 tablespoon Traditional Adobo Seasoning (page 14)
2 cups Chicken Stock (page 4)
2 bay leaves
¼ cup fresh parsley, minced
Kosher salt
Freshly ground black pepper
MawMaw's Dirty Rice
Besides being a side dish good enough to eat as a main, this "dirty" rice makes a terrific stuffing for chicken, quail, or turkey.
In a large, heavy sauté pan, heat 2 tablespoons of the oil over mediumhigh heat. Add the chicken livers and sausage and cook, stirring, until the meat is browned, about 5 minutes.
Add the remaining tablespoon of oil and the holy trinity (bell pepper, onion, and celery) and cook until vegetables soften, about 5 minutes. Add garlic and Traditional Adobo Seasoning. Cook for 5 minutes, stirring often. Season with salt and pepper to taste.
Add the stock and bay leaves, scraping the bottom of the pan to loosen any browned bits. Bring to a boil, then lower the heat and simmer for 5 minutes.
Add the rice and stir thoroughly. Cook until the rice is heated through, about 5 minutes. Remove from the heat.
Remove the bay leaves and stir in the parsley before serving.
SERVES 4
4 cups cooked jasmine rice, chilled
1 ½ teaspoon granulated sugar
2 tablespoons vegetable oil
1 teaspoon black mustard seeds
1 teaspoon cumin seeds
1 medium onion, finely chopped
1 small Serrano chile, finely chopped
1 tablespoon ground coriander
½ teaspoon ground turmeric
¼ teaspoon cayenne pepper
1 teaspoon kosher salt, plus more
2 tablespoons fresh cilantro, finely chopped
1 tablespoon fresh lime juice
Additional Garnish
Fresh cilantro, finely chopped
Plain whole-milk yogurt
Lime wedges
Nani's Masala Rice
Don’t let its simplicity fool you—it’s packed with flavor and delicately balances salty and spicy. The onions bring sweetness and green chiles add heat, making every bite more comforting than the next.
Place the chilled jasmine rice in a medium bowl and sprinkle sugar over; mix to combine.
Heat oil in a large skillet over medium heat. Cook black mustard and cumin seeds until they start to sputter, about 10 seconds. Add onion and chile, stirring often until onion is translucent, about 4 minutes.
Add coriander, turmeric, and cayenne, and cook until the spices are fragrant, about 30 seconds. Add the sweetened rice mixture and kosher salt, tossing until rice is evenly dyed with turmeric.
Sprinkle 2 tablespoons of water over, then cover and steam until rice is warmed through and fluffy, about 3 minutes.
Remove from heat and garnish with fresh cilantro, a drizzle of plain yogurt, and lime wedges for squeezing over.
SERVES 8
½ pound thick-cut bacon, chopped
green bell peppers, chopped
sweet onion, diced
pound lean ground beef 4 cloves garlic, minced 1 tablespoon ground chili powder 1 teaspoon kosher salt 1 teaspoon ground paprika 1 teaspoon ground black pepper 1 15-ounce can pinto beans 1 15-ounce can cannellini beans 1 15-ounce can kidney beans 1 15-ounce can black beans ¾ cup ketchup ¼ cup light brown sugar, packed
tablespoons apple cider vinegar 2 tablespoons Worcestershire sauce
2 tablespoons yellow mustard
2 teaspoons Texas Pete® Hot sauce
Cowboy Beans
Not to be confused with chili, cowboy beans, also called chuckwagon beans, are a classic side dish with roots in the Southwest and Texas, beloved at barbecues, parties, and potlucks throughout the region.
Preheat the oven to 350°F.
In a large Dutch oven over medium heat, cook the bacon until crisp, about 7–9 minutes. Remove the bacon with a slotted spoon, leaving the drippings in the pot.
Add the bell peppers and onion to the drippings and sauté until tender and lightly golden, about 7–9 minutes.
Stir in the ground beef and garlic, cooking until the beef is crumbled and no longer pink. Mix in the chili powder, salt, paprika, and black pepper.
Drain and rinse the pinto, cannellini, kidney, and black beans. Add the beans, ketchup, ¾ cup water, brown sugar, vinegar, Worcestershire sauce, yellow mustard, hot sauce, and cooked bacon to the beef mixture. Stir until well combined.
Cover the pot and bake in the oven for about 45 minutes, or until the liquid has thickened. Serve hot.
SERVES 4
3 large sweet potatoes, peeled, cut into sticks
¼ cup extra-virgin olive oil
1 teaspoon smoked paprika
Kosher salt
Freshly ground black pepper
Sriracha Dip
¼ cup crème fraîche or sour cream
2 teaspoons sriracha
2 teaspoons honey
Sweet Potato Fries with Sriracha Dip
For the best sweet potato fries, pat the potato sticks dry before tossing them with the oil. For roasting, use the largest sheet pan you’ve got; more surface area means crispier fries.
Preheat oven to 400°F.
Pat 3 large sweet potatoes, peeled and cut into sticks, dry with a paper towel.
Place sweet potatoes on a baking sheet and drizzle with ¼ cup extravirgin olive oil; season with smoked paprika, kosher salt and freshly ground black pepper. Toss to coat and spread out in a single layer.
Roast until golden brown and slightly crispy, 25–35 minutes.
For sauce, mix ½ cup crème fraîche or sour cream, sriracha, and honey in a small bowl.
Serve sweet potato fries with Sriracha Dip and/or ketchup.
SERVES 8
4 pounds Yukon Gold potatoes, peeled and cut into 2" chunks
1 ½ sticks unsalted butter, cut into small cubes
1 cup heavy cream
1 small bunch chives, thinly sliced Kosher salt
Freshly ground white pepper
Whipped Yukon Gold Potatoes
Do not skip the second step in this recipe, which involves dry frying the potatoes. This will ensure the starches firm up, making them easier to absorb the butter and cream.
Put the potatoes in a large pot, cover with water and bring to a boil. Simmer over moderate heat until tender, about 25 minutes.
Drain and return the potatoes to the pot. Cook over moderate heat for 1 minute, shaking the pot to dry the potatoes.
In a large saucepan, melt the butter in the cream. Working over the saucepan, pass the hot potatoes through a ricer or food mill. Stir with a wooden spoon until light and fluffy. Remove from heat and stir in the chives.
Season with salt and white pepper to taste.
SERVES 4
1 ½ pounds parsnips, scrubbed, sliced 1" thick
2 tablespoons unsalted butter, cubed
Kosher salt
Freshly ground black pepper
Parsnip Purée
This is about as easy as a side dish gets, providing a perfect base for any protein or vegetable main. Want to elevate this dish? Brown the butter separately before adding to the purée.
Place parsnips in a medium pot of salted water, adding enough water to cover the parsnips.
Cover the pot and bring to a boil, then uncover, lower the heat, and simmer for 15–20 minutes, until the parsnips are very soft.
Remove from heat, reserving 1 ½ cups of the parsnip cooking liquid. Strain parsnips and transfer to the bowl of a food processor fitted with the steel blade, and pulse to chop the parsnips. Slowly drizzle in ½ cup of the cooking liquid.
Purée the parsnips, adding the remaining cup of cooking liquid until the parsnips are creamy and almost smooth but still have some texture. Add butter and freshly ground black pepper; purée until well combined.
Season with salt and additional pepper to taste. Serve with an extra cube of butter on top.
SERVES 4
2 pounds asparagus, trimmed
½ cup mirin
¼ cup white miso
2 tablespoons rice wine vinegar
2 teaspoons ginger, grated and peeled
Additional Garnish
Fresh lime juice
Scallion greens, thinly sliced
Toasted sesame seeds
Ginger-Miso Grilled Asparagus
This quick ginger-miso marinade is perfect for more than just asparagus. Try it with leeks, green beans, or even blanched sugar snap peas for an easy salad.
Prepare a grill for high heat. Whisk mirin, miso, vinegar, and ginger in a small bowl. Place asparagus on a small baking dish and pour miso mixture over. Toss to coat.
Grill asparagus, turning occasionally, until charred on all sides and crisp-tender, 4–5 minutes. Transfer to a platter.
Squeeze lime juice over, then top with scallions and sesame seeds.
SERVES 4
1 pound green beans, rinsed and dried
½ cup vegetable oil
5 garlic cloves, minced
¼ teaspoon crushed red pepper
Kosher salt
Blistered Garlic Green Beans
These Chinese-style garlic green beans are the perfect side dish. The green beans are flash fried, which gently blisters the outer skin but keeps the center tender and lightly crisp.
Snap off the tough ends of the green beans. If your green beans are very long, snap them in half.
Heat the oil in a wok or large pan over medium-high heat. To check to see if the oil is hot enough, throw a green bean into the wok. If bubbles start to form around the bean immediately, the oil is ready for frying.
Working in batches, fry the green beans for about 2 minutes, or until the green beans start to wrinkle on the outside. Transfer beans to a plate lined with paper towels. Repeat until all the beans are fried. Turn off the heat.
Carefully discard the hot oil and re-heat the wok back to medium-high heat. Add the minced garlic and cook for about 30 seconds to 1 minute, until fragrant. Add the red pepper flakes and green beans back to the wok. Stir to combine and cook for an additional minute.
Transfer the beans to a plate and season with salt to taste.
MAKES 60 BALLS
1 ½ cups peanut butter
1 cup unsalted butter, softened
½ teaspoon vanilla extract
4 cups confectioners' sugar, sifted, plus more as needed
4 cups semisweet chocolate chips
Buckeyes
Peanut butter and chocolate come together in these nobake treats inspired by Ohio’s Buckeye tree, known for nuts that resemble a deer’s eye. Legend has it these bite-sized sweets were first made in the 1960s and quickly became a favorite far beyond the Buckeye State.
In a large bowl, beat together peanut butter, butter, and vanilla with an electric mixer until smooth. Gradually mix in 4 cups of sifted confectioners' sugar until the dough is stiff and holds its shape, adding more sugar if needed.
Roll the dough into sixty 1-inch balls and place them on wax paperlined cookie sheets. Insert a toothpick into the top of each ball and freeze until firm, about 30 minutes.
Melt chocolate chips in a double boiler or a heatproof bowl set over a pan of simmering water, stirring until smooth.
Using the toothpicks, dip the frozen peanut butter balls into the melted chocolate, leaving the top partially uncovered.
Place the dipped balls back on the cookie sheet, remove the toothpicks, and refrigerate until ready to serve.
MAKES 18 COOKIES
2 cups light brown sugar, packed
½ cup salted butter, softened
¼ cup vegetable shortening
2 eggs
½ teaspoon salt
1 teaspoon ground cinnamon
1 teaspoon baking powder
3 tablespoons boiling water
1 teaspoon baking soda
2 ½ cups all-purpose flour
2 cups quick oats
Vanilla Filling
5 tablespoons all-purpose flour
1 cup whole milk
1 teaspoon vanilla extract
1 cup unsalted butter
1 cup granulated sugar
Kosher salt
Oatmeal Whoopie Pies
The origin of whoopie pies is debated, with Pennsylvania crediting Amish cooks and Maine pointing to Labadie’s Bakery in Lewiston, where they were sold in the 1920s. Regardless, these cake-like cookie sandwiches filled with cream remain a timeless classic.
Preheat oven to 350°F and line two baking sheets with parchment paper.
In a large bowl, cream the brown sugar, butter, and shortening until combined. Mix in the eggs, then add the salt, cinnamon, and baking powder. Dissolve the baking soda in boiling water, add it to the bowl, and mix. Gradually add the flour and oatmeal until the dough comes together.
Scoop large tablespoons of dough, roll into balls, and place onto the baking sheets 1-inch apart. Bake for 10 minutes. Remove from the oven and transfer the cookies to a rack to cool completely.
In a small saucepan over medium heat, whisk the flour into the milk, stirring until the mixture thickens. Let cool to room temperature, then stir in the vanilla. In a bowl, cream the butter and sugar until smooth. Add the cooled milk and flour mixture and beat until combined. Season with salt to taste.
Spread filling onto the flat side of a cooled cookie and press a second cookie on top. Serve immediately or freeze for later.
SERVES 12
1 pound challah bread, sliced (day old bread preferred)
1 ¼ cup whole milk
¾ cup heavy cream
3 large eggs
3 large egg yolks
2 teaspoons vanilla paste
½ cup light brown sugar, packed
½ teaspoon kosher salt
½ teaspoon ground cinnamon
⅛ teaspoon ground nutmeg
2 bananas, cut into 1-inch pieces
3 tablespoons unsalted butter
6 tablespoons light brown sugar, packed
1 tablespoons dark rum, optional
1 recipe Easy Whipped Cream (page 247)
Challah French Toast Banana Pudding
Did you stop by our booth at LeadingAge 2024? We showcased our latest culinary concept, "The Sweet Shop" where we featured decadent desserts, candies, and this Nashville classic - banana pudding.
In a large bowl, whisk together milk, cream, eggs, yolks, vanilla, brown sugar, salt, cinnamon, and nutmeg. Mix until sugar has dissolved. Set aside.
Arrange and shingle sliced bread in 9-inch round cake pan. Slowly pour the liquid mixture over bread, ensuring the bread is fully coated. Let assembled bread pudding sit at room temperature for 30 minutes.
Preheat oven to 350°F. Bake room temperature bread pudding for 40-50 minutes until the custard liquid has set and the tops of bread are golden brown. Remove from oven and set aside until cool.
Melt butter in a skillet over medium heat. Add sliced bananas and brown sugar. Stir to coat bananas in butter and sugar. Turn bananas over a few times during the cooking process. Heat until brown sugar has dissolved and bananas are beginning to soften. If desired, drizzle rum over the bananas and toss to coat until dissolved.
To assemble, cut a piece of the challah-french toast and place in the bottom of a small mason jar or dessert glass. Top with a spoonful of the caramelized banana mixture, and a dollop of whipped cream.
SERVES 5
5 large egg yolks
2 ½ cups heavy whipping cream
6 ounces dark chocolate, roughly chopped
½ cup granulated sugar
½ teaspoon kosher salt
1 recipe Easy Whipped Cream (page 247)
Additional Garnish
Dark chocolate, shaved Roasted hazelnuts, chopped
Sous Vide Chocolate Pot de Crème
Outside of France, for some reason, Pots de Crème are the underdog of French custards. They don’t receive nearly as much love as crème brûlées do – but if you go to France, it’s a whole different story. We make this custard full-proof with the sous vide method.
Carefully separate the egg yolks from the whites into separate bowls, save the whites for later use.
In a heavy bottom pot, add the cream and bring to a simmer over medium-low heat, about 5 minutes. Remove from heat and add the broken chocolate pieces.
Allow chocolate to fully melt into the cream, about 5 minutes, stirring occasionally. With and immersion blender, blend until fully combined.
Add sugar and salt to the egg yolks and whisk to combine. Carefully add to the chocolate cream and blend again with the immersion blender until smooth. Strain mixture through a fine mesh strainer and cheese cloth into a separate, clean bowl.
Distribute mixture evenly into 5 mason jars with airtight lids.
Heat your sous vide circulator to 167°F. Add your mason jars and cook for 1 hour.
The pot-de-creme can be served warm or chilled. To serve, garnish with a dollop of whipped cream, shaved chocolate, and chopped hazelnuts (optional).
MAKES 24 PIECES
3 pounds whole almonds, plus more
1 tablespoon whole cardamom pods
1 ¼ cups granulated sugar
1 cup unsalted butter, melted
1 16-ounce package phyllo dough, thawed
Saffron Syrup
3 cups sugar
2 cups water
½ teaspoon saffron threads
Almond and Cardamom Baklava with Saffron Syrup
One of the oldest desserts in history, Baklava history can be traced back to the 8th century B.C., when the Assyrians first baked it in their wood-burning ovens.
In a medium saucepan over high heat, add the sugar, saffron, and water. Bring to a boil and cook until the sugar is dissolved, about 2 minutes. Remove and let cool. Do ahead: You can prepare the saffron syrup in advance; it can be stored in the refrigerator for up to 1 week when covered.
Preheat to 350°F. In a food processor, pulse the almonds and cardamom until finely ground, about 5 minutes. Add the sugar and pulse a few times to incorporate evenly. Set aside.
Prepare a 9”x 13” baking pan by brushing the interior with some of the melted butter. Take one sheet of phyllo and place it in the pan. Brush the top of the phyllo sheet with the melted butter. Repeat this process a few more times until you have used up about ⅓ of the phyllo pastry.
Now, distribute about ½ of the nut mixture evenly over the top layer of phyllo. Continue assembling the baklava, one sheet of phyllo pastry at a time using another ⅓ of the phyllo. Again, brush each layer with a bit of the melted butter. Distribute the remaining ½ of the nut mixture evenly over the top layer of phyllo. Finish the remaining ⅓ of the phyllo pastry following the same process, laying one folded sheet at a time and brushing each layer with melted butter. Brush the very top sheet of phyllo with butter.
Using a sharp knife, carefully cut the pastry into 24 diamond shaped pieces, or a diagonal grid. Top each diamond with a whole almond.
Place the baking dish on the middle rack of your heated oven. Bake anywhere from 35 to 45 minutes or until the top of the baklava turns golden and a skewer inserted in the center comes out clean.
As soon as you remove the baklava from the oven, pour the cooled saffron syrup all over the hot baklava. Let cool before serving.
MAKES ONE 9" PIE CRUST
1 ¼ cup all-purpose flour
½ teaspoon kosher salt
½ cup shortening, cut into small pieces and frozen for 30 minutes
¼ cup ice-cold water, plus more as needed
Easy Pie Crust
Everyone needs a tried-and-true pie crust recipe in their repertoire. This basic pie crust with shortening, which comes together with fewer than five pantry staples, is perfect for all your pastry crust needs.
Whisk together flour and salt in a large bowl. Cut in chilled shortening with a pastry blender until the mixture resembles coarse, pea-sized crumbs.
Add half of the ice-cold water; use a fork to stir the flour up from the bottom, just until it's mixed in. Press down on any chunks and continue working the dough around the bowl.
Continue to add ice-cold water, mixing a little at a time just until dough is moist enough to hold together when molded; you will not need more than a couple tablespoons over the total and in fact, may need less. Do not add too much water!
Gently gather dough together into a ball and wrap in plastic wrap. Chill in the refrigerator for at least 30 minutes. For best results, chill for 4 hours, and up to 2 days.
When ready to use, roll dough on a lightly floured surface, being careful not to overwork it. Fit dough into a pie plate. If it crumbles or tears as you work it, just pinch and press it back into shape. Use as directed in your pie recipe.
Tip: Chill everything before you start. Put the bowl and pastry cutter in the refrigerator, and keep a couple ice cubes in the water to keep it cold. This keeps the shortening from blending too much with the flour, leaving you with little pockets of shortening that result in extra flakes.
MAKES 1 CUP
1 cup heavy cream
2 tablespoons confectioners' sugar
1 teaspoon vanilla extract (or ½ teaspoon vanilla paste)
Easy Whipped Cream
Whisk cream in a chilled glass or metal bowl with an electric mixer until frothy.
Add confectioners' sugar and vanilla; continuing to beat until soft peaks form, about 5-8 minutes.
Do ahead: You can prepare whipped cream in advance; it can be stored in the refrigerator for up to 3 days when covered.
MAKES 1 CUP
4 large egg whites
½ cup granulated sugar
¾ cup powdered sugar, sifted
Easy Meringue
Using an electric mixer on high, beat egg whites until loose and foamy, about 2 minutes.
With motor running, gradually add granulated sugar and beat until stiff, shiny peaks form, about 5 minutes.
Gradually add powdered sugar and beat another 2 minutes (meringue will deflate slightly when you add the powdered sugar but will regain volume).
Do ahead: You can prepare meringue in advance; it can be stored in the refrigerator for 2 days when covered.
MAKES 1 PIE
4 large eggs
1 ½ cups granulated sugar
1 cup buttermilk
½ cup unsalted butter, melted, cooled
2 teaspoons vanilla extract
⅓ unsweetened cocoa powder
¼ cup all-purpose flour
¼ teaspoon kosher salt
1 recipe Easy Pie Crust (page 246)
Additional Garnish Easy Whipped Cream (page 247)
Chocolate Buttermilk Pie
Although this pie’s roots are in the United Kingdom, it is considered a traditional pie of the South. It’s mildly sweet with deep chocolate flavor, smooth, and custardy, with a great tang from the buttermilk.
Roll out the Easy Pie Crust dough on a lightly floured surface to a 10" round. Transfer to a 9"-diameter pie pan. Lift edges and allow dough to slump down into pan, then press dough firmly into bottom and sides and crimp the edges as desired.
Chill pie shell until firm, at least 1 hour and up to 1 week (cover tightly in plastic wrap if chilling longer than 1 hour).
Preheat to 375°F.
Whisk eggs and sugar in a large bowl to combine. Add buttermilk, butter, vanilla, cocoa powder, flour, and salt and whisk until smooth.
Remove pie crust from the refrigerator and pour filling into the crust, bake for 15 minutes.
Reduce oven temperature to 350°F and continue to bake pie until a tester inserted into the center comes out clean, about 45 minutes. Transfer to a wire rack and let cool.
Cut pie into slices and serve with Easy Whipped Cream.
MAKES 1 CAKE
½ tablespoon package dry yeast, dissolved in ¼ cup lukewarm water
¼ cup sugar
1 egg
¾ teaspoon salt
⅓ cup vegetable shortening
½ cup hot mashed potatoes (if using instant, use water for liquid & do not add salt)
½ cup scalded whole milk, cooled to warm
3 cups all-purpose flour
¼ cup melted, unsalted butter
Crumble Topping
¼ cup flour
½ cup light brown sugar, packed
2 tablespoons saleted butter
Ground cinnamon
Moravian Sugar Cake
This rich coffee cake, with roots in Moravian Church settlements, is a perfect treat for holiday brunch or a sweet pairing with coffee anytime. A tradition since 1930, Dewey’s Bakery in North Carolina has made this buttery classic a staple.
Proof the yeast by dissolving it in lukewarm water with a pinch of sugar (avoid hot water, as it can kill the yeast). Let sit until the mixture foams lightly.
Preheat the oven to 350°F.
In a large mixing bowl, cream together the eggs, salt, sugar, and shortening until smooth. Gradually mix in the warm milk and mashed potatoes. Stir in the yeast mixture until well combined.
Add the flour, one cup at a time, until the dough is stiff enough to handle. Turn the dough out onto a floured surface and knead until soft and spongy, about 10–15 minutes by hand (or mix in a food processor until a ball forms). Transfer the dough to a greased bowl, cover, and let rise until doubled in size, about 2–3 hours.
Punch down the dough and place it on a greased cookie sheet or in a 13x9-inch pan. Cover and let rise again until doubled, about 1 hour. Brush the top of the dough with melted butter and use your fingers to punch holes about 1 inch apart.
Prepare the crumble topping by mixing thoroughly, then fill the holes with the mixture. Sprinkle the remaining crumbs evenly over the top and dust with cinnamon.
Bake for 20 minutes, or until the cake is golden and fully baked on the bottom. Serve warm.
MAKES 1 CAKE
White Chocolate & Coconut Snowball Cake
Have you heard of the Tom Cruise Cake? It's a white chocolate bundt cake from Doan’s Bakery in LA that Tom famously sends to all his friends at Christmas. Not on the list this year? No problem! Below is perfect copy-cat recipe that will make you feel like an "A-list."
Preheat to 325°F. Spray a 12-cup bundt pan with nonstick spray and dust with granulated sugar, set aside.
In a medium size bowl, whisk together flour, baking powder, and salt, set aside. In a small mixing bowl, stir together the coconut milk, buttermilk, and coconut emulsion, set aside.
In the bowl of a stand mixer fitted with a paddle, beat the butter and sugar on medium speed until light in color and fluffy in texture, about 3 minutes.Stir in the melted white chocolate, followed by the eggs and egg whites, making sure to scrape down the sides and bottom of the bowl in between additions. Continue to beat on medium-high speed for about 2 minutes, until the mixture gets smooth in texture and slightly bigger in volume.
With the mixer on low speed, add ⅓ of the flour mixture, followed by ½ the coconut mixture, another ⅓ of the flour, the second ½ of the coconut mixture, and then the remaining flour mixture. Stir until just combined.
Pour the batter into the prepared pan. Bake for 50 to 55 minutes, or until a toothpick inserted in the center of the cake comes out clean. Remove from oven and place the bundt pan on a cooling rack to cool completely before inverting the cake on a cake stand.
Garnish Shredded coconut, sweetened
For the Coconut Buttercream, beat the butter and cream cheese for about 2 minutes in a stand mixer, gradually adding the sifted powdered sugar one cup at a time. Stir in the coconut extract and salt to taste.
Spread the Coconut Buttercream on top of the cake and cover with the shredded coconut.
MAKES 1 CAKE
⅔ cup unsalted butter, room temperature
¾ cup granulated sugar
2 eggs, room temperature
2 cups all-purpose flour
1 teaspoon baking powder
¼ teaspoon kosher salt
Pastry Cream
1 ¼ cups whole milk
1 tablespoon orange zest
1 egg
1 egg yolk
⅓ cup granulated sugar
¼ cup all-purpose flour
2 tablespoons cornstarch
1 teaspoon vanilla extract
Basque Glaze
1 egg, room temperature
¼ cup whole milk
Gâteau Basque
Gâteau Basque is a classic Basque cake straight from the gastronomic epicenter of Spain. Typically served in the morning alongside a cup of coffee, be sure to garnish with cherry compote for an authentic experience.
For the pastry cream, pour the milk and orange zest into a medium saucepan over medium-high heat and bring to a simmer. In a sperate bowl, beat the egg, egg yolk, flour, cornstarch, and vanilla extract until it's pale yellow, thick, and paste-like.
Once the milk is hot, slowly add it to the egg mixture, whisking constantly to temper the eggs and not cook them. Pour the custard back into the saucepan and set over medium heat. Whisk constantly until the mixture boils and thickens, about 3-4 minutes. Push the pastry cream through a sieve into a heatproof container. Press a piece of plastic wrap onto the top to prevent a skin from forming, chill in the fridge for 4 hours, or overnight. Do ahead: You can prepare the pastry cream in advance; it can be stored in the refrigerator for 3 days when covered.
Preheat the oven to 350°F. Grease and line a 7-inch springform tin or cake tin with parchment paper, then lightly dust with flour. Whisk the flour and baking powder in a large mixing bowl. In a separate bowl, beat the butter and sugar until smooth and creamy. Add the eggs one at a time, beating well between each one. Gradually mix in the flour mixture until the batter is smooth and combined.
Transfer to a piping bag fitted with a large round nozzle. Pipe a spiral of batter to cover the base of the tin, then pipe a single circle around the outside of the tin to form a wall about 1 inch high. Fill the center of the tin with the pastry cream, then smooth the top. Pipe the remaining batter over the top of the pastry cream to seal, making sure the top is smooth. Chill in the fridge for at least 15 minutes. For the glaze, combine the egg yolk and milk, whisking until well combined. Brush the mixture over the top of the cake and use a fork to score a crosshatched pattern on top.
Bake the gâteau until it's well risen and golden brown, about 45 minutes. Let the gâteau cool completely on a wire rack before serving.
CCL Hospitality Group is a national leader in culinary and support services, operating through four distinct companies: Morrison Living, Coreworks, Unidine, and The Hub. We deliver world-class hospitality infrastructure, backed by top talent and innovative solutions.
Our culture of service is dedicated to shaping the industry’s future leaders, with a focus on delivering elevated hospitality experiences for communities nationwide.
Founded with a clear vision, CCL Hospitality Group is committed to enhancing the lives of those we serve through exceptional food, professional service, and an unwavering dedication to quality.