2 minute read
Pumpkin Decorating Without Carving
PUMPKIN
without Carving
Advertisement
Fall is just around the corner and as you may have recently noticed during your most recent grocery shopping trip, pumpkins have returned once more. Soon it’ll be time to decorate your home with jack-o-lanterns and autumn decor however you may encounter an issue. You have no skills at carving a pumpkin. What makes it worse is that all the pumpkin carving kits have horribly flimsy tools that bend easily and barely make a dent in even the softest pumpkins. What’s worse is having to reach in and scoop out all the slimy seeds and try your best not to get it everywhere. After all that. . . the pumpkin lasts maybe a few days before turning green in the warm humid weather.
Luckily we have several alternatives that are not only easy but also free of pumpkin guts. Since they do not require damaging the pumpkin, it’ll ensure that they last much longer than your standard jack-o-lantern. There are several options to choose from to suit your skill level and talent so you won’t be stuck with a failed pumpkin (we’re lookin at you Pinterest). So take a look then head over to your local craft store.
LEVEL 1
2 pumpkins & 1 can of gold spray paint
Wipe the pumpkin down with soap and water to get off any oil and dirt. Once it’s dry set it outside on paper or anything you don’t mind turning gold. Shake the can for a minute to ensure you get even coverage before spraying a thin even coat around the pumpkin. Wait 20 minutes then apply another coat then repeat 2 more times. Let dry for a day and viola! One can should be enough for 2 pumpkins.
LEVEL 2

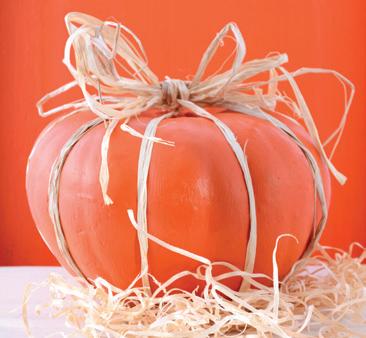
1 pumpkin & 1 - 50 yard stool of straw ribbon (raffia)
Start by choosing a pumpkin with a stem. Tie the end of the ribbon around the stem to anchor it. Use the grooves of the pumpkin to guide you, they will also help keep the ribbon from slipping. Use the stem to wrap the ribbon around it before moving on to a different groove (hot glue also does the trick). Once done secure it with a knot and make a bow from the ribbon to place on top.
LEVEL 3


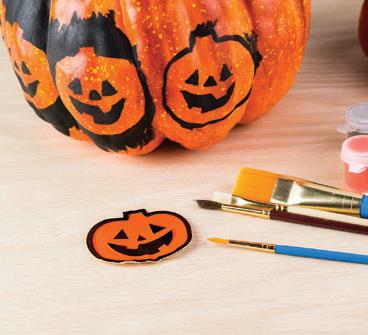
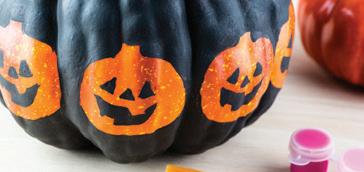
1 pumpkin, paint brushes, black paint & pencil. Draw small jack-o-lanterns around the pumpkin with the pencil. With a smaller paint brush paint the edges of the pumpkins first along with the face. Once all of them have been completed, finish painting the rest of the pumpkin black. You may need 2-3 coats to ensure the pumpkin is fully covered. The end result will be a black pumpkin with cute mini pumpkins revealing the natural orange underneath.


