11 minute read
Mathematics


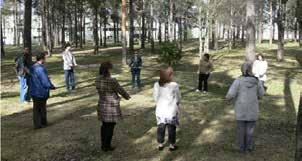
5. Geometry rope
Purpose: Practise geometry terms.
Advertisement
Age: 7–15.
Divide the class into groups of 6–10. Give each group a piece of rope at least 6 m long that is joined at the ends. Ask the groups to form different geometrical figures, e.g. a triangle, a rectangle, etc. Older pupils can do the exercise in silence or even blindfolded.
Square
Triangle Rectangle Circle
6. Secret picture
Purpose: Communication, practise telling the time, the points of the compass or other position words. Older pupils can do the exercise in a foreign language.
Age: 7 and over. The pupils work in pairs. Each pupil has a one-metre long length of rope. They sit with their backs to each other and lay their ropes in front of themselves in the shape of a circle. One in the pair places out their objects and tells the other where he or she is putting them, e.g. “I’m putting a cone at 12 o’clock”. When all the objects have been put out, the results are compared. When both have tried leading the other, the rope can be used to look for items one metre in diameter or circumference.
7. Concept bingo
Purpose: Practise concepts.
Age: 6–9.
Work in pairs. Each pair has a bingo card with 3 x 3 squares. Each pair gathers nine different objects from nature that can fit in the squares. The teacher now tells the pupils to remove one object at a time, e.g. the longest, the heaviest, the oldest, etc. Every time a pair get three empty squares in a row they shout “Bingo”. Keep going until all squares are empty.
8. All numbers – go!
Purpose: Mental arithmetic.
Age: 7 and over.
Mark out a rectangle, for example with a rope, roughly the size of a volleyball pitch. The pupils stand along one of the short sides. Each one has a card with a figure from 1 to 9.
The teacher stands in the middle and calls out: “All numbers – go!”
The pupils respond: “Which number”.
The teacher replies, for example: “7”.
Pupils with cards with the number 7 on or who can form a group by adding their numbers together to make 7 (e.g. 3+1+3) can now cross to the other side holding up their cards for everyone to see. The ones who cannot make 7 can now try to run across without the teacher catching them. Difficulty can be increased by using other forms of arithmetic.
9. Number on the collar / Number on the forehead
Purpose: Practise understanding of numbers.
Age: 5 and over.
Pin a sheet of paper with a number on to each pupil’s collar with a clothes peg or let them hold them against their foreheads. They are not to see their own numbers. Everyone goes round asking each other questions to try to guess the number, e.g. “Is it more than 8”? “Is it less than 10”? Older pupils can have fractions, decimals, negative numbers, etc. End by getting the pupils to stand with their numbers in ascending or descending order.
10. A metre ofrope
Purpose: Practice measuring, using mathematics in real situations.
Age: 5–15.
Work in pairs. Each pair has a piece of rope one metre long.
1.
2. 3. 4. 5. 6. 7. 8.
9. Guess how long a metre is by one pupil holding out his or her arms and then the other one using the rope to check. Find something 1 metre long. Find something half a metre long. Find something 2 metres long. Find a tree one metre in circumference. Measure the fattest tree you can find. Measure the circumference of your head. Arrange four pieces of rope to form a square. Find out how many children can stand inside it. Guess how long 10 metres is. Walk the distance. Use your rope to measure and see if you were right.
11. What is the volume ofa standing tree?
Purpose: To learn how to measure volume and estimate how much timber can be obtained from a tree.
Age: 12 and over.
Using this formula you can make a rough calculation of the volume of a tree trunk. First use one of the methods in no. 13 to calculate the height of the tree.
The area of the base of the tree is a circle where the area is the square of the radius multiplied by pi (r2 ·π). Multiply the area by the height of the tree (h) and divide the result by 2 since the tree is narrower towards the top.
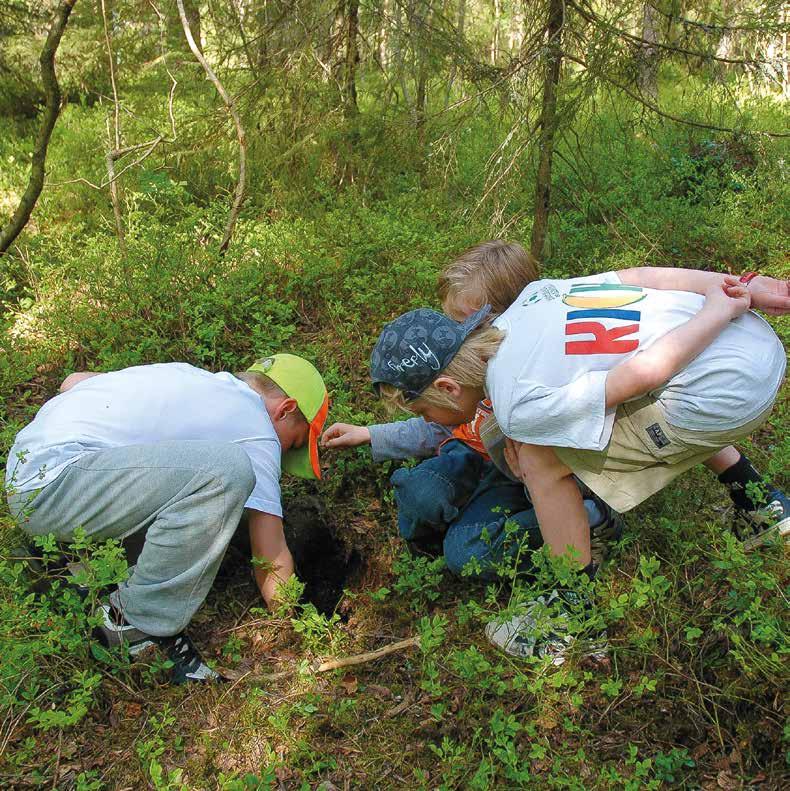
12. How many legs animals have
Purpose: Practice geometry and measuring and learn about animals.
Age: 3–9.
The pupils gather eight sticks each and then form themselves into a circle. They place their sticks in a single pile in the middle. The teacher asks the first pupil: How many legs does a fly have? The child enters the circle and picks up as many sticks as a fly has legs. Everyone in the circle can help count. The pupil returns to the circle and the teacher asks the next one: How many legs does a butterfly have?
When all the children have had a question and are standing holding their sticks, the teacher divides the class into smaller groups.
The groups are given tasks like: Make a circle with your sticks and see how many children can fit inside.
Look at your sticks and guess how long a line they would make if you put them one after the other. Put them out and see who guessed best. Guess how long the line would be if you used everyone’s sticks. Put them out and see who guessed best.
13. Simple methods to measure the height ofa tree
If you don’t have a height measurer, you can still estimate the height of a tree using one of the following methods. Help each other to try different methods and compare the results. Two methods can be used to measure a distance by stepping. Either measure the length of your own step and multiply this by the number of steps or practice taking one-metre steps and step out the distance by walking it.
Method 1 Begin by measuring how long your own step is when you are walking normally. Stand about ten metres from the tree. Hold up a stick with your arm outstretched and mark the height of the tree with your thumb. Lay the stick down as if the tree had fallen aside and ask someone to stand at the end of the stick that is not at the base. Step out the distance from that person to the tree and multiply that by the length of your own steps.
Method 2 Ask a person to stand next to the tree. Stand about ten metres from the tree and hold up a stick with your arm outstretched. Measure the first person’s height by marking it on the stick with your thumb. Then, with your arm outstretched, measure how many times the person’s height the tree is. Multiply the result by the person’s actual height and this will tell you how high the tree is.
Method 3 Take a straight stick that is a little longer than your arm. Hold it with your arm outstretched as shown in the picture. Make sure your thumb is at the base of the tree and then move forwards or backwards so that the tip of the stick is at the top of the tree. Step out the
distance between yourself and the tree and multiply that by the length of your step.
Method 4 This method assumes that the sun is making distinct shadows. Stand so that you can measure the proportion of your shadow to your height. Measure the tree’s shadow and calculate the height of the tree based on the same proportion.
Method 5 This method uses a height measurer that you can make yourself (you can find instructions for making one a little further down). Stand exactly 15 metres from the tree you want to measure. Hold up the height measurer and use the straw as a sight to find the top of the tree. Put your thumb on the string when it stops moving to lock it in the position it is in when you aim at the top of the tree. Read off the scale and note down the result. Then do the same again but this time aim at the base of the tree. Add the two results together.
C
B C
B A
Pace out the height of the tree
Make your own height measurer
Materials: graph paper (5 mm squares), cardboard, ruler, pencil, tape, thumbtack, drinking straw, a length of thin string and a weight (e.g. a metal nut).
• Take a piece of graph paper. Mark a point 12 squares from the left-hand edge and 6 squares from the top (this is where you will put the thumb tack).
• Using the ruler, draw a horizontal line 15 squares below the point you marked earlier.
• Divide the line into metres, each square corresponding to 1 metre and with 0 directly below the point you marked. Mark metres both to the right and to the left.
• Cut out a piece of cardboard measuring 20 cm by 15 cm. Tape the graph paper to the cardboard so that its upper edge is parallel to the cardboard’s upper edge.
• Take a piece of string about 35 cm long. Make a small loop at one end. Tie a metal nut on the other end. Place a thumbtack in the loop and attach the string at the point you marked earlier.
• Tape a straw along the upper edge of the cardboard.
15 squares
5 5 10 15
Read off here
A
C
B
Read off B
Read off A
14. Discover Pi π
Purpose: Purpose: investigate and understand mathematical concepts.
Age: 10 and over.
Divide the class into suitably sized groups. Each group must find and investigate circle-shaped things in the school yard. These might for example be a round table, a tree or a bicycle wheel. If it is difficult to found round objects, the group can draw a circle on the ground. (Use a piece of string and hold it at a centre point to draw the circumference.) Draw the circle with a stick or other suitable object. Then investigate how long the circumferences and diameters of the different circle-shaped objects are. Note down the figures with care so as not to mix them up. When the groups return to the classroom, enter their figures in a table on the board (see below). Ask the pupils to work out what the circumference divided by the diameter is and enter the figures in the last column. If all the measurements have been made precisely enough, the value in the last column will be about the same for all the objects. You have discovered Pi π!
Object
Table
Tree
Bicycle wheel
Circumference Diameter Circumference/Diameter (π)
15. Ball in the hole
Purpose: Practice team-work and for the youngest pupils learn to count from 1 to 10.
Age: 5 and over.
Use a sheet or a shower curtain. Cut out ten holes and number them from 1 to 10. The holes must
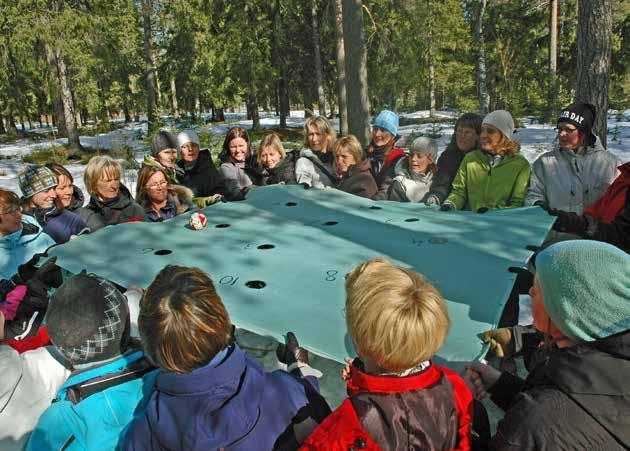
be of the right size for the ball to fall into but not through. The pupils stand around the sheet/shower curtain and grab the edge. They now have to cooperate to get the ball from hole 1 to hole 10 in sequence. If the ball falls into the wrong hole, they have to start again. The exercise can be done with two teams competing.
16. Mathematic machine
Place a fabric over a table. Have two pupils crawl under the table with a calculator, flashlight and pen. They are now the “brain” of the machine. Mark where in and out are on the machine. The pupils in the machine are given a card with the mathematical expression the machine should perform. For example, × 3 + 6 or + 0.5 × 3.
Then have different pupils come up and put a number on a piece of paper in the machine. The pupils who act on the machine’s “brain” now perform the given counting operation and send out the answer written on the back of the paper that classmate sent in.
Then a new pupil is allowed to come in and insert his paper with a new number that the machine sends out after it has done the mathematical calculation.
All pupils in the class can then be helped to figure out what the machine does with the number that is stopped. When some pupils say they know what the machine is doing, they have to come forward and enter a number into the machine and also write on the back what they think should come out. The pupils who can give two numbers with correct answers have probably come up with what the machine does.
When it’s time to reveal what the machine is doing, ask the pupil to tell it. It can lead to several different explanations, which still mean the same thing, although they can sound completely different. In the first challenge, one explanation could be that you multiply the number that is entered by three and then add by six,
× 3 + 6 It could also be that you first add two to the number that is entered and then multiply by three,
(× + 2) × 3
How come both explanations give the same answer? An algebraic explanation is
(× + 2) × 3 = 3 × (× + 2) = 3 × + 6
The pupils may not understand the formal way of writing, but after a few examples, the pupils are usually convinced that the same operation can be expressed in different ways.
Once the pupils understand what the challenge is, it is time to let them go on their own.
Then they work two and two with a cardboard box, calculator and cards with different mathematical operations.


