

As part of our ongoing effort to continually make your digital banking experience seamless, we at Mascoma Bank have been working on a major upgrade to our platform. We have focused on creating an experience that is convenient, easy, and provides you with the flexibility to take care of your finances anytime from anywhere With this upgrade, in addition to a new design and user-friendly experience, we have added some new features such as Card Controls, Financial Wellness, Goals, and Locations.
This guide is designed to assist in answering questions and help you navigate through some common transactions.
Browser and Device Support
You can access your accounts via desktop, tablet, or mobile devices anytime, anywhere. For an optimal experience, make sure your devices are using the most updated versions of software available
Browser Support: Make sure your browser is within the latest 2 versions (Safari, Chrome, Edge, Firefox). Please note, Internet Explorer 11 does not support digital banking and standards that are implemented in newer browsers.
Device Support:
Windows: Versions still supported by Microsoft and support a browser listed above OS X: Versions still supported by Apple and support a browser listed above
Android: Version 9.0+
iOS: Last 2 major releases
Enroll Now
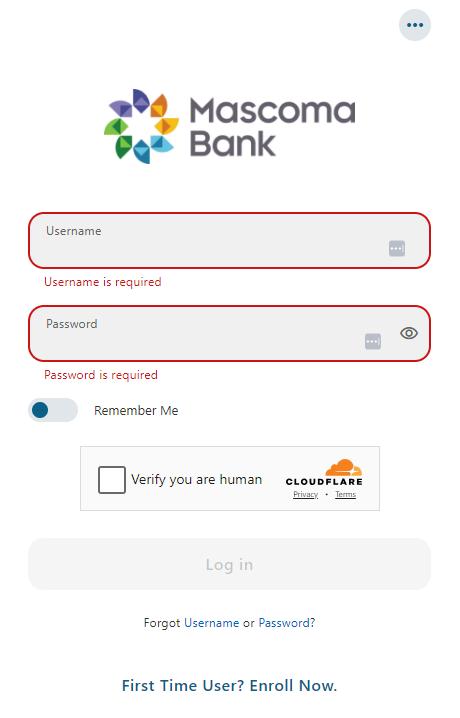
Click “First Time User? Enroll Now.”
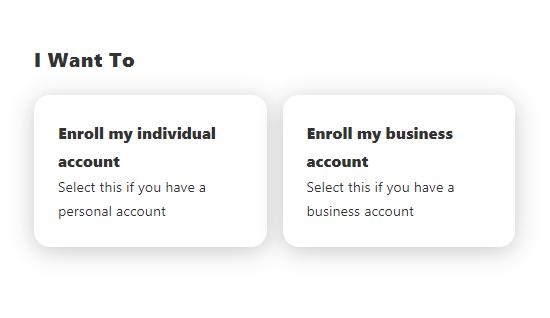
For personal accounts, choose “Enroll my individual account.”
Accept the disclosure by clicking “I agree” and “Continue ”

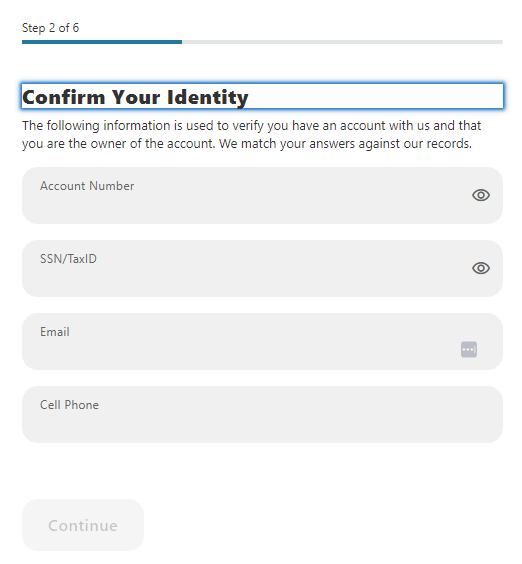
Confirm your identity.
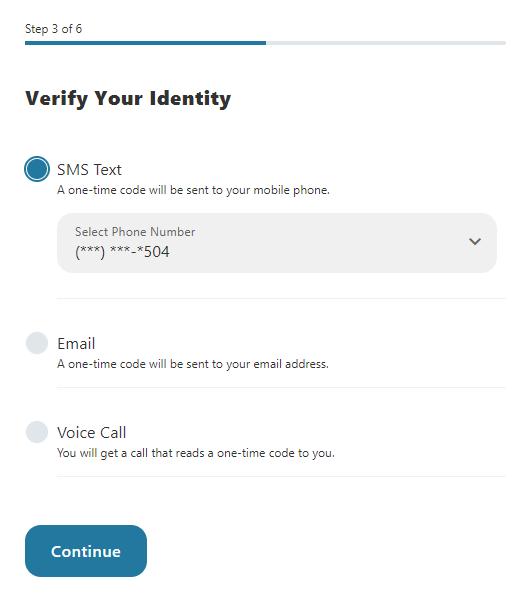
Choose your preferred method for verification and click “Continue ”
Enter the Verification Code and click “Verify.”

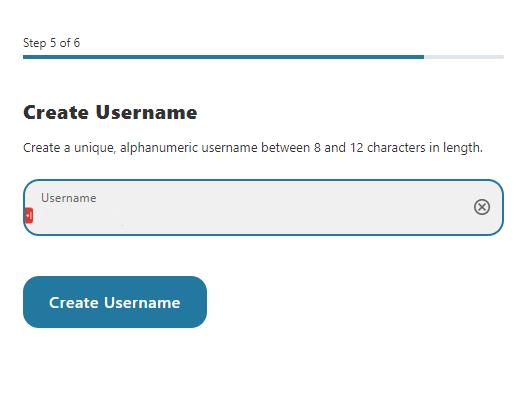
Create a username.
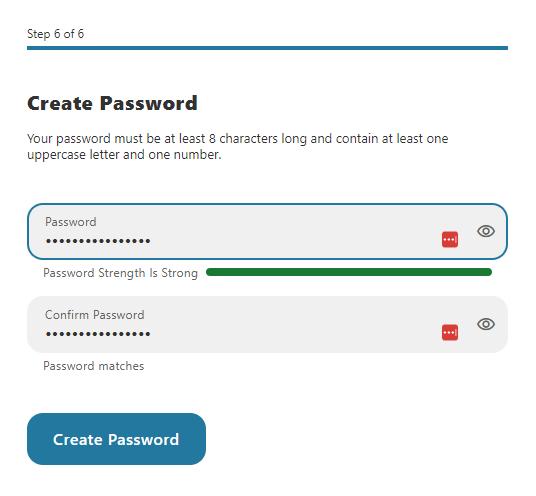
Create a password. You will then be brought to the dashboard.
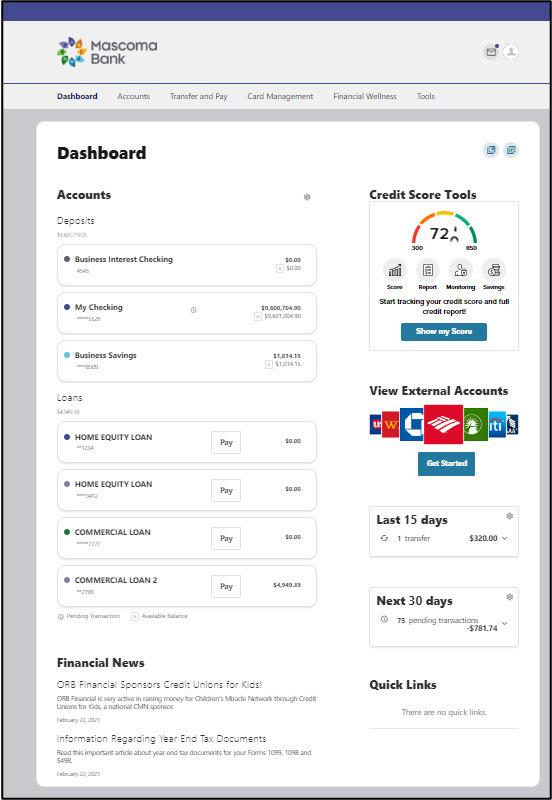
Once you have successfully logged in, the dashboard will provide immediate access to the features you will likely use most frequently, requiring fewer clicks to perform financial tasks online. Here is a high-level overview of the summary dashboard from a desktop view.
1. Credit Score Tools shows the primary account holder's credit score.
2 Accounts are grouped by Account Type Class (e g , Checking, Savings, Loans)
3 Linked External Accounts from other Financial Institutions
4. Activity Modules provides a quick glance of recent and future activities.
Please note: If you want to change the order in which your accounts or loans appear on your (home) screen, you can do that through our computer-based digital banking, but currently it is not possible to reorder accounts on the app
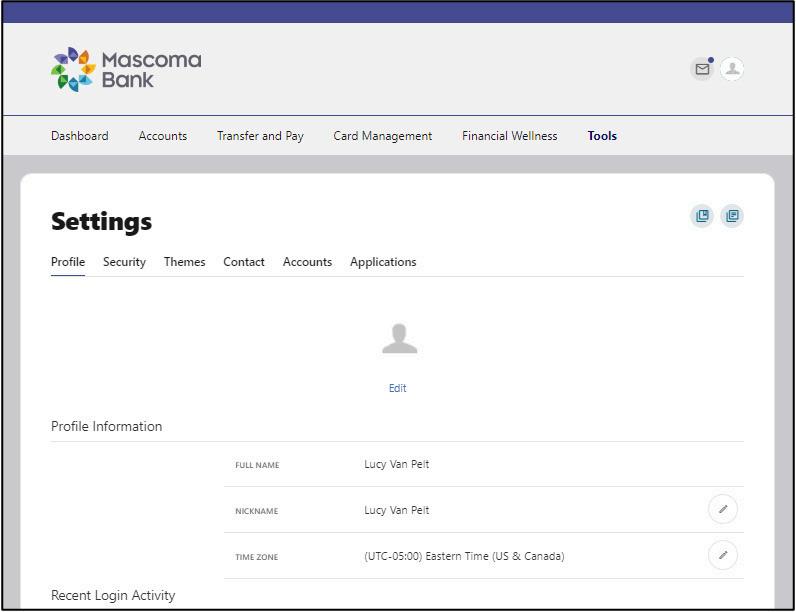
Settings allows you to view, update, and manage the settings that are applicable to your account and overall digital banking experience. You can navigate to Settings by clicking on the Profile icon -> Settings or by clicking on Tools -> Settings.
Profile: Enter profile information, such as nickname, time zone, profile picture, and view your recent login activity
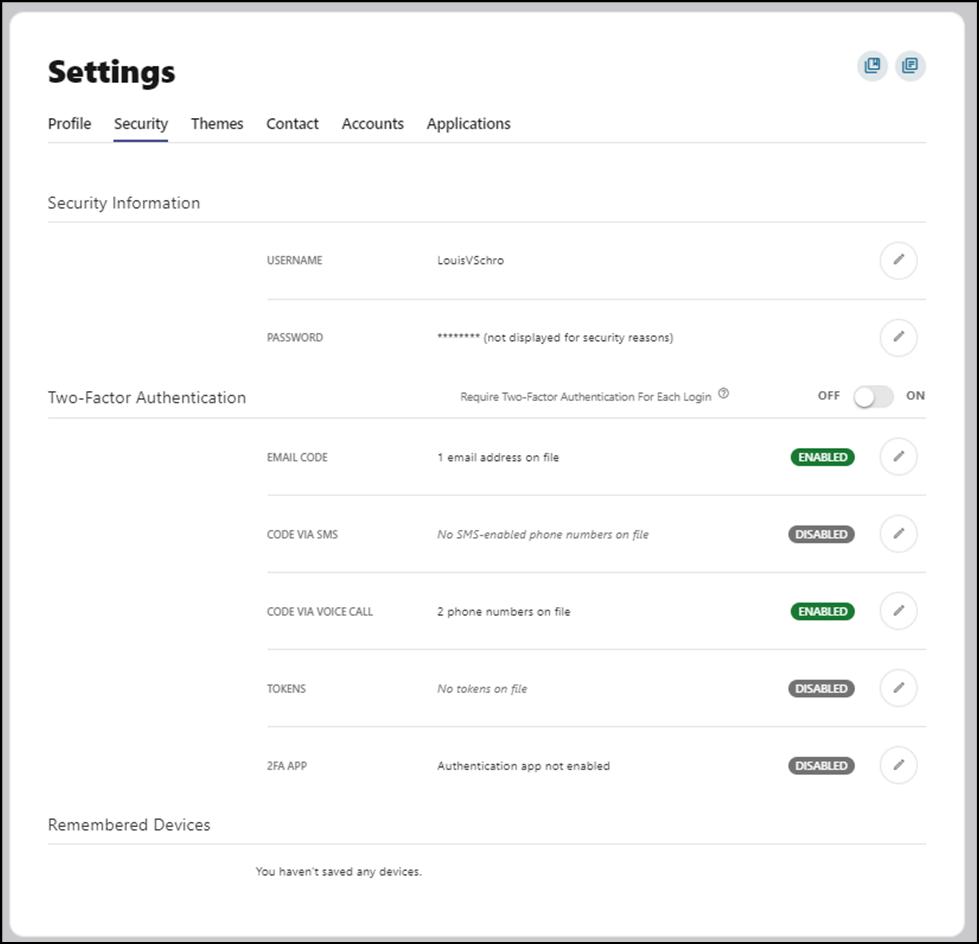
Security: View and edit security details, such as username, password, and two-factor authentication, and maintain your authenticated devices.
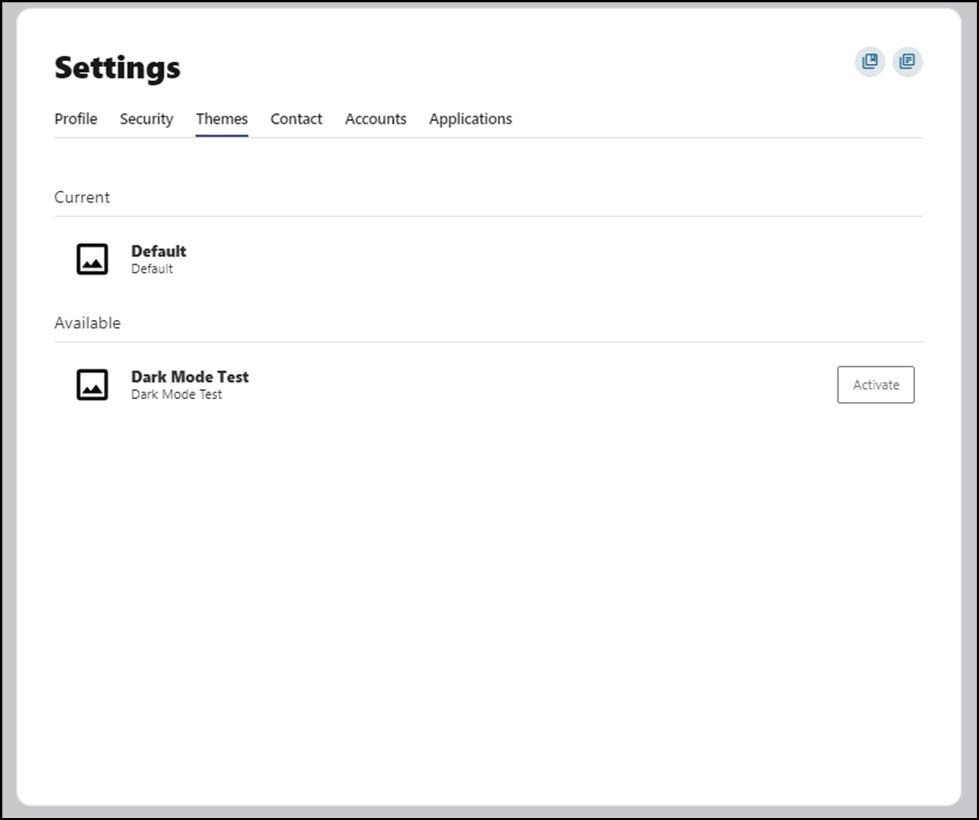
Themes: Personalize the look of your digital banking experience.
Widgets: Choose which widgets are displayed and the order they appear on your home dashboard
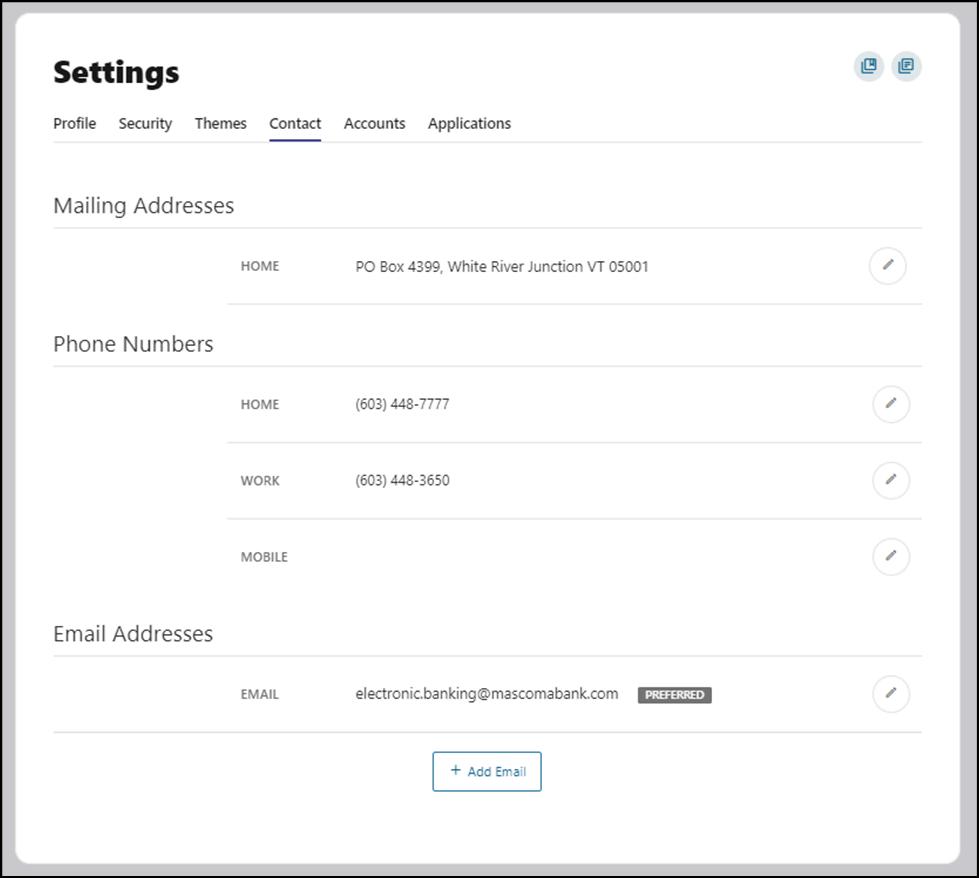
Contact: Make modifications to contact info, including address, phone numbers, and email addresses.
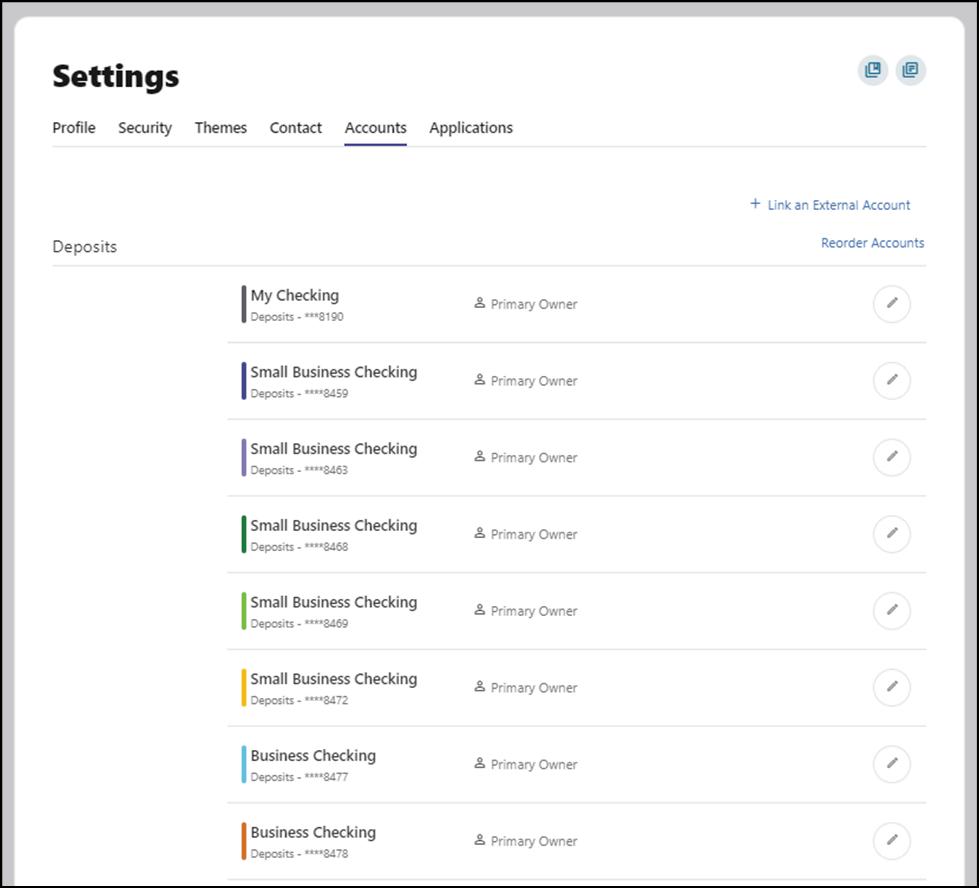
Accounts: Configure account color and nickname, display order, or hide accounts from display. You can also request access, confirm, or delete external (ACH) accounts.
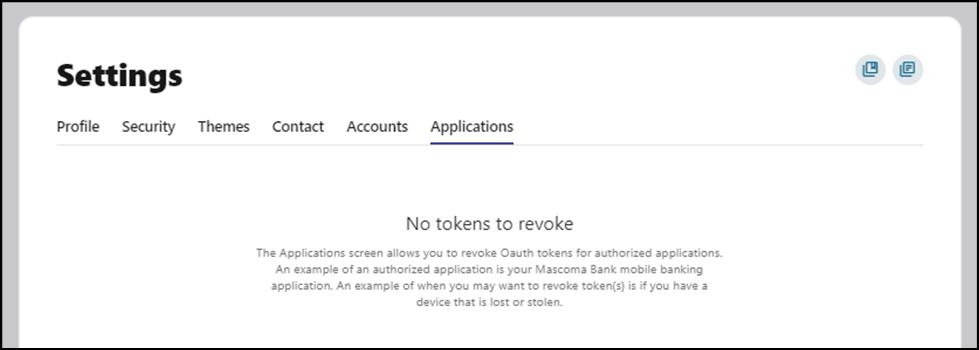
Applications: View and revoke access to an authorized device
Security Tab
Themes Tab
Contacts Tab
Accounts Tab
Applications Tab
We’ve organized information within five navigation menu categories located at the top of your dashboard to help you quickly and seamlessly navigate to the features and tools you’ll use the most
This guide will show the default layout for the dashboard navigation. However, Mascoma may make changes in the future.
Accounts: Gain a comprehensive view of your account details and transaction history
Statements: View documentation related to your accounts (statements, tax documents, etc )
ClickSwitch: We’ve partnered with ClickSwitch to make it easy for you to switch your direct deposits from your previous financial institution to your new Mascoma Bank account.
Transfers: Perform an immediate transfer of funds, pay loans, schedule future or recurring transfers, link internal or external accounts, view transfer activity.
Bill Pay: Make a payment, manage the payee’s information and details, add payees, and view the payment history or scheduled activity and manage eBills.
Manage My Cards: Block your card to prevent it from being used for new purchases without closing your account. You can unblock your card at any time.
Card Updater: Instantly update your card everywhere you pay online
Credit Score Tools: View your credit score.
Savings Goals: Create, manage, and track progress on your savings goals. Create and manage income and expense thresholds
Spending: View spending habits in different categories and track recurring expenses
Check Services: Stop payment on a check, reorder checks, and set up a check withdrawal
Customer Service: Here you can update your address or submit a travel notice for your debit card(s).
Message Center: Send messages and respond to inquiries using the secure message center.
Settings: Update and manage settings for your profile, security, and notifications.
Alerts: Update and manage alerts.
Locations: Locate one of our branches or ATM locations
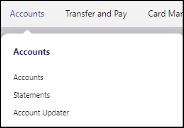
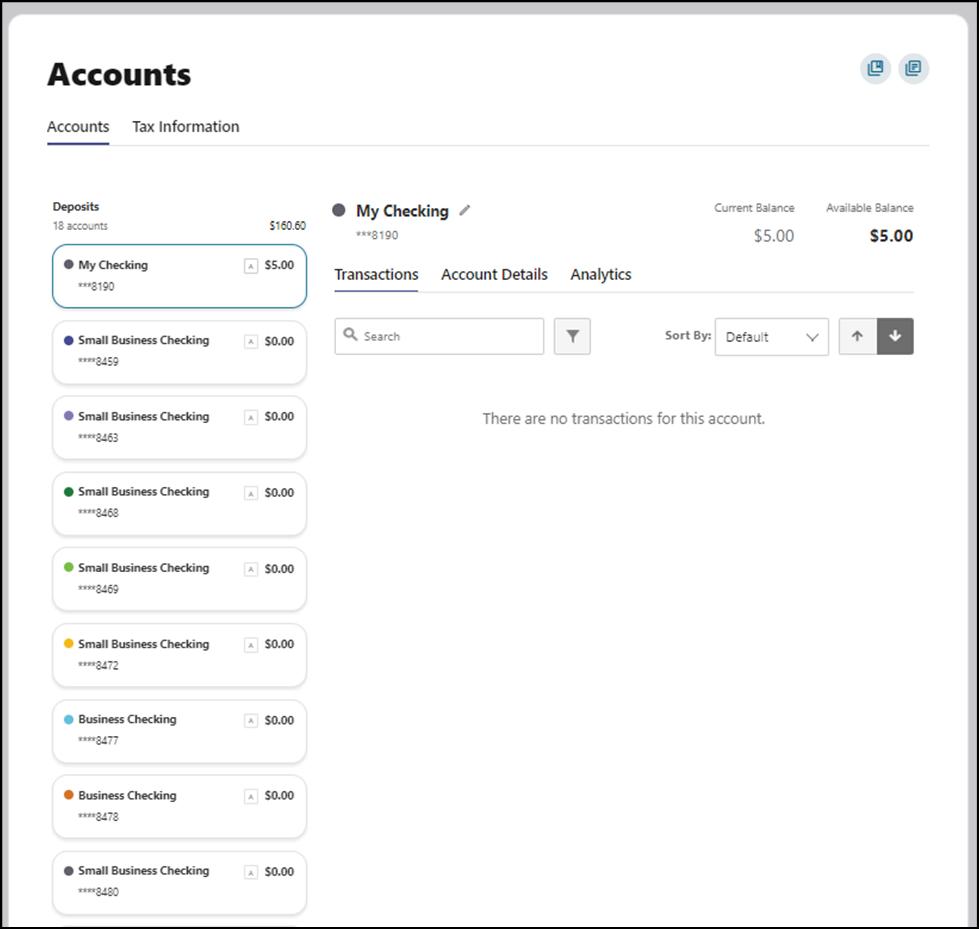
To navigate to your accounts, click on the Accounts category in the navigation menu and select "Accounts" from the list.
The Accounts tab will list details related to all your Mascoma Bank accounts along with transaction level data.
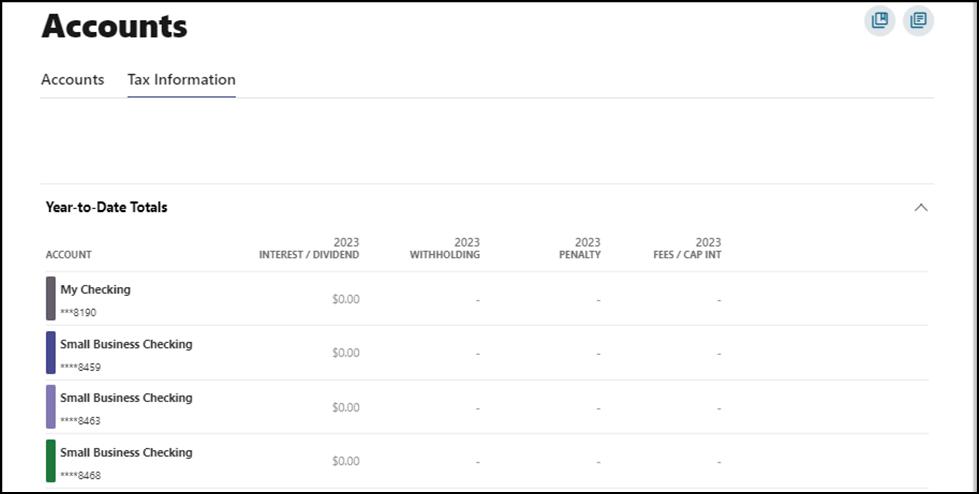
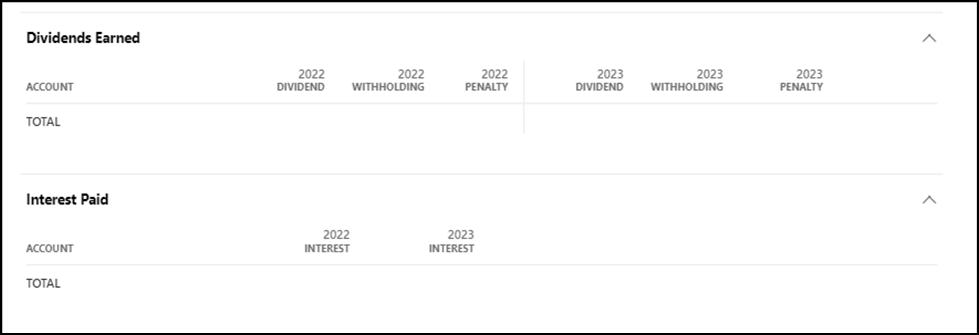
The Tax Information tab will list your tax data.
To navigate to your eStatements, click on the Accounts category in the navigation menu and select “Statements” from the list.

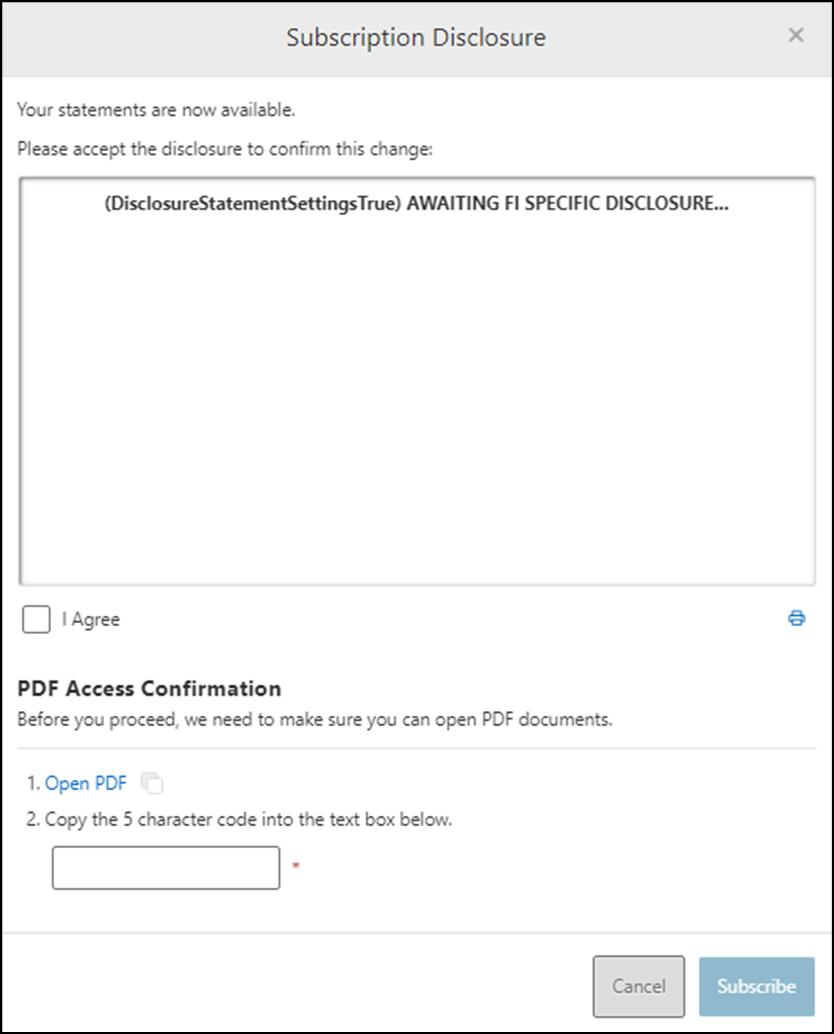
The overview tab lets you subscribe to eStatements if you have not already by clicking on "Subscribe" button. The screen below appears upon clicking the "Subscribe" button. You will have to review the disclosure, confirm if you can open PDF documents, and check the box "I Agree." The statements tab will have all of your eStatements.
ClickSwitch
Click on the Accounts category in the navigation menu and click “ClickSwitch ” We’ve partnered with ClickSwitch to make it easy for you to switch your direct deposits from your previous financial institution to your new Mascoma Bank account. Click “Open.”

This will launch another web page. You can choose to switch direct deposits or switch recurring payments
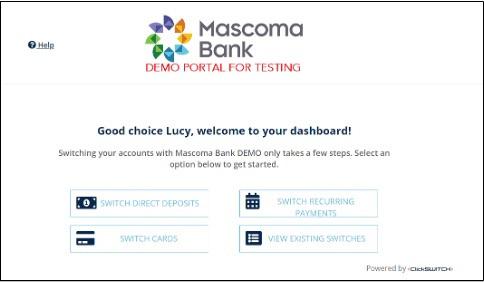
You have the option of switching by manually entering details or by using Switch Assist
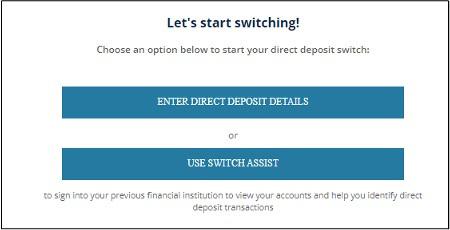
Switch Direct Deposit Manually
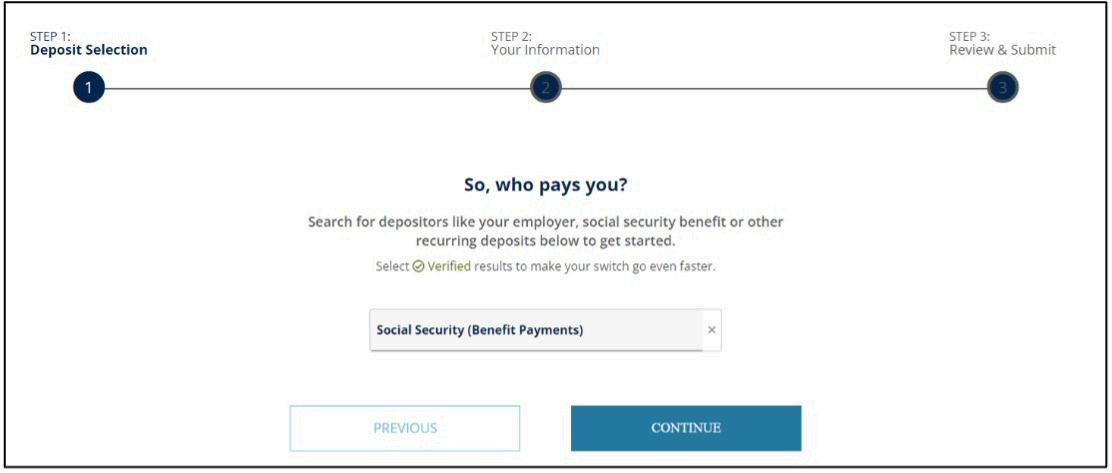
Enter who pays you and click “Continue ”
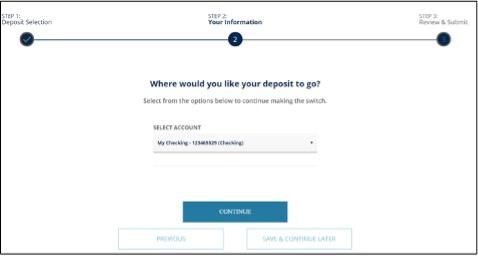
Select which account you’d like the deposit to go to and click “Continue.” Please note, required information may vary depending on the type of direct deposit you are adding.
Next, enter further details regarding this direct deposit. Click “Continue.”

Confirm the details and click “Submit ”
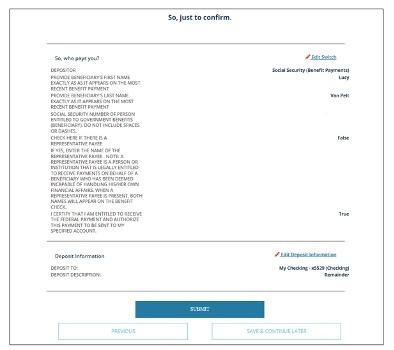
Your direct deposit is on its way! It may take a few cycles to reflect on your account

Switch Direct Deposits Using Switch Assist/Plaid
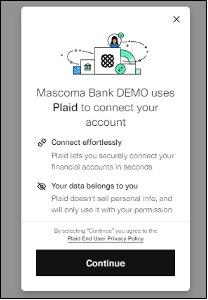
Mascoma Bank uses Plaid to connect to your other financial accounts Click “Continue ”
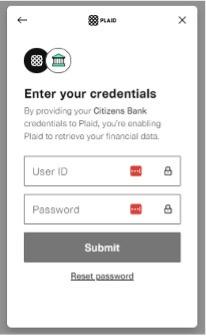
Enter your credentials and click “Submit.”
Follow the prompts to complete the process.
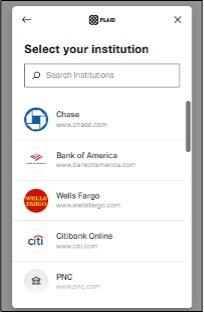
Select your institution
Switch Recurring Payments Manually
Click on “Enter recurring payments details ”
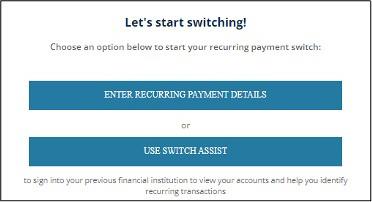
Enter who you’d like to pay and click “Continue.”

Select the account you’d like to take these payments from and click continue.
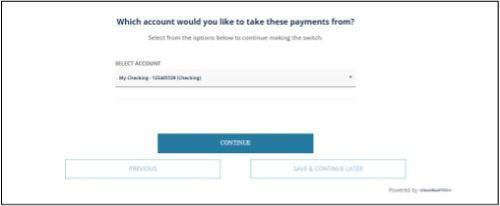
The following screens may differ depending on who you are paying.
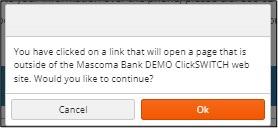
Some companies may require you to log in to your online account Click on the hyperlink to do so.

Click “Ok.” This will bring you to the company’s website and you will log in.
Others may ask you to manually enter details regarding the account Confirm and click “Continue ”
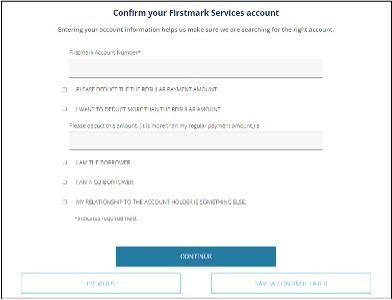
Confirm the details.
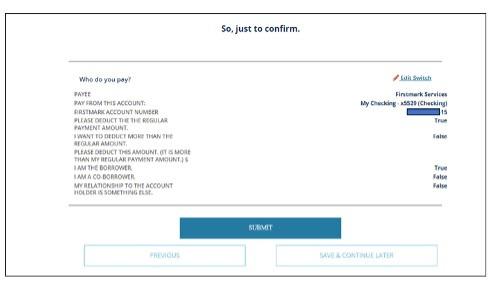
Click “Submit.” The switch has been made. You can expect to see the changes within 1 to 2 billing cycles.

Transfer & Pay
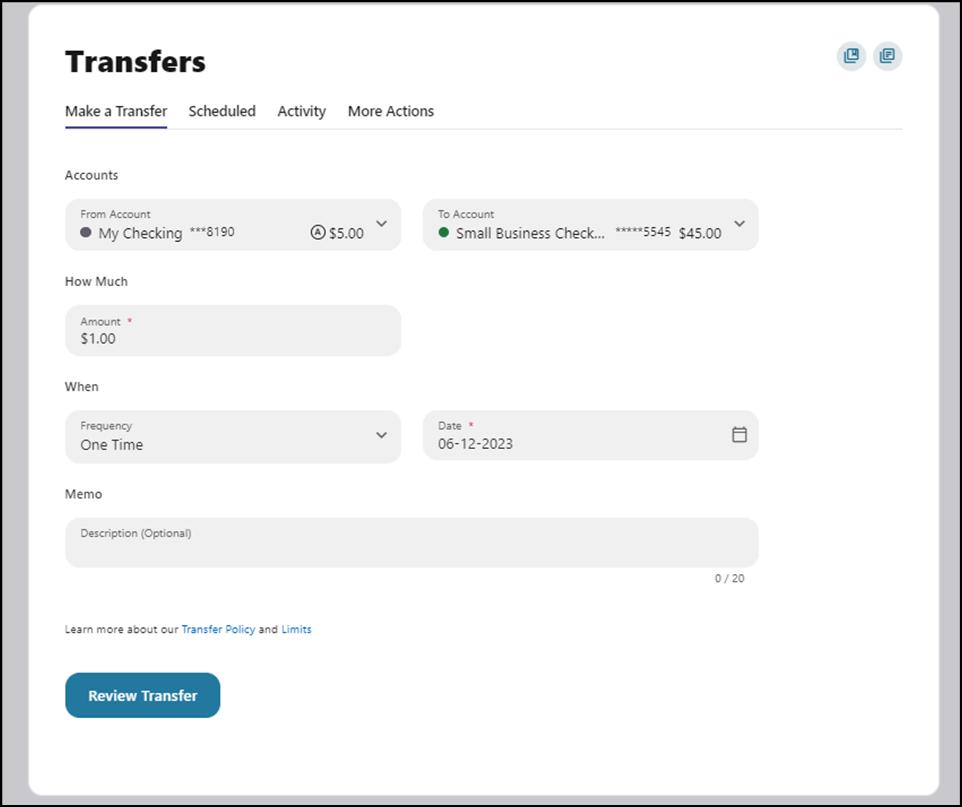
Make a Transfer
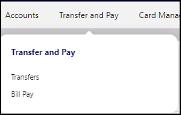
Navigate to "Transfer & Pay" and click on "Transfers."
Select the source account from the "From Account" dropdown menu.
Select the destination account from the "To Account" dropdown menu.
Select the Amount you want to transfer.
Choose the date (or start date) you want the transfer to take place.
Select the frequency with which the transfer will repeat.
Review the transfer and submit
Scheduled
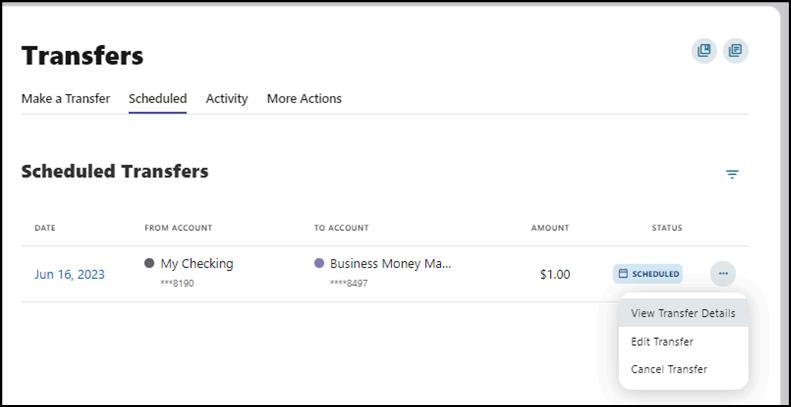
View all the transfers that are scheduled.
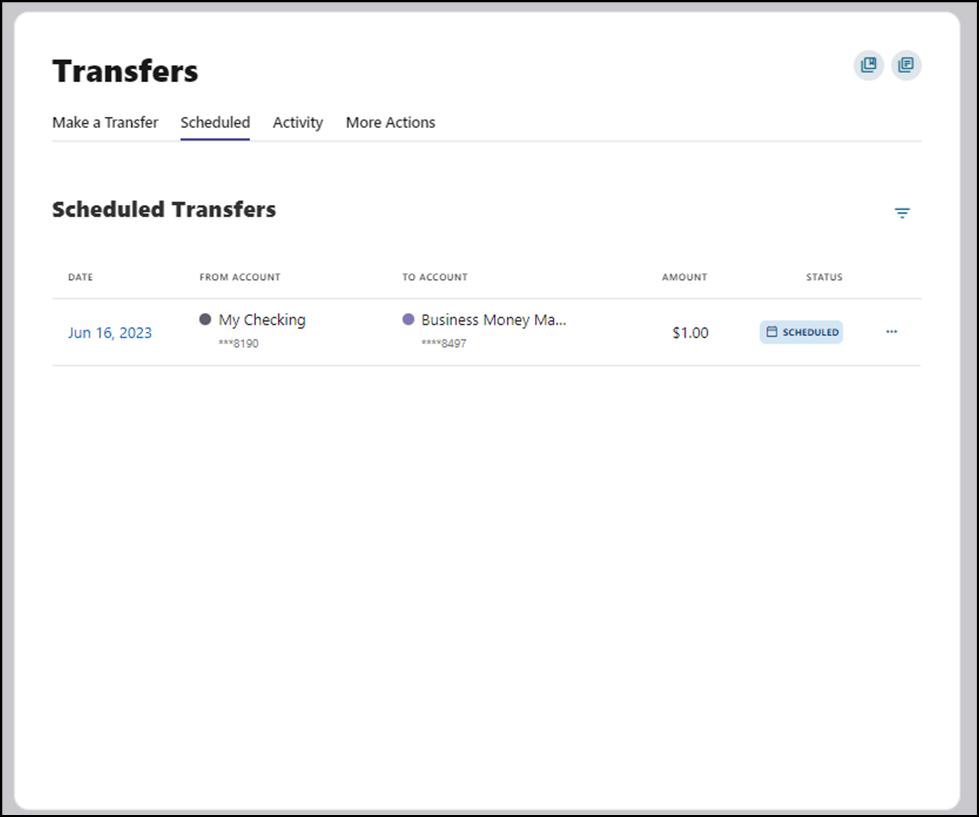
You can View Transfer Details, Edit Transfer, and Cancel Transfer by clicking on the ellipses ( ) next to Status
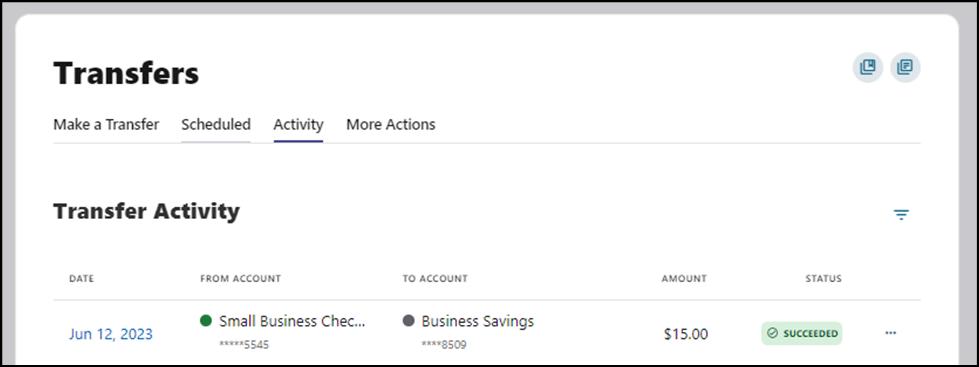
View all the successful or failed transfers with details as seen below
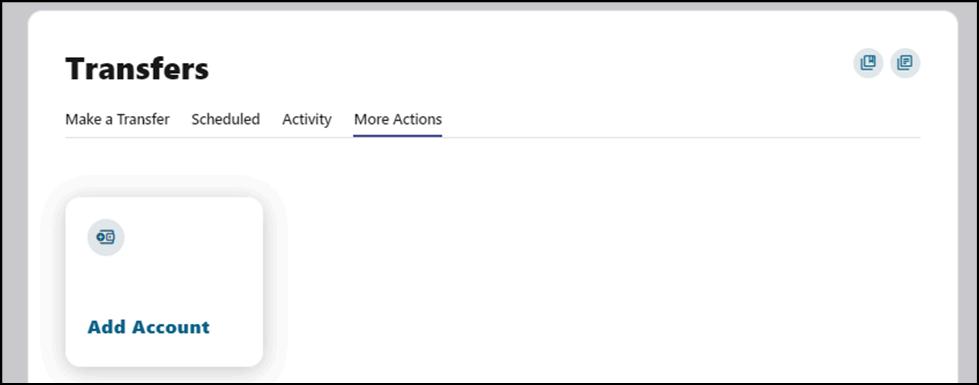
To add an account, click on the "More Actions" tab and select "Add Account "
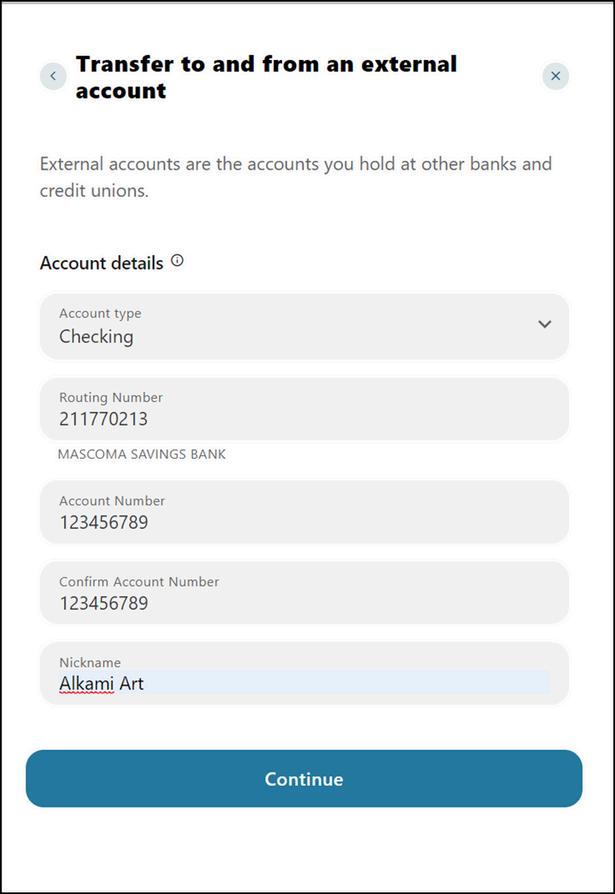
Select "Add an Account Manually" from the dropdown menu. The Add Account window is displayed.
Enter an Account Type.
Enter a Routing Number
Enter an Account Number.
Confirm the Account Number.
Enter a Nickname
Click the “Continue” button to add the account or click the “Cancel” button to close the window.
This step needs verification. A code is sent via your chosen method - email, text, or call Enter the code and click "Verify "
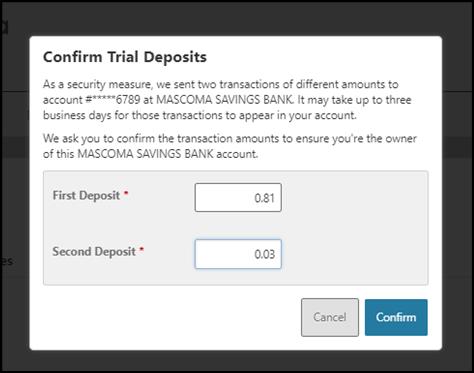
The system will send two trial deposits to the account. This process may take up to three business days to complete Before the account can be added to your profile, you must confirm the value of the first and second trial deposits.

To view the pending external account and confirm the trial deposit, go to your Dashboard and click on the "Confirm" notification that appears, as seen in the image here.

This will take you to the Accounts tab in Settings Select the account and click "Confirm "


Enter the two trial deposit values and click on "Confirm" to successfully add the external account for transfers.
Select “Add an Account Instantly.”
Select the financial institution you would like to add

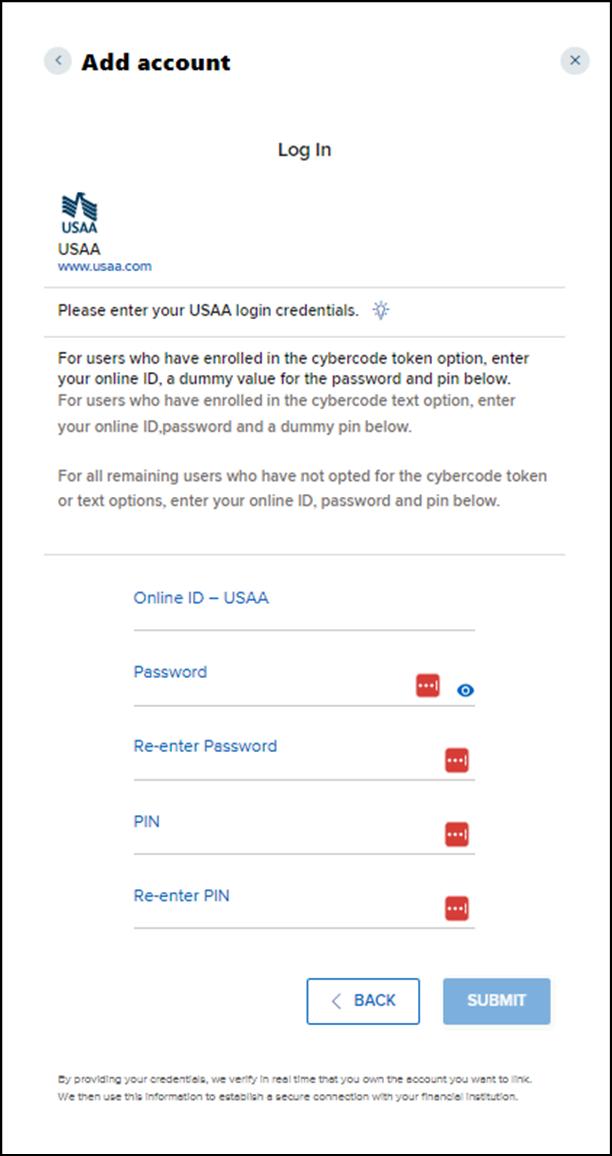
Enter your credentials for the financial institution you are adding and click “Submit.” The criteria will vary depending on the financial institution.
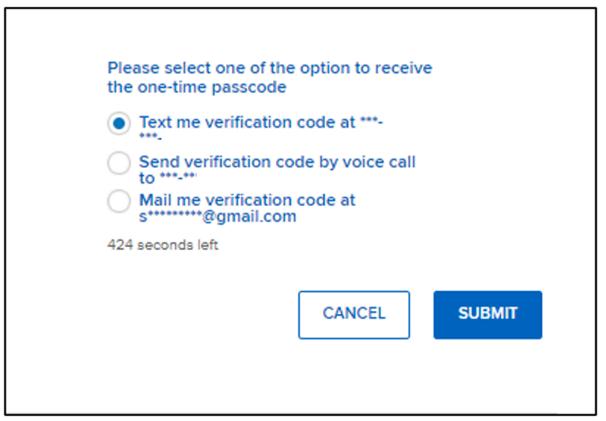
Select how you’d like to receive the code for verification (text, email, or call).
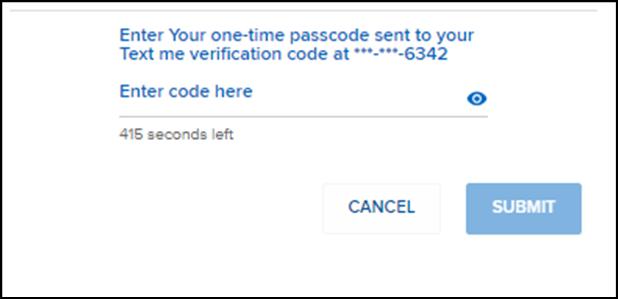
Enter the code and click “Submit ”
Select the accounts you’d like to use for transfers by sliding the toggle and click “Submit.”

Click “Continue” to verify
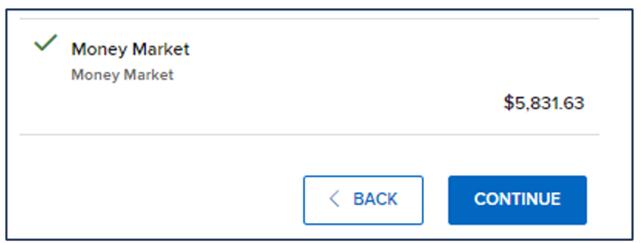
Select "Send money to another Mascoma Bank customer" from the dropdown menu The Recipient information window is displayed.

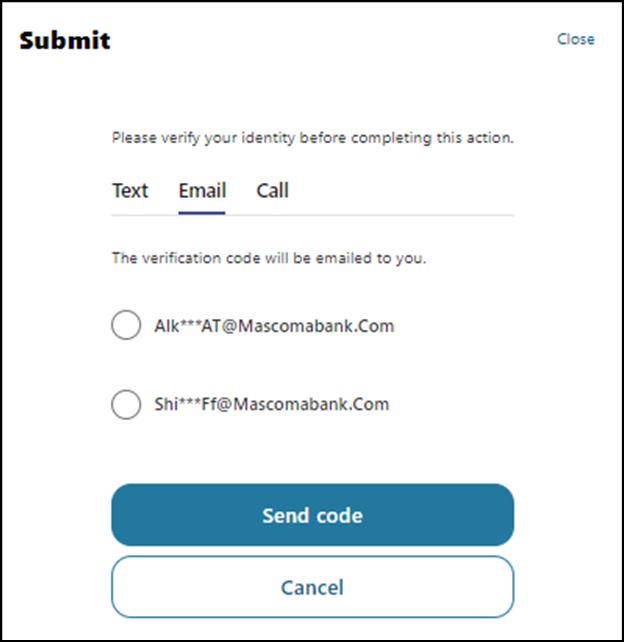
Verification is needed Select from Text, Email, or Call to receive the code
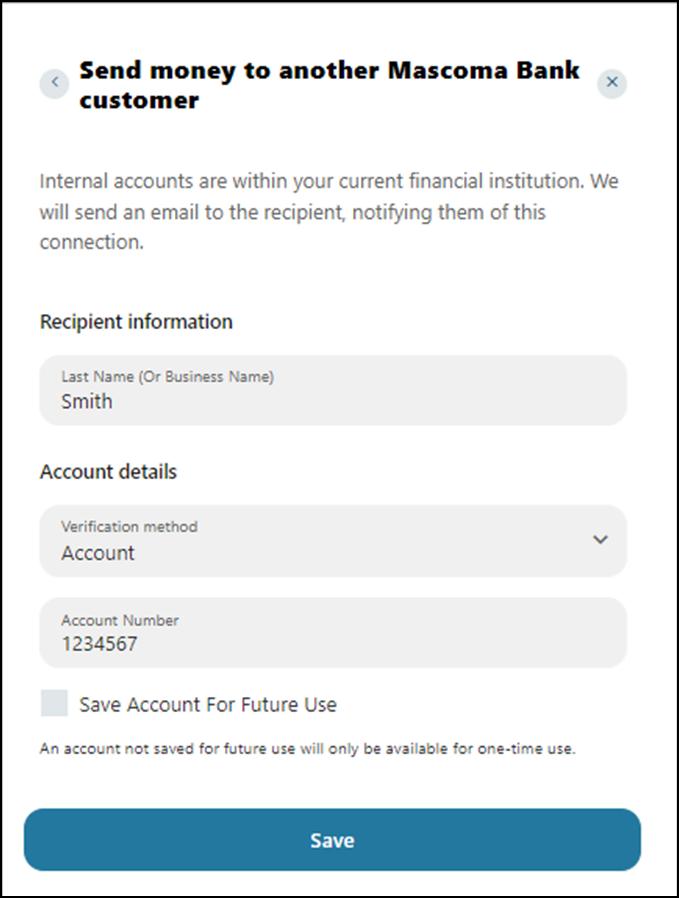
Enter the necessary details and click "Save."
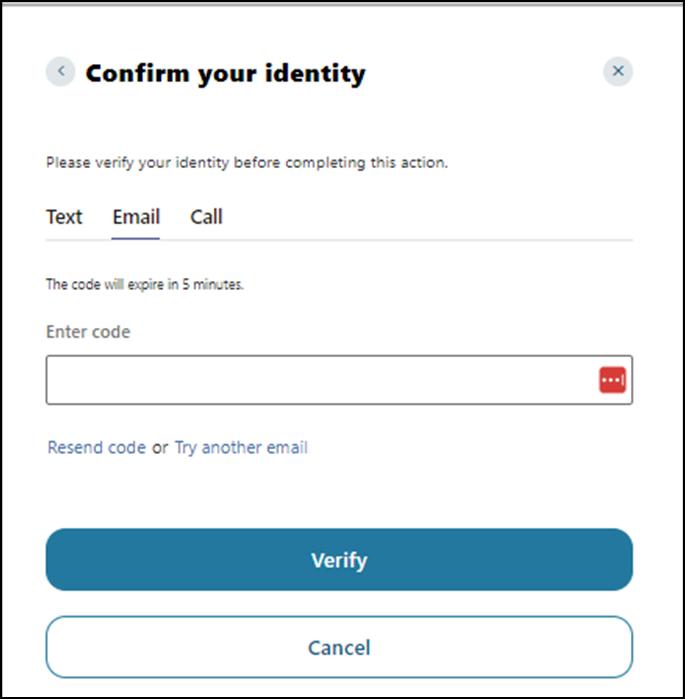
Confirm your identity using your chosen method
To access Bill Pay, navigate to Transfer and Pay menu option and select "Bill Pay."
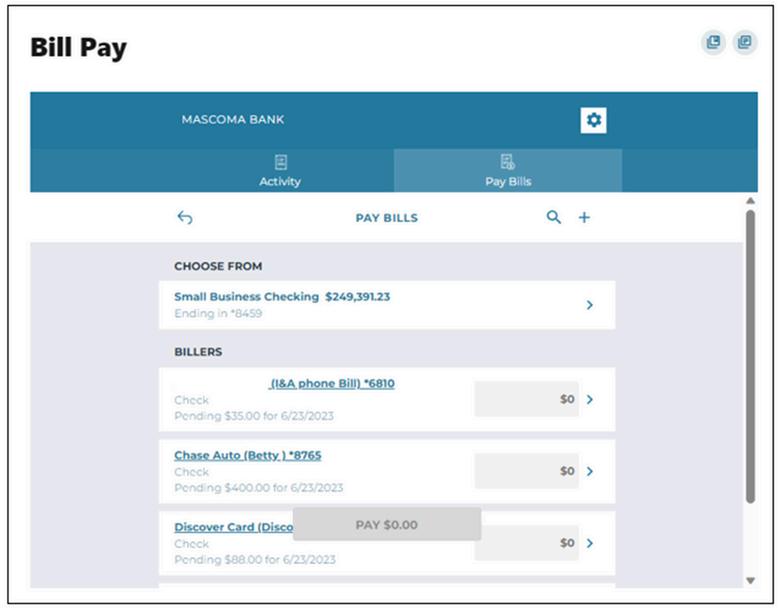
The Activity tab lists all the scheduled and historical bill pays Pay Bills
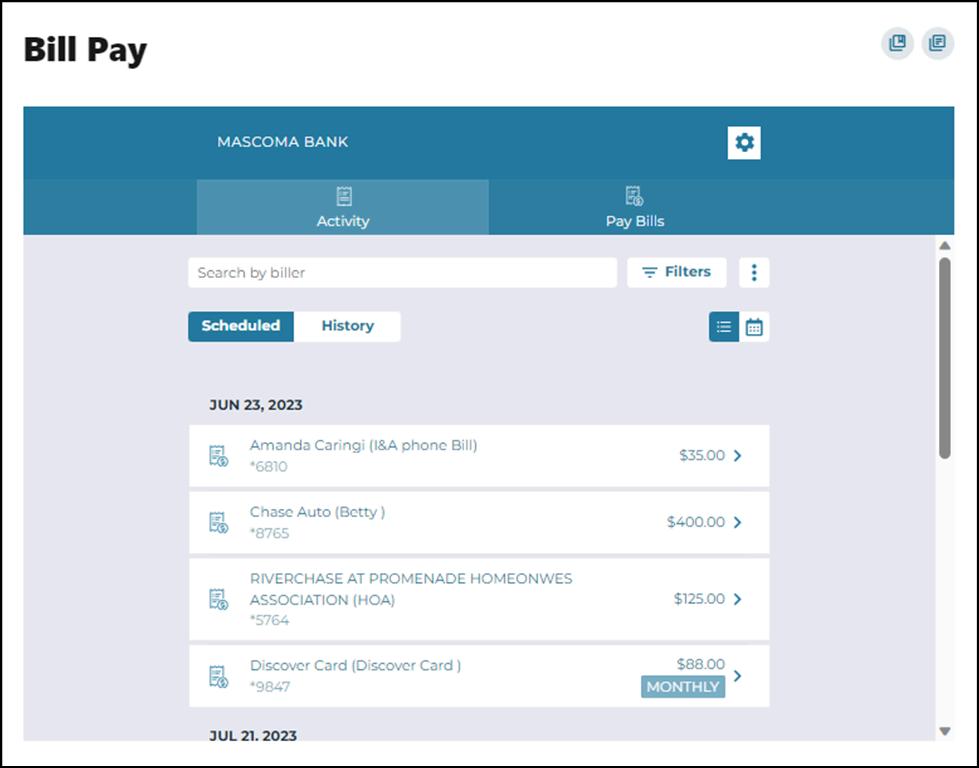
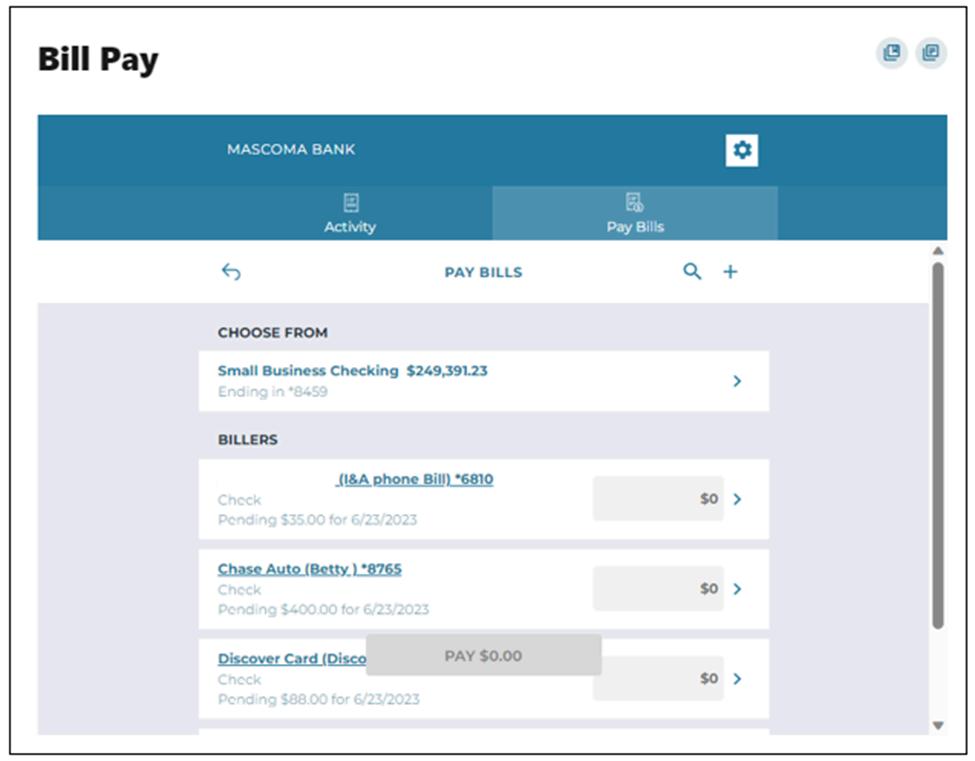
Select the Pay Bills tab to add a business payee and pay a business.
Add a Business Payee for Bill Pay
Click on "+" next to the search icon.
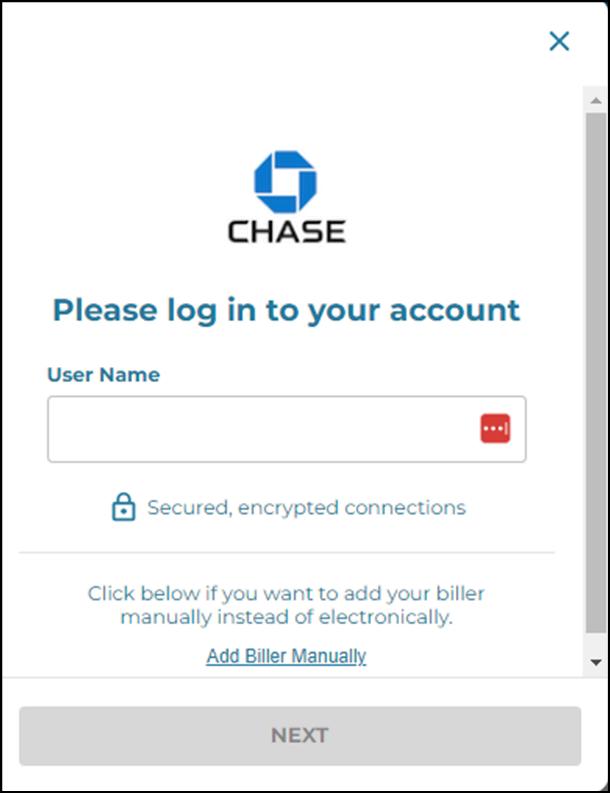
Enter the name of the biller you would like to add or add one manually by clicking the "Add" button.

You can either log in to the chosen business's online platform by entering your credentials or click "Add Biller Manually" and click “Next ”
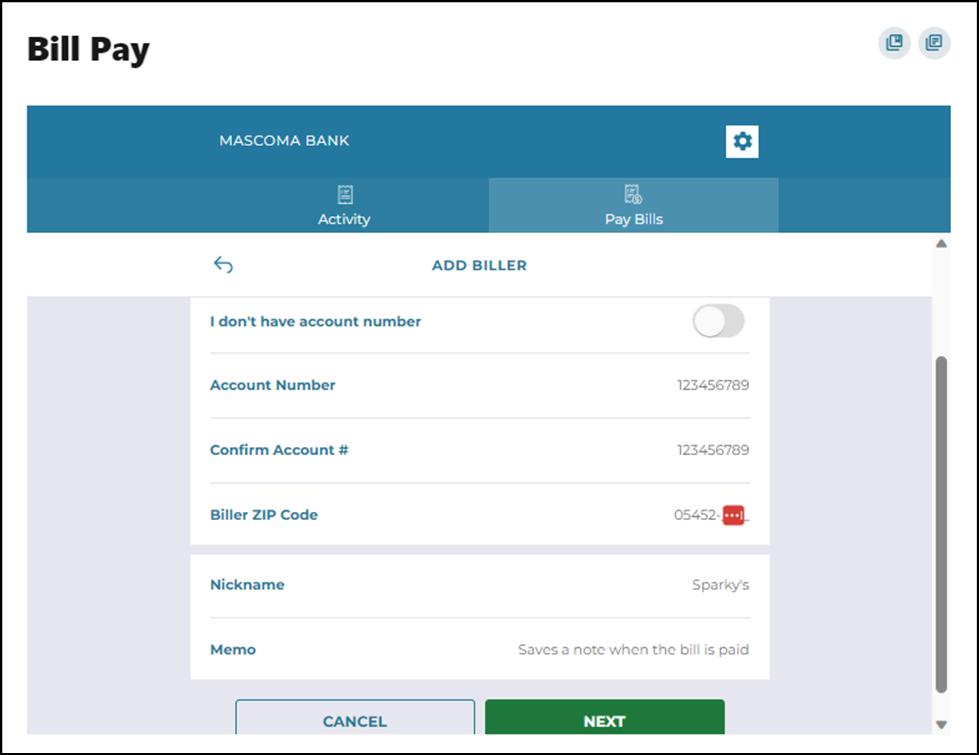
To add a biller manually, enter all the biller information such as name, account number, zip code, nickname, and memo, and click "Next". The next screen will request that you add the address of the biller.
Verification is needed to add a business as a biller. A code is sent to your chosen method – email, text, or call. Enter the code and click "Verify."
Pay a Business
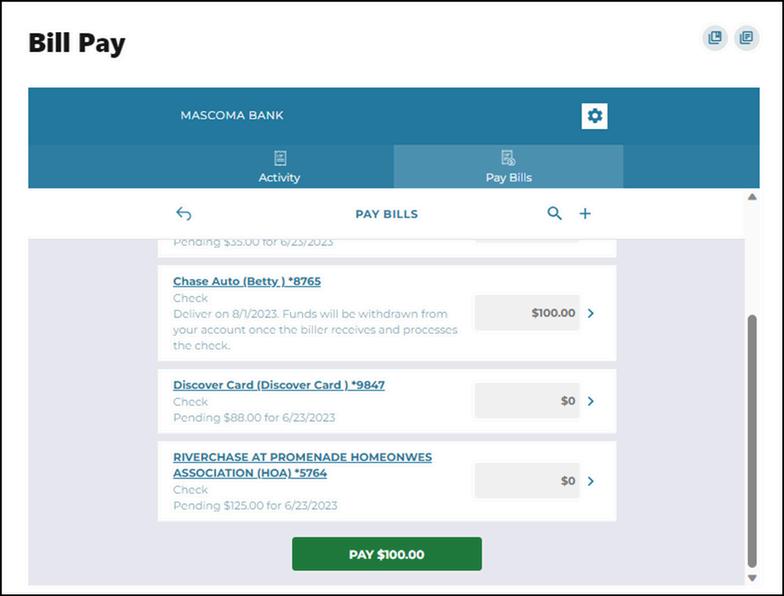
Select "Pay Bills" tab in Bill Pay.
Select the account under "Choose From "
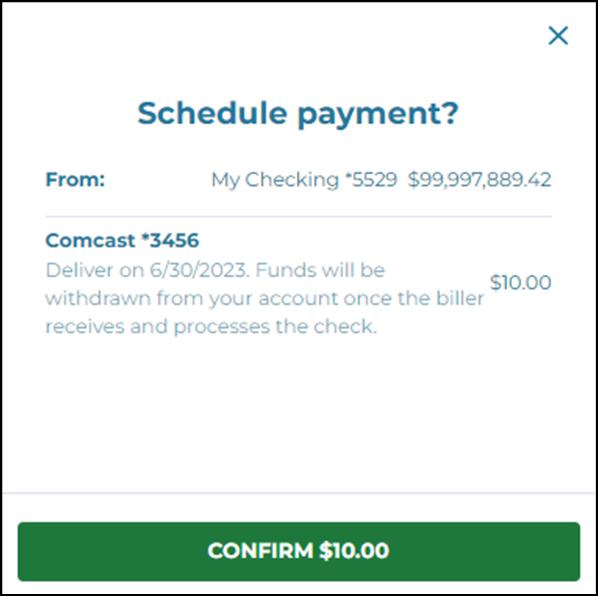
Select the Biller and enter the amount to pay. Click on "Pay $XX.XX."
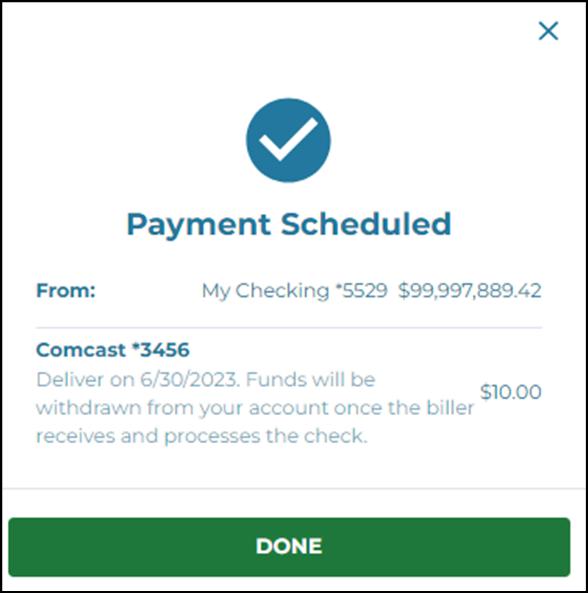
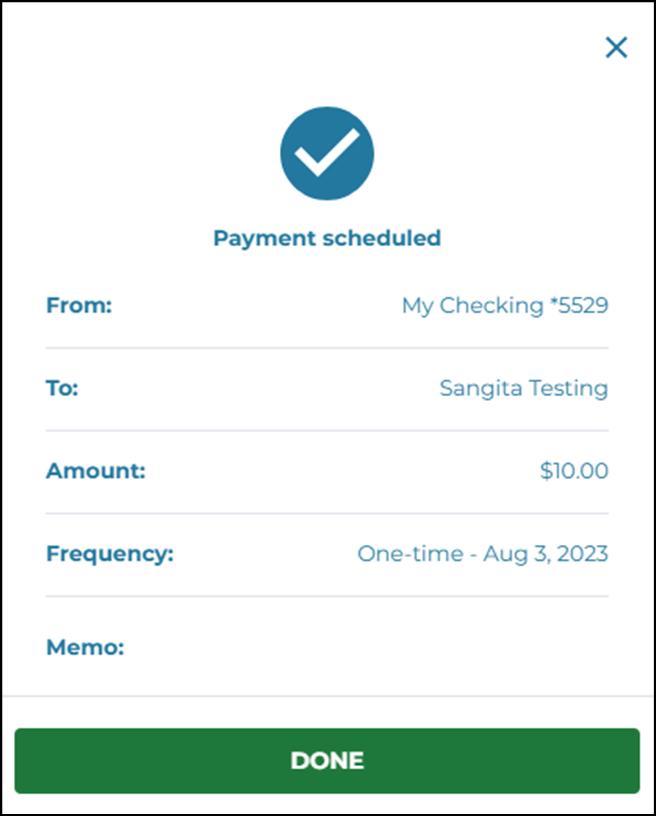
Payment is scheduled. Click “Done.”
Add a Payee - Individual
Select "+" next to "Pay A Person."
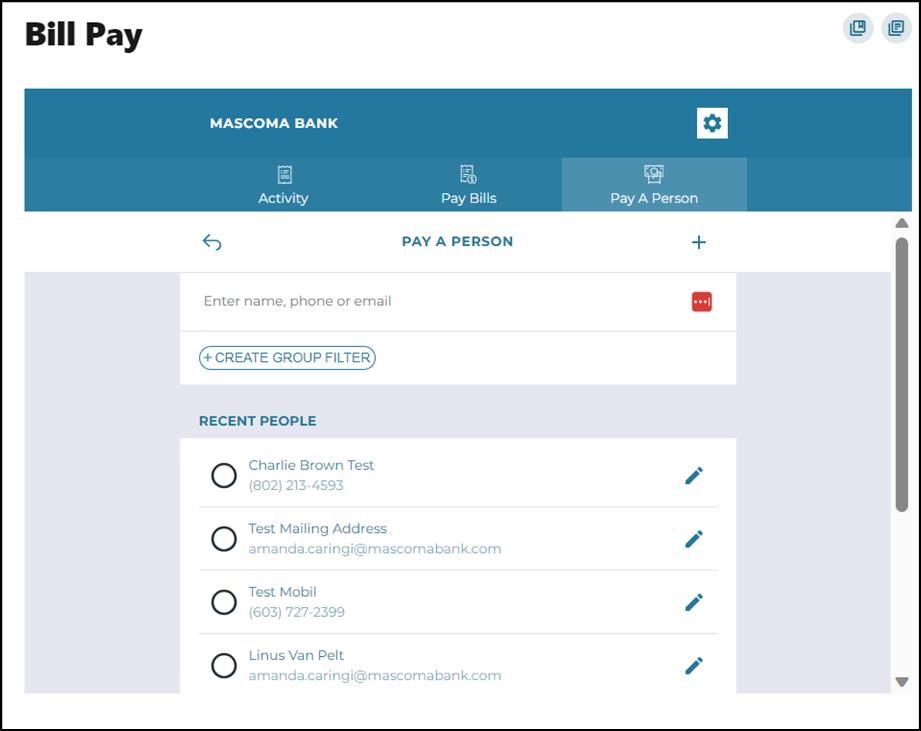
Enter the contact details of the individual, including First Name, Last Name, Mobile Number, Email, Payment Delivery method, and a Security Question. The mobile number is the default payment delivery method. You can choose email address by clicking on the arrow.

Click "Save and Pay."
Verification needed. Select Text, Email, or Call to receive the code

Select an individual payee by clicking the radio button
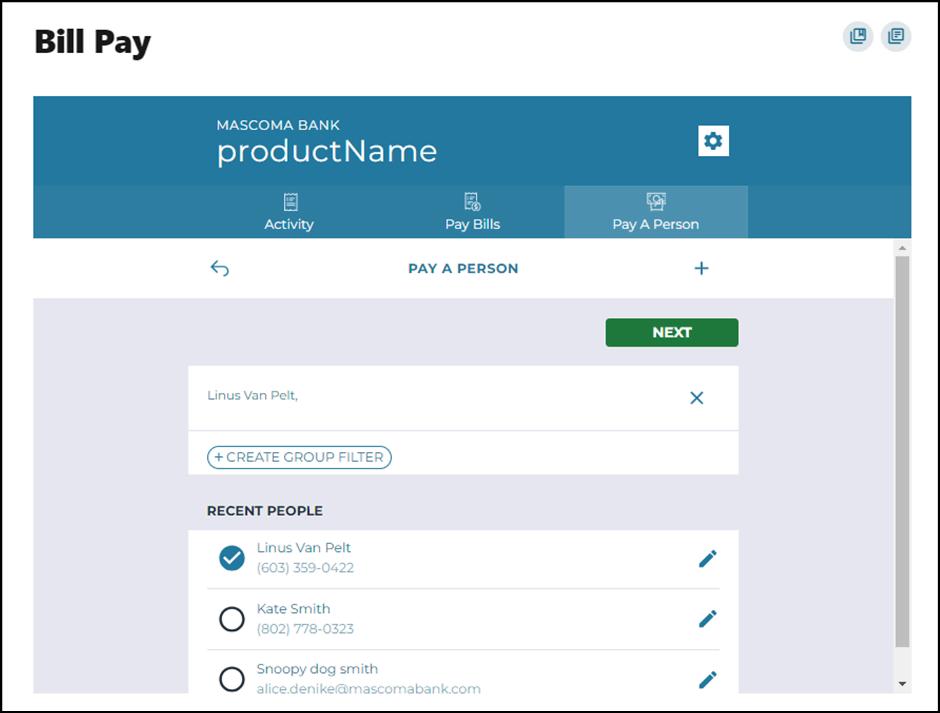
Enter the $ amount, add a memo, select the "From" account and enter the date and frequency for payment. Click "Pay."

Confirm payment.

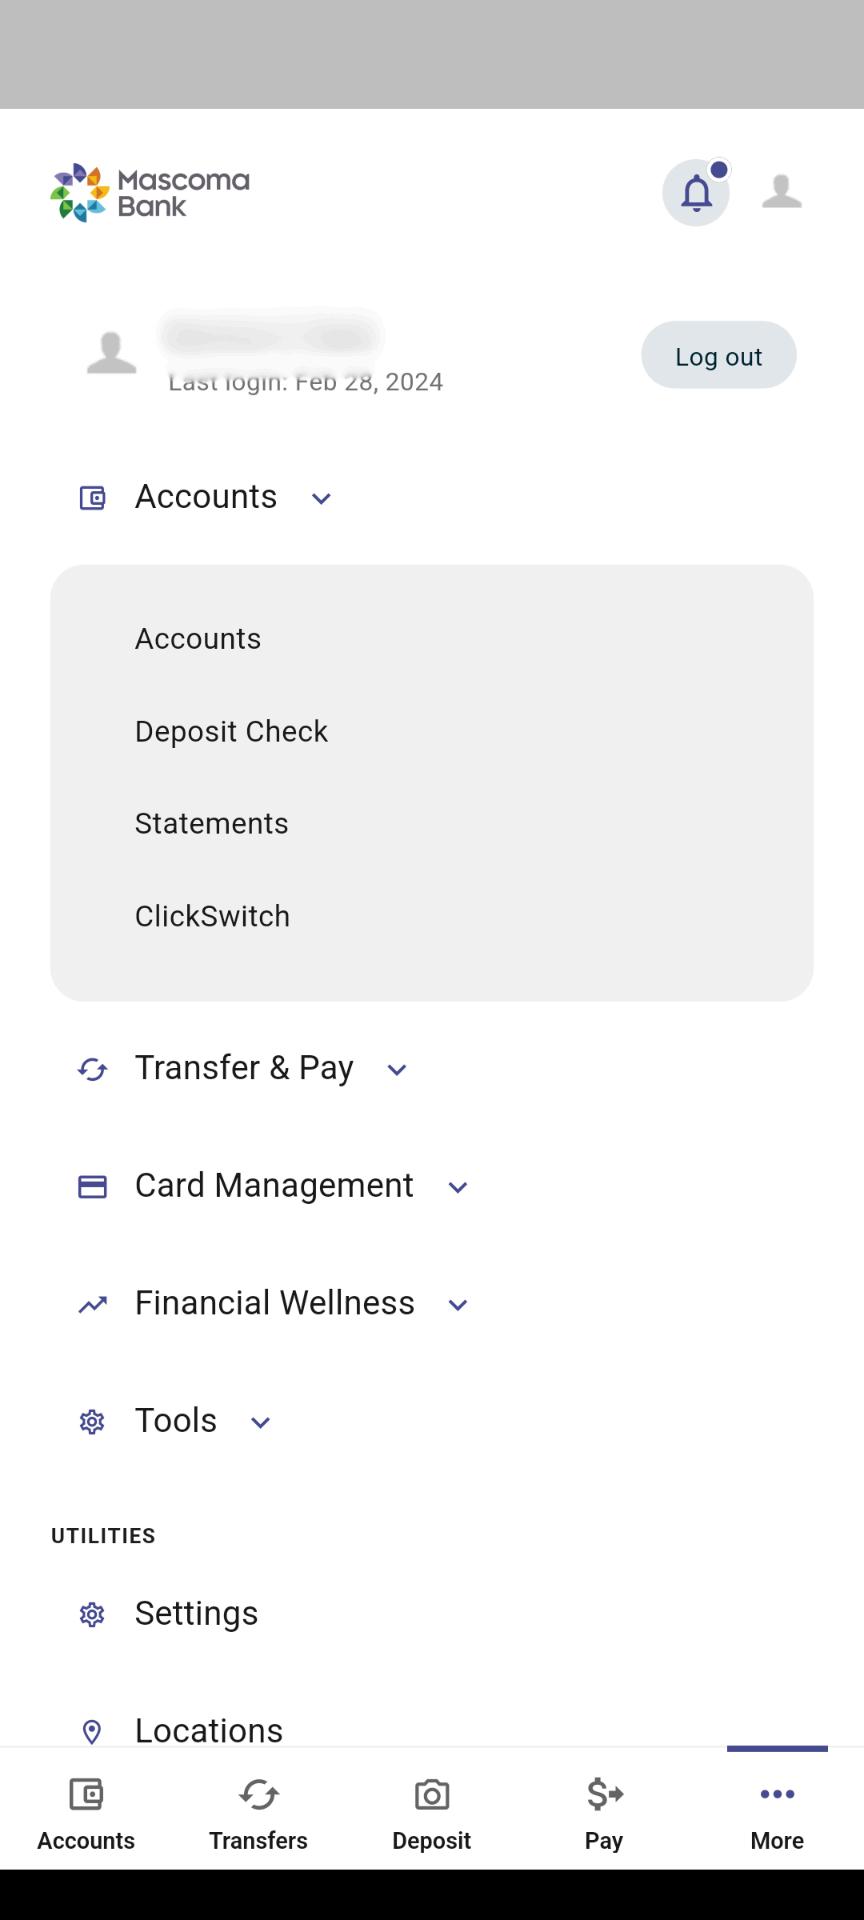
Under “Accounts,” tap on “Deposit Check.” You can also tap on the camera icon at the bottom of the screen (with “Deposit” labeled underneath). First-time users will need to accept disclosures.

Follow the prompts in the app to upload pictures of the front and back of your check, enter the amount, and submit.
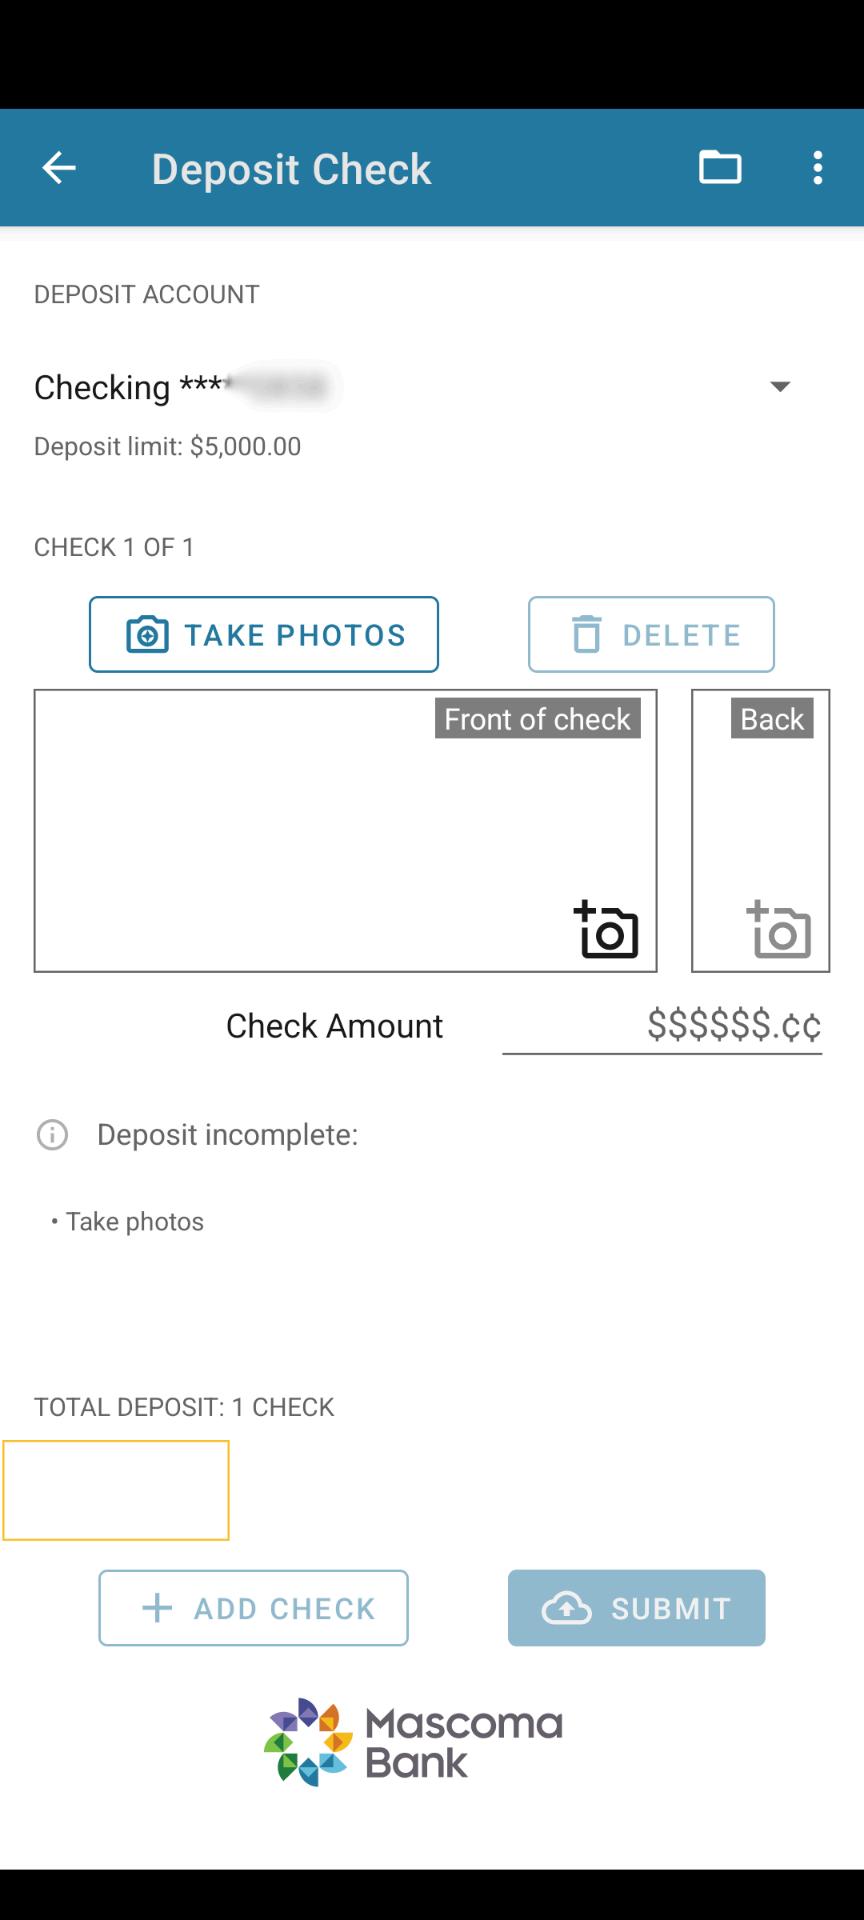

Checking Your Mobile History
Got to “Mobile Deposit” as if to make another deposit.
Choose an account.
At the top, you’ll see a folder icon
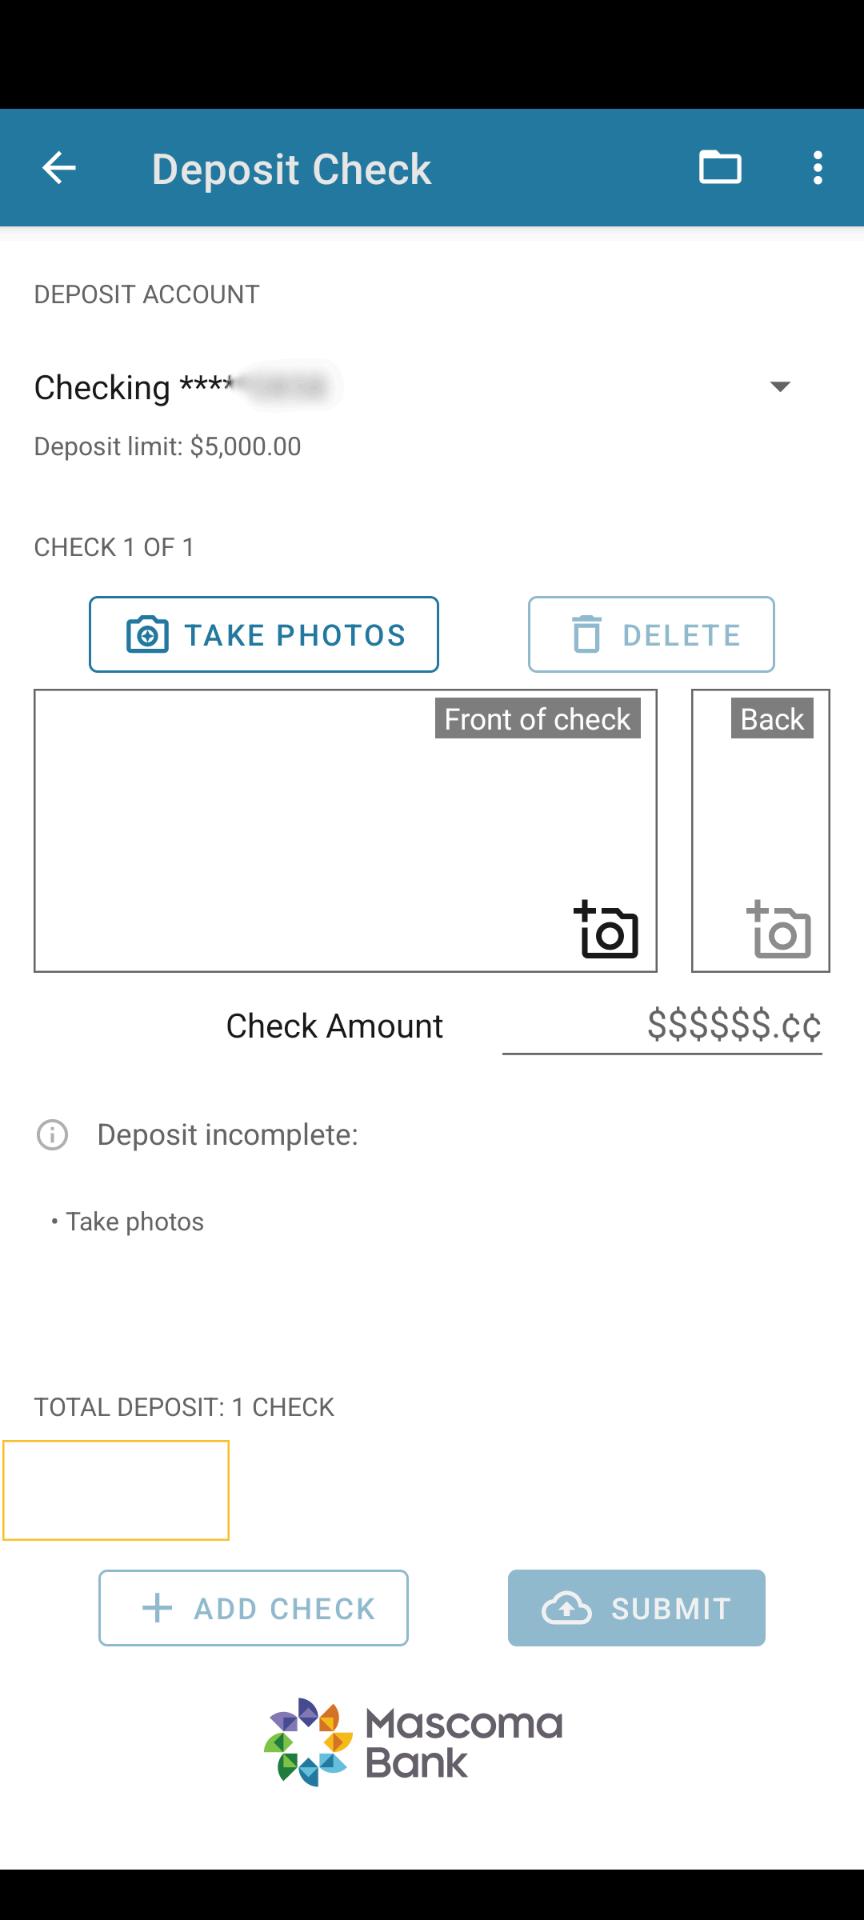


Tap the folder to see your deposit history.


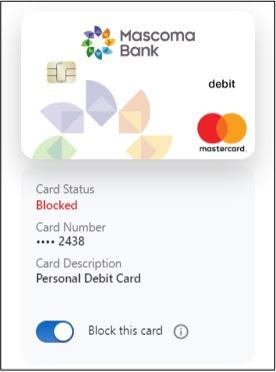
Under the Card Management menu, you will find Manage My Card Here you can block your card to prevent it from being used for new purchases without closing your account. You can unblock your card at any time.
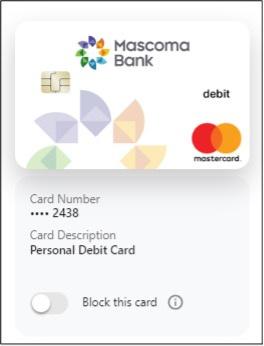
Use the toggle to block the card Click “Block this card.”

Use the toggle to unblock the card when/if you are ready.

Update your card everywhere you pay online instantly

Search for the merchant and click “Continue ”
Enter your card and billing information once to update the payment method on all the sites you’ve selected. Click “Continue.”

Follow the prompts to complete the process.
Here you can submit travel notices for specific debit cards that are in your name only. Complete the fields and hit submit.

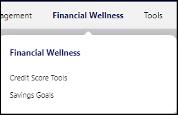
To navigate to Credit Score Tools, click on Financial Wellness then Credit Score Tools
Here you can view your credit score with daily score updates and credit monitoring
Enter all the necessary details, check the authorization box, and click “Continue.”

From the Savings Goals menu option, you can also navigate to the Spending screen.
Spending
The Spending dashboard gives you an overview of your spending over a period of time, spending based on categories, transactions, and recurring expenses.
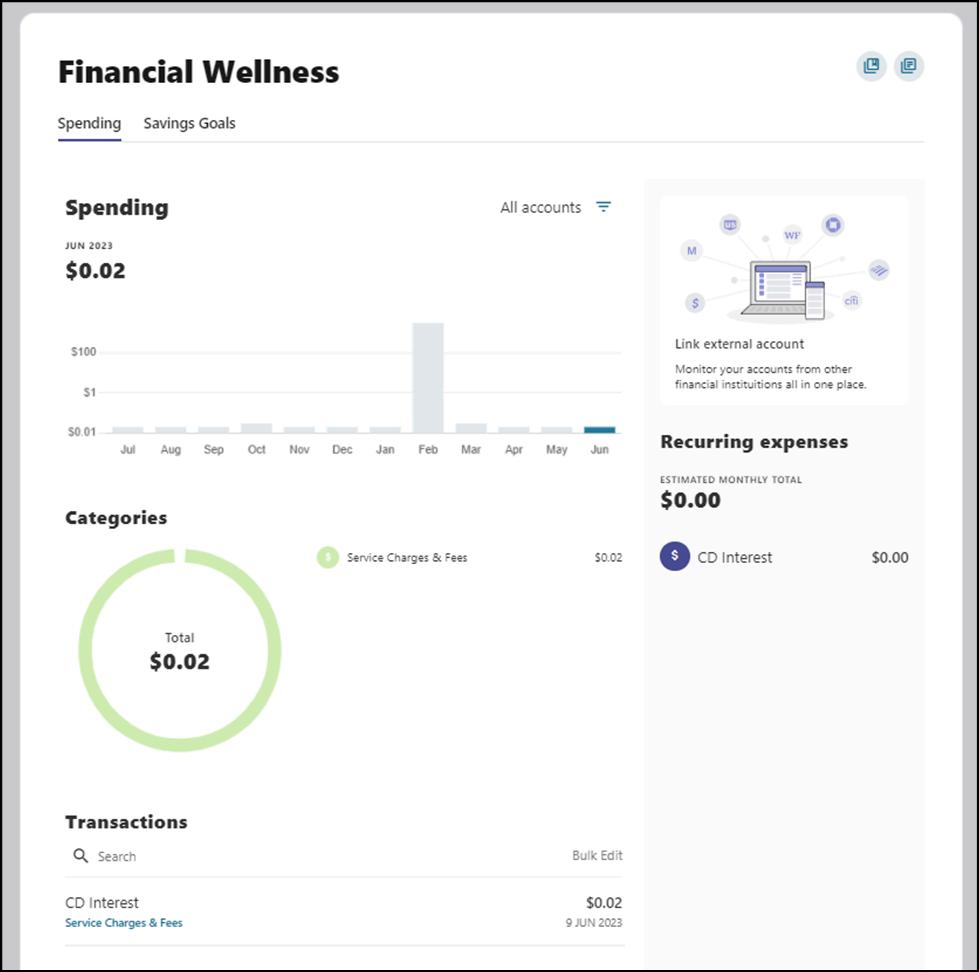
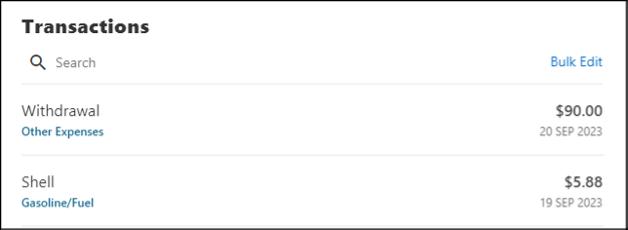
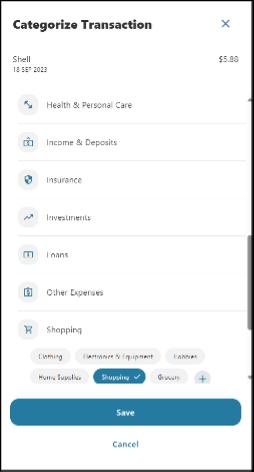
Within the Spending screen, if you’d like to edit the category for an item, simply click on the transaction. A slideout will appear in which you can edit the category. There is a checkbox to select if you’d like all future transactions from this merchant to be applied to the new category. Make your edits and click save

Savings Goal
The Savings Goals tab helps you create, manage, and track progress on your savings goals, while allowing you to create and manage income and expense thresholds
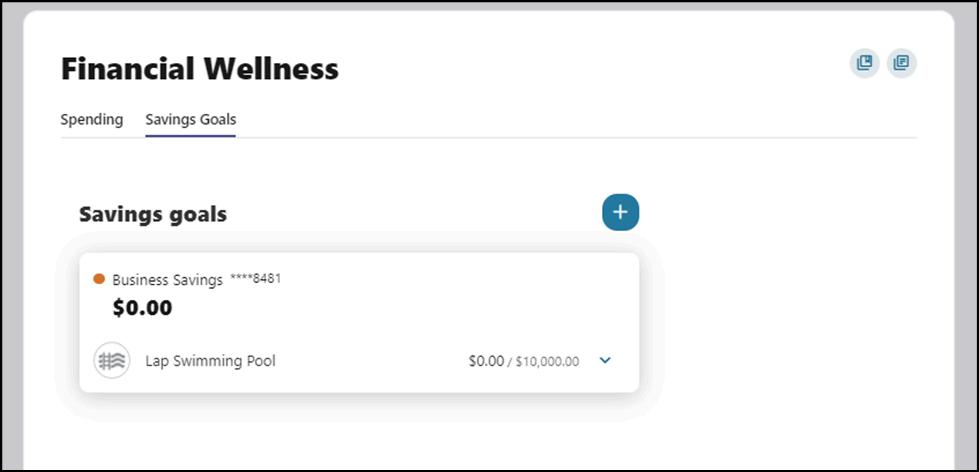
Create a Goal
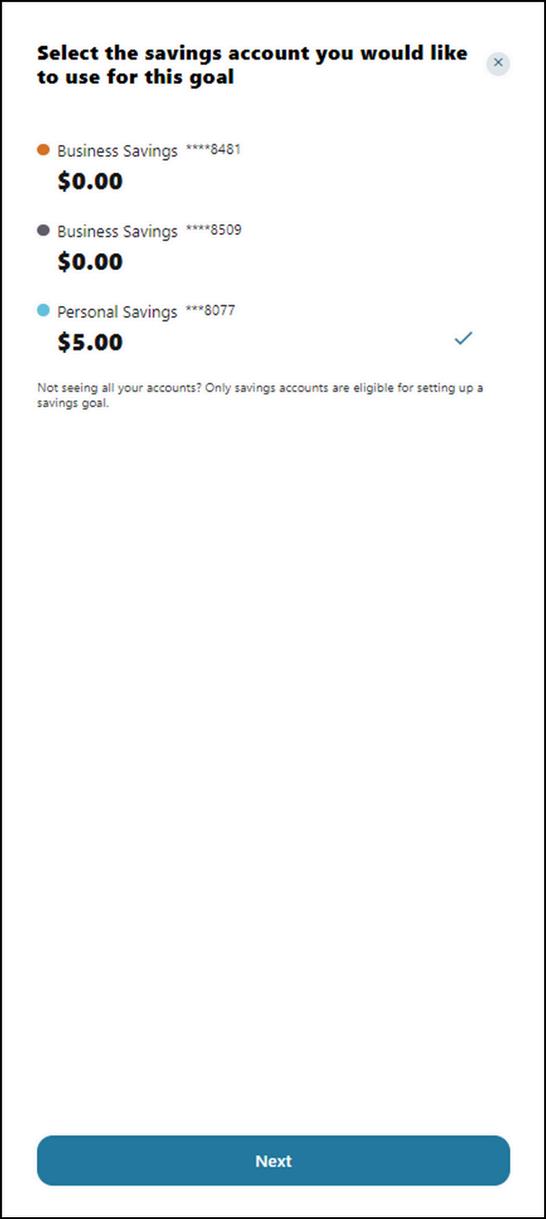
Select the savings account you would like to use for a goal. Click “Next.”
Select the category Click “Next ”

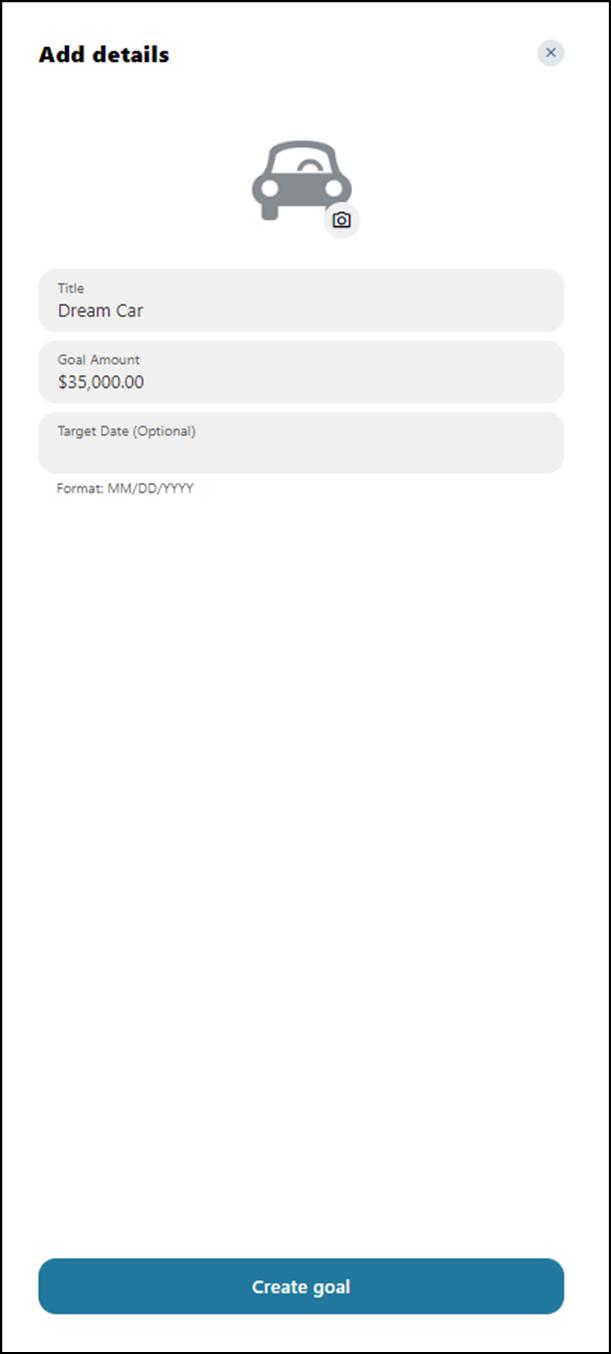
Add the necessary details to complete the goal settings, including Title, Goal Amount, and Target Date (optional). Click "Create goal."

Check Services
To access Check Services, navigate to the Tools tab on the menu.
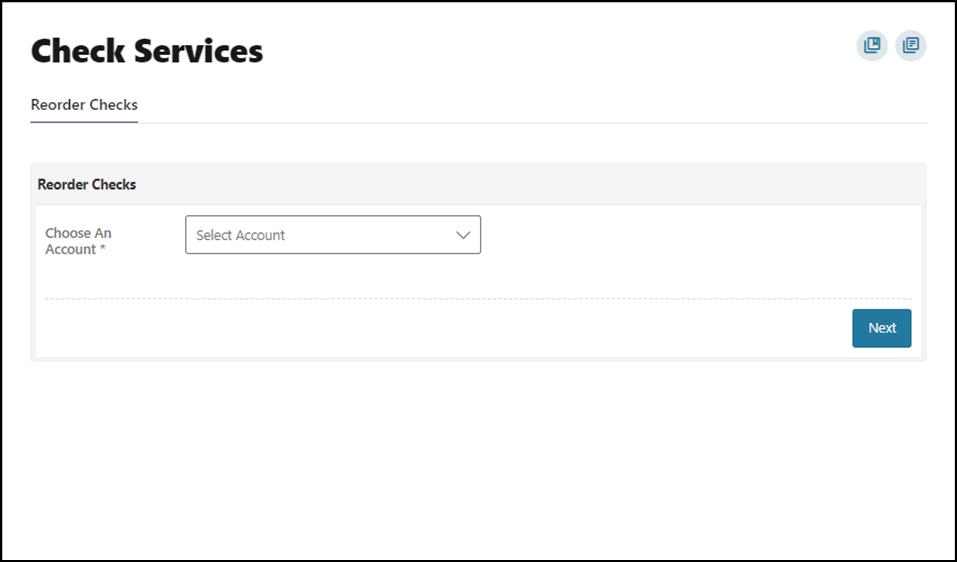
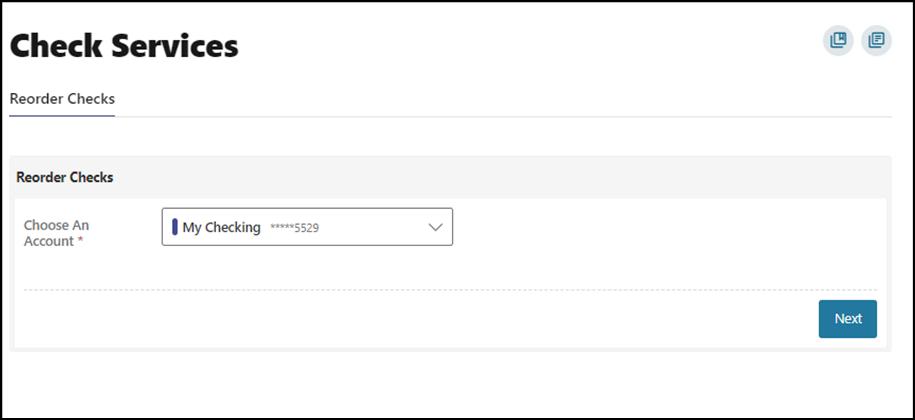
Reorder Checks
Select the account from the dropdown menu and click “Next.”
Click on "Order Checks."
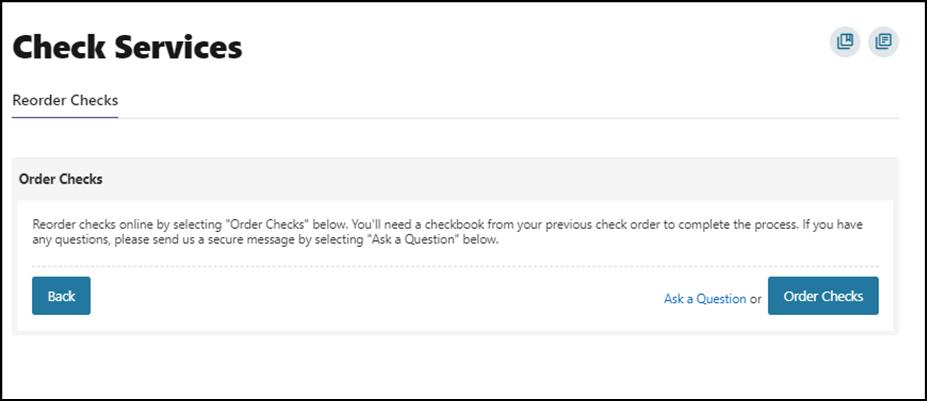
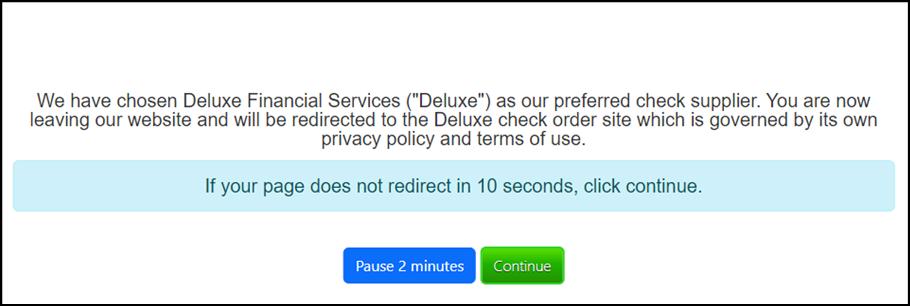
You will be redirected to a third-party check supplier website. Please refer to the Appendix for third-party website screenshots.
Your privacy is our top concern You can securely send sensitive information such as your account number and other personal information by using the secure Message Center
You can access the Message Center by clicking the envelope next to your profile icon or by navigating to Tools -> Message Center. You will be notified through the profile envelope if you have an unread message. The number of unread messages is indicated on the right side of the message envelope icon.


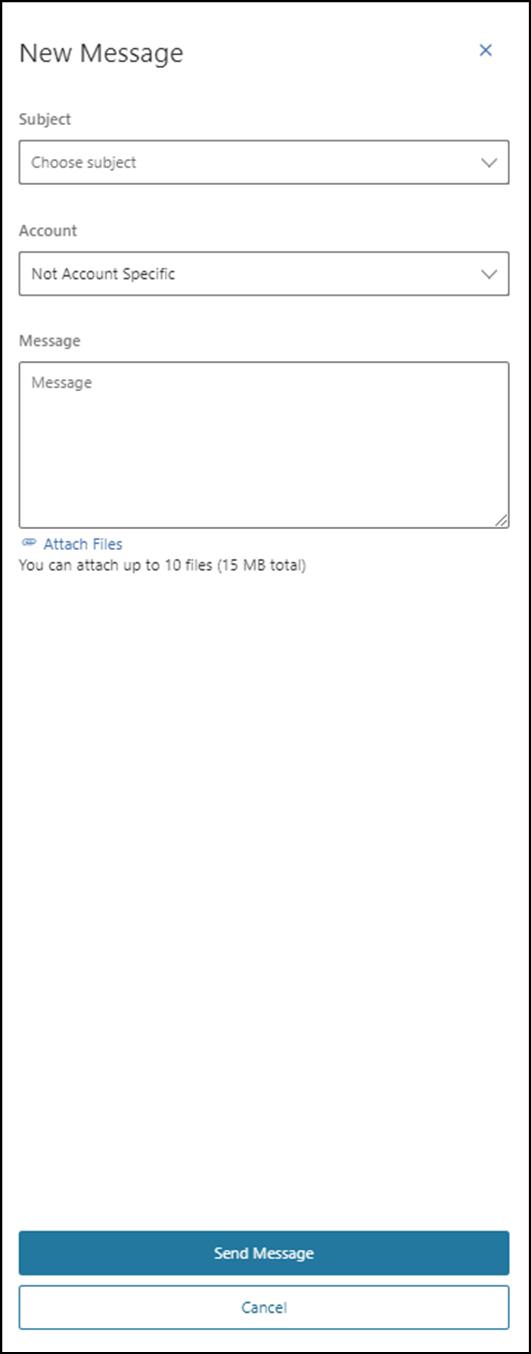
To compose a new message, click the Compose button on the Inbox tab of Message Center.
Select the message Subject from the dropdown menu.
Select the Account the message refers to from the dropdown menu
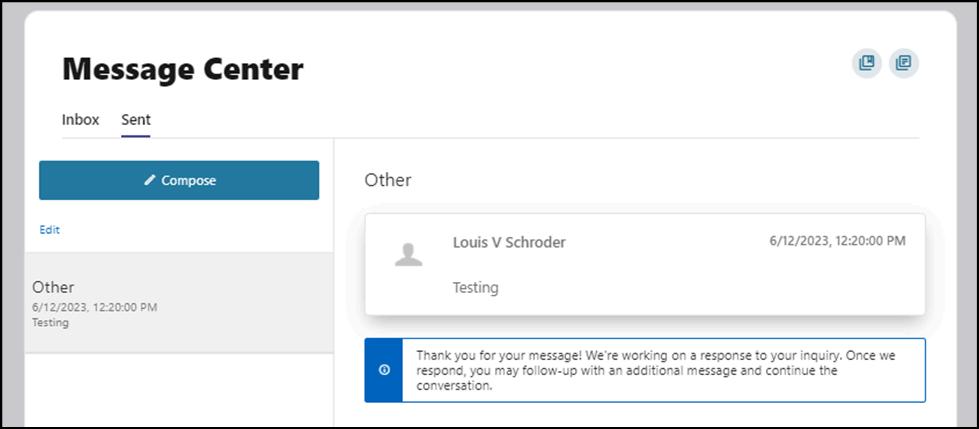
Enter the Message body and select the “Attach Files” link to attach files to the message
Click the “Send Message” button to send the message or click the “Cancel” button to close the New Message window without sending the message
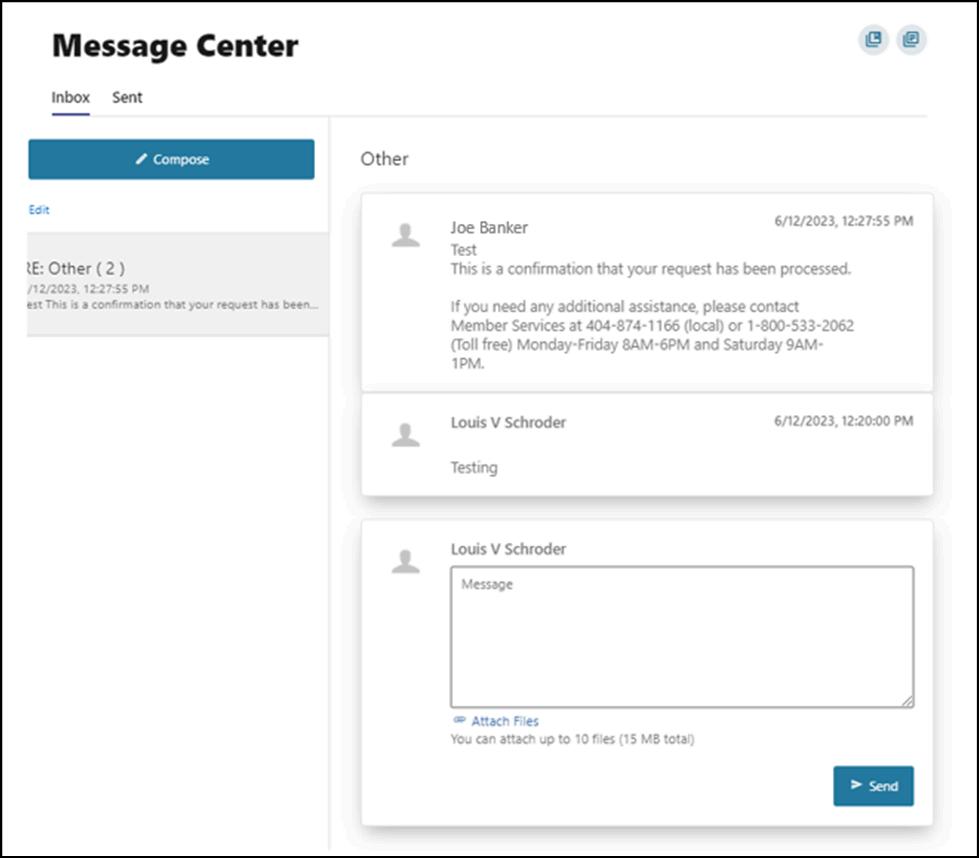
To reply to a message, select the message thread to respond to
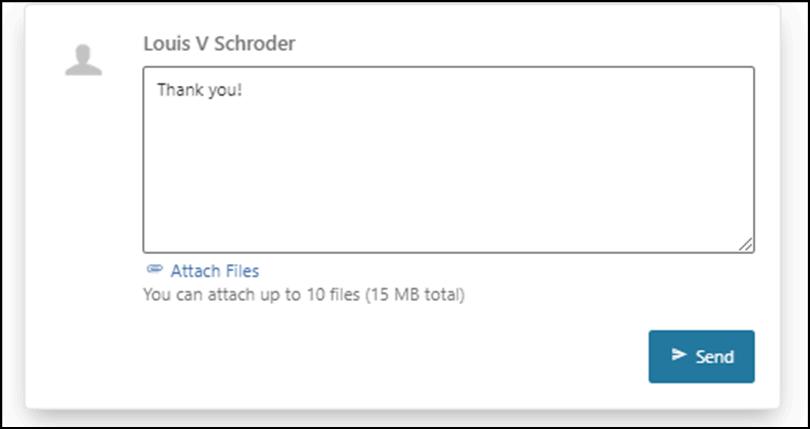
View the messages within the thread. Enter a Message response
Select the “Attach Files” link to attach files to the message.
Click the “Send” button to send the response.
You have the ability to mark a message thread as unread or read, or to delete it.
Click the Edit link to view the message actions.
Click the checkbox next to the message thread to act on.
Click the delete (trash can) button to delete the message threads.
Click the unread (envelope) button to mark the message thread as unread.
Click the read (open envelope) button to mark the message threads as read.

The Sent tab allows you to view and delete messages that have been sent.
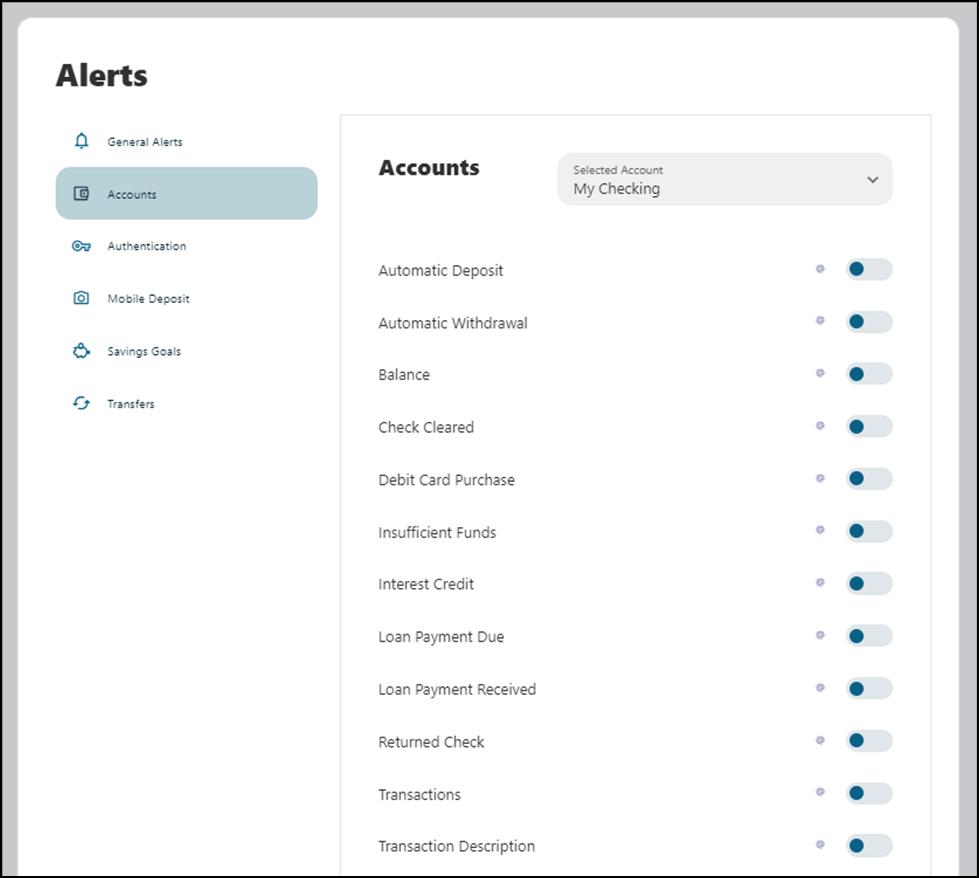
You can choose to make changes to your account alerts and notifications settings by navigating to Alerts under the Tools menu
General Alerts: Default security alerts and other notifications triggered by important events, such as changes to your personal information
Accounts: You can enable alerts and notifications for changes and activities related to your accounts such as balance, balance summary, transactions etc.
Authentication: You can enable access to your online banking.
Mobile Deposit: Set up notification when a mobile deposit is completed.
Savings Goals: Set up notification when your saving goals are completed or endangered.
Transfer: Set up notifications related to transfer activities such as transfer fails or successes, external transfer account added, etc.
You can receive alerts by email or SMS
Before you can receive text alerts, you must verify that your phone can receive text messages.
Within Digital Banking, go to the Tools menu, then select Settings, then Contact
Click on the pencil icon next to Mobile to edit.

Add your mobile number and click the box next to “I Would Like To Receive SMS Messages To This Number,” then click “Send a code via text.” Then click “Save Changes.”
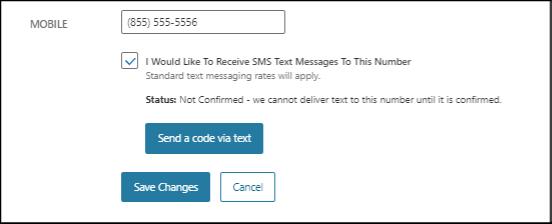
You will receive a text message to your mobile number with a code Please enter this number to complete the verification process.
You can access information regarding Mascoma Bank ATM locations and branches by navigating to Locations under the Tools menu
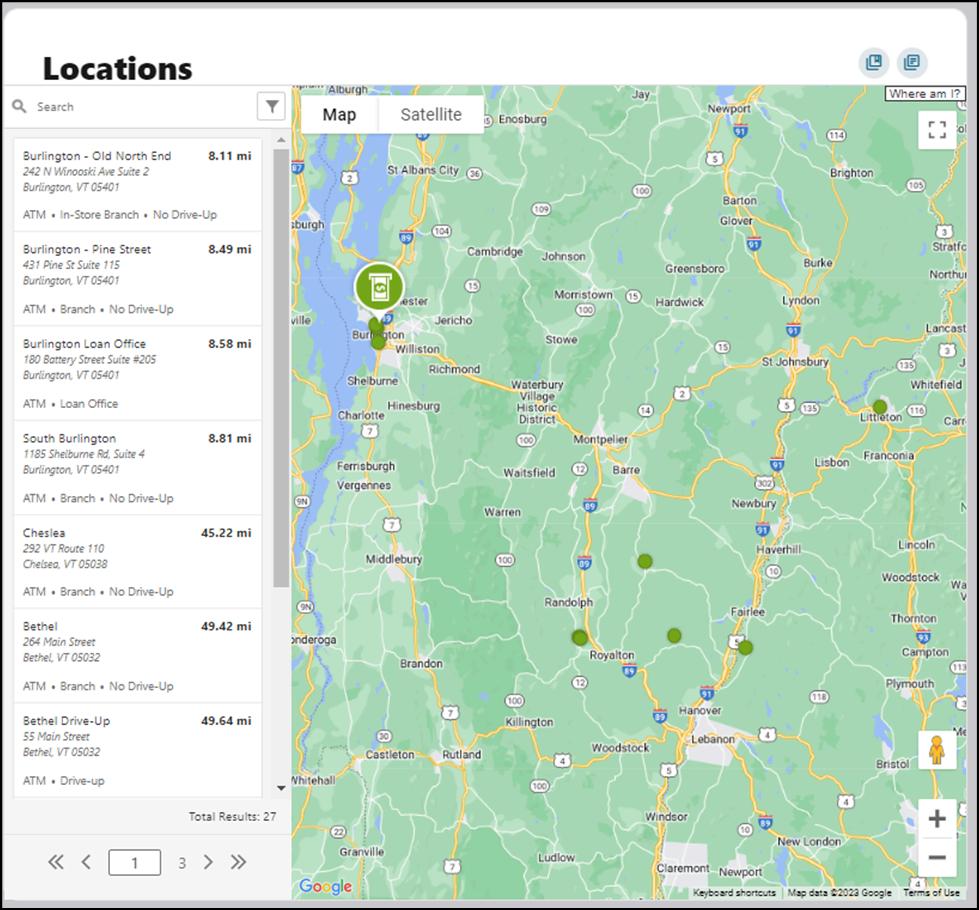
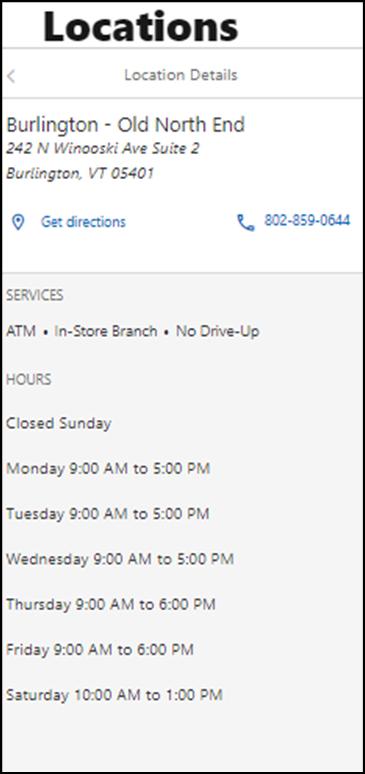
To navigate to the secure forms, go to the Tools menu > Customer Service Here you can submit a travel notice for your debit card or submit an address change
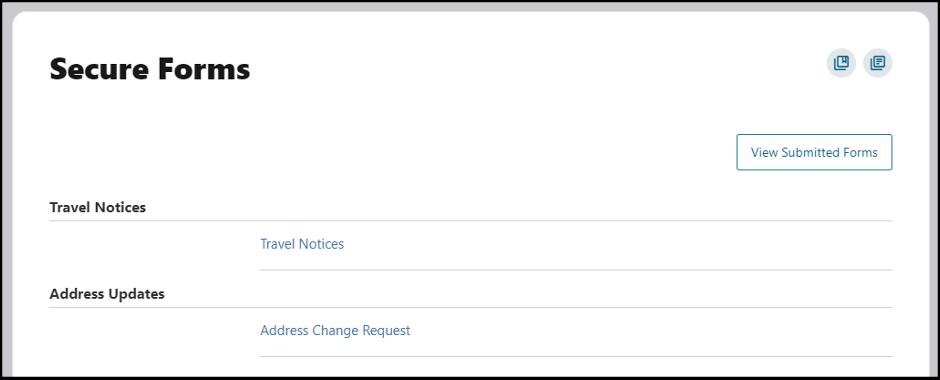

Select the appropriate form, complete the fields, and hit “Submit.” You can also view your submitted forms by clicking the button shown above.
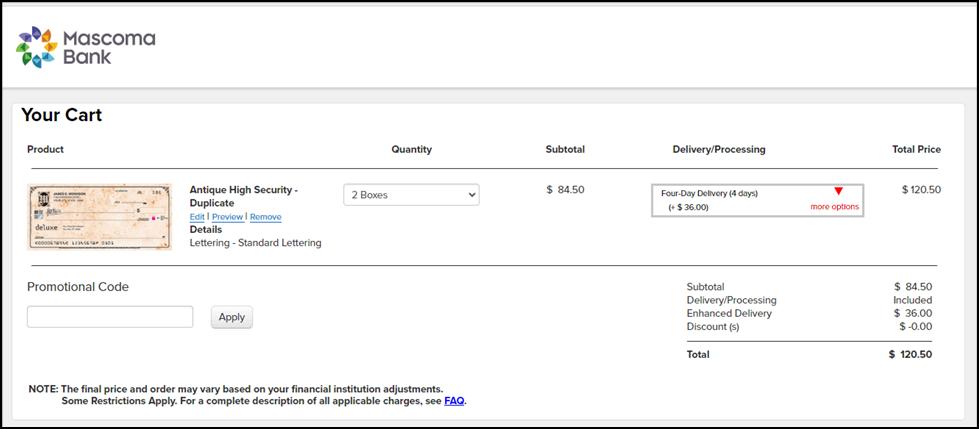
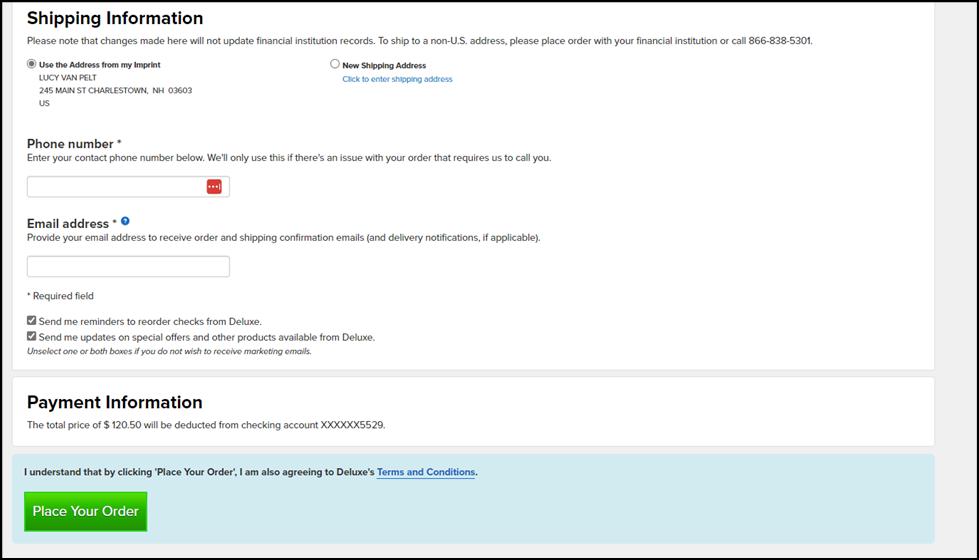
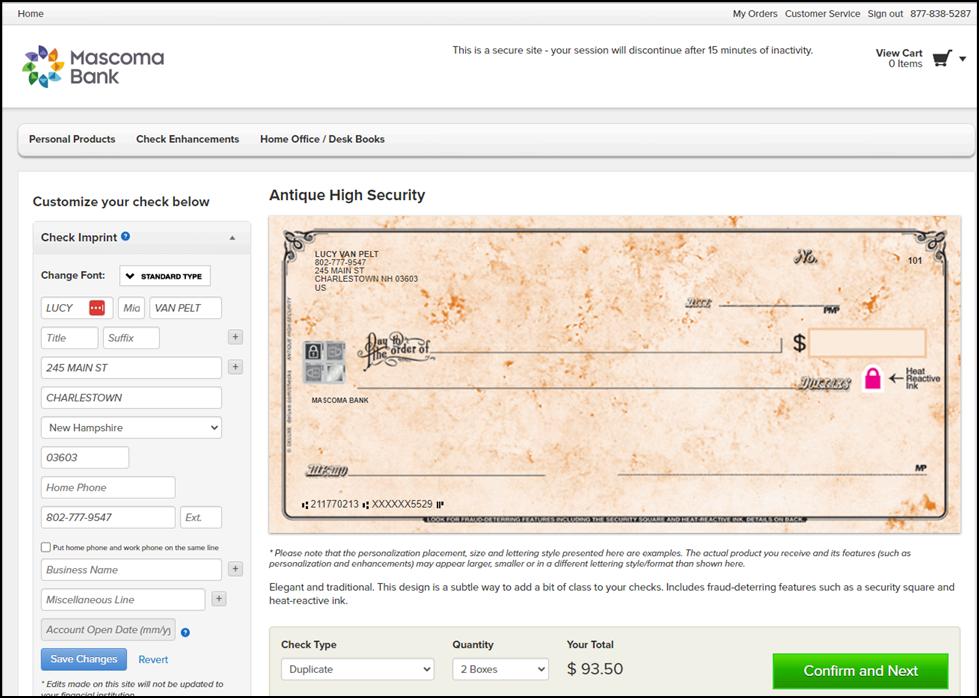
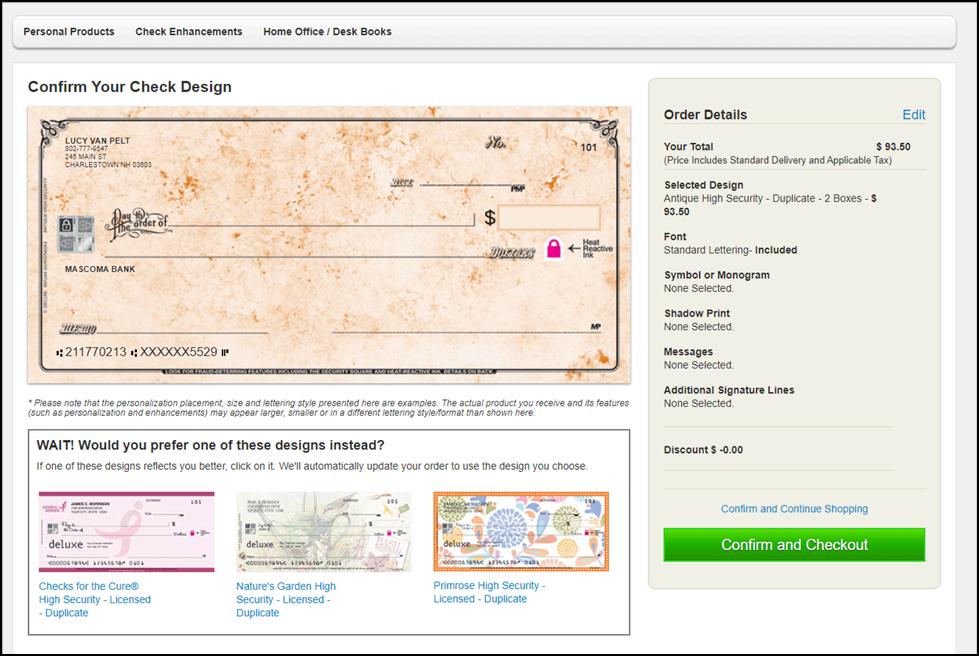
Reorder checks third-party website screenshots for reference.

Enter the necessary details and click on "Save Changes " Select the check type and quantity from the drop-down menu and click on "Confirm and Next." Appendix

Review the details and click on "Confirm and Checkout."
Review the cart details and click on "Place Your Order "
