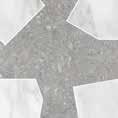
60x6O Matt GRAPHIC DEVELOPMENT

18 19
V2
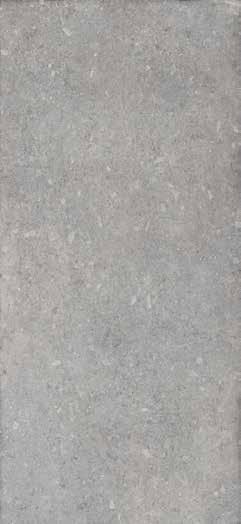
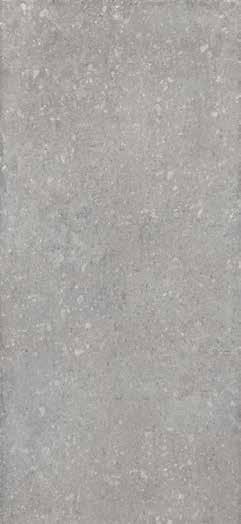
CENERE
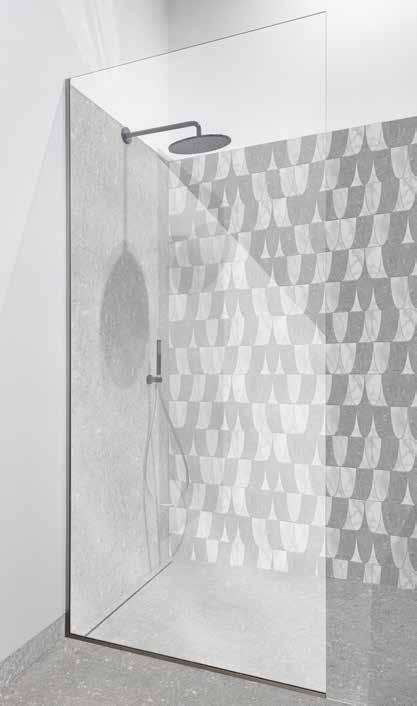
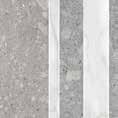
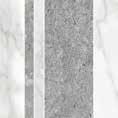
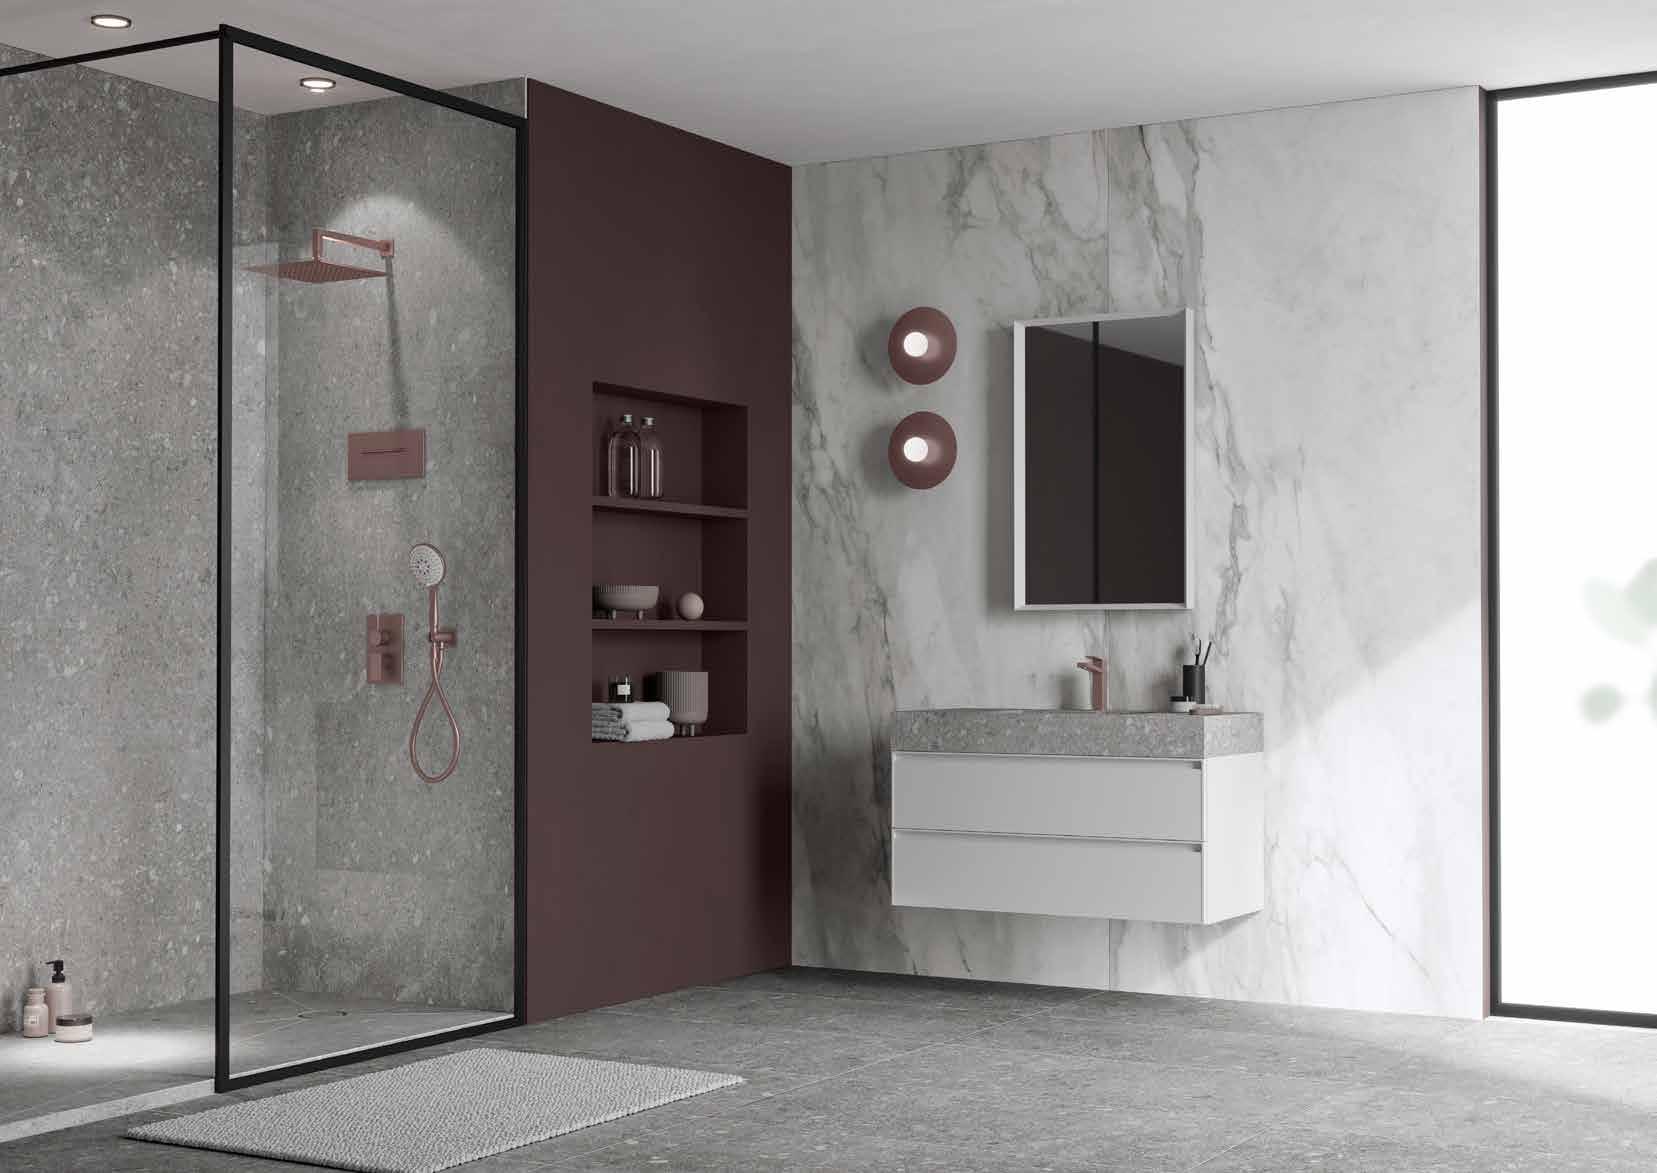
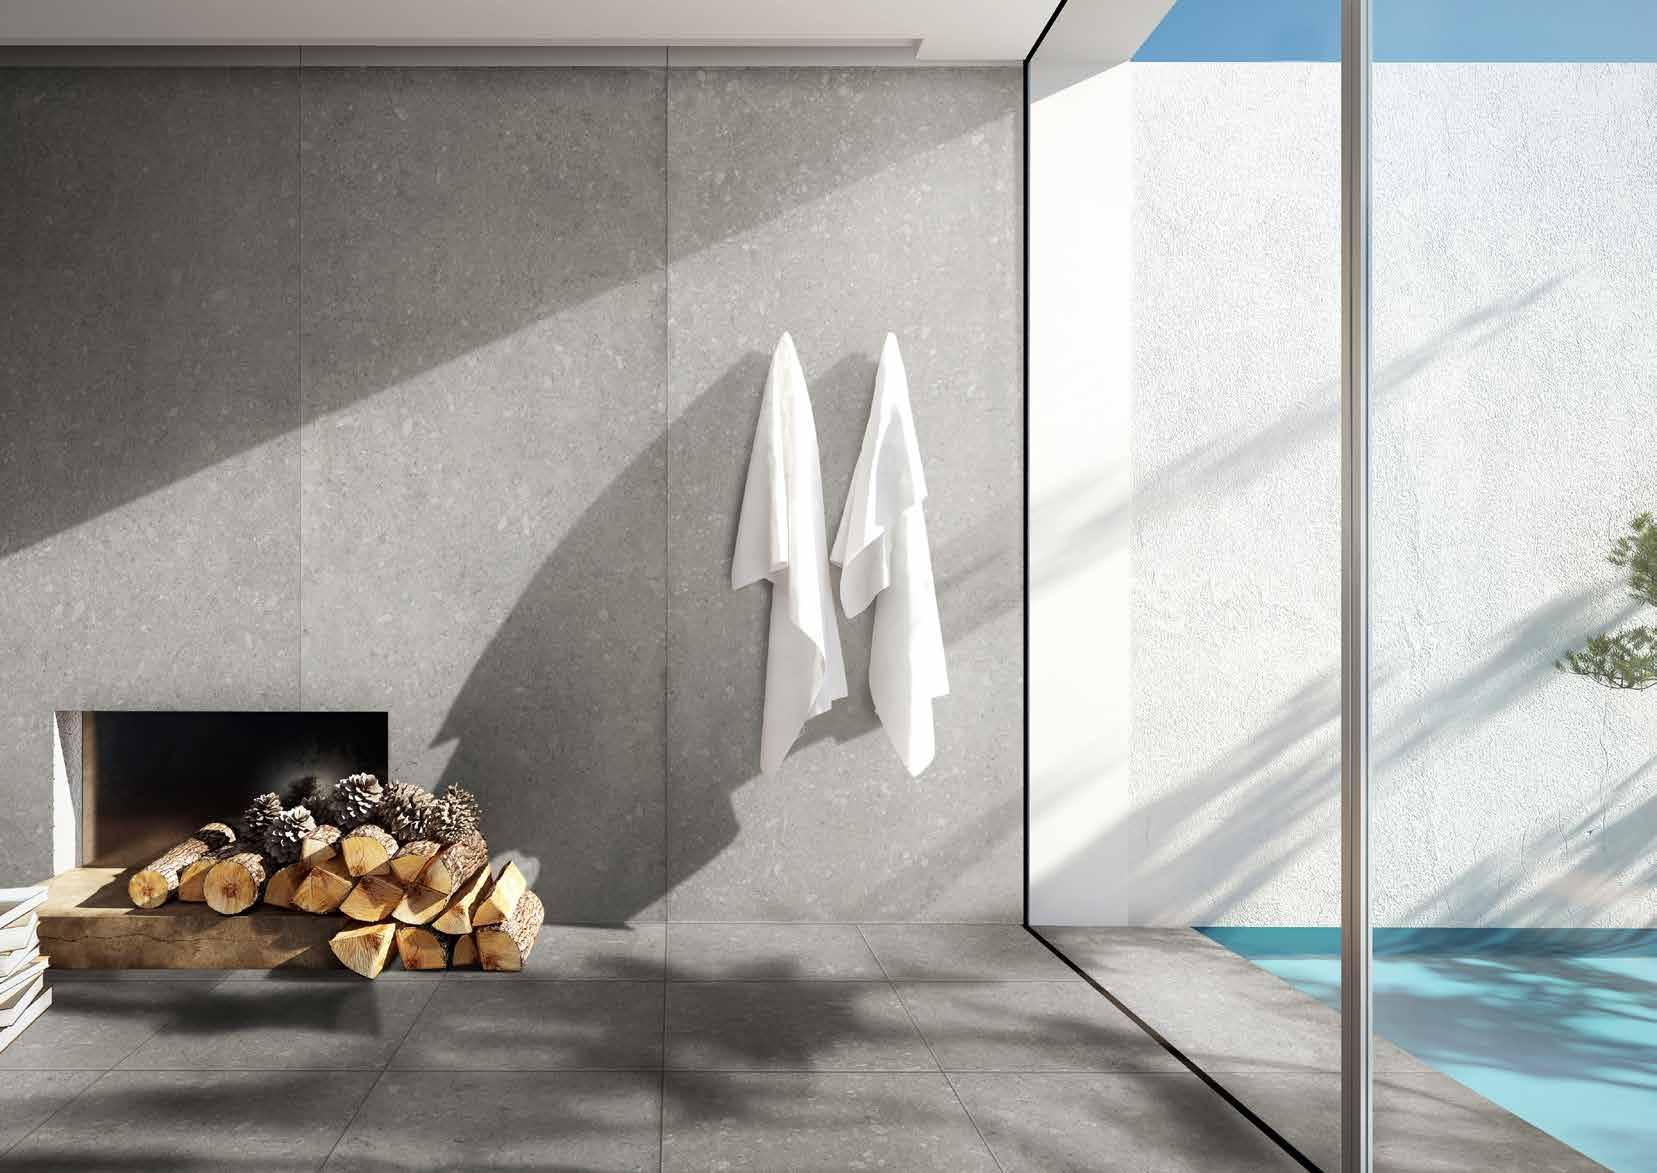
120x280cm Cenere matt wall
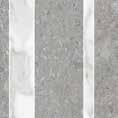
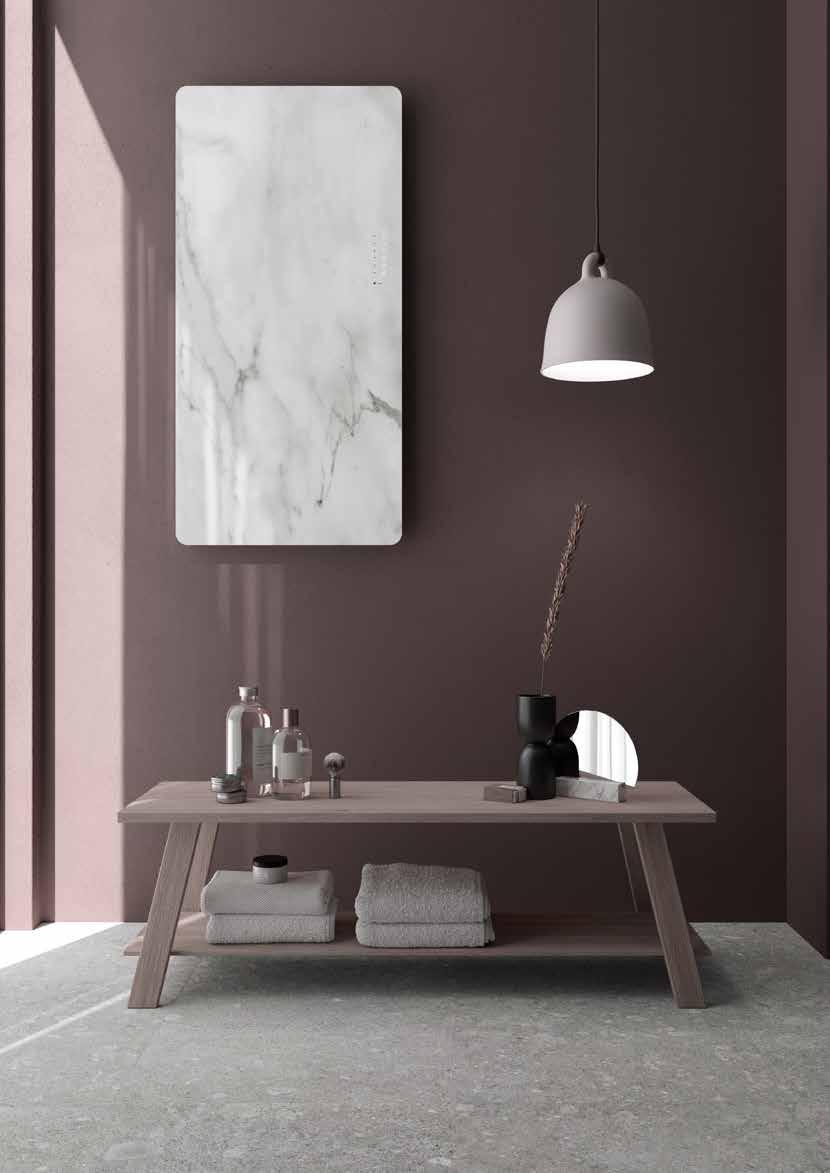
120x280cm Marmo Apuano honed wall
60x120cm Cenere matt floor

22
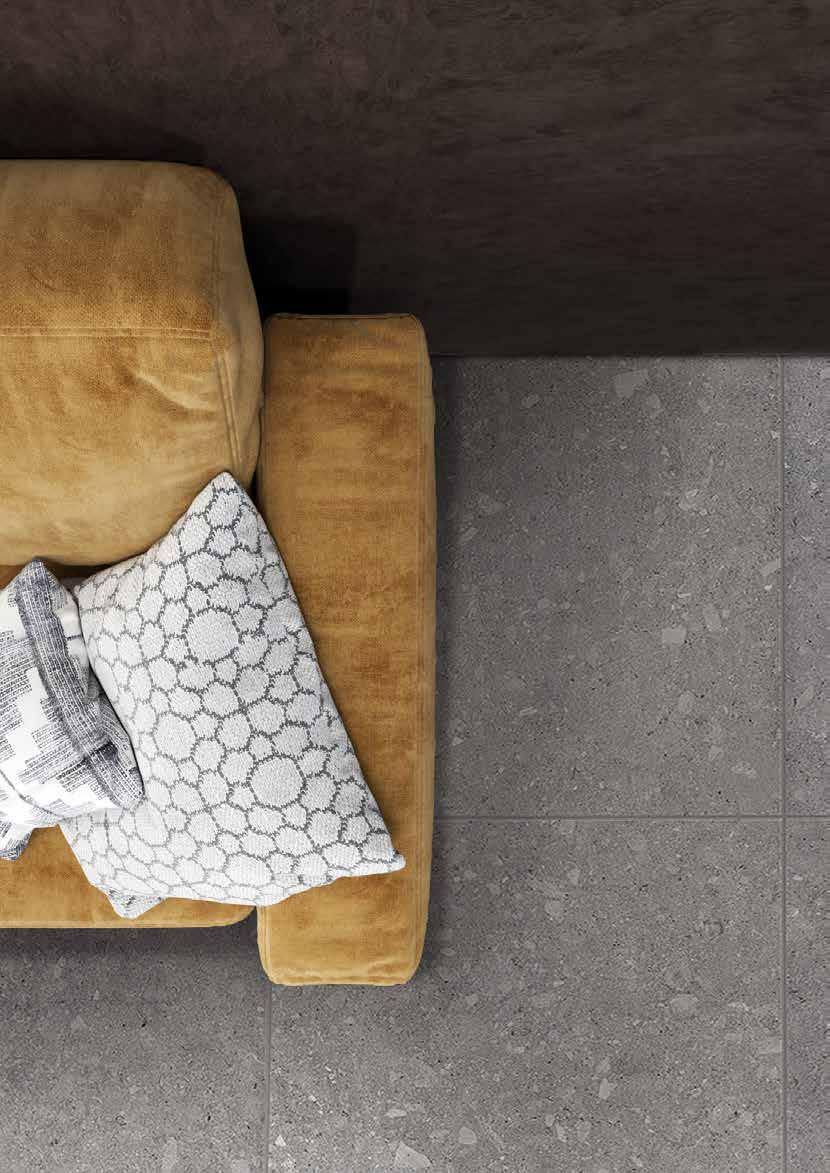
60x120cm Cenere matt floor
CENERE
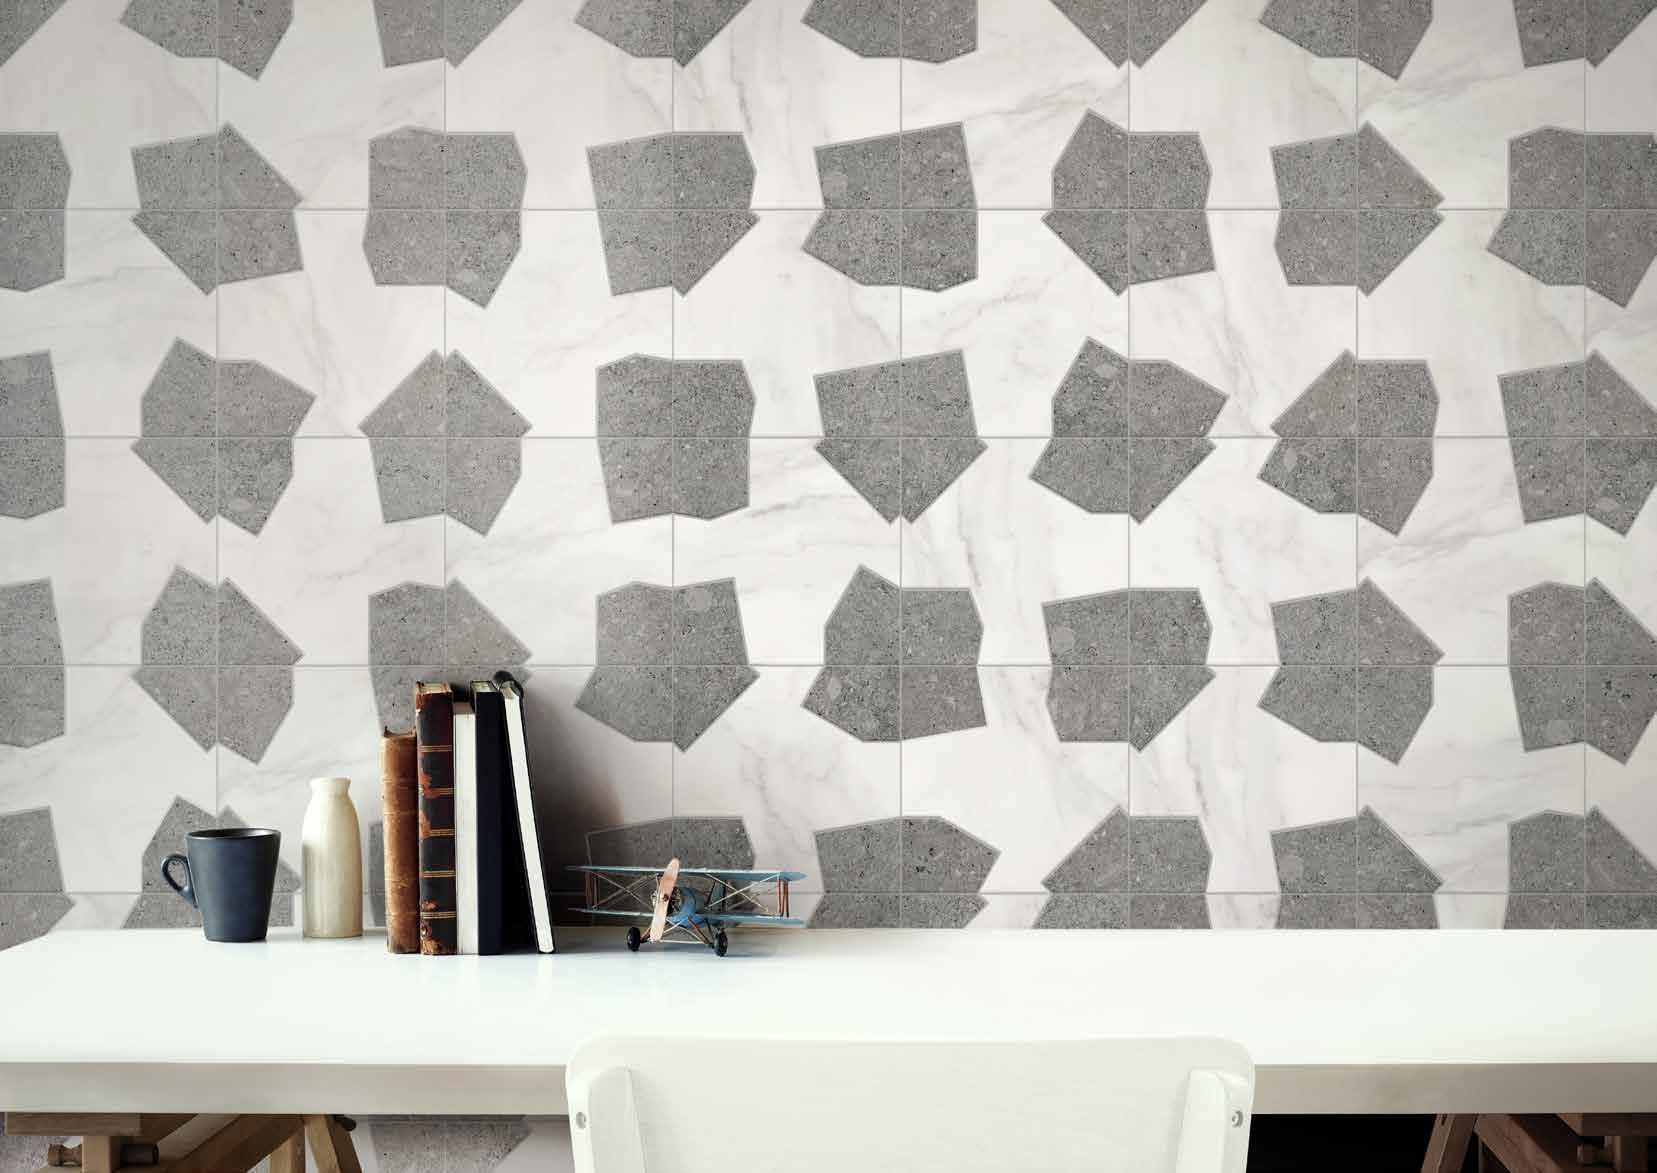
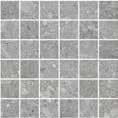
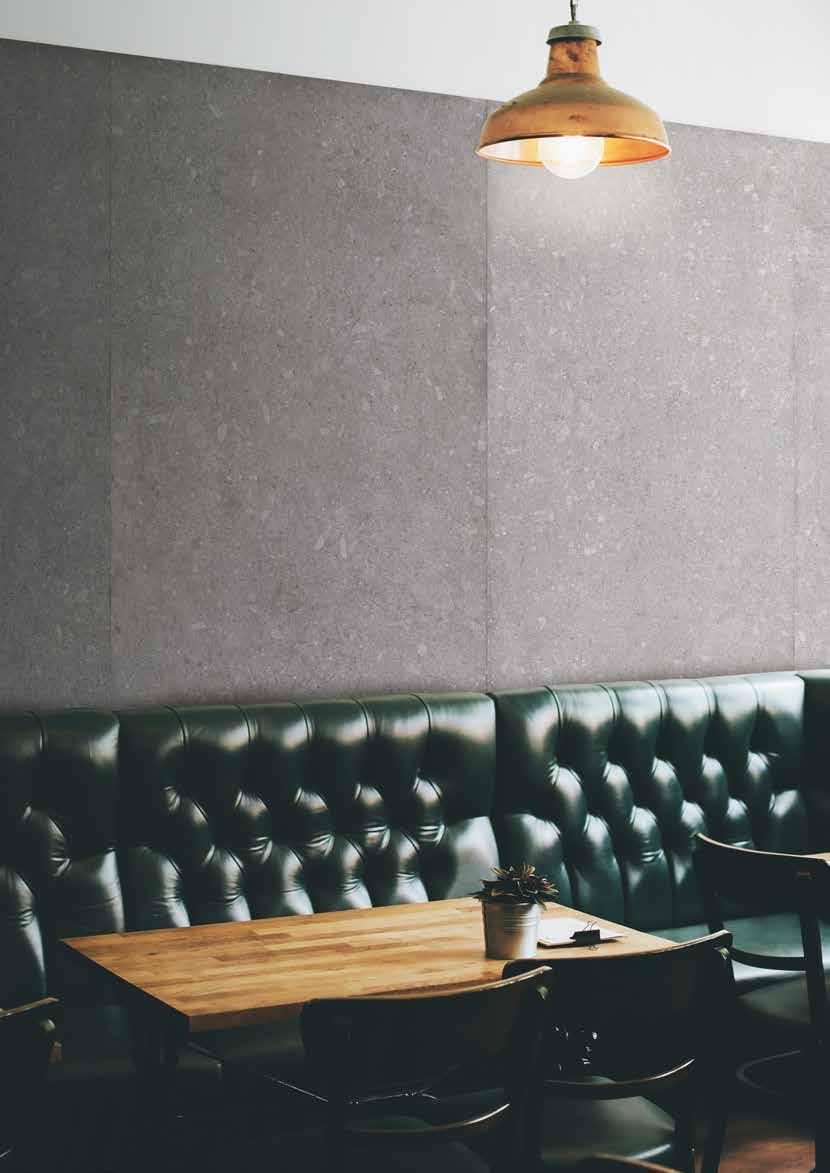
Cross Dark Cenere 29x29cm (pag. 10) wall
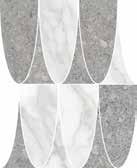
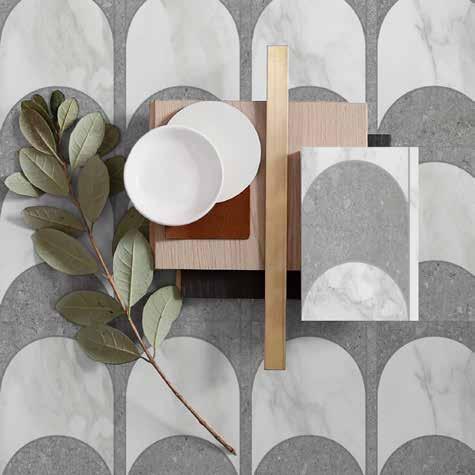
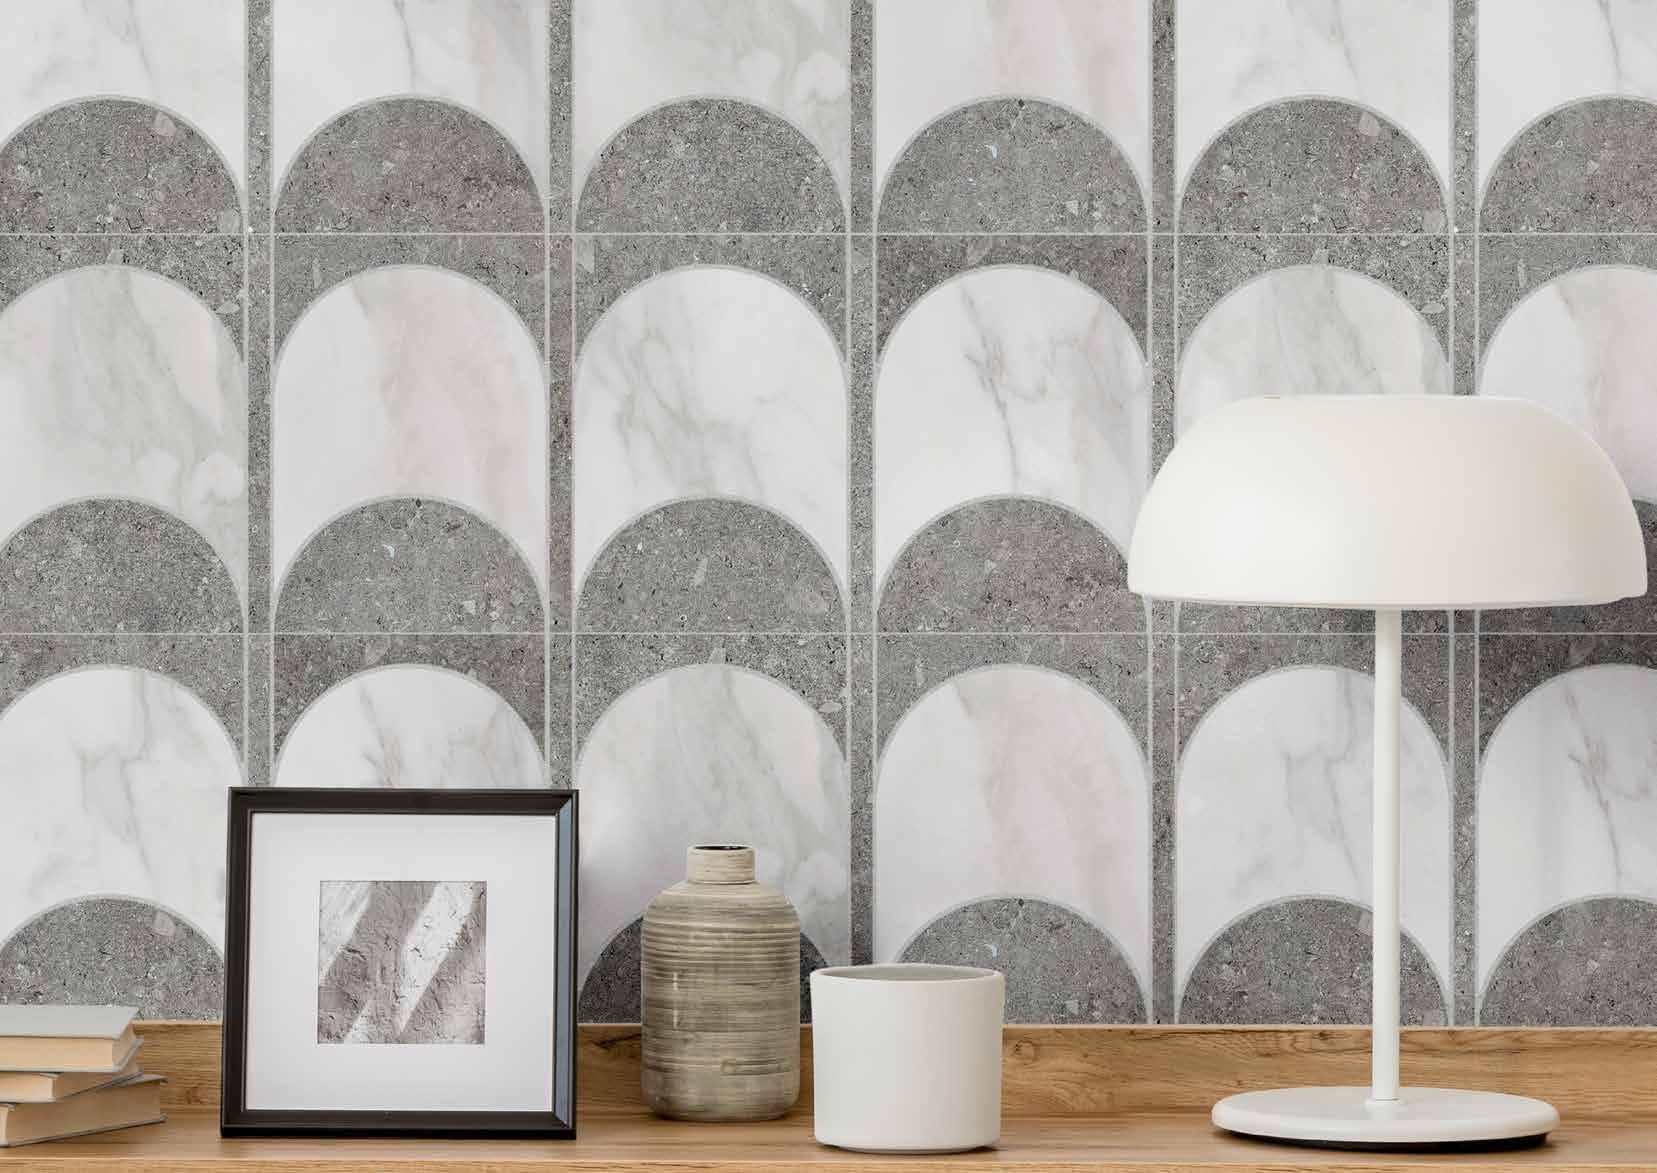 Dome Shade Cenere 29,6x39,6cm (pag. 10) wall
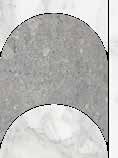
 Strips Cenere 29x29cm (pag. 10) wall
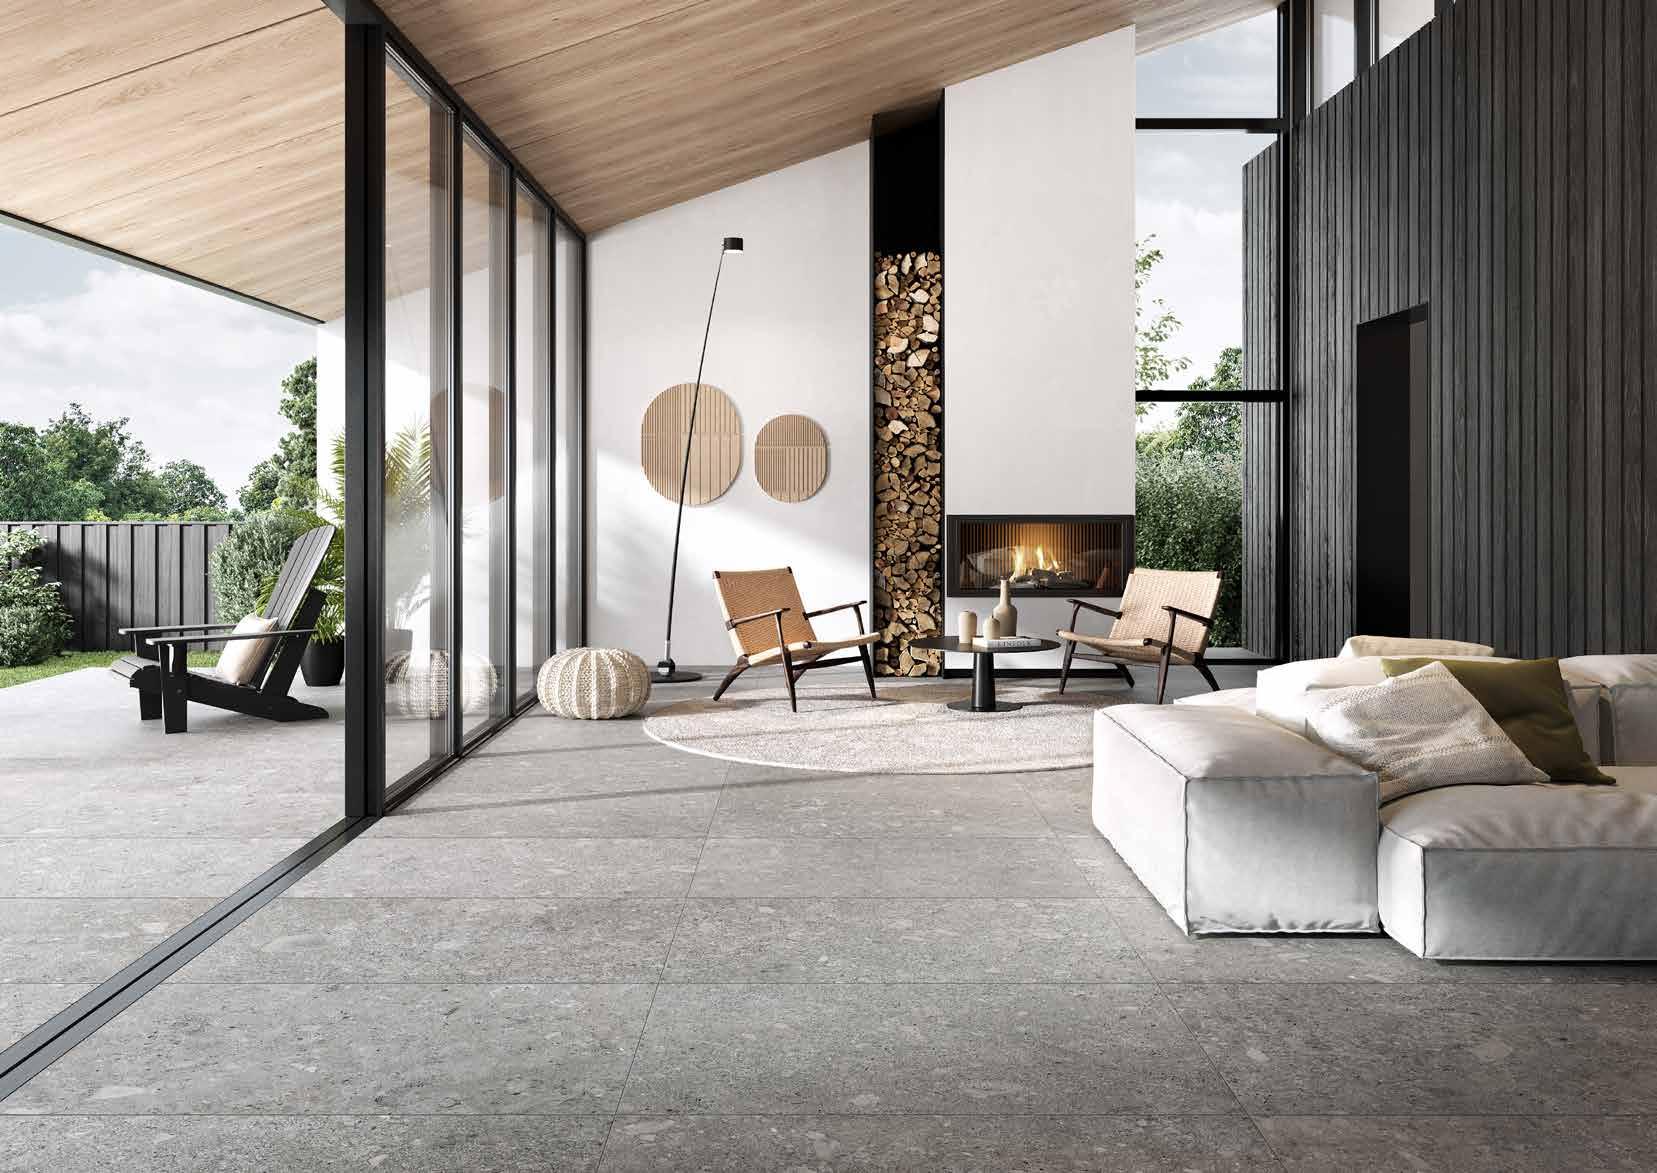
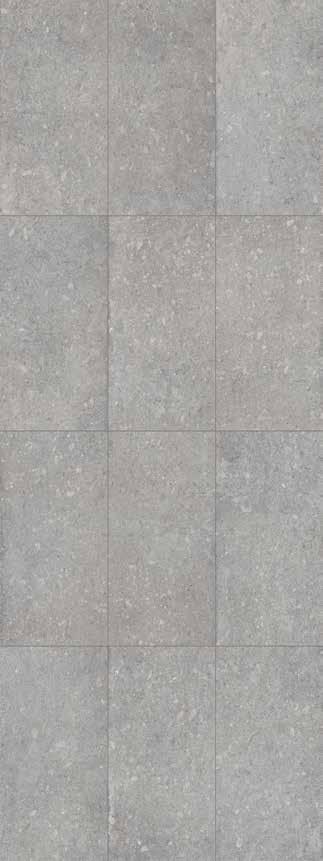
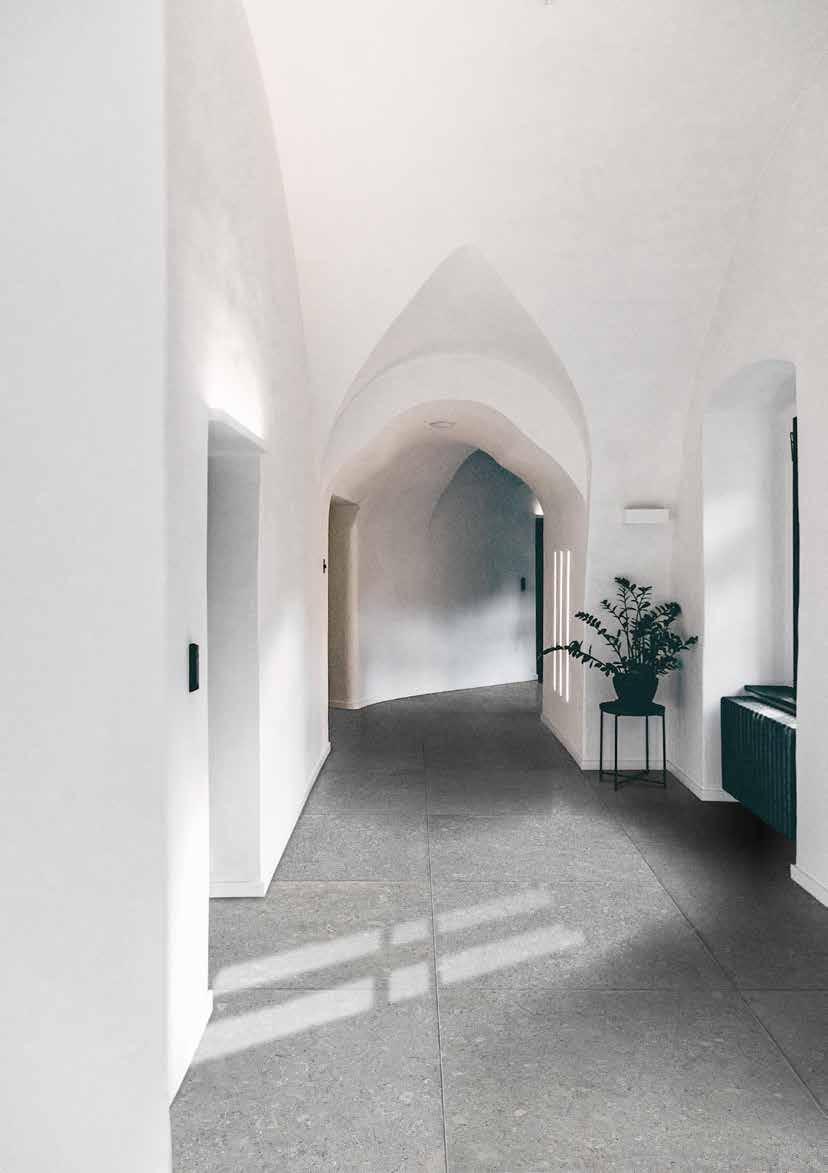
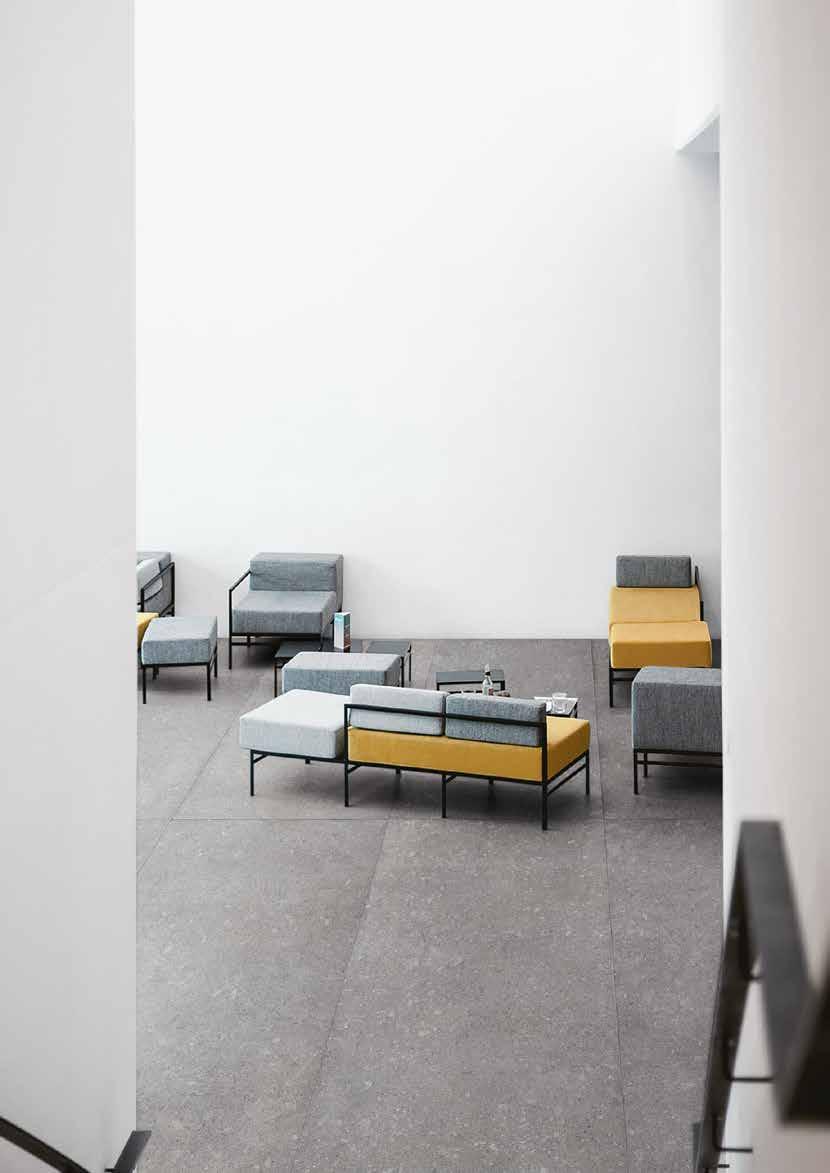
60x120cm Cenere matt indoor floor 60x120cm Cenere ultra matt outdoor floor
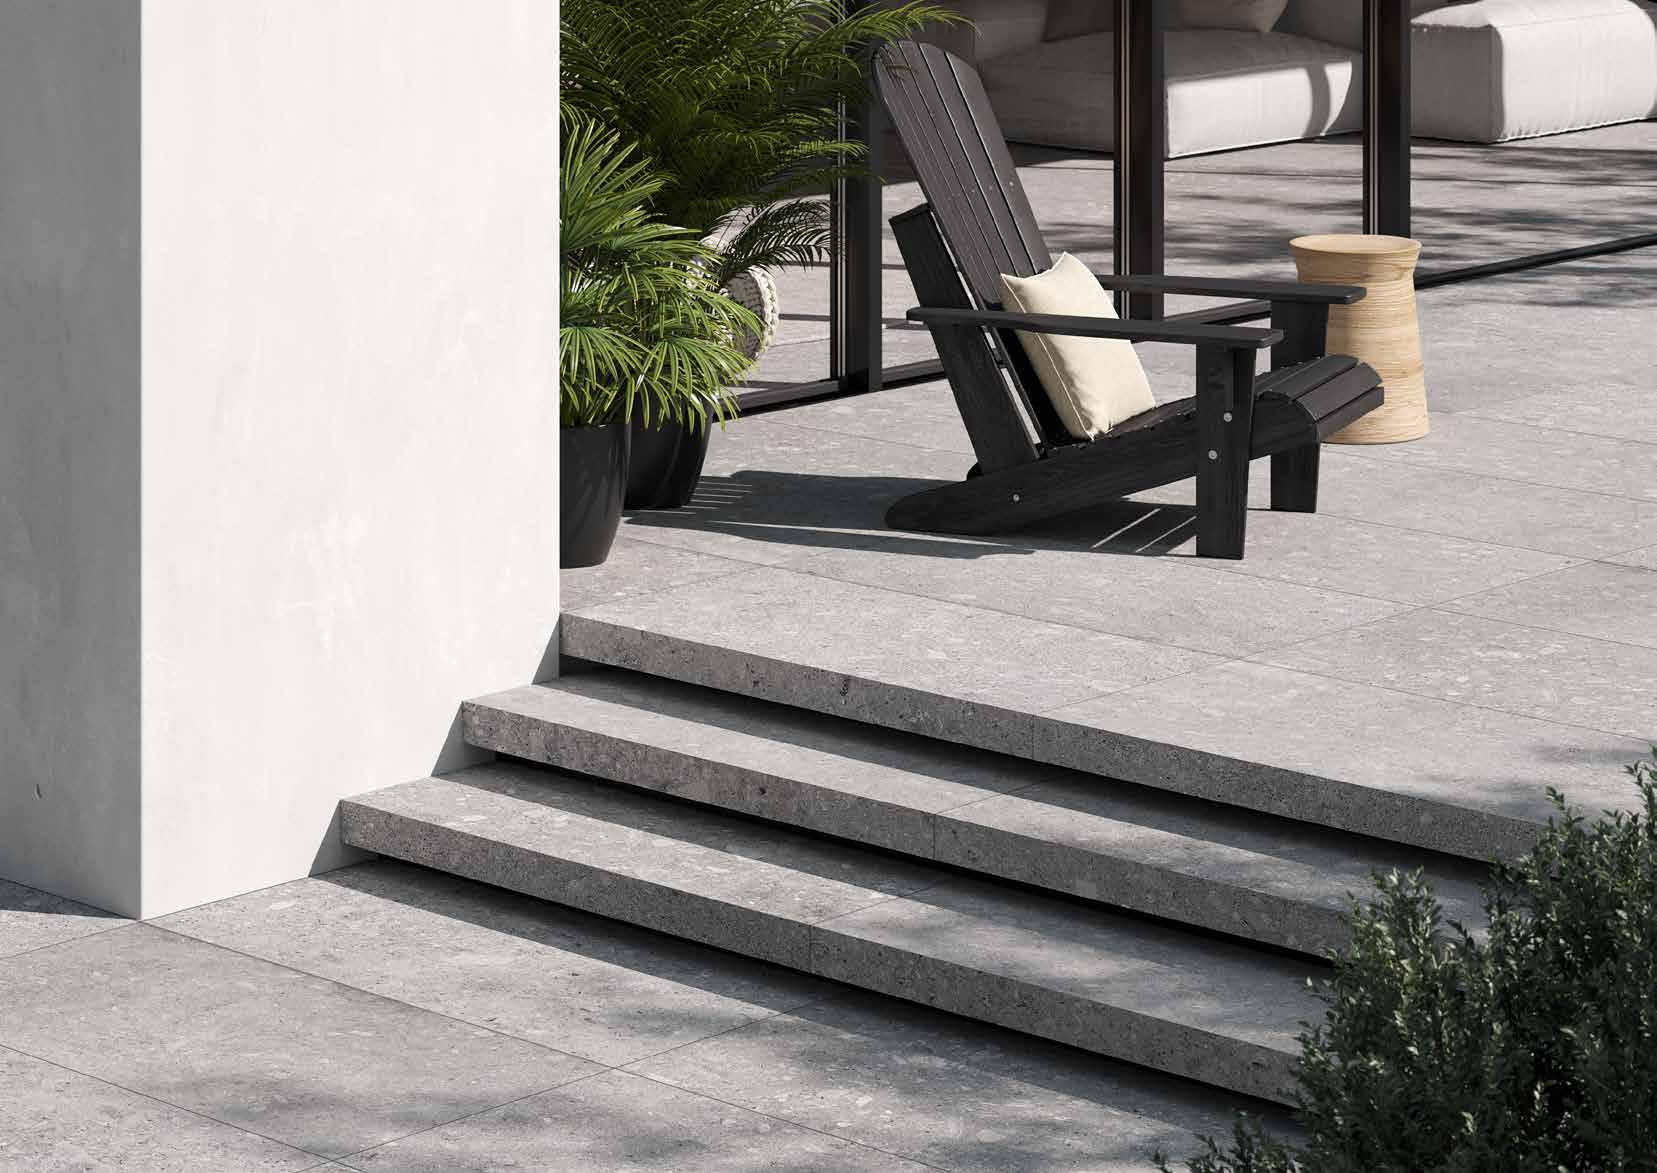
60x120cm L Element 60x120cm Cenere ultra matt outdoor floor
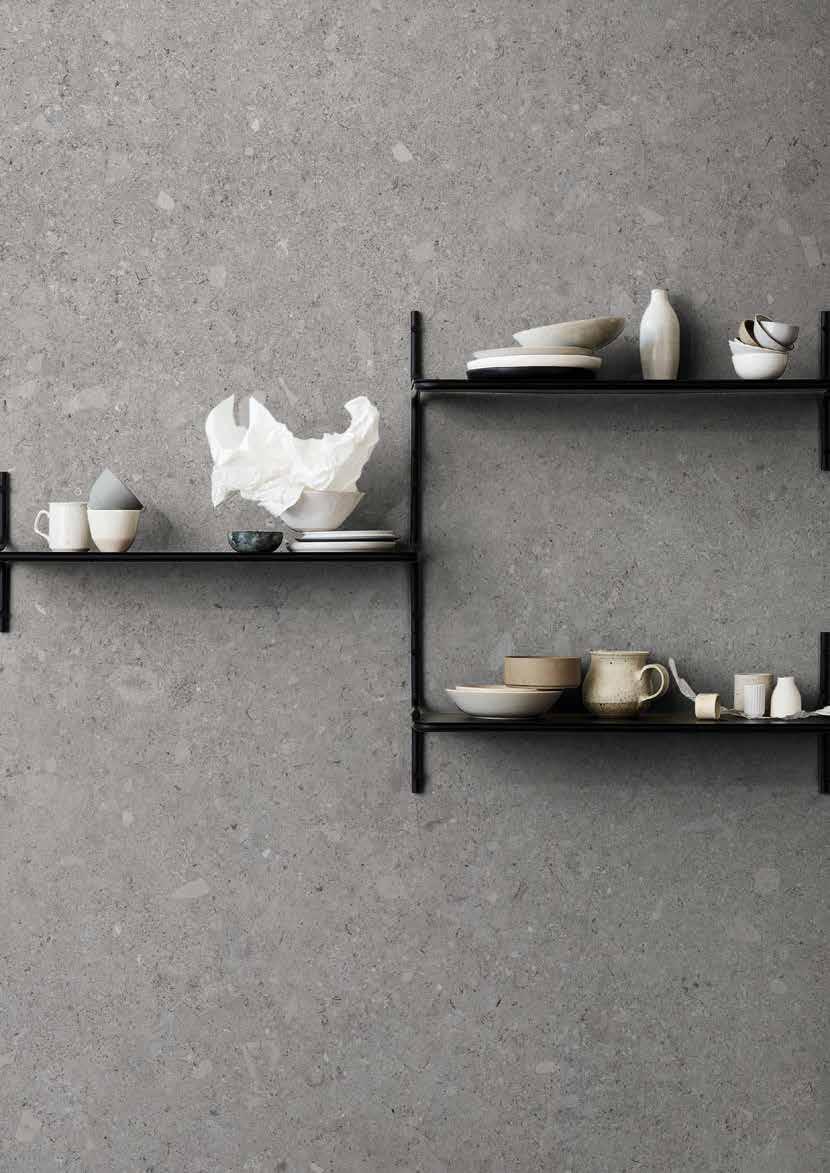
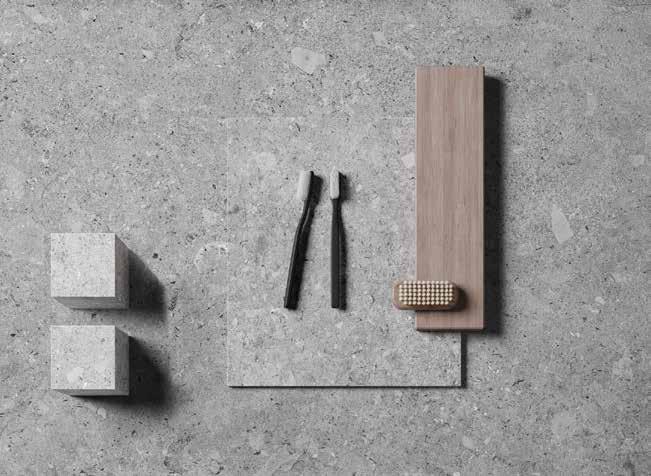
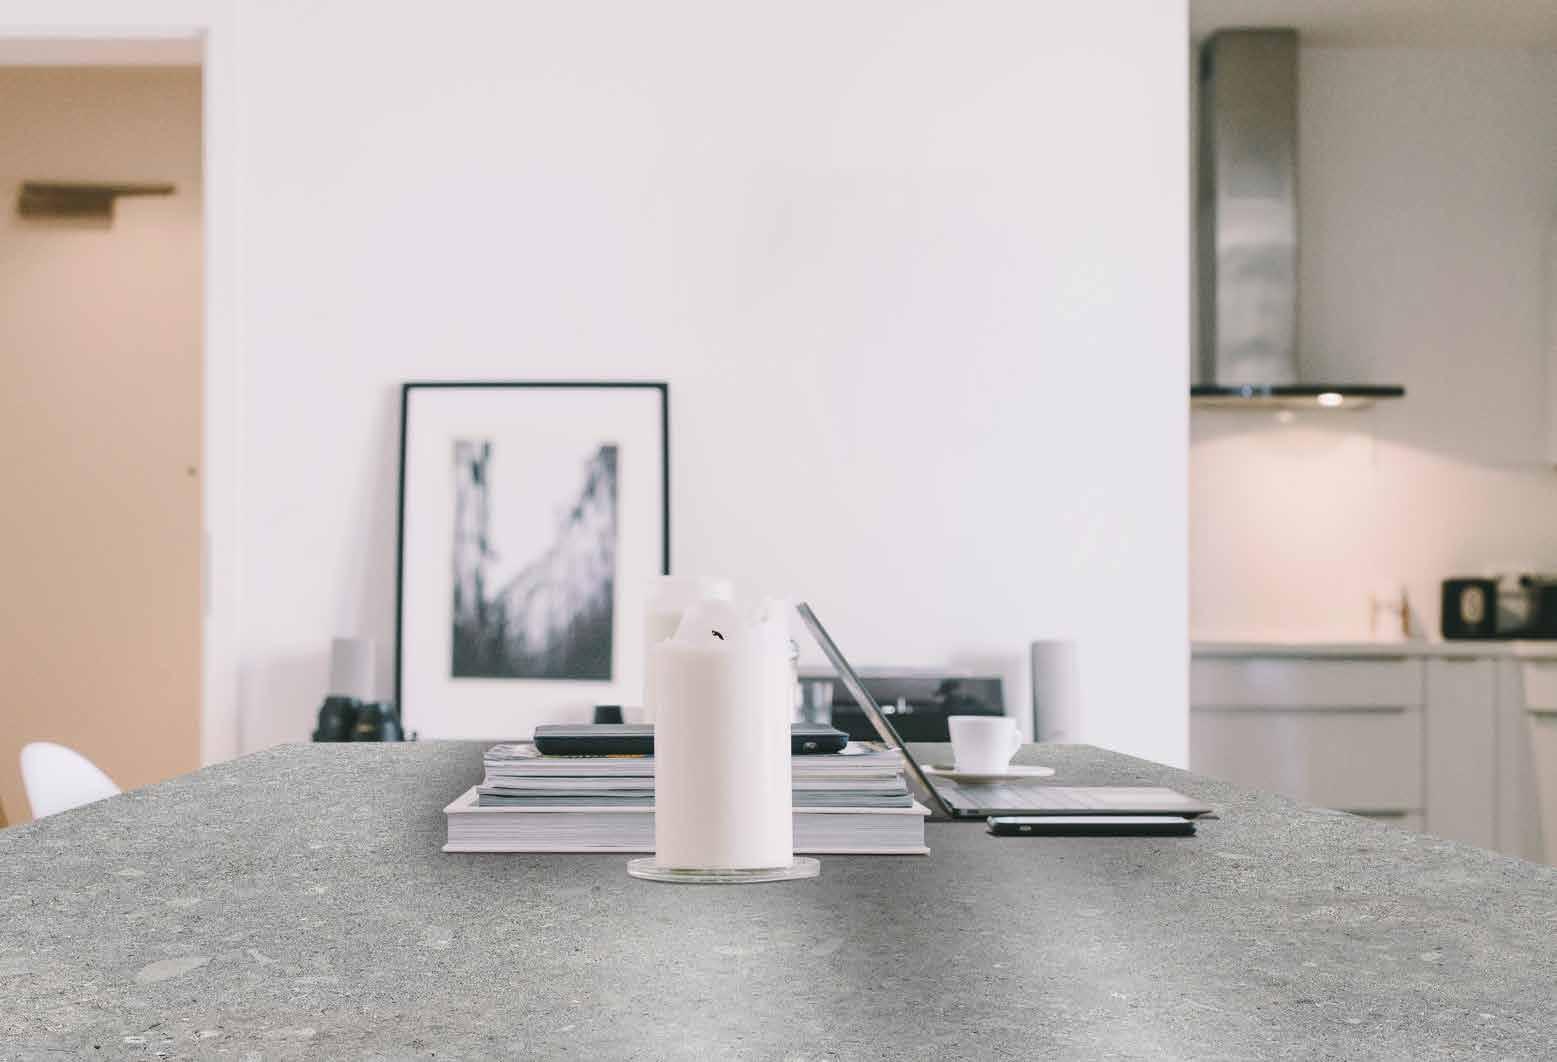
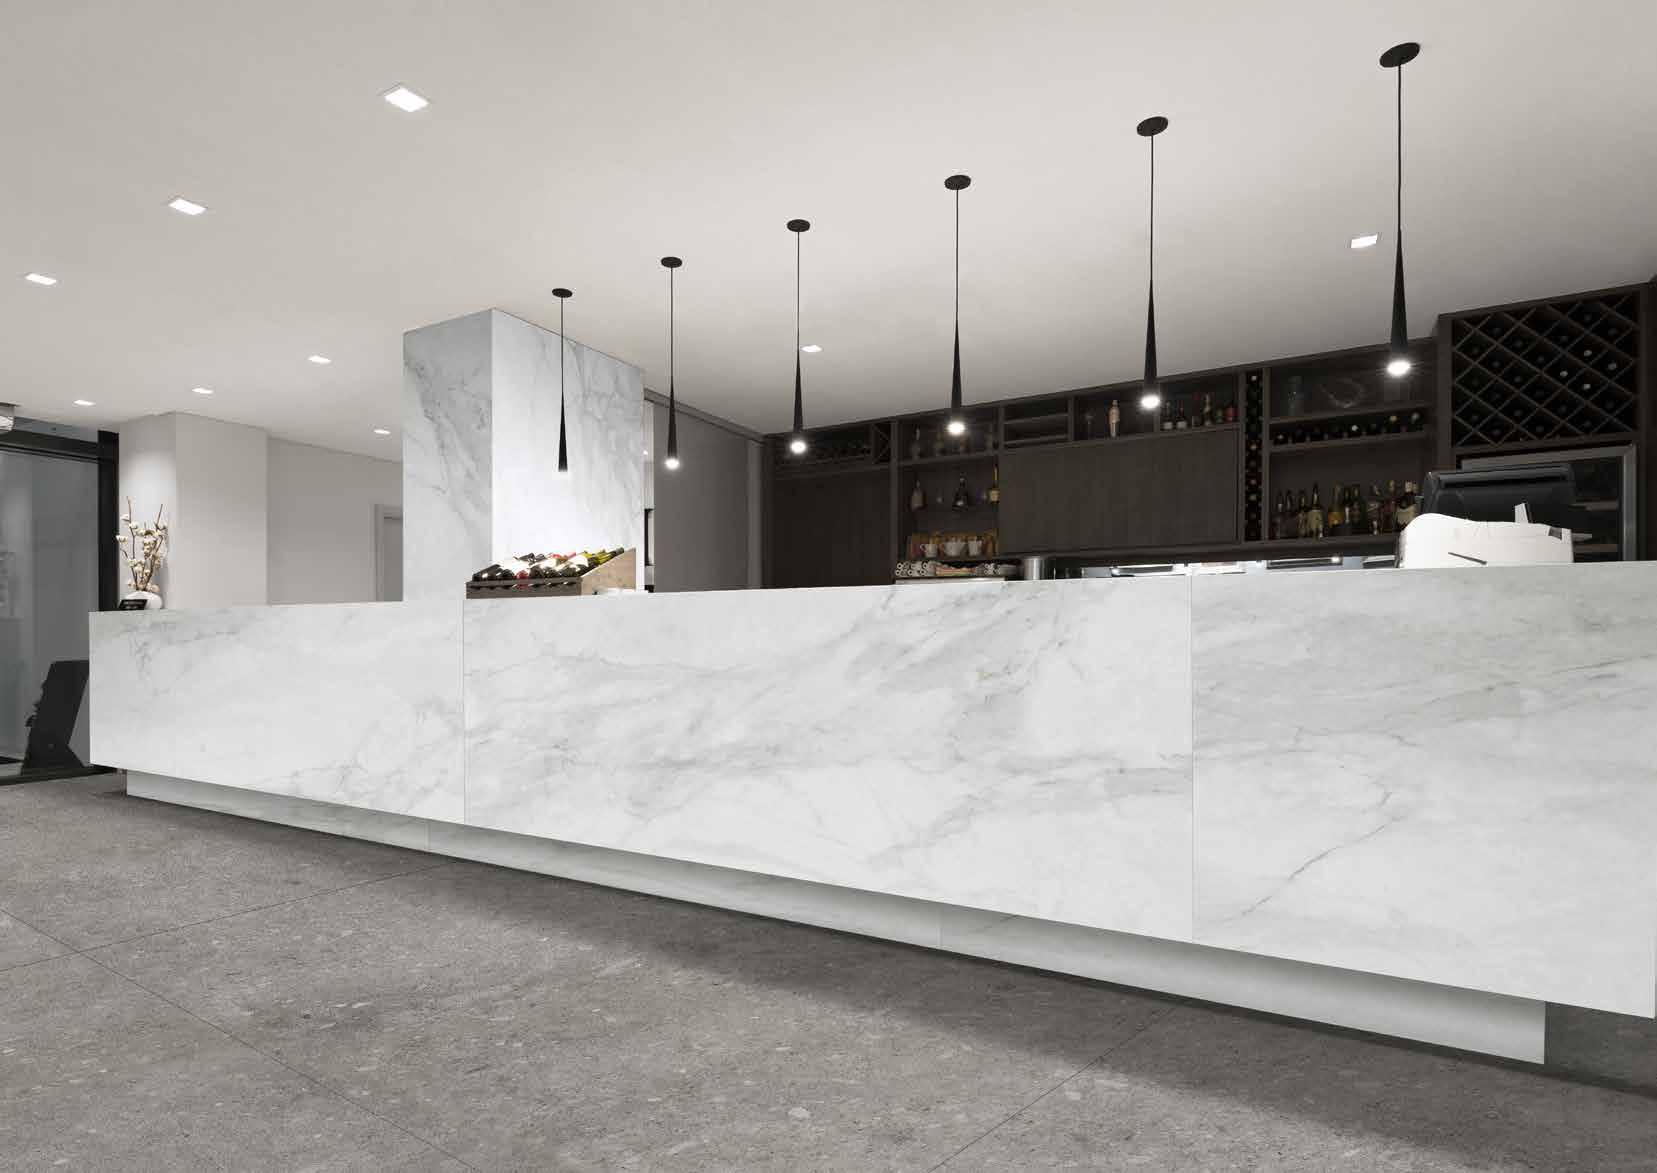
The 160x320cm slab can be used as a work surface for tables and kitchen worktops for 360 degrees of customization.
La lastra 160x320cm può essere usata come piano di lavoro per tavoli e top cucina per una personalizzazione a 360 gradi.
34 35
160x320cm Cenere matt table
60x120cm Cenere ultra matt floor 120x280cm Cenere matt wall 60x60cm Cenere matt floor
38
CENERE
60x60cm
Cenere matt floor
41 120x280cm
Cenere matt wall
CENERE
42 CENERE
120x280cm Cenere matt floor
120x280cm Marmo Apuano honed desk (Ceramica Magica) 120x280cm Cenere matt floor
46 47
BOX | SCATOLA PALLET PCS | PZ SQ.MT. | MQ KG BOXES | SCATOLE SQ.MT. | MQ KG 60x120cm 24"x48" matt 2 1,44 33,40 30 43,20 1022 80x80cm 32"x32" Vintage 2 1,28 29,90 40 51,20 1216 60x60cm 24"x24" matt | ultra matt rectified 3 1,08 21,00 40 43,20 860 30x60cm 12"x24" matt rectified 6 1,08 21,00 40 43,20 860 30x30cm 12"x12" matt rectified 11 1,00 19,50 48 48,00 956 15x15cm 6"x6" matt rectified 44 1,00 19,50 48 48,00 956 Ellipse 31,8x39cm 12,5"x16" 10 1,07 21,00 30 32,10 650 Strips 29x29cm 12"x12" 6 0,51 11,50 60 30,30 710 Cross Light - Cross Dark 29x29cm 12"x12" 6 0,51 11,50 60 30,30 710 Dome Mild - Dome Shade 29,6x39,6cm 12"x16" 4 0,47 11,00 48 22,56 548 Mosaic 30x30cm 12"x12" (5x5cm 2"x2") matt rectified 11 1,00 19,50 30 30,00 956 SKIRTING 5x60cm 2"x24" matt rectified 12 7,2ml 7,20 - -STEP TREAD 33x120cm 13"x48" matt rectified 2 - 19,00 - -IMBALLI
SQ.MT. SLAB MQ LASTRA KG SLAB KG LASTRA PCS CRATE PZ CASSA SQ.MT. BOX MQ CASSA KG BOX KG CASSA 160x320cm 63"x126" matt unrectified 5,12 152,50 7 35,84 1190 PCS A-FRAME PEZZI CAVALLETTO SQ.MT. SLAB MQ LASTRA KG SLAB KG LASTRA SQ.MT. A-FRAME MQ CAVALLETTO KG A-FRAME KG CAVALLETTO 160x320cm 63"x126" matt unrectified 22 5,12 152,50 112,64 3491 SQ.MT. SLAB MQ LASTRA KG SLAB KG LASTRA PCS CRATE PZ CASSA SQ.MT. BOX MQ CASSA KG BOX KG CASSA 120x280cm 48"x111" matt | ultra matt rectified 3,36 48,65 20 67,20 1033 SQ.MT. SLAB MQ LASTRA KG SLAB KG LASTRA PCS A-FRAME PEZZI CAVALLETTO SQ.MT. A-FRAME MQ CAVALLETTO KG A-FRAME KG CAVALLETTO 120x280cm 48"x111" matt | ultra matt rectified 3,36 48,65 44 147,84 2241
IMBALLI PACKAGING
PACKAGING
CARATTERISTICHE TECNICHE TECHNICAL FEATURES
TECHNICAL FEATURES
CARATTERISTICHE TECNICHE
Technical features unglazed porcelain stoneware Conforming to european Standards EN
TECHNIQUES
Color resistance to light Resistenza dei colori alla luce Lichtbeständigkeit Résistence des couleurs à la lumière DIN
Fungi resistance Resistenza ai funghi Pilzresistenz Résistence aux mycètes
SRI Solar reflection index
SRI Indice di riflessione solare SRI Sonnenreflexionsindex SRI Indice de réflexion solaire
Tendency to retain dirt Tendenza a trattenere lo sporco Tendance à retenir la saleté Neigt zur Zurückhaltung von Schmutz
Contact with food Contatto con alimenti Kontakt mit Lebensmitteln Contact avec aliments
ASTM-G-21-15
Contact for 28 days with a variety of fungal strains Contatto per 28 giorni con diversi ceppi fungini
28 Tage Kontakt mit verschiedenen Pilzarten
Contact pendant 28 jours avec différentes souches fongiques
No growth on the surface Nessuna crescita fungina in superficie Kein Pilzwachstum auf der Oberfläche Aucun développement fongique en surface
In-house test method
UNI-9300:2015

UNI-EN-1186:2003
Illuminant D65 / Spectrophoyometer at 10 ° Illuminante D65 / Spettrofotometro a 10 ° Leuchtkörper D65 / Spektralphotometer bei 10 ° Illuminante D65 / Spectrophotomètre à 10 °
Carbon black staining agent Macchiante Nero carbone Färbemittel kohlenshwarz Tachant Noir carbone
Contact with solvents for 2 hours at 40° Contatto con diversi solventi per ore a 40°
2 Stunden langer Kontakt mit verschiedenen Lösungsmitteln bei 40° Contact avec différents solvants pendant heures à 40°
Available on request Disponibile su richiesta Auf Anfrage verfügbar Disponible sur demande
No visible change Nessun cambiamento visibile Keine sichtbare Veränderung Aucun changement visible
Available on request Disponibile su richiesta Auf Anfrage verfügbar Disponible sur demande
al gelo
Frostbeständigkeit
Résistance au gel
Resistance to low concentrations of acids and alkali Resistenza a basse concentrazioni di acidi e alcali
Beständigkeit gegen schwach konzentrierten Säuren und Laugen Résistance à des basses concentrations d’acides et bases
Resistance to high concentrations of acids and alkali
Resistenza a alte concentrazioni di acidi e alcali
Beständigkeit gegen hoch konzentrierten Säuren und Laugen Résistance à des hautes concentrations d’acides et bases
Resistance to domestic chemicals and additives for swimming pools Resistenza ai prodotti chimici di uso domestico e agli additivi per piscina Beständigkeit gegen chemischen Haushaltsreiniger und Zusatzstoffe für Schwimmbäder
EN ISO 10545-12
*Pass according to ISO 10545-1 Test superato in accordo con ISO 10545-1 Test überstanden nach ISO 10545-1 Pv en accord avec norme en 10545-1
*Declared value Valore dichiarato Angegebener Wert Valeur déclaré
Resistant Resistente Widerstandsfähig Résistant
From ULA to ULB
Da ULA a ULB
Von ULA bis ULB
De ULA jusqu’à ULB
Resistance to cold liquids Resistenza ai liquidi freddi Beständigkeit gegen kalte Flüssigkeiten Résistance aux liquides froids
Resistance to moist Resistenza al calore umido Beständigkeit gegen feuchte Hitze Résistance à l’humidité
UNI-EN-12720:2013
Period of contact 10s to 24h Tempi di contatto da 10s a 24h Kontaktzeit von 10s bis 24h Temsp de contact de 10s à 24h
CEN TS 16209 Cl. B
EN ISO 10545-13
*Declared value Valore dichiarato Angegebener Wert Valeur déclaré
From UHA to UHB Da UHA a UHB Von UHA bis UHB De UHA jusqu’à UHB
Resistance to dry heat Resistenza al calore secco Beständigkeit gegen trockene Hitze Résistance à la chaleur sèche
Thermal shock resistance Resistenza agli sbalzi termici Temperaturwechselbeständigkeit Résistance aux écarts de température
UNI-EN-12721:2013
55° to 100° cycles Cicli da 55° a 100° Zyklen von 55° bis 100° Cycles de 55° à 100°
No visible change CEN TS CEN TS 16209 Cl. B Nessun cambiamento visibile CEN TS CEN TS 16209 Cl. B Keine sichtbare Veränderung CEN TS CEN TS 16209 Cl. B Aucun changement visible CEN TS CEN TS 16209 Cl. B
* It’s advisable to refer to Contract Division for all necessary guidelines to a correct use. Si raccomanda di consultare Contract Division per le indicazioni necessarie al corretto utilizzo. Zur korrekten Anwendung wird empfohlen mit unserem Contract Division Kontakt aufzunehmen. Merci de consulter nôtre Contract Division pour les indications a un usage correct.
UNI-EN-12722:2013
55° to 180° cycles Cicli da 55° a 180° Zyklen von 55° bis 180°
Cycles de 55° à 180°
EN ISO 10545-9 -


* It’s advisable to refer to Contract Division for all necessary guidelines to a correct use. Si raccomanda di consultare Contract Division per le indicazioni necessarie al corretto utilizzo. Zur korrekten Anwendung wird empfohlen mit unserem Contract Division Kontakt aufzunehmen. Merci de consulter nôtre Contract Division pour les indications a un usage correct.
No visible change CEN TS CEN TS 16209 Cl. B Nessun cambiamento visibile CEN TS CEN TS 16209 Cl. B Keine sichtbare Veränderung CEN TS CEN TS 16209 Cl. B Aucun changement visible CEN TS CEN TS 16209 Cl. B
Resistant Resistente Widerstandsfähig Résistant
48 49
CARATTERISTICHE TECNICHE GRÈS PORCELLANATO TUTTA MASSA Conformi a Norme Europee EN 14411 ISO 13006 App. G (Gruppo BIa UGL con Eb ≤ 0,5%) TECHNISCHE EIGENSCHAFTEN FEINSTEINZEUG DURCHGEFÄRBT Gemäß den Europäischen Normen EN 14411 ISO 13006 App. G (Gruppe BIa UGL mit Eb ≤ 0,5%) CARACTERISTIQUES TECHNIQUES GRES CERAME PLEIN MASSE Conformes aux Normes Européennes EN 14411 ISO 13006 App. G (Groupe BIa UGL avec Eb ≤ 0,5%)
features
porcelain stoneware
to european Standards EN 14411 ISO 13006 App. G (Gruppo BIa UGL con Eb ≤ 0,5%)
Technical
unglazed
Conforming
CARATTERISTICHE TECNICHE GRÈS PORCELLANATO TUTTA MASSA Conformi a Norme Europee EN 14411 ISO 13006 App. G (Gruppo BIa UGL con Eb ≤ 0,5%) TECHNISCHE EIGENSCHAFTEN
FEINSTEINZEUG DURCHGEFÄRBT Gemäß den Europäischen Normen EN 14411 ISO 13006 App. G (Gruppe BIa UGL mit Eb ≤ 0,5%)
CARACTERISTIQUES
GRES CERAME PLEIN MASSE Conformes aux Normes Européennes EN 14411 ISO 13006 App. G (Groupe BIa UGL avec Eb ≤ 0,5%)
13006 App. G (Gruppo BIa UGL con Eb ≤ 0,5%) TECHNICAL FEATURES CARATTERISTICE TECNICHE TECHNISCHE DATEN CARACTERISTIQUE TECHNIQUE TESTING METHOD METODICA DI PROVA PRÜFVERFAHREN NORME D’ESSAIS REFERENCE STANDARD RIFERIMENTO NORMA STANDARDWERT RÉFÉRENCE NORME TEST RESULTS VALORE PRODOTTO PRODUKT WERTE VALEUR PRODUIT Sizes Dimensioni Abmessungen Dimensions EN ISO 10545-2 Compliant Conforme Erfüllt Conforme Water absorption Assorbimento d’acqua Wasseraufnahme Absorption d’eau EN ISO 10545-3 E ≤ 0,5% Average value 0,08% Valore medio 0,08% Durchschnittswert 0,08% Valeur moyenne 0,08% Modulus of rupture Carico di rottura Bruchlast Charge de rupture EN ISO 10545-4 N (sp. >= 7,5 mm) Compliant Conforme Erfüllt Conforme Bending strength Resistenza alla flessione Biegefetsigkeit Résistance à la flexion >35 N/mm Compliant Conforme Erfüllt Conforme Abrasion resistance Resistenza all’abrasione Abriebbeständigkeit Résistance à l’abrasion EN ISO 10545-6 < 175 mm Compliant Conforme Erfüllt Conforme Moisture expansion Dilatazione all’umidità Feuchtigkeitsexpansion Coefficient de dilatation à l’humidité EN ISO 10545-10 Declared value Valore dichiarato Angegebener Wert Valeur déclaré 0,01% Lead and cadmium discharge Determinazione della cessione di piombo e cadmio Blei- und Cadmiumentladung Perte de plomb et cadmium EN ISO 10545-15Absent Assente Abwesend Absent Frost resistance Resistenza
14411 ISO
Résistance
piscines UB min. UA Friction coefficient (Slipperiness) Coefficiente di attrito (Scivolosità) Reibungskoeffizient (Schlupfrigkeit) Coefficient de friction (Glissement) DIN 51130 *Declared value Valore dichiarato Angegebener Wert Valeur déclaré R10 matt ANSI A137.1 (DCOF) >0,42 N ≥ 15 cm (%) (mm) Length and width - Lunghezza larghezza Länge und Breite ±0,6% 2,0 mm Longueur et largeur • Thickness Spessore Stärke Epaisseur ±5,0 ±0,5 • Lineartity Rettilineità spigoli Kantengeradheit- 0,5 1,5 Rectitude des arêtes • Wedging Ortogonalità Rechtwinkligkeit ±0.5 ±2,0 Orthogonalité Warpage Planarità Ebenflächigkeit-Planéité 0,5 2,0 Appearance: percentage of acceptable tiles, per lot Aspetto: percentuale di piastrelle accettabili nel lotto 95% min. Oberflächenbeschaffenheit: Prozentsatz der Fliesen, die den gefordeten Eigenschaften entsprechenAspect: pourcentage de carreaux
sur
totale
aux prod. chimiques d’usage domestique et additifs pour
acceptables
la fourniture
TECHNICAL FEATURES CARATTERISTICE TECNICHE TECHNISCHE DATEN CARACTERISTIQUE TECHNIQUE TESTING METHOD METODICA DI PROVA PRÜFVERFAHREN NORME D’ESSAIS REFERENCE STANDARD RIFERIMENTO NORMA STANDARDWERT RÉFÉRENCE NORME TEST RESULTS VALORE PRODOTTO PRODUKT WERTE VALEUR PRODUIT Stain resistance Resistenza
Fleckenbeständigkeit Résistance aux taches EN ISO 10545-14 Declared value Valore dichiarato Angegebener Wert Valeur déclaré CLASS 5
alle macchie
51094
Compliant Conforme Erfüllt Conforme
Pb Cd
TECHNICAL FEATURES
Technical features unglazed porcelain stoneware Conforming to european Standards EN 14411 ISO 13006 App. G (Gruppo BIa UGL con Eb ≤ 0,5%)
TECHNICAL FEATURES
CARATTERISTICHE
Technical features unglazed porcelain stoneware Conforming to european Standards EN 14411 ISO 13006 App. G (Gruppo BIa UGL con Eb ≤ 0,5%)
CARATTERISTICHE TECNICHE GRÈS PORCELLANATO TUTTA MASSA Conformi a Norme Europee EN 14411 ISO 13006 App. G (Gruppo BIa UGL con Eb ≤ 0,5%)
TECHNISCHE EIGENSCHAFTEN FEINSTEINZEUG DURCHGEFÄRBT Gemäß den Europäischen Normen EN 14411 ISO 13006 App. G (Gruppe BIa UGL mit Eb ≤ 0,5%)
Thermal shock resistance
Resistenza agli sbalzi termici Temperaturwechselbeständigkeit Résistance aux écarts de température
Frost resistance
Resistenza al gelo
Frostbeständigkeit
Résistance au gel
Resistance to low concentrations of acids and alkali
Resistenza a basse concentrazioni di acidi e alcali
Beständigkeit gegen schwach konzentrierten Säuren und Laugen Résistance à des basses concentrations d’acides et bases
Resistance to high concentrations of acids and alkali
Resistenza ad alte concentrazioni di acidi e alcali
Beständigkeit gegen stark konzentrierten Säuren und Laugen Résistance à des hautes concentrations d’acides et bases
Resistance to domestic chemicals and additives for swimming pools
Resistenza ai prodotti chimici di uso domestico e agli additivi per piscina
Beständigkeit gegen chemischen Haushaltsreiniger und Zusatzstoffe für Schwimmbäder Résistance aux prod. chimiques d’usage domestique et additifs pour piscines
Stain resistance of unglazed porcelain
Resistenza alle macchie di piastrelle non smaltate
Fleckenbeständigkeit von unglasierten Fliesen Résistance aux taches des carreaux non émaillés
Colors resistance to light Resistenza dei colori alla luce Lichtbeständigkeit Résistance des couleurs à la lumière
Friction coefficient (Slipperiness)
Coefficiente di attrito (Scivolosità)
Reibungskoeffizient (Schlupfrigkeit)
Coefficient de friction (Glissement)
EN ISO 10545-9
EN ISO 10545-12
*Pass according to ISO 10545-1 Test superato in accordo con ISO 10545-1 Test überstanden nach ISO 10545-1
Pv en accord avec norme en 10545-1
*Pass according to ISO 10545-1 Test superato in accordo con ISO 10545-1 Test überstanden nach ISO 10545-1
Pv en accord avec norme en 10545-1
*Declared value Valore dichiarato Angegebener Wert Valeur déclaré
*Declared value Valore dichiarato Angegebener Wert Valeur déclaré
App. G (Groupe BIa UGL avec Eb ≤ 0,5%)
CARACTERISTIQUES TECHNIQUES GRES CERAME PLEIN MASSE Conformes aux Normes Européennes EN 14411 ISO 13006 App. G (Groupe BIa UGL avec Eb ≤ 0,5%)
EN ISO 10545-13
Resistant Resistente Widerstandsfähig Résistant
Resistant Resistente Widerstandsfähig
Résistant
From ULA to ULB Da ULA a ULB Von ULA bis ULB De ULA jusqu’à ULB
From UHA to UHB Da UHA a UHB Von UHA bis UHB De UHA jusqu’à UHB
de dilatation thermique linéaire
Thermal shock resistance Resistenza agli sbalzi termici Temperaturwechselbeständigkeit Résistance aux écarts de température
Frost resistance Resistenza al gelo Frostbeständigkeit Résistance au gel
Resistance to low concentrations of acids and alkali
Resistenza a basse concentrazioni di acidi e alcali
Beständigkeit gegen schwach konzentrierten Säuren und Laugen
Résistance à des basses concentrations d’acides et bases
Resistance to high concentrations of acids and alkali
Resistenza ad alte concentrazioni di acidi e alcali
Beständigkeit gegen stark konzentrierten Säuren und Laugen
Résistance à des hautes concentrations d’acides et bases
Resistance to domestic chemicals and additives for swimming pools
Resistenza ai prodotti chimici di uso domestico e agli additivi per piscina
Beständigkeit gegen chemischen Haushaltsreiniger und Zusatzstoffe für Schwimmbäder Résistance aux prod. chimiques d’usage domestique et additifs pour piscines
EN ISO 10545-12
*Pass according to ISO 10545-1
superato in accordo con ISO 10545-1
überstanden nach ISO 10545-1
en accord avec norme en 10545-1
*Pass according to ISO 10545-1
Test superato in accordo con ISO 10545-1
Test überstanden nach ISO 10545-1
Pv en accord avec norme en 10545-1
*Declared value
Valore dichiarato
Angegebener Wert Valeur déclaré
*Declared value
Valore dichiarato Angegebener Wert Valeur déclaré
EN ISO 10545-13
Resistant Resistente Widerstandsfähig Résistant
Resistant Resistente Widerstandsfähig Résistant
From ULA to ULB Da ULA a ULB Von ULA bis ULB De ULA jusqu’à ULB
From UHA to UHB Da UHA a UHB Von UHA bis UHB De UHA jusqu’à UHB
UB min. UA
*Declared value
EN ISO 10545-14
DIN 51094
DIN 51130
*Declared value
Valore dichiarato
Angegebener Wert
Valeur déclaré
No noticeable color change.
Non devono presentare apprezzabili variazioni di colore.
Die Muster dürfen keine sichtbaren Farbveränderungen aufweisen. Ne doivent pas présenter de variations importantes des couleurs.
*Declared value Valore dichiarato Angegebener Wert
CLASSE 5
No alteration after testing Materiale inalterato dopo il test Keine Veränderung nach dem Test Aucune altération relevée
Stain resistance of unglazed porcelain Resistenza alle macchie di piastrelle non smaltate Fleckenbeständigkeit von unglasierten Fliesen Résistance aux taches des carreaux non émaillés
Colors resistance to light Resistenza dei colori alla luce Lichtbeständigkeit Résistance des couleurs à la lumière
Friction coefficient (Slipperiness) Coefficiente di attrito (Scivolosità) Reibungskoeffizient (Schlupfrigkeit) Coefficient de friction (Glissement)
EN ISO 10545-14
DIN 51094
DIN 51130
Valore dichiarato Angegebener Wert
Valeur déclaré
No noticeable color change.
Non devono presentare apprezzabili variazioni di colore. Die Muster dürfen keine sichtbaren Farbveränderungen aufweisen. Ne doivent pas présenter de variations importantes des couleurs.
*Declared value
Valore dichiarato Angegebener Wert Valeur déclaré
CLASSE 5
No alteration after testing
Materiale inalterato dopo il test Keine Veränderung nach dem Test Aucune altération relevée
50 51 TECHNICAL FEATURES CARATTERISTICE TECNICHE TECHNISCHE DATEN CARACTERISTIQUE TECHNIQUE TESTING METHOD METODICA DI PROVA PRÜFVERFAHREN NORME D’ESSAIS REFERENCE STANDARD RIFERIMENTO NORMA STANDARDWERT RÉFÉRENCE NORME TEST RESULTS VALORE PRODOTTO PRODUKT WERTE VALEUR PRODUIT Sizes Dimensioni Abmessungen Dimensions EN ISO 10545-2 Compliant Conforme Erfüllt Conforme Water absorption Assorbimento d’acqua Wasseraufnahme Absorption d’eau EN ISO 10545-3 Eb ≤ 0,5% Compliant Conforme Erfüllt Conforme Modulus of rupture Resistenza alla flessione Biegefestigkeit Résistance à la flexion EN ISO 10545-4 Medium value 35 N/mm min. Compliant Conforme Erfüllt Conforme Breaking strength Carico di rottura Bruchlast Charge de rupture sp. < = 7,5 mm: min 700 N Compliant Conforme Erfüllt Conforme Abrasion resistance Resistenza all’abrasione Abriebbeständigkeit Résistance à l’abrasion EN ISO 10545-6 175 mm 3 max Average Medio Mittelwert - Moyenne < 150 mm
Wärmeausdehnung
Angegebener
Valeur
≤9 MK-1
Thermal expansion coefficient Coefficiente di dilatazione termica lineare
Coefficient de dilatation thermique linéaire EN ISO 10545-8 *Declared value Valore dichiarato
Wert
déclaré
UB min. UA
Valeur
R10 matt R11 ultra matt ANSI A137.1 (DCOF) >0,42 TECHNICAL FEATURES CARATTERISTICE TECNICHE TECHNISCHE DATEN CARACTERISTIQUE TECHNIQUE TESTING METHOD METODICA DI PROVA PRÜFVERFAHREN NORME D’ESSAIS REFERENCE STANDARD RIFERIMENTO NORMA STANDARDWERT RÉFÉRENCE NORME TEST RESULTS VALORE PRODOTTO PRODUKT WERTE VALEUR PRODUIT Sizes Dimensioni Abmessungen Dimensions EN ISO 10545-2 Compliant Conforme Erfüllt Conforme Water absorption Assorbimento d’acqua Wasseraufnahme Absorption d’eau EN ISO 10545-3 Eb ≤ 0,5% Compliant Conforme Erfüllt Conforme Modulus of rupture Resistenza alla flessione Biegefestigkeit Résistance à la flexion EN ISO 10545-4 Medium value 35 N/mm min. Compliant Conforme Erfüllt Conforme Breaking strength Carico di rottura Bruchlast Charge de rupture sp. > = 7,5 mm: min 1300 N Compliant Conforme Erfüllt Conforme Abrasion resistance Resistenza all’abrasione Abriebbeständigkeit Résistance à l’abrasion EN ISO 10545-6 175 mm 3 max Average Medio Mittelwert - Moyenne < 150 mm Thermal expansion coefficient Coefficiente di dilatazione termica lineare Wärmeausdehnung Coefficient
EN ISO
Valore
Angegebener Wert Valeur déclaré ≤9 MK-1
déclaré
10545-8 *Declared value
dichiarato
EN
ISO 10545-9
Test
Pv
Test
R11 ultra matt
R10 matt
N ≥ 15 cm (%) (mm) Length and width Lunghezza e larghezza Länge und Breite ±0,6% 2,0 mm Longueur et largeur Thickness Spessore Stärke Epaisseur ±5,0 0,5 Lineartity Rettilineità spigoli Kantengeradheit- 0,5 1,5 Rectitude des arêtes Wedging Ortogonalità Rechtwinkligkeit ±0.5 2,0 Orthogonalité Warpage Planarità Ebenflächigkeit-Planéité 0,5 ±2,0 Appearance: percentage of acceptable tiles, per lot Aspetto: percentuale di piastrelle accettabili nel lotto 95% min. Oberflächenbeschaffenheit: Prozentsatz der Fliesen, die den gefordeten Eigenschaften entsprechenAspect: pourcentage de carreaux acceptables sur la fourniture totale N ≥ 15 cm (%) (mm) Length and width Lunghezza e larghezza Länge und Breite ±0,6% 2,0 mm Longueur et largeur Thickness Spessore Stärke Epaisseur ±5,0 0,5 Lineartity Rettilineità spigoli Kantengeradheit- 0,5 1,5 Rectitude des arêtes Wedging Ortogonalità Rechtwinkligkeit ±0.5 2,0 Orthogonalité Warpage Planarità Ebenflächigkeit-Planéité 0,5 ±2,0 Appearance: percentage of acceptable tiles, per lot Aspetto: percentuale di piastrelle accettabili nel lotto 95% min. Oberflächenbeschaffenheit: Prozentsatz der Fliesen, die den gefordeten Eigenschaften entsprechenAspect: pourcentage de carreaux acceptables sur la fourniture totale
TECNICHE
ANSI A137.1 (DCOF) >0,42
CARATTERISTICHE
TECNICHE
CARATTERISTICHE TECNICHE GRÈS PORCELLANATO TUTTA MASSA Conformi a Norme Europee EN 14411 ISO 13006 App. G (Gruppo BIa UGL con Eb ≤ 0,5%) TECHNISCHE EIGENSCHAFTEN FEINSTEINZEUG DURCHGEFÄRBT Gemäß den Europäischen Normen EN 14411 ISO 13006 App. G (Gruppe BIa UGL mit Eb ≤ 0,5%) CARACTERISTIQUES TECHNIQUES GRES CERAME PLEIN MASSE Conformes aux Normes Européennes EN 14411 ISO 13006
* It’s advisable to refer to Contract Division for all necessary guidelines to a correct use. Si raccomanda di consultare Contract Division per le indicazioni necessarie al corretto utilizzo. Zur korrekten Anwendung wird empfohlen mit unserem Contract Division Kontakt aufzunehmen. Merci de consulter nôtre Contract Division pour les indications a un usage correct. * It’s advisable to refer to Contract Division for all necessary guidelines to a correct use. Si raccomanda di consultare Contract Division per le indicazioni necessarie al corretto utilizzo. Zur korrekten Anwendung wird empfohlen mit unserem Contract Division Kontakt aufzunehmen. Merci de consulter nôtre Contract Division pour les indications a un usage correct. 10mm
SLABS TECHNICAL INFO
Thermal shock resistance
Resistenza agli sbalzi termici Temperaturwechselbeständigkeit Résistance aux écarts de température
Frost resistance
Resistenza al gelo
Frostbeständigkeit
Résistance au gel
Resistance to low concentrations of acids and alkali
Resistenza a basse concentrazioni di acidi e alcali Beständigkeit gegen schwach konzentrierten Säuren und Laugen Résistance à des basses concentrations d’acides et bases
Resistance to high concentrations of acids and alkali
Resistenza ad alte concentrazioni di acidi e alcali
Beständigkeit gegen stark konzentrierten Säuren und Laugen Résistance à des hautes concentrations d’acides et bases
Resistance to domestic chemicals and additives for swimming pools Resistenza ai prodotti chimici di uso domestico e agli additivi per piscina
Beständigkeit gegen chemischen Haushaltsreiniger und Zusatzstoffe für Schwimmbäder Résistance aux prod. chimiques d’usage domestique et additifs pour piscines
Stain resistance of unglazed porcelain
Resistenza alle macchie di piastrelle non smaltate
Fleckenbeständigkeit von unglasierten Fliesen
Résistance aux taches des carreaux non émaillés
Colors resistance to light Resistenza dei colori alla luce Lichtbeständigkeit Résistance des couleurs à la lumière
Friction coefficient (Slipperiness)
Coefficiente di attrito (Scivolosità)
EN ISO 10545-9
EN ISO 10545-12
Prozentsatz der Fliesen, die den gefordeten
1_Packaging
2_Moving packages
3_Moving large tiles on site
4_Working on large tiles
5_Preparing the surface and applying adhesive
6_Installation
7_Grouting
8_Cleaning
9_General recommendations
1_PACKAGING
Special packaging has been developed to store and transport large tiles safely. Large tiles, whether all the same size or in different sizes, are loaded into crates. All packages are dispatched full or according to individual order requests. IT IS RECOMMENDED TO MOVE THE CRATES ONE AT A TIME.
Crate for 120x280cm
Cm 291,6 x P144,6 h 34,4 - Kg per slab 48,65 - Slabs per crate 20 - Sqm per crate 67,20 - Kg per full crate 1093 - Kg per empty crate 90
Stockability max 10 pallets in warehouse
A-Frame for 120x280cm
*Pass according to ISO 10545-1 Test superato in accordo con ISO 10545-1 Test überstanden nach ISO 10545-1 Pv en accord avec norme en 10545-1
*Pass according to ISO 10545-1
Test superato in accordo con ISO 10545-1
Test überstanden nach ISO 10545-1
Pv en accord avec norme en 10545-1
*Declared value Valore dichiarato Angegebener Wert Valeur déclaré
*Declared value Valore dichiarato Angegebener Wert Valeur déclaré
EN ISO 10545-13
Resistant Resistente Widerstandsfähig Résistant
From ULA to ULB Da ULA a ULB Von ULA bis ULB De ULA jusqu’à ULB
From UHA to UHB Da UHA a UHB Von UHA bis UHB De UHA jusqu’à UHB
Cm 330 x D75 h 199,6 - Kg per slab 48,65 - Slabs per A-Frame 44 - Sqm per A-Frame 147,84 - Kg per full A-Frame 2340 - Kg per empty A-Frame 200
2_MOVING PACKAGES
Long side
This is the best option. Use forks at least 1.4 m long, set to the width that provides the best possible support for the package. Short side
Use forks at least 2.1 m long, set to the width that provides the best possible support for the package.
LOADING TRUCKS AND CONTAINERS
To load packages into a container, you can either use a fork lift or load from the ground using ramps of suitable height. Use straps, ties and airbags to keep the material secure during transport. When loading, always make sure that weight is distributed evenly to avoid displacement during transport. Loading calculations must always take account of transport weight limits.
ARRANGEMENT FOR LOADING ON CONTAINERS
SIZE 120x280cm on crates
Container 20’: 12 crates
Container 40’: 24 crates. PAY ATTENTION TO MAXIMUM GROSS WEIGHT
SIZE 120x280cm on A-Frame
Container 20’: 3 A-Frame plus any pallets, according to positioning and stackability, up to a maximum of 15. PAY ATTENTION TO MAXIMUM GROSS WEIGHT
Container 40’: 9 A-Frame. PAY ATTENTION TO MAXIMUM GROSS WEIGHT
EN ISO 10545-14
DIN 51094
*Declared value
Valore dichiarato
Angegebener Wert Valeur déclaré
No noticeable color change. Non devono presentare apprezzabili variazioni di colore. Die Muster dürfen keine sichtbaren Farbveränderungen aufweisen. Ne doivent pas présenter de variations importantes des couleurs.
3_MOVING LARGE TILES ON SITE ON-SITE EQUIPMENT
It is important to use suitable equipment to move large tiles on site.
Suction cups
No alteration after testing
Materiale inalterato dopo il test Keine Veränderung nach dem Test Aucune altération relevée
Use vacuum pump suction cups on non-smooth or textured surfaces to ensure a firm grip during manual movement. Use non-marking rubber suction cups on light coloured surfaces.
Suction cup bars or lifting frames with cross-bars
Applying this type of lifting device to large tiles improves rigidity and permits completely safe transport on tile trolleys.
Reinforced trolley
We recommend the use of reinforced trolleys to move tiles around large sites and to move tiles in which holes, cutouts or cuts have been made to permit the passage of electrical cables or water pipes.
Work bench with aluminium profiles
Use a work bench with aluminium profiles to support the tiles you need to work on practically and safely. Install the work bench on a stable and even surface.
52 53
TECHNICAL FEATURES CARATTERISTICE TECNICHE TECHNISCHE DATEN CARACTERISTIQUE TECHNIQUE TESTING METHOD METODICA DI PROVA PRÜFVERFAHREN NORME D’ESSAIS REFERENCE STANDARD RIFERIMENTO NORMA STANDARDWERT RÉFÉRENCE NORME TEST RESULTS VALORE PRODOTTO PRODUKT WERTE VALEUR PRODUIT Sizes Dimensioni Abmessungen Dimensions EN ISO 10545-2 Compliant Conforme Erfüllt Conforme Water absorption Assorbimento d’acqua Wasseraufnahme Absorption d’eau EN ISO 10545-3 Eb ≤ 0,5% Compliant Conforme Erfüllt Conforme Modulus of rupture Resistenza alla flessione Biegefestigkeit Résistance à la flexion EN ISO 10545-4 Medium value 35 N/mm min. Compliant Conforme Erfüllt Conforme Breaking strength Carico di rottura Bruchlast Charge de rupture ≥ 4000 N Compliant Conforme Erfüllt Conforme Abrasion resistance Resistenza all’abrasione Abriebbeständigkeit Résistance à l’abrasion EN ISO 10545-6 175 mm 3 max Average Medio Mittelwert Moyenne < 150 mm Thermal expansion coefficient Coefficiente di dilatazione termica lineare Wärmeausdehnung Coefficient de dilatation thermique linéaire EN ISO 10545-8 *Declared value Valore dichiarato Angegebener Wert
Valeur déclaré ≤9 MK-1
Resistant Resistente Widerstandsfähig Résistant
UB min. UA
CLASS
Reibungskoeffizient (Schlupfrigkeit) Coefficient de friction (Glissement) DIN 51130 *Declared
Valore dichiarato Angegebener Wert Valeur déclaré R11 ultra matt ANSI A137.1 (DCOF) >0,42 N ≥ 15 cm (%) (mm) Length and width Lunghezza e larghezza Länge und Breite ±0,6% 2,0 mm Longueur et largeur Thickness Spessore Stärke Epaisseur ±5,0 0,5 Lineartity Rettilineità spigoli Kantengeradheit- 0,5 1,5 Rectitude des arêtes Wedging Ortogonalità Rechtwinkligkeit ±0.5 2,0 Orthogonalité Warpage Planarità Ebenflächigkeit-Planéité 0,5 ±2,0 Appearance: percentage of acceptable tiles, per lot Aspetto:
Oberflächenbeschaffenheit:
Eigenschaften
value
percentuale di piastrelle accettabili nel lotto 95% min.
entsprechenAspect: pourcentage de carreaux acceptables sur la fourniture totale
CARATTERISTICHE TECNICHE
Europee EN 14411 ISO 13006 App. G (Gruppo BIa UGL con Eb ≤ 0,5%) TECHNISCHE
GRÈS PORCELLANATO TUTTA MASSA Conformi a Norme
* It’s advisable to refer to Contract Division for all necessary guidelines to a correct use. Si raccomanda di consultare Contract Division per le indicazioni necessarie al corretto utilizzo. Zur korrekten Anwendung wird empfohlen mit unserem Contract Division Kontakt
Merci de consulter nôtre Contract Division pour les indications a un usage correct.
aufzunehmen.
MOVING TILES BY HAND ON SITE
To ensure operator safety, always move large tiles one at a time. At least two people are needed to move each tile, and more may be needed depending on the weight of the tile.
Manual tile lifting kits include suction cup frames for tiles of 120x260cm and above.
Single suction cups
Use suction cups with individual handles only to lay a small number of tiles in ground level areas that are easily accessible and provide plenty of room for manoeuvre. Attach the suction cup to the centre of the tile to ensure good balance when moving it.
Suction cup frames
Place the frame over the centre of the tile so that the ends of bars touch the walls of the crate. To stop the edges of the tile coming into contact with the floor, adjust the end hooks to leave a small gap between the tile and the floor.
4_WORKING ON LARGE TILES
Accurate cuts, shapes, cutouts and holes can be made by specialist tile workshops and processing centres using cutting discs, CNC systems, water jets and other professional equipment.
Simple jobs can be completed on site, but special attention is needed during both movement and working.
A bench of suitable size, with aluminium support profiles is ideal for cutting and drilling jobs.
CNC MACHINING (OFF-SITE)
CNC machines can perform high-precision operations on large tiles, including the forming of sink surrounds.
WATER JET MACHINING (OFF-SITE)
Water jet machines can be used for various operations including cutting, shaping and hole formation, with accurately formed corners and edges and correct final chamfering.
EDGE FINISHING (OFF-SITE)
Automatic machines and special tools are required to finish edges. All kinds of edge should be finished using a cutter and an edge chamfering tool. The minimum width of straight edges is 2 mm.
The minimum radius of of rounded edges is 2 mm.
HOLES
Holes for accessories, taps, fittings and electrical cables must be at least 5 cm away from the edge of the tile. The minimum corner radius of internal cutouts must be 5 mm. Outside edges should always be chamfered for maximum strength.
Instructions
1. Position the large tile on a stable, clean and flat work bench. Keep the finished surface facing up.
2. Start the work using a diamond disc mounted on an angle grinder or drill (normal mode, not hammer). Cut the tile at an angle of about 75°.
3. Gently oscillate the tool to complete the hole. Keep the cutting disc wet to avoid overheating. Use a diamond countersink to make holes that will remain visible.
4. On completion of work, clean the area thoroughly.
STRAIGHT CUTS
Use a cutting guide to align the cutting tool. Only use diamond cutting discs that are designed for porcelain tile and suitable for use on the machine in question. Discs must be water cooled and speed reduced at the beginning and end of the cut. Adjust rotation and feed speed to suit the dimensions of the disc and the nature of the cut. To obtain ‘L’ shapes, make straight cuts first and then drill a hole at the corner.
MANUAL STRAIGHT CUTS
Position the large tile you need to cut on a stable work bench of suitable size.
Use a cutting guide to align a tungsten carbide cutting tool over the line to be cut.
Instructions
1. Lower the bar and cutting wheel on to the line to be cut.
2. Cut the ends of the tile for about 5 cm, working from the inside towards the outside.
3. Complete the cut without stopping and at constant speed and pressure.
4. Move the tile so that the line of the cut protrudes about 10-15 cm from the bench.
5. Break off one of the two ends with a pincers. Again using a pincers, apply gentle pressure to the other end to detach the entire section along the cutting line. Two people are needed for this job to avoid the cut section falling and breaking.
6. Remove the cutting guide and smooth the remaining sharp edge of the tile with a diamond pad or resin grinder.
MANUAL CURVED CUTS
Position the large tile you need to cut on a stable work bench of suitable size.
Use a cutting guide to align a tungsten carbide cutting tool over the line to be cut.
Instructions
1. Mark out the cutting line with a pencil.
2. Use an angle grinder with a suitable cutting disc to cut the tile along the marked line.
RECTANGULAR CUTOUTS
‘L’ or ‘C’ shaped cutouts may be required:
- on the edge of a tile, near corners or columns
- in the centre of a tile, to fit accessories, taps, electrical equipment, sinks, hobs, etc. Cutouts must be positioned at least 5 cm from the edge of the tile and from other holes.
Instructions
1. Position the large tile on a stable, clean and flat work bench. Keep the finished surface facing up.
2. Mark the outline of the cutout.
3. Use a drill in normal (not hammer) mode with a diamond bit or an angle grinder with a cutting disc of 6-8 mm in diameter. Proceed to make circular holes at the inside corners of the marked cutout. The cutting tool must be cooled continuously.
4. Complete the cutout using an angle grinder with a small diameter (max. 125 mm) diamond disc to cut along the straight edges.
5_PREPARING THE SURFACE AND APPLYING ADHESIVE
Before applying adhesive, make sure that the back of the tile is perfectly clean and free from ceramic powder and engobe.
Make all necessary 45° corner tile cuts before applying adhesive.
To clean the tiles, use a sponge damped in a water and detergent solution.
The adhesive must cover the entire surface and be of uniform thickness. To achieve this condition use the technique of double application. Apply adhesive in straight lines parallel with the short side of the tile.
This permits air to escape more easily. Start by applying adhesive to the back of the tile using a square toothed spatula with teeth no smaller than 3 mm. Proceed parallel with the short side of the tile, taking care to cover the entire back of the tile, including the corners. Now apply adhesive to the substrate using a slant ridge spatula with teeth of at least 10 mm, proceeding in the same direction as for the back of the tile and taking care not to leave any area uncovered. Facing tiles should be applied with the aid of an additional mechanical support.
Use a class C2-S1/S2 adhesive on floors. For walls, use a class T adhesive with reduced vertical slip. Always choose the type of adhesive best suited to the substrate.
6_INSTALLATION
Before you start installing tiles, make sure that the lot is of sufficient quantity and of the right colour and thickness. Follow all the rules and precautions necessary for correct installation. Prepare the substrate, ensure the correct composition of mortars or adhesives, respect specified drying times, expansion joint positions and beating methods, etc.
Installing tiles with adhesives
Tiles must be installed by qualified persons using suitable equipment. Installation should always be performed under good lighting conditions. The choice of adhesive depends on the type of tile (material and size), the substrate to be covered and the use to which the tile will be subject. Check that the material has been correctly installed before the adhesive dries completely, so that minor corrections can be made if necessary. Installing tiles with fresh mortar
The use of fresh, cement-based mortar or “thick-bed” mortar is not recommended for tile sizes with long sides of over 30 cm or for non-absorbent substrates.
Instructions
1. Check that the substrate (screed) is hard enough, clean, free from cracks and smooth, with a maximum variation in level of 1 mm/2 metres.
2. First apply adhesive to the tile and substrate, then lift the tile and, with great care and using suitable moving equipment, lay it gently on the adhesive of the substrate. Once in place, the tile cannot be lifted again, and position adjustments are restricted to a maximum of 4-5 cm.
3. Use a manual or electric, anti-bounce tile beater to beat the tile, working from the centre outwards and in straight lines. This ensures maximum adhesion between the tile/adhesive/substrate and facilitates the elimination of air. Remove any adhesive forced out from the joints to keep them free for grouting.
4. Place spacers around the edges of contact with other tiles to form a joint of at least 2 mm.
5. Position the tiles one after another, moving them into place with a suitable manual tool and leaving a joint of at least 2 mm between them. Always lay floors first and then tile the walls. A gap of at least 3 mm should be left between the perimeter of the floor and the bottom of walls.
6. Use self-levelling spacers to ensure the accurate positioning of tiles. These should be removed when the adhesive is dry and before grouting. Insert wedges by pushing them towards the tile laid previously. Wedges can correct up to 1 mm of difference in height.
7. When the adhesive is completely set, remove the levelling wedges with a mallet.
8. After installation, and depending on the type of adhesive used, floor surfaces should not be walked on for 12-24 hours.
Technical joints
Structural expansion and movement joints are essential to the durability of an attractive tiled surface. Ask a professional tiler for advice and/or help.
Structural expansion joints should be located over those found in the substrate and made using a suitable sealant or profile. In outdoor floors, movement joints must be provided in areas of 9-12 sq.m. depending on the substrate and in high traffic indoor areas or on flexible substrates. Areas can be increased to 20-25 sq.m for indoor floors over a stable substrate.
In any case, always leave a gap of 3-5 mm between the perimeter of the floor and any walls, columns or corners and between tiled sections and sections covered in other materials.
The manufacturer declines all responsibility for installations without adequate joints between tiles: the minimum acceptable joint between tiles is 2 mm.
7_GROUTING
Wait for the adhesive to set completely before grouting.
Instructions
1. Make sure that the joints are clear and free from all traces of adhesive and/or powder. Residual material preventing filling of the joint to at least 2/3 the thickness of the tile must be removed.
2. Grout small areas at a time (4-5 sq.m.) especially when working with textured, non-slip or polished tiles. Use a suitable rubber spatula. Always test grout of a colour that contrasts with the tiles on a small, hidden area before grouting the rest of the surface.
3. Remove excess grout from the surface in diagonal strokes before the product dries, and remove all residues.
4. Clean the surface thoroughly with a sponge damped in clean water then wipe down the surface, including the joints with a damp cloth. Use a sponge and plenty of water to clean off epoxy grouts.
The reaction times and hardness of these products makes it impossible to remove residues once set. Always refer to the grout manufacturer’s specifications to ensure that the product is suitable for the type of tile.
8_CLEANING
The entire tiled surface must be cleaned, including the tiles, joints, movement joints and profiles. Cleaning must continue until all traces of installation materials have been eliminated.
INITIAL CLEANING
Initial cleaning is of fundamental importance for all subsequent steps and for correct maintenance over time. Thorough initial cleaning helps floors remain attractive and protected for years to come, and only has to be performed once, before the floor is used.
Initial cleaning should be performed 4-5 days after completion of grouting, when the grout sealant is perfectly dry, but no later than 10 days after. Use an acid or alkaline detergent to suit the characteristics of the sealant. Always test detergents on an unused tile or on a small hidden area of the floor to ensure compatibility, especially in the case of lapped or polished tiles. Do not use cleaning products containing hydrofluoric acid (HF) or its derivatives.
After grouting and cleaning, the surface may still present a film of cement residue that cannot be removed using water alone. In such cases, the residue must be removed using an acid-based product, diluted according to the manufacturer’s instructions.
Instructions
1. Start by wetting the tile surface, especially the joints, which are not normally acid resistant.
2. Next, distribute the prepared acid solution over the surface and leave it react for a short time (2 minutes).
3. Do not allow the solution to dry on the floor. Remove it either manually or using a single-head scrubber-dryer fitted with a non-abrasive disc.
4. Rinse the surface thoroughly afterwards.
Use of a floor cleaner is particularly recommended for textured tiles and large surfaces. Manual methods can then be used to clean points inaccessible to the machine such as corners, along walls and wherever the machine cannot operate.
54 55
SLABS TECHNICAL INFO
ORDINARY CLEANING
The purpose of ordinary cleaning is to remove dirt and marks and to restore the surface’s original appearance. Porcelain tiles do not require protective treatment: regular, thorough cleaning is sufficient to keep it in perfect condition. Clean tiled surfaces thoroughly using hot water, a soft cloth or sponge and neutral detergent if necessary. Industrial scrubber-dryers can be used to clean large floors, with inaccessible areas cleaned manually afterwards.
9_GENERAL RECOMMENDATIONS
Never rub surfaces with abrasive materials such as metal scrubbing pads or hard brushes as these might leave indelible scratches or marks. Remove greasy or oily residues using a detergent containing organic solvents or with an alkaline detergent (pH>9), then rinse the area thoroughly. Do not use soaps as they can leave a slippery film on the surface, especially if used with hard water. Do not use products containing waxes or shine- enhancing rinse agents. Do not use abrasive detergents on smooth and/or polished surfaces. In the case of matt materials, always test abrasive detergents on a small area of tile first. Always test any non-neutral detergent on an unused tile or on a hidden area of the floor first.
WARNING
For material that has already been laid, Terratinta Ceramiche: - does not accept any complaints for visible defects.
- does not accept liability for the quality of the tiled surface but only for the characteristics of the material supplied. - once the material has been laid, it is wise to keep aside a few tiles for possible future repairs or to have a sample of the material in the event of complaints.
INFORMAZIONI TECNICHE PER LASTRE
1. Sistemi di imballaggio
2. Movimentazione degli imballi
3. Movimentazione delle lastre in cantiere
4. Lavorazioni sulle lastre
5. Preparazione supporto e stesura collante
6. Posa
7. Stuccatura
8. Pulizia
9. Raccomandazioni generali
1_SISTEMI DI IMBALLAGGIO
Per lo stoccaggio e il trasporto delle lastre in condizioni di sicurezza è stato studiato un imballo realizzato su misura. Le lastre, siano esse tutte dello stesso formato o di formati differenti, sono riposte all’interno della cassa. Gli imballi sono spediti in condizioni di massimo carico o secondo le richieste dei singoli ordini.
SI RACCOMANDA DI MOVIMENTARE LA CASSE UNA ALLA VOLTA.
Cassa per 120x280cm
Cm 291,6 x P144,6 h 34,4 - Kg lastra 48,65 - Lastre per cassa 20 - Mq per cassa 67,20 - Kg cassa piena 1093 - Kg cassa vuota 90 Sovrapponibilità max 10 casse a Magazzino
Cavalletto per 120x280cm
Cm 330 x P75 h 199,6 - Kg lastra 48,65 - Lastre per cavalletto 44 - Mq per cavalletto 147,84 - Kg cavalletto pieno 2340 - Kg cavalletto vuoto 200
2_MOVIMENTAZIONE DEGLI IMBALLI
Lato lungo È l’opzione più indicata. Usare forche lunghe almeno 1,2 m allargate al massimo per coprire il più possibile la superficie dell’imballo. Lato corto
Usare forche lunghe almeno 2,1 m allargate al massimo per coprire il più possibile la superficie dell’imballo.
CARICO CAMION E CONTAINER
Per caricare gli imballi nei container si possono usare carrelli elevatori oppure è possibile caricare da terra, con l’aiuto di rampe su misura. Per assicurare il materiale durante il trasporto si raccomanda l’uso di cinghie, tiranti e airbag. Durante il carico assicurarsi sempre che il peso sia distribuito per evitare sbilanciamenti durante la movimentazione. Il calcolo per il riempimento deve sempre tenere conto dei limiti di peso per il trasporto.
DISPOSIZIONE PER CARICO SU CONTAINER
FORMATO 120x280cm su cassa
Container 20’: 12 casse.
Container 40’: 24 casse. FARE ATTENZIONE AL PESO LORDO MASSIMO
FORMATO 120x280cm su cavalletto
Container 20’: 3 cavalletti più eventuali palette, secondo disposizione e sovrapponibilità, fino ad un massimo di 15. FARE ATTENZIONE AL PESO
LORDO MASSIMO
Container 40’: 9 cavalletti. FARE ATTENZIONE AL PESO LORDO MASSIMO
3_MOVIMENTAZIONE DELLE LASTRE IN CANTIERE GLI STRUMENTI DA CANTIERE
Per la movimentazione delle lastre nel cantiere è importante usare gli strumenti adatti ai grandi formati.
Ventose
Usare ventose a pompa su superfici non lisce o strutturate per garantire un’ottima presa durante la movimentazione manuale. Usare ventose con gomma antimacchia sulle superfici chiare.
Barre con ventose o telaio con traverse
Lo strumento, applicato alla lastra, ne aumenta la rigidità consentendo di spostarla con carrelli specifici, in completa sicurezza.
Carrello rinforzato
Consigliamo di usarlo per la movimentazione in cantiere su superfici ampie e per spostare lastre su cui sono stati eseguiti fori, scassi o altri interventi per il passaggio di impianti elettrici o idrici.
Banco di lavoro con profilati in alluminio
Usare un banco di lavoro con profilati in alluminio per eseguire le lavorazioni in comodità e sicurezza. Installare il tavolo su una superficie stabile e piana.
MOVIMENTAZIONE MANUALE IN CANTIERE
Per la completa sicurezza degli operatori, movimentare le lastre una alla volta.
Per la movimentazione delle lastre è necessario il contributo di almeno due operatori, variabile a seconda del peso complessivo della lastra. Il kit di sollevamento manuale delle lastre include un telaio con ventose per lastre 120x260cm e superiori.
Ventose singole
Usare maniglie con ventose solo in caso di posa di poche lastre e locali a piano terra, facilmente accessibili e con ampi spazi di manovra. Agganciare le ventose al centro della lastra per una movimentazione in perfetto equilibrio.
Telaio con ventose
Sistemare il telaio al centro della lastra, in modo che le estremità inferiori delle barre aderiscano alla parete della cassa. Per evitare il contatto tra il bordo lastra e il suolo, regolare i ganci delle estremità lasciando un minimo di spazio tra terreno e lastra.
4_LAVORAZIONI SULLE LASTRE
Tagli, sagomature, scassi o fori sulle lastre si possono eseguire in laboratori e centri specializzati attraverso taglio a disco, CNC, water jet. Le lavorazioni più semplici si possono eseguire direttamente in cantiere, con massima attenzione durante la movimentazione e l’esecuzione. Un banco da lavoro con profilati in alluminio delle giuste dimensioni è l’ideale per tagli e forature puliti.
MACCHINE CNC (C/O Laboratori specializzati – NON IN CANTIERE).
Le macchine a controllo numerico permettono di realizzare lavorazioni particolari con grande precisione, tra cui il filo-top per il lavello.
MACCHINE A IDROGETTO (C/O Laboratori specializzati – NON IN CANTIERE).
Il taglio a idrogetto permette diversi tipi di taglio, sagomatura o foratura, con massima definizione di spigoli e bordi.
BORDO (C/O Laboratori specializzati – NON IN CANTIERE)
Per la finitura dei bordi servono macchine automatiche e utensili specifici. Completare tutti i tipi di finitura con un rompifilo o un bisello perimetrale. Larghezza minima dei bordi diritti, 2 mm; angolo di curvatura minimo dei bordi arrotondati, R 2mm.
FORI
I fori utili per accessori, rubinetteria o impianti elettrici devono distare almeno 5 cm dai bordi esterni. Il raggio minimo degli angoli interni deve essere di 5 mm. Smussare sempre i bordi esterni con rompifilo per aumentarne la resistenza. Istruzioni
1. Posizionare la lastra su un piano di lavoro stabile, pulito e planare. Rivolgere la superficie rifinita verso l’alto.
2. Cominciare la lavorazione con una fresa diamantata montata su una smerigliatrice angolare, oppure un trapano non battente. La lastra deve essere incisa con un angolo di circa 75°
3. Eseguire il foro facendo oscillare lo strumento con cautela. Mantenere la fresa sempre bagnata per evitarne il surriscaldamento. In caso di ‘foro a vista’, si raccomanda l’utilizzo di svasatori diamantati.
TAGLIO A MACCHINA RETTILINEO
Posizionare la macchina per il taglio lungo una guida di taglio.
Usare sempre dischi diamantati per gres porcellanato adatti alla macchina impiegata, raffreddati ad acqua con velocità ridotta in entrata e uscita. Regolare le velocità di rotazione e avanzamento secondo le dimensioni del disco e della lavorazione prevista. Per le sagomature a L, prima di procedere con i tagli lineari praticare un foro in corrispondenza dell’angolo.
TAGLIO MANUALE RETTILINEO
Posizionare la lastra da tagliare su un banco di lavoro stabile e della giusta dimensione. Usare una guida di taglio con utensile incisore al carburo di tungsteno, posizionato lungo la linea dell’area da tagliare.
Istruzioni
1. Appoggiare la barra di taglio con la rotellina di incisione in corrispondenza della linea di taglio prevista.
2. Incidere per circa 5 cm le estremità della lastra, dall’interno verso l’esterno.
3. Eseguire l’incisione completa senza pause, con velocità di taglio e pressione costanti.
4. Spostare la lastra sul banco, attenti a far sporgere la linea di incisione di circa 10-15 cm.
5. Realizzare lo spacco su una delle due estremità con una pinza troncatrice. Proseguire applicando delicatamente pressione con la pinza sull’altra estremità, no al distacco della sezione lungo la linea di taglio. Per evitare la caduta o la rottura della porzione tagliata sono necessarie due persone.
6. Rimossa la guida di incisione, eliminare il filo tagliente della lastra con un tampone diamantato o una mola in resina.
TAGLIO MANUALE NON RETTILINEO
Si consiglia questo tipo di taglio in opera solo per piccole lavorazioni. Per le lavorazioni più complesse, rivolgersi a laboratori specializzati.
Istruzioni:
1. Tratteggiare la linea di taglio con una matita.
2. Usare una smerigliatrice angolare con dischi idonei per tagliare la lastra secondo la linea disegnata.
SCASSI RETTANGOLARI
Gli scassi possono essere a ‘L’ o a ‘C’:
- sul bordo della lastra, in prossimità di angoli o colonne
- al centro della lastra, per sistemare accessori, rubinetteria, impianti elettrici, lavelli, piani cottura.
56 57
SLABS TECHNICAL INFO
INFORMAZIONI TECNICHE PER LASTRE
Se realizzati lontani dal bordo devono essere fatti a una distanza minima di 5 cm dai bordi o da altre aperture.
Istruzioni
1. Posizionare la lastra su un piano di lavoro stabile, pulito e planare. La sua superficie rifinita va rivolta verso l’alto.
2. Tratteggiare bordi dello scasso da eseguire.
3. Usare un trapano non battente, o una smerigliatrice, con punta diamantata o fresa con diametro 6-8 mm. Seguire la stessa procedura della foratura circolare lavorando in prossimità degli angoli interni dello scasso disegnato. Mantenere lo strumento costantemente raffreddato.
4. Completare lo scasso tagliando con una smerigliatrice angolare con disco diamantato di piccolo diametro (max 125mm) lungo i bordi tratteggiati.
5_PREPARAZIONE SUPPORTO E STESURA COLLANTE
Prima di stendere l’adesivo, assicurarsi che il retro della lastra sia perfettamente pulito, senza polvere ceramica o engobbio. Per lastre che necessitano la jollatura a 45° procedere alla lavorazione prima della stesura del collante. Per la pulizia, utilizzare una spugna con soluzione di acqua e detergente.
La stesura del collante deve essere a letto pieno, condizione che si ottiene col metodo della doppia spalmatura.
I movimenti dovranno essere lineari, così da realizzare una stesura rettilinea, sempre parallela al lato corto della lastra, per facilitare la fuoriuscita dell’aria.
Iniziare a stendere la colla sul retro della lastra con una spatola dentata con dente dritto - mai inferiore a 3 mm - e procedere sempre parallelamente al lato corto della lastra, avendo cura di distribuire l’adesivo su tutta la superficie, angoli compresi.
Stendere quindi la colla sul sottofondo con una spatola a denti inclinati con dente minimo di 10 mm, procedendo nello stesso verso adottato per il retro della lastra, senza lasciare aree prive di collante.
Per le lastre posate in facciata, predisporre un aggancio meccanico supplementare.
Per pavimenti si consiglia l’utilizzo di un adesivo di classe C2-S1/S2.
Per rivestimenti, invece, si raccomanda una colla di classe T, con scivolamento verticale limitato. In tutti casi, valutare il tipo di adesivo in funzione del supporto.
6_POSA
Prima di iniziare la posa, accertarsi che la partita di materiale sia adeguata e sufficiente per quantità, tono e calibro. Rispettare tutte le norme e le precauzioni alla base di una corretta esecuzione del lavoro: preparazione del sottofondo, composizione della malta o dei collanti, rispetto dei tempi di essicazione, posizionamento dei giunti di dilatazione, battitura, ecc.
Posa con adesivi
La posa deve essere effettuata da personale qualificato e con attrezzi adeguati. Si consiglia di eseguire l’operazione sempre in condizioni ottimali di illuminazione.
La scelta dell’adesivo dipende dalla tipologia delle piastrelle (gruppo di appartenenza e formato), dalla superficie da rivestire e dalla sua destinazione d’uso. Verificare la posa del materiale prima che il collante sia secco, per facilitare eventuali correzioni.
Posa con malta fresca
La posa a malta cementizia fresca o “strato spesso” è sconsigliata per formati con lato maggiore di 30 cm e con supporti non assorbenti.
Istruzioni
1. Verificare che il fondo (massetto) sia sufficientemente stagionato, pulito, privo di fessurazioni e liscio, con una differenza di planarità massima di 1 mm/2 m.
2. Dopo la doppia spalmatura, sollevare la lastra e posarla con estrema cura sul collante del supporto, attraverso gli strumenti per la movimentazione: una volta posata, la lastra non sarà più sollevabile e si potrà muoverla fino a un massimo di 4-5 cm.
3. Usare un frattazzo anti-rimbalzo, manuale o elettrico, per battere la lastra dal centro verso l’esterno con movimenti lineari, garantendo la massima aderenza lastra/adesivo/supporto e assicurando l’uscita di tutta l’aria rimasta tra le due superfici. Se dopo la battitura fuoriesce adesivo dalle fughe, asportarlo e svuotarle.
4. Posizionare lungo bordi a contatto con le altre lastre i distanziatori, che garantiscono una fuga almeno pari a 2 mm.
5. Posizionare le lastre una dopo l’altra e avvicinarle con l’apposito strumento manuale, lasciando almeno 2 mm di fuga. Cominciare sempre dalla posa del pavimento e continuare con il rivestimento a parete. Tra pavimento e parete consigliamo di creare un giunto perimetrale di almeno 3 mm.
6. Il posizionamento della lastra deve essere calibrato sfruttando i distanziatori autolivellanti, da rimuovere a collante secco e prima della stuccatura. Inserire i cunei spingendoli sempre verso la lastra posata in precedenza: assicurano una correzione fino a 1 mm di dislivello.
7. Quando la colla è completamente asciutta, rimuovere i cunei con una mazzetta.
8. Terminata la posa, in base al collante impiegato, la superficie non dovrà essere calpestata prima di 12-24 ore.
Giunti tecnici
Inserire giunti di dilatazione strutturali e di frazionamento è fondamentale per il mantenimento di una buona superficie piastrellata: si consiglia quindi di utilizzare la collaborazione e/o consulenza di un posatore professionista.
Per giunti di dilatazione strutturale, rispettare quelli già presenti nel sottofondo e realizzarli utilizzando sigillante idoneo o profili ad hoc.
Il giunto di frazionamento deve essere posato all’interno di un’area di 9-12mq, in base al sottofondo, per la posa di pavimenti in esterno, in aree interne soggette ad alto calpestio o su sottofondi soggetti a flessioni; per la posa in ambienti interni con sottofondo stabile, le specchiature possono essere di circa 20-25 mq.
In ogni condizione, completare la posa del suolo lasciando un giunto perimetrale di 3-5 mm dalle pareti, colonne o spigolature e tra piastrelle e altri materiali. Si declina ogni responsabilità per la posa senza fuga tra le piastrelle: si considera posa a giunto minimo quella con fuga di 2 mm.
7_STUCCATURA
Prima di realizzare le fughe, attendere fino alla completa asciugatura del collante.
Istruzioni
1. Assicurarsi che i giunti di posa siano vuoti e liberi da ogni traccia di collante e/o polveri. Eventuali residui che non garantiscono il riempimento di almeno 2/3 dello spessore della piastrella dovranno essere rimossi meccanicamente.
2. Stuccare piccole superfici per volta (4-5 mq) in particolare se si tratta di prodotti strutturati, antiscivolo e levigati, utilizzando apposite spatole in gomma. Per fughe in netto contrasto cromatico con le piastrelle posate, si consiglia di testare sempre il fugante su un’area limitata e nascosta.
3. Eliminare l’eccesso di fugante dalla superficie con movimenti diagonali, quando il prodotto è ancora umido, e togliere tutti i residui.
4. Pulire accuratamente con una spugna bagnata in acqua pulita e ripassare con uno straccio umido su tutta la superficie, comprese le fughe. Per gli stucchi epossidici si raccomanda la pulizia con spugna e abbondante acqua.
La velocità di reazione e indurimento di questi prodotti rende impossibile la rimozione dei residui dopo l’indurimento. In ogni caso, consultare sempre le specifiche dei produttori di materiale fugante per verificare la correttezza della scelta in base al tipo di piastrella.
8_PULIZIA
La pulizia deve riguardare l’intera superficie della piastrellatura: piastrelle, fughe, giunti di deformazione e profili. L’operazione è corretta quando si raggiunge la completa eliminazione di tutti i residui dei materiali di posa.
PULIZIA INIZIALE
Il lavaggio dopo la posa è una fase di fondamentale importanza per tutti gli interventi successivi e per la corretta manutenzione nel tempo. Un accurato lavaggio iniziale permette ai pavimenti di restare belli e protetti a lungo e si esegue normalmente una sola volta prima dell’utilizzo del pavimento.
Si raccomanda di effettuare la pulizia iniziale dopo 4-5 giorni dal completamento della stuccatura della superficie, quando la sigillatura delle fughe risulta completamente asciutta, e non più tardi di 10.
Usare un detergente adeguato, a base acida o alcalina in funzione delle caratteristiche del sigillante. Si consiglia di testare sempre la resistenza del prodotto ai detergenti su un pezzo non posato o su una piccola porzione nascosta della superficie piastrellata, in particolare per prodotti lappati o levigati.
Evitare l’uso di prodotti di pulizia contenenti acido fluoridrico (HF) e suoi derivati.
La superficie fugata e pulita può presentare un film di residui cementizi non asportabili con sola acqua. In questi casi è necessario l’utilizzo di un prodotto a base acida, opportunamente diluito secondo quanto dichiarato dal produttore.
Istruzioni
1. Per prima cosa, bagnare la superficie piastrellata, in particolare le fughe, di norma non resistenti agli acidi.
2. Spargere poi la soluzione acida preparata e far agire per un breve tempo (2 minuti).
3. Non lasciare asciugare il prodotto applicato, ma rimuovere la soluzione con una macchina monospazzola con disco non abrasivo e aspira liquidi e/o manualmente.
4. Al termine, risciacquare abbondantemente. La pulizia eseguita con macchine è particolarmente consigliata per prodotti strutturati e per grandi superfici e va sempre completata manualmente nei punti difficilmente raggiungibili, soprattutto negli angoli, lungo le pareti e in ogni zona in cui la monospazzola non può operare.
PULIZIA ORDINARIA
La pulizia ordinaria delle superfici ha lo scopo di rimuovere lo sporco, cancellare i segni e ripristinare l’aspetto originale. Le piastrelle in gres porcellanato non hanno bisogno di trattamenti di protezione: una corretta e regolare pulizia è sufficiente a mantenere inalterata la superficie.
Pulire in modo accurato lavando con acqua calda, straccio o spugna morbida ed eventualmente con detergenti neutri. Per locali con grandi superfici, è possibile utilizzare macchine industriali lavasciuga, con completamento manuale dove necessario.
9_RACCOMANDAZIONI GENERALI
Non strofinare le superfici con strumenti abrasivi, come pagliette in metallo o spazzole dure che potrebbero lasciare graffi e segni indelebili. Rimuovere eventuali residui grassi o oleosi con detergenti contenenti solventi organici o con detergenti alcalini (pH>9), poi risciacquare accuratamente.
Non utilizzare saponi, perché potrebbero lasciare uno strato viscido, in particolare se utilizzati con acque dure.
Non utilizzare prodotti contenenti cere o brillantanti.
Evitare l’uso di detergenti abrasivi su superfici lucide e/o levigate.
Su materiali matt, utilizzare solo dopo verifica su una piccola porzione piastrellata.
In generale, l’uso di qualunque detergente non neutro deve essere prima testato su una piastrella non posata o su una porzione nascosta della pavimentazione.
AVVERTENZE:
A materiale già posato, Terratinta Ceramiche: - non accetta contestazioni dovuti a vizi palesi - non risponde sulla qualità dell’opera piastrellata ma solamente sulle caratteristiche del materiale fornito.
Al termine della posa, è bene conservare alcune piastrelle di scorta per eventuali riparazioni o anche per disporre di un campione rappresentativo del materiale in caso di contestazione.
58 59


// 45, via Viazza II Tronco 41042 Fiorano Modenese(MO) Italy T +39 0536911408 F +39 05361940223 terratintagroup.com Terratinta Group terratintagroup // brand of Terratinta Group Srl SB #terratintastyle "Stay hungry, stay foolish." S.
1955-2011 DOWNLOAD AREA
Jobs
terratintagroup.com