Celebrating Rural America Since 1882


Maintaining your pantry, maintaining your family.


WASTE NOT! GIVE YOUR WORKSHOP LEFTOVERS NEW LIFE.

SPICE UP YOUR GARDEN FOR YOUR KITCHEN.


THRIFT AND REUSE YOUR WAY TO ZERO WASTE.


22 Grow Your Own Spices


Season

28 Hunting 101
The reality of hunting is more expensive than you’d think.
33 Everything but the Gobble
When you’ve purchased or harvested a delicious bird, you won’t want to waste a single morsel of meat.


44 Choosing Critters

To build impressive genetics into your herd, flock, or fluffle (of rabbits!), be sure to set goals — and don’t hesitate to follow them.
54 Seasons of the Sheep
Follow a farmer through a year of tending to her herd.

69 Let’s Go to the Cattle Auction
Whether selling or buying, preparation is key before stepping into a sale barn.


39 Scrappy Woodworking

Give your workshop leftovers new life with these projects.
49 Forge Ahead with Blacksmithing


Get all fired up about learning how to weld with a coal forge.

58 Color Block Mitten Pattern


Keep your hands toasty next winter by tackling this eyecatching project for knitters of any experience level.


VOLUME 141, ISSUE 5

ISSUE EDITORS
ALLISON SARKESIAN, Lead Editor

OSCAR H. WILL III, Editor at Large EDITORIAL TEAM
INGRID BUTLER KARMIN GARRISON
REBECCA MARTIN JESSICA MITCHELL
ILENE REID KALE ROBERTS
AMANDA SORELL JEAN TELLER
CARLA TILGHMAN
ADVERTISING DIRECTOR
BRENDA ESCALANTE; BEscalante@OgdenPubs.com
ART/PREPRESS
SHELLY BRYANT, Art Director
WEB AND DIGITAL CONTENT
TONYA OLSON, Digital Content Manager
WEB SERVICES TEAM
BEN SAUDER DARBY STIPE ALYSSA WARNER
DISPLAY ADVERTISING
800-678-5779; AdInfo@OgdenPubs.com
CLASSIFIED ADVERTISING

866-848-5416; Classifieds@Grit.com
CUSTOMER CARE • 866-803-7096 CustomerService@OgdenPubs.com
■ Life has a funny way of keeping us on our toes, doesn’t it? Just when we think something is set in stone, life steps in and points us in a new direction. That’s the situation I’ve found myself in recently, and it’s resulted in big changes I never saw coming. I’ve chosen to pursue it fully. Because of those changes, this will be my last note as the lead editor of Grit.
As excited as I am for this new opportunity, I’m also incredibly sad to step away from a magazine that I love dearly. But I learned long ago to follow my heart. It may not always make sense at first, but it’s never steered me wrong. Saying “goodbye” to this magazine and its people feels like parting ways with a dear friend. The great thing about old friends, though, is that you never really say “goodbye,” just “see ya later!” Even though I won’t be directly involved in a leadership role, I know I’ll always be part of Grit. I’ll follow along with each issue, soaking up its long and storied history as I turn every page.
BILL UHLER, Publisher
MARISSA AMES, Editorial Director
CHERILYN OLMSTED, Circulation & Marketing Director
BOB CUCCINIELLO, Newsstand & Production Director
BOB LEGAULT, Sales Director
TIM SWIETEK, Information Technology Director ROSS HAMMOND, Finance & Accounting Director
Grit Magazine (ISSN 0017-4289)

September/October 2023, Vol. 141, Issue No. 5. Grit is published bimonthly by Ogden Publications, Inc., 1503 SW 42nd St., Topeka, KS 66609-1265.
Periodicals Postage Paid at Topeka, KS and additional mailing offices. POSTMASTER: Send address changes to Ogden Publications, Inc., 1503 SW 42nd St., Topeka, KS 66609-1265. For subscription inquiries call: 866-803-7096
• Outside the U.S. and Canada, call 1-785-274-4361 • Fax: 785-274-4305
SUBSCRIBERS: If the Post Office alerts us that your magazine is undeliverable, we have no further obligation unless we receive a corrected address within two years.
©2023 Ogden Publications Inc.
Printed in the U.S.A.
In accordance with standard industry practice, we may rent, exchange, or sell to third parties mailing address information you provide us when ordering a subscription to our print publication. If you would like to opt out of any data exchange, rental, or sale, you may do so by contacting us via email at CustomerService@ OgdenPubs.com. You may also call 866-803-7096 and ask to speak to a customer service operator.
I can’t begin to put into words how much the Grit community means to me, and how much I’ve enjoyed being involved in its happenings. In my very first editor’s note, I talked about the importance of community and how Grit has an especially strong one. I feel that more today than ever before. Those of you who represent all that Grit is the heart, soul, and lifeblood of rural America understand the value of such a strong community.
I’ve worked with this magazine long before I stepped into a leadership role, and as I look back on the years, I can’t help but smile. I have countless wonderful memories, including laughing, crying, and rejoicing as I’ve chatted with readers and authors during my time here. You are what truly makes this magazine special: a community so willing to share their knowledge and stories to benefit others. After all, neighbors helping neighbors is a staple of rural life no matter if those “neighbors” are miles apart.
Grit’s new lead editor, Karmin Garrison, is already a part of our wonderful rural community and lives the “can-do” lifestyle of livestock, sustainable food, family, and knowing how to fix what’s broken, and I know she’ll carry on this magazine’s legacy well. She brings years of expertise in editing, publishing, and the many facets of rural life. I’m looking forward to reading each future issue and seeing many of your familiar names pop up in the magazine from time to time.
From the bottom of my heart, thank you all for making my time at Grit such a joy. May we keep sharing our stories, helping our neighbors, and celebrating rural America.
See ya later,
Allison Sarkesian ASarkesian@OgdenPubs.comWhen canning green beans, add 25 milligrams of zinc to your jar. Your green beans will stay nice and green. If you have a problem finding 25 milligram tablets, simply add half of a 50 milligram tablet!
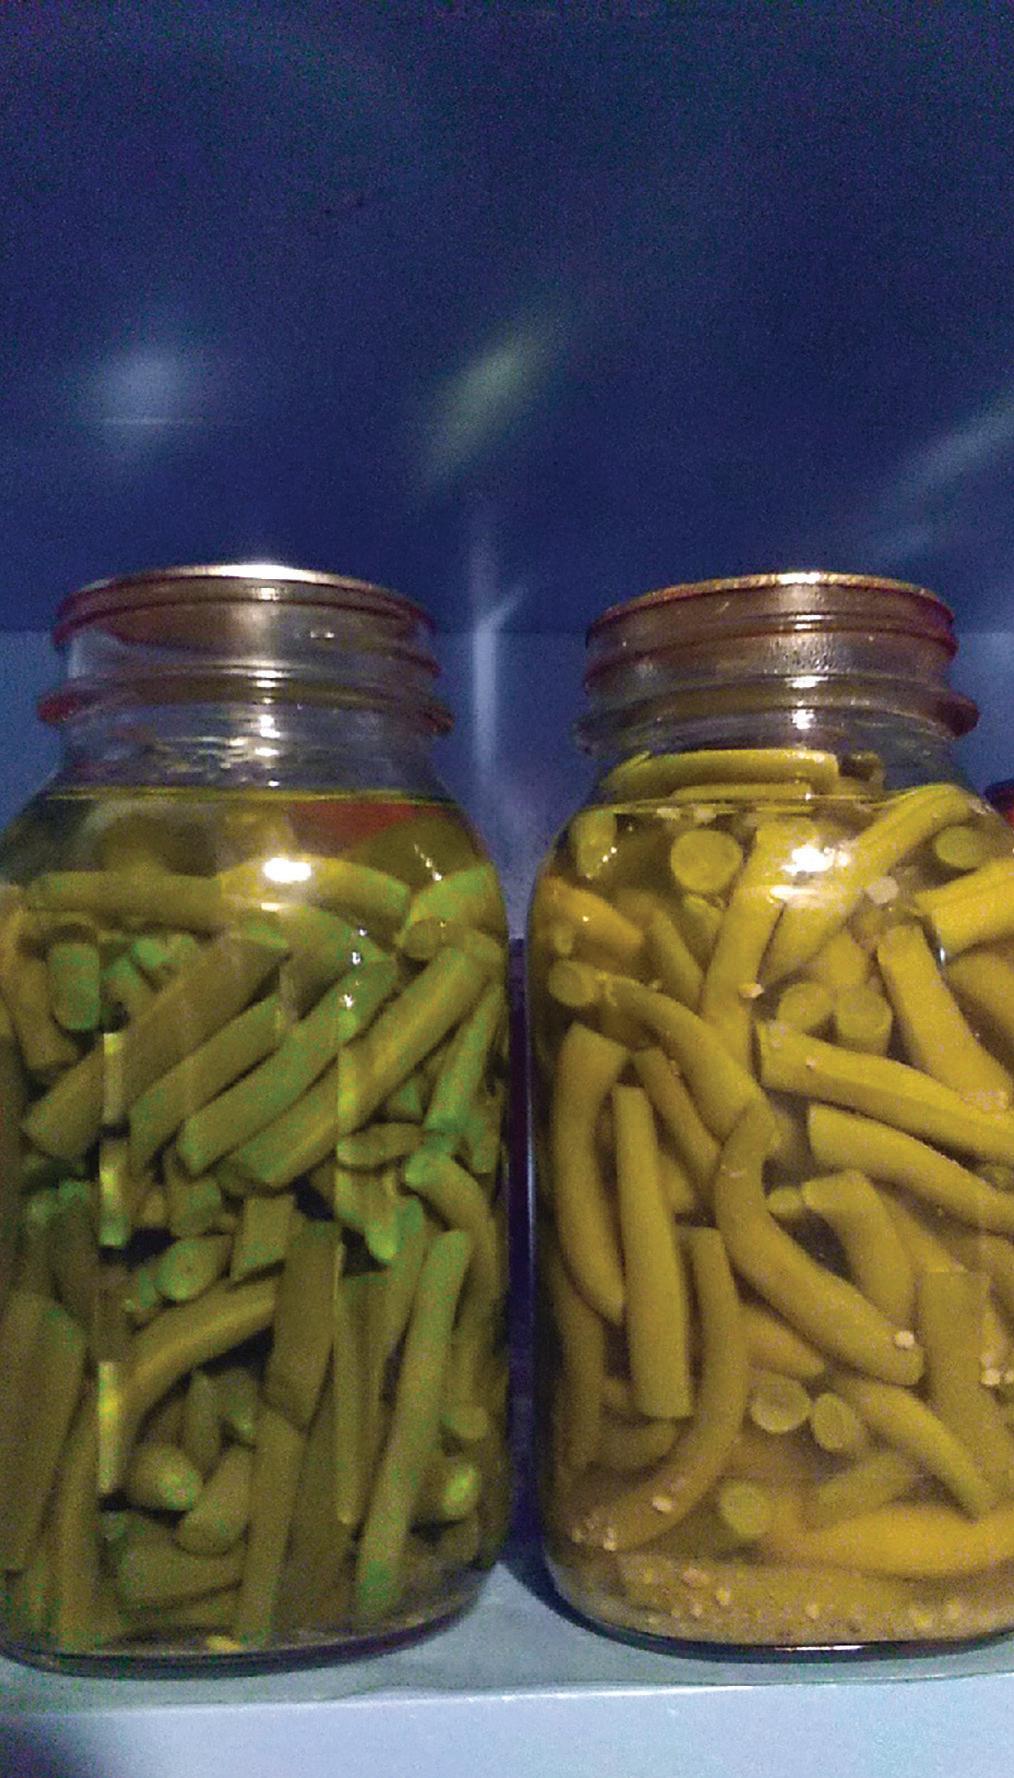
ESTHER BEACHY HUTCHINSON, KS
Visit www.Grit.com and search “reader letters” to see what other members of the GRIT community have been up to lately.


Make an easy bird feeder with a pumpkin! Cut pumpkin in half, then fill each half with birdseed. You now have an impromptu birdfeeder. Birds will also nibble on the pumpkin’s flesh.
 SHEILA CARPENTER ST. CLOUD MN
I made a bug shaker, garden duster, grass seeder, you name it. I took a empty Pringles can, and drilled holes in the bottom. Then, I filled it up and put the lid back on it. Now I just shake it where needed.
 DIANA JOHNSON LIMA, OH
If you have garden, farm, or home advice you’d like to share, send an email to Letters@Grit.com, or mail a letter to 1503 SW 42nd St., Topeka, KS 66609. We pay $25 for each tip we publish.



 By Jeff Ransdell

They set up sawhorses across the old barnyard in two long lines, planks laid across to make tables, food arranged down the center. Neighbors brought whatever chairs they could cart to line the sides. Maybe a hundred people came and went throughout the afternoon. There was food for an army; every wife seemed to bring a casserole, a fruit salad, a pie, maybe a jar of prize pickles, just to be sure. Fifteen women fluttered around the large farmhouse kitchen, bringing more dishes out. It felt almost too warm to breathe in that kitchen, even with the fan set to high, but the ladies were determined to keep the hot food coming. A regular convention of aprons.
Children ran, tagged, tripped, and laughed, generally getting in the way. Cousins Georgia, David, and I had an eating contest, but it was no real contest against David’s multiple plates. Georgia could barely manage two. Afterward, we fled to the cool front-parlor floor, groaning from our indiscretion.
Men talked weather and crops — maybe an unwritten law, since I never saw two farmers meet who didn’t cover these essential topics if they said much beyond “hello.” They talked of the old days, the days of Captain John who played the fiddle ’round about. They remembered when the weeping willow up by the springhouse had been planted. My God, it had gotten as big as a granary barn. One man showed off his daddy’s shotgun, so they took it to the side

field to make sure it worked. If you were 9 and begged and whined enough, they might let you have a go.
Once evening fell, with shadows creeping down the hill behind the house, the last leftover pie finding a picnic basket to ride home in, the ladies retreating to the parlor to drink iced lemonade, the men then pulled chairs under the box elder tree out back, miraculously finding some sipping whisky. They talked of plowing behind the horses, mentioning the best horses by name and taking a sip in their honor. They remembered how the family, every few months, went to Lafayette in a horse-drawn wagon to buy the 50-pound bags of flour, seed, sometimes a role of calico. Each child would get a bit of hard candy from a big glass jar. That would be a long, dusty trip, taking most of a day there and back, with chores to do before and after.

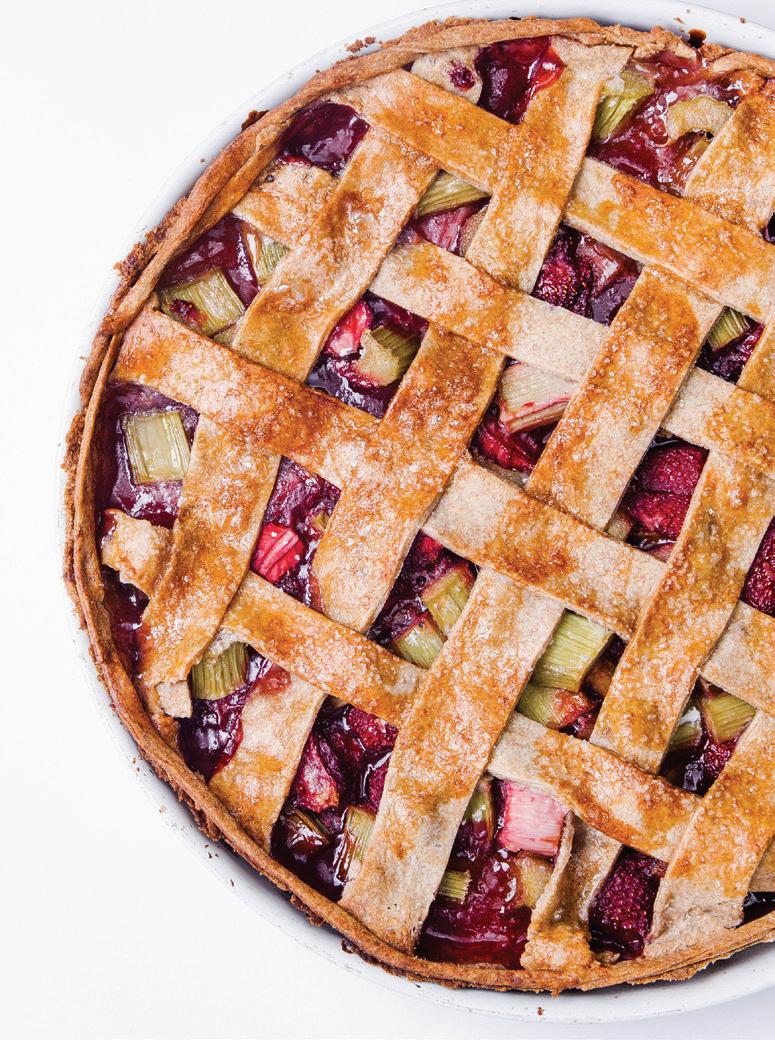
I never knew how these annual gatherings would end; I’d fall fast asleep. But people lingered, I’m sure, not quite wanting to go their separate ways. There would be a long, cold winter to endure before they’d celebrate again. The gossip, the news, the food, and the sipping would go a way toward helping them see it through. They knew it was good to celebrate their summer of hard work, to relax a little bit, to smile a cautious smile. Just as they also knew, should the seedlings wither or the fields be muddy-wet at harvest, they’d all just work harder. Because that’s what farmers do best. They see it through.


These 10 tools can help save time and energy around the farm.
By Jeremy Chartier■Over the years of setting fence posts, fixing barns, and repairing equipment, I’ve built a little collection of specialty tools to make my life easier. The following list is of farm tools and equipment that many may not have thought of investing in. This list doesn’t replace the essentials; it enhances them.


A rebar tie wire twister is a timesaver for DIY fence installation. It’s meant to twist hardware wire tightly while tying rebar rods together at intersections when you’re preparing to pour a concrete structure. I use the twister for something different.
Anyone who has put up a livestock fence with cattle panels and steel T-posts can attest to the love-hate relationship between an installer and the wire clips that are usually provided with the T-posts. These clips work, but they can be annoying to work with, they take much longer to tie a panel to a T-post, and there are never enough of them.
Here’s where the rebar tie wire twister comes into play. Using tie wire, loop a length around the post and panel, bend both ends, and hook both bends with the rebar tie wire twister. Now, spin the wire up tight and clip off or bend down the extra wire: Your fence is now secured to the post. You can buy rebar tie wire or
hardware wire, or, in a pinch, save the baling wire from hay bales. Buying a fair-sized spool of wire and keeping some extra bale ties handy will usually ensure you won’t run out of wire to tie up your fence. Try it next time you put up fencing; you might be pleasantly surprised at how much easier it makes the job.
Sometimes, you change your mind. It happens to all of us, but when you change your mind about where that fence line needs to be, you’ll have a problem. Remember all those T-posts you diligently pounded deep into the ground? They won’t be easy to pull out, especially when they’ve been there awhile. This is a job for a farm jack! The farm jack is an old-school tool that can lift, squeeze, push, and pull objects. With a farm jack and short length of chain or a T-post attachment, you can easily pluck stubborn T-posts out of the ground.
The farm jack has a few clever tricks up its sleeves. Its jaw can be hooked under the bumper of a vehicle or other sturdy point to lift it; a chain can be attached to either end of the jack to use it as a come-along or a mechanical winch; and if you have the additional jaw, it can be configured to squeeze things together, such as bent steering components or twisted livestock gates.
Even though a farm jack can double as a come-along in a pinch, nothing beats having the right-sized come-along for the job at hand. The come-along is essentially a hand winch that uses a steel cable. If you have a stubborn fence post that just won’t stay straight, you can use the next post in line, on the side the offending post is leaning away from. Correct the crooked post by attaching one end of the comealong to the top of the post, the other to the base of the next post, and then winch away until the post is back to being upright.
Using a come-along is more convenient than fighting with your bulky farm jack. Not only is a come-along typically easier to manipulate, to lift, and to carry, but it also has the distinct advantage of having a spool and cable, instead of having to ratchet over the body of the farm jack. If you need to winch something over a sizable distance, a come-along will make the job easier, since you can continuously winch for a greater distance, instead of winching and resetting like you’d need to do with a farm jack.
Chains are worth their weight in gold. They’re tops on my list of farm tools and equipment, and they’ve always proven to be worth the investment. They’ve played
important roles on our farm, such as securing loads to our trailer, pulling trucks out of precarious positions, lifting heavy objects, and stabilizing or binding objects together.
When buying chains, invest in a highgrade, 3⁄8-inch standard chain. The cheaper 5⁄16-inch or smaller chain may have an appetizing price point, but you’ll really want the higher working load capacity of a 3⁄8-inch chain, which is commonly found on 18-wheelers and logging equipment. I’ve never snapped a 3⁄8-inch chain, but I’ve seen 5⁄16-inch chains come apart. When a chain breaks, it whips back with tremendous energy. I’ve seen small chains destroy truck cabs, shatter windows, and scar trees.
Consider the following attachments for your chains.
Shackles. Shackles are great attachment points if you intend to secure a rope to the end of a chain, or you need a cable or another chain to slip within that attachment point without potentially losing the connection.
Slip hooks. Slip hooks are open-ended round hooks (though some have a latch) used on equipment lift points.

Grab hooks. When I need to use a chain, a grab hook usually does the job. Grab hooks lock onto a link of chain, and they’re held in place by the links on either side of the link it’s attached to. I prefer to have grab hooks on either end of a chain.
A chain binder is a useful addition to a chain. Chain binders are used to tighten a chain firmly to the side rail or to other attachment points when securing a load on a flatbed trailer. Although lever binders are easy to find secondhand, I prefer the safer ratchet binders, which are built similarly to a three-point hitch top link. I find ratchet binders work wonders for tensioning chains.
Even if you don’t own a trailer, a chain and binder can secure or even winch (albeit within a short distance) with respectable ease and accuracy. I’ve used them to pull metal frames back into square, to bind poles together, to square up a shed’s framework, and even to inch a
heavy transmission away from an engine while the transmission was held up by a transmission jack. They may be a limiteduse tool, but they’re useful nonetheless. If you own 3⁄8-inch chains and you find a ratchet binder for sale at a yard sale, tag sale, or flea market, grab it.
If you own livestock, especially breeding livestock, then a wireless baby monitor is a handy item to have. It can help you keep an eye on an expecting or sick animal; it’s also useful for when you just want to check in on your animals periodically. Night vision and a good microphone are essential when parking a baby monitor in the barn.
A scoop shovel is my favorite for handling loose material, especially pine shavings. In my chicken coops, I use a deep bedding pack of pine shavings for litter, and eventually, I need to clean it out. I’ve used digging shovels, flat shovels, and even snow shovels, but none can beat the scoop shovel. I especially like the plastic styles, since they stand up to corrosives and are easier to disinfect.
Things are bound to break, and more often than not, you won’t be around your tools or within reach of an electrical socket or air hose when it happens. Ratchets and wrenches are worthwhile and essential tools, but wrenching for hours gets old quick, especially when you’re in a hurry. Cordless impact drivers can be a great investment.
Most stores offer a 1⁄4-inch, quickchange impact driver that accepts standardized screw bits. To attach sockets to this tool, pick up a socket adapter. Many different brands now offer 1⁄4-inch, 3⁄8-inch, and 1⁄2-inch socket adapters. Be sure to buy several of these adapters in the size you intend to use most (for me, that’s 1⁄2-inch), since they do occasionally snap. Then, you’ll have the power and speed of an impact in a small, light, easy-to-use package to make your mobile repairs that much easier.
I’ve used my impact with the 1⁄2-inch socket adapter to spin lug nuts, to remove a pitman arm nut, and to drive a ball joint tool while installing driveshaft joints. This thing also drives screws like nobody’s business, so much so I’ve all but retired my drill.
I bought this on a whim to hang on my tractor for when I needed to attach, detach, or adjust the three-point hitch. I was always hunting down a hammer and adjustable wrench when I needed to change implements, but now I have both in the same tool! If you happen across one of these at your local store, it’s worth the few bucks.
Last, but not least, I strongly recommend a high-quality, compact tactical flashlight. If you need to see what’s in that bush, across the field, on the other side of the road, or in that engine bay, or if you need to find out what’s creeping around your chicken coop in the dark or what’s bothering the cows in the field at night, you’ll need a serious flashlight. Look for a flashlight that puts out 500 lumens or more.
If you’re a DIY homesteader like me, there’s bound to be a few things on this list of farm tools and equipment that will prove handy to you. These 10 tools are a great start to expand your knowledge of homesteading tools.
At 12 years old, Jeremy Chartier became involved with his local 4-H group. He later joined the local Future Farmers of America chapter and showed livestock until his college years. After graduating from the University of Connecticut, he joined the University of Maine’s Poultry Service Provider training program. Today, Jeremy sells started pullets to local backyard farmers, is still involved with 4-H as a poultry showmanship judge, and writes about his passion for farming.


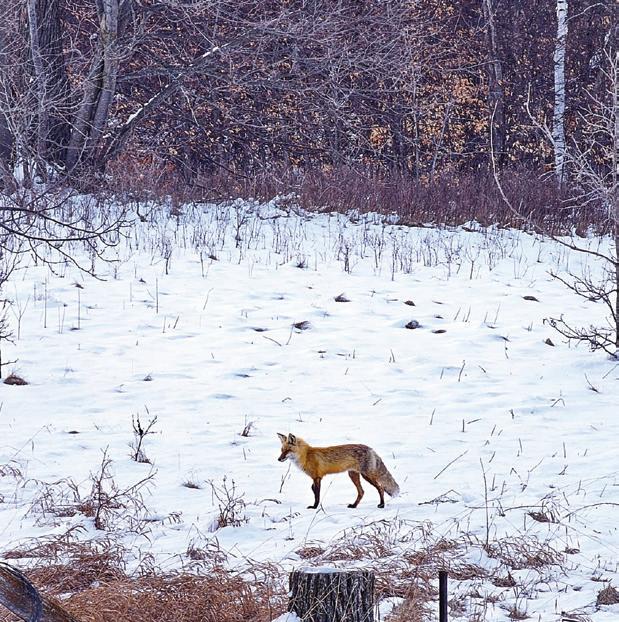


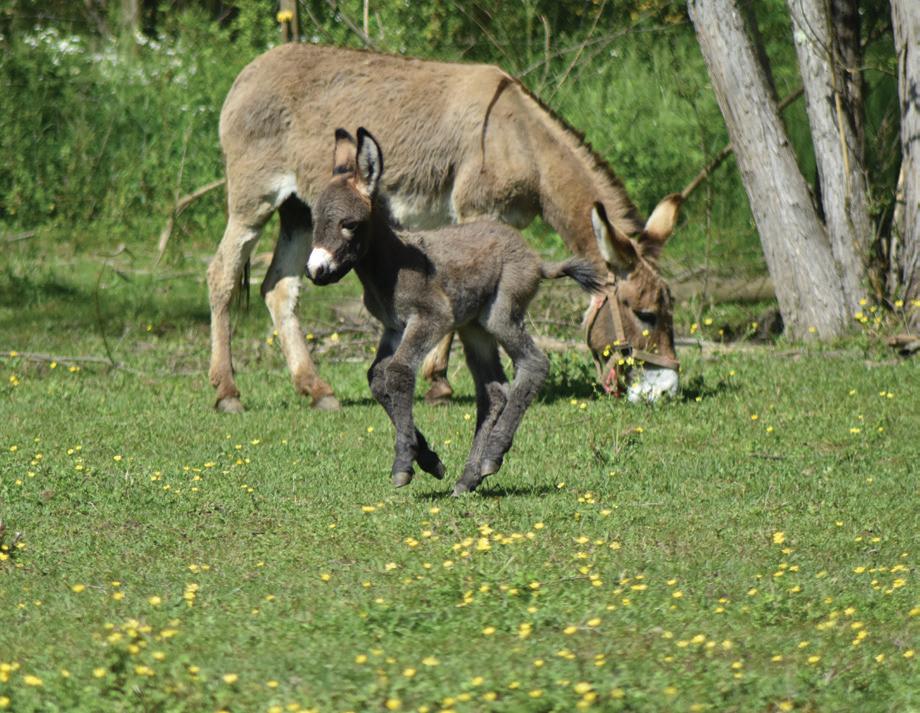

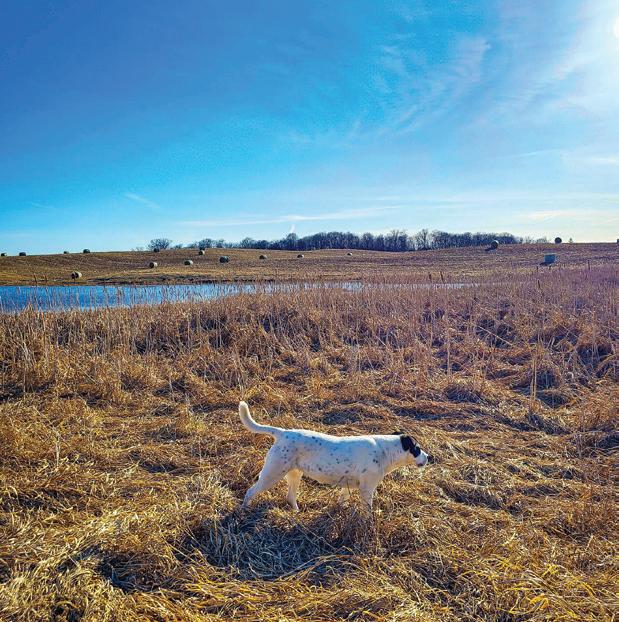





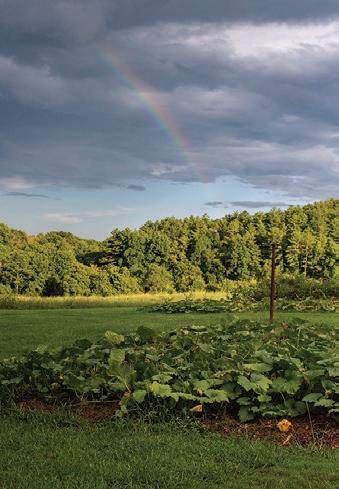
I took this photo during a recent thunderstorm.

ZAC GRIGGS OKLAHOMA
I had a Grit paper route in Piscataway, New Jersey, in the early 1970s. I started my route from scratch, and it taught me a work ethic that made me successful even until this day.

JEFF HALL
VIA EMAIL
Chipmunks cause me more problems than any other animal. They start by digging up planted seeds and then digging out small plants. They eat my strawberries, even when I try my best to cover them. It’s amazing how small a hole they can t through.
 JOHN BERCKBICKLER GLENSHAW, PENNSYLVANIA
I found the recipe for Finnish Bread that I think will t the bill for Robin
Koble in Mail Call in the July/August 2023 issue of Grit: www.NordicKitchenStories.co.uk/2021/02/24/ Finnish-Sourdough-Rye-Ruisleipa-Recipe.
JEFF HASTINGS
VIA EMAIL
I read Grit cover to cover and have two pen pals who put ads in your Looking For section.
STEVE PETERS
VIA EMAIL
We welcome letters from our readers. If you’d like to comment on an article, share your opinions, or submit a “Looking For,” send us an email (with photos, if available) to Letters@Grit. com, or send a letter to: GRIT Mail Call, 1503 SW 42nd St., Topeka, KS 66609. Electronic submissions are more likely to receive a timely response. Readers assume all risk associated with publishing a mailing address, requesting correspondence, and responding to correspondence requests in GRIT magazine.

PEN PAL
I’m looking for pen pals. I live on a farm with chickens, geese, cattle, and cats. I have a large garden and love cooking. Looking for recipes, gardening tips and tricks, and people who love food and animals.
Jessica Mittelstadt
Box 11
Flatbush, Alberta
T0G 0Z0 Canada
FABRIC

I’m looking for any fabric to make projects for myself or to give away. I love to work with denim, cotton, polyester, and satins of any color.
Fay Maxson
410 N. 75th Ave.
Pensacola, FL 32506
PEN PALS


I’m 61 years old, and live on a farm. I enjoy mushroom hunting and berry picking in our woods. I love western shows, sewing, cooking, and building DIY doll houses (I’ve built over 30). My husband and I collect electro-mechanical pinball machines and go to a lot of garage sales and flea markets. I’d love to keep in touch with others who have the same interests or just want a pen pal.
Diana Johnson
4720 Greely Chapel Road
Lima, Ohio 45806
Learn how to properly store food in your pantry and use it.
 Story and photos by Jenny Underwood
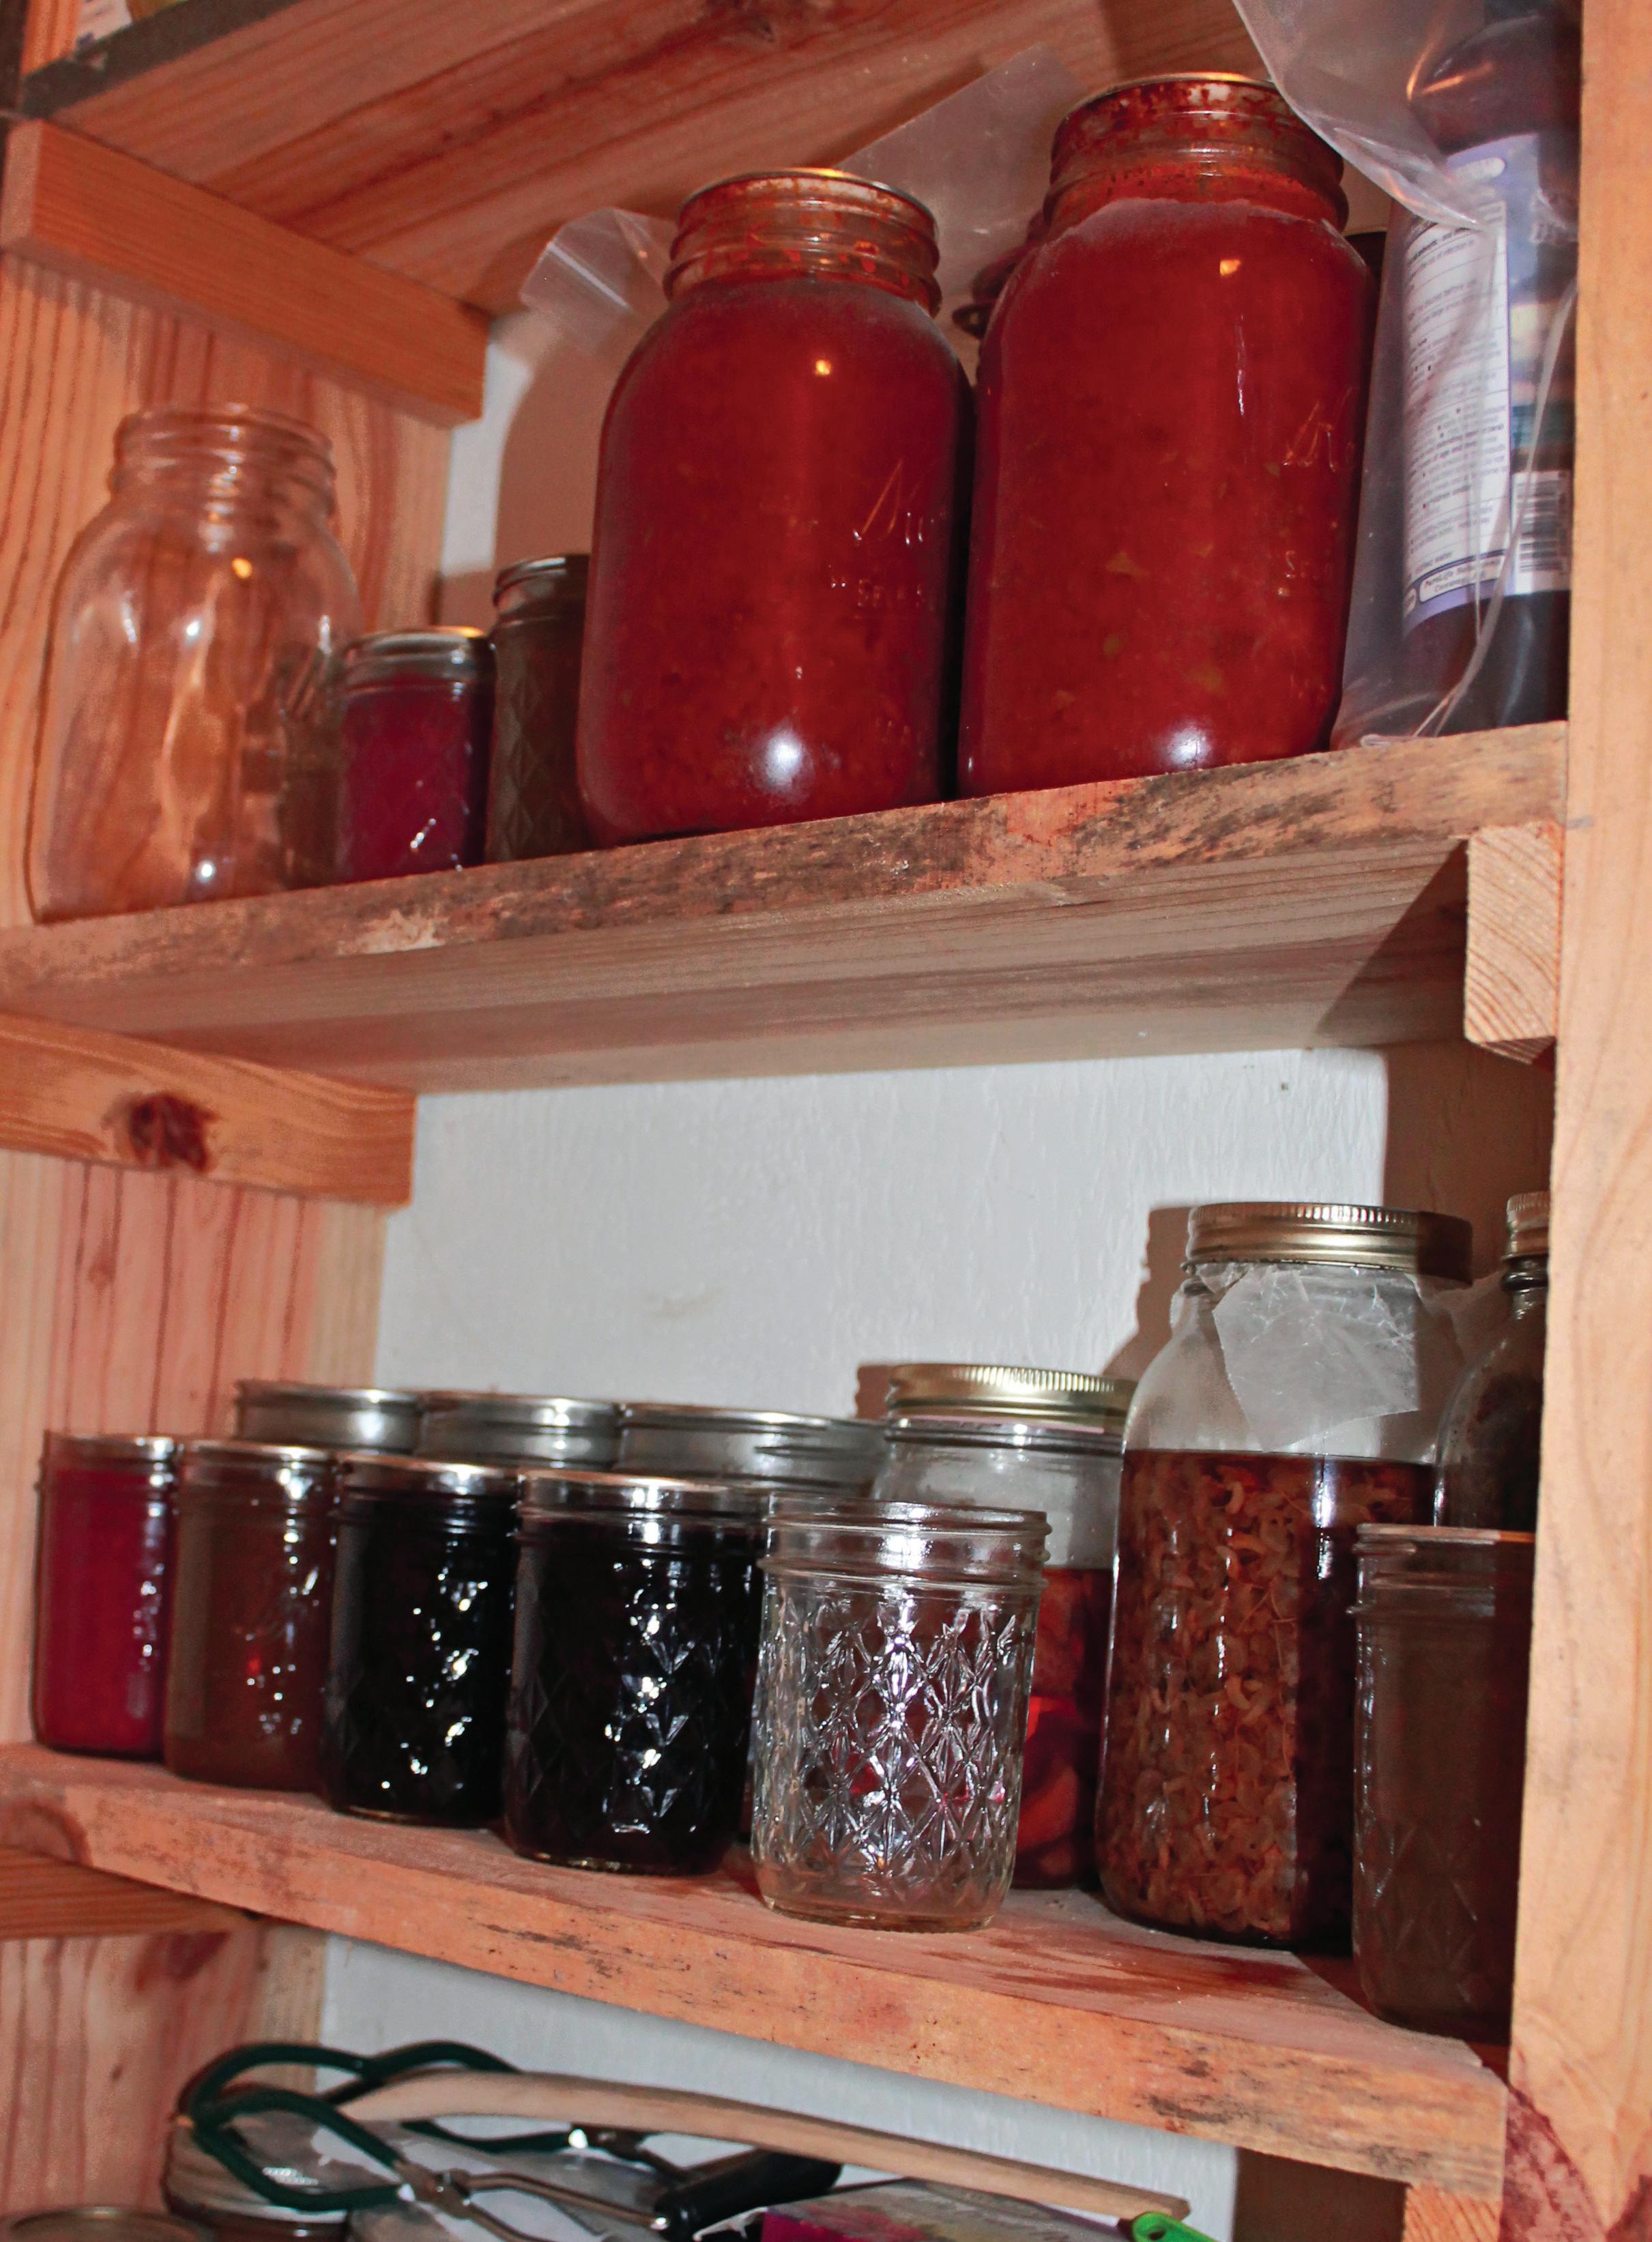
While somefacets of self-reliant living may be hard, depending where you live, a pantry can be successfully stocked anywhere and by anyone. It’s even possible to do it on a tight budget or with minimal space! And the beauty of having a pantry is the feeling of peace you’ll have knowing you can feed your family even if you can’t get to a grocery store.
First thing you should do when starting a pantry is plan Make a list of the food items you eat each week or month. Then, list them in categories.
• What’s perishable? These foods include produce, milk, eggs, fresh breads or pastries, meats, or cheeses.
• What’s shelf-stable? This includes wheat, pasta, rice, oats, our, salt, oils, beans, canned goods, and crackers.

• Which items can be canned, frozen, or dehydrated? This section is huge and incredibly versatile. It can include items from the perishable section, such as meats, breads, and cheeses, and freezing can be a fantastic way to store most fruits and vegetables.
After making your list, multiply your amounts to gure out how much you’ll need for one month. This should be your rst goal in setting up a pantry: to store enough food for one month. When you reach that goal, you can add another month until your stockpile is the desired size.
Make a list of 5 to 10 meals your family enjoys and keep your pantry stocked with all the items needed to make them
Dry
Wheat berries, oats (old-fashioned, quick, and steel-cut), rice (white, brown, or wild), pasta, dehydrated fruits and vegetables, oils, shelfstable fats (tallow, lard), salt, spices, freeze-dried foods, coffee, tea, beans, canned foods, sugar, maple syrup, honey, baking powder, baking soda, yeast.
Frozen
Meats, dairy, vegetables (blanch first), fruits, breads, eggs, homemade freezer meals.
Fresh
Potatoes, sweet potatoes, carrots, onions, cabbages, winter squashes, turnips, apples, pears, citruses, fermented dairy, fermented vegetables.
3 to 5 times a month. Also make a list of all the items you have in your pantry and keep a record of how many you have of each. Note each time you use one. Laminating your list is a simple way to do this, so you know at a glance which foods you have on hand and which ones you need to purchase.

Good advice is to take a fifth of your grocery budget each month and spend it on stock-up items even better if you get them on sale! So, if you’re spending $100 each week on groceries, take $20 and use that to buy extra stock-up items. You can also just set an amount, like $5, and buy the most bang for your buck.
The easiest things to store are nonperishable items. They can also be the cheapest. Where I live (very rural), with the larger town an hour away, we can get a 16-ounce box of whole-wheat pasta for $1.50. Every time we go grocery shopping, we buy 5 to 10 packages of pasta. I don’t use all those in the two weeks between shopping trips, so some get put up each time.
Living on rice and beans may sound boring, but, honestly, you do need a good amount of these if you normally eat them.
I buy dry beans in the 10- or 20-pound bags frequently, and then I can them myself for a quick, delicious, and healthy meal. It’s also cheap to purchase one or two bags of beans and store them in a 5-gallon bucket. They’re actually good indefinitely, but as they get older, they do get less tender, so rotate your stock.
(Patrice Lewis did a fantastic story about “old” beans in our sister publication Countryside and Small Stock Journal, www.IAmCountryside.com/Growing/HowLong-Do-Dry-Beans-Last — Grit Editors.)
The next-easiest foods to store are foods that are frozen or that can be frozen. You’ll obviously need a larger freezer and the ability to keep it going if the power goes out. Don’t keep a huge food supply in your freezer with no way to get emergency power. This is one reason some people opt for freeze drying or canning. To freeze your foods, you’ll also need storage options, such as plastic freezer bags, vacuum-seal bags, freezer-safe bowls, or freezer-safe jars. When freezing multiple small items, such as berries or onions, flash freeze them on a cookie sheet lined with parchment paper before putting them into freezer containers. This will prevent them from becoming a solid, unusable lump. Label your frozen foods with the contents and date. Frozen food may technically last for years but, after a while, it becomes distasteful and unappetizing. A good rule to follow is to use your frozen foods within one year.
Perishable goods are the hardest foods to store. Fresh fruits and vegetables are a wonderful addition to your diet, so plan ahead so you always have some. One of the best methods is to buy or grow produce that stores well. For example, potatoes and cabbages last for weeks (or months, if you turn the latter into sauerkraut), while lettuce generally doesn’t last a week. Carrots store for months in cold storage, but bananas won’t last more than a few days. While it’s fine to get more perishable foods, when you’re stocking up for the long term, think hardier fruits and vegetables. One fantastic way to do this is to buy large quantities
Store root vegetables in root cellars to keep them fresh longer. Potates last weeks when stored this way.of fruits or vegetables when they go on sale and preserve them yourself. Make dehydrated, canned, and frozen fruits and then store in a cool room or root cellar. We do this every year with strawberries, peaches, and apples. It can also be done with meats, dairy, vegetables, and eggs. Fermenting your vegetables is a fun way to have more shelf-stable “fresh” food.
There are many different places where you can shop for good deals to stock your pantry. I use my local bulk-buying store, a membership warehouse, Azure Standard, local farmers, sales at my grocery store, and, of course, my own garden. If you can’t afford the amount needed to purchase from any of these places, see if you can group up with friends and go in on an order together. My friends and I do this frequently and it helps each of us. The larger orders often cut costs in multiple ways by providing a bulk discount or free shipping.
Now that you’ve started stocking up, you may be wondering, “Exactly where do I store this?” Thankfully, there are many underutilized places in our homes that work just fine. Take a look through your home. Are there empty or partially empty closets? How about under your
beds or under a stairwell? Maybe you have a crawl space under the house or a basement or unused cellar. Have an empty wall in the garage that will fit some shelves? Make use of all of those! For optimal storage of dry goods, you need dry, cooler temperatures.
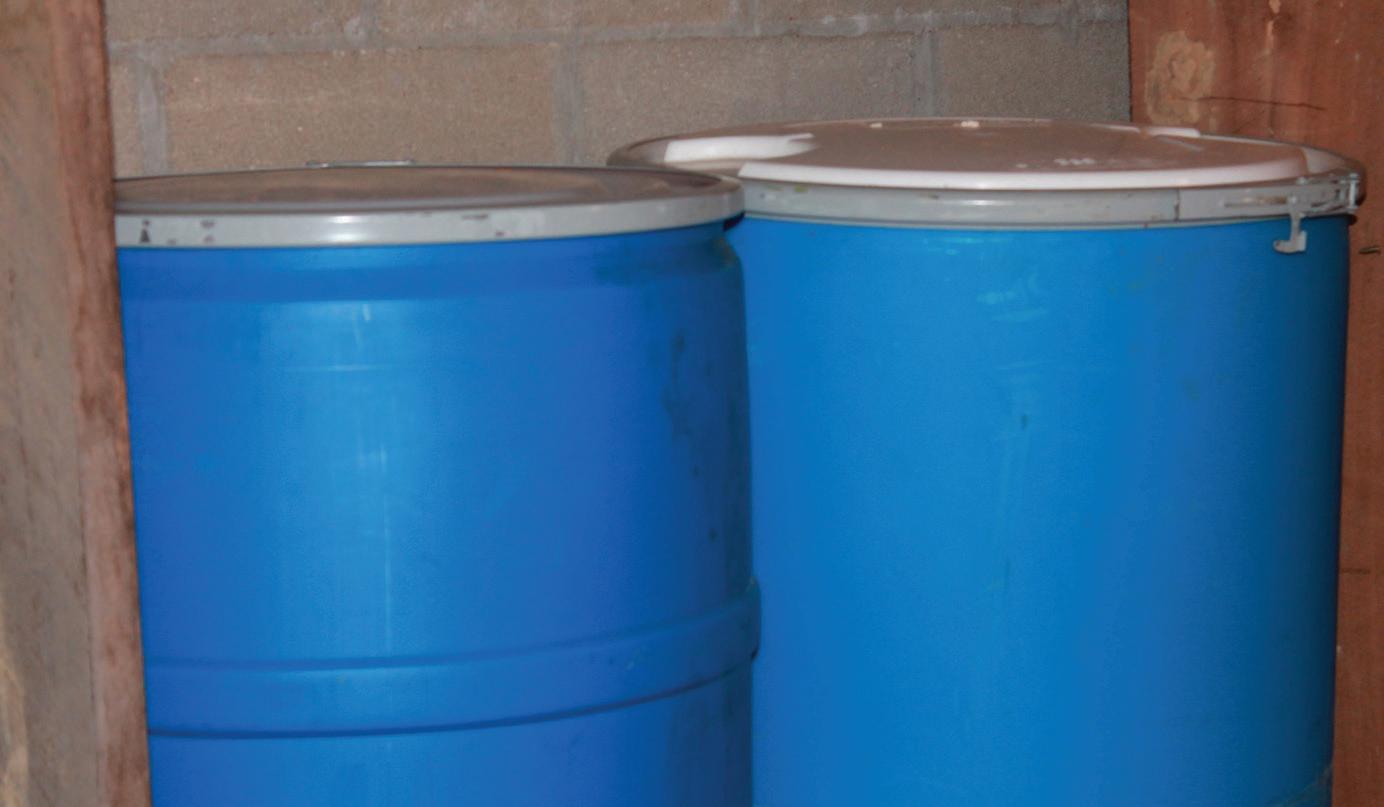
If you live in a humid climate, store your dry goods in food-grade buckets, barrels, or glass jars with a moisture absorber. The containers can be new or repurposed, but make sure whatever was in them before was food-safe also. Check out local food businesses, such as ice cream plants, delis, or bakeries, for containers. These often sell food-grade barrels and buckets at greatly reduced rates. Mason jars or any other quality glass jars also work wonderfully. I store oats, beans, nuts, and sugar in these. Remember: Moisture, heat, light, and pests are your enemy when it comes to safely storing food long-term. Package according to your climate and the type of food.

So, what’s the purpose of a pantry? In my home, it’s designed to help us eat healthfully and economically. It’s also a buffer in case we can’t get to the grocery store or there’s a natural disaster. And that means my main goal for my pantry is to use it to cook from! Yes, I cook from my
Learn the secrets of growing abundant plants and vegetables. Explore the fascinating natural world around us. Delve into a “hands-on” subject like beekeeping or mushrooms.


folkschool.org/grit
BRASSTOWN, NORTH CAROLINA
1-800-FOLK-SCH
See #9 on page 60
pantry on a daily basis, and it makes my meals easier and quicker. How do you go about doing that?
First, don’t stock items you don’t eat. Our family eats an enormous amount of beans and wheat berries. Obviously, I have large quantities of both of those. However, we don’t eat store-bought canned goods. We don’t like them, so, I don’t buy them.
Any food-grade container will suit your needs, as long as you can find a spot for it.The same is true with sugar. I use raw cane sugar, so that’s what I stockpile, not the cheaper beet sugar. Store what you use so you’ll actually use it. That’s not to say you can’t have a few true “emergency” items but I personally don’t stock my pantry with them.
Secondly, think ahead about the meals you enjoy making. If pizza is a staple in your home, then store lots of wheat or flour, pizza sauce or dehydrated tomatoes, frozen shredded cheese, and any other toppings you prefer (canned mushrooms, pickled peppers and onions, for example). If you love chili or soup, make up large batches once a month, and can them or can individual ingredients, such as beans, potatoes, or meat. Having all of these ingredients on hand at any time means you can consistently cook your favorite meals without running to the grocery store. This will save you time, money, and headaches.
Remember, by starting small and adding in a few items each time you shop, you can build a substantial pantry faster than you think. Be patient, be consistent, and keep an eye on your storage. Protect it from moisture, heat, light, and pests. Rotate your storage and actually use it daily to prepare your meals. Soon, you’ll find you have less stress, less shopping trips, more money, and more time! Make a pantry that works for you and your family; you’ll be happy you did.
Jenny Underwood is a homeschooling mama to four lively blessings. She makes her home in the rural foothills of the Ozark Mountains with her husband of 20 years. You can find her reading a good book, drinking coffee, and gardening on their little 5th generation homestead. She blogs at www.InconvenientFamily.com
Pizza, chili, soups, stews, casseroles, pasta meals, black beans and rice, breads, and granolas are all simple meals you can make from your pantry! Try this family recipe made from Carla Tilghman’s pantry.
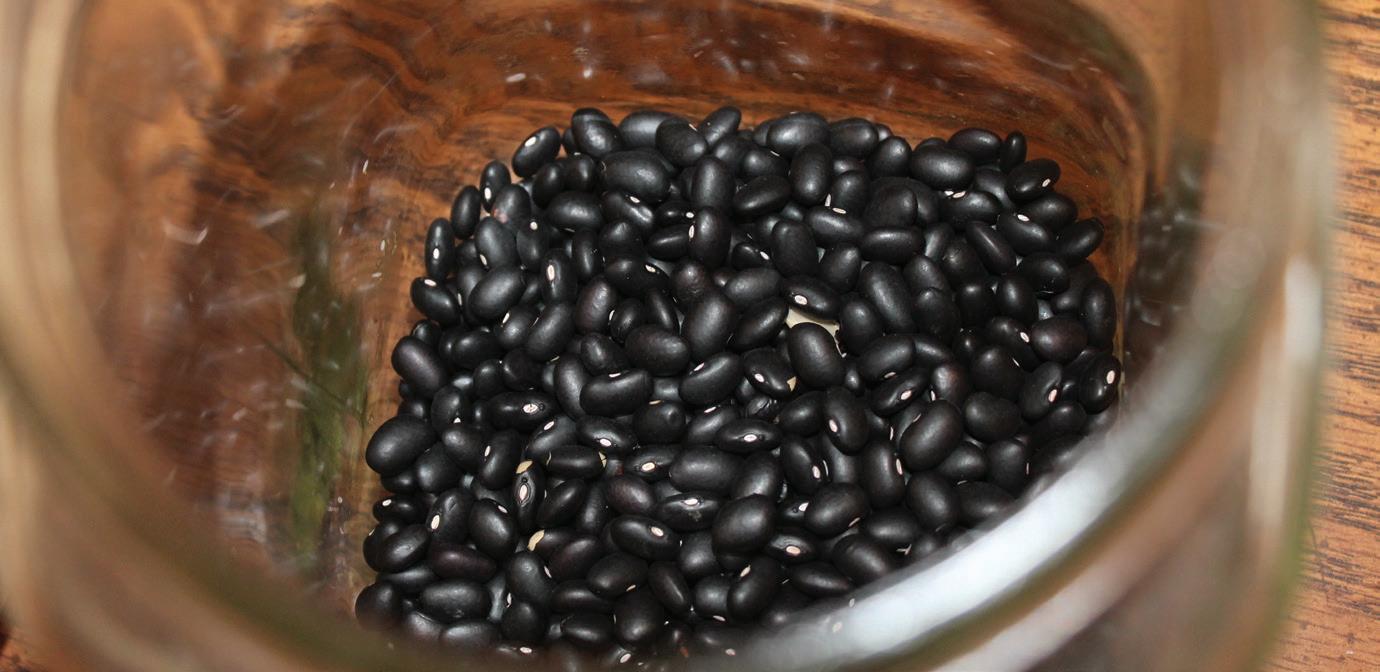

2 medium onions, chopped
12-ounce can chopped green chiles
5 cups pre-cooked chicken, diced
12-ounce can cream of celery soup
12-ounce can cream of mushroom soup
24-ounce can chopped tomatoes, drained
24-ounce can chicken broth
18 corn tortillas, fried until crisp in grapeseed oil
10 ounces grated Monterey Jack cheese
10 ounces grated cheddar cheese
Grapeseed oil
Sauté onions and chiles in grapeseed oil until tender. Add diced chicken. In separate bowl, mix together soups, tomatoes, and broth. In 9-by-13-inch pan, alternate layers of tortillas, chicken, soups, and some cheese (reserve some cheese for topping). Bake 45 to 60 minutes at 350 F. Top with reserved cheese. Serve hot.








 By Patrice Lewis
InMay of 2016, I quietly embarked on an experiment: shifting to a zero-waste lifestyle. I transitioned our household as best I could toward this new goal. Rather to my surprise, it worked.
Going zero-waste went hand-in-glove with a number of other lifestyle choices we’d adopted over the years: frugality, green living, food self-sufficiency, etc. How much more difficult, I wondered, would it be to take that next step and stop creating garbage?
Interestingly, we’re outside the usual demographic for zero-wasters. We aren’t young, single, urban, or minimalist. We’re self-employed empty-nesters living on a deeply rural homestead. I learned that being rural required a different approach than when living in cities or suburbs.
Zero-waste is built upon five principles.
• Refuse what you don’t need.
• Reduce what you do need.
• Reuse by not using disposable items.
• Recycle what you can’t refuse, reduce, or reuse.
• Rot (compost) the rest.
A zero-waste lifestyle is more than just recycling. In fact, the goal is to recycle
less, not more. Zero-waste emphasizes waste prevention over waste management.
The average American generates 4.5 pounds of trash per person per day, or about 1,600 pounds per year. Multiply that by the number of people in your household, and you can start to understand the scope of the issue.
As with all new projects, it was a zealous approach at first. I read, researched, and obsessed. I did a trash assessment and weighed our garbage. I completely changed my shopping habits, and became hyper-aware of just how much packaging exists in stores and avoided it as much as possible.
It was less difficult to adopt the lifestyle than I thought, in large part because we were already self-sufficient and thrifty. After starting a home woodcraft business more than 30 years ago, we adopted extreme frugality. We raise or grow much of what we eat, and buy in bulk what we don’t. Organic scraps go to the dog, the chickens, or the compost pile. Because we’re so far away from stores, shopping trips are planned rather than recreational activities. Our distance from restaurants means cooking from scratch is imperative,
convenience foods are rare, and takeout food is almost unheard of. Our preferred source for everything, from clothes to tools, is thrift stores.
All this meant our trash output was already far lower than national standards. However, the biggest step on the road to zero-waste was transitioning from disposable products. We embraced anything and everything that had a washable or reusable option. This move away from disposables had a massive effect on our trash output.
During the early weeks of transitioning to zero-waste, we were still generating some trash. At the end of the first month, when an average family of three should have produced 405 pounds of garbage, we produced 4.5 pounds. Not perfect, but not bad by any means. Each month, our trash decreased further.
During those early days, in what’s apparently a typical reaction for newcomers to zero-waste, I developed a hyper-sensitivity toward garbage. I also realized how ubiquitous plastic is. It’s literally everywhere. One time, I stood in line behind a man purchasing a case of water — tiny amounts of water, packaged in throwaway bottles, packaged yet again in plastic wrap. For a moment, I was
Shifting your lifestyle is never easy. Here are some tips for going zero-waste on a rural homestead.
physically revolted at the sight. Yes, that’s what a zero-waste lifestyle does to you. (Just a warning.)
One of the most important things you can do to move toward a zero-waste lifestyle is to physically examine your garbage. Tip it onto the ground, paw through it, and categorize what you’re throwing away. Only by addressing what’s in your trash can you move to eliminate it.
Do you eat a lot of takeout food or buy a lot of convenience foods? Do you have a lot of junk mail or use disposable goods, such as plastic cutlery and paper plates? How about disposable diapers?
The stuff you’re throwing out is the stuff you need to address. It’s too easy to downplay how much you use until you see the evidence right in front of your eyes. When you concentrate on what you’re throwing away — and take steps to reduce what’s causing the trash — your trash can be reduced by up to 90%.

One of the rst things I learned about living a zero-waste lifestyle is most of the advice is geared toward urbanites. In many cities, groceries with bulk bins or package-free options are easy to nd, and thrift stores abound. In deeply rural settings, the zero-waste lifestyle must be approached differently.

For us, the nearest large city is a 2.5hour drive one-way, so trips are reduced to four or ve times a year. Since it’s such a logistical challenge, I try to create as little recycling waste as possible.
My purpose in going to the city during my quarterly trips is to stock up on bulk quantities (usually 50-pound bags) of things we don’t grow or raise ourselves. This means I’m tasked with disposing of bulk packaging, part of upstream waste. How do we dispose of bulk bags? We burn them.
In fact, the burn barrel has become an integral part of our rural zero-waste lifestyle. You’d be surprised what burns.

Junk mail, burnable non-wood waste from our woodcraft business, the occasional potato chip bag, even clothes we’ve worn to rags. Burning might come across as heresy to some, but it’s either that or the land ll. Besides, we burn a lot less than most people think, simply because we

don’t have as much trash. We use the burn barrel once a month for about 10 minutes. For times when burning is dangerous, we store burnable waste in dog-food bags or other large, burnable bags and tuck them in the barn. When the season changes and we can use the burn barrel, I drop a bag in

Itmust be recognized a zero-waste lifestyle often means waste is subsidized by others higher upstream.
the barrel, set it alight, and feed the other bags in after the first one burns down.
What is upstream waste? Quite simply, it’s trash created in the making, packaging, and selling of a bulk product. One blogger wrote, “For every pound of trash we throw away, 7 pounds are thrown away in the waste upstream.” For this reason, it’s doubtful many people achieve the degree of zero-waste “purity” they claim.
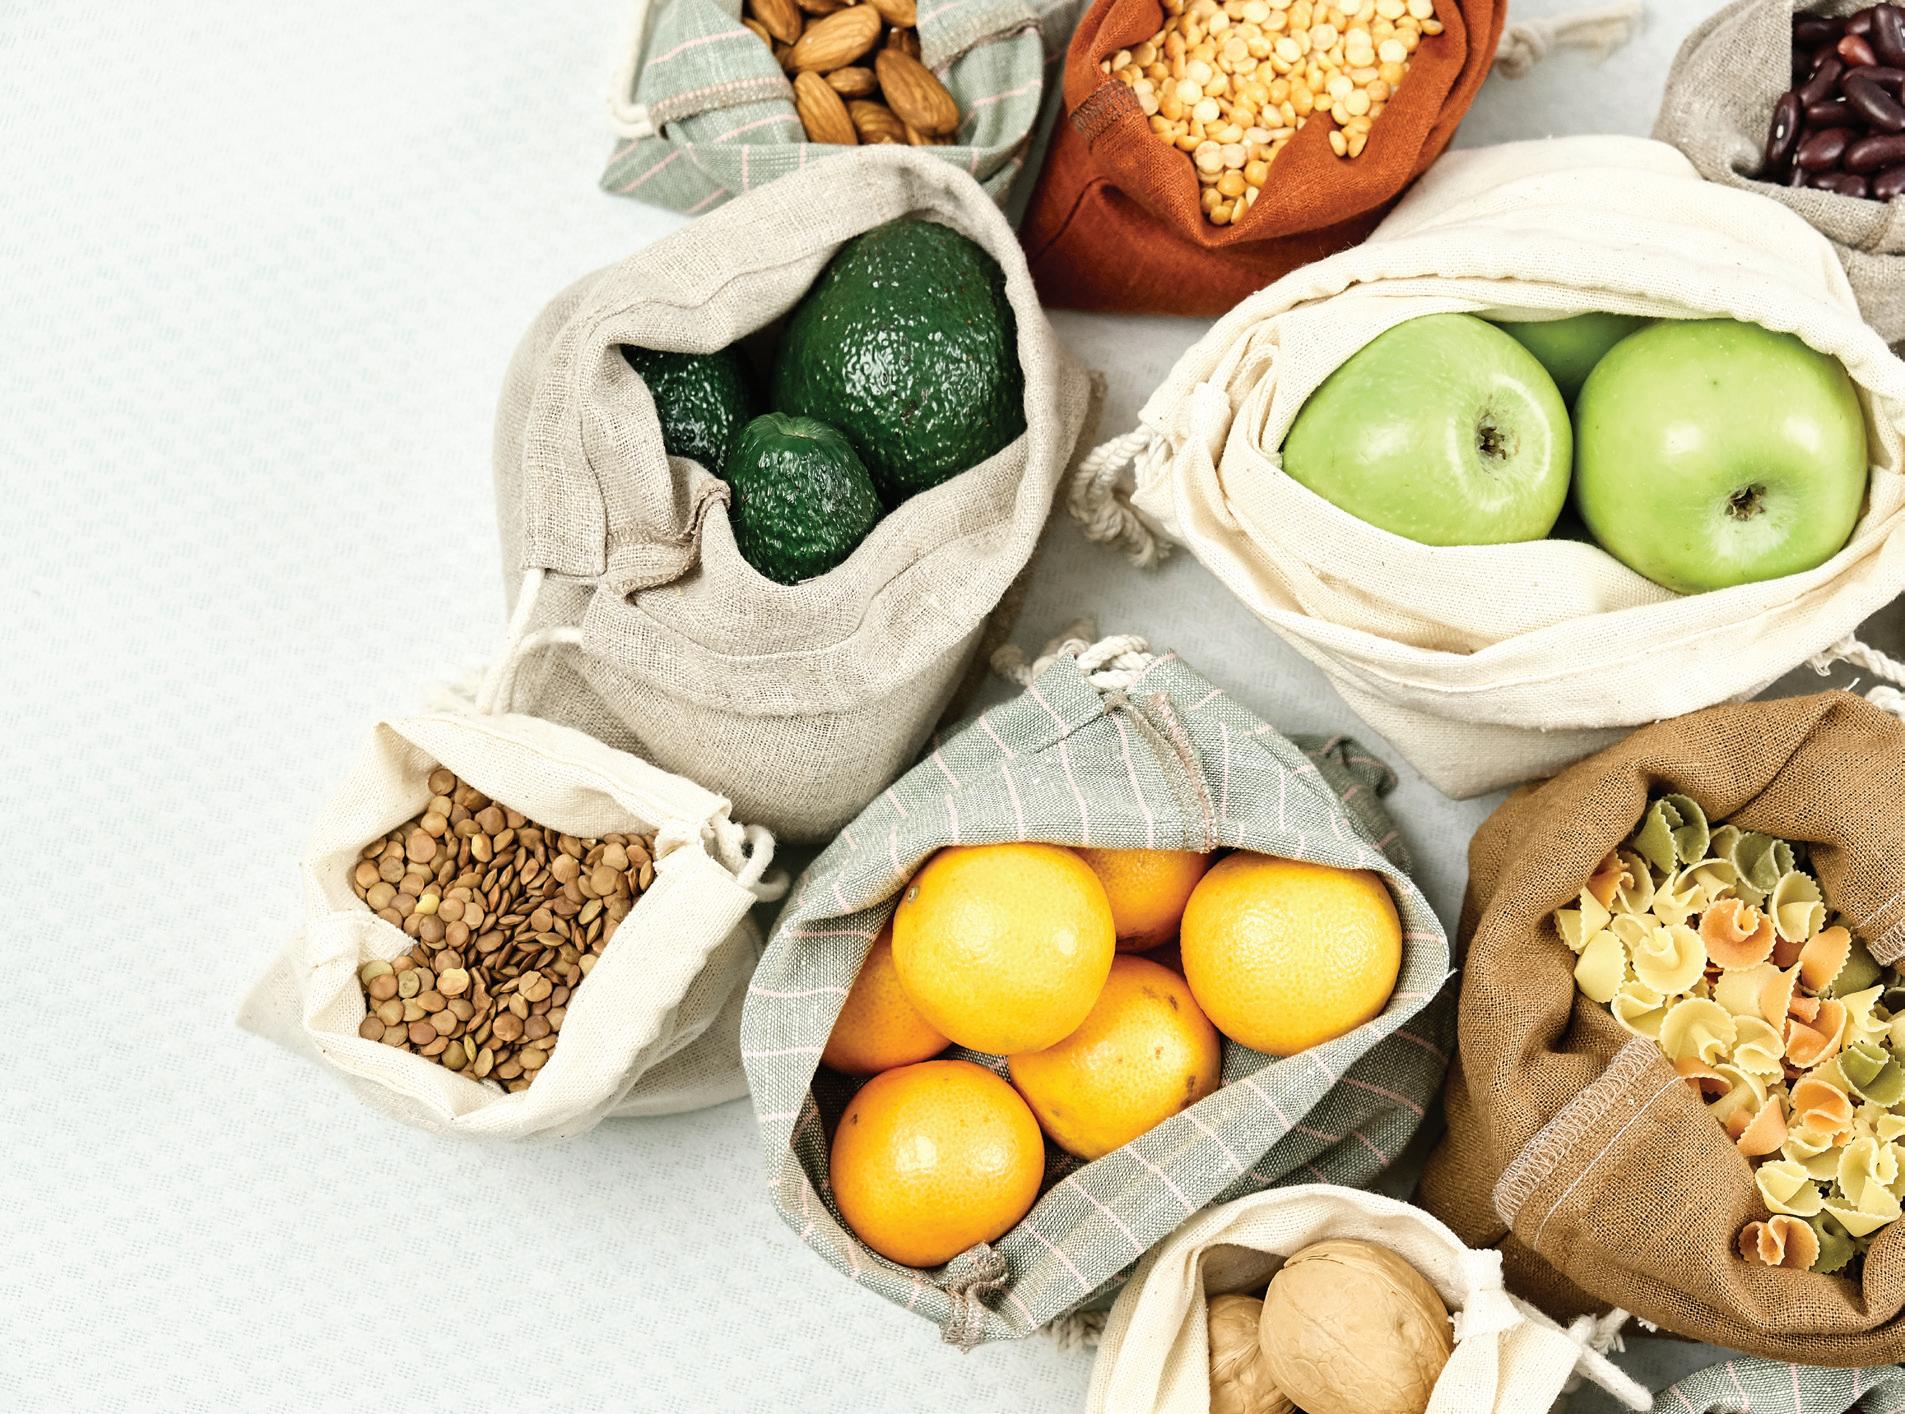
When someone decants lentils from a bulk bin at the grocery store into a reusable cloth bag, those lentils weren’t trucked into the store in loose form. Instead, they came in 50-pound bags. It must be recognized that a zero-waste lifestyle often means waste is subsidized by others higher up the chain.
For this reason, I feel no “zero-waste guilt” in buying large quantities of things we don’t grow or raise ourselves, such as salt or sugar or rice even if it means disposing of a bag or container.
One of the myths associated with a
zero-waste lifestyle is the expense. This myth derives from the initial cost of purchasing reusable items, even though the price, amortized over many years, is negligible. Since the lifestyle urges less consumption, adherents reduce their recreational shopping and switch to second-hand sources.
However, unquestionably, those who adopt a zero-waste lifestyle will be urged by buy buy buy. Pay no attention to these pricey recommendations and marketing tactics. A zero-waste lifestyle is cheap, and it’s supposed to be.
Another myth is the lifestyle is inconvenient and takes more time. This depends on how DIY you get about making products. Once things are incorporated into your routine, they hardly take more time.
We’re not perfect, but my husband and I only produce about 10 to 15 pounds of trash per year (near-equal to the twoperson daily average). Considering we have home businesses and a small farm, I don’t think that’s too bad.
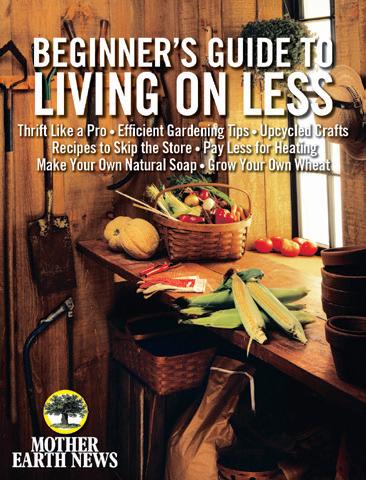
Saving money and sticking to a budget is important, whether you live in the city or out in the country. The Mother Earth News Beginner’s Guide to Living on Less is full of information and tips that will help you save a buck or two and stick to your budget. Whether you’re growing, making, and preserving your own food; learning to build your own furniture; raising your own milk goats; or growing your own firewood, this issue will be a resource you keep returning to. You’ll also learn how to grow $700 worth of food in 100 square feet, propagate your plants with low-tech techniques, reduce energy costs around your house, use upcycled pallets to build useful furniture, and more!
This title is available at Store.Grit.com or by calling 866-803-7096. Mention promo code MGRPANZ5. Item #10134.
Zero-waste emphasizes the lifestyle isn’t just about keeping things out of the landfill. It’s meant to reduce demand for transient items that supplement laziness. Reducing waste takes time. It’s also fun, challenging, and captivating.
Patrice Lewis is an advocate of simple living and self-sufficiency. She’s experienced in homestead animal husbandry and small-scale dairy production, food preservation and canning, country relocation, home-based businesses, and food self-sufficiency. Follow her website www.patricelewis.com.
What are some of your tips and tricks for living a zero-waste life?
Let us know on Facebook (@GritMagazine) and Instagram (@Grit1882).
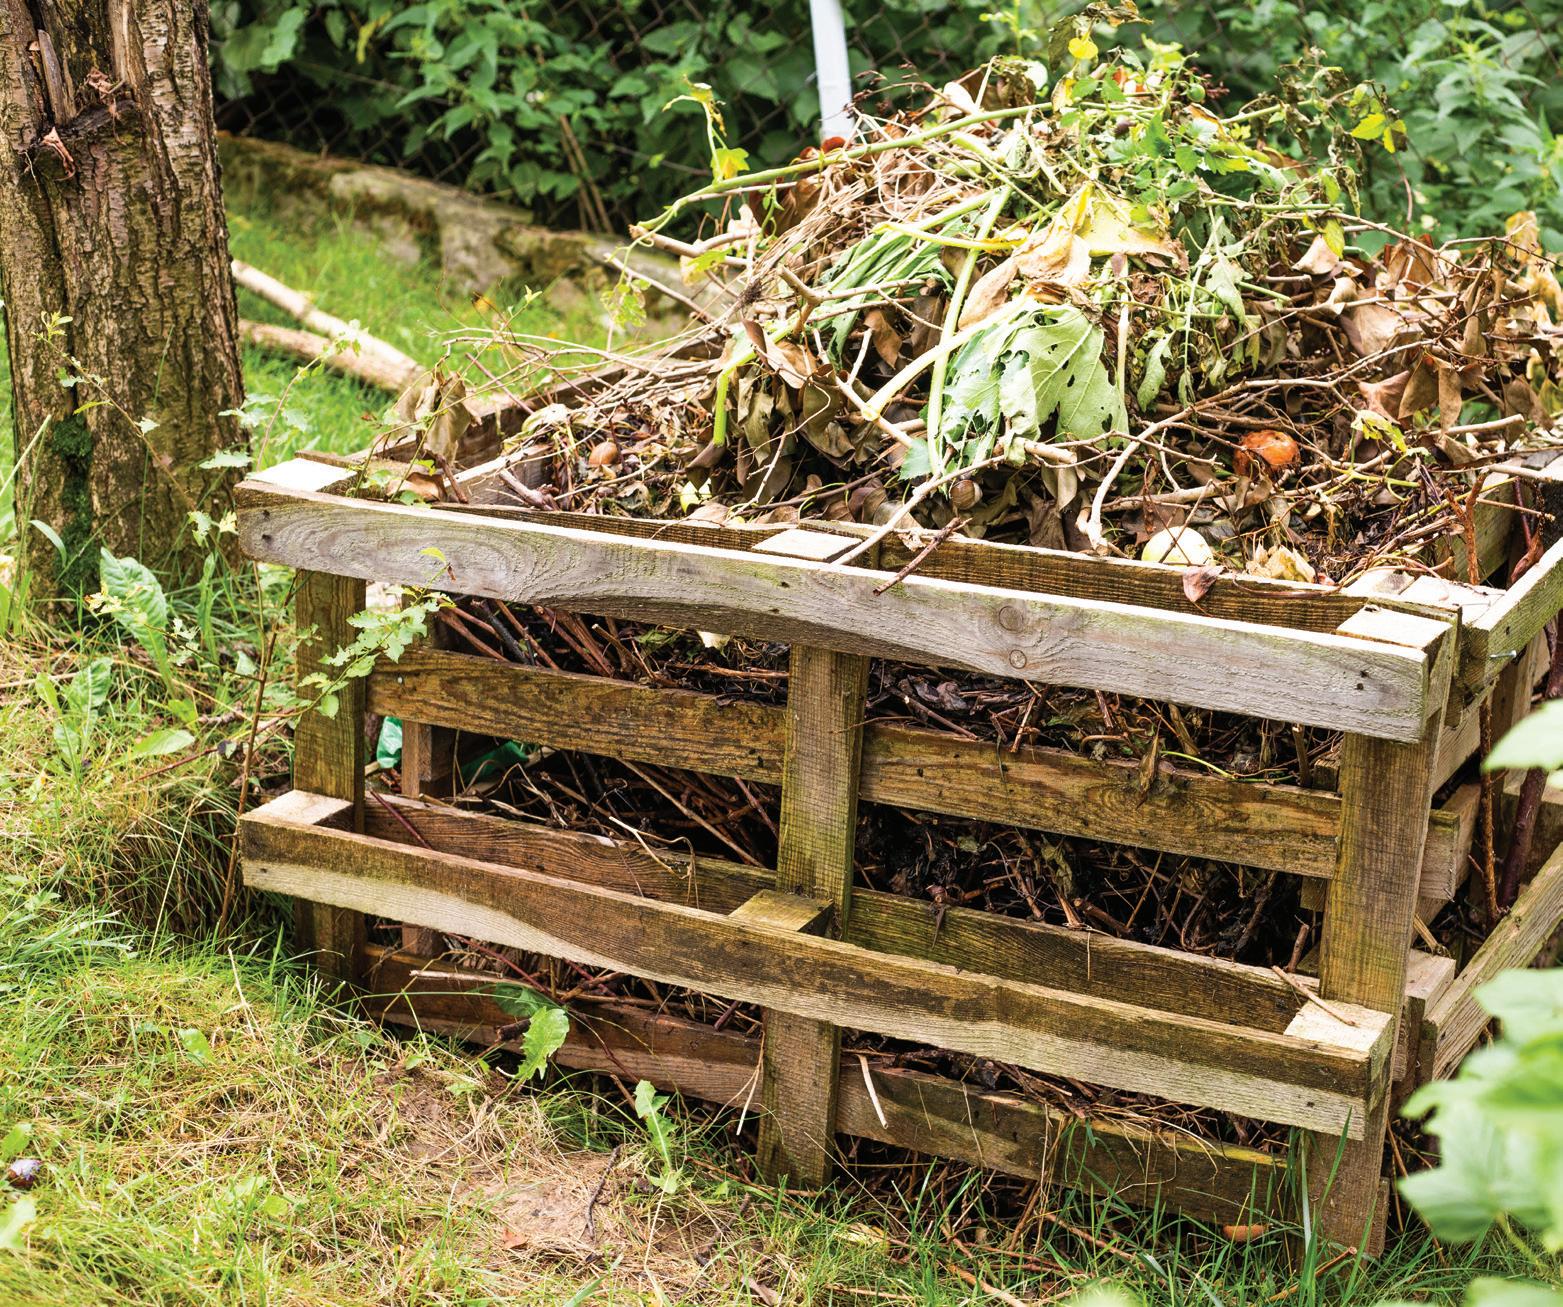
Rot (compost) may be last on the list, but it’s an important step in going zero-waste.Full Size Mode
Shortened Mode


Compatible with Most Cordless Drills
established garden. The Fusion Cultivator was made to mix,


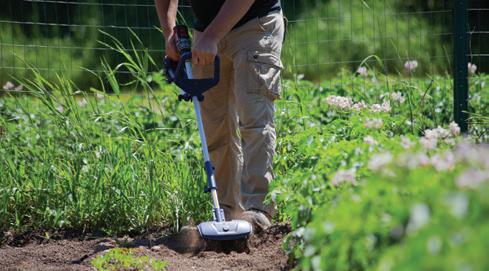
The Fusion Drill-Powered Cultivator simply attaches to any cordless drill and creates a powerful and lightweight cultivating tool for your established garden. The Fusion Cultivator was made to mix, aerate and weed garden soil. It’s portable and lightweight! At 6 lb. this unit can be operated by almost anyone in any garden setting. With the option of using the cultivator in two lengths, mixing and aerating soil in garden beds of all sizes has never been easier. You have the power. We have the tool!

• Compatible with most cordless drills


• Full size mode for standard garden plots (51”)
• Shortened mode for raised bed gardens (19”)
• Shortened mode for raised bed gardens (19”) 1-YEAR


• Adjustable cultivating width up to 8”

• Cultivating depth up to 5.5”
• 1-Year Warranty


LIMITED WARRANTY


 By Tasha Greer


spices to avor foods played a prominent role in the origins of agriculture. Some have been used for over eight millennia, and the avors we savor today are much like what pre-pottery Neolithic people used to add interest to their meals. Mustard and cumin made frequent appearances in ancient diets, and sesame was among the earliest oil crops.
When you plant these spice seeds, you hold the evolutionary history of thousands of years of collaboration between humans and nature — and also your own culinary future — in your hands.
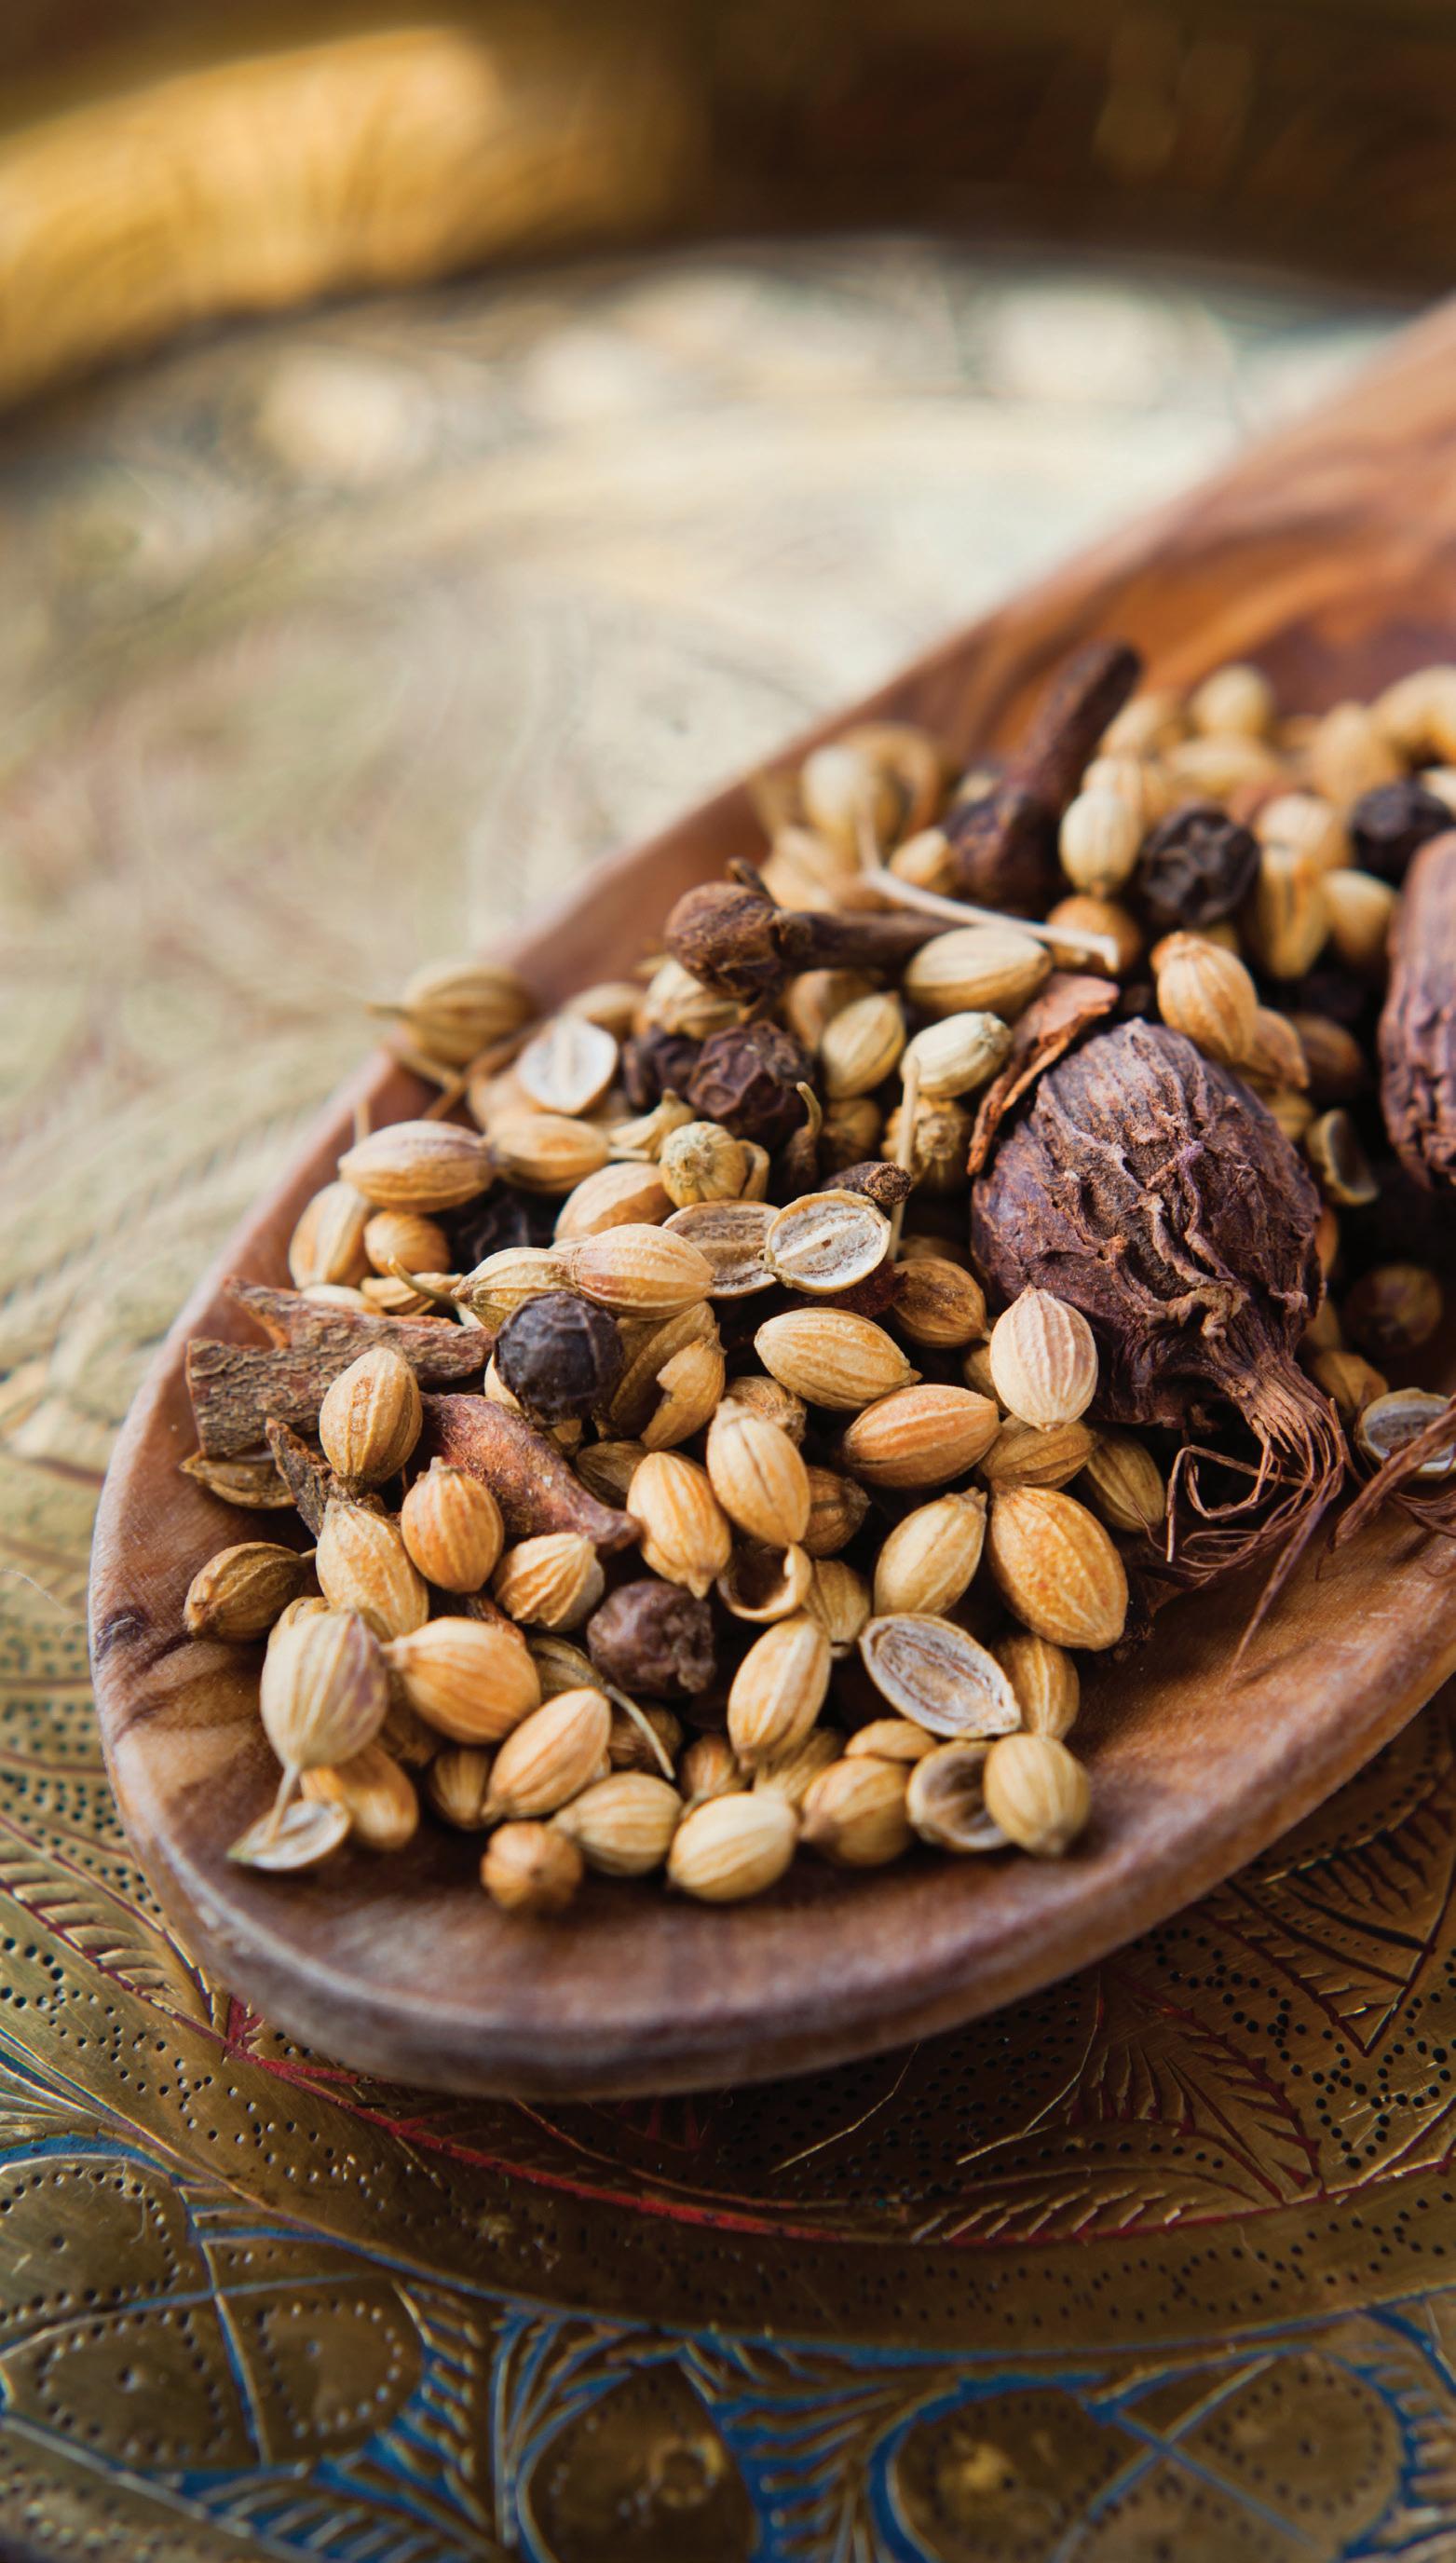
Seed spices are generally the easiest spices to grow. You’ll have the best success growing spice seeds from a respected seed saver working in your region or in a climate similar to yours. (Planting seeds from your spice rack will not give good results.) A key difference between growing spices and herbs is the time to harvest. Whereas herbs grown for their leaves can be ready to harvest in mere weeks, spice plants used for their seeds can take four months or longer to reach harvest.
While you can grow seed spices indoors, yields are typically low. Annual seed spices grow best in spring and early summer. Unless you have moderate winters, fall planting isn’t ideal because of decreasing daylight hours and smaller pollinator populations. For biennial or perennial spices, late-summer planting works as long as plant root systems have time to mature before cold weather sets in.
Harvesting spice seeds requires a few special steps. You’ll cut off the seed heads or seedpods and dry them inside a bag or on screened herb-drying racks. For large harvests, use what I call the “candywrapper” method, laying out a piece of airpermeable fabric on dry ground, placing the seed heads or seedpods in the center, and rolling the fabric ends like a candy wrapper. Hang the fabric roll in a protected location with good air circulation until dry.
Season your meals with the homegrown seeds of mustard, cumin, and sesame.
Seeds that don’t easily separate from their plant parts require threshing. To do this for small quantities, put the harvested parts in a pillowcase and beat it on hard ground or with a stick.
Newly harvested spices will smell stronger after they rest in an airtight container for a few weeks. When stored in airtight containers and away from direct light, your spices will last three years or longer. For peak quality, package spices in portions you’ll use in about three months. That way, you won’t expose years’ worth of spice to the air when you need a small quantity for cooking or medicine.

Mustard seed is the second-mostconsumed spice on the planet, behind black peppercorn. Canada and Nepal are the world’s top mustard producers, but it’s so easy to grow, you don’t need to rely on imports. Plant a handful of seeds into prepared soil in early spring, and mustard practically grows itself! You have three distinct mustard varieties to try.
Leaf mustard, Brassica juncea, is commonly grown by home gardeners. Also known as “brown mustard,” these
plants produce large quantities of tasty brown seeds that easily substitute for other varieties. They work particularly well for a whole-ground mustard, having a tangy flavor similar to horseradish. Plant extra, and harvest the young, frilly leaves as salad greens.
White and yellow mustards are variations of the variety used as a condiment on hot dogs. Actually of the same species, Sinapis alba, white or yellow mustard is mainly grown as a field crop or even a cover crop. The entire plant is edible, but you’ll enjoy blending the seeds to make the mostly smooth, vibrantly colored condiment at home.
The seeds of black mustard, Brassica nigra, have a hard outer coating that pops like popcorn when roasted. If you like to cook South Asian cuisine, you’ll appreciate the strong nutty flavor they lend to many of the region’s dishes. In stores, you’ll find black mustard oil. At home, try infusing a mild oil with your roasted seeds.

Growing
Mustard can develop a 3-foot-long taproot. Grow this spice in prepared ground, in deep raised beds, or in deep
“Chicken Soup for the Soil® improves your soil by feeding the microbes and supplying all the nutrients most fertilizers neglect.”

Grow higher quality fruits & vegetables with more color, better taste, less bug infestations & disease.

Contains all the elements in the periodic table (sea nutrients, amino acids, humic, fulvic, and other herbal extracts).
All natural, toxin free, & bioavailable.
Non-leaching formula / nutrients accumulate over time.


Perfect for gardeners, growers, and farmers. humic, ranchers and farmers.


containers. Plant seeds in early spring, 1⁄4 inch deep in full sun to partial shade. Seeds will germinate within 2 to 5 days. Mustard prefers cool temperatures, and seeds do best between 50 and 75 degrees Fahrenheit. Mature plants will tolerate up to 85 degrees but become susceptible to pests in higher heat. The plant does well in a wide range of soil types. In compost-rich soil, mustard can tolerate pH ranges from 5.0 to 8.0. Before planting, add 3 inches of compost and incorporate a slow-release nitrogen fertilizer, such as feather meal or soybean meal, into the soil.
Mustard plants are self-pollinating and make a lot of seeds, so the pods grow heavy. Stake the slumping portions of the plant upright or space plants far enough apart 8 to 10 inches of space to allow room for mustard’s natural arching habit when seeding. The profusion of seedpods in various states of drying is even more beautiful than mustard flowers. Colors range from green to pink, purple, yellow, and brown.
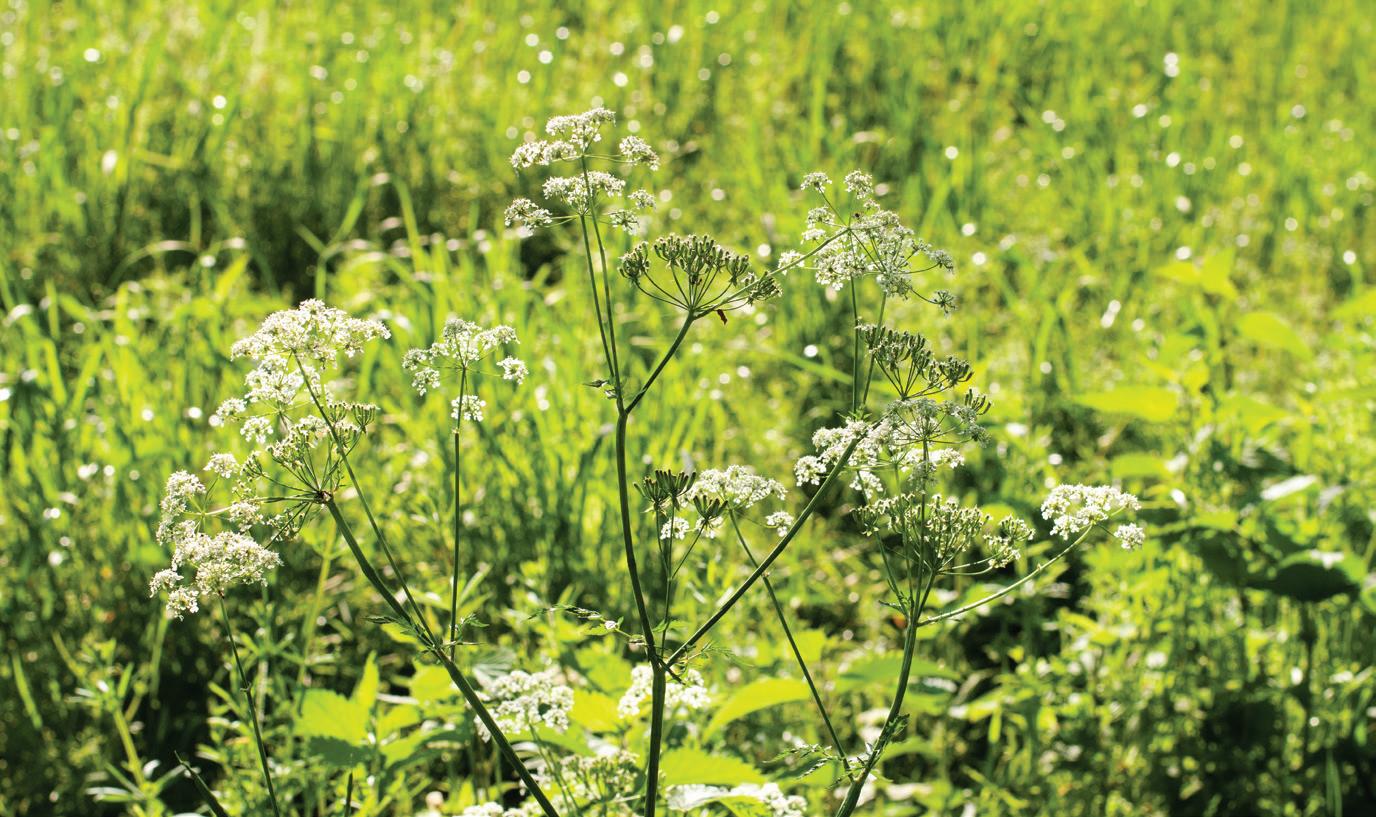
I recommend over-seeding and eating the extra seedlings as baby greens when they’re 2 inches tall. Continue to harvest the leaves on remaining plants between 20 and 40 days, and your seed harvest can begin after about 100 days. If you allow the plants to bolt and flower, they can grow up to 5 feet tall.
Harvest mustard before the oldest pods feel papery, cutting the seed tops just above the last leaves (if you miss your chance, you could end up with endlessly self-sowing mustard). Place the tops in a paper bag or use the candy-wrapper method to finish drying them. Thresh and remove the chaff.
You can plan on getting 3 to 5 tablespoons of seeds from each plant.
You might not have known that mustard’s potent volatile oils have a medicinal use. When used in powdered mustard seed packs or plasters, these oils create a rubefacient effect on the skin, drawing blood to the area on which the mustard is applied. This circulatory system
stimulation can soothe sore muscles, reduce joint inflammation, and decrease pain. Use caution, as mustard can cause irritation when applied topically.
Beloved the world over for its musky, pungent aroma and peppery, nutty taste, cumin makes its way into a wide variety of foods, including curries, pickles, breads, and seasoned meats. Yet, Cuminum cyminum is difficult to produce commercially. Native to the Eastern Mediterranean and Egypt, most of the world’s supply is grown today on small farms in India and China. In India, cumin is such a critical staple food and so little
is grown that the government mandates local demand be met before any cumin is allowed to be exported.
Cumin is a tricky spice to grow unless you have the perfect climate. It requires a long, warm but not hot growing season. Plants are prone to stunting, and cumin’s top-heavy foliage sits on spindly stems, subject to being knocked over by wind or rain. On the upside, mature cumin is drought-tolerant. Plus, its compact size makes it good to grow in pots you can temporarily move indoors during inclement weather.
Between the complexity of growing cumin and extreme weather events, the surplus for international sales is small.

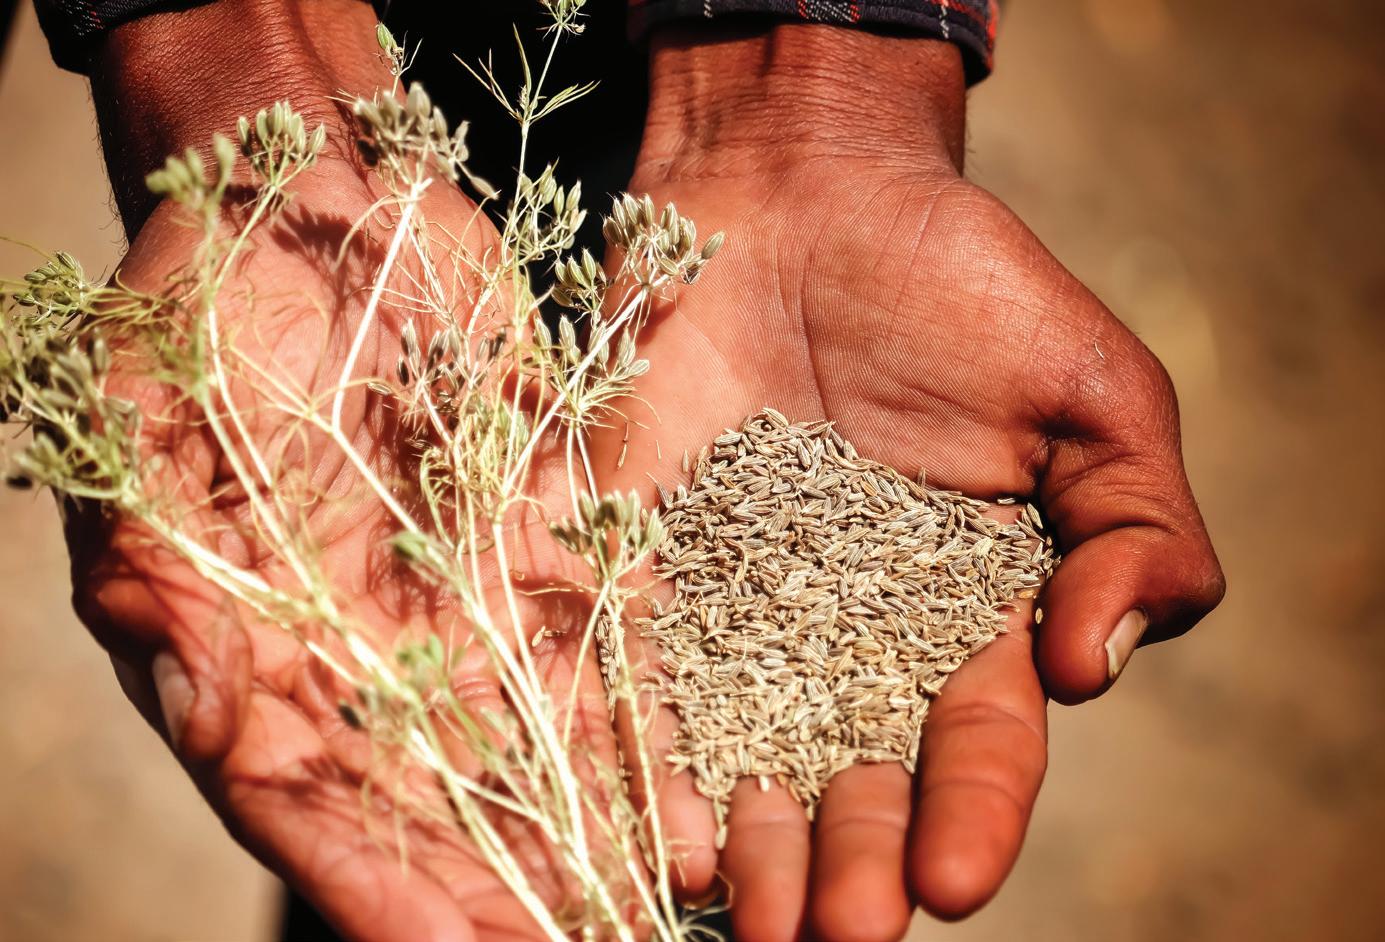
Cumin scarcity is a real risk in the future. Supply your own demand, and expand your gardening skills by mastering the art of growing this spice at home.
Sow seeds indoors, in ideal conditions, 4 to 6 weeks before last frost. To improve germination, soak seeds for eight hours. Then, sow seeds on the surface of 65-degree soil. Water deeply to settle the seeds. Mist the soil with a spray bottle or misting hose twice daily until germination. From then on, you can water regularly, but because contact with wet soil increases fungal risks, water only when the top 1 or 2 inches of soil feel dry.
Take plants outdoors when temperatures are between 50 and 80 degrees their temperature sweet spot and the weather is mild. If growing in containers, use individual 6-inch pots, or grow a few plants together in larger pots. To grow larger quantities of cumin, outdoor garden beds under the protection of low polytunnels are best. In humid areas, give plants 6 or more inches of space to limit fungal risks. In dry areas, plant only 3 inches apart on 6-inch rows to help crowd out any weeds. Temporary shade helps control temperatures on hot days, while plastic covering can protect plants in cooler or wet weather. Aim to keep plants in their sweet spot throughout their life cycle.
Weed early and as often as you can. Young cumin plants have fine, upright, feathery foliage that can easily be outpaced by fast-growing weeds until the plants are nearly mature and have a significant leaf mass.

When plants bloom, leave them outdoors in a wind-protected location, near other flowers to encourage insect pollination. Grow at least three plants together for crosspollination (hand-pollination is ineffective).
Remove seed heads when the plants begin to wither. Dry them under cover. Thresh dried heads and winnow the chaff. Plants produce about 1⁄4 to 1 teaspoon of seeds each.



Cumin’s earthy, aromatic seed can be used medicinally to regulate insulin levels for those experiencing insulin resistance or Type 2 diabetes. A 2016 study in the Iranian Red Crescent Medical Journal showed that consuming cumin seed for eight weeks not only lowered insulin levels, but also resulted in lowered cholesterol and weight loss. For those seeking these results, you’ll need more than a sprinkle in your weekly curry; take larger doses of encapsulated cumin seed.
Sesame, Sesamum indicum, is often called a survival plant. Its fat and protein content, along with its utility as an oil, paste, and flour meal, have helped subsistence farmers since antiquity survive in harsh climates. Sesame is also itself a survivor, tolerating extreme heat, crowding, and poor soil. Landraces have adapted to monsoon and drought conditions. The

plant’s natural dehiscence or shattering of the seedpods also helps ensure sesame’s self-propagation. As a result, wild and naturalized sesame can be found in many warm regions of the world.
Despite 5,000 years of cultivation, probably beginning in India, industrial sesame production only became possible in the mid-1900s. A natural genetic mutation made some seedpods indehiscent (non-shattering). This allowed growers to breed pods that were easier to harvest mechanically. Still, harvesting sesame has remained a largely manual undertaking worldwide.
Dried sesame lacks the aromatic, volatile oils associated with some other spices. An antioxidant called sesamol prevents its oils from volatilizing, so sesame is even used in margarine and ghee to make them shelf-stable. Yet, when you roast or toast the seeds, all that oil
Harvest Your Own Homegrown Spices No Matter Where You Live
In Grow Your Own Spices, author and spice-growing gardener Tasha Greer hands you everything you need to know to grow a thriving spice garden, with practical tips and in-depth advice on cultivating more than 30 different spices. Inside, you’ll learn about easy-togrow spices that are perfect for beginners, the best way to tend tropical spices, how to cultivate root spices, tips for harvesting your own capers, and more. Let Grow Your Own Spices show you how to spice up your garden, your plate, and your health with medicinal use notes from Lindsey Feldpausch!

This title is available at Store.Grit.com or by calling 866-803-7096. Mention promo code MGRPANZ5. Item #10826.
volatility activates, revealing sesame’s oily, nutty flavor well-suited for using in savory dishes, breads, candy, pastries, and desserts, and for blending into tahini. In other words, cooking causes the flavor to…open sesame. (You had to see that one coming!)
Sesame is an easy-to-grow spice that produces mature seeds in about 3 to 4 months. Store-bought sesame seeds are typically all white, because they’re hulled and sorted for color purity, but home gardeners will find a range of colors to try. The black seeds, prized by gastronomes, have edible hulls.

The plants and flowers are quite beautiful, with bell-shaped flowers growing up to 6 feet tall that open for weeks, making them work well in pollinator and bird gardens. The plants also benefit the soil by reducing the number of harmful nematodes and fungal pathogens, and their pervasive root structure breaks up compacted soil.
Sesame is a warm-weather crop. It requires temperatures above 70 degrees for good growth, and mature plants can tolerate up to 105 degrees. For an early start, plant seeds indoors 6 to 8 weeks before ideal outdoor conditions, using an electric seed mat to warm up the soil. Incorporate 3 or 4 inches of compost into your soil before you start planting. Add feather meal, bat guano, or other slow-release nitrogen sources for the best yields. Sow seeds ¼ inch deep, and water daily until plants begin to germinate, which will happen between two and five days. Use row covers and mulch to keep the soil warm.
Some sesame varieties tolerate wet conditions, while others only thrive in
dry conditions. Some sesame grows in a narrow, non-branching fashion suited to rows. Others are branching and require more space. Some varieties need dense planting to produce; others need more space. (You see the trend: Get to know the varieties you choose.)
In consistently hot weather, seedpods are harvestable in about 90 days. Otherwise, plan on harvesting between 110 and 130 days. For small production, pick individual pods when they’re mostly dry, but let the plants continue to grow. Like okra, pods will keep forming at the top of a plant. Finish drying pods on a baking sheet or drying rack.
For larger harvests, when 75% of the lower pods show signs of drying, cut the tops. Hang-dry the heads in a paper bag or dry on a tarp to minimize losses. Thresh and winnow the chaff. You can expect 1 to 3 tablespoons of seeds per plant.

The seeds of sesame provide a rich medicine. The oil, abundant in lignans and tocopherols, demonstrates prolific antioxidant activity. Consuming the seeds may reduce blood pressure from their beneficial lipid content, shown to decrease the narrowing of the arteries and oxidative damage. Sprinkle the seeds liberally on foods or eat more tahini for these favorable effects.








The reality of hunting is more expensive than you’d think.

 By Dana Benner


I’vebeen hunting most of my life. When I was growing up, I’d often walk about 1,000 feet from my house and find myself in rabbit, squirrel, and grouse habitats. As soon as school ended, I’d grab the old bolt action .410 shotgun and head out. Sometimes, I came home with something, sometimes not. Everything taken became part of a meal.
To this day, for me, hunting is all about feeding my family and sharing the bounty with others. You won’t find deer heads or stuffed birds on the walls of my home. After 10 years in the army, I find no thrill in killing anything. Hunting isn’t a sport for me. Baseball is a sport; hunting is not.
Hunting isn’t just a matter of getting a license, going into the woods, and shooting something. To be a great hunter takes years of practice and working with some really good teachers. It’s about learning respect for the animals you’re hunting, respect for the environment, respect for other people’s property, and, above all, respect for yourself and your abilities.
I was lucky to have many good teachers over the years, starting with my mother. My mother taught me how to hunt, but long before I was allowed to actually hunt, she taught me about respecting wildlife, how to read signs, and all those other things one needs to know to be a hunter. All of these skills were taught to her by her father. I’ve since passed those skills down to my daughter and granddaughters.
Other teachers guided me as well. My two brothers-in-law took me under their wings and helped me perfect my shooting and stalking skills. By far, the greatest teacher I had was the late Jack Hanley.
Jack was the best wingshooter I’ve ever known, but he taught me much more than just my way around a shotgun. Jack taught me to be humble, to help others when needed, and to be overall respectful. Jack never bragged, though he
rightfully could do so, but he didn’t have to. His skills spoke for themselves. He didn’t have to prove anything to anyone. I miss our morning grouse and woodcock hunts, his advice, and his friendship. I try to honor him by teaching others the skills of the woods.
Jack once called me an “instinctive shooter,” meaning everything seemed to come naturally to me. I do believe some people have certain talents, but taking advantage of those talents requires constant practice. A good marksman is one who knows the firearms they’re using and practices so much that those firearms become an extension of themselves. Why is this important? Because the ability to make one shot count and the need to make a clean and humane kill is essential to being a good hunter.
I practice as much as possible. I prefer outdoor shooting ranges, but when the

weather is bad, I move indoors. I also work with people, including my daughter, looking to improve their firearms skills. I often tell new shooters that it’s better to expend a few rounds on the range than it is to make a poor shot in the field. I firmly believe this.
There’s a misconception that hunting is simple. If you’re hunting to put food on the table, be prepared for a lot of hard work. You’ll spend many hours in the field scouting without your firearm. This is where your woods skills will come into play. You’ll need to find those areas where your intended prey frequent. Find water sources, food plots, and bedding and nesting areas. Look for signs, such as tracks, scat, tufts of hair; anything that’ll tell you animals are present. Take notes and plot the locations on a map or handheld GPS. Visit these areas at different times of day and in different weather
The Compassionate Hunter’s Guidebook is a guide for those who come to the act of hunting with pure intentions, motivated by a desire for healthy food that comes directly from the land where they live. This practical manual suggests that hunting is not a “sport” and the animals whose lives are taken are not “game.” It combines a deep, philosophical exploration of the ethics of killing with detailed instructions on every step of the process. A unique and comprehensive, fully illustrated guide to the complexity, ethics, and spirit of the hunt, The Compassionate Hunter’s Guidebook is a must-read for beginning and experienced hunters alike.

This title is available at Store.Grit.com or by calling 866-803-7096. Mention promo code MGRPANZ5. Item #7212.
conditions. All of this will take time and effort, but if done correctly, it’ll pay off in the end.
I left home for the Army at 17, and when I came back, everything had changed. The once-open fields and woods where I’d hunted were gone. In their place stood homes, and most of the remaining woodland was posted with “No Trespassing” signs. The farm where I’d once worked and hunted was gone as well. Rows of condos and a golf course now stood where rows of corn and squash had been.
Not only had the landscape changed, but the mindset about hunting had changed as well. People don’t seem to hunt to put food on the table anymore. Hunting has become a sport. Instead of grouse and woodcock hunting, people were hunting for stocked pheasants, with the goal of “taking your limit.”
Fees, regulations, and other costs have also changed. Where once your one hunting license covered everything, now you have to purchase separate turkey and pheasant tags, as well as pay additional fees, some of which have nothing to do with hunting. Where you could either walk or make a short drive to your hunting spot, you now need to figure in driving longer distances and the fuel costs that involves (and fuel isn’t cheap). At one time, ammo was literally a “dime a dozen.” Not anymore. Ammunition has become a major expense in today’s world.
At first glance, you’d think that once you’ve invested in a firearm, then it would all be downhill. I hate to say it, but you’re just getting started.
1. Licenses. Every year, you’ll need to purchase a license. You’ll start with just a basic license. Currently, a Resident license in New Hampshire will cost you $32 and covers deer and small game. If you want to hunt bear, pheasant, turkey, or waterfowl, there’s an additional fee for each. If you want to hunt moose, you’ll pay a fee to enter a lottery. If you’re lucky enough to win the lottery, you’ll then need to pay a separate fee for a moose permit. Some states have separate licenses for large and small game, and even break it down by species of large game. An archery license will cost an additional $32, and a muzzleloader
license will set you back another $16. A pheasant permit costs $31 and allows you to take two birds per day, up to a total of 10 birds throughout the season. A bear license costs $16, as does a turkey license, though you’re allowed two turkeys per year. Not looking so good anymore, is it?


2. Fees to hunt. Every year, more and more land is closed off to hunting. The land that’s left open is often privately owned. In some states, you actually have to pay a fee to hunt the land, charged by the landowner and sometimes by the state. Some require you to hire one of their guides.
3. Travel. With more land being posted, you’ll have to travel greater distances to hunt, often on less-than-ideal parcels. Travel means more expenses you’ll need to figure into your hunting budget.

On long trips, I try to make the most of it by hunting at least two days. That means lodging. Lodging rates in the U.S. average about $212 per night. A two-day trip adds another $424 to your budget. You’ll have to eat, and if you’re like me, you’ll have to stop for coffee, so gure about $200 for food and beverages.
If you plan to hunt out of state, the price just goes up. Vermont is one of my favorite states to hunt in, and if you want to hunt there, plan to pay $102 for the basic, Non-Resident hunting license. This is before any other permits. This actually isn’t a bad deal, as many other states charge much more and offer less than Vermont does with just its basic license.
The next thing you’ll need to gure in is how you’re going to get your harvested game home. Many states have rules regarding bringing game in from other states. Make sure you know the rules. You’re more than likely going to have to have your game processed in the state it was taken and then shipped to your home address. If you’ve spent the money for an elk hunt in Montana, you’ll want to bring your game home, but it’ll cost you between $200 and $600 on average. Find out these costs well ahead of time.

We have no control over license and permit fees, the cost of ammunition, or the cost of fuel. With that said, we can cut costs in other areas.
1. Only purchase the permits you actually intend to use. If you only plan to hunt pheasant once, don’t bother buying a permit, and concentrate on the upland game your basic license covers. The same goes for any of the other permits.
2. Travel costs could be some of your largest expenses. Cut lodging costs by hunting with a buddy or two who can share the costs. If you travel together in one vehicle, you can save money by splitting the costs of fuel. Plus, hunting with a buddy makes the experience more enjoyable.
3. Drop food costs while on the road by bringing your own. Instead of stopping for coffee, bring your own in a thermos. Make sandwiches or bring other food items from home. Meat snacks or other snacks will see you through while in the woods.
4. Hunt public land instead of paying fees to hunt private land. When hunting public land, plan your hunt for weekdays when other people are at work. Avoiding the weekends will cut down on the chances of running into crowds of other hunters or people hiking.
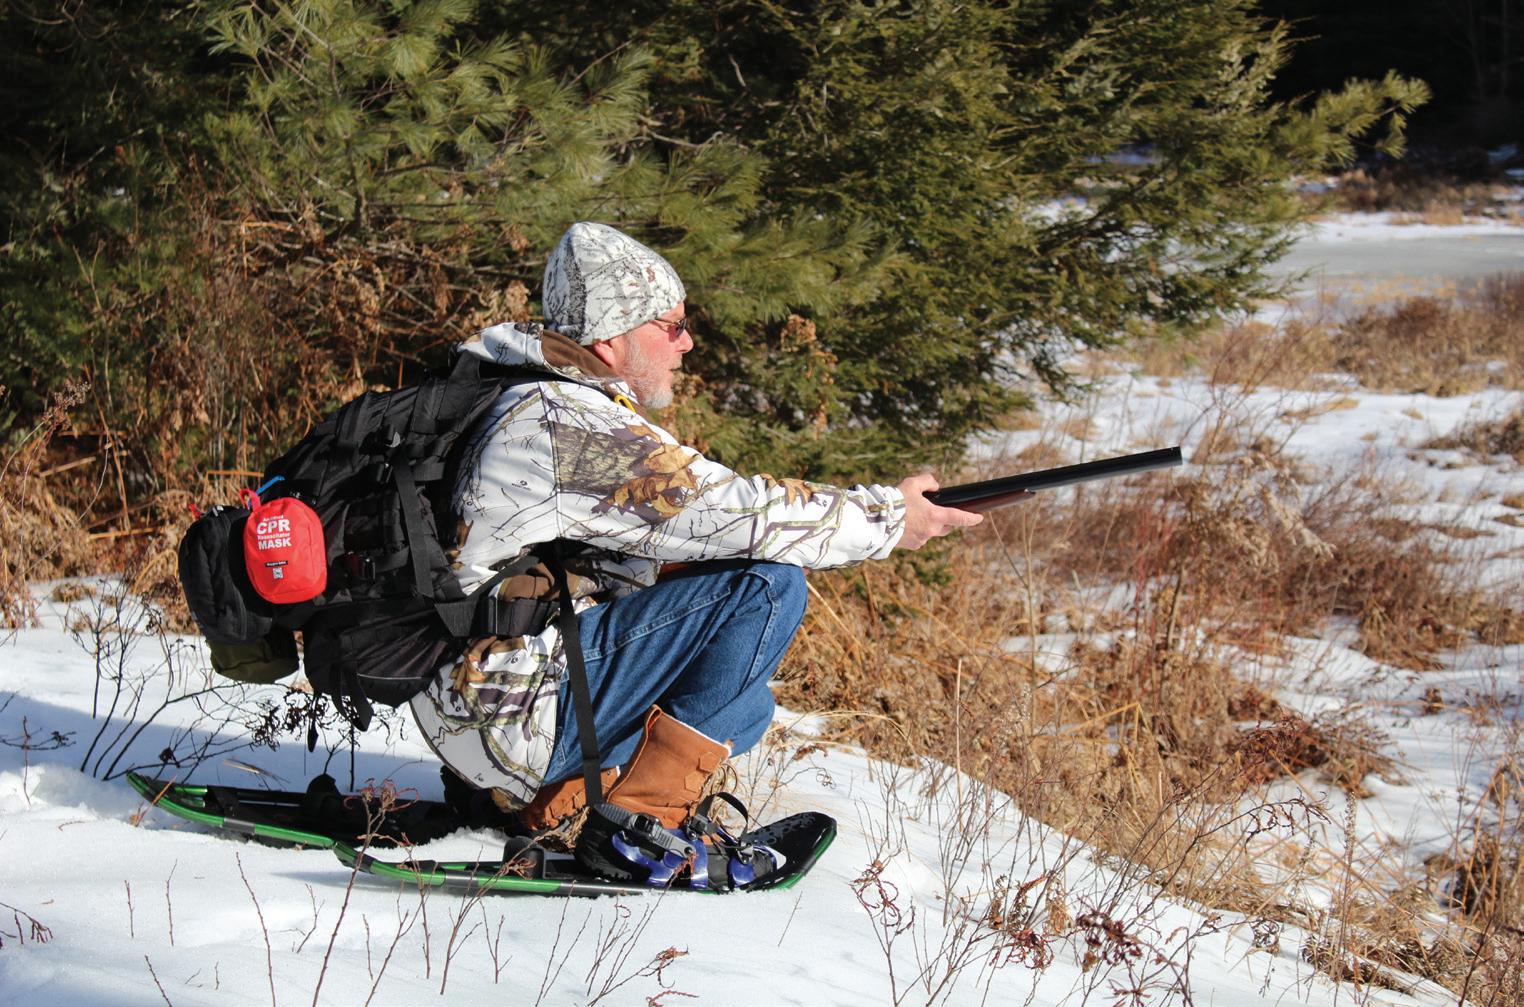
Things aren’t what they used to be. Gone are the days of simply, selectively harvesting game for the table. The costs of sustenance hunting have risen to a point of making it almost beyond many
people’s budgets. I refuse to pay $31 for the privilege to put pheasant on the table for my family. With a limit of 10 birds per season, and assuming you’re able to get all of your birds, that equates to about $3 per bird, but chances are you won’t get your limit. When you gure in all the other costs, it’s cheaper to visit a local poultry farmer or even the grocery store and purchase 10 chickens.
Hunting is still a great way to provide your family with all-natural, healthy food, but you’ll need to do your homework and make it cost-effective. Balance things out and do the best for your family.
Dana Benner has been writing about all aspects of the outdoors and sustainability for over 35 years, with his work appearing in regional and national publications.


Start living a more independent, self-sufficient lifestyle and stop overpaying for basic necessities – it’s easier than you think and we’ll show you how!


From raising poultry to maximizing your organic garden’s yield, kickstart your journey to greater food independence alongside master gardeners and experts in animal husbandry who can help you avoid making expensive mistakes.


You don’t have to spend a fortune to put in place methods that can save you money and keep you safe, comfortable, and ready for anything nature has in store. Here’s a tip if you plan to attend: have some questions ready for a special Off-Grid Energy Q&A.


From grant-writing to networking, marketing, and beyond, learn what it takes to be successful and how to get started. Will 2023 be the year you unleash your inner entrepreneur and reap the rewards?


I’ve spent most of my life making sure animals are healthy, happy, and productive. Doesn’t matter if you’re running a big farm with all sorts of livestock, have a little hobby farm, or you just have a couple of pets, you can learn ways to ensure their optimal nutrition and care for their overall well-being. No matter the size of your operation or budget, there are many tricks and tips that you can use to help your animals thrive.
So, I’m eager for this upcoming MOTHER EARTH NEWS FAIR in West Bend, Wisconsin. I’ll be sharing all kinds of practical wisdom and real-life know-how from my 50+ years in veterinary medicine. If you’ve got a mind to be the best animal caretaker you can be, at home or as a business, well, I’m here to help you hit that bullseye.


I can’t wait to see ya there!

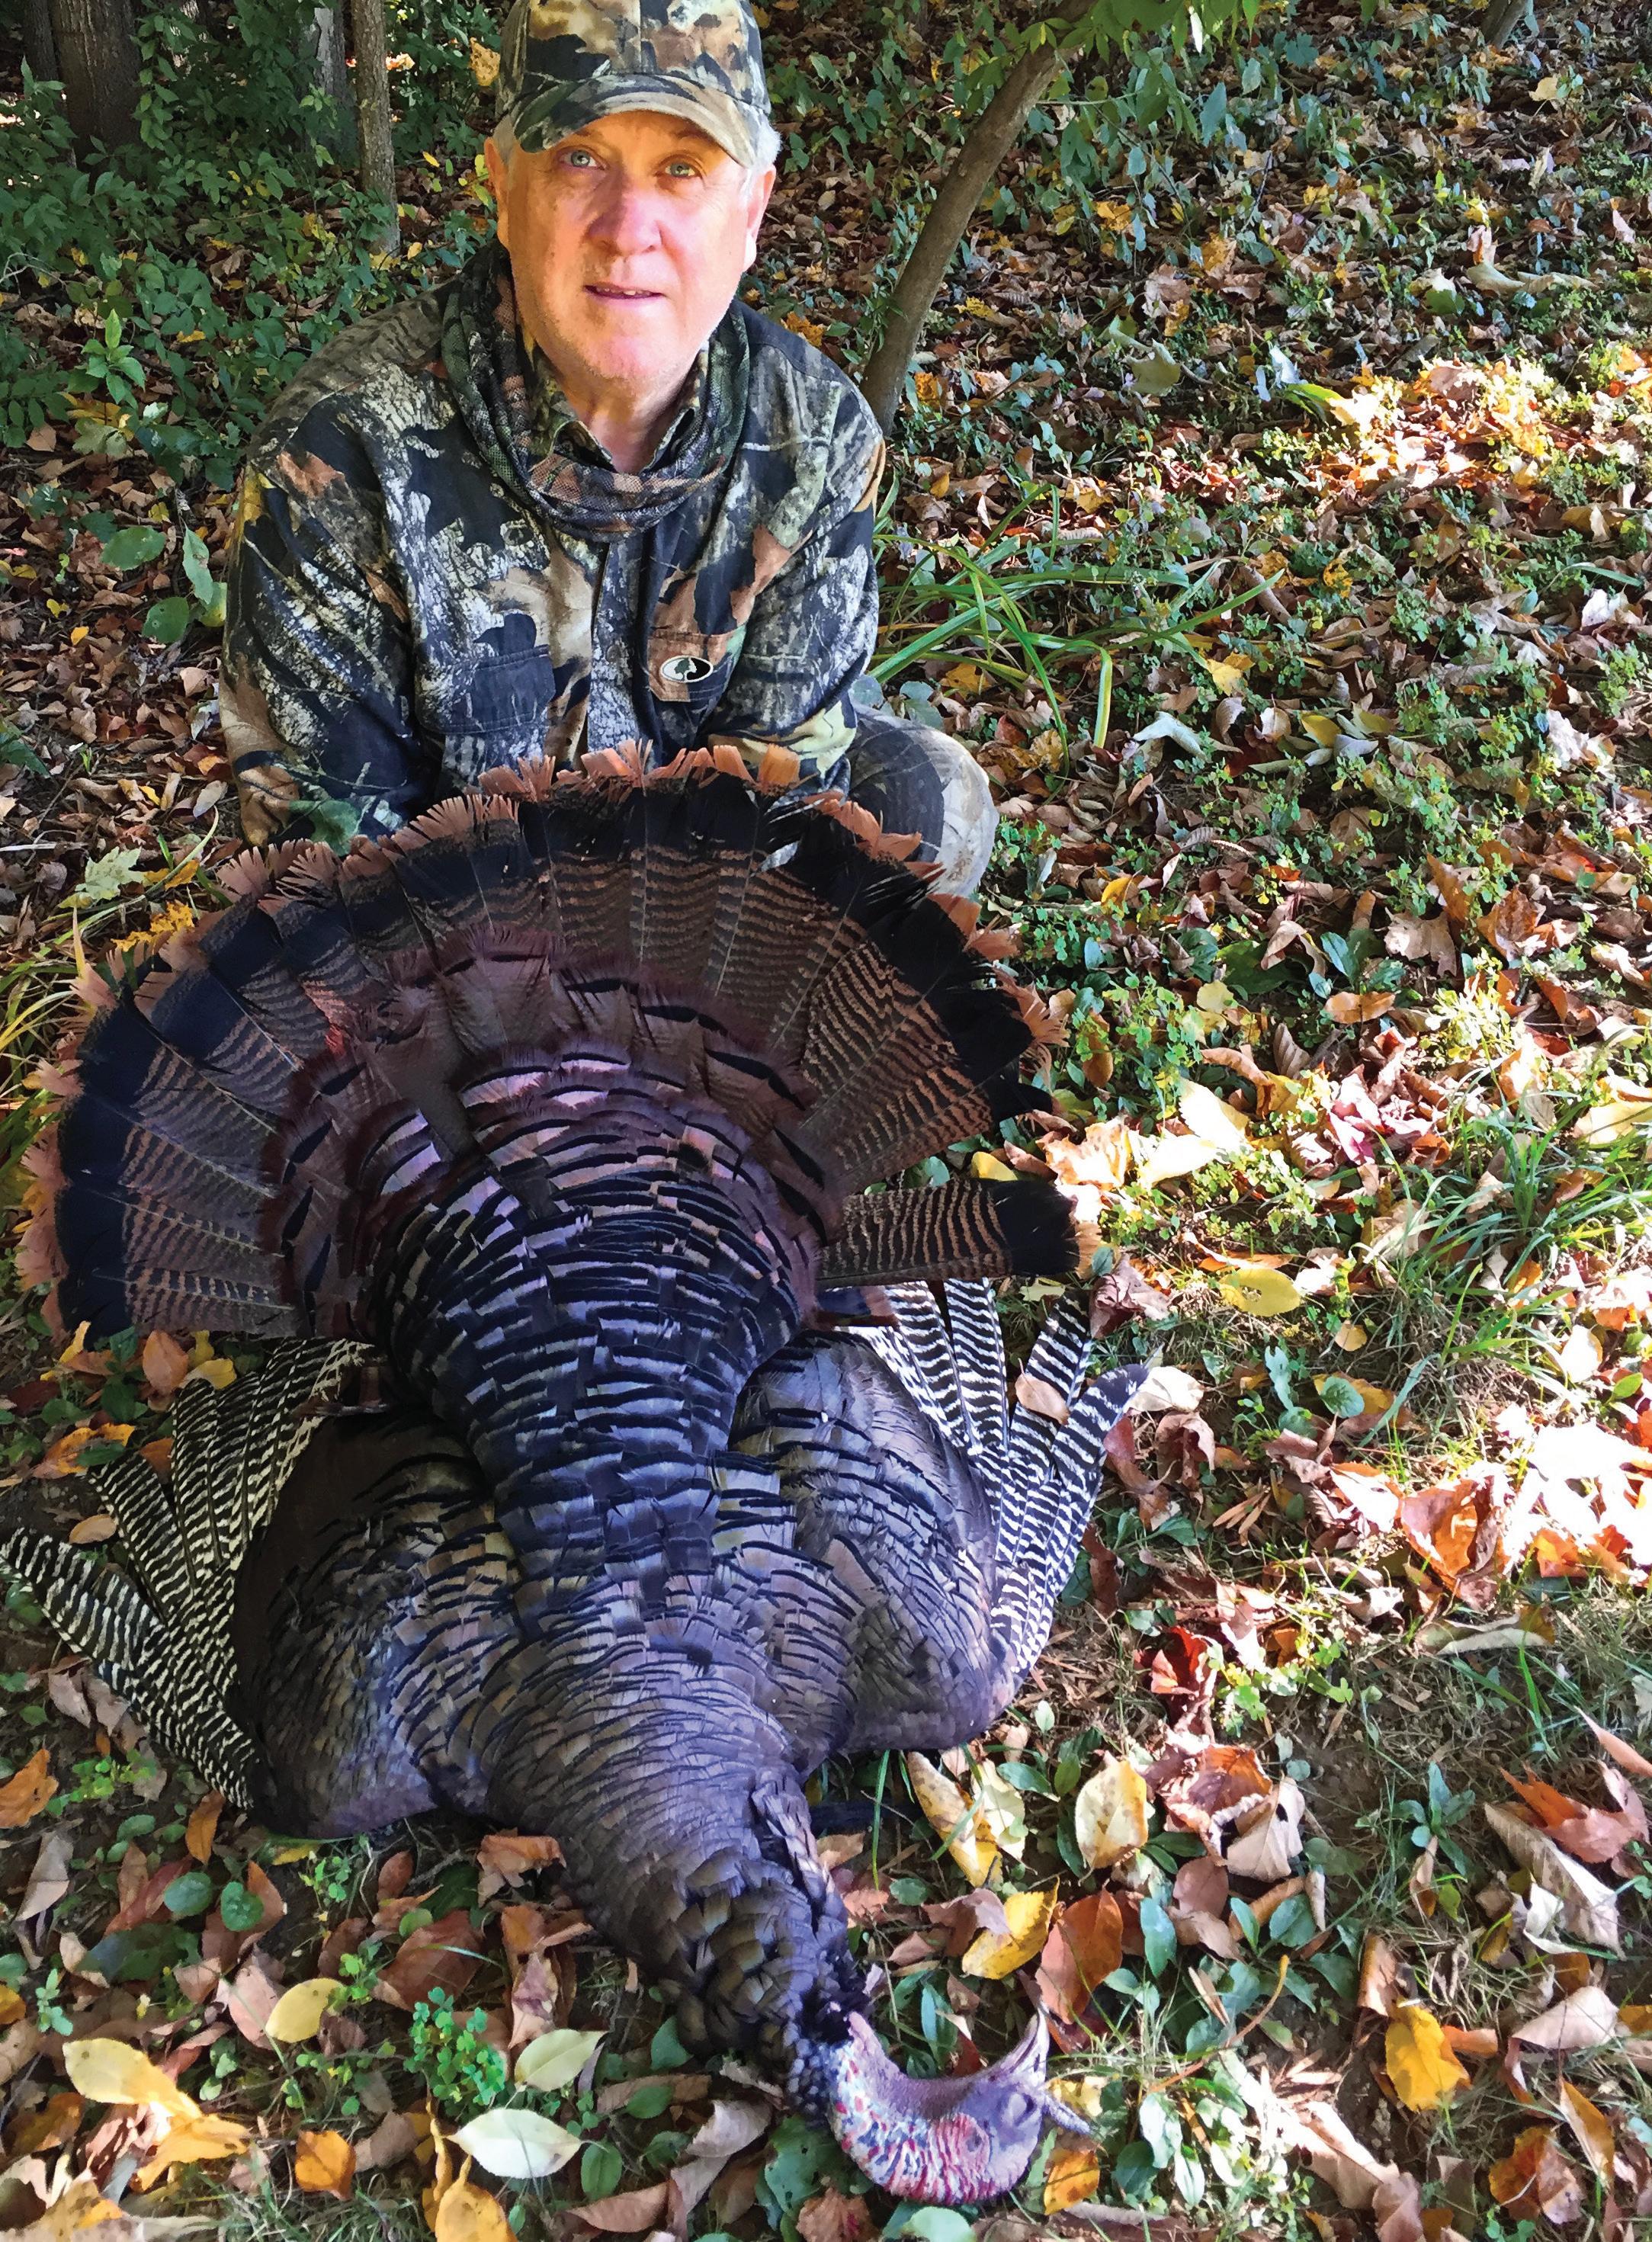
■My wife, Elaine, and I relish living off the land as much as possible, as we feel this lifestyle provides exercise and healthy food from sh, game, and wild edibles. As locavores, we try to maximize the meat from every animal I kill. In my opinion, the most challenging game animal to harvest is the wild turkey. So we especially don’t want to leave any meat unclaimed when I’m butchering these big game birds.


Which leads to this question: What can be eaten from a wild turkey — or any domestic bird, for that matter — besides the breast and legs? A number of years ago, I posed that question to my turkey-hunting mentor, Larry Prof tt, whose family operates the famed Ridgewood Barbecue in Bluff City, Tennessee. Larry knows a thing or two about food preparation. He told me the neck, wings, and giblets are all worth eating. Here’s Larry’s favorite gravy recipe, along with a host of other recipes, to make the most out of your hard-earned turkey.

“I watched my mother make this gravy every Thanksgiving and Christmas,” Larry told me. “Now, my family, even the grandchildren, insists on giblet gravy for Thanksgiving and Christmas. Be sure to use a whole stick of ‘real’ butter, which really makes the gravy tasty.”

Yield: 8 to 12 servings.
Meat from 1 turkey wing
2 hard-boiled eggs
13 tablespoons all-purpose flour 41⁄2 cups and 3 tablespoons whole milk, divided

1 stick (1⁄2 cup) butter
Salt and pepper, to taste
1. Chop liver, gizzard, heart, and turkey-wing meat into pencil-erasersized pieces. Chop boiled eggs into small pieces. Mix together and set aside in a large bowl.
When you’ve purchased or harvested a delicious bird, you won’t want to waste a single morsel of meat.
Bruce and Elaine IngramWild Turkey Giblet Gravy

Wild turkey necks are especially scrawny-looking, but they surprisingly have quite a bit of meat on them, even more so on a domestic bird. Nevertheless, expect a significant difference in meat gleaned between, for example, a 4-year-old gobbler and a 6-month-old fall jenny. (In this case, the gobbler will likely have more meat.)
To avail the neck meat, hold the head with one hand, locate the joint between the head and top of the neck, and sever with a knife or hatchet. Then, holding the top of the neck, locate the lowest neck joint where it adjoins the back, and cut through the joint. You can then easily pull or cut off the trachea.
For all neck recipes in this story, we place the neck in a slow cooker, cover with water or broth, and cook on low for 4 hours. Remove the neck from the cooker, allow to cool for 15 minutes or so, and then use a fork to “scoop out” the meat between the various joints. Often, we’ll also put the heart, liver, and wing meat in the slow cooker and use them later for their own entrées.
2. Put flour into a soup bowl. Add 2 tablespoons whole milk. Mix to make a flour paste. Then, continue stirring in 1 tablespoon milk, a little at a time, mashing out the lumps in the paste, until you achieve a slurry or thin, milkshake-like consistency.
3. In a large saucepan, melt butter. Remove pan from heat.
4. Add 4 cups whole milk to butter, and stir well.
5. Add giblet-egg mix, and then pour in flour-and-milk slurry.
6. Add pepper, to taste. Then, take a teaspoon and taste the mix. If it needs some salt, add salt a teaspoon at a time, stir well, and taste until satisfied.
7. Start warming gravy mixture on the stove on medium heat, stirring continuously. When gravy starts to bubble, it’ll thicken. If it’s a little thicker than you’d prefer, stir in 1⁄2 cup milk. Once you’ve reached desired consistency, turn heat to low for no longer than 10 more minutes, stir, and pour into gravy bowl.
Many hunters aim for the neck when they’re hunting turkeys, so that part of the bird’s anatomy is likely to have shot pellets in it. Taking that likelihood into account, we like to thoroughly run our fingers through the meat before it’s added to any recipe.
Yield: 2 sandwiches.
1 to 2 tablespoons olive oil
1⁄4 cup sweet onion, chopped
1⁄2 stalk celery, chopped
1 garlic clove, finely chopped
2 tablespoons tomato paste
2 tablespoons water
1 tablespoon brown sugar
1 tablespoon prepared yellow mustard
1⁄2 tablespoon Worcestershire sauce

1 teaspoon apple cider vinegar
1 precooked turkey neck, meat removed
1. Heat oil in a skillet over medium heat. Add onion and celery and cook 3 to 4 minutes.
2. Add garlic and cook another minute.
3. In a separate bowl, combine tomato paste, water, brown sugar, mustard, Worcestershire sauce, and vinegar. Pour over contents in skillet. Cook 3 to 4 minutes to allow flavors to combine.
4. Stir in turkey neck meat. Cook another 3 to 4 minutes. If mixture is too thick, add water as needed.
5. Serve on buns or bread.
This is an entrée that’ll work well for any meal. Sometimes, we’ll prepare this dish for dinner and then warm the leftovers for breakfast the next morning.
Yield: 4 servings.
1 to 11⁄2 cups precooked wild turkey neck meat
1 cup fresh broccoli, finely chopped
1⁄3 cup onion, chopped
1⁄2 cup fresh mushrooms, chopped
1 cup grated cheese (we used a combination of cheddar and Monterey Jack)
5 eggs
11⁄4 cups whole milk (if you want more creaminess, use 1⁄2 cup half-and-half and ¾ cup milk)
1⁄3 cup all-purpose flour
1⁄4 teaspoon salt
1. Preheat oven to 350 F. Place turkey, broccoli, onion, mushrooms, and cheese in the bottom of a greased pie plate.
2. Combine eggs, milk, flour, and salt in a mixing bowl. Beat until mixed. Pour over contents in pie plate.
3. Bake for 50 minutes or until the center of the frittata is set. Let cool 10 minutes before cutting and serving.

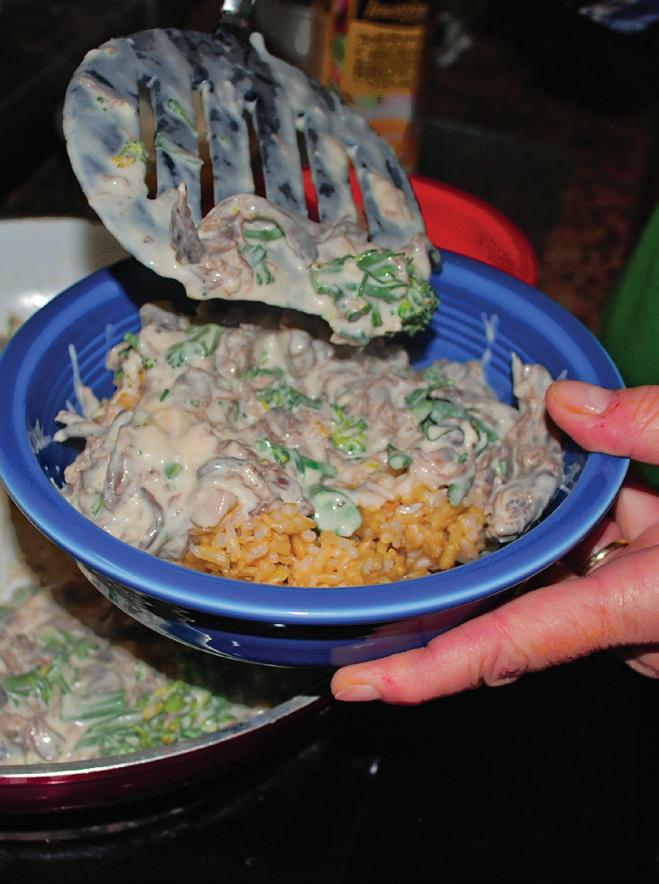
This is a lighter version of traditional Alfredo sauce. Usually, Alfredo sauces depend on cream, but we use milk and broth thickened with flour, which we feel is healthier. Also, feel free to use an additional garlic clove if you prefer more of a “kick” in an entrée. We, however, think too much garlic may overwhelm
the flavor Parmesan cheese brings to this dish.
Yield: 4 to 6 servings.
1⁄4 cup unsalted butter


1 garlic clove, minced
4 tablespoons all-purpose flour


2 cups broccoli florets
1 cup milk (use cream for more richness)
11⁄2 cups grated fresh Parmesan cheese

1 cup chicken, turkey, or vegetable broth
Salt and pepper, to taste (we use 1⁄4 teaspoon salt and 1⁄8 teaspoon pepper)

2 to 3 cups precooked wild turkey neck meat, shredded or chopped
Prepared rice of choice
1. In a heavy pan over medium heat, melt butter. Add garlic. Sauté 3 to 4 minutes.
2. Sprinkle flour over buttered garlic. Cook gently until flour is goldenbrown, about 4 to 5 minutes.
3. While this is cooking, steam broccoli until slightly tender.
4. Slowly whisk milk into flour-butter mixture. It’ll be thick.


5. Add Parmesan cheese and stir until well-melted.
6. Gently mix in broth until incorporated. Taste and add salt and pepper as desired.
7. Add turkey and broccoli to the pan. Heat until both are heated through.
8. Serve over rice.

Turkey wing meat tastes a great deal like that of the breast, which makes sense because of their proximity. Meat from one wing should be enough for 2 or possibly 3 sliders if from an older bird. We usually don’t prepare sliders until we have the wing meat from two birds. Yield: 4 to 6 sliders.

Precooked turkey wing meat
Sliced tomatoes
Lettuce leaves
Prepared slider buns (see Slider Buns recipe, Page 36)
Mayonnaise, aioli, barbecue sauce, Italian dressing, or other condiments of choice

1. Layer wing meat with tomatoes and lettuce on pre-made slider buns.

2. Add condiments of choice. Other possible topping additions include onion slices, avocado slices, cheese, and olives.
We never have enough turkey wing meat to make 16 sliders, so we freeze the excess buns for later. Better still, put butter or jam on them and enjoy a sweet treat with the slider appetizer. Yield: 16 slider-sized buns.

6 tablespoons prepared sourdough starter
6 tablespoons lukewarm water
1⁄2 teaspoon instant yeast
1 cup all-purpose flour
1⁄4 cup whole-wheat flour
1 tablespoon potato flour
1 tablespoon dry milk
11⁄2 teaspoons salt
11⁄2 teaspoons sugar
2 tablespoons unsalted butter, softened
1. In mixing bowl with an electric mixer, combine sourdough starter, water, and yeast. Add flours, dry milk, salt, and sugar on top, and then add softened butter.
2. Using the dough attachment, mix on low until ingredients come together, about 2 minutes. Dough will be sticky.
3. Turn speed on the mixer to almost medium, and mix for another 6 to 8 minutes, until dough is smooth and elastic.
4. Cover with plastic wrap, and let dough rise in a warm place for 45 minutes. Remove cover, stretch dough, and fold dough over itself 4 times. Place covering back on, and let dough rest another 45 minutes.
5. Lightly flour a clean work surface. Turn dough out onto the surface and cut into 16 equal pieces. Shape dough into balls and place on a sheet of lightly greased parchment paper positioned on a baking sheet. If dough balls have seams, place seams on the bottom, and then slightly flatten dough balls.
6. Cover and let rise another 90 minutes until light and puffy.
7. Bake in oven preheated to 375 F for 20 minutes. An instant-read thermometer should register 190 F when inserted into buns after 20 minutes.

8. Let cool before serving. Slice almost in half, leaving a small hinge to keep bun together.

We thought about calling this entrée several different names, including “Clean-Out-the-Freezer Salad,” but we opted for the “Hearty” title, pun intended. Turkey hearts are indeed
hearty in terms of nutrition, as they boast large amounts of omega-3 and omega-6 fatty acids and impressive amounts of vitamins B2, B6, and B12, plus iron and zinc.
As far as the “Clean-Out” title, we were rummaging through our freezer and discovered a package of 2 turkey hearts and a small turkey neck just the right amount of meat for a salad. The picture for this entrée was taken in late spring, and the ingredient list is based on what was available in our garden and woodlot at that time. So, except for the turkey meat, the ingredients for this salad
constantly change, and most of them can be measured to taste.
Yield: 1 large salad.
2 precooked turkey hearts, chopped
1 precooked turkey neck

Mozzarella cheese, grated

1⁄2 cup broccoli florets, chopped
2 mild white spring onions, sliced
11⁄2 to 2 cups spinach, roughly chopped
Chives, roughly chopped
Dandelion leaves, roughly chopped
Broadleaf plantain leaves, roughly chopped
1. Remove all meat from neck and toss all ingredients together, and add your salad dressing of choice when serving.


Bruce and Elaine Ingram are the authors of Living the Locavore Lifestyle, a book about hunting, shing, and gathering food (with recipes). Contact them at BruceIngramOutdoors@Gmail.com.


Dennis Biswell joins us on our podcast.


Hone your hunting skills before heading outdoors, including scouting, survival tips, placing your shot, and more.

The Bread Recipes Special Collection includes information and 12 different recipes for some of your favorite types of bread. Get ingredients and instructions for making challah, sourdough, gluten-free potato bread, ciabatta, whole wheat, and more!

A single case of African swine fever can wipe out an entire herd. People can’t get it, but they can spread it. Learn to spot signs of infection, and protect your pigs from this lethal disease.


www.aphis.usda.gov/ProtectOurPigs

Give your workshop leftovers a new life with these projects.
Story and photos by Sean Stinyspread that last coat of polyurethane onto a side table, Adirondack chair, or chicken coop door I’ve crafted, the leftover pieces of cherry and oak and redwood are often, and usually always, too precious and pricey to chuck. But they’re also not meant to accumulate dust or to shelter generations of spiders.
So, once or twice a year, I drag out these leftovers, cutoffs, and waste
After I’vepieces, and I pick a project or two speci cally for them. Mixing and matching hardwoods is fruitful, and customizing simple ideas, such as, say, your basic birdhouse, is a nice feather in your woodworking cap.

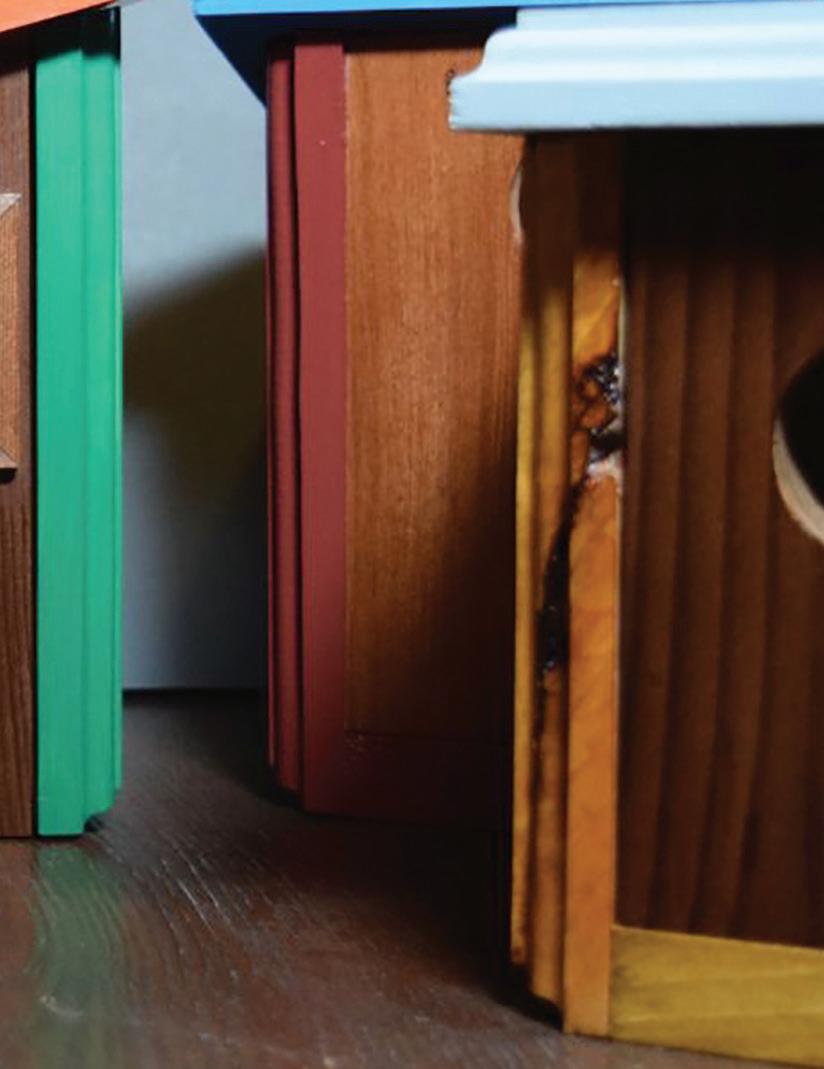

The awed pieces that have been cut away, so as not to introduce a gouge or knot into the shimmering, mahogany tabletop, are perfect here. Even plywood cutoffs, which are excellent for kindling except for the
toxic glue, are useful for the unseen backs, oorboards, or roofs of birdhouses, and they also work well chopped into single-use painter’s pyramids for applying nish.
These proverbial mis ts can be turned into a feature of your homemade collection. When I rst began working with wood, I thought, “If only I could sell something I made. If someone would be willing to spend their dollars on
From
to right: Practice your wood-burning skills
something I crafted, that would be pretty neat.” As it turned out, these scrap projects were indeed the first pieces I turned into commerce pocket-change commerce, admittedly. Though disregarded at first glance, many of these scraps have become favorites of mine.
Each of these relatively small projects can be done in a modest wood shop. In fact, I finished each of them in my attic wood shop. Yep, the workshop that’s up the pull-down ladder and to the right. (The chop saw and router table are the dust-covered crown jewels of my workshop.) My wood shop is complete with a bedsheet tacked to a rafter to keep the dust away from the Christmas boxes, camping gear, and ski equipment.
In the wood shop, haste makes waste. Here, waste makes finely crafted scrapwood projects like the following. Each modest project is for the home or yard and could make a wonderful housewarming or holiday gift. These projects are also a chance to prove that one woodworker’s kindling is another’s log cabin.
Candleholders might be simple, but they’re easily customizable for a bit more complexity and charm. Use these candleholders as an eye-catching centerpiece or unique gift. The alternating wood looks pretty dapper too.
Take some strips of maple and cherry, flip them on their edges, glue up, and then run them through the planer (hand or benchtop) to smoothness. Space out and use the Forstner bit to create some candle holes, and then round over the outer edges.

Coasters are another easy project, and they also allow you to practice your woodburning skills. Cut a 31⁄2-inch square, and route the edges. A cove or chamfer will work well; just ease up on the hardwood and take a few passes, end grain first, of course. Give it a sand.
Find or customize a design, trace or freehand it onto the wood, snag your wood-burning kit, and go to town, carefully.
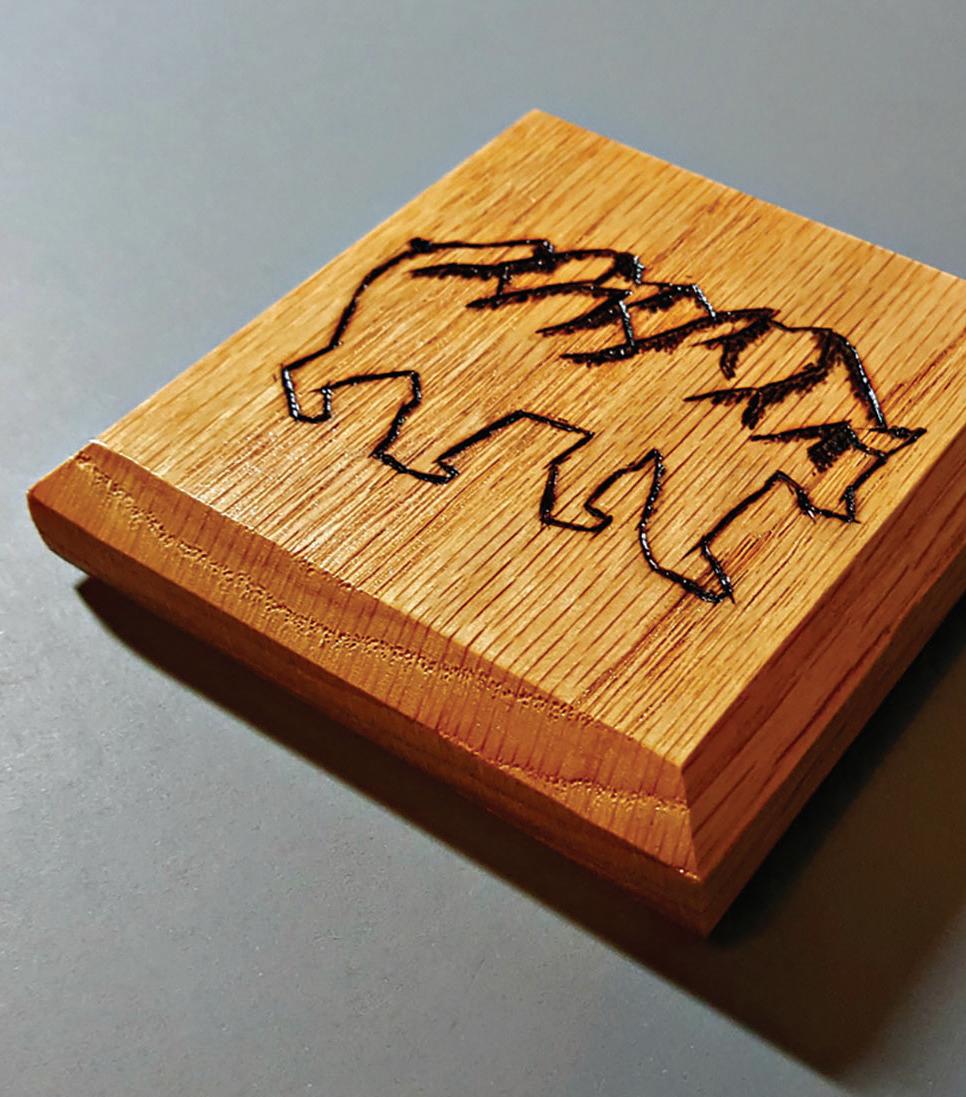
Because the wood-burning kit only makes an appearance in my shop every
couple of years, I like to do a practice run or two on a true throwaway (an unquestionably unusable waste piece).
Fancy Wine Rack
There’s no better way to dress up a few bottles of wine than with a hardwood wine rack with a customized design. Ditch that store-bought, rinky-dink one; a redwood or cherry rack cradling a cabernet or pinot really classes up the joint.
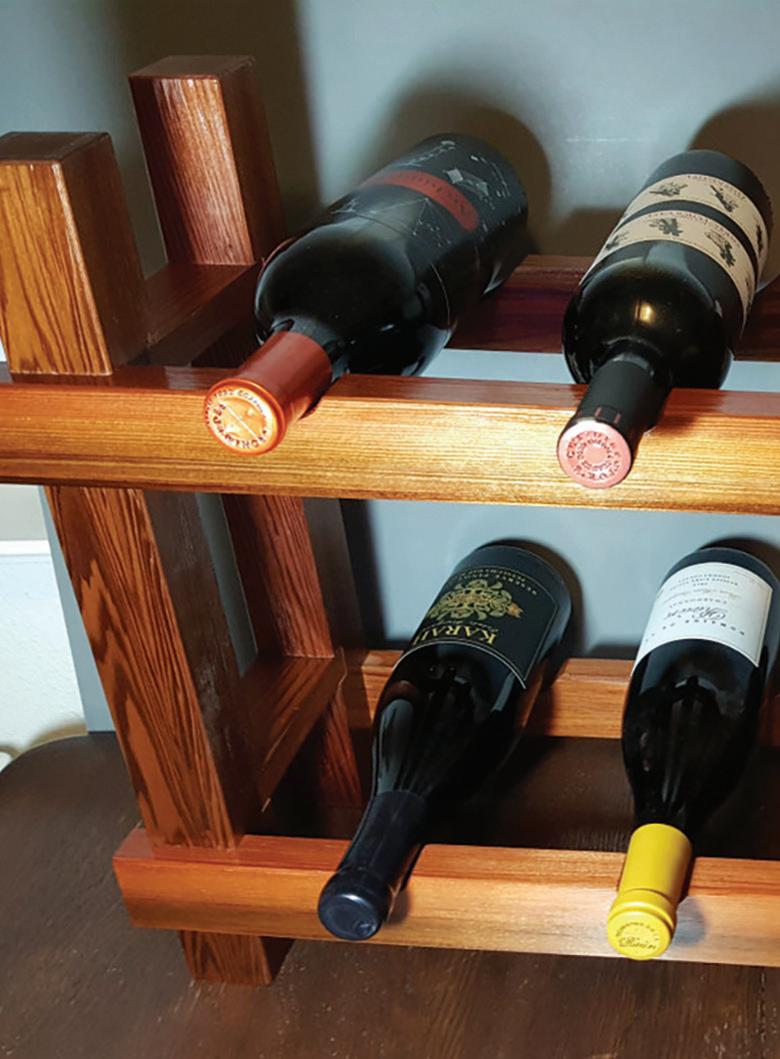

A four- or six-bottle rack is perfect for the kitchen countertop. Lay out the desired number of bottles first, space them out, and then finalize the dimensions.
Mill the four legs and four rails. Jigsaw or bandsaw the half-moons for the bottle necks and bottoms. If you happen to have an oscillating spindle sander, bring those halfmoons to a uniform size and smoothness. Pass the router over the sharp edges, apply your favorite joinery (I like to use a dado), semigloss it with polyurethane, and admire your scrappy handiwork.
Need party favors? Want to incorporate physics into your woodworking? This floating wine-bottle holder will do the trick.
This project is compellingly simple, but a little mathematical know-how (and trial and error) may be in line. Cut some walnut or oak to 10 inches long by 21⁄2 inches wide, or glue up a combo. Forstner bit a 11⁄2-inch hole, 13⁄4 inches from the top. Cut a 45-degree angle on the bottom,
left with these coasters. Store wine in a creative, homemade bird house or rustic wine rack.round over the edges, sand, and add polyurethane.
Now for trial and error. This project is designed for a standard 750-milliliter wine bottle, but most importantly, the bottom angle might take some nessing (and a re-cut or two), as might the wine bottle. Moving the neck of the bottle farther in or out will change its center of gravity. Test it out gingerly at rst, with your hands at the ready.
It may take a couple of tries to get the angle to sync with your bottle (you might nd that a 42-degree cut works better than a 45-degree one, for example). Once you nd the new center of gravity of your project, it’ll be stable.



With DIY Wood Pallet Projects, you can finally personalize your space without having to spend a fortune on getting that perfect rustic-chic look. Featuring 35 creative upcycling ideas, this book will help you transform old wood pallets into beautiful projects to fill your home and yard with style and personality. If you’ve never picked up a power tool, don’t worry. These easy, step-by-step instructions guide you through the entire woodworking process as you re-create all of your favorite designs. The one-of-a-kind creations you’ll discover in this guide include a rustic wood clock, a herringbone coffee table, a planter box with mitered corners, cut-out silhouette art, and a pallet slat-backed bookcase. Complete with stunning photographs and plenty of inspiration, each of the covered designs will be the perfect addition to your home.

This title is available at Store.Grit.com or by calling 866-803-7096. Mention promo code MGRPANZ5. Item #7419.


Lay out the picnic blanket in the soft grass, kick off your ip- ops, dig into the creamy potato salad, and uncork that bottle of rosé on a warm summer afternoon. But how to balance it all, especially those delicate wine glasses that were a wedding gift from Aunt Joanie? With a wine caddie.
Chop a piece of redwood at 12 inches, Forstner bit your holes, jigsaw the entry point for the glasses, give it a nice round over, maybe even a cove route, and voilà, it’s summertime and the living is easy!


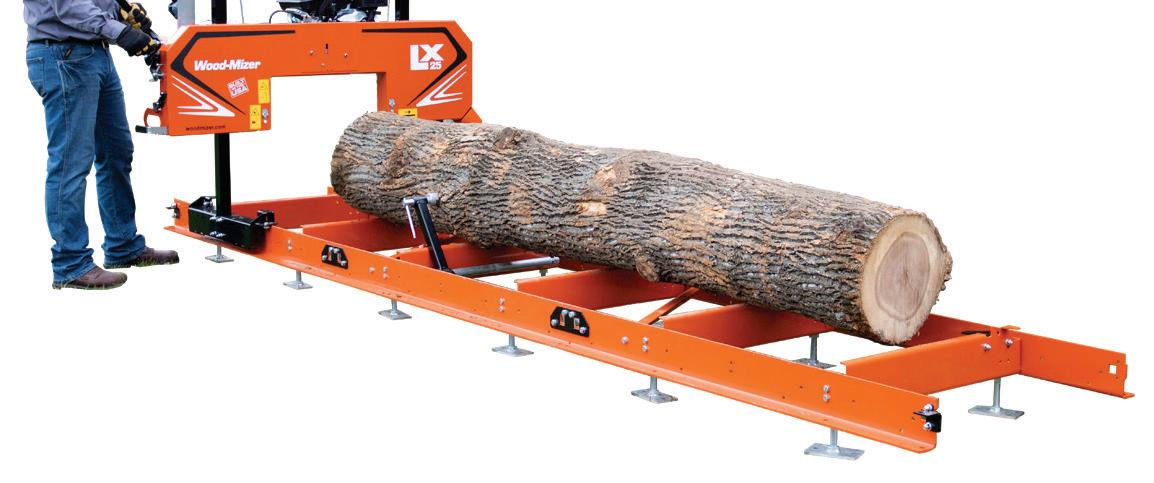



Here’s an idea that combines wine, birds, and the ramshackle monitor barns I see here around Sonoma County.

Grab some redwood and cut angles for the roof and lower roof into the front and back. Then, trace and jigsaw out the bottle holes. Spindle sand to bring the holes to smooth uniformity. Cut out the sidepieces, then four matching roof pieces. Plywood will work well for the sidepieces. Round over the edges with the router or mix it up with
a chamfer. Then, cut to length four dowels, which will shelve the bottles on the inside. Clamp, glue, add polyurethane, and then go to your grab bag of leftover corks. Lay out a design for the sides, frame them in with a custom molding, and then glue down the corks.
As the perfect habitat for your favorite vintages, this unique piece is sure to turn a few heads and garner inquisitive questions, such as “What species of wine nests in that barn?” Answer: the red and white species of the genus.
A couple of hardwood bookends can hold up your 2023 Farmers’ Almanac and A Sand County Almanac, or Faulkner and Hemingway (and, of course, Jim Harrison). Mix and match or use a single species, such as mahogany or sapele. Route or dado a rabbit so the wood goes together perfectly. Jigsaw some detailed edges, then catch the bead on the round-over bit (an ogee works here too) to give it a slight Victorian edge. Sand, glue, and semigloss with wipe-on.
For a slightly larger project, consider a tabletop bookcase for a bedside table. Cut the sides to average book width, generally 5 to 6 inches, and bandsaw a wavy detail into the top. Dado in the back and shelf, route off the edge sharpness, sand, glue, and add polyurethane.
Now, you’ve got a spot for the stack of books you’re going to read for three minutes before you fall into a deep, deep slumber.
Where to store those knickknacks and doohickies? A dark redwood shelf will make a warm addition to your office or study.
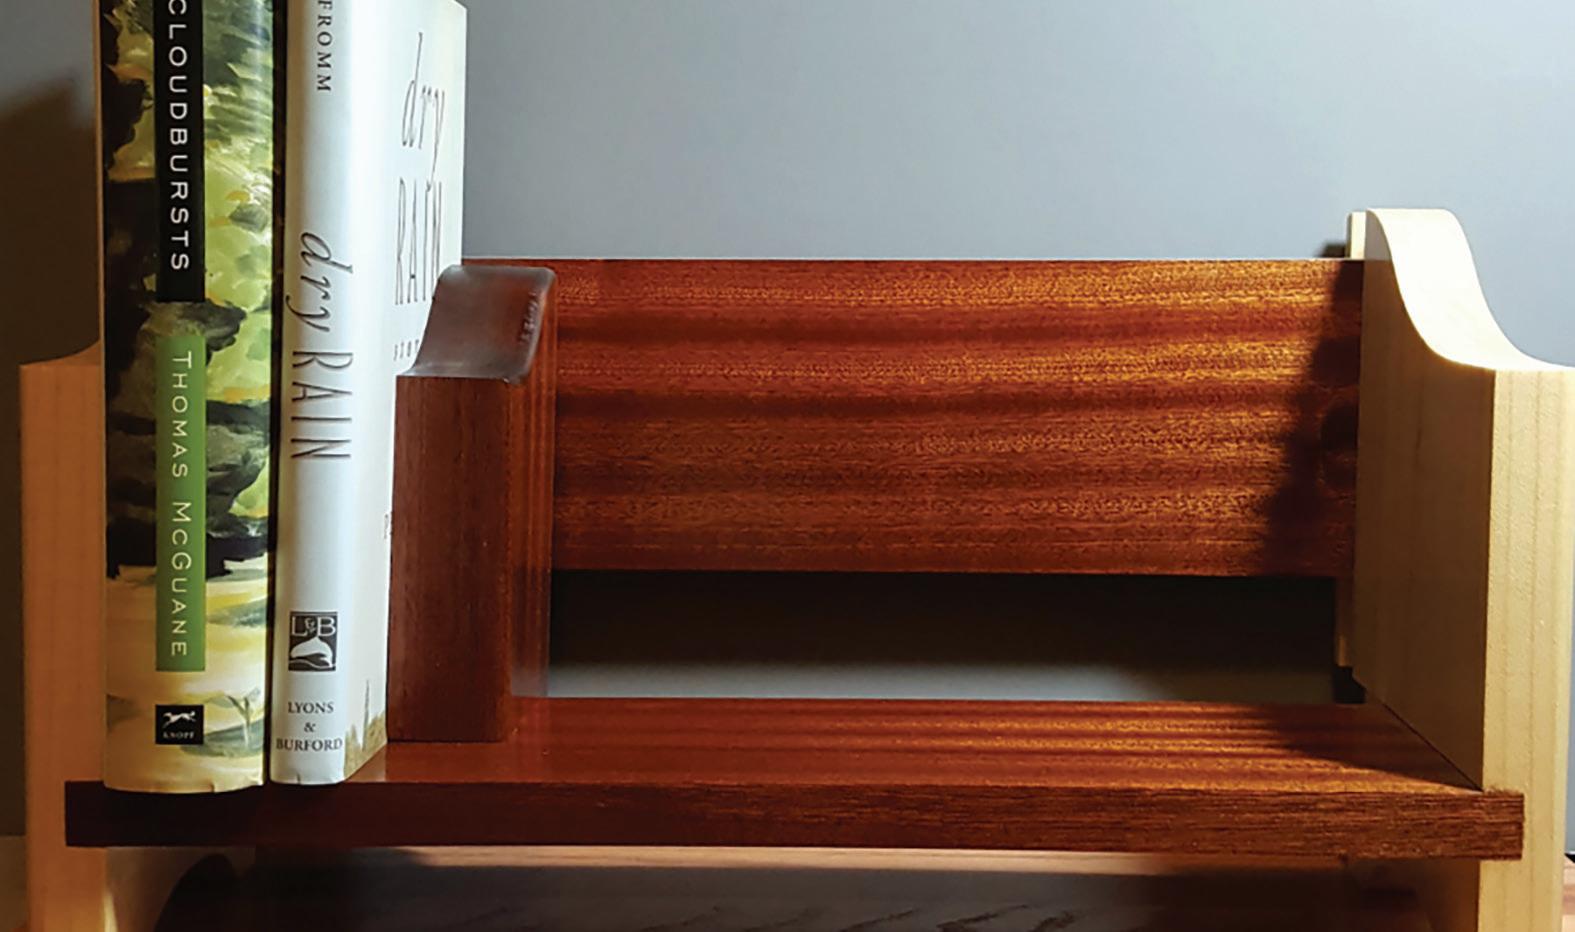

Mill four pieces of redwood, give the sides a bit of detail on the top and bottom with the bandsaw, take a pass to the edges with a cove bit, and then dado the shelves into place. Give it a third shelf for smaller souvenirs or extend the depth for larger thingamajigs.
Picture frames, though seemingly basic, are one of the more challenging scrap projects to tackle. The knots and
Ornithological domiciles are a great option for scrap wood, particularly for plywood waste. You can easily find building plans for birdhouses online, and the warblers and finches will be most thankful for their prefab, single-story rancher. After all, a home without a birdhouse is just a house.

Rip four walls, build a simple box, chop a 10-degree angle on the top, give the edges a round over (or a Roman ogee if you’re feeling plucky), and grab a leftover hinge.
Forstner bit a welcoming entrance hole. Leftover spray paint will spruce up the roof, while a leftover dowel will make an excellent chimney. Bam, avian real estate!
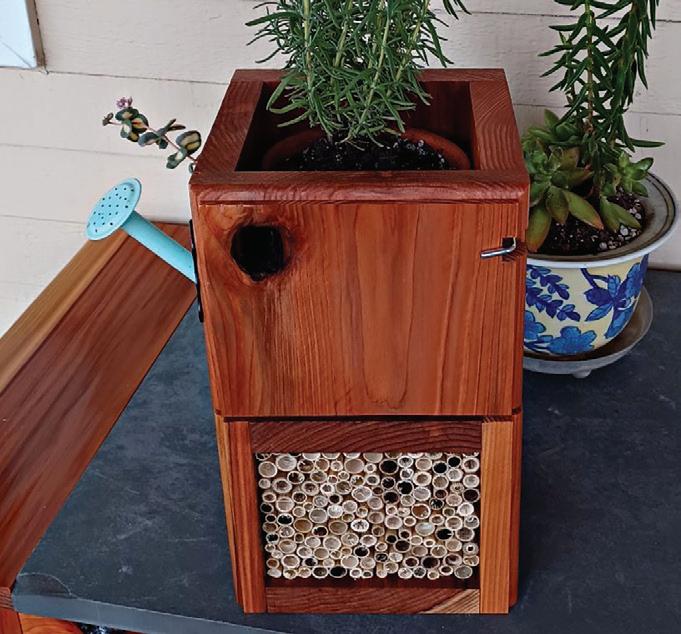
The bees need our help any which way these days, so why not house and nourish them with some layaway redwood? Nesting tubes fill the bottom, and that sweet, sweet lavender serves as the roof.
defects look rustic, and with a photo of Grand Teton elk in the frame, I’ve taken to dubbing this charming project the cowboy picture frame.
Locate an old cabinetry router bit (apply some 3-in-1 oil if rust blooms have sprouted) that will carve out a nice face profile. Rabbit the inside edges for the glass to fit snugly and miter the 45-degree angles. Easy in theory, more difficult when the wood meets the bench.
The most challenging part of this project is the 45-degree parts. Getting the 45-degree clamps to fit securely can be difficult, as is getting the cut pieces to line up in the clamp with precision. Once together, the inside rabbits might need to be expanded slightly to fit the glass. It can also be tricky to hand-sand the little droplets of glue that seep out and harden in the face profile, or to miter the 45-degree pieces at the beginning.
For the glass, I like to buy the cheapest clip frame at the local craft store, usually an 8-by-10-inch or an 11-by-14-inch. I then chuck the clips and keep the glass.
This one is a basic, open-topped box, with a divider in the center. Redwood looks great hanging on a fence or tree. Give the edges a deep round over and add a charming gate that swings open for access to the lavender. A turning L screw will lock and unlock the gate, and an application of spar polyurethane will shield the redwood from sun and rain. Nesting tubes are pretty common at your local hardware store.
One chic addition to a modern home is a barn door, whether for the dining room (fashionable) or to hide the cluttered pantry (functional). Build the door, buy the hardware, install the track, and become the architect of your homestead. Why not add a small, cute barn door to an already built side table or TV stand?
Plane and glue the panels, add decorative rails and stiles if the mood strikes, route the edges, sand, and add polyurethane (or spar varnish if it’s going outside).
To procure the hardware, search for “mini barn door hardware,” select from
Clockwise from top: A bookshelf for all your great reads. Feed the bees with this planter box. A classic birdhouse.DESIGNED. ENGINEERED. REMARKABLE VALUE.
a few different styles, and reach for your wallet (a complete hardware kit costs $50 to $60). Follow the directions that come with the kit, and keep a level nearby so the door is (somewhat) plumb, even if it’s just for decoration.
Whenever I get cabin fever over the winter months or I’m eager to jettison my ever-growing pile of hardwood
throwaways, these small scrap-heap projects keep my mind occupied and my woodworking skills sharp.


Sean Stiny is a writer and woodworker in Sonoma County, California. Find more of his projects at www.LongRoadWoodworking.com.

• Efficient PTO powered stump grinder makes stump removal easy.
• Easy operation from the seat of the tractor using existing tractor hydraulic controls.


• Cutting wheel design provides a smoother cutting action for higher productivity.


• Models designed for tractors 22 -50 PTO HP and 45- 100 PTO HP.
To build impressive genetics into your herd, flock, or fluffle (of rabbits!), be sure to set goals — and don’t hesitate to follow them.
By Virginia Montgomerybefore us worked hard over the centuries to build the breeds and traits of our modern-day livestock. As homesteaders and breeders, we have an ethical responsibility to breed animals for more than just pro t, and to choose livestock for the best possible genetics.
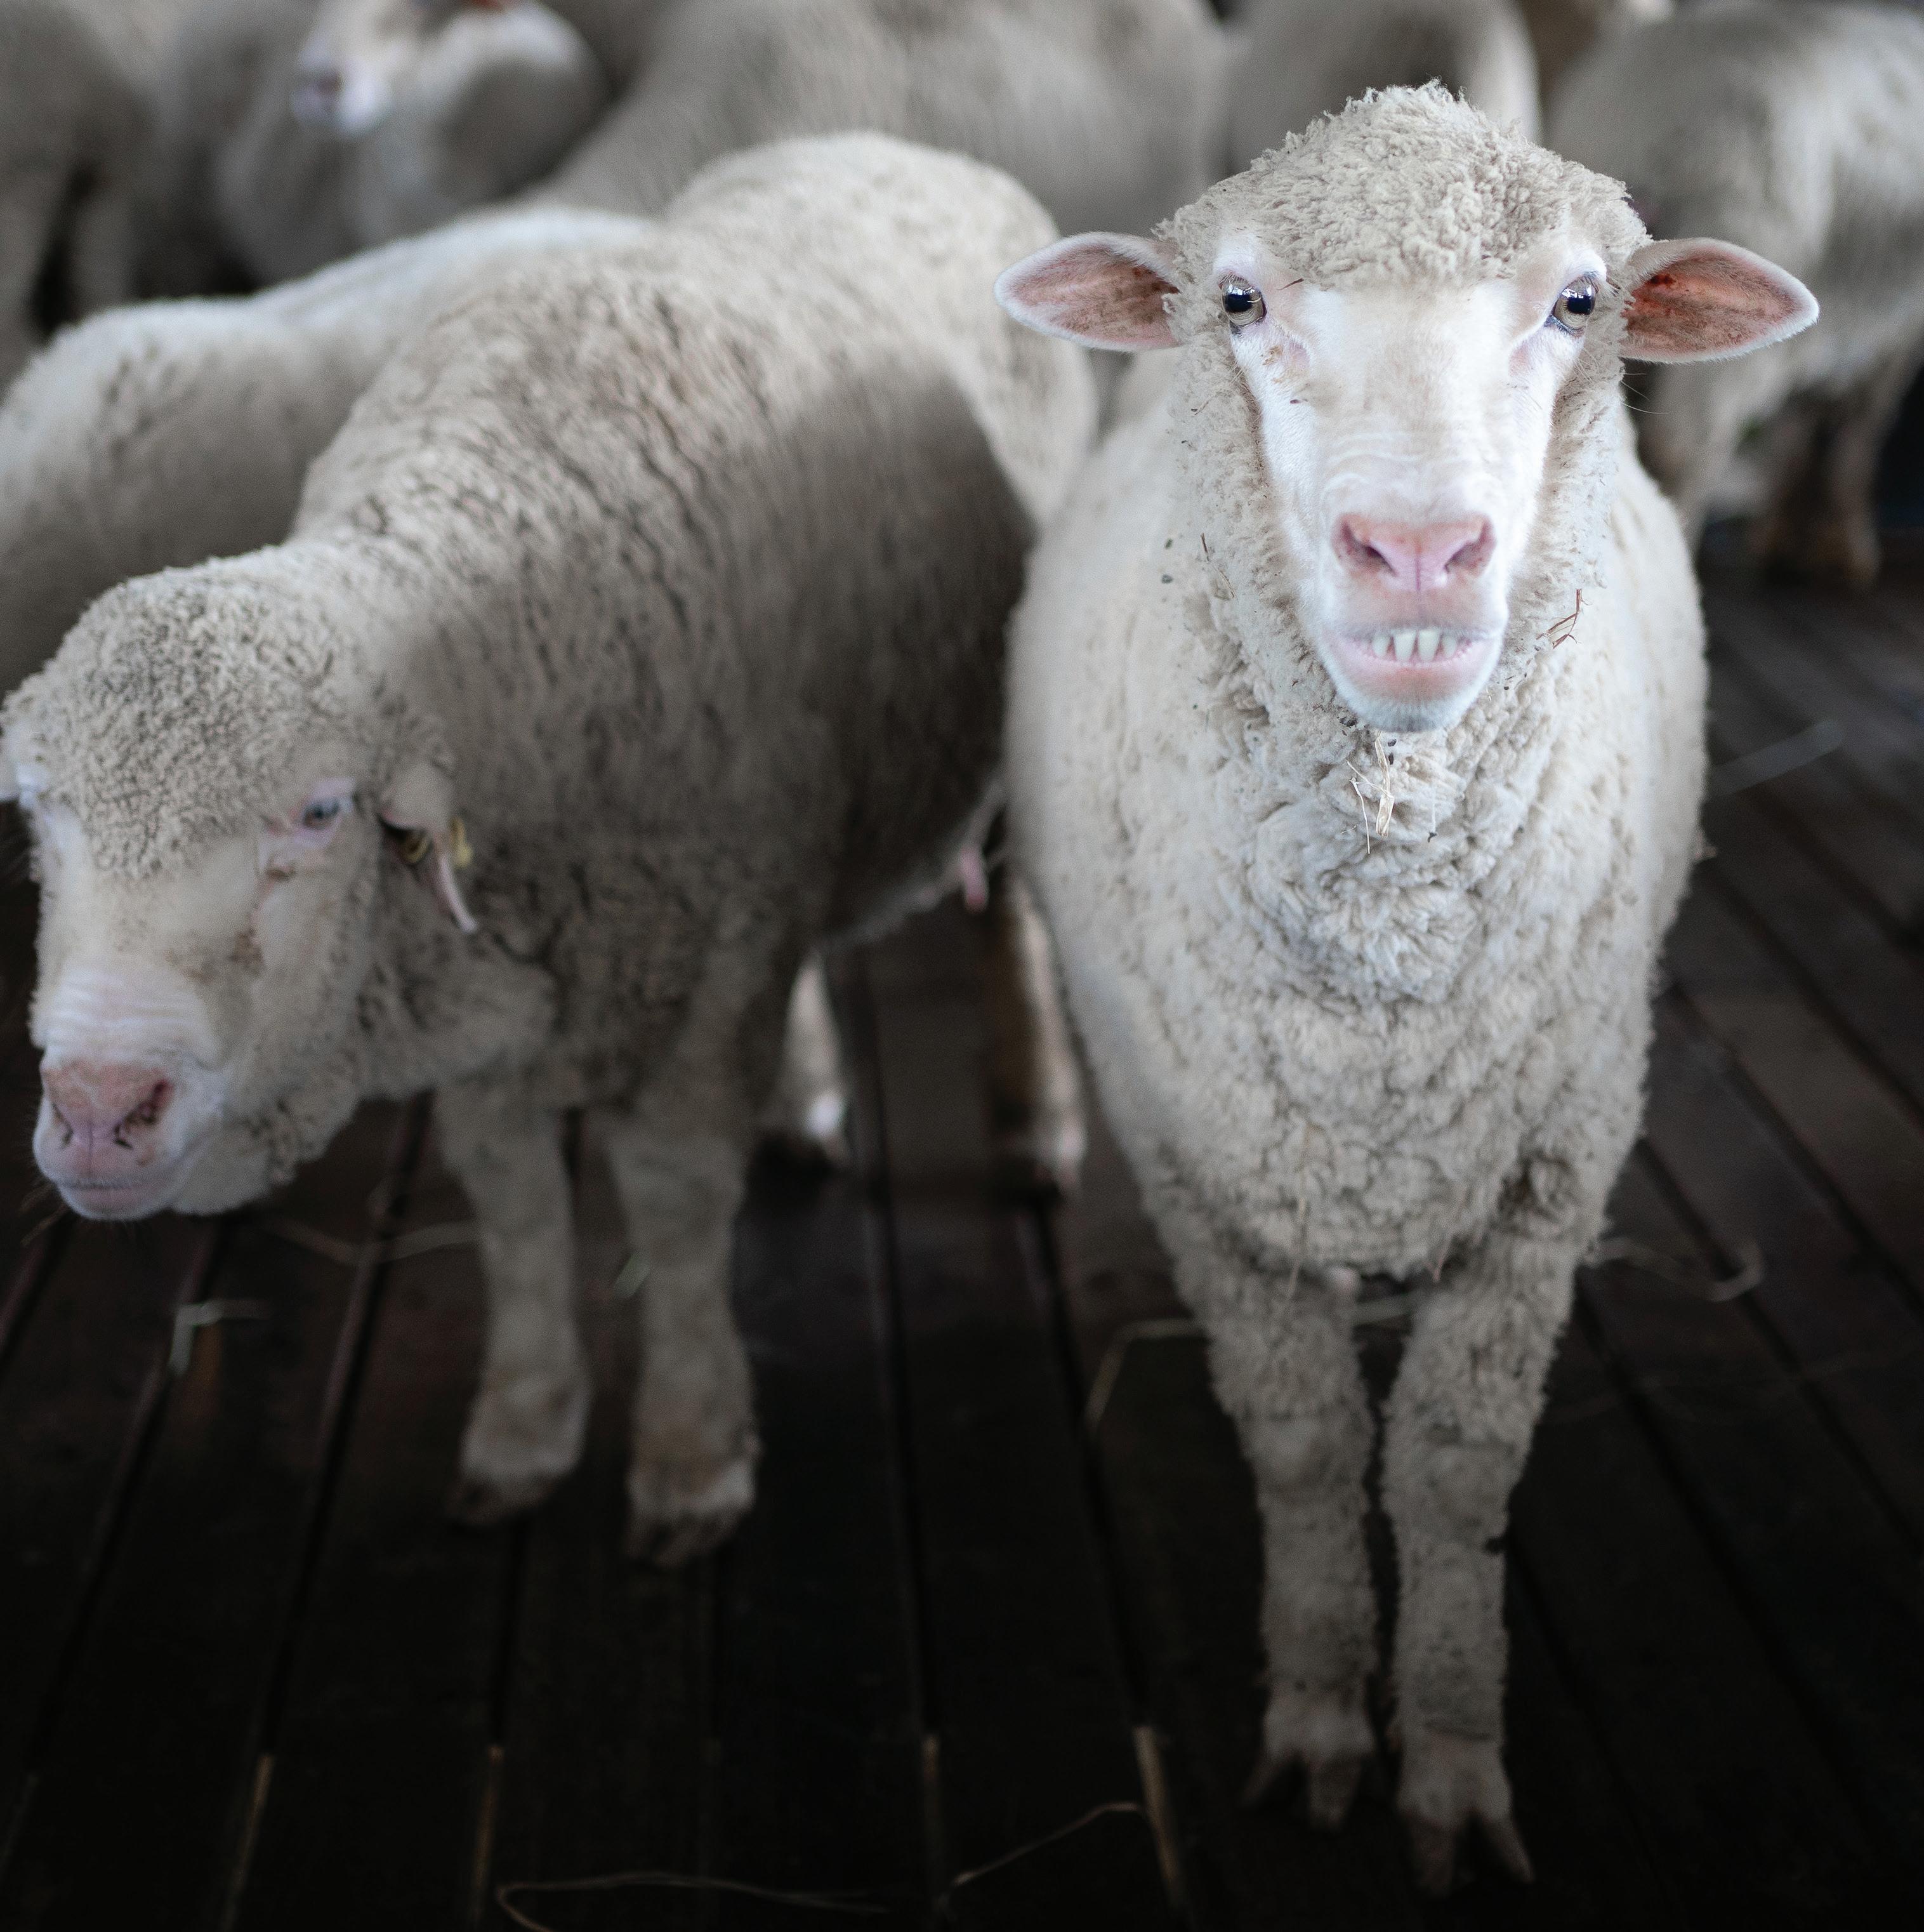
I currently raise my family’s ock of chickens, and I’ve previously raised rabbits and goats, so I have personal experience in choosing animals for a

breeding program. Here are some of the factors I consider when selecting for genetics.
First, I look at the overall health and temperament of the animal and decide on my personal goals. For example, for the safety of my small children and our ock, we need calm roosters that don’t attack their caretakers.
I also consider the overall body structure, or “conformation.” I want a
wide hen with large breasts and thick weight to help ensure a good meat bird when hatching out chicks.
Unfortunately, I encounter many people who breed for color in their poultry. Color is the last thing you should consider when breeding any animal. The same is true with rabbits when people breed these animals strictly for beauty, because they’re intended for pets. These rabbits go on to have health and behavioral issues, because breeders weren’t focused on more critical matters.
When the owners of Nowak Farms decided to add the Beefmaster cattle breed to the property, their Florida community met the move with confusion, because the breed was new and unfamiliar. But for the farm owners, this was the right move, and they love the breed’s conformation and temperament.
Overall, conformation is important on our farm, because a strong body structure is key to our animals’ good health. We’ve culled many larger roosters for leg problems (combined with behavioral issues), because they need a good structure to live a long life.


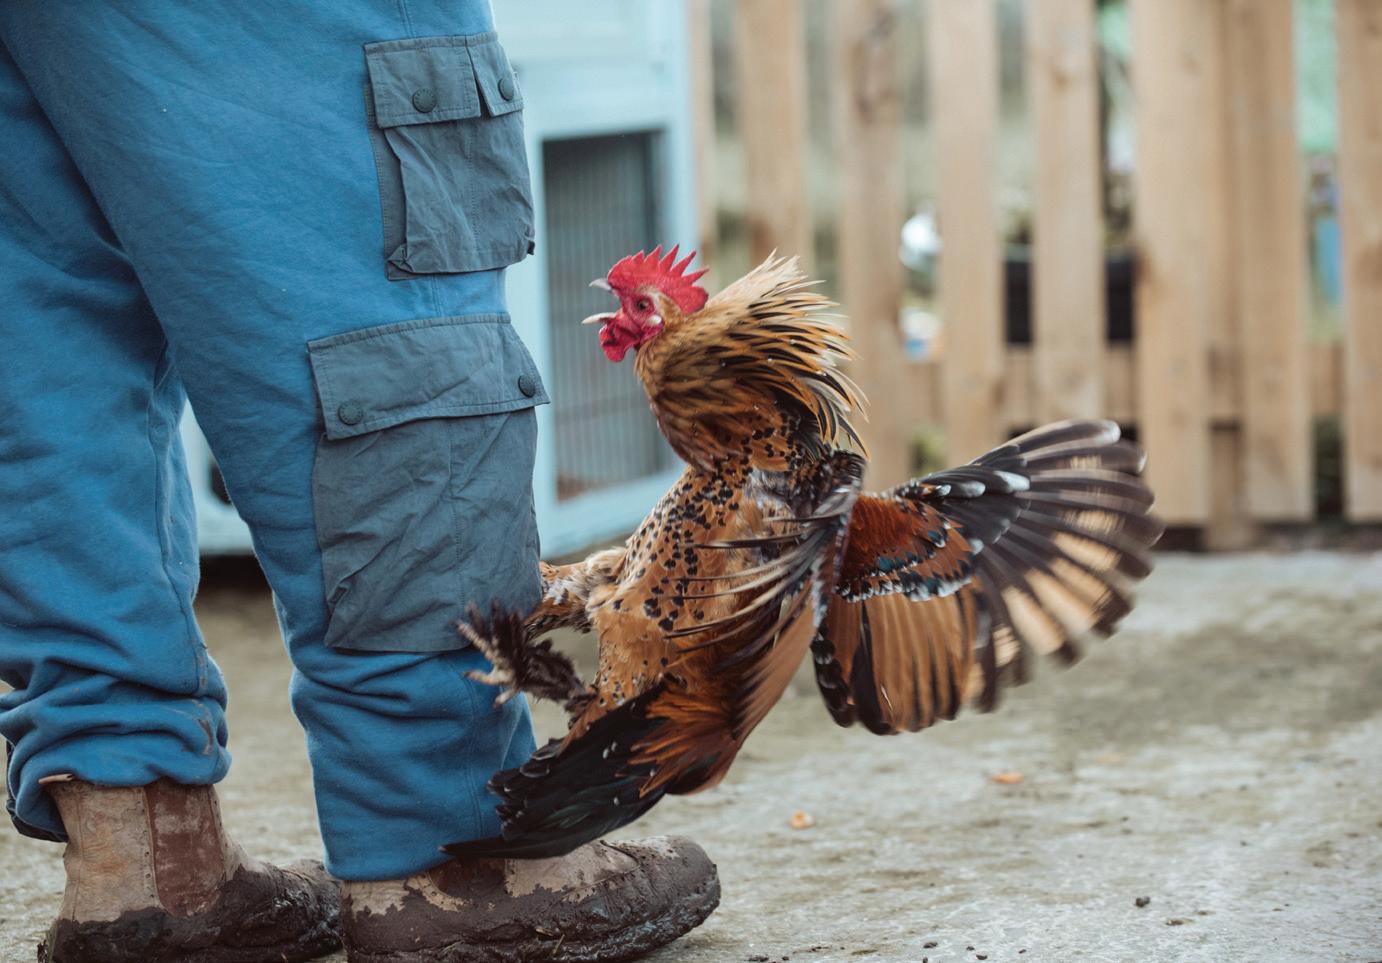
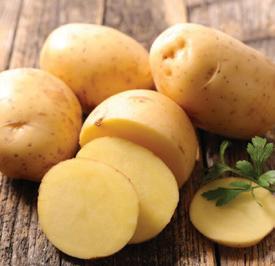
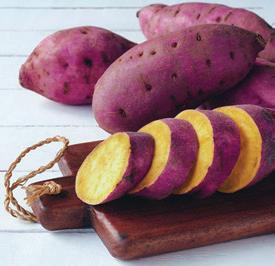

Health should always be the first trait you evaluate when selecting livestock, because a healthy animal is a strong animal that’ll produce for years to come.

Consider what purpose the animal will serve meat, milk, fiber, eggs, and so on. For instance, many believe a good udder attachment on dairy goats is just for conformation, but it’s also paramount for the animal’s health. An udder that sags is at risk of developing infection, leading to a sick animal that won’t produce as much and will cost more money in the long run.

Meat pigs and beef cattle need to possess a good body structure to produce quality meat, as a nice structure can carry a lot of flesh and put on the right amount of fat. When I raised English Angora rabbits, I bred for wool that didn’t mat easily. This made caring for them simpler, because they needed less brushing, and they were less likely to develop skin infections. Ultimately, though, I wanted a fiber animal that produced good-quality wool.
The most important trait often varies from breeder to breeder, but the animal’s health should always be top priority. For that reason, animals with genetic health issues should never be bred.
Culling is the selective removal of animals by means of selling or slaughtering. For years, people thought the word was synonymous with slaughter; however, breeders also use the term to describe retiring an animal to a pet home or simply removing it from a breeding program. Your method of culling is up to you.
Culling should be a vital part of every breeding program. You’re not breeding with a purpose if you don’t sell or

evaluate. I often think of homesteader Justin Rhodes, who presents his strict culling practices to more than a million subscribers on his YouTube channel. He often culls if an animal struggles to give birth, because he wants livestock that need little to no intervention. Or, consider Weed ’em & Reap’s YouTube channel. This family raises dairy goats, and the mother often makes tough calls to sell or sterilize animals that don’t meet her standards.

Over the past 20 years of raising livestock with my family, I’ve developed my list of an animal caretaker’s top five reasons for an automatic cull.
1. Aggressive behavior is always my first reason to cull an animal, especially when tied to genetic issues. When I was young and a member of 4-H, I raised an aggressive rooster whose behavior I believed could be changed. Then, he spurred me and hit a vein. His behavior continued to worsen, and we ended up eating him. This experience opened my eyes to the
fact that sometimes animals are born with serious behavioral issues that can’t be put right.
2. Genetic problems. Not only will I cull an aggressive animal, but I’ll also cull its offspring, because the problems may be passed down. Genetic health is always a cull for me, as I don’t want bad traits to accidentally be bred into my program. This will save a lot of headaches later on. The Weed ’em & Reap YouTube folks unsuccessfully tried to breed out a genetic issue and ended up sterilizing the entire line. A similar issue happened with my flock of Columbian Wyandottes. The roosters developed leg issues, and I culled them immediately, because this problem would complicate almost every other item on my list of top five cull reasons.
3. Poor mothering costs money and causes problems. I worked in many rabbitries when I was new to raising rabbits, and observed that bad mothers chewed ears and limbs off babies, stomped on them, and even occasionally attacked them and their human caretakers. I’m lenient with protective mothers, but not those that hurt their babies.
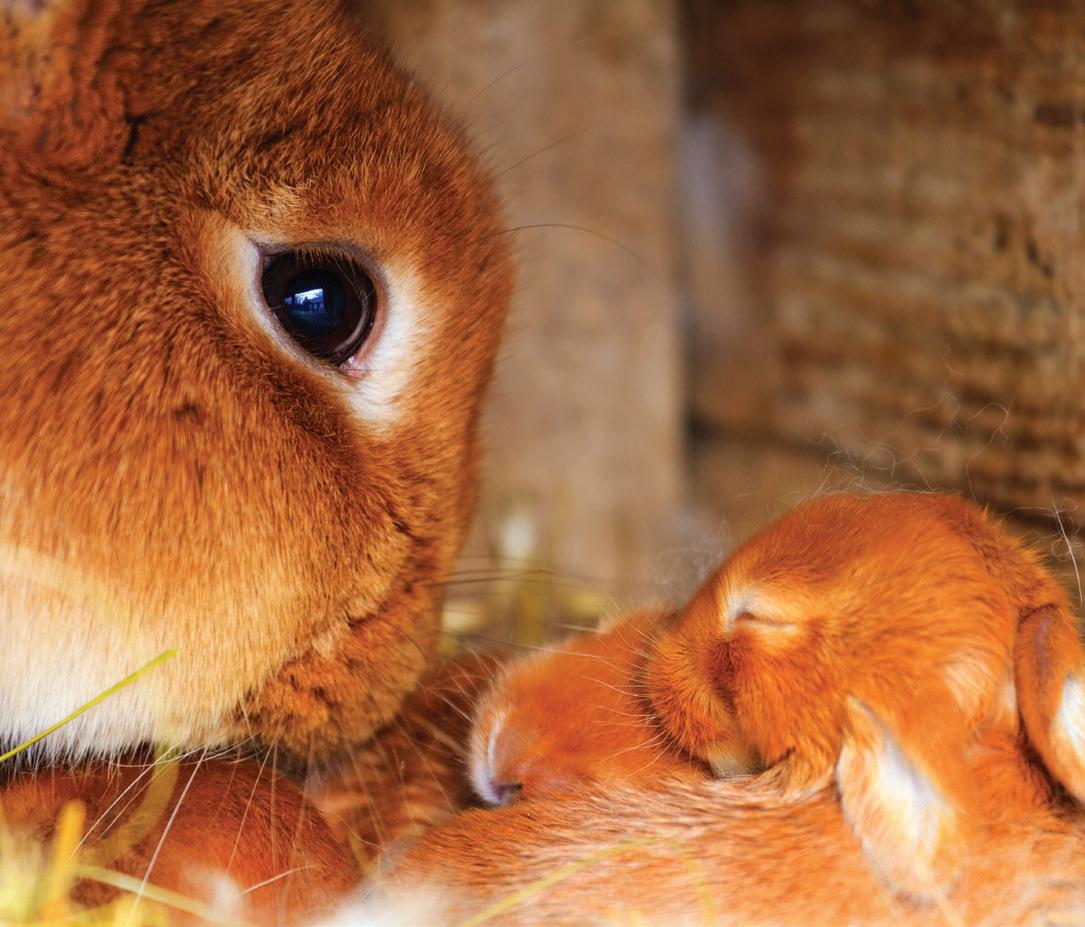
4. Severe conformation issues. Conformation isn’t only important for show animals, but also for your breeding program. When you read
standards that have been set for a livestock breed, you’ll note the conformation guarantees the overall health and production of the animal. It’s sometimes best to cull animals with conformation problems and instead find livestock more closely aligned to what you need. Figure out your exact needs, because each animal has a different body conformation.
5. Inability to free-range. If any poultry can’t or won’t free-range, it results in an automatic cull from my flock.
When you breed animals, your ethical responsibility includes ensuring the animal is well cared for. This includes any future offspring. That’s why goals are critical, not only short-term but also long-term. The first step is to have a clear idea of what you need in the animal. Breeding just for breeding’s sake can cause a host of issues, especially if you don’t have a pedigree or a history of your animals’ lines. Choosing goals is important to better understand yourself and what you need to do to accomplish this within a sustainable and healthy breeding line.
For example, one of my current goals is to develop a dual-purpose egg and meat chicken. This goal directs me when I’m buying chicks. Another goal is to create breeding pens for purebred heritage breeds to better improve our
sustainability, and to sustain these breeds for future generations. This means I’m constantly researching lines and identifying pertinent breeders.
I made the mistake of lacking clear goals when I raised rabbits. Someone once told me at a show, “You need to figure out what your true passion is when it comes to breeds and stick with it.” They were right. I was so determined to have many colors and breeds that I couldn’t focus on improving my rabbits.
Another important aspect to understanding your goals is knowing where you can obtain future stock. If you pick a rare breed, you may need to spend money to gain more genetics over time. This can cause a lot of future headaches and may not be right for everyone.
Choosing livestock for the best genetics is a process; you have to make yourself a plan and then purchase animals based on it. Having a good, sound animal as the foundation to your breeding lines will ensure you won’t have issues in the future, and culling hard is important.
Make sure you purchase stock from reputable dealers with biosecurity practices in place, including clean areas for their animals, a manageable number of animals or breeds, and a good knowledge base about their lines’ genetic information. Breeders of cows and other large stock, as well as poultry, should conduct yearly inspections. When you
purchase from a reputable breeder, you’re more inclined to get healthy animals.
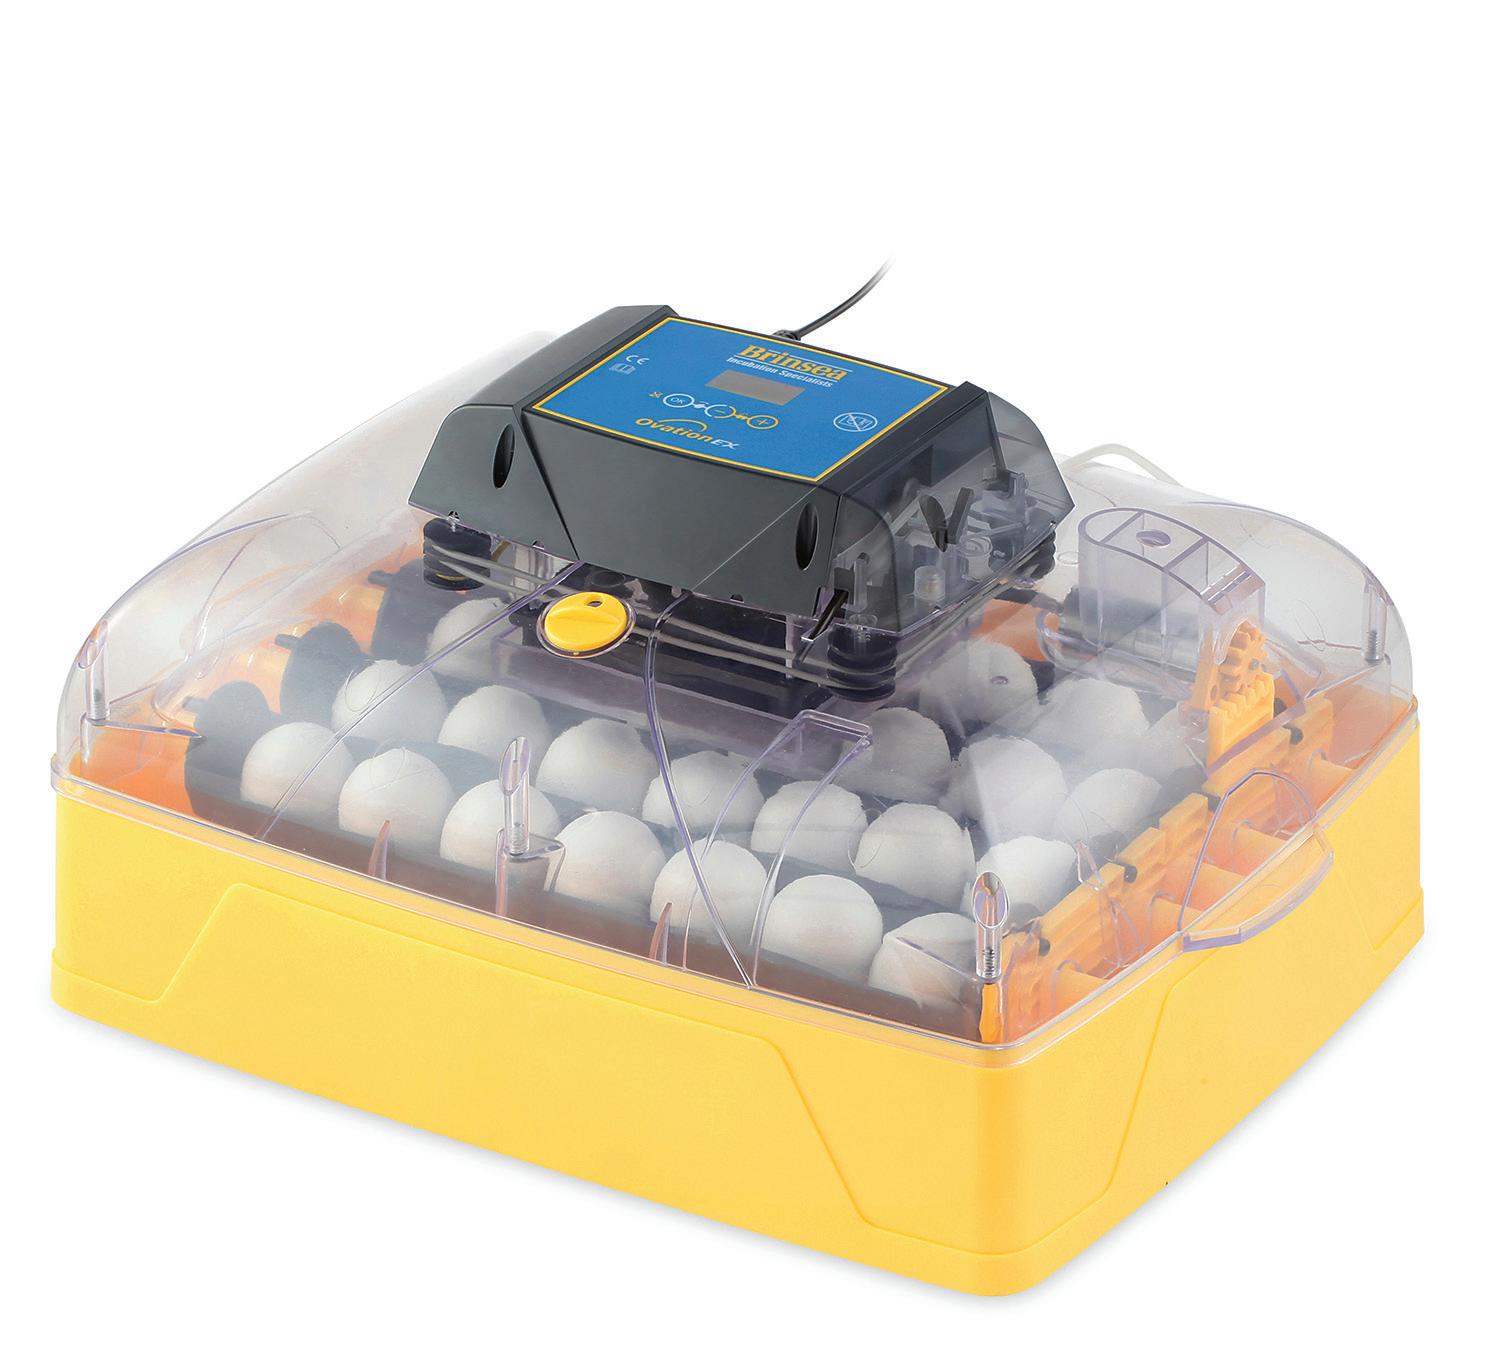

Find a mentor nearby who raises the animals you want. This is a great way to learn more about your animal’s genetics. Ask your mentor how they manage their stock and plan their breeding program. Record-keeping is important for staying on track, so discover how your mentor manages that aspect.



By following your goals, you’ll ensure your animals’ genetics are exactly what you need to meet your objectives as a breeder. Also, consider importing new stock to bolster diversity, because you’ll increase the likelihood of genetic abnormalities by line breeding too much another reason why recordkeeping is so important.


Virginia Montgomery is a writer and beginning homesteader who runs a small backyard farm with her family.


• Up to 2X THE POWER of the competition
• CUT 3" THICK BRUSH & tall eld grass with ease


• WIDEST SELECTION of deck sizes and features


• GO-ANYWHERE power steering & hydrostatic drive options








• 5X THE POWER of a handheld trimmer
• TRIM precisely without arm fatigue

• MOW where a bladed mower can’t

• TOUGHEST trimmer cord available

• Self-propelled hauler
• Powers up hills with ease
• Powered dumping
• Converts to a atbed


Tow-Behind
• #1 in vacuum power and capacity
• NEW PRO MAX model holds up to 450 gallons
• All models newly redesigned with up to 20% more capacity

• NEW PILOT XT models ll paper leaf bags for curbside pickup

• Collects & mulches up to 50 lbs. of leaves
• Includes onboard caddy for extra bags

I’ve beensmithing for more than a decade at my business, Five Points Blacksmith Shop in Charleston, Illinois. While forging iron is physically demanding, I’ve learned that controlled movement is much more important than brute strength.
Although many blacksmiths opt to use modern equipment, such as electric welders, it’s bene cial to know traditional joinery. Building a repertoire of basic blacksmithing techniques will allow you to increase your skill as you accumulate knowledge. Once you’re comfortable performing basic tasks, you’ll be able to complete a broad range of aesthetic and functional projects for your home and garden. Here, you’ll learn about mastering a fundamental blacksmithing technique: forge welding.
Also referred to as “ re welding,” forge welding is the process of uniting two or more pieces of metal through heat and hammer.


Get all fired up about learning how to weld with a coal forge.
When the proper welding temperature has been achieved, two pieces of steel stock can be fused together with blows. Forge welding isn’t difficult, although your chance of being burned by the materials is somewhat high. By maintaining your focus and staying calm, you’ll learn how it feels to safely connect with iron, not simply manipulate it.
Before setting up a welding fire, you need to remove clinkers, ash, and all other debris from your coal forge. The most common fire used to forge-weld is a chamber-shaped, or “beehive,” fire. This formation will allow you to observe the metal stock as it heats, and its enclosed “oven” will concentrate the heat on the stock inside the chamber.
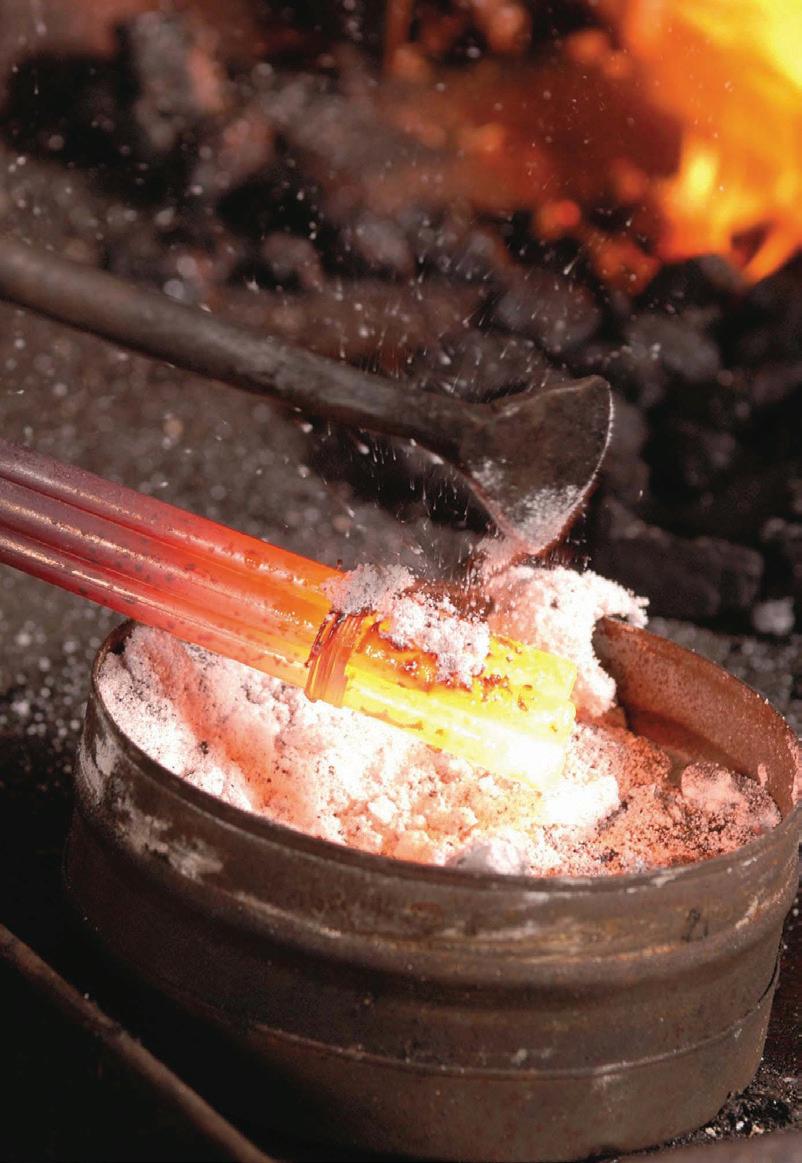
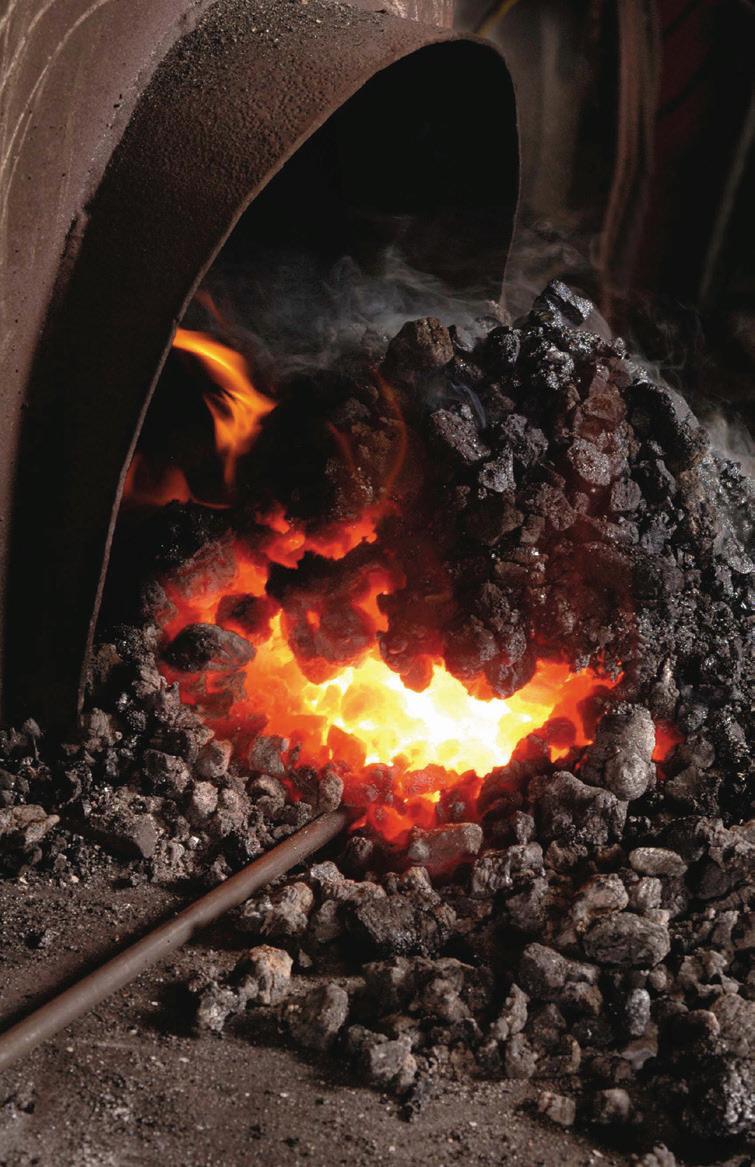
A beehive fire is similar in formation to a banked fire. When a fire is banked, the buildup of wet coal on top of burning coal insulates and keeps the embers slowly burning for a long period of time. Beehive fires have the same layered technique, but the airflow is constant, which creates an intensely hot center.
To create a beehive fire, follow the same start-up procedure as with a regular forging fire. As you rake coal into the fire, pat down the mound with the bottom of the shovel. The goal is to create an extremely hot and compacted heat source. Once a fire has been established, increase the blower and start adding moistened coal to the fire. (Remember to shut down the blower before
proceeding with actual forge welding, because air circulation will increase the rate of oxidation.) As the wet coal burns, it’ll solidify and surround your fire with a hard, igloo-shaped chamber. Continue adding wet coal and patting it down with the shovel. The overall height of the mound should be equal to the depth of the firebox.
The interior of the compacted coal pile will transform into coke, which you’ll use as the fuel for the clean, hot fire essential for forge welding. The outer wet layer will create a shell that you’ll poke open to create an entrance for the stock. The entrance should be located on the front and near the bottom of the mound, where the fire is white-hot. You must be able to check your stock as it’s heating, but the fire’s intensity can damage your eyes if you stare at it. I strongly encourage you to invest in a pair of didymium safety glasses. Standard safety glasses won’t shield you from the fire’s intense ultraviolet light.
Practice creating the heat and temperature needed for forge welding by intentionally burning a 1⁄2-inch-diameter piece of 5-inch-long stock. Place half the stock into the fire. Wear didymium safety glasses while you watch what happens, but don’t stare intently. You’ll notice the surface gains a glass-like appearance as the color of the metal stock becomes lighter. Watch for the initial sparks, and, in a short time, the sparking will intensify as the metal begins to melt.
The optimal temperature for forge welding mild steel is 2,300 degrees Fahrenheit. At welding heat, this material will have a molten surface and a soft internal structure. A common mistake of beginning smiths is to overuse the forge’s blower to increase fire intensity but airflow increases the rate of oxidation, and steel can’t be forge-welded when scale is present.
Flux is important because it protects metal from further oxidation and liquefies and removes scaling that’s occurred during heating. Apply this powdered compound to the mating surfaces of mild and carbon steels during forge welding. Flux melts and flows into the tightest cracks, removing any oxide that’s already formed and coating the exposed surfaces to stop any further scaling.
As the flux begins to melt, you’ll notice the surface looks wet and fluid; this is called “slippery welding temperature.” Soon after, the surface will take on a bright-yellow or white appearance and sparks will begin to appear, signaling it’s time to forge the weld, because your material has reached a semi-molten state. The metal surface has begun to burn slightly, so you’ll need to work fast. Don’t overheat metal, and work efficiently once you’ve achieved welding heat. Try to avoid repeated heats, as reheating will increase the difficulty of getting the materials to adhere to each other.
Before two pieces of metal can be forge-welded, you must prepare the mating, or contact, surfaces. “Scarfing” is the process of upsetting the tips of two pieces of stock with angled, slightly bulged surfaces. The purpose of hammering the end of a piece of metal stock is to create a diagonal, bulged surface. Scarfing also builds up the mass of material that will be lost in the heating and hammering process. The resulting diagonal surface increases the contact area for the weld. A convex scarfed surface helps ensure the center of the joint is fused before the edges, and it allows for impurities such as slag, oxides, and welding flux to be expelled
during the welding process, creating a stronger connection.
Your stock ends should be upset before they’re scarfed (see illustration, below). This increase in mass will help maintain the original thickness of the steel. Avoid long, thin scarfs, because they’re susceptible to burning up and have difficulty maintaining the proper temperature. A finished scarf end should measure about 11⁄2 times the thickness of the original stock material.


Try this practice scarfing exercise using the standard igloo-shaped forging fire described earlier. Use a 20-inch length of 3⁄8-inch-square stock, because round stock has a tendency to roll, making it more difficult for beginners. Start by heating the tip (half-inch or less) of one piece of stock to a bright-orange color. If the heat is longer than a half-inch, quickly pour a stream of water on the backside of the material to cool it off.
Place the heated tip over the far side of the anvil face and bring your hammer straight down on the tip of the stock. These are called “back-up blows.” Rotate the stock 180 degrees every few blows until you see the end compress and become larger than the stock size. Hold the stock

material nearly flat on the face of the anvil and use the hammer to move the bulge to one side of the tip.
Reheat about 11⁄2 inches of the end of one piece of stock to bright-orange. Place the heated end flat on the far side of the anvil face. Use back blows, positioning your hammer face so it makes contact at a 45-degree angle with the upset material. Position the scarf with the large bulge against the round edge of the anvil and forge its convex.
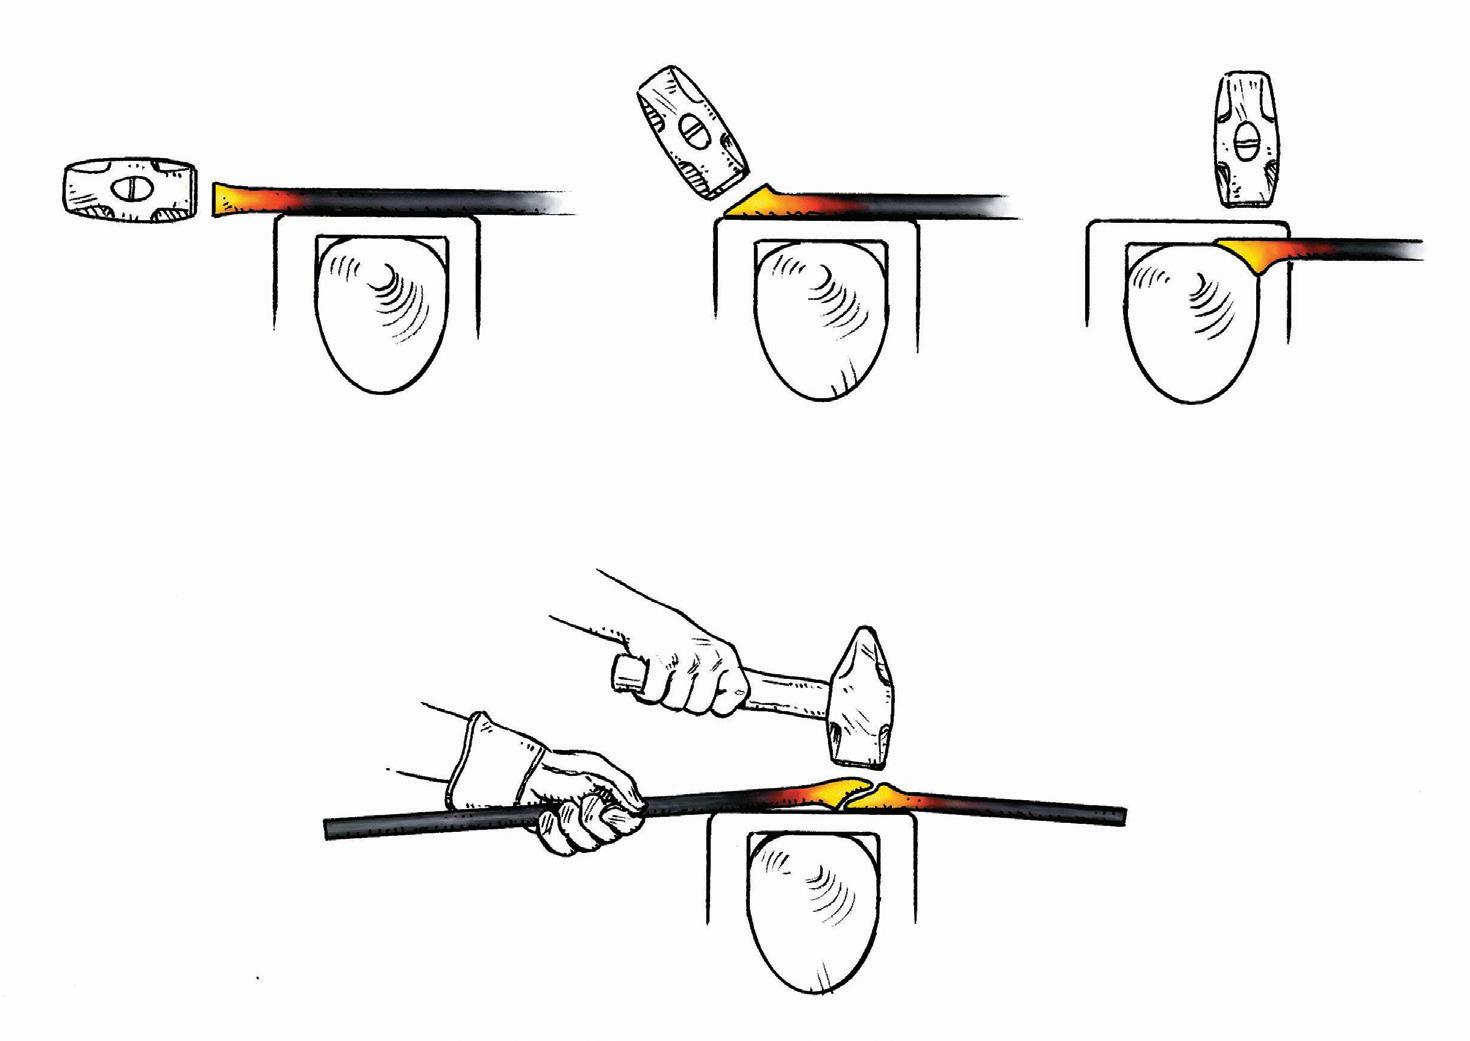
All shaped metal stocks can be scarfed, but only round-stock scarfs come to a point. Rectangular and square stock scarfs have a straight edge with a slight radius.


Place the scarfed surface you wish to weld into the forge fire. Position the stock horizontally, and carefully rotate it to ensure the heat is evenly applied. When the stock is bright-orange, carefully rotate it so the mating surfaces are facing upward. Sprinkle flux onto the scarfed surfaces.

Don’t increase the blower to accelerate the fire temperature, because more air will cause more oxidation. When a sparking yellow or white appearance has been achieved, quickly remove the metal from


the fire. Lift it vertically and out from the fire don’t drag it through the coals! Then, use a wire brush to remove any impurities on the contact surfaces and strike the stock on the anvil’s edge to pop off excess flux. Your stock is now ready to be forge-welded using one of the weld types described below.
Fagot welds are probably the easiest forge weld to perform, because neither upsetting nor scarfing is required. The word “fagot” dates to the 14th century and refers to the bundling of sticks. Fagot welds consist of either a bundle of iron stock or one piece of bar stock bent back on itself. This weld can be used to recycle scrap materials into a thicker piece of stock.
To practice forging a fagot weld, obtain a 20-inch length of 3⁄8-inch-square stock. Using a beehive fire, heat approximately 5 inches of the tip to bright-orange. Place 3 inches of this heated portion over a hot-cut hardy tool on your anvil, and hammer down until the stock is cut halfway through.
Position the stock with the cut mark facing upward on the far edge of the anvil face, and hammer the protruding portion downward. Bring the entire heated section of the stock to the anvil surface and continue hammering until the stock bends back upon itself and the two sides meet.
Return the stock to the fire and bring it to a yellow-orange color. Sprinkle some flux on both sides of the seam and return the stock to the fire. As it heats, make sure a wire brush and hammer are waiting on the anvil.
When sparks start to pop out of the fire and a yellow-white color has appeared, carefully and quickly remove the stock from the forge and use the wire brush to remove any scale and excess flux from the material. Return the stock to the anvil face. Make the first hammer blows on the top and bottom, leaving the seamed sides open to push out impurities. The first few hits should occur quickly, dead on, with medium to light blows that allow the moltening material to begin to stick. Heavy blows will blow the molten material out of the sides of the scarf, so they should occur only after the initial connection has been made.

Because fagot welds are easy to perform, they’re the perfect practice exercise when you’re learning to identify a proper welding temperature color.
Loop welds, also known as “eye welds,” require only one piece of stock and one scarfed end. They’re incorporated into numerous forging projects, such as fireplace tools, and they’re fairly simple to execute. They can be performed on all types of stock.
To make a practice loop weld, cut a 30-inch length of 3⁄8-inch-round stock. Heat about 1 inch of the end of the metal to a bright-orange forging temperature and taper it. Return the stock to the fire and heat about 10 inches of the tapered end to the forging color. Bend this portion over the anvil’s horn until the tapered tip meets the stock. Pinch the two pieces together but maintain a small space between them.
Return the stock to the fire again and heat the area between the bulge and the scarfed tip. Use the anvil horn to shape this section into a loop. Keep hammering until the tip meets the section of bulged stock.
Gently nudge the coals of your beehive fire with a rake and place the fluxed, looped end of stock into the coals, with the area to be welded in the center of the fire. Bring the stock color to a sparking yellow-white.
Remove the stock from the forge fire, use a wire brush to quickly remove any scale, and then bring the loop to the anvil face. Your first hammer blow should occur at the thickest area of the connection right at the heel of your taper. Using controlled strikes, hammer the sides of the weld by rotating the material.
After you’ve complete the forge weld, return the loop to the fire, reheat, and use the anvil horn to finish shaping the loop.
Lap welding is the process of joining two scarfed edges together. Both scarfs need to be forged to the same length and angled surface, or you won’t have a smooth transition between stock. Since two separate pieces are being joined, this type of weld requires a bit more choreography.
Use two pieces of 3⁄8-inch-square stock, with one cut 5 inches long and the other 20 inches. You can hold the longer piece of stock with your hand, but the shorter piece will require tongs.

Heat about 1 inch at the end of each piece to a bright-orange forging temperature, and upset. Reheat to forging color and scarf the upset end of each piece. Apply ux and return the pieces of stock to the re. Heat the metal to sparking yellow-white.
Hold the short piece secured in the tongs with your dominant hand, and grip the longer length of material in your passive hand. Remove both pieces from the re. Place the short piece on the face of the anvil, scarf side up. With the short piece in position, place the long piece, scarf side down, over the rst. The two scarfed surfaces will stick together when they make contact. When the tips are aligned with both mating surfaces touching, drop the tongs and pick up the hammer.
Strike the stock a few times, and then use rapid, heavy blows while rotating the stock. Continue until the two pieces appear to be connected throughout the length of the scarfs. Maintain a uniform thickness. Don’t hammer once the color has diminished, because you’ll no longer be welding the metal together.
You’ve just forge-welded two separate pieces of steel stock. To test the strength of your weld, place the materials in the grip of a vise just below the weld. Use your hammer and strike a couple of heavy blows. A strong weld will bend without breaking apart.
Lorelei Sims is an expert blacksmith, metal artist, and owner of Five Points Blacksmith Shop in Charleston, Illinois. View examples of her work at www.BlacksmithChic.com This story is excerpted from her book, The Beginner’s Guide to Blacksmithing, available at right.

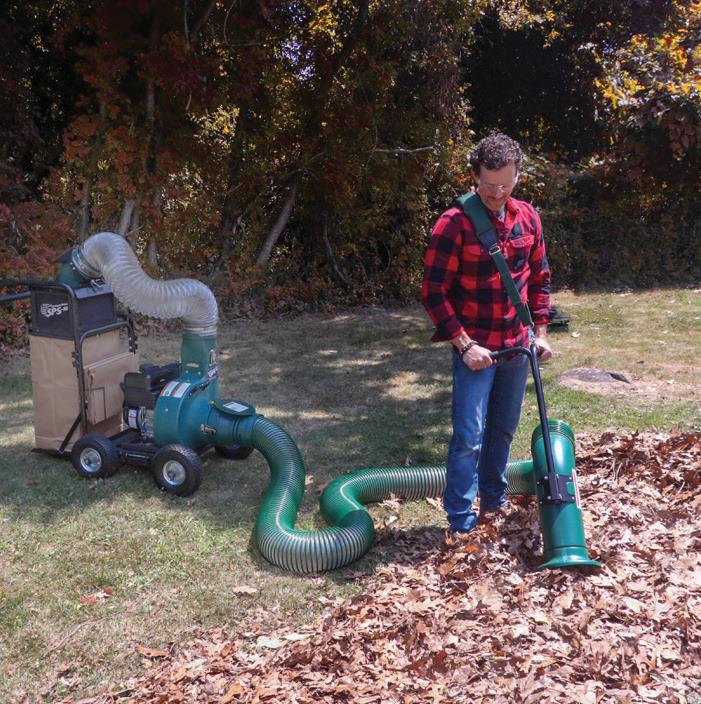
Set yourself up for blacksmithing success with Lorelei Sims’ indispensable guide. The Beginner’s Guide to Blacksmithing features clear instructions to make learning easy. Like having a master blacksmith at your side, the book offers detailed, step-by-step, full-color exercises teaching the universal skills and techniques used to forge iron.
Learn to find and salvage the right kinds of steel, set up your shop, collect essential tools, and work safely in your backyard or home workshop. This essential reference book includes beautiful and functional projects organized by difficulty level, allowing you to progress at your own pace and master the skills learned in earlier chapters.
This title is available at Store.Grit.com or by calling 866-803-7096. Mention promo code MGRPANZ5. Item #11796.


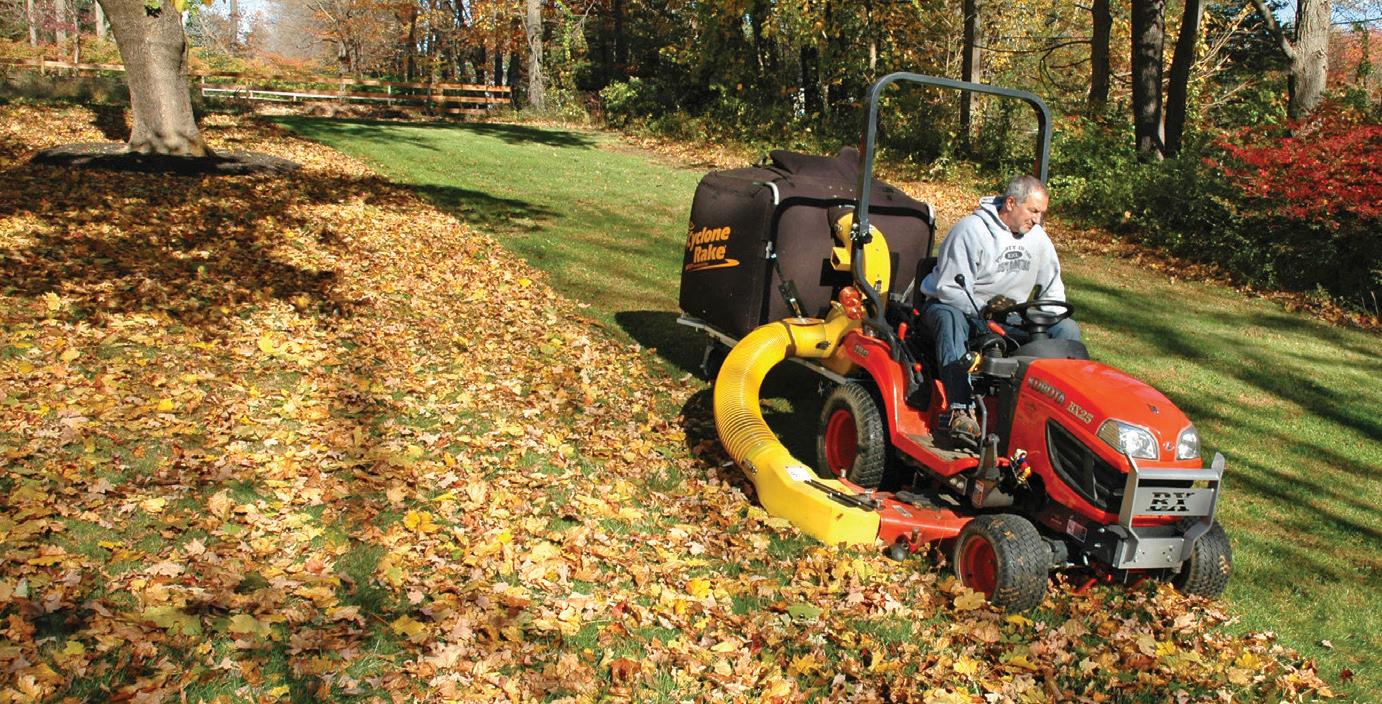
Follow a farmer through a year of tending to her herd.


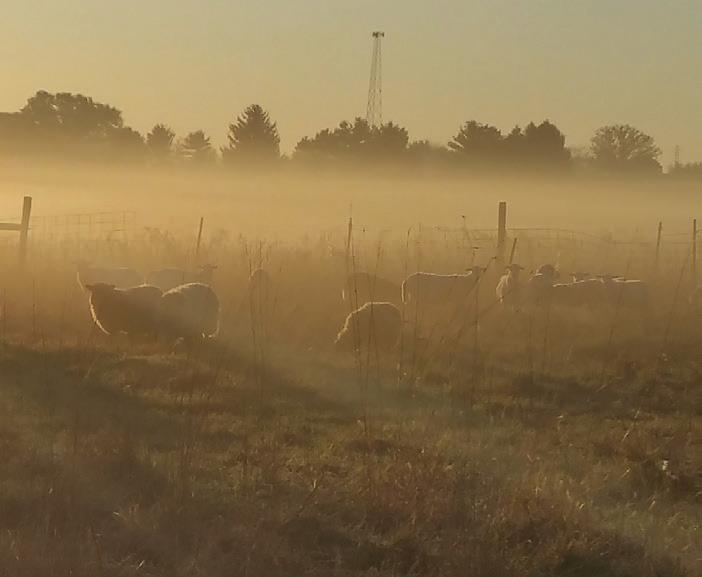


 Story and photos by Keba Hitzeman
shepherds how they manage their flock in each season, and you’ll probably get 10 different answers. Although the details will vary depending on the needs of each homestead, their responses will have some commonalities. Food, water, and shelter are three things every person raising sheep is concerned about, and to top it off, we’re all thinking at least one season ahead!
Don’t get me wrong, I make sure to enjoy the present, especially when the weather is warm and the lambs are bouncing around their mothers on fresh, green grass. But that won’t last, and I need to plan as best I can to keep my flock healthy and safe all year. What’s happening with the sheep each season, and what does planning a season ahead look like at Innisfree on the Stillwater?
I keep two separate flocks of Shetland sheep. The main flock consists of the ram and my fiber wethers. The second flock is the non-breeding and nursery flock, which comprises my retired ewes, mamas, new lambs, and lambs too young to be bred. The main flock uses the largest pastures, while the non-breeding flock rotates around the farm and grazes the yards, marginal areas, and smaller pastures by the barn.
My main jobs during summer are to keep the water troughs and mineral feeders filled, and to rotate the non-breeding flock to new grass. Since that flock sometimes
needs to be moved twice a week, this means regularly checking the permanent fences and moving the portable fencing panels. It can get hot here in southwest Ohio, so I’ll ensure there’s plenty of shade wherever I move the sheep. They’re fine if they can lie down in a shady spot during the day, either under trees and bushes or in a barn or other shelter.
While the sheep enjoy their pastures, I’m watching the grass and the weather it’ll soon be time to cut and bale hay. I have around two dozen sheep, so my hay requirements aren’t huge, but I like to overestimate how much my sheep will eat over winter. Better to have too much than to run out! When the grass is ready (between late June and August), we’ll cut, bale, and move the hay to the barn. It’s a good feeling to see the barn full and know there’s plenty of food for winter.
Summer is also the time to make decisions about my lambs. The ewe lambs are usually reserved before they’re born, and I tend to keep the boys as fiber producers. If it looks like I’ll have too many with the same color of wool, I’ll sell them or trade them for a boy with a color I don’t have. I’m still working on getting all 11 main colors.
Both flocks are still out on their separate pastures in July, and I use this time to do some sheep shuffling. I move the mama

Housing, Feeding, Shearing, Spinning, Dyeing, and More
In The Good Living Guide to Keeping Sheep and Other Fiber Animals, author Janet Garman shares her expertise, interviews, tips, and advice from fiber farmers and craftspeople across the country. Readers will learn the basics of properly raising sheep, goats, llamas, alpacas, and rabbits, with tips on selecting animals, feeding, housing, breeding, and health care. Garman provides instructions for shearing, sorting, skirting, washing, picking, carding, combing, and spinning the wool. Enthusiasts will also find recipes; instructions for natural, plant-based dyes; and advice for selling your finished yarn.
This title is available at Store.Grit.com or by calling 866-803-7096. Mention promo code MGRPANZ5. Item #9625.
ewes from the non-breeding flock to the main flock. I only have one ram and three or four ewes to breed each year, so I don’t keep the breeding ewes separate from the ram. Shetland breeding season is roughly from October to January, and they gestate for 147 to 152 days, but I’ve had ewes give birth from Feb. 18 through July 27. Their lambs will stay in the non-breeding flock until they’ve grown enough to hold their own with the “big girls.”
Our local county fairs are in midAugust, and that’s when I’ll begin to keep an even closer eye on how the grass is holding up. With our hot summer and early fall weather, the grass is losing nutritional value and not regrowing as quickly after being eaten. I’ll rotate the non-breeding flock more often and open our “bonus pasture” to the main flock. This pasture is a regenerative prairie habitat where the sheep from the main flock will graze after the milkweed, goldenrod, ironweed, and other pollinator-friendly plants have bloomed. This pasture will support the sheep until it’s time to bring them to the barn area for winter.
Any spring lambs I’ve sold will be heading to their new homes now. I’ll double-check the hay in the barn to confirm I have more than enough to feed the flock during winter. When we had cattle, there was one year we barely had enough hay to feed all the cows. That experience has made me double- and triple-check every year since, even though the sheep don’t eat nearly the volume of hay the cows did.
As we enter October, I’ll turn my attention to the winter barn area. Are the fences around the barn pastures secure? Do I have functional heaters for each water tank? Do I need to clean out any spots before I bring in the sheep?

The timing for taking the sheep off the pasture is always dependent on our weather. Last year, I brought both flocks to the main barn and started feeding them hay at the end of November. The Shetlands can dig through a small amount of snow to get to the grass, but I like to give the grass plenty of time to rest before the next spring comes, and based on how well the pasture looked this past spring, that was the right answer.

My barn is an old bank barn with two levels. The upper level is for hay storage, while the lower level has two separate loafing areas. This is perfect for my two flocks, which each has its own hay feeders and outdoor access. I’ve had to make some changes to secure these areas for sheep, but I can feed them from inside the barn, making a cold winter job more tolerable. I have electrically heated water hoses I run to the two water tanks, then to our spigot near the house. It’s a process to drag the hose across the driveway, to plug it in, to wait for it to warm up, to fill the water troughs, and then to pull the hose back so no one runs over it, but it sure beats carrying all those 5-gallon buckets of water several hundred feet in winter weather!
The breeding ewes will have been in the main flock with the ram since early fall, and in early February, I’ll move the pregnant ewes back to the non-breeding flock, which stays in the area of the barn closest to where the lambing pens will be. I’ll set up the lambing pens, check the heat lamps, and wait. I like having lambs earlier in spring, because it’ll still be cool when I’ll need to castrate the male lambs, and that way, I won’t need to worry as much about flies or infections. But I’m prepared with heat lamps if the lambs arrive in extreme cold.
Even with the daily work of getting food and water to the sheep, winter is a slower season. I’ll reflect on the past year, what went well, and what I want to change. Much of my musing occurs at my spinning wheel: Winter is my time to focus on working with all that lovely wool! The relaxed pace of spinning, knitting, and weaving allows me to brainstorm for the upcoming year. Are there any purchases or repairs that need to be budgeted or made? Can I improve my pasture rotation system? Did I learn something from an outside source I’d like to try? There’s always something new to experiment with; it may or may not work for my flock, but I won’t know until I try.
Spring shearing is also on my mind during winter. I double-check that my shearing stand and hand shears are in good condition, since I don’t use electric shears;
I consider which fleeces I’ll be keeping for my own use and which I’ll be selling; and I think about how much fleece I’ll have the fiber mill make into roving.

I breathe a sigh of relief when signs of spring appear we’ve made it through another winter! It’s most likely rainy and muddy, but the temperatures are rising, and the grass is slowly starting to grow again. The lambs usually arrive between February and April. After a week or so of being penned inside for monitoring, mamas and babies rejoin the flock outside. The lambs love exploring their new environment, which frustrates the ewes, who can’t keep track of where they’ll run off to next. The elderly ewes inspect the new arrivals, and then wander off to see if they missed a blade or two of new grass.
To everyone’s great joy, pasture rotation starts around the middle of April we’re all tired of hay by this point! I walk the fence lines looking for spots that need repairs, run hoses to the water tanks, check the shelters, and fill the mineral feeders. Moving the flocks is simple enough: I just fill a bucket with sweet feed. My sheep know that buckets contain treats, and they’ll follow that sound. It’s a noisy endeavor, and some of them get over-excited and run in the wrong direction, but we’ll all get to the correct pasture in the end.
Shearing begins when the nighttime temperatures are consistently above 40 degrees Fahrenheit, usually in early May. I’ll only shear two or three sheep a day, so shearing is time- and labor-intensive with the couple dozen sheep I have. A few years ago, a damp April forced me to move the flocks from the winter area to their spring pastures without shearing them first. Although this shouldn’t have surprised me, I discovered the fleeces were cleaner after the sheep were on pasture, compared with when they were eating and sleeping on hay in the barn.
Every year since then, I’ve moved them onto grass before shearing, and I’m pleased with the results. The fleece will still contain vegetable matter, but the sheep
don’t look like walking hay bales when I get them on the shearing stand.
The sheep are shorn, the fleeces are ready for processing or selling, the lambs are growing, everyone is enjoying the green grass, and we’ve come full circle to summer. Time to think about how much hay I’ll need for the coming winter!
Keba Hitzeman grew up as a free-range child on the farm she now owns with her husband, where they raise grass-fed and grass-finished sheep and goats. You can find her online at Studio at Innisfree (www.StudioAtInnisfree.com).


 By Melissa Leapman


These“Chip Off the Ol’ Color Block” mittens were made with Manos del Uruguay


Maxima yarn, a hand-spun and hand-dyed merino wool whose purchase supports rural Uruguayan women. You can substitute any 100% extra- ne yarn in a medium worsted weight, but be sure to check the gauge rst. The gauge of the pictured wool is 4.5 to 5 stitches per 1 inch on US 6 and 8 (4 and 5 mm) size needles.
The pair of mittens will take 41⁄2 to 5 hours to knit. These instructions will produce small or medium-sized mittens. Changes for large and extra-large sizes are noted in parentheses as necessary.
Hanks of #4 medium-weight 100% merino wool yarn in the following colors, each about 31⁄2 ounces and 219 yards:


Medium blue (A)


Hot pink (B)


Neon yellow (C)
Light blue (D)


Set of US 6 (4 mm) double-pointed needles
Set of US 8 (5 mm) double-pointed needles
Blunt-end yarn needle
3 stitch markers, one in a contrasting color for the beginning of the round Stitch holder

In stockinette stitch (aka “stocking stitch”), worked in the round with the larger needles, 18 stitches and 26 rounds = 4 inches, blocked
K2P2 ribbing (multiple of 4 stitches)
Pattern round (RS): *K2, P2; repeat from the * around
Stockinette stitch worked in the round (any number of stitches)
All rounds: Knit around
Cuff. With smaller double-pointed needles and A yarn (medium blue), cast on 32 (40) stitches. Place a marker for the beginning of the round. Join, being careful not to twist the stitches.
Begin the K2P2 ribbing, and work even until the piece measures approximately 31⁄2 (4) inches from the beginning.
Change to B yarn (hot pink) and the larger needles. Begin stockinette stitch worked in the round, and use the M1, or “Make 1,” technique to increase 2 (0) stitches evenly spaced on the first round 34 (40) stitches.
Continue even in stockinette stitch worked in the round until the piece measures approximately 41⁄2 (51⁄2) inches from the beginning.
Place additional markers after the first stitch and before the last stitch of the round.
Begin thumb gore. Next round (increase round): Knit to first marker, M1 knitwise, slip the marker, work to next marker, slip the marker, M1 knitwise, knit to end of the round 36 (42) stitches.
Repeat the increase round every other round 3 (5) more times, then every 4 rounds once 44 (54) stitches including 12 (16) thumb stitches between the markers.
Knit one more round, ending when you reach the second marker.
Separate thumb from hand. Remove the marker and slip 12 (16) stitches onto a holder or
piece of scrap yarn, and using C yarn (neon yellow), use the e-wrap cast-on technique (pictured at right) to cast on 2 stitches; place a marker for the new beginning of the round. Then, use the e-wrap cast-on technique to cast on 2 more stitches and complete the round 36 (42) stitches.
Continue even until the piece measures approximately 10 (111⁄2) inches from the beginning, and use the K2tog method to decrease 4 (2) stitches evenly spaced along the last round 32 (40) stitches remain.
Decrease for tip. Next round: *K2, K2tog; repeat from the * around 24 (30) stitches remain.
Work even for 1 (2) rounds.
Next round: *K1, K2tog; repeat from the * around 16 (20) stitches remain.
Work even for 1 (2) rounds.
Next round: *K2tog; repeat from the * around 8 (10) stitches remain.
Break the yarn, leaving a 6-inch tail. Thread tail through the remaining stitches and pull it tight to secure. Fasten off.
Thumb. Slip the 12 (16) stitches from the holder onto 2 double-pointed needles. Use a third double-pointed needle and D yarn (light blue), and pick up and knit 4 stitches along the cast-on at thumb 16 (20) stitches.
Knit across the first 6 (8) stitches of thumb. This is now the beginning of the round. Place a marker.
Continue even for 13⁄4 (21⁄4) inches above the thumb cast-on stitches, and use the K2tog technique to decrease 1 (2) stitch(es) evenly spaced along the last round 15 (18) stitches remain.
Next round: *K1, K2tog; repeat from the * around 10 (12) stitches remain.
Next round: *K2tog; repeat from the * around 5 (6) stitches remain.
Begin with a slip knot, then use your thumb to twist the yarn to create a loop on the knitting needle. Continue until required stitches have been cast on.

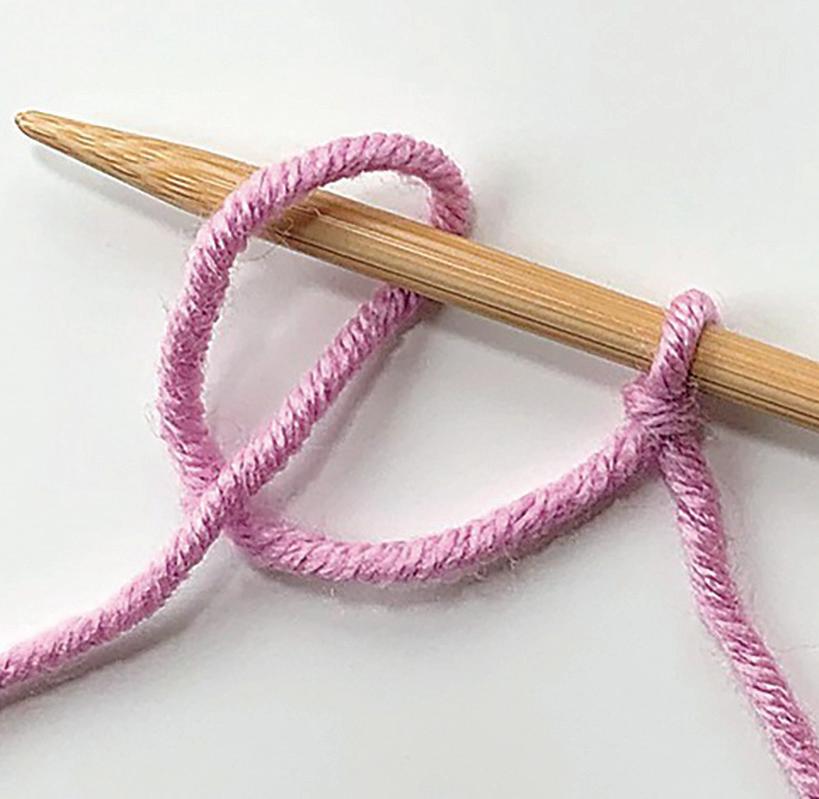
Break yarn, leaving a 6-inch tail. Thread tail through the remaining stitches and pull it tight to secure. Fasten off.
Follow the same instructions as with the left mitten, but substitute yarn color D for A, C for B, A for C, and B for D. (Refer to right mitten pictured on opposite page.)
Hide all remaining yarn tails. Block to 8 (91⁄2) inches palm circumference and 11 (121⁄2) inches in length.
Melissa Leapman is an American crochet and knit designer who creates designs for major yarn companies. She’s the author of several bestselling knit and crochet books. This project is excerpted from her latest book, InstaKnits.
*If you have recently requested information using our reader service reply card and have not received a response, please reach out to the advertiser directly at the above link.




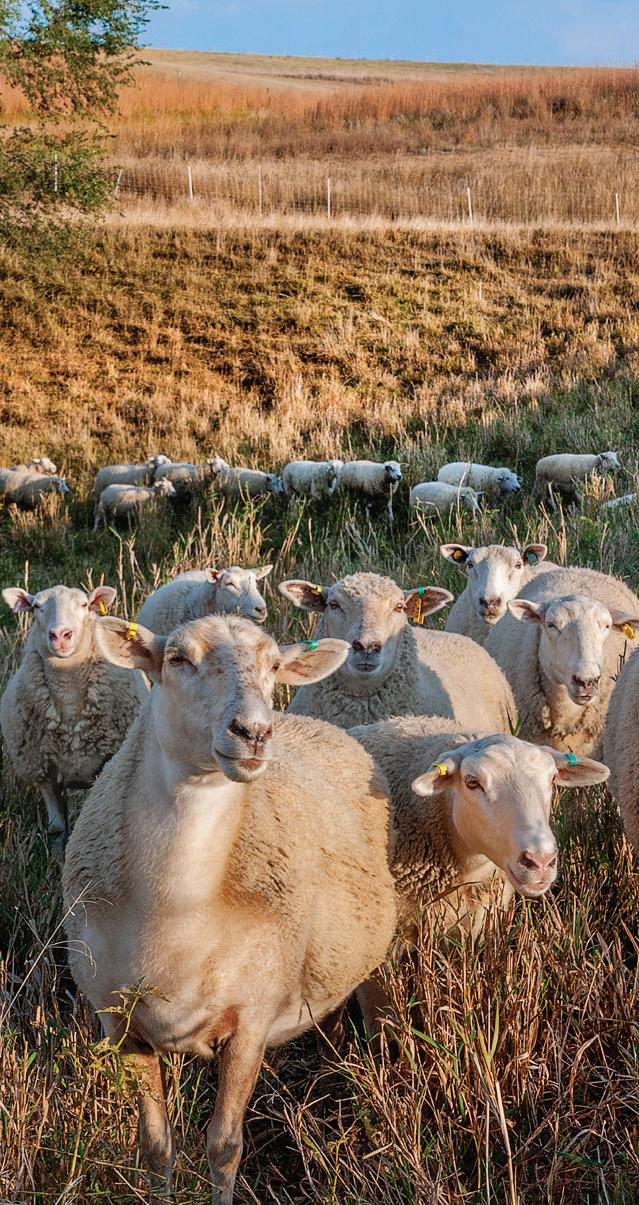
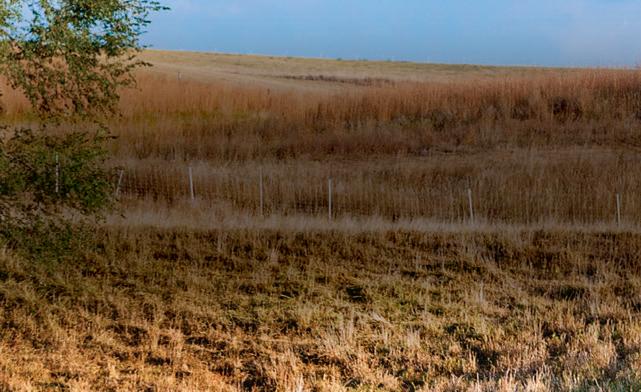



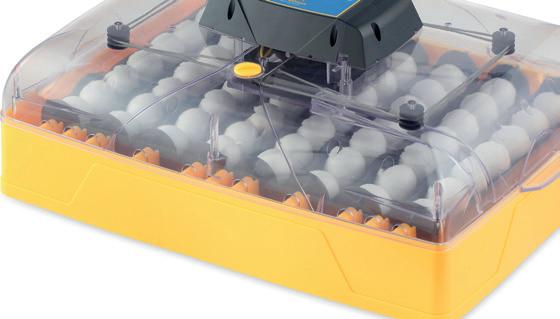
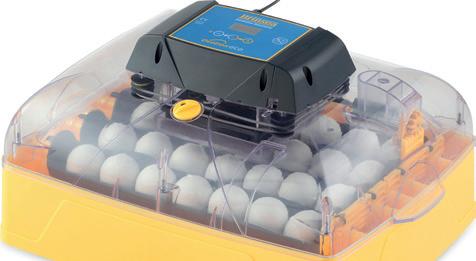











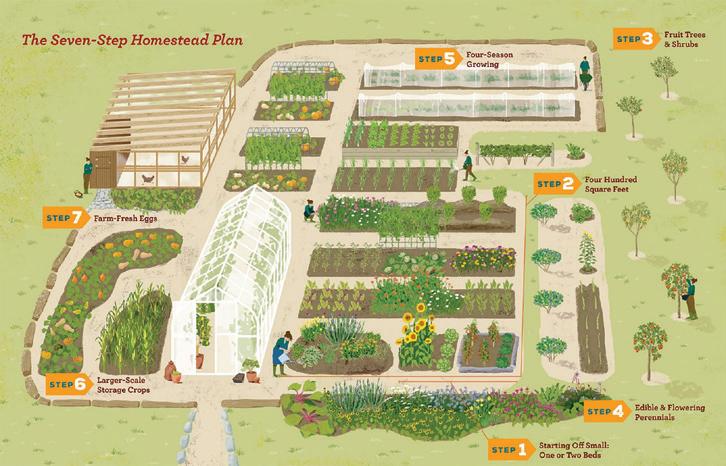


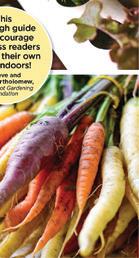


A complete handbook filled with a host of valuable information and DIY projects. From growing vegetables, microgreens, and herbs to hydroponic gardening, troubleshooting, and more, you’ll learn how to grow fresh produce all year round, no matter where you live! Also included is a stunning gallery of real indoor gardens from around the world to inspire your planting.
#11879 $24.99 Member: $21.99
NEW ITEMS!
BLUE OYSTER, KING OYSTER, PINK OYSTER MUSHROOM GROWING KIT
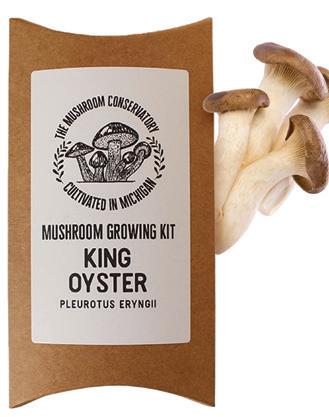

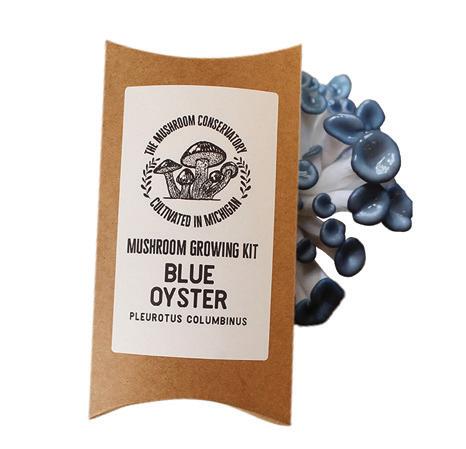
Learn to grow your own mushrooms at home without any specialized equipment. Each kit includes detailed instructions, your mushroom culture, and a fungi word search. It’s a great project for anyone with a love of plants, to do as part of a nature study, or simply because they are beautiful and fascinating. Plus, they are great for cooking with/eating or just looking at if you’re the non-mushroom-eating type. #12060, Blue Oyster; #12061, King Oyster; #12062, Pink Oyster $20.00
DIY

DIY Mushroom Cultivation is the ideal guide for getting started in the fascinating and delicious world of fungiculture. With full-color photos and step-by-step instructions, this book will prove an invaluable resource for everything from setting up a home growing space to harvesting, processing, and using mushrooms in cooking. Also available as an e-book. #9850 $29.99 Member: $25.99


Sam Thayer’s Field Guide to Edible Wild Plants pioneers a novel identification system using everyday language accessible to beginning and advanced foragers alike, designed to stand alone or work with phone-based identification apps to confirm positive ID before a plant is eaten. Readers will also learn about the plant’s habitat, conservation, edible parts, harvest seasons, and preparation methods. Destined to become the new standard in foraging field guides.
#12073 $32.95 Member: $29.95


With breathtaking clarity, Compost Science for Gardeners demystifies composting practices and helps readers determine the best technique for their unique situation. This comprehensive sciencebased book is your key to building healthier soil and growing better plants. Using plain language and easy-to-follow instructions, this essential resource distills and blends the latest scientific research with the author’s many decades of knowledge and experience into manageable form, debunking a host of common gardening myths along the way. Also available as an e-book.

#11907 $22.99 Member: $19.99

Dig into the world of herbal medicine with this complete guide to cultivating and harvesting plants with healing properties. In these pages, you’ll learn the basics of gardening in your backyard — or on your windowsill or porch — including instructions for preparing soil, composting, and weeding. You’ll then find detailed descriptions of the twelve most common, easy-to-grow, most useful healing herbs, with instructions for growing, harvesting, and utilizing them.
#11929 $16.99 Member: $14.99

These stainless steel, needle nose long tipped straight blades are the perfect tool for harvesting your vegetables and cutting flowers. At 7.5 inches long, and featuring a black band to secure shears in a closed position when not in use, this is a tool no home gardener should be without.
#12017 $16.95 Member: $14.95
RAFFIA SUN HAT




This women’s raffia sun hat is light on your head even on a hot day in the direct sun. This sun hat has a tightly woven yet flexible brim and a “crushable” loosely woven crown. The raffia weave is breathable even while it is blocking more than 95% of UVA and UVB rays. The outside of the crown is encircled with a natural raffia tie and bow. Inside the crown is a tie for adjusting the fit of your hat. 4-inch brim. One size fits most.
#12065 $49.00 Member: $44.99
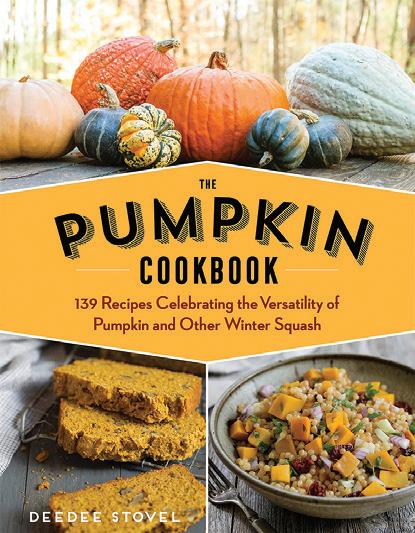
The 139 recipes found in The Pumpkin Cookbook offers diverse and delicious options for enjoying pumpkin and other winter squash (such as butternut, acorn, and kabocha) year-round. With recipes for many forms of pumpkin, including both fresh and canned pumpkin puree, and inspired by world cuisines, this cookbook lets the versatility of this superfood shine through in snacks, drinks, salads, soups, and more.
#8391 $16.95 Member: $14.95

From sweet to savory and from breakfast to bedtime, apples take center stage in this fun volume. With recipes ranging from traditional apple pies and crisps to unexpected surprises like Ground Lamb Kebabs with Apple Mint Raita, The Apple Cookbook includes 125 recipes for dishes that you can enjoy with all of your friends.

#8987 $16.99 Member: $12.95
Mixes in a Jar is a culmination of author Renee Pottle’s years-long search for the perfect convenience food. In Renee’s collection of 106 mix recipes, you’ll find the perfect spice blend for a pot of award-winning chili or a delicious minestrone; recipes for meals as diverse as Mulligatawny Soup and Creamy Ravioletti Salad; breakfast favorites such as Buckwheat Pancakes; breads for every meal, including Mulled Wine Muffins; and desserts for every sweet tooth. Also available as an e-book.

#11145 $24.95 Member: $21.95

Roll up your sleeves, warm up your oven, and find a new favorite bread with help from the recipes found in the updated cookbook Mother Earth News Bread! From intense, chewy sourdough to light, airy focaccia, many of today’s most popular breads are best when they’re fresh from the oven.


#9094 $24.99 Member: $21.99

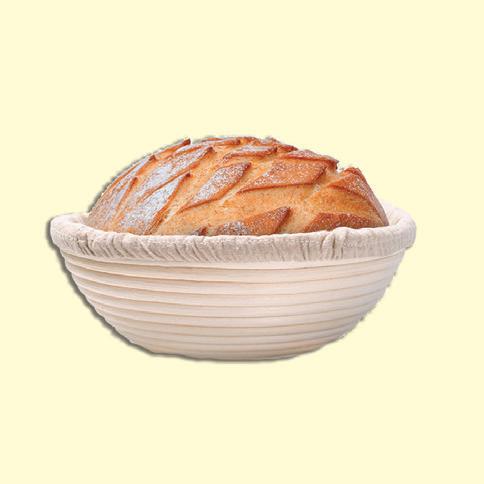
These oval and round bread-proofing baskets are perfect for proofing softer bread dough that requires added support, and provides structure and shape while the dough is in the proofing (rising) process. Its coiled texture helps add an artisan beauty and professional finish to homemade loaves of bread, and the removable cotton-linen blend liner (plus a dusting of flour) prevents dough from sticking and adds an even deeper decorative appeal.

#10464, Oval; #10463, Round $21.99 Member: $18.99


Intended for new and experienced home canners, this book covers food preservation methods, safety information, and teaches the “mix and match” approach that demonstrates the easy way to swap out seasonings and spices, vinegars and brines, and fruits and vegetables. With tips and recipes that encourage experimentation with different flavors and combinations to find the perfect pickled fruit and vegetable, you’ll have an exciting dish at every meal!
#9505 $24.95 Member: $21.95

Open up the Comfort Food Cookbook and discover how easy it is to make delicious comfort food with a few wholesome ingredients that will bring the whole family together. With 230 recipes from the archives of long-running country lifestyle magazine Grit, you’re sure to find your next favorite meal!
#9093 $24.99 Member: $21.99
The Kilner butter churner offers the easy way to make homemade butter! Simply place heavy whipping cream into the butter churner, turn the handle, and in no time you can enjoy fresh and delicious butter. The churner can hold up to 34 fluid ounces and comes with recipes! It measures 4.3 inches wide by 10.6 inches high by 6.5 inches long, and is hand wash only.
#8994 $59.95 Member: $56.95


Lucy Vaserfirer’s Flavored Butters provides the recipes and techniques for homemade flavored butters. In 50 recipes, she offers up ideas that are amazingly quick to execute in the kitchen and transformative in the flavor they impart. The recipes cover both sweet and savory applications, and each includes advice about what the butter is best used on. Plenty of photographs illustrate the recipes, and you’ll also find ample tips and tricks.

#10682 $14.99 Member: $12.99
Become an expert at making a variety of homemade butters with our special Butter Churn Kit! Included is a one-ofa-kind guidebook, Flavored Butters, and the only piece of equipment you will need to begin setting your table with delicious, homemade butter: the Kilner Butter Churner.

#11138 $74.95 Member: $64.99
Raise Backyard Chickens helps get you started with everything from incubating fertile eggs to receiving and raising dayold chicks to building a chicken coop to keeping your birds safe and healthy. You’ll find top-notch advice on how to protect your flock from predators, produce the healthiest eggs, and so much more.
#8871 $24.95 Member: $21.95
THE COMPLETE GUIDE TO DIY GREENHOUSES, 3RD EDITION

Design, build, and equip your very own greenhouse with the building plans and photo-illustrated step-by-step instructions in BLACK+DECKER The Complete Guide to DIY Greenhouses, 3rd Edition. From ornate, Victorianstyle greenhouses to basic cold frames and simpler kits, you’re sure to find a project that meets your needs and fits your space, so you too can extend your gardening season in style.
#12036 $34.99 Member: $29.99
HOMESTEAD SURVIVAL
Veteran homesteader and star of Discovery’s Homestead Rescue Marty Raney shares a big-picture vision of how ordinary families can become radically resilient homesteaders: powering, feeding, and caring for themselves through their own efforts and on their own land. This guide will show you how to buy land with the natural resources you need to build and feed a homestead. It will teach you how to go off-grid with your own power and water systems. Raney also shares how to build a greenhouse that will keep growing year-round, and more.
#12037 $20.00 Member: $17.00


RAISING RESILIENT BEES

With over 100 color photographs and illustrations, Raising Resilient Bees is the comprehensive source for new and experienced beekeepers, offering a sustainable, natural, and repeatable model of care for hive health and production. Authors Eric and Joy McEwen take two decades’ worth of beekeeping experience, experiments, and professional production to deliver groundbreaking methods in queen-rearing, varroa mite management, Natural Nest hive design, and more.
#12074 $34.95 Member: $29.95

Anyone, at any age, can enjoy the benefits of keeping a backyard chicken flock. Whether you have yet to take the plunge and buy your very first chickens or are a seasoned owner, the newest Guide to Backyard Chickens is an enjoyable read for everyone! This guide is 100 pages of articles written by chicken experts. It provides tips for keeping a healthy and productive flock, building and renovating chicken coops, even information on owning ostriches and geese.

#11923 $6.99 Member: $5.99
Community preparedness is at the core of author Kyle Ferlemann’s summary of a myriad of lessons learned over decades of studying, interviewing, and living through any number of natural disasters and geopolitical conflicts. Practical Preparedness focuses on what we can do before disaster strikes, listing the steps to take so you and your family will have the best chance of surviving any type of event during any season of the year.

#10307 $17.99 Member: $15.99
Get the entire collection of America’s Rural Yesterday Volume 1, 2, 3, and the newly published volume 4. These books feature beautiful photographs by famed photographer J.C. Allen & Sons, Inc., so you get an unprecedented view into the lives of rural farmers from past generations.
#11938 $99.80 Member: $79.99
TO ORDER, CALL TOLL-FREE: 866-803-7096 (OUTSIDE U.S. AND FOR CUSTOMER SERVICE: CALL 785-274-4365)

ITEM!
In Natural Goat Care, consultant and author Pat Coleby shows how to solve your herd’s health problems both with natural herbs and medicines and the ultimate cure, bringing the soil into a healthy balance. Topics covered include correct housing and farming methods, psychological needs of goats, breeding techniques, nutritional requirements, and diagnosing health problems.

#11973 $28.00 Member: $23.99
NEW ITEM!
The Ecological Farm is the go-to guide for ecological growing, with a unique focus on reduced tillage, minimizing farm and garden inputs, and pest control. Featuring color photographs, charts, and graphs throughout, the book emphasizes the importance of managing the details of an entire growing system. Included is a crop-by-crop guide to growing more than 25 of the most popular and profitable vegetables and fruits.
#12072 $44.95 Member: $38.95
It’s time to take the hassle out of defeathering! This chicken plucker will help you quickly defeather your poultry and fowl. The large tub with 92 rubber fingers quickly and efficiently processes two to four birds at a time. Please allow two weeks for delivery. Available for shipment to continental U.S. addresses only.

#9926 $499.99 Member: $489.99

Save money on the cost of feed and make feed that your animals like by making it at home with this Bravo Feed Grinder. The 110-volt hammer mill is an easyto-use grinder that allows for at-home production of livestock feed and can plug into any normal house outlet. This grinder includes the grinder, bucket, and three sieves (measuring 4, 6, and 8 millimeters). Please allow two weeks for delivery. Available for shipment to continental U.S. addresses only.
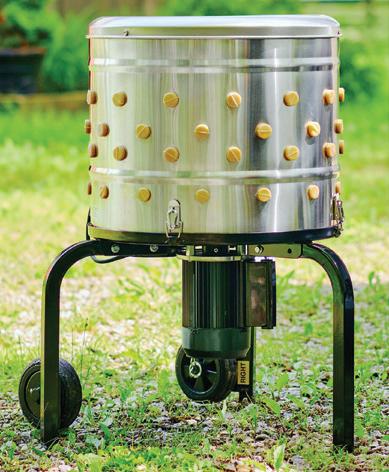

#9335 $602.00 Member: $585.00


Contain and protect your chickens in the backyard or on the pasture with this complete fence system. Choose this kit if you plan to move the fence one per season (or less often.) Effective for all types of poultry. 48” tall. 100’ long. Please allow two weeks for delivery. Available for shipment to continental U.S. addresses only.


With its beautiful ceramic white and blue floral design and sturdy stainless steel handle, you won’t mind leaving this compost crock on your kitchen counters. Collect up to three quarts of your peelings, egg shells, coffee grounds, and vegetable scraps for your garden compost. Easy to clean and odorless, thanks to a replaceable filter in the lid, it allows you to be environmentally friendly without effort!
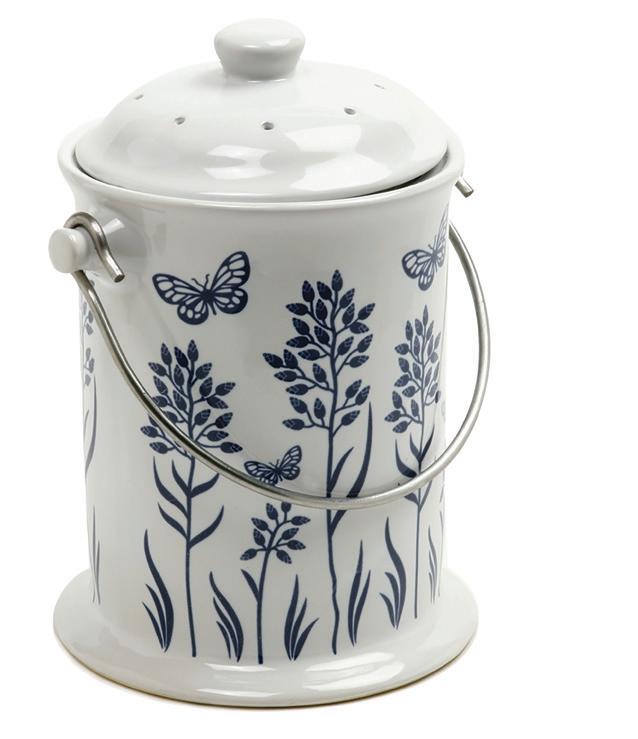
#12043 $46.95 Member: $42.95
SET OF 2
Charcoal filters help absorb odors that the ceramic compost keepers produce. Each filter is 5.5 inches in diameter, round. Filters should be changed approximately every 6 months, depending on use, heat and humidity.
#10299 $5.99 NEW ITEM!

Blogger and homesteader Melissa K. Norris inspires with practical and easy methods to help you cook from scratch, garden, preserve your own food, and see God’s fingerprints in your everyday busy life. You’ll learn how to plan, plant and harvest for eating and preserving, implement natural solutions for common gardening problems, and ways to improve your family’s health with natural cooking and cleaning methods.
#12025 $14.99 Member: $12.99

Country Wisdom & Know-How is an unprecedented collection of information on nearly 200 individual topics of country and self-sustainable living. Compiled from the information in Storey Publishing’s landmark series of “Country Wisdom Bulletins,” this book is the most thorough and reliable volume of its kind. Nearly 1,000 black-and-white illustrations and photographs run throughout, and fascinating projects and trusted advice crowd every page.
#8219 $25.99 Member: $21.99
PALM BEACH, FLORIDA — Millions of Americans take the supplement known as CoQ10. It’s the coenzyme that supercharges the “energy factories” in your cells known as mitochondria. But there’s a serious flaw that’s leaving millions unsatisfied.
As you age, your mitochondria break down and fail to produce energy. In a revealing study, a team of researchers showed that 95 percent of the mitochondria in a 90-year-old man were damaged, compared to almost no damage in the mitochondria of a 5-year-old.
Taking CoQ10 alone is not enough to solve this problem. Because as powerful as CoQ10 is, there’s one critical thing it fails to do: it can’t create new mitochondria to replace the ones you lost.
And that’s bad news for Americans all over the country. The loss of cellular energy is a problem for the memory concerns people face as they get older.
“We had no way of replacing lost mitochondria until a recent discovery changed everything,” says Dr. Al Sears, founder and medical director of the Sears Institute for Anti-Aging Medicine in Palm Beach, Florida. “Researchers discovered the only nutrient known to modern science that has the power to trigger the growth of new mitochondria.”
Dr. Sears explains, “This new discovery is so powerful, it can multiply your mitochondria by 55 percent in just a few weeks. That’s the equivalent of restoring decades of lost brain power.”
This exciting nutrient — called PQQ (pyrroloquinoline quinone) — is the driving force behind a revolution in aging. When paired with CoQ10, this dynamic duo has the power to reverse the age-related memory losses you may have thought were beyond your control.
Dr. Sears pioneered a new formula — called Ultra Accel II — that combines both CoQ10 and PQQ to support maximum cellular energy and the normal growth of new mitochondria. Ultra Accel II is the first of its kind to address both problems and is already creating huge demand.
Over 47 million doses have been shipped to men and women across the country and sales continue to climb for this much soughtafter brain fuel. In fact, demand has been so overwhelming that inventories repeatedly sell out. But a closer look at Ultra Accel II reveals there are good reasons why sales are booming.
The medical journal Biochemical Pharmacology reports that PQQ is up to 5,000 times more efficient in sustaining energy production than common antioxidants. With the ability to keep every cell in your body operating at full strength, Ultra Accel II delivers more than just added brain power and a faster memory.
People feel more energetic, more alert, and don’t need naps in the afternoon. The boost in cellular energy generates more power to your heart, lungs, muscles, and more.
“With the PQQ in Ultra Accel, I have energy I never thought possible at my age,” says Colleen R., one of Dr. Sears’s patients. “I’m in my 70s but feel 40 again. I think clearly, move with real energy and sleep like a baby.”
The response has been overwhelmingly positive, and Dr. Sears receives countless emails from his patients and readers. “My patients tell me they feel better than they have in years. This is ideal for people who are feeling old and run down, or for those who feel more forgetful. It surprises many that you can add healthy and productive years to your life simply by taking Ultra Accel II every day.”
You may have seen Dr. Sears on television or read one of his 12 best-selling books. Or you may have seen him speak at the 2016 WPBF 25 Health and Wellness Festival in South Florida, featuring Dr. Oz and special guest Suzanne Somers. Thousands of people attended Dr. Sears’s lecture on anti-aging breakthroughs and waited in line for hours during his book signing at the event.
Ultra Accel II is turning everything we thought we knew about youthful energy on its head. Especially for people over age 50. In less than 30 seconds every morning, you can harness the power of this breakthrough discovery to restore peak energy and your “spark for life.”
So, if you’ve noticed less energy as you’ve gotten older, and you want an easy way to reclaim your youthful edge, this new opportunity will feel like blessed relief.
The secret is the “energy multiplying” molecule that activates a dormant gene in your body that declines with age, which then instructs your cells to pump out fresh energy from the inside-out. This growth of new “energy
factories” in your cells is called mitochondrial biogenesis.

Instead of falling victim to that afternoon slump, you enjoy sharp-as-a-tack focus, memory, and concentration from sunup to sundown. And you get more done in a day than most do in a week. Regardless of how exhausting the world is now.
Dr. Sears reports, “The most rewarding aspect of practicing medicine is watching my patients get the joy back in their lives. Ultra Accel II sends a wake-up call to every cell in their bodies… And they actually feel young again.”
And his patients agree. “I noticed a difference within a few days,” says Jerry from Ft. Pierce, Florida. “My endurance has almost doubled, and I feel it mentally, too. There’s a clarity and sense of well-being in my life that I’ve never experienced before.”
This is the official nationwide release of Ultra Accel II in the United States. And so, the company is offering a special discount supply to anyone who calls during the official launch.
An Order Hotline has been set up for local readers to call. This gives everyone an equal chance to try Ultra Accel II. And your order is backed up by a no-hassle, 90-day money back guarantee. No questions asked.
Starting at 7:00 AM today, the discount offer will be available for a limited time only. All you have to do is call TOLL FREE 1-800-434-3690 right now and use promo code UAGRIT823 to secure your own supply.
Important: Due to Ultra Accel II recent media exposure, phone lines are often busy. If you call and do not immediately get through, please be patient and call back.
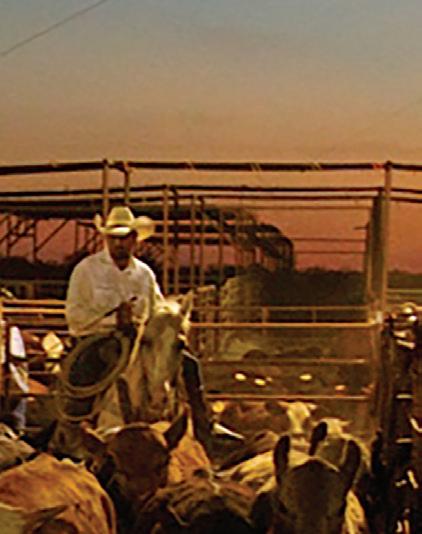
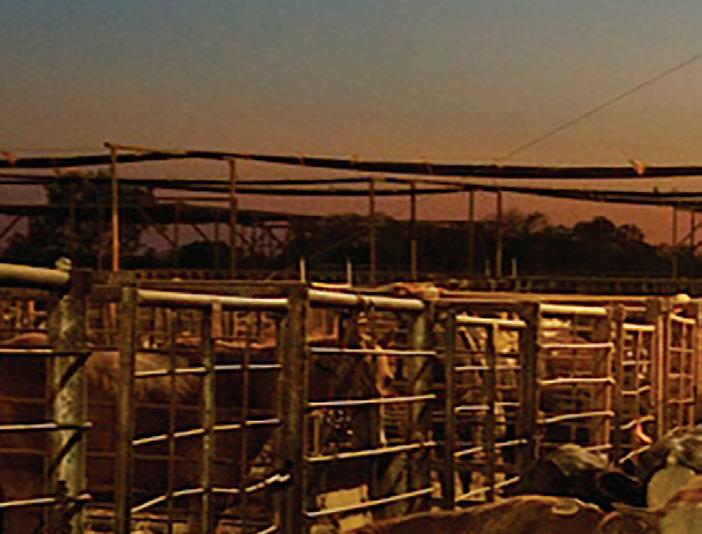




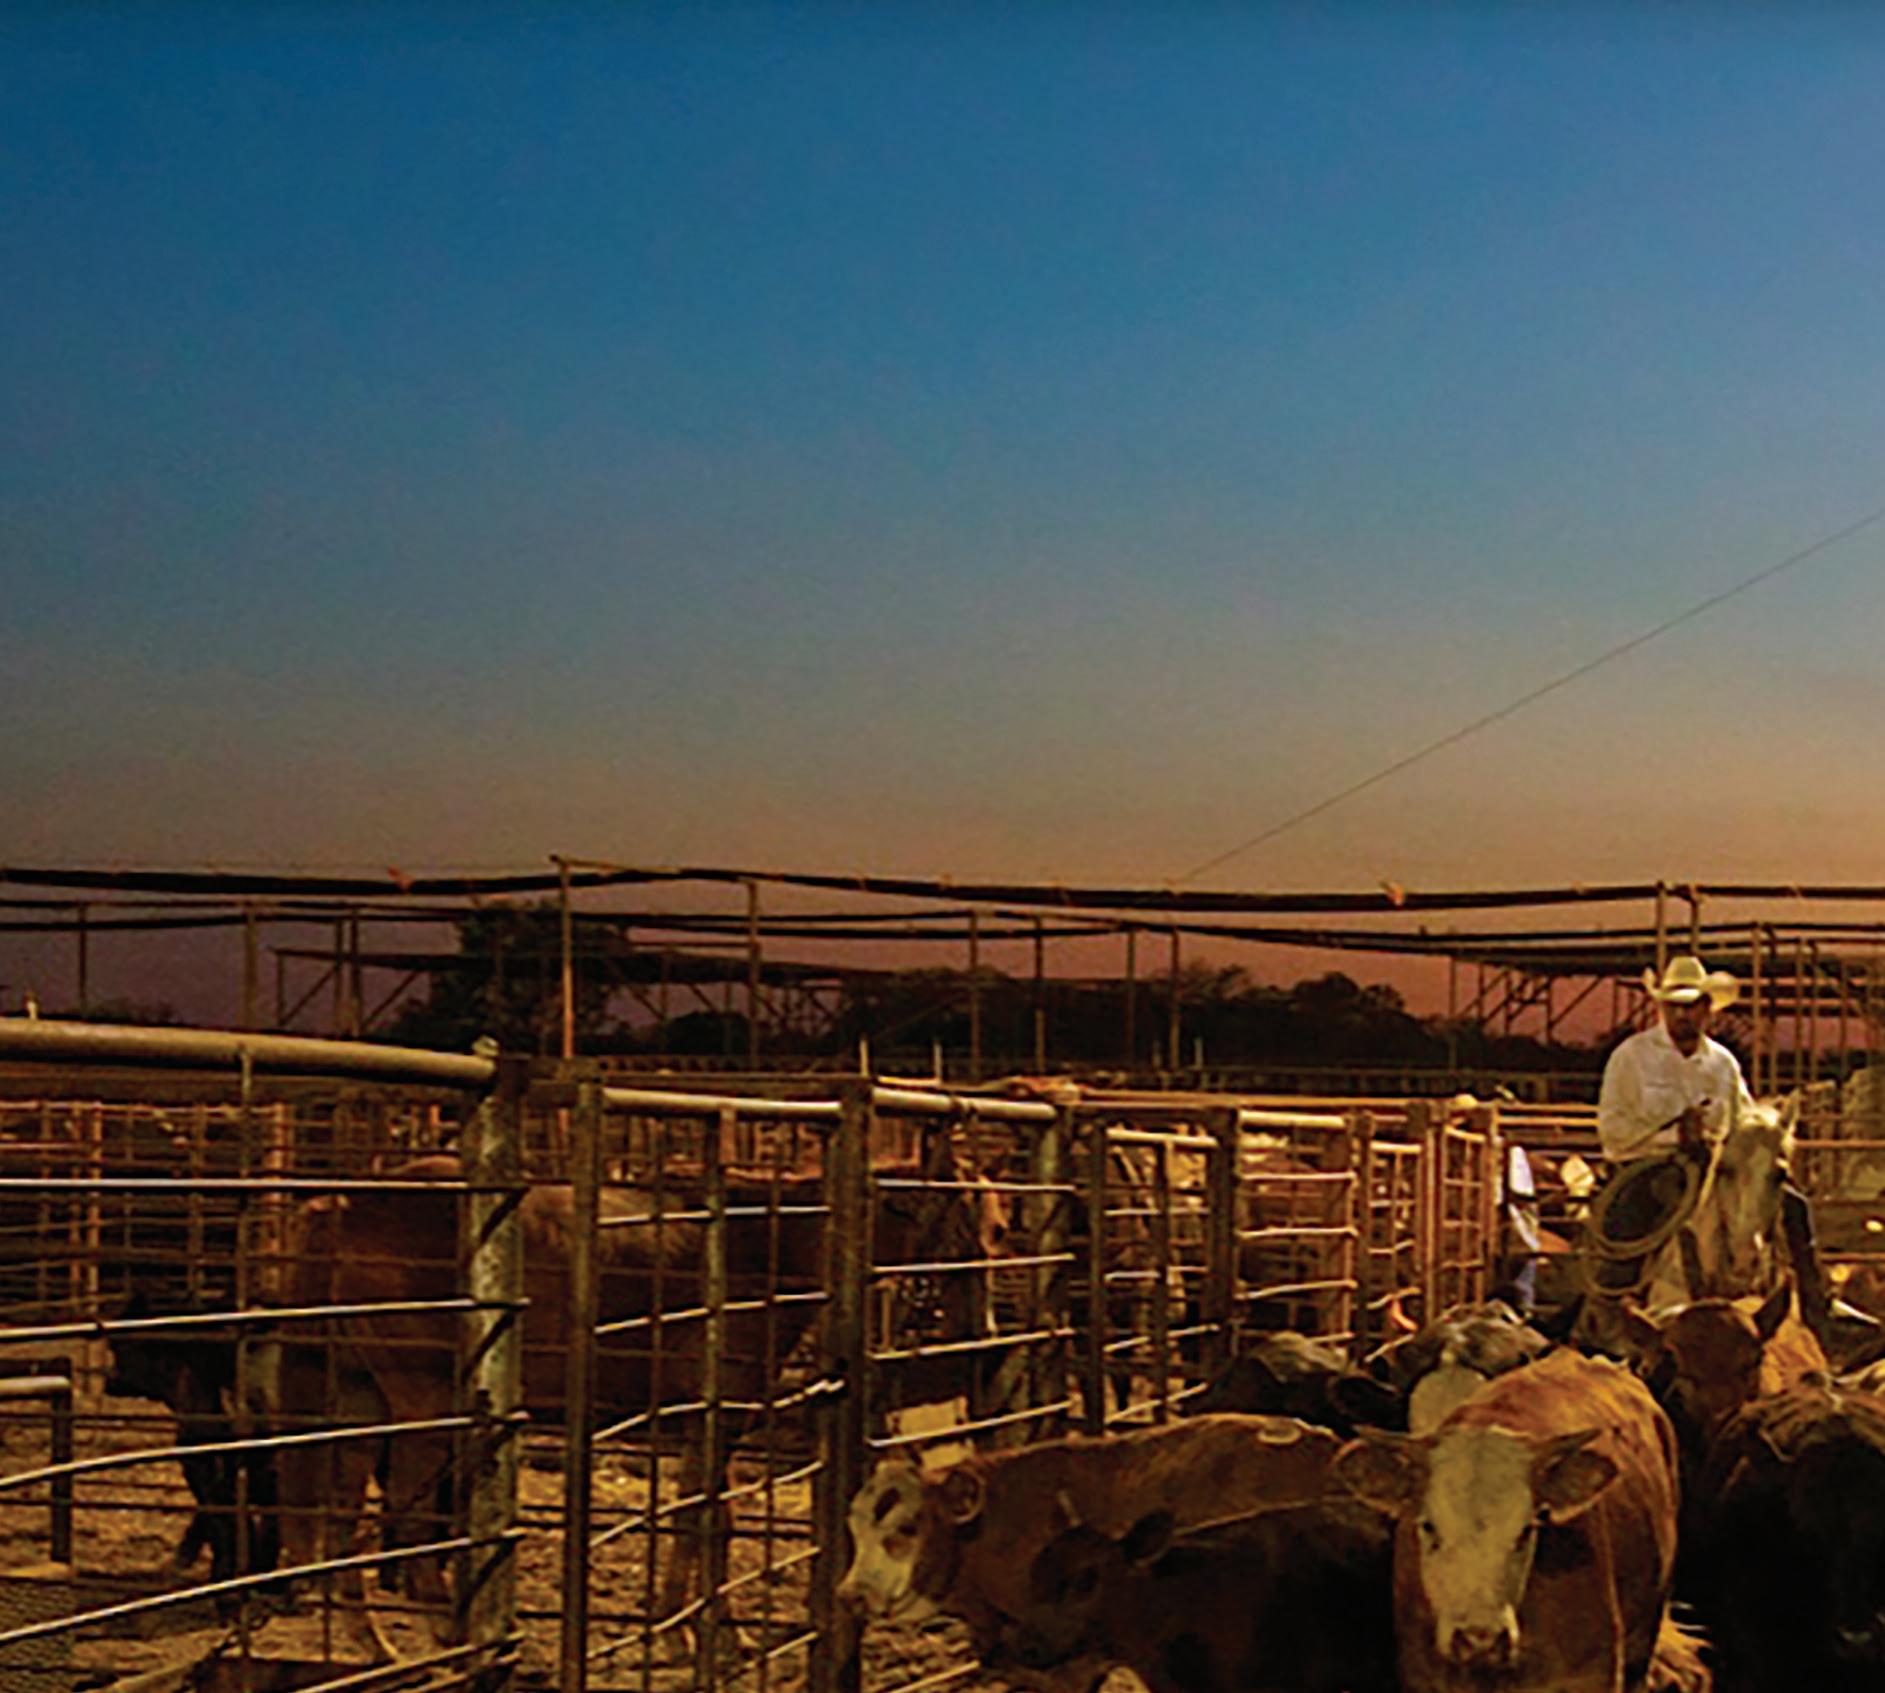 By Ashleigh Krispense


hum of an auctioneer’s chant lls the Fredonia sale barn amid shouts and calls from sorters pushing cattle through the myriad pens and alleys behind the sale ring. It’s just another Tuesday afternoon in sunny Fredonia, Kansas. Nestled about 90 minutes southeast of Wichita, the Fredonia Livestock Auction is a bustling hub of activity on sale day, as cattle are hauled in from surrounding areas to be auctioned off and shipped via trucks to their various new homes.
The sale-barn owner, Brad Haun, stands inside the sale ring, calling out details for various groups of cattle — from vaccinations given, to age, to cows’ current stage of pregnancy — working hand in hand with his world-champion auctioneer, Blaine Lotz, to deliver an honest and speedy sale. My husband and I join the crowd and watch from fold-down seats just to the side of the ring. Partway through the sale, Brad sets aside his microphone to brie y visit with us. Taking a seat, he shares the history of his sale barn.
Whether selling or buying, preparation is key before stepping into a sale barn.
Years before, another barn had stood in the same place as today’s sale barn until a fire burned it down, leaving only the scale. For about two years, the town sat without a sale barn, and locals resorted to hauling their cattle to other livestock auctions to sell them. One of the original owners of the burneddown barn encouraged Brad to restart the sale. The sale barn had made a living for his family for many years, and he believed the community needed a cattle auction and that Brad was fit to run it.
After some discussion, Brad and his father purchased the barn and set about rebuilding it. The entire barn had to be reconstructed, as the fire had destroyed everything except the scale used to weigh cattle. Brad tells me one of the challenges he faced was finding a way to get people to return to selling cattle at the Fredonia barn after they’d started selling elsewhere. Fifteen years later, Brad has a well-known and successful cattle auction that has people both newcomers and longtime sellers and bidders and cattle coming from all across the area.
As you walk into the Fredonia Livestock Auction, you’re greeted by a cozy café on one side, which routinely serves up cheeseburgers and other comfort food, and a busy clerk’s office on the other. Straight ahead, the double doors lead to the auction ring, where you can settle into a chair and take in all the action.
A red metal door on the left side of the ring breezes open, and cattle enter the ring.

The scale beneath their feet takes the group’s weight and displays it on a screen to the left of the auctioneer’s booth. That same screen shares other relevant information, such as the number of head in the lot and the average weight of a single animal in the group.
To the right of the booth, a second screen displays information about the previous bunch that just sold: the group weight, number of head, and average weight for a single animal; the bidder number of the buyer who purchased them; and the price they sold for.
If you sit for a while, you’ll notice how the auction team works like a well-oiled machine. Sorters have the cattle ready to come into the ring and pass an information card in with the group. Brad takes the card and tells the audience about the lot of calves before handing the card into the auctioneer’s booth and suggesting a starting price to Blaine.
For a newcomer to a livestock auction, all of this may feel like a whirlwind, especially when the bidding goes into full swing. However, a few key areas of preparation before stepping into the sale barn can help you overcome any confusion and navigate the process of buying or selling an animal.
While it might take some practice, learning to understand an auctioneer’s chant is important to your success in purchasing cattle at a sale barn. While auctioneers may use “filler words” (such as “dollar bill” or “all the money now”), it’s essential to pay
attention and catch the current price they’re calling for.
At most sale barns, cattle are generally sold by the pound. For example, if a group of five steers, each weighing an average of 480 pounds, is sold for $1.95 per pound, the final price would be the total group weight (2,400 pounds) multiplied by $1.95, equaling $4,680.
The longer you sit, the more you may notice how individual buyers in the audience have their own ways of placing a bid. For some, it can be as simple as a finger motion once they have the auctioneer’s eye. Having a solid group of cattle buyers at a sale barn is essential to a successful auction. As local rancher (and my father-in-law) Todd Krispense says, “You don’t have an auction if the buyer doesn’t come, and it takes at least two!”
While some members of the audience may be looking to buy a smaller quantity of cattle for their own personal use, another group in the audience is generally made up of order buyers (also known as “cattle buyers”), who make their living from days spent at the sale barns. Generally, order buyers are people who take orders from individuals or ranches for specific groups of livestock (certain weights, breeds, or those within a certain price or quantity limit) and then purchase the livestock on their behalf. For the rancher, this can save them time and hassle, as they can continue working back on the ranch and still have livestock, such as cattle, bought for them. For the order buyer, it can provide a means of income, as they make a commission off the cattle they buy.
Though it might seem like a person can save money by not hiring an order buyer, it can be worth the commission fee to some folks once they understand the amount of wisdom and insight an honest order buyer can apply when choosing which cattle to purchase. A group of steers could look like a great deal to you, but the order buyer may have a reason to hold off from purchasing them, such as the animals’ previous history.
According to Todd, order buyers are the lifeblood of the cattle auction nowadays, as most of the cattle that run through a sale barn will be purchased by them. As they sit and watch each group of cattle run through the auction, an order buyer might have multiple people they’re purchasing cattle for. As Todd notes, order buyers are given the task of juggling the cattle currently available for sale between who’s looking to buy and how much they’re willing to pay.
Todd also shares that selling cattle at a sale barn is straightforward: Bidders run them up to what they think they’re worth, and that’s the amount the seller will get, minus sale-barn expenses. For a buyer, though, it can require a bit more guring. While the buyer doesn’t have to worry about the expenses of the sale barn, they do have to calculate freight and destination expenses. These destination expenses can include the order buyer’s commission and expenses incurred during transportation from unloading the cattle midway if it’s a long trip (although, many truckers will just drive it straight through nowadays).

For anyone new to the cattle business, stepping into a cattle auction might seem somewhat intimidating, as the fast-paced sale requires quick judgment and decisions. So, have an idea of what you’re looking for in an animal before you even get there.
Here are some things to watch for once an animal enters the ring.
Disposition. Does the animal charge the fence or helpers in the ring? Is it frequently snorting or pawing at the ground? While you may never fully know what’s going on in the mind of your cattle, an unpredictable and mean-spirited animal can be a danger not only to your fencing, but also to you and your family.
Body conformation. While you might not need top-of-the-line quality in your cattle, it can be helpful to nd animals that have good conformation (shape or structure). An example of poor conformation could be a calf that has a high-set tail, big ears, a long face, or lots of loose skin. Conformation can be a sign of quality in your animals, but it can also hold value in the future, as poor conformation can lead to health issues. For example, Todd says if a heifer is bought (intending to be bred and become a cow) but doesn’t have a wide-enough pelvic measurement, it can cause issues during calving. Another example can be cattle with crooked legs or poor feet, as they can eventually become lame.
Signs of illness or injury. Look for the obvious indicators of sickness, such as


coughing, a snotty nose, bad or blind eyes, loose stools, or a lethargic attitude. Notice how the animal stands and moves around the ring. Does it appear to favor one foot or leg? Does it show any signs of lameness?
If you observe traits like these in an animal, it could be a sign to steer clear of bidding on it.
As with any purchase you make, find a seller with a good reputation. Listen to what the sale barn says Brad calls out details about groups of animals before bidding begins at his sale barn, for example and if you have a chance to visit with local ranchers beforehand, see if they have any recommendations on specific animals to purchase.
Before you raise your hand to make that first bid, have a plan in place for what you’re looking to purchase and what you’ll do with the animal once it’s in your care. A sale day can be an exciting experience, but don’t let the adrenaline sweep you away.
• Know how many head can comfortably fit on your available acreage or space.
• Consider both the amount of available grass and the feed that may be required later in the year.
• Bring a trailer to haul any purchased livestock, or hire somebody to haul them home.
• Don’t get a mixture of random cattle without plans to properly work them (such as young, uncastrated bulls that could mix in among any heifers or cows on your property).
• Listen closely for any vaccinations that have been administered if you don’t have the desire or ability to deal with vaccinating them soon after their arrival.
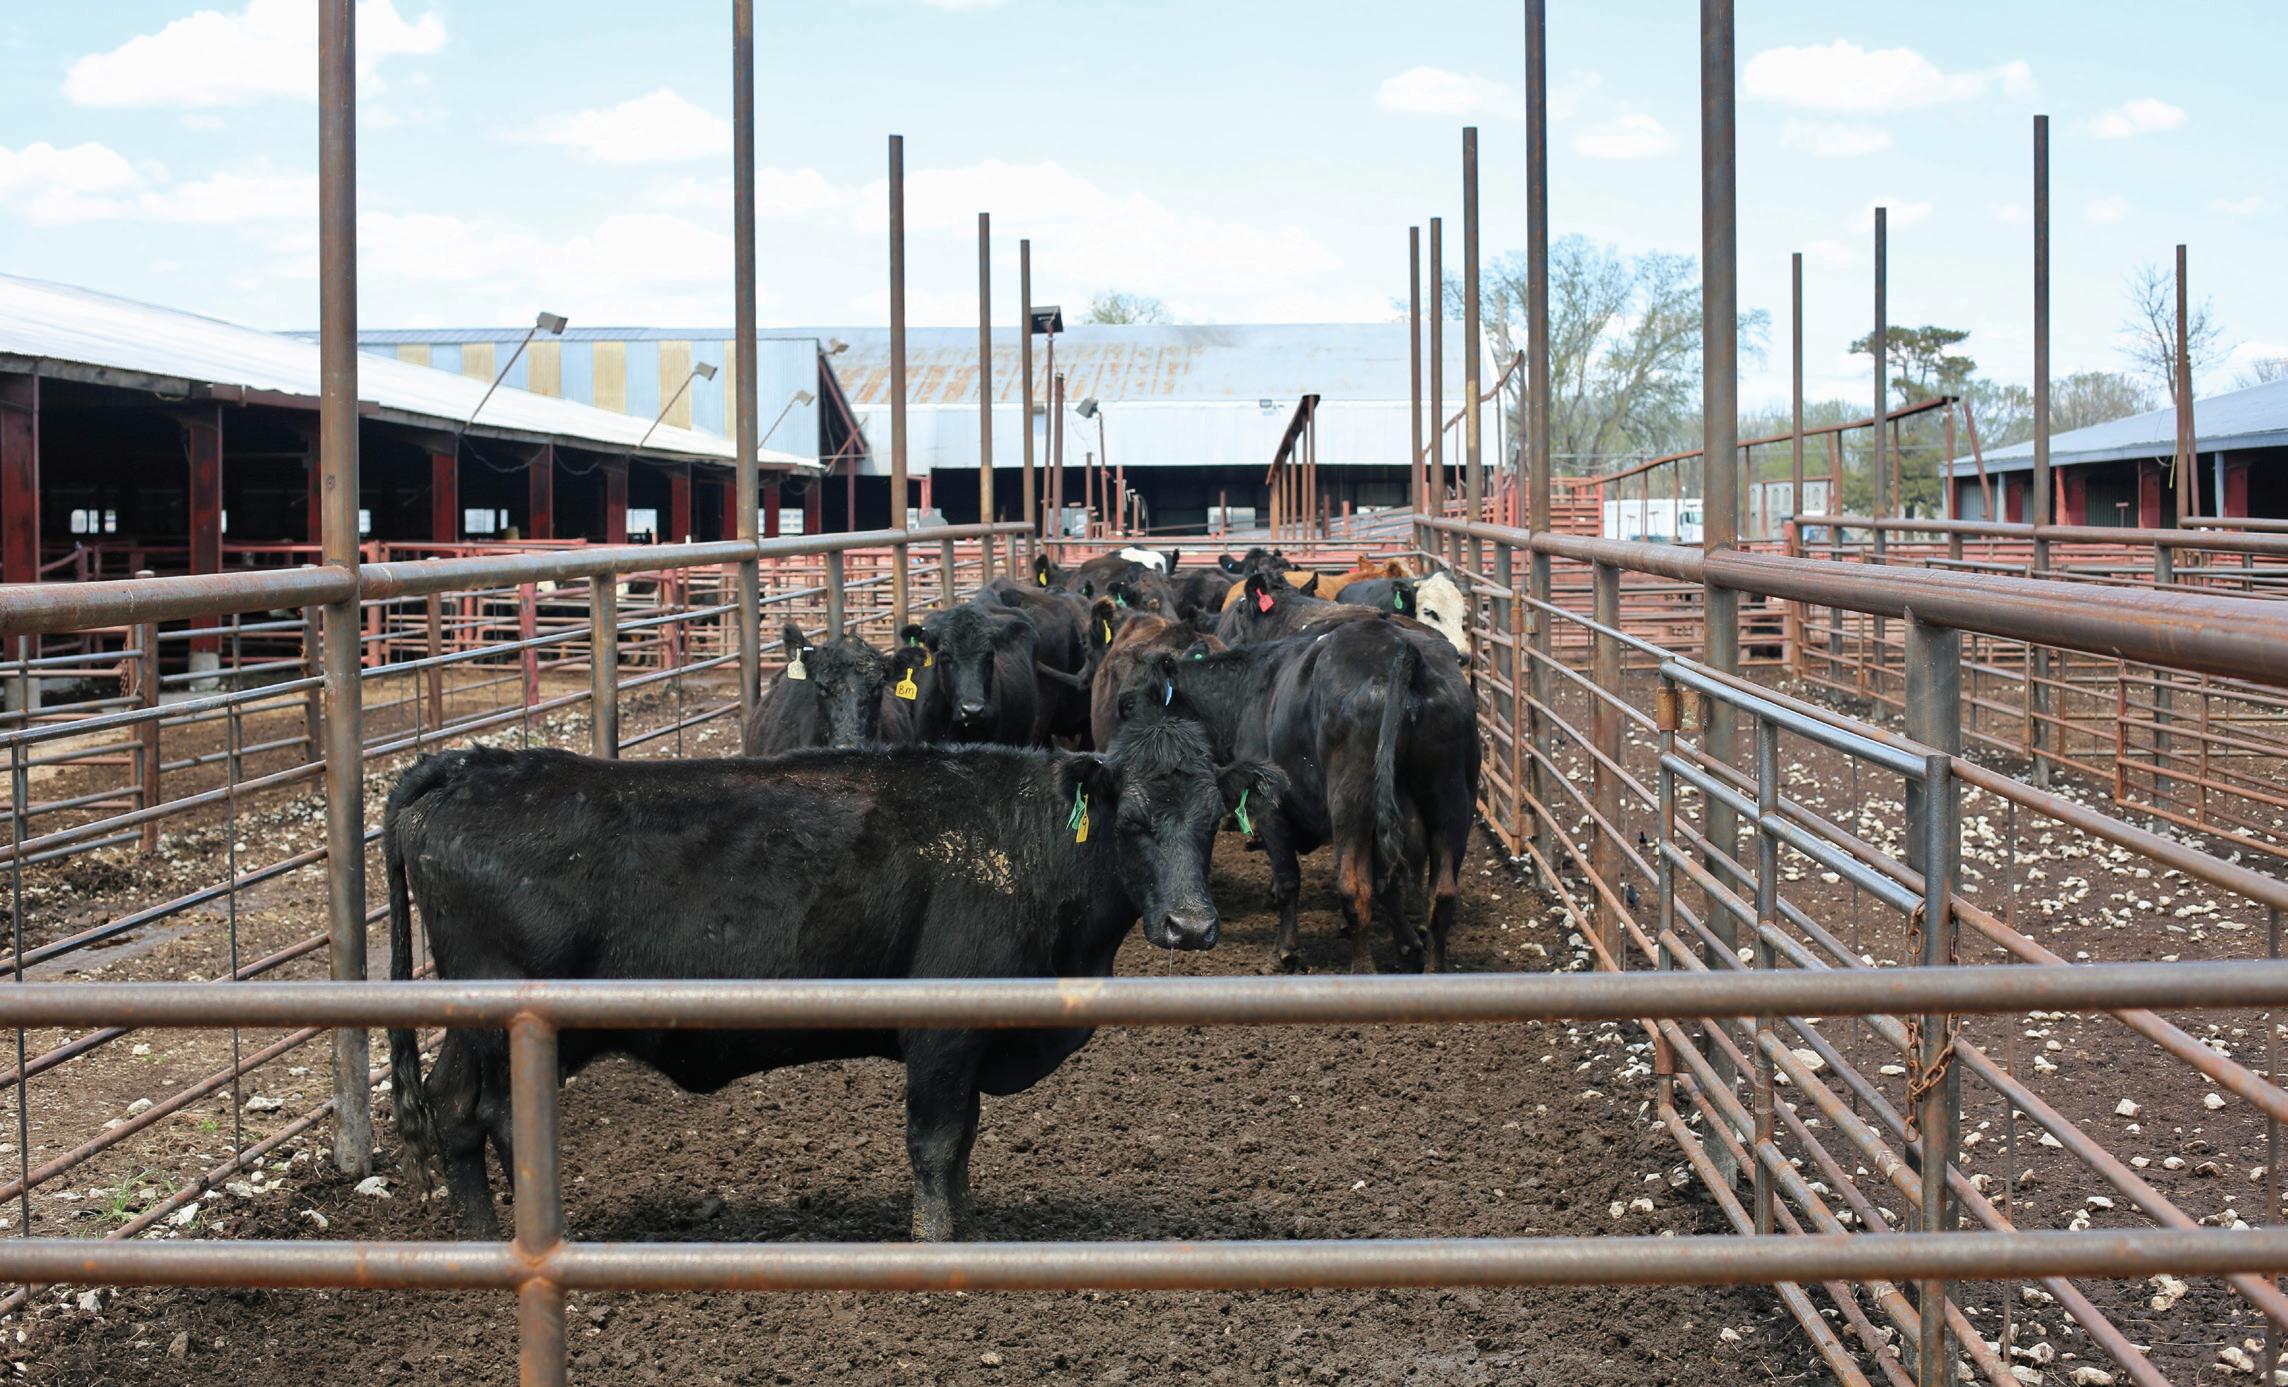
When searching for a sale barn where you can sell your cattle, Todd suggests to do your research and find a barn that has a good reputation, and where your cattle are likely to bring the best price. Ask questions and visit with people. Find out what their experiences have been at specific cattle auctions. Did they feel like the sale-barn staff treated their animal well? Did they get

a good price for their livestock? If you visit a sale barn, notice how the facilities look. Are they well-maintained? Can you tell effort has been put into not only the barn but the whole operation? Todd suggests looking for a “reputable barn with an adequate number of buyers.” Remember, he adds, “You need more than two buyers.”
Cattle auctions offer many opportunities to learn and step a bit deeper into the world of both buying and selling livestock. By approaching with some caution and wise decision-making, you’ll have a much better chance at a successful experience with your livestock. Happy bidding!
Ashleigh Krispense is a freelance writer from central Kansas, where she lives on a farm with her husband, Kolton, and their menagerie of critters. You can follow along with her recipes, ramblings, and farm happenings on her website, www. PrairieGalCookin.com
Once your purchase is made and your cattle are loaded into your stock trailer, it might be an exciting, yet slightly scary, feeling as reality sinks in at the responsibility you just signed up for. Raising cattle can certainly provide some challenges at times and plenty of opportunities for learning, but it can also offer great rewards! From fresh meat or dairy (depending on the kind of cattle you purchase) to an extra stream of income, your family will enjoy the fruits of your labor!
Have everything lined up before you even head to the cattle auction, even if you end up coming home with an empty trailer the first time or two. Here are some things you should have ready before you unload your cattle:
• An adequate acreage of good grass or a sturdy pen and good-quality hay to feed.

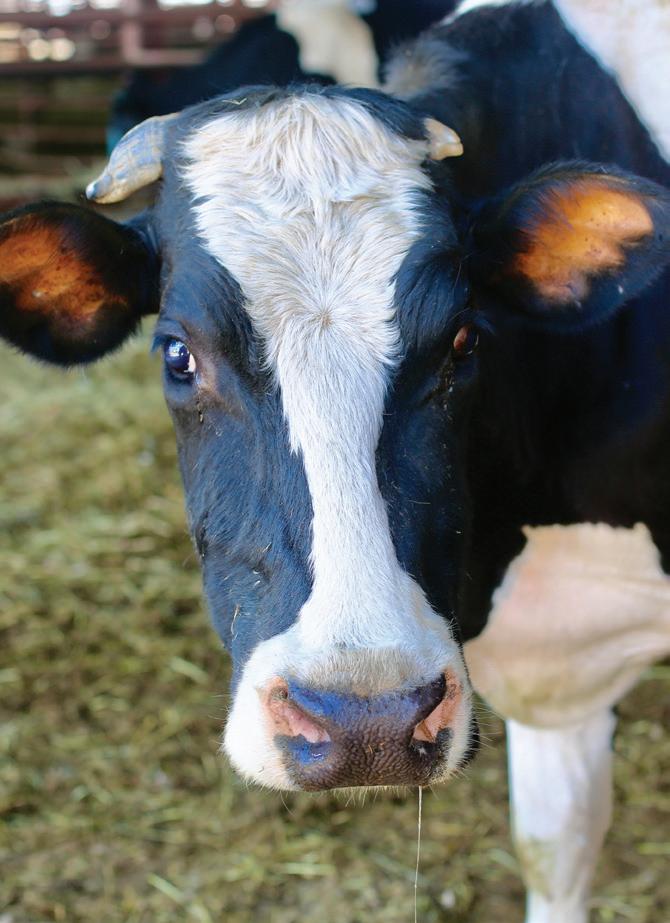
• Some form of shelter that’s seasonally appropriate.
• Sturdy fencing (and knowledge of where to find tools or supplies to make future repairs).


• A water trough and fresh, clean water.

• Feed and, if needed, protein to supplement with later in the year.

• Basic medications.
• One or two sorting sticks and a hotshot, if desired.
• A trusted local vet and, if possible, a nearby rancher to call in case of emergency or to answer questions.







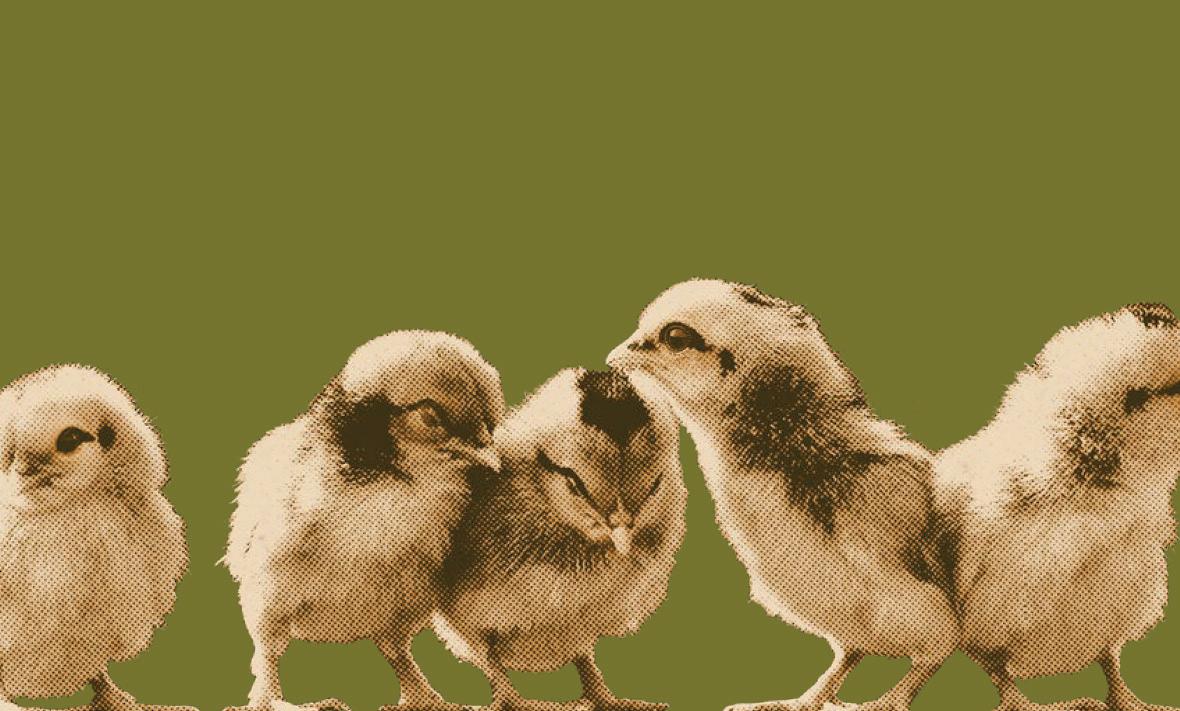






MINIATURE TEXAS LONGHORNS For sale in Texas. TLBAA registered Miniature and small framed Texas Longhorns. Great for pet or show. 941-374-1856 www.Mini-TexasLonghorns.com
www.heartlandhighlandcattleassociation.org

717.336.4878

www.freedomrangerhatchery.com sales@freedomrangerhatchery.com
WE SPECIALIZE IN FREEDOM RANGER CHICKS; these TriColored & Red feathered chickens grow to 5-6 lbs in 9-11 weeks. We also offer Novogen Brown egg layers, French Guinea Keets, Silkies, Khaki Campbell Ducklings, and White Muscovy Ducks.
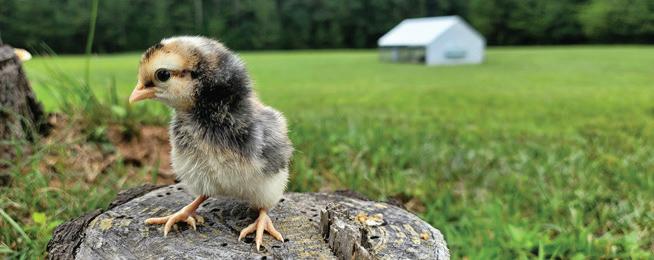
Contact for a free informational packet. www.heartlandhighlandcattleassociation.org
www.highlandauction.com

heartlandhighlandcattle@gmail.com 417.345.0575 or text 417.733.3201
D&E DAIRY GOATS ALPINES, Saanens. Selling 200 plus head annually, breeding bucks and does available. 319-350-5819. Facebook
D & E Dairy Goats.
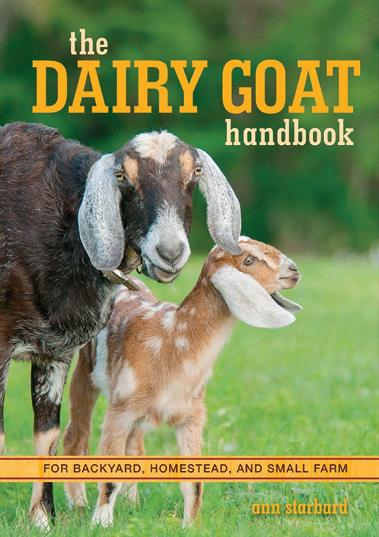
BABY FARM ANIMALS, Hand-raised on organic/non-GMO feed. Saanem-LaMancha Dairy Goats; old-time Scotch Collie puppies; white blue-eyed kittens. Call 785-754-3882.
POULTRY
Free shipping

1-day shipping (to most states) metzerfarms.com


FREE COLOR CATALOG 203 varieties shipped to your local post office, chickens, rare breeds, bantams, ducks, geese, turkeys, guineas, pheasants, quail, supplies and videos. Since “1936” Cackle Hatchery® PO Box 529, Lebanon, MO 65536, 417-532-4581. cacklehatchery.com
JOHNSON’S WATERFOWL 36882 160th Ave. NE Middle River, Minnesota 56737. 218-222-3556. www.johnsonswaterfowl.com
Breeds: Call Ducklings. White, Snowy, Pastel, Grey, Penciled and Black or Blue Bibbed.


FREE CATALOG. Chicks, Turkeys, Ducklings, Goslings, Guineas, Gamebirds, Bantams, Equipment. Hoffman Hatchery, Box 129L, Gratz, PA 17030; 717-365-3694; www.hoffmanhatchery.com
COUNTYLINEHATCHERY.COM Best assortments available. Chicks, ducklings, goslings, turkeys, guineas, peafowl, and hatching eggs. Coggon, IA. 319-350-9130.
HARPER’S GAMEFARM, Bobwhite Quail and Ringneck Pheasant, Eggs, Day Old Chicks and Flight Birds. Call 806-435-3495 or 0528 or check out www.harpersgamefarm.com
SHEEP
MARUSHKA FARM’S YOUR SOURCE for CVM/Romeldale breeding sheep, raw fleece, roving, yarn and sheepskins. 570-490-4759; visit www.marushkafarms.com
UNITED HORNED HAIR SHEEP ASSOCIATION, INC. Non-profit organization representing and registering Black Hawaiian, Corsican, Desert Sand, Mouflon, Multi-horned Hair, New Mexico Dahl, Painted Desert, American Heavy Horned and Texas Dall Sheep. www.unitedhornedhairsheepassociation.org uhhsa@yahoo.com 281-468-7744.-
YARROW DELL FARM, Lauren & Matt Kuckkahn, Hayden, CO. yarrowdellfarm@gmail.com California variegated mutant sheep. Registered & unregistered CVM’s, Icelandic chickens, Livestock guardian dogs.
OUTDOOR WOOD FURNACE
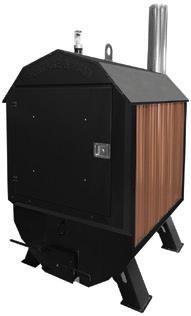
The industry leader in proven clean burn technology


• All Fire no smoke.
• Combustion efficiency 99.5%
• Burns up to 60% less wood
• 7 industry firsts
• Carbon neutral
• Oldest renewable energy.
• Compatible with off-grid use
SEATWEAVING SUPPLIES, chair cane, reed splint, Shaker Tape, fiber & natural rush. Complete line of basketmaking supplies. Waxed linen cord. Royalwood Ltd., 517-MEL Woodville Rd., Mansfield, Ohio 44907. 800526-1630. www.RoyalwoodLtd.com
HERBAL EDUCATION FOR ALL. Online and at your own pace. www. heartofherbs.com Learn to care for your family and community naturally. Use coupon EMAIL15 to save 15%.
VITAZYME - OMRI approved biostimulant helps plants utilize nutrients allowing them to grow to their genetic potential. Sold world-wide. PlantDesigns.com/ vitzayme. 800-728-2716 for pricing, information & ordering.

Ultimate Outdoor Furnace LLC


Les Radcliffe
507-254-0622
Polar Furnace Factory Rep Dealer/ Agent opportunities

www.ultimateoutdoorfurnace.com

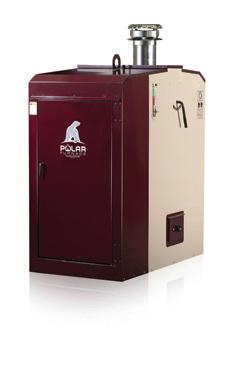
www.TreasureChestMint.com
(844) 577-5388
Gold & Silver: Bullion & Coin Lowest retail prices in the USA! Send SASE for product list. 209 W 3rd Street Roswell, NM 88201

MONEY FOR FARMERS. SKIP the banks and get your DREAM funded NOW! 10k-2M all day. CashForEveryone.com
MAKE JAM & JELLY with low amounts of any sweetener. No Sugar, Preservatives, or GMOs At natural food stores or www.pomonapectin.com 559-760-0910

FREE
SOON Church/Government uniting,suppressing RELIGIOUS LIBERTY enforcing NATIONAL SUNDAY LAW. Be informed! TBSM, Box 374 , Ellijay, GA 30540 tbsmads@yahoo.com 1-888-211-1715.
PRODUCT
SAVE YOUR SOLES
Get Inspired! 80 + healthy low-sugar recipes At Bookstores & Online
NATURE’S BEST provides premium ingredients and customer service manufacturing organic, non-GMO feed across North America. Nature’s Best knows what is important to their customers and continually strives to provide trusted products and healthy, innovative options from poultry to livestock feeds.

FREE


FREE BIBLE STUDY COURSE Write: Know Your Bible, Box 157, McEwen, TN 37101.

DIG-RIG Shovel Attachment Makes digging easy Made in USA $17.24 Shipping Included. Order Now 256-718-0676. 4140 Helton Dr., Florence, AL. 35630. www.digrigshovel.com
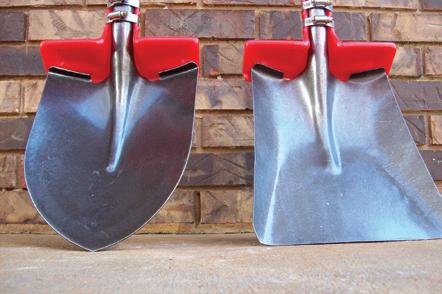
SCYTHESUPPLY.COM European scythes. Mow where your tractor can’t go. Custommade handles(snaths). 496 Shore Road Perry, Maine 04667 207-853-4750, Free Catalog. www.scythesupply.com, FREE hat with scythe outfit: use code GRT at checkout.
GIFTS MADE IN THE USA
Old Fashion Hand Made CLOTH DOLLS, Sunbonnets, Doll Clothes, American Made in Kansas. Free Catalog. Shipped only by US Postal Service. 913-856-6757

SIMPLY SOLAR GREENHOUSES

8’, 15’ and 28.5’ models. One piece design. Resistant to severe weather.
SOLAR TIME TRACKER
Tracks the sun across the sky. Many packages available. 866-478-4050
BUILD WITH PVC
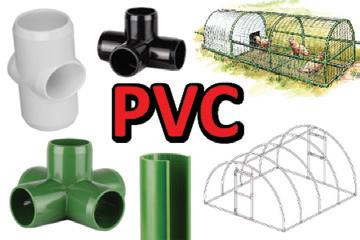
HOUSEHOLD PRODUCTS
COOKIE CUTTERS Order our catalog now for only $10 (Refundable via credit voucher when your total orders for the 2023 calendar year reach $25.00) Over 700 shapes, designs, & sets covering all holidays & many subjects. Mail check, money order to: Cape Cookie Cutter Company, PO Box 424, Cape Girardeau, MO 63702.
FISH & POND SUPPLIES: Large selection of lake, pond and watergarden supplies. Free catalog! Stoney Creek, Inc., Grant, MI. Since 1970 (800) 448-3873. www.stoneycreekequip.com
GOSPEL PIANO CDS Hymns, gospel songs from days gone by! All instrumental (no singing). Great for retirees, housewives, quilters, farmers, travelers, everyone! Free brochure. Jacky Campbell, 216 Spokane Rd, Natchez, MS 39120. bennycampbell495@yahoo.com
CHRISTIAN SINGLES CATALOG. Photos. Penpals. Sample $1. Singles, Box 310-GT , Allardt, TN 38504. 931879-4625. www.nicesingles.com
KEEPING YOUR FLOCK SAFE has never been easier or more reliable. With only one moving part, no mechanical switches and no calibration ChickSafe are the ultimate rugged, fuss-free automatic coop door openers with 3 year warranty.

www.Brinsea.com
-Specialized Fittings-Free Plans -
-Snap Clamps & PVC KitsCirco Innovations, Inc. 877-762-7782
www.circoinnovations.com
HAND PUMPS: All stainless steel for your water. Well or cistern. 5 models to choose from. No electric needed. For more information write to Jonas & Mattie's Stainless Hand pumps, 564 Clyde Marengo Rd. Clyde, NY 14433.
HEALTH
100% ORGANIC BLACK SALVE
Tablets and Salve HERBAL PLUS PRODUCTS
1-800-996-3203
herbalplusnv@gmail.com
classifieds@Grit.com or call 866-848-5416
LIVESTOCK EQUIPMENT GET

SOUTHERN EXPOSURE SEED EXCHANGE
Open-pollinated, Heirloom & Organic Seeds & Garlic selected for flavor and local adaptability. Free Catalog 540-894-9480. www.southernexposure.com

1-888-667-7009. CHECK OUT OUR AD IN THE MARKET PLACE!!
1-866-443-7444
LakelandFarmAndRanch.com
TURTLE TREE BIODYNAMIC SEED INITIATIVE Pioneer of seed transparency offering Organic and Heirloom Openpollinated Vegetable, Herb and Flower seed. Located in Camphill Village since 1998. Free Catalog: turtle@turtletreeseed.org 1 (800) 930-7009. www.turtletreeseed.org
CROSSCUT SAWS: Saw tools, knives, firewood-cutting, people-powered tools. Catalog $1.00. ($3.00 Canada/ Overseas). Crosscut Saw Company, PO Box 7875, Seneca Falls, NY 13148; 315-568-5755; CrossCutSaw.com

IDEAL POULTRY BREEDING FARMS, INC.
Supplying quality backyard poultry since 1937.
www.idealpoultry.com

1-800-243-3257.
HATCHING YOUR OWN CHICKS is fun, easy and affordable with Brinsea Forget Styrofoam incubators and watch your eggs hatch every time. Quality incubators since 1976durable, easy to clean, user friendly digital controls and 3-year warranty. Free color catalog.

www.Brinsea.com
1-888-667-7009.
GO TO
WWW.CHICKENDOORS.COM for the best automated door on the market or call 512-995-0058

FREE COLOR CATALOG 203 varieties shipped to your local post office, chickens, rare breeds, bantams, ducks, geese, turkeys, guineas, pheasants, quail, supplies and videos. Since “1936” Cackle Hatchery® PO Box 529, Lebanon, MO 65536, 417-532-4581.
cacklehatchery.com
MYERS POULTRY FARM - FREE CATALOG. Chicks (9 meat varieties), Ducklings, Goslings, Turkeys, Guineas, more. 966 Ragers Hill Road, South Fork, PA 15956, 814-539-7026. www.myerspoultry.com
MOVE TO HENRY COUNTY, VA
- great land prices for farmers and homesteads. Contact Demetria Clark: Hauser Realty Group. 276-201-6393. www.hauserrealtygroup.net

Equal Housing Opportunity.
THE EGG CARTON STORE Best Prices, selection, high quality. 40 years of egg packaging and marketing expertise! Egg Cartons, Filler Flats, Stamps, Egg Cases, Nesting Boxes, Supplies, Poultry Care, Custom Cartons and Labels Call for GREAT wholesale/pallet quantity pricing! 866-333-1132. FREE SHIPPING on all cartons and filler flats.
WWW.EGGCARTONSTORE.COM


TRY THIS BEFORE PUMPING your septic system or replacing your drain field! Accelerator by Dr. Pooper Drain Field Cleaner is a revolutionary non-toxic commercialstrength septic treatment that clears organic solids from septic tanks and drain fields. Money-back-guarantee! Order at DoctorPooper.com

NRR HATCHERY has been a family owned and operated farm in Northeast Oklahoma since 2013. 1 Day Old Chicks, Hatching Eggs, Fresh Eggs, Mealworms and Farm Goods. Local Pickup and Shipping Available. For more information visit our webiste at www.nrrhatchery.com

Your equipment is valuable. Knowing how to repair and fabricate essential hardware will help make it last.


Master the fundamentals of welding, brazing, and soldering so you can repair equipment both big and small, from a garden rake to a mower. Learn to add a bale spear to your tractor bucket, build a wall-mount hay feeder, or make metal hooks. Real repair scenarios help you strategize for those moments when you need to x equipment in bad weather, at awkward angles, or out in the eld.

Item # 9562 $24.95
Grown nearby. Join more than 3,000 other farms and connect directly with consumers by listing your farm. Your FREE farm profile can showcase products with farm ph++otos, your farm story, and google map locations where you sell. Made for ALL farms and food types.
WWW.LOCALHENS.COM


Thousands of Americans are rediscovering normal freedom of movement thanks to a “miracle oil” capsule that’s outperforming hemp in promoting joint comfort.
According to the official figures from the CDC, more than 58 million Americans are living with joint discomfort. This epidemic has led to a search for alternative approaches – as many sufferers seek relief without the harmful side effects of conventional “solutions.”
Anti-aging specialist Dr. Al Sears is leading the way with a new formula he calls “the most significant breakthrough I’ve ever found for easing joint discomfort.”
The capsule is based on a “miracle oil” historically treasured for its joint healthsupporting properties. Marco Polo prized it as he blazed the Silk Road. And to this day, Ayurvedic practitioners rely on it to promote optimal joint health.
Now, with a modern twist backed by science, Dr. Sears is making this natural solution for joint health available to the public.
Your Body’s Hidden “Soothing System”
Joint health research changed forever with the discovery of the endocannabinoid system (ECS) in 1992. Up until that point, research on cannabinoids focused on psychoactive effects. Now, scientists were looking at a new way to fight occasional aches and pains.
Your ECS serves as a central “signaling system” that tells your body how to react to things you do every day. It controls several critical bodily functions such as learning and memory, sleep, healthy immune responses – and your response to discomfort.
A recent study revealed a direct link between the ECS and creaky, sore joints. Researchers at the University of Edinburgh studied the aging of mice with endocannabinoid deficiencies versus “normal” mice.
As they aged, the deficient mice had a whopping 60% more joint degeneration than the mice with a healthy ECS.
As the name suggests, the ECS responds to cannabis. At the time it was discovered, scientists assumed that was the best way to support it. But thanks to Dr. Sears’ all-natural solution, you can power up your ECS without marijuana.
“Calling it the ‘endocannabinoid system’ was a misnomer from the very beginning,” Dr. Sears explained. “Modern research reveals that you don’t need cannabis to activate this incredible system. You don’t need to ‘get high’ to get joint relief.”
A scholarly review found that plants and herbs that don’t produce mind-altering effects can support the ECS and help it maintain its healthy functions.
This includes common foodstuffs, such as kava, chocolate, black pepper, and most significantly – the star ingredient to Dr. Sears’ own Mobilify formula - frankincense.
Modern scientists say this natural ingredient meets “cannabinoid tetrad” – the signs used to determine if something supports the ECS. While it doesn’t produce a “high” like cannabis does, it binds to the same receptors to support a healthy response to discomfort.
All the Benefits of CBD –Without Cannabis
Indian frankincense, the chief ingredient in Mobilify, has been shown to provide all the benefits of cannabis without any feelings of sluggishness or sleepiness.
And studies show that users don’t have to wait long for the comfort they’re looking for.
In a study published in the International Journal of Medical Sciences, 60 patients with stiff knees took 100 mg of Indian frankincense or a placebo daily for 30 days. Remarkably, Indian frankincense “significantly” supported healthy joint function and relieved discomfort in as little as five days.
Additional research linked regular use to lasting comfort.
In another study, 48 participants were given an extract made from frankincense for 120days. When the results came in, researchers determined the extract strongly supported joint comfort – especially in the knees.
These results were all achieved without marijuana. Research continues to back up the idea that you can support smooth, strong, and healthy joints naturally – without tiredness or sluggishness.
Mobilify has already helped thousands of Americans stay on their feet and breeze through
their daily activities with ease.
One user even reported getting results the same day it was used.
“Mobilify really helps with soreness, stiffness, and mild temporary discomfort,” Joni D. said. Larry M, another user, compared taking Mobilify to living a completely new life.
“After a week and a half of taking Mobilify, the discomfort, stiffness, and minor aches went away…it’s almost like being reborn,” he said.
Dennis H. said it helped him get back to his favorite hobby.
“I can attest to Mobilify easing discomfort to enable me to pursue my golfing days. Definitely one pill that works for me out of the many I have tried,” he said.
Right now, the only way to get this powerful, unique Mobilify formula that clobbers creaking joints without clobbering you is directly from Dr. Sears. It is not available in stores.
To secure your bottle of this breakthrough natural joint discomfort reliever, buyers should call with Sears Health Hotline at 1-800-3298485. “The Hotline allows us to ship the product directly to customers.”
Dr. Sears believes in this product so much, he offers a 100% money-back guarantee on every order. “Just send me back the bottle and any unused product within 90 days, and I’ll send you your money back,” said Dr. Sears.
The Hotline will be taking orders for the next 48 hours. After that, the phone number may be shut down to allow them to restock. Call 1-800-329-8485 to secure your limited supply of Mobilify. If you are not able to get through due to extremely high call volume, please try again! Call NOW to qualify for a significant discount on this limited time offer. To take advantage of this exclusive offer use Promo Code: MBGRIT823 when you call.
“Yeah — it’s not selling.”
“Hey hon, it’s not the color… or your work…
It’s uh… uh… well, chickens don’t have thumbs.”


“I gave ‘em to the kids, you know this tech generation. They said, ‘Create a trend, sell online’ — a clothesline, maybe?
‘Head covers, tail covers, egg carriers, tiny hammocks, on and on. And raise the price, it creates demand.’”


Your loyal companion is just as excited for the hunt as you are. Let VICTOR Pet Food help them get out there and thrive this season. Each bag, including the exclusive Realtree® line, features VICTOR’s proprietary VPRO® Blend of vitamins and supplements. With the optimal protein-to-fat ratios to fuel active hunting dogs plus added glucosamine and chondroitin for joint support, these formulas are designed to keep hunting dogs running strong all season long – on and o the field.


Find the right formula for your partner at victorpetfood.com


