6 minute read
COACHING – Feeling your way
Feeling your Way with Contours
Eoin Rothery (WA)
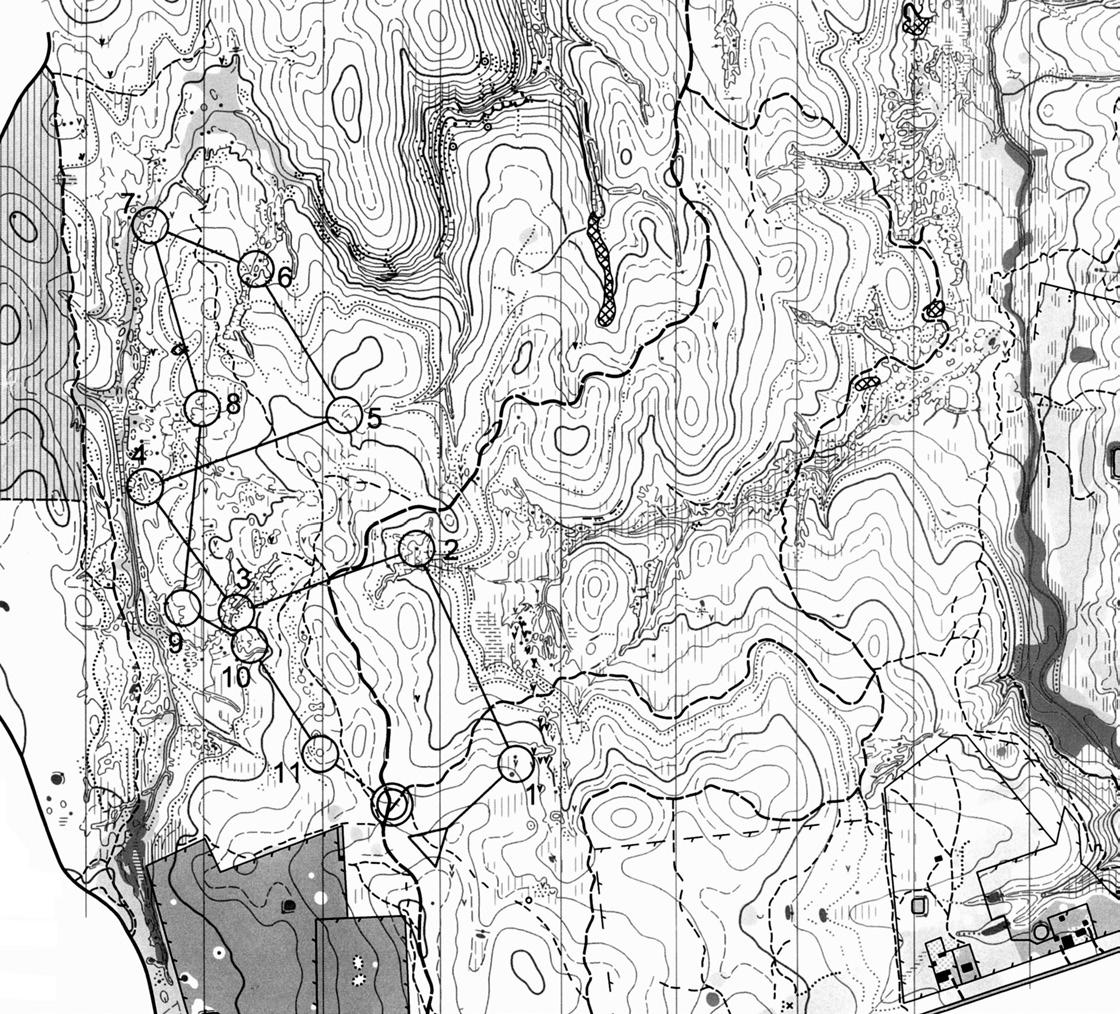
CONTOURS are the most useful features on virtually any map, and it is worth taking the time to get to know them. One very helpful thing about contours is that if you have a slope, you have directions – particularly up and down, but other angles can be estimated. This helps many orienteers to navigate without using their compass – in fact some world elites, like Pasi Ikonen of Finland, don’t even bring one with them. Contours can also make good handrails (a line feature that you can follow in the terrain – ridges, gullys, breaks in slope). In fact, contours are often mapped as a series of line features – and so the orienteer should use them as such. The simplest form of this is “Contouring”, which is to follow a contour, that is go at the same height in the terrain and this is surprisingly effective. However, a bit too careless and you drift downhill, while too fit or anxious and you’ll probably over-correct and go uphill. A rule of thumb would be to alternate uphill or downhill sides of any obstruction. Contouring relies on a fairly accurate map, so should not be attempted for more than a few 100 metres. Partly this is because orienteering maps are “relatively” accurate, not “absolutely” accurate – and they are better that way. The mapper exaggerates prominent features, putting them in their correct relative position and may have to displace others depending on symbol size. Where possible it is usually sensible to avoid unnecessary climb during your course. Even if you are not running in a virtual 3D terrain map (like some people are) you should at least know whether the next control is above you, below you, or at the same height so that you can plan your route accordingly. On any route choice, you should be very wary of trying to go obliquely across contours in a straight line – that is probably the most difficult technique to get right.
Sailor’s Creek, Daylesford, Victoria
1:10 000
The spacing of contours is a guide to the steepness, but watch out for plateaus! Of themselves, contours cannot show the difference between a series of flat, stacked terraces and a smooth slope. This is one reason specialist orienteering mappers spend many hours in the bush – by using form lines they can show the shape of the slope. In the case of terraces or platforms the mapper can put a form line close to one of the contours to show the break in slope. Steep slopes are difficult to move on, in any direction, and the steeper they are, usually, the rougher they are. In general, and this applies to mountain bikes too, you don’t want rough going uphill – DO YOUR CLIMBING ON A GOOD SURFACE! A hill top or a saddle between two hills are definite points on the map and worth considering as attack points. Setters often provide a route choice between going over a hill, or around. A tired orienteer will almost always go around, but running a long way around a steep slope is not always that fast, particularly if it is rocky, wet or there are fallen trees. It might be an effort to get to the hill top, but at least you know exactly where you are. Danger – on the way down it pays to be very careful of your direction as you could easily go down the wrong spur – a lot of them start from the top of the hill! Which brings us to a hairy old anecdote about contours which is worth repeating – “Run up spurs and down gullys”. This is because spurs meet at a definite point going up hill (the hill top), and the same is true for gullys going down hill. Following a creek uphill runs the danger of turning into the wrong branch. However, going into a creek at any time is usually a bad idea, as the vegetation is usually thicker down there. Another anecdote is “Approach controls from the top” – the point being that you can see more; the jury is out on that one. A single contour hill is a very good control point and often used by setters. Hills that are not high enough to be shown by a contour (with a 5m contour interval, that would be at least 2.5m, or a generous 2m) are shown with the brown dot – high point, or knoll. So by definition these features are usually between 0.5m and 2m high. The definition does not say what they are made of, so that can be earth or rock. The distinction between a rocky high point and a boulder can get a bit technical – my definition is that a giant could roll a boulder down the hill, but not a high point (because it is “bedrock” or solidly attached to the rest of the ground). The geologist’s term is “float” (from glaciated terrains where ice has dropped “boulder trains”) and float can be distinguished from bedrock by repeated blows of a big hammer – float gives a hollow sound, while bedrock sings! (not that I’m suggesting you bring a hammer orienteering). The thicker contours are called index contours and are meant to be used as a way of quickly imagining the general shape of the land, especially if combined with major creeks or watercourses. In general, any closed contour you see on a map will be a hill, unless you are in sand dunes, limestone karst or on a subsidenceaffected area (eg NZ). In most other countries in the world gullys have creeks in them. Unfortunately Australia doesn’t, but helpfully even Aussies mark the bottom of valleys with a blue line. No, it doesn’t mean water, it means where the water would probably be during or immediately after a torrential downpour. Called a “watercourse” it can be a prominent line of erosion but is mostly a very subtle place where you can trip over. However, some of the best terrain for orienteering is Australian “Gold Mining” which is a result of long-gone water directed through contour canals having formed substantial erosion gullys and other features. Depressions are just that – very depressing. Notoriously used as places to hide control flags they can be extremely difficult to find, and in fact if there is no corresponding spoil heap beside them, they are not meant to be found with the tools available to an orienteer – compass and pacing are not precise enough at 1:10,000 or 1:15,000 for the job. Worse, they are blatantly obvious when someone drops in or jumps out of them, so giving away the position to anybody else in sight and introducing Lady Luck where she has no right to be. In my view, the best position for a control flag is above the normal ground surface, next to the depression, and too bad if it can be seen from a fair distance. Contours and cliffs are related, too. If greater than the contour interval, a cliff should have at least two contours running into the ends. On some maps, contours used to be coloured black where they were essentially cliffs or very steep rock. Cliffs are mostly parallel to the contours of the slope they are on – but beware of those that face up the hill (it does happen!) There have been a few attempts to work out how much extra effort is a hill and therefore how much it is worth going around to avoid climbing a contour. Underfoot conditions and tiredness have a big effect on this, but it is probably in the range 200m300m of ascent = 1km around. At 10 minutes per km, this would be one 5m contour is equal to 10-16 seconds or 35-50m extra distance. So, you see, there is more to contours than an invisible brown line – get to know them and you will never look back!


