How to Draw MANGA-INSPIRED
Illustrations for Beginners


How to Draw MANGA-INSPIRED
Illustrations for Beginners
LIDIA CAMBÓN


welcome to the colorful world of character drawing with alcohol markers!
Whether you’re an aspiring artist eager to bring your imaginative characters to life, or simply fascinated by the vibrant art style often seen in anime and manga, this book is your guide to mastering this exciting medium.
I can’t pinpoint exactly when art drew my attention. From a very early age, I was always drawn to the beauty in things; drawing and painting was just a way for me to channel those creative interests. Paper and pencil are always available, so they became my first mediums.
Seeing as I grew up a child of the nineties who watched loads of anime, I was inspired by the colorful and expressive characters in these cartoons. Subsequently, my first drawings were recreations of the characters in my favorite shows. I started by just copying the characters in my notebook with a pencil and trying to recreate their style, which was an easy way to get into drawing characters—what I still draw to this day. Looking back, it fascinates me to recognize how an interest that formed so long ago has so heavily influenced my current style.
While I started my lifelong love of art by drawing characters in pencil, I fell in love with color as soon as I had access to comics and magazines. The first coloring tools I got my hands on were some colored pencils— hard lead ones, of course. Inevitably, using these basic pencils proved to be a frustrating experience, and although the process was enough to make me realize that I wanted to start adding color to my art, it wasn’t giving me the results I’d hoped for.
At the time, most of the color illustrations that I was inspired by came from the comic and manga covers I had in my collection of books, so the discovery of the millennia for me was when I learned what manga artists used to paint their beautiful manga covers: Copic markers. In hindsight, I marvel at the fact that I hadn’t made the discovery before, but I hadn’t had the right exposure. I didn’t speak much English back then, and I still lived in the countryside of Spain, so it took me months to discover this around 2006.
Buying these markers online was out of the question for me at the time, but I eventually found a
shop about one hour away from my house that sold Copic markers. As far as I knew, Copic markers were the only alcohol markers available then, and Copics were very expensive. At around eight euros a piece, I had to save money to buy five or six every month. Little by little, I procured myself a small collection of markers.
Learning to use them effectively was not easy; alcohol markers are not a very intuitive tool, and I had no resources to learn how to use them. I made them work through lots of experimenting and trying various approaches. Doing so gave me the tools to understand the methods that worked for me, and it propelled me to think outside the box in order to create unique results.
Since then, alcohol markers have never left my side. Even when I moved to London from Spain with very few items on me, I brought my small collection of alcohol markers. Fortunately, we now live in a time where endless colors of alcohol markers are available at many different price points, making them a medium that’s readily available for almost anyone interested in experimenting with them. They are truly my favorite art supply, and I can’t wait to share with you the tips and tricks I’ve learned from experimenting and illustrating with alcohol markers.


As
I was learning, I created loads of sketches that I didn’t share with the world.
It
was a good way to keep a safe space for my creativity and artistic experiments without the fear of judgment or the pressure of producing perfect art.
If you’re looking for an introduction into the expansive world of alcohol markers and how you can use them to craft unique, expressive characters, you’ve come to the right place. Chapter 1 will dive into all the supplies you’ll need to get started with this book, as well as recommendations for a few extra supplies that can take your art to the next level. In Chapters 2 and 3, we’ll start by exploring color theory and how to choose the best colors for your art pieces, and then we’ll cover everything you need to know about blending with your alcohol markers so you can achieve the exact color, gradient, and look that you want. Chapter 4 will cover the topic of artistic style as I walk you through my tips and tricks for developing your personal artistic style, so you can create your own distinctive characters.
Next, we’ll practice putting our markers (and our drawing skills) to use. Chapter 5 will teach you how to sketch the initial outline of your characters, so you can practice coloring them in with your alcohol markers in Chapter 6. In Chapter 7, we’ll put everything we’ve learned so far into practice as I walk you through how to create a full character from scratch.
If at the end of your practice, you decide that you’d like to continue your art practice, Chapters 8 and 9 will discuss the best ways to get your artwork in front of a large audience and grow your art community, as well as additional ways you can further continue your artistic education.
Finally, we’ve included twelve pages of practice paper at the back of the book, so you can practice using your alcohol markers on paper specifically intended to take this medium. However, you may benefit from having an additional sketchbook handy in case you want to continue practicing the art exercises in this book.

Whether you’re a beginner or an experienced artist looking to expand your skillset, this book will provide you with the tools and inspiration to create captivating characters using alcohol markers.
The included practice pages will allow you to put your newfound knowledge into action and witness your growth as an artist.
Happy drawing!

to create beautiful character illustrations using alcohol markers, it’s important to have the right supplies. Let’s explore the different materials you might need as you get started on your alcohol marker journey, and a few extra supplies that might come in handy.
before we dive into my list of recommended materials, I think it’s important to first identify why I—and so many other artists—love using alcohol markers for our artwork.
First, alcohol markers are fast, easy to store, and versatile. Thanks to their blendability—as well as the wide range of colors available—any kind of color is possible, from moody darks to playful pastels. Alcohol markers can also give your artwork a digital-like finish, which can make it easy to photograph and scan your illustrations. You can also achieve different results, just by changing the type of paper you’re working with—but more on that later!
As artists, we are fortunate that so many new companies have begun to manufacture alcohol markers, making them more accessible to everyone and available at many different price points. Because there are so many options out there, buying your first set can get a bit overwhelming, so this section focuses on the different brands and what you can expect from each.
Copic is the original brand of alcohol markers. Copic began producing these markers back in the eighties, and they are still the most famous brand today, as they use great-quality ink and can manufacture any color under the sun—ranging from dark and saturated colors to soft and pastel shades. You can purchase them in packs, but every marker is also sold individually, which is convenient when you are interested in building your own collection of markers that go with your particular art style. They are refillable, so you can buy ink for the markers you use most often. You can also purchase replacement nibs. Copic offers their own paper and other accessories for their markers, too.
Overall, the Copic brand offers a comprehensive ecosystem of products that optimize work, so there’s no wonder why they are the industry standard. When purchasing, though, bear in mind that not every Copic marker is the same as they offer different types of nibs (round, chisel, and brush), so take care in selecting the right options for you.
These markers are one of, if not the most, expensive choices on the market, but the price comes with excellent quality.
If you can, I recommend trying them at least once, though I don’t recommend these markers for someone who is just starting out. Selecting a more affordable option until you get used to the medium and understand what you need your markers to offer will benefit you cost-wise. In addition, the brush nib from Copic markers is very soft, which means that although you can achieve amazing results and line variation, it is also difficult to use for someone with limited experience, which can lead to frustration. If you already have experience with cheaper marker brands, give Copic a try. They could help level up your coloring game!
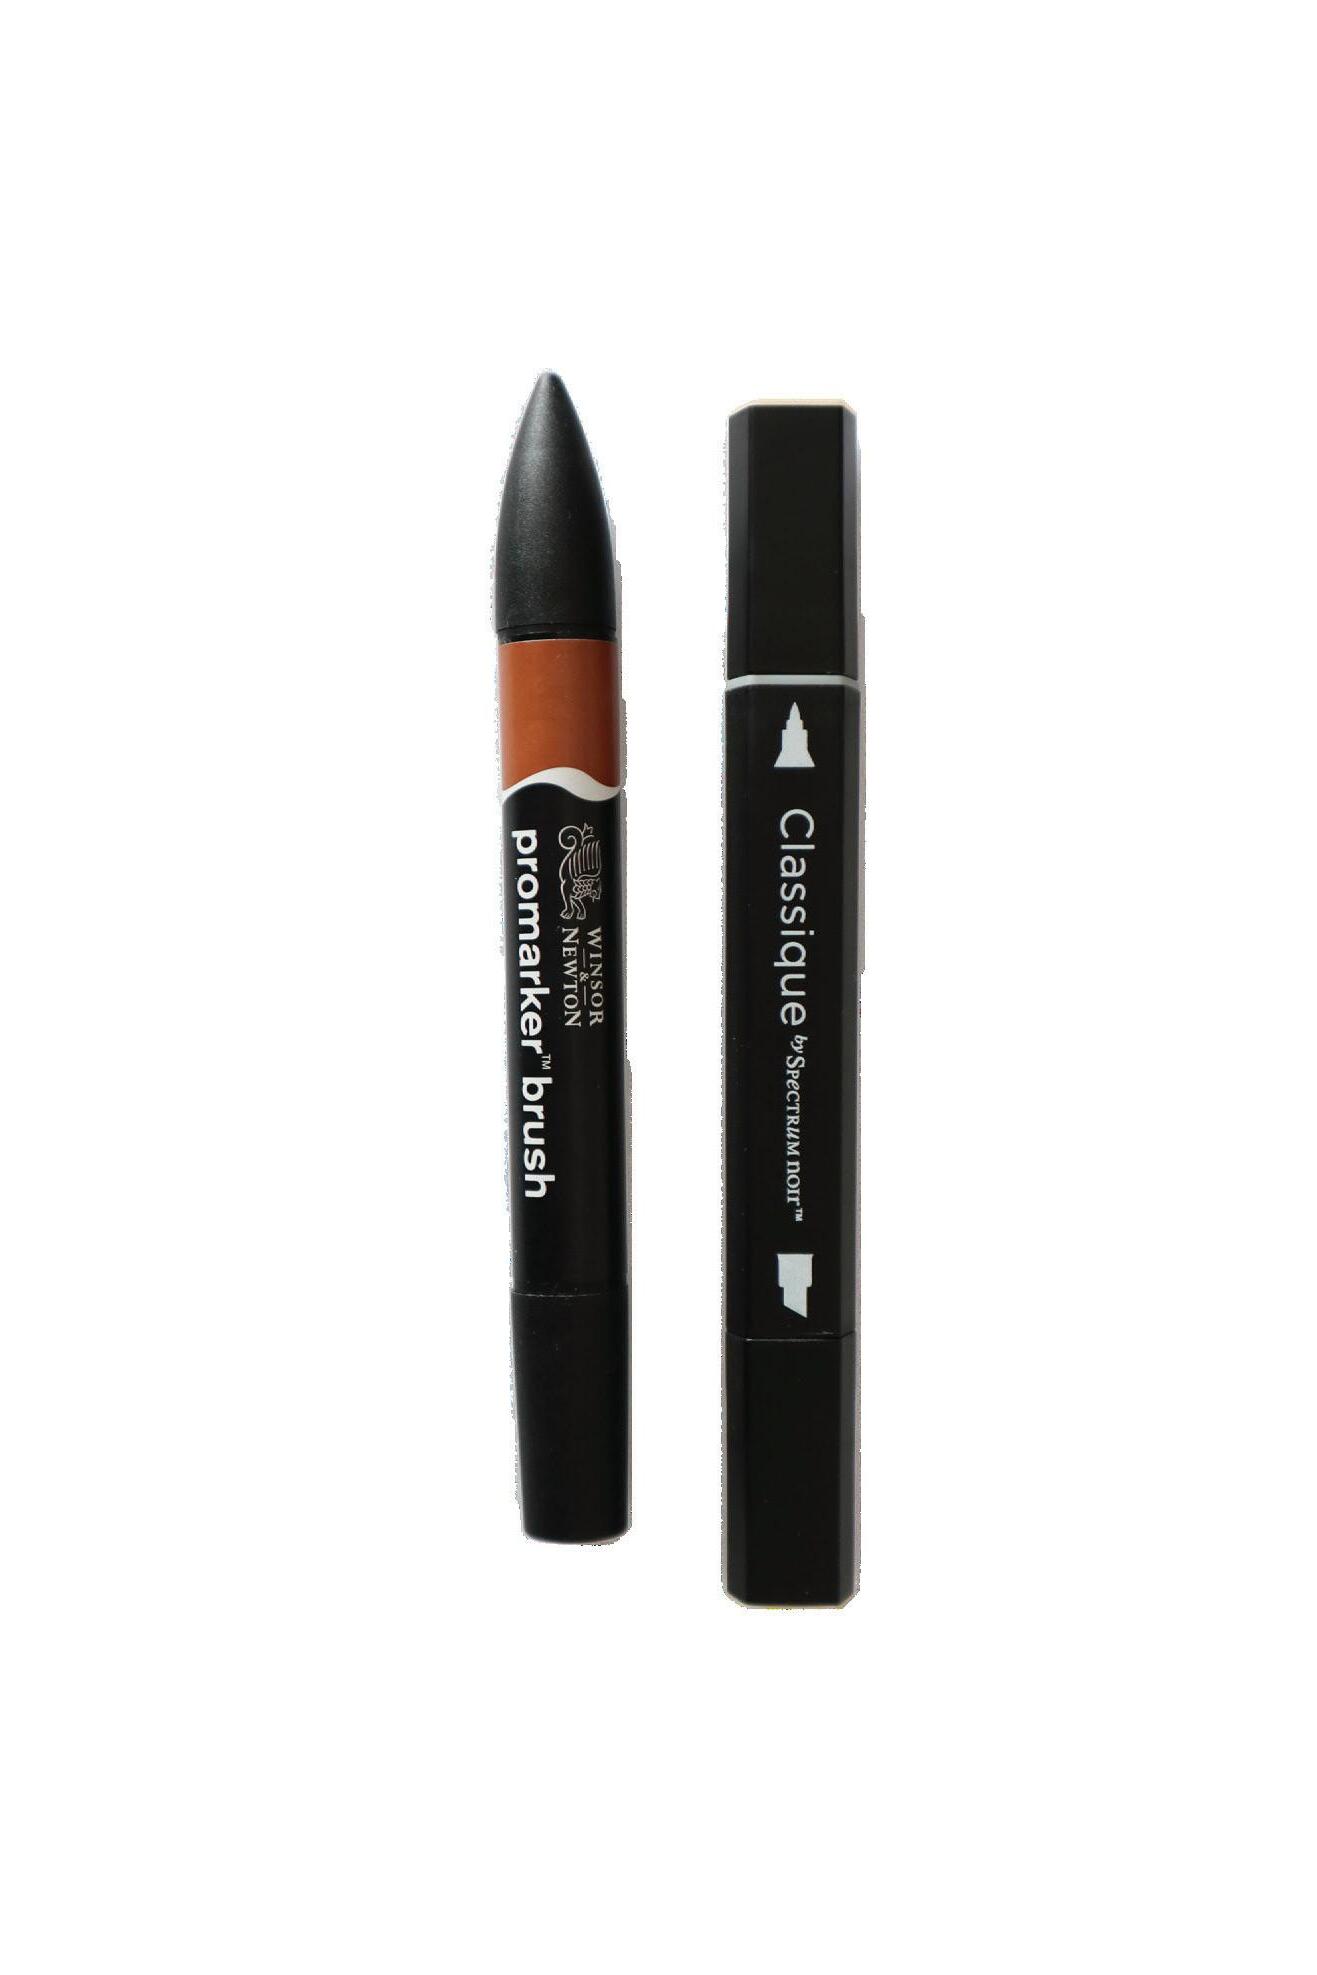
Some professional, established brands also offer alcohol markers, the most famous of them being Winsor & Newton with their Promarker line. The ink quality and the color selection are similar to those offered by Copic, so sometimes the choice comes down to personal preference. Promarkers are often used for fashion and architecture design, as the grip offered by these markers differs from Copic, which in my opinion is better for more organic designs. These could be a good option for you if you are ready for a professional-quality marker and Copics aren’t available to you.

In recent years, new brands of alcohol markers have appeared on the market, making growing a larger collection of colors finally possible for those of us on tighter budgets. Of course, the quality is not as always equal to their more expensive counterparts, but unlike other media like watercolors or acrylics, you can achieve more professional results with these markers if you know how to make the most of them.
These markers usually come in big packs so you can’t buy the markers individually. Most of these brands also don’t offer refills. The range of colors is getting bigger every day, but because they don’t sell individual markers, you might have to buy a big pack even if you are only interested in a couple of the colors. When holding these markers in hand, you can feel that the build is not as high-quality compared to higher-end brands like Copic. Still, I’ve never felt that this has held me back from getting good results; rather, it is just a cosmetic difference that doesn’t affect performance.
Because the quality of the ink is surprising for the price, these are the markers I use the most. I recommend these markers for beginners but also to those for whom having a big collection of different colors is important. Because they are inexpensive, they are the best way for you to start your marker collection and try out this beautiful medium.
When buying from these brands, keep in mind that because they are relatively new, they have gone through many iterations, so keep an eye out for the latest versions of their products. That way, you can make sure to avoid any of the problems that early versions of these markers had. Nowadays, most of them come with the combo of chisel nib and brush nib—but once again, I offer a word of caution to double-check that you’re purchasing the most recent versions, as the early versions used to be round nib and chisel nib and that might not be what you want.


From top to bottom: A marker from the Arrtx OROS collection, an Arteza EverBlend art marker, and an Ohuhu dual-tip marker from their Honolulu collection.
The importance of nibs can often go overlooked, but the type of nib you choose for each part of your project can have a big impact on your process. There are three main types of nib: brush, chisel, and round. Let’s go over the pros and cons of each type of nib, as well as my recommendations for when to use each one.
As one of the most popular types of nibs, a brush nib is very useful when it comes to blending, as well as for painting areas like hair and skin. I’ve noticed that there tends to be two main kinds of brush nibs, which I’ll call soft brush nibs and hard brush nibs.
Soft brush nibs are very flexible and allow for more control over the pressure placed onto the paper, which helps determine the thickness of lines. Because of this nib’s flexibility and bounciness, I love to use soft brush nibs for adding highlights to hair, but I don’t recommend using this nib for filling in large areas of color, as it will cause patchiness and prevent you from getting a perfect flat.
Hard brush nibs release ink faster than soft brush nibs, which can bleed through your paper if kept in the same spot for too long. This nib is still flexible, although not as flexible as a soft brush nib. Hard brush nibs are better for filling in large areas of flat color and are great for beginners who may not yet feel comfortable using soft brush nibs.
While brush nibs are really popular, they can often be overused—so be careful not to use brush nibs in areas where another nib may be better!
A chisel nib is a very versatile nib, and one of my favorites! Chisel nibs are relatively consistent in the amount of ink they release, which makes them perfect for filling in big areas and achieving perfect flat colors. Because of their unique shape, chisel nibs can be used for large sections as well as small details, but they’re not the best choice for blending or creating flawless gradients.
Also known as bullet nibs, round nibs come in slightly different sizes depending on the brand, but they are typically small, pointy nibs that allow for a lot of control. Round nibs are perfect for drawing thin lines and minor details, but they can also be used for filling in small areas when held at an angle. Be careful: this nib can cause patchiness when used to fill in larger areas, although it’s a great choice for artists whose style is flat and graphic!
Let’s practice working with the different types of nibs and the main brushstrokes you’ll use for each. This will not only help you gain confidence when laying down color with your markers, but it will also help you learn which nibs are best to use for different areas of your illustrations. Flip to the blank practice paper in the back of the book or grab your sketchbook to practice these exercises!
Although it’s a very valuable nib, the brush nib can be a difficult one to learn how to control, so I recommend spending some extra practice time with it so you can become familiar with how it paints.
Side note: The brush nib can change between brands, so you may find it easier or more difficult depending on the brand of marker you’re using.
Brush Nib 1: Start by practicing a perfect, straightforward line. Using the side of the brush nib, drag the marker in one direction, making sure to maintain a consistent speed and pressure.
Brush Nib 2: Then, repeat this action but only use the very tip of the brush nib and with very light pressure. Just like the brushstroke we practiced for Brush Nib 1, the key is to keep the same pressure and speed to get a perfect line, but now it’s a bit more difficult! Practice this until you achieve a continuous perfect line that is free from any breaks or skips.
Brush Nib 3: Next, practice controlling the pressure and direction by drawing a wavy line. Use light pressure on the upward brushstrokes to achieve thinner lines, and switch to heavier pressure on the downward brushstrokes to get thicker lines.
Brush Nib 4: This brushstroke, which involves quickly moving from heavier pressure to lighter pressure, can be very useful when creating gradients and shadows. Practice creating these lines very quickly. You should not only see a difference in the thickness of the line as you change the pressure, but also in the ink flow, which will make the thicker part look darker and the thinner part look lighter. This is a very important exercise and one that can create very different results depending on the brand of the marker and how hard the brush nib is, so I recommend you try this exercise with each brand you own so you can see the differences for yourself.


Chisel Nib
Chisel Nib 1: Since the chisel nib is so useful for filling in large areas, let’s practice by first drawing a thick, straight line. Use the entirety of the flat edge of the nib and drag the marker in a continuous line, only moving in a single direction. The aim is to work fast enough so you avoid leaving dark streaks without going back to areas you’ve already worked on, as this can create unwanted ink lines.
Chisel Nib 2: Use the side of the chisel nib to create a fine line. Make sure to always use the same amount of pressure and speed to keep the ink flow consistent. You will often use the chisel nib for background areas, so it’s important to know how to fill in smaller details without changing your nib so the background color stays flat and consistent.
Chisel Nib 3: Practice using the side of the chisel nib again, but instead draw a wavy line. Rather than using a different amount of pressure for the upward strokes and downward strokes, keep your pressure consistent so you achieve a wavy line that has the same thickness throughout.
One of the easiest nibs to use, the round nib is great for achieving perfect lines with a consistent color and thickness. For this reason, you should learn how to master this nib, as it can become your best friend for painting details like hair.
Round Nib 1: Practice creating uniformly straight lines with your round nib. You’ll notice that this nib offers very little difference in the ink flow, no matter how much pressure you use.
Round Nib 2: Now, test out wavy lines, noticing how the ink flow remains relatively steady between upward and downward brushstrokes.


As mentioned before, a fascinating and often overlooked property of alcohol markers is that they can look vastly different depending on the paper you use. The paper or sketchbook you choose will impact the level of saturation, the actual color, and the blendability of the markers, as well as how much the ink will spread and the final texture of the drawing.
It’s important to experiment with different types of paper until you find the one that works for your style. There’s no right or wrong choice, just the one that works for you.
Now let me tell you a bit more about some of the different papers that you can find, both in sketchbook and loose-sheet format. You can look to this as a guide when determining where to start, depending on what you are looking for.
For each paper, we will discuss the following chief qualities:
• Blendability: How easy is it to blend different colors together? Will it allow you to get perfect flats that don’t look streaky? How easy is it to achieve a good gradient?
• Absorbency: How much ink does the paper absorb, and how quickly?
• Bleed-Proof: Does the paper prevent ink from bleeding onto other pages?
• Ink Spread: Once you put down color, does the ink stay contained to the area you painted? Or does it start spreading beyond that boundary?
• Compatibility with Other Media: How easily does the paper take other art supplies—whether wet or dry media—in addition to the alcohol markers?
• Price: How affordable is the paper compared to other options on the market?
• Availability: How easy is it to find this type of paper in stores?
Blendability: Medium-high
Absorbency: Medium
Bleed-Proof: Yes
Ink Spread: Low
Compatibility with Other Media: Only dry media
Price: Mid-tier
Availability:
Widely available online; difficult to find in stores
Let’s start with paper marketed as alcohol marker paper. This type of paper has become more available in recent years, and most marker brands offer this paper, as it’s engineered for optimal results with their own markers.
This type of paper is normally bleed-proof, meaning that the ink won’t transfer to the other side of the paper. This is one of the safest options to choose from, and I recommend it if you are starting out and you don’t want to worry too much about how the paper you are drawing on will impact the performance of the markers you’re using. With alcohol marker paper, you can be precise because the ink won’t spread too much, and you don’t need to worry about the ink bleeding onto the next page. This paper also takes other dry media well (other inks, colored pencils, etc.).
However, this paper is typically thin and can be a bit fragile to work with. Although it’s gained popularity in recent years, it can still be difficult to find in stores and isn’t available in many sizes. It also tends to be more expensive than other options. Nevertheless, if you find a brand of alcohol markers that you love, it may be worth experimenting with their paper to see how you like it.

Blendability: Low
Absorbency: Medium-high
Bleed-Proof: No
Ink Spread: Medium
Compatibility with Other Media:
Compatible with most wet and dry media
Price: Affordable
Availability: Widely available online and offline
This is an option many people consider when starting with alcohol markers. This paper is a little bit thicker; it gives more texture, which some people desire for their work; it’s incredibly easy to find in any art store; and it
comes in all different sizes and formats.
However, in my own art, I’ve found this paper very difficult to work with. This doesn’t mean that it’s a bad option for you. In fact, you might already have some of this paper in your collection, so it’s always worth trying out.
Because it is a bit thicker, this paper absorbs a fair bit of ink, and it dries quickly. This normally makes blending more difficult, so the color often starts looking streaky quickly unless your technique is perfect. Because of this, it can spread a little, too, which makes precision in drawing rather challenging. Most of the time, this paper is not thick enough to contain the ink, so it will often bleed onto the next page.
On the positive side, this paper takes very well to other media, both dry and wet. So, depending on your process, this could be a worthy option for you.


Explore the vibrant world of alcohol markers. Featuring stunning illustrations by Lidia Cambón (@msshanh), this beginner-friendly guide will teach you everything you need to get started creating cute manga-inspired characters.
INCLUDES :
Interactive lessons for learning alcohol marker techniques, like blending, shading, and more Tips for choosing the right materials for your project
Step-by-step tutorials for drawing character features
An in-depth guide for creating a character from scratch 12 added pages of art paper, so you can practice with your markers directly in the book
Tried-and-tested tips for developing your artistic style