![](https://assets.isu.pub/document-structure/200323030911-f31556c040b2fdc3df006d9cc6e01cd3/v1/89925262d544ccc6a7f75a77ce38a1ea.jpg?width=720&quality=85%2C50)
1 minute read
Easter Craft
Make a Bunny!
Step 1
Advertisement
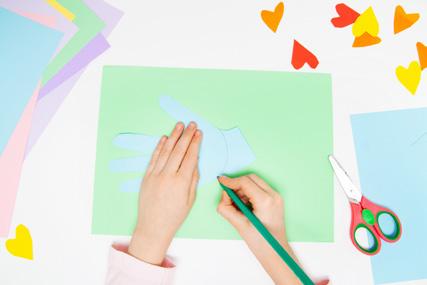
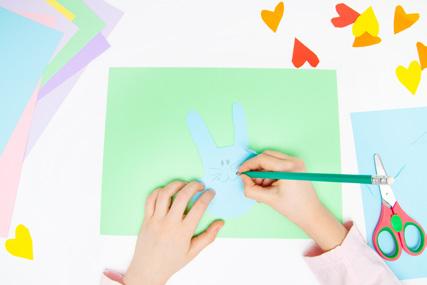
Grab a sheet of paper in your favourite colour and using a pencil, trace around your hand.
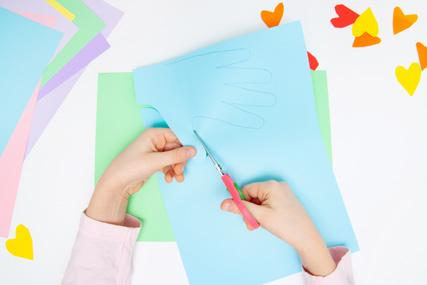
![](https://assets.isu.pub/document-structure/200323030911-f31556c040b2fdc3df006d9cc6e01cd3/v1/29c44afe814d4bb3fda0c412769c89ac.jpg?width=720&quality=85%2C50)
Step 2
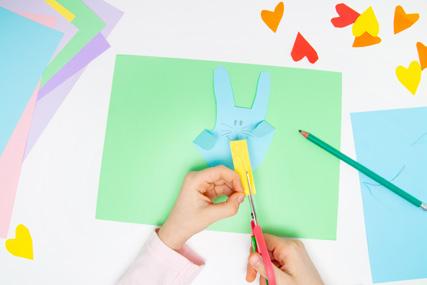
Very carefully cut around the outline of your hand. Get an adult to help if needed.
![](https://assets.isu.pub/document-structure/200323030911-f31556c040b2fdc3df006d9cc6e01cd3/v1/7018d48dab81a5f761a933fe9d29c717.jpg?width=720&quality=85%2C50)
Step 3
Mark out where your hand and wrist separate, and cut. You now have a cut-out of just your hand.
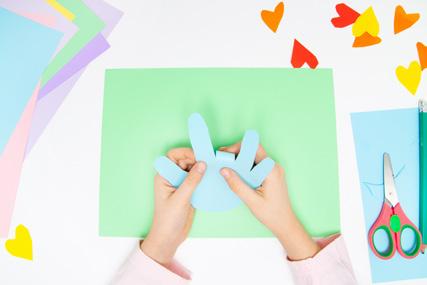
![](https://assets.isu.pub/document-structure/200323030911-f31556c040b2fdc3df006d9cc6e01cd3/v1/fa8a8bb99b6953c199aecd35623f4698.jpg?width=720&quality=85%2C50)
Step 4
Fold the middle finger behind your paper hand. Your index and ring finger will be the bunny’s ears.
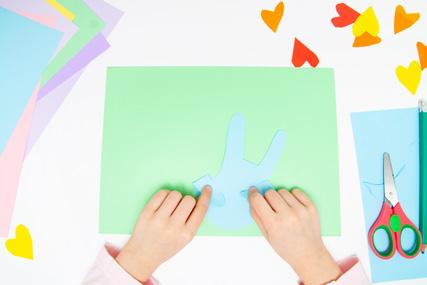
![](https://assets.isu.pub/document-structure/200323030911-f31556c040b2fdc3df006d9cc6e01cd3/v1/4188e3b2569370430da47bfe4857f046.jpg?width=720&quality=85%2C50)
Step 5
Gently fold the thumb and pinky forward a little. These will be the bunny’s paws.
![](https://assets.isu.pub/document-structure/200323030911-f31556c040b2fdc3df006d9cc6e01cd3/v1/fe30dd743a2b8938c75d25de9af3bb30.jpg?width=720&quality=85%2C50)
Step 6
Draw a cute face for your bunny. Don’t forget the eyes, mouth and whiskers, but leave out the nose.
![](https://assets.isu.pub/document-structure/200323030911-f31556c040b2fdc3df006d9cc6e01cd3/v1/55fb2e4890782f1f7d61bf901a6b1751.jpg?width=720&quality=85%2C50)
Step 7
Using another sheet of coloured paper, cut out a nose and inside of the ears for your bunny.
![](https://assets.isu.pub/document-structure/200323030911-f31556c040b2fdc3df006d9cc6e01cd3/v1/a46324237785434cf16b2973d0ae2848.jpg?width=720&quality=85%2C50)
Step 8
Using a glue stick, glue the inside of the ears and nose to your bunny.
Step 9
![](https://assets.isu.pub/document-structure/200323030911-f31556c040b2fdc3df006d9cc6e01cd3/v1/c64011c9dd805dc0239753ed47f79b17.jpg?width=720&quality=85%2C50)
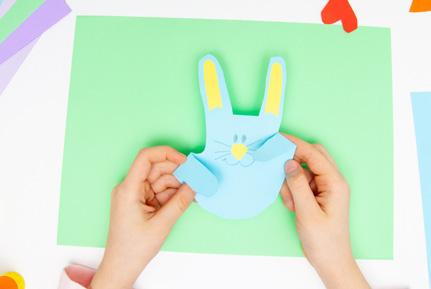
Your adorable Easter bunny is complete! Keep him yourself or give him as a gift.
![](https://assets.isu.pub/document-structure/200323030911-f31556c040b2fdc3df006d9cc6e01cd3/v1/781d0533cb0b143457349693ef420bf1.jpg?width=720&quality=85%2C50)
![](https://assets.isu.pub/document-structure/200323030911-f31556c040b2fdc3df006d9cc6e01cd3/v1/7e91c19ab8ccc4a547db9792a7c38e73.jpg?width=720&quality=85%2C50)
![](https://assets.isu.pub/document-structure/200323030911-f31556c040b2fdc3df006d9cc6e01cd3/v1/d0ca3605bd7e145b1f488e52f092eb6e.jpg?width=720&quality=85%2C50)
![](https://assets.isu.pub/document-structure/200323030911-f31556c040b2fdc3df006d9cc6e01cd3/v1/5b094d86e36e5da1e5211db5f47ee3fd.jpg?width=720&quality=85%2C50)
![](https://assets.isu.pub/document-structure/200323030911-f31556c040b2fdc3df006d9cc6e01cd3/v1/036fa43a39b1564af1ae52575e968989.jpg?width=720&quality=85%2C50)