PIzza Making GUIDE

A Taste of Authenticity


Performance Foodservice’s Italian food experts source products for our Roma® family of brands directly from Italy. We find the best aged balsamic vinegars, extra virgin olive oils, espresso, cheeses, prosciutto, and other authentic Italian staples and deliver them directly to your kitchen.
Our Roma brand combines more than 65 years of heritage to bring the best Italian ingredients to America. In 1951, at the age of 20, Louis G. Piancone left Corato, Italy, for the United States.
In 1955, Piancone decided to pursue the true American dream and opened an Italian delicatessen in Bradley Beach, New Jersey.
Noticing a need for wholesale distribution to restaurants in the area, in 1964 he sold the retail side of his business. He moved his focus to supplying authentic Italian food to restaurants and Roma Food was born.
Today Roma combines this tradition with a dedication to sourcing the best Italian products, both traditional and innovative. Roma is the leading foodservice brand for authentic Italian food and impeccable service.


Rich joined the Performance Foodservice team in 2013. He enjoys partnering with the American Culinary Federation and Child Foundation to help bring scratch cooking along with healthy great tasting options to schools. In February 2020 Rich attended the Associazione Verace Pizza Napoletana in Naples Italy and became a Certified Pizzaiolo in Neapolitan Pizza.
Rich Smice comes to Performance Foodservice with over 34 years of experience working in all aspects of the foodservice industry. His career started out in restaurants serving as a Chef’s Apprentice. He received his Chef de Cuisine Certification in 1993, and over 17 years he held numerous high-level roles including Executive Chef, General Manager, and Corporate Chef.
He played a pivotal role in opening 21 restaurants from concept to successful operation. He continued to expand his experience in the foodservice industry as a Corporate Chef in the food brokerage field. He worked successfully at both the distributor and operator levels managing and educating up to 70 companies while handling training, demonstrations, marketing analysis, menu development, design and costing, customer contract negotiations, and presentations. In 2010 he was awarded Broker of the Year. In 2011 he was awarded the honor of Sara Lee Broker Chef of the year and sat on the Sara Lee Chef Board.
Scaling or weighing the ingredients when making dough is very important. Too much or too little of any of the ingredients will cause changes to the texture, taste, handling and browning of the finished product. When mixing dough care should be taken to make sure that enough flour is used. If too little flour is used or if there is a high moisture content to the flour or if the amount of liquid in the formula is too high, the dough will be wet, sticky and hard to handle. A good rule of thumb for the amount of liquid to use in a formula is 50% of the amount of flour by weight. For example: if you were to use 50 lbs of flour in a formula you would need at least 25 lbs of liquid for a correct formulation. If oil or other liquids are used include that amount into the calculation of the liquid needed for the formula. When the moisture content is too low the dough will be tough, dry and hard to handle.
Dough needs an adequate amount of mix time to develop the gluten. If mix times are too long the dough will be mixed to the breakdown stage. This means that the gluten structure is broken which causes slack dough. Slack dough has very little life, it stretches easily and since the structure is broken, does not proof well or spring when baked.
Dough that is mixed too little, will be “bucky”. This means that it will shrink back when stretched. Well mixed dough should be smooth with no lumps of flour. Old time bakers say that it should feel like a baby’s bottom. A good rule of thumb for mixing dough is to mix it to the clean-up stage; this means that the dough ball forms and it literally cleans the sides of the mixing bowl.
Once mixed, the dough is given a short resting period. This allows the dough to relax which makes it easier to handle. It is then scaled and rounded into balls. In some cases the dough balls are given a light coat of oil to prevent drying. Depending upon the type of pizza, it is either placed into the retarder (refrigerator) or panned out and then refrigerated for use later. When placing dough into the retarder, make sure that there is enough space for the necessary air circulation around the dough. If the dough does not cool down quick-
ly it may over proof. If the dough is allowed to sit at room temperature for a long period of time after make-up, the heat generated during the mixing process activates the yeast causing it to proof too quickly. Once dough starts proofing quickly it is hard to control and difficult to handle.
The ideal storage temperature for dough is between 34 and 40º F. After make-up, chill the dough as quickly as possible. This slows down the proofing process which extends its life. Should the outside of the dough become dry, spray with water. This will soak into the doughball and eliminate the dryness. For easiest handling and the best finished product, dough should be room temperature before baking.
The action of yeast multiplying in the dough, and in that process, changing sugars to alcohol which release carbon dioxide. The carbon dioxide is trapped in the gluten structure causing the dough to rise or expand. When working with yeast you must remember that it is a living organism. Temperatures will effect its actions. For most yeast products, if you use a temperature above 110º F the yeast will die and the dough will not proof.
Under proofed dough can be attributed to: low amounts of yeast in the formula, low water temperatures, high salt content and yeast that is too old. Dough that is under-proofed is hard to stretch, has little flavor and will blister and burn when baked. This is seen even at low baking temperatures in any kind of oven. Pizza bottoms of underproofed dough will have round, black spots, and the tops will have bubbles. The solution to this problem is to allow the dough a longer time to proof or to adjust the formula or to change the handling procedures. If there is a problem with the yeast the dough may never proof.
Over-proofed dough is attributed to: high yeast content, high sugar content, high water temperature, long proof times, high temperatures and old dough. Dough that is over-proofed will tear when stretched and is hard to brown. Some people feel that the flavor of over-proofed dough is unacceptable.


Bakers


Chicago-style pizza is pizza prepared according to several different styles developed in Chicago, widely referred to simply as deep dish pizza due to its cooking style. The pan in which it is baked gives the pizza its characteristically high edge which provides ample space for large amounts of cheese and a chunky tomato sauce. Chicago-style pizza may be prepared in deep-dish style and as a stuffed pizza.
There is also a style of thin-crust pizza found in Chicago and throughout the rest of the Midwest. The crust is thin and firm enough to have a noticeable crunch, unlike a New York-style pizza. This pizza is cut into squares, also known as “tavern-style” or “party cut”, as opposed to wedges.
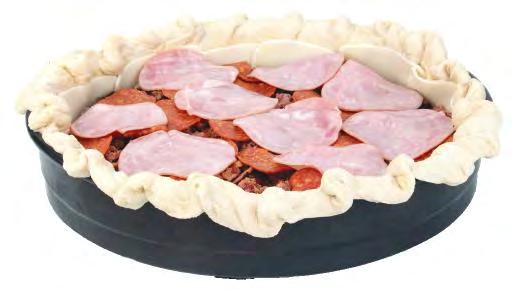
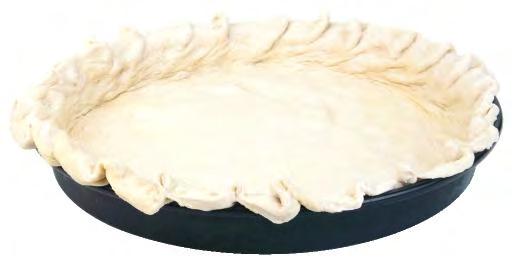 Dough in the Pan
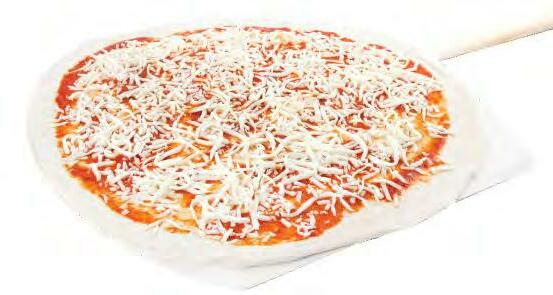
Adding the Toppings
Flour (cornmeal) 100% 38 oz flour with 2 oz corn meal Water 60% 24.28 oz (7 oz at 85° to mix with yeast, and 17.28 oz cold water) Salt 2% .8 oz
Malt/Sugar 2% .8 oz Yeast 1% .4 oz
Shortening 4% 1.62 oz Butter 4% 1.62 oz
Prepare the Dough Mix 95% of the flour with 5% cornmeal. Add the sugar/malt to the mixer on the lowest setting for 1 minute. Add most of the cold water, save some, then add the yeast & warm water and mix for another minute on the low setting. Use the rest of the cold water to rinse out the rest of the yeast. Next, add the softened butter, and the lard/shortening and mix for another minute. Make sure the flour from the bottom of the bowl is being picked up and incorporated into the dough. Add the salt and mix for another minute. Cover the dough for 30 minutes with a wet towel, then knead for 3-5 minutes until the dough is smooth. Cut into dough balls, set in a dough tray and cover with film tightly and refrigerate for a day or two. The first dough ball for the bottom of the pie use 38 oz, and the second dough ball for the top crust use 23.75 oz dough ball.

On Day 2 or 3, start the oven to warm up to 500 degrees. The dough balls should rest at room temperature for at least a half hour to warm up to around 60 degrees. Dust the working surface with cornmeal and place the 38 oz dough ball onto the surface. Apply more cornmeal to the top of the dough and use a rolling pin to roll out your dough. If the rolling pin begins to stick add another dusting of cornmeal and continue to roll out your dough ball to a minimum 19” circle. Generously apply butter to your Chicago style pan, and place your rolled out dough in the center of the pan. Press the edges, so the dough is evenly placed in the pan, and allow to rest for 30 minutes for the dough to settle and take shape of the pan.
Add a thin layer of sliced PS mozzarella around the edge of the pan, going up about ½” on the edge creating a nice barrier for the toppings. Next, add chopped up meatballs, pepperoni, Italian sausage, sauteed onions, red peppers, and mushrooms. Add some chopped garlic, and grated Romano, then add some shredded PS mozzarella. Then add a layer of sliced provolone.
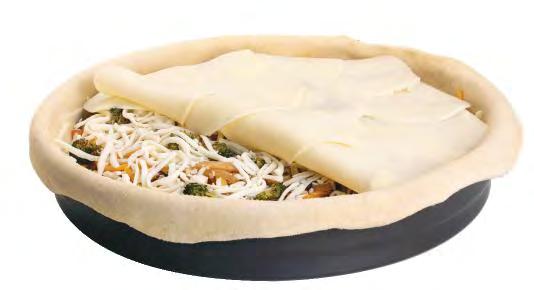


Next, roll out the top layer of the pie, by dusting the work surface with cornmeal, putting the dough ball down, adding more cornmeal and rolling it out to about a 15” circle. Then place the rolled out top crust onto the pie, and begin to crimp the edges. (Jim used a technique of pinching the dough between his index finger & thumb, then twisting the dough 180 degree, and going counter-clockwise all away around the crust). Cut four 2” cuts to allow steam to release, and place in the oven for about 30 minutes. Check color of the crust, until you’re satisfied the dough is thoroughly cooked.
After removing the pan from the oven, brush the dough with garlic olive oil, then allow to rest for 10 minutes. Carefully work a spatula around the edges, and then under the crust, until you’re sure the pie is loose from the pan. Carefully slide the pie onto a cutting board, where you’ll then add warmed up sauce, Romano cheese, added gallops of sauteed spinach, and ricotta.
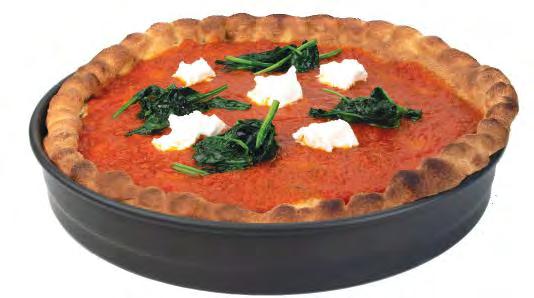 Dough in the Pan
Adding the Toppings
Top Layer of the Pie




Bakers


Bakers
Neapolitan is the original pizza. This delicious
dates all the way back to 18th century in Naples, Italy. During this time, the poorer citizens of this seaside city frequently purchased
that was cheap and could be eaten quickly. Luckily for them, Neapolitan pizza was affordable and readily available through numerous street


Bakers

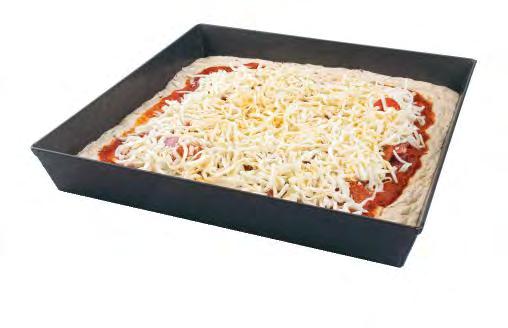
Detroit Style Pizza is a rectangular pizza with a thick, crispy, and airy crust. It is traditionally topped with a blend of mozzarella, white cheddar, and Wisconsin brick cheese, then tomato sauce layered on top of the other toppings (rather than directly onto the dough). This style of pizza is baked in rectangular steel pans.

Make Poolish starter by mixing yeast with water, then add flour and mix by hand. It is very sticky. Soak hands in ice cold water before you mix to help with sticking to your hands. Place starter in a glass measuring cup topped with film. Puncture a few holes in film with a knife to let it breathe.
16 hours later, make dough. Add 2.2 g of yeast to 70 g warm water and let it sit for a minute. Then whisk yeast until dissolved completely before pouring into mixing bowl. Use a little of the 210 g cold water to rinse out the yeast cup to capture all of the yeast. Add water to mixing bowl, then add the flour & sugar. Mix until all flour is blended, then add Poolish and mix. Add salt and start to knead dough. Again, the dough tends to be sticky, so a cold-water ice bath of hands helps. Add EVOO and knead oil into the dough. Cover with a damp cloth and allow to rest for 30 minutes.
Knead the dough for 3 minutes then divide into two equal size dough balls. Oil hands and put a small layer of oil around the dough balls. Place dough balls 3-4” apart on a plate and cover tightly. Refrigerate overnight.
Smear butter on the bottom of Lloyd pan and 1-2” up the sides. Stretch and pat the dough into the pan trying to spread it evenly – covering the entire bottom of the pan. Cover and let sit in a warm place to rise for 20-60 minutes. Fill a pot with hot water and set the pan on top for a better rise.
Thinly coat EVOO on the dough, and dimple. Using fingertips, press down the dough leaving an uneven surface. Do not press all the way through the dough. Cover again and let rise for 3 hours. Par-bake crust at 450 degrees for 8 minutes. Allow crust to cool on a drying rack. Put a thin layer of EVOO on the bottom of the Lloyd pan before placing the crust back inside. Put cheese on the crust edge to edge, allowing for some to melt down the edges. This will form the burnt charred cheese outer layer. Top pizza with desired toppings and bake at 450 degrees for 15 minutes on a Pizza Steel. Allow the steel to heat up for 1 hour before baking. Heat pizza sauce in small pan then add two sauce lines (Racing Stripes) across the long way of the pizza. Cut & Eat.





Flour
Whether
call
Roman
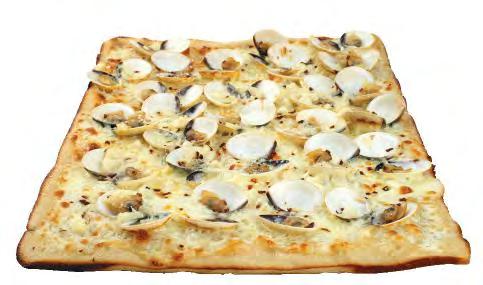
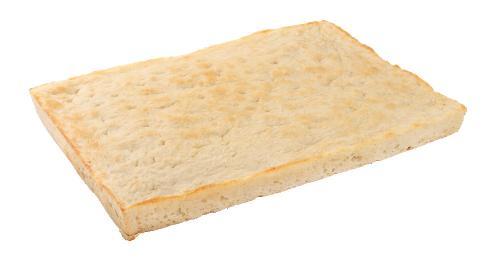
Pizza Romana or Pizza al taglio, one thing is certain, Roman style pizza’s popularity is on the rise. Some may think it’s a fad, but this style pizza originated in Rome in the early 1960’s and is now widespread throughout Central Italy and gaining fans in the United States.
The
is left to rest in the refrigerator for two whole days. The secret to the best Roman pizza is allowing the dough enough time to rest and develop large air bubbles. Those large air bubbles are the key component to a light and airy Roman style pizza crust. On the third day, the dough is ready to be transferred into pans to rise and proof at room temperature for eight hours.
 Dough in the Pan
Pre Bake, Topped in the Pan
Baked in the Pan


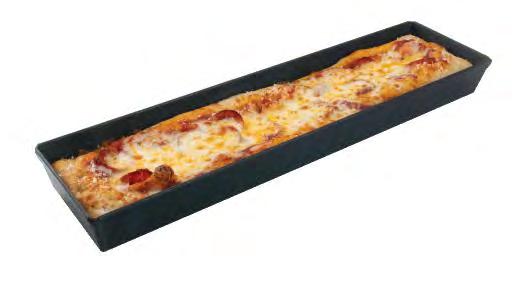
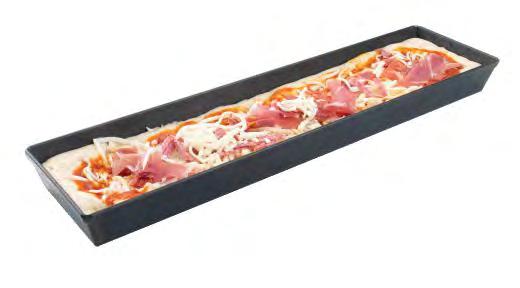


Bakers
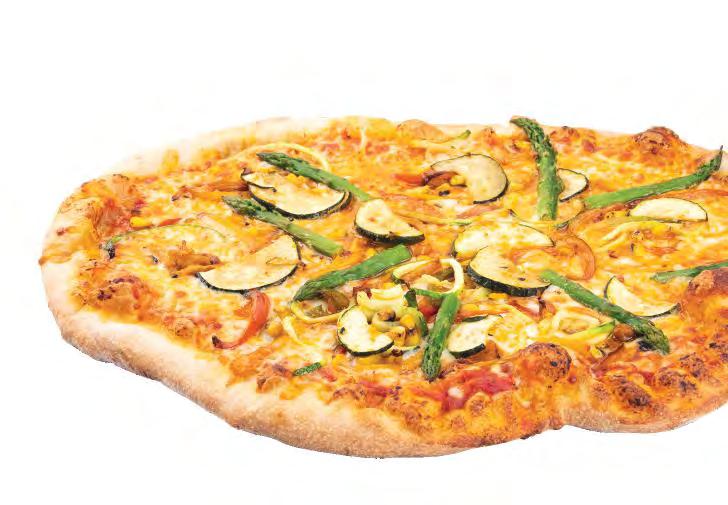
Bakers

Bacon Topping
Canadian-Style Bacon (oz)
3.5
14 8.75 13.5
3.5 4.25 2.25 4.25 6.25 3.25 6 7.5
1.75 1.25 1.75 2.5 1.5 2.5 3 2 3 4
Diced Ham (oz) 0.75 1 1.5 1.25 2 2.5 2 3 4 3 4.5 5.75 4 6 8 5.25 7.75 10.5 6.5 10 13.25
Genoa Salami (oz) 0.25 0.33 0.5 0.33 0.5 0.75 0.5 1 1.25 1 1.25 1.75 1.25 1.75 2.5 1.5 2.5 3 2 3 4

Chicken Strips (oz) 0.75 1 1.5 1.25 2 2.5 2 3 4 3 4.5 5.75 4 6 8 5.25 7.75 10.5 6.5 10 13.25
Meatballs (oz) 0.75 1 1.25 1.25 2 2.25 2 2.5 3.5 2.5 3.75 5 3.5 5 6.75 4.5 6.75 8.75 5.5 8.5 11
Taco Meat Crumbles (oz) 0.75 1 1.5 1.25 2 2.5 2 3 4 3 4.5 5.75 4 6 8 5.25 7.75 10.5 6.5 10 13.25
Chorizo Crumbles (oz) 0.75 1 1.5 1.25 2 2.5 2 3 4 3 4.5 5.75 4 6 8 5.25 7.75 10.5 6.5 10 13.25
Shredded Beef (oz) 0.75 1 1.5 1.25 2 2.5 2 3 4 3 4.5 5.75 4 6 8 5.25 7.75 10.5 6.5 10 13.25
Andouille (slices) 3 4 5 3
