2 minute read
AV Notes
Adding a Music Track (Basic A)
Find a piece of music which is about the same length as your slides. You can shorten or lengthen slides later so the music and slides are the same length. This is important because it will allow the natural end of the music to finish with the end of your slides. If you just stop the music part way through the tune because the slides have finished, it will be easily noticed by the judges and penalised.
Store the piece of music you plan to use in the main folder for your AV.
Drag and drop your music onto the Audio 1 track.
• You can shift the music to a new place on the track by grabbing the bar across the top with the cursor and dragging it to a new position.
• You can rename the track by right-clicking Audio 1 and in the drop-down menu choose Rename Track.

Trimming the End
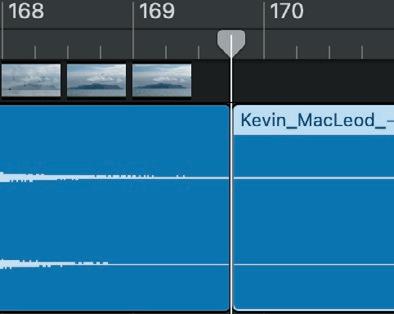
Some music has a long tail at the end which you cannot hear but which will stop your completed AV ending when the audible music ends. You can shorten some of the slides so the music and slides end together and put one of two long black slides at the end to cover this time. Better still, you can shorten the end of the music track. There are two ways to do this.
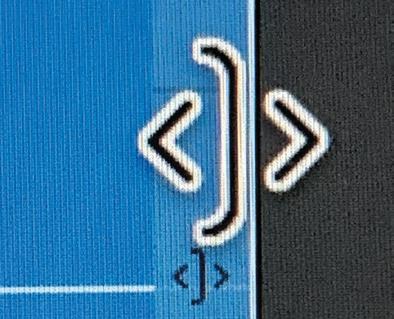
1 Put the cursor at the end of the music track and it will change to a square bracket with two arrowheads. (Make sure you get this symbol and not the option to loop off.) Hold down the mouse and drag the end of the music track back to where the sound waves actually end. Using this method is non-destructive and can be changed later.

2 Put the Playhead where you want the music track to end. Listen to the end to make sure you leave enough music to fade out.
• Go to Edit->Split regions at Playhead (Comd +T).
• Make sure the part of the track that you want to remove is selected (the top bar is highlighted).
• Press Delete to remove the last bit. This method is permanent.
• Remember to save your work often!
Share
This will convert your working file into a format that you can import into your AV project.
There are several ways you can do this. I am only going to cover one way but if you are interested you can explore the other options.
• Go to Share-> Export Song to Disc.
• Save As….. Note that this uses the same name as the one you gave it when you started this project, but adds the date and the time. You can use this information to work out which is the latest version of your project. Another option is to replace the date and time with v1, v2 etc.
The default is to save the finished version of your project to Garageband, along with the working version. My preference is to save it into the same folder where all the other elements for this AV have been stored.
To import this project into a format that can be used in any project select mp3. In the next button, click on the double arrow if necessary and choose the Highest Quality. Choose Export.
Adding your Music Track to your AV
• Open your AV Making programme. Drag and drop the Shared Music file onto a track below the images.
• Play your AV to see how well the music works with the images. You may be able to adjust the length of some images to work better with the music.
• To change your music track, go back to Garageband and Open an Existing Project.
• Open the working copy of your Project.
You can either make changes and save these changes OR you can Save As … and add a version number to the title. This allows you to go back to an earlier version if the changes you make don’t work.
Next time I will give instructions for adding a voice-over and adjusting the music.


