
5 minute read
Affinity Photo Tutorial
Adding Dynamic Range Do you sometimes have the need for more dynamic range in your scene? If then look no further: Affinity Photo makes it easy to create an HDR image using multiple files.
TODAY’S CAMERAS have more megapixels than ever before, but even the best professional tools have their limits and there may be occasions when you’re met with a scene that challenges the dynamic range limits of your camera. These occasions often occur when there is high contrast lighting, typically around the golden hour, where a
Advertisement
WORDS AND IMAGES MATTY GRAHAM
camera may struggle to expose both for the dark foreground and the light sky, resulting in a less-than-favourable overall result. Of course, photographers can address this issue by using ND filters in the field to balance the exposure, but even this may not be enough to level the histogram.
Fear not, for HDR (High Dynamic Range) is the photographer’s safety net and, by merging multiple files taken at varying exposures, you’ll be able to manage the shadows and highlights in the scene to get a better result. But many professionals view processing HDR files as a bit of a time vampire, since you need to merge the files and then edit them into a final frame. Luckily, with Affinity Photo creating and editing HDR images is quick and easy…

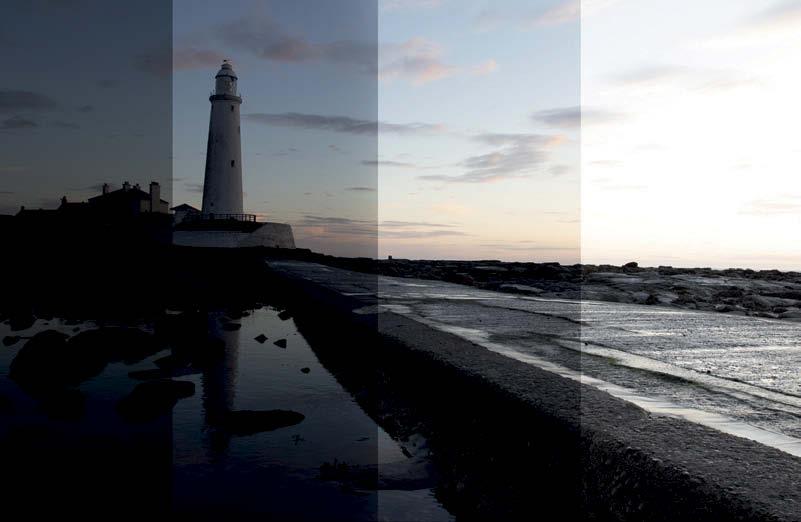
ABOVE: Realising the scene he was photographing had too much dynamic range to enable a perfect result to be achieved in one shot Matty set his camera up on a sturdy tripod and shot four component images to create the base for his HDR result.
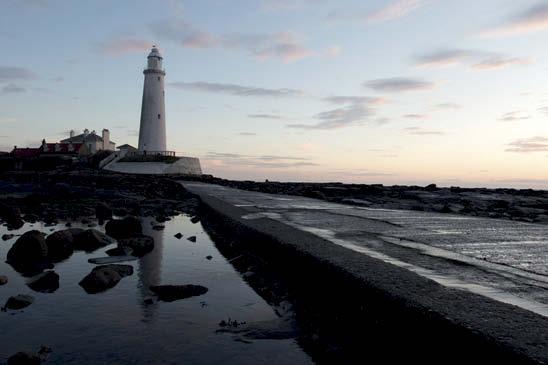
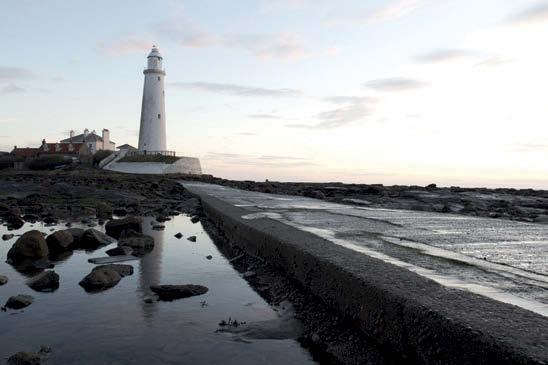
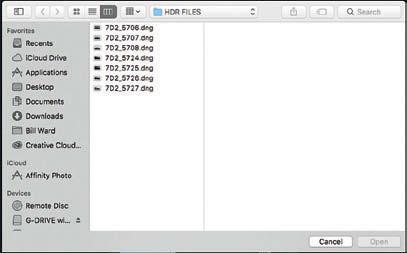
SELECT YOUR IMAGES Start this technique by placing the images you’d like to merge together (Raw files or JPEGs - Affinity Photo can merge either) in one folder on your desktop as this will make it easier to find your images. Next, open up Open Affinity Photo and then use the mouse to select your File and scroll down to the HDR Merge option. A dialogue box will appear so then you need to click Add and select the images you’d like to merge together. STEP ONE


REFINE YOUR SETTINGS Before merging the images refine your settings. If you shot your images handheld leave the ‘Automatically align images’ box ticked. However, if you used a tripod, there’s no need for this. Set Noise Reduction to around 40% if you’re working with Raw files - leave this unticked if working with JPEGS, otherwise you’ll lose fine detail - and keep the ‘Tone map for HDR image’ box ticked too. Once you’re happy with the setting, click OK. STEP TWO
When the HDR Merge finishes, explore the Pre-sets on the left and then fine-tune the look of the image using the sliders on the right of the interface. There’s options for a more Natural looking HDR, which may appeal to those who need to merge files but don’t want the image to look ‘overly HDR’ while there are also more extreme Pre-sets that ramp up the detail and contrast within the frame. EXPERIMENT WITH PRE-SETS STEP THREE

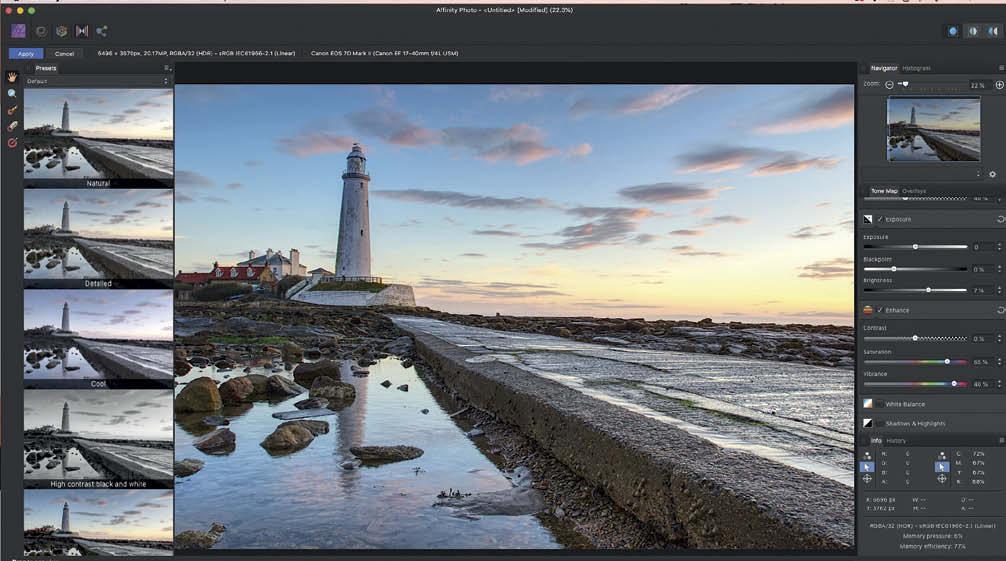
FINALISE ADJUSTMENTS STEP FOUR You may decide to bypass the Pre-sets altogether, but even if you do select one of them you can still refine the adjustments by using the Tone Map options on the right of the interface. These include Tone Compression, Local Contrast and a number of tonal adjustments, which offer you the opportunity to tweak the exposure even more to your liking. Finally, Enhance sliders enable you to adjust the Vibrance and Saturation to really ramp up the colour in the frame. Make any adjustments and then click the Apply button at the top left.
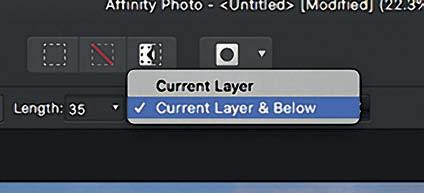
To add that final polish to your HDR creation, it’s worth checking on (and removing) dust specks that were on the lens. Head to the Layers panel and click Add Pixel Layer, select the InPainting tool from the Tool bar on the left of the interface and then head to the top of the interface to change Current Layer to Current Layer & Below. You can then click to remove specks of dirt to clean up the image in a non-destructive way, changing the size of the brush with the square bracket keys if needed. Finally, click File> Export and save the file in the format of your choice. STEP FIVE CLEAN UP ANY DUST MARKS
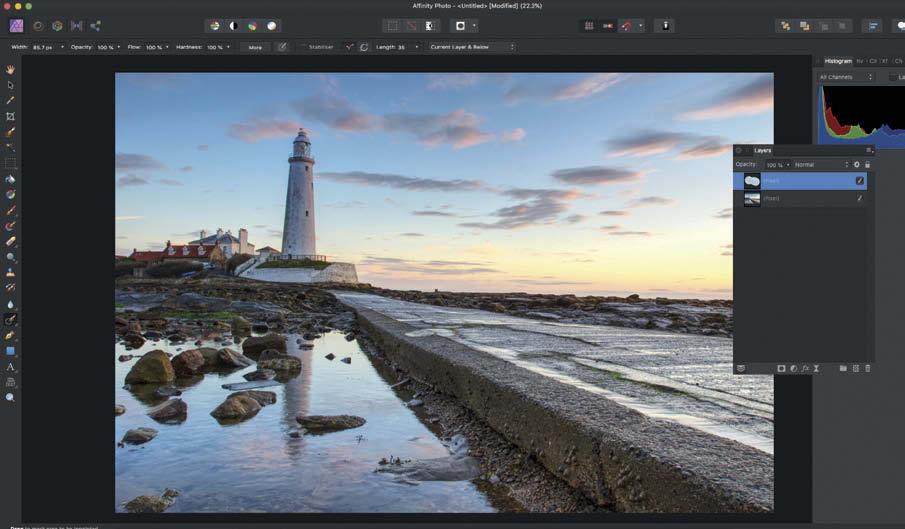
BEFORE
RIGHT:The HDR process works by combining files with different densities to create one composite image that has a huge dynamic range. These are slivers of the four files that made up the final HDR result.
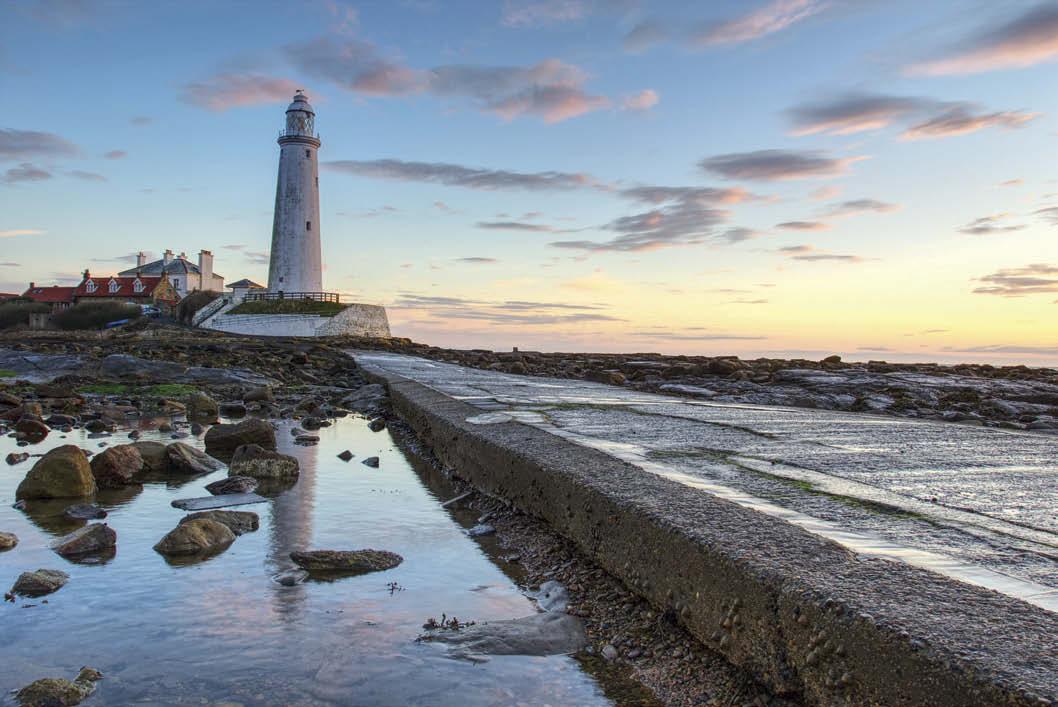
BELOW: Here’s the final HDR result, which has the distinctive glow associated with this technique. It’s possible in the Affinity Photo software to tailor the strength of the effect to your personal taste.
AFTER

VIDEO: Now head to the Professional Photo website at www.professionalphoto.online for an exclusive video where Matty talks through the techniques covered here in real time.
More information: / https://affinity.serif.com
One of the key issues for anyone including tall objects such as trees or buildings in a frame is converging verticals and we show how to correct these without the need for a tilt & shift lens! NEXT MONTH:


