3 minute read
Activity – How to Measure the Soil Texture
The best way to measure soil texture is to send a sample to a lab for measurement of % sand, % silt, and % clay to provide a precise textural class. This kind of analysis is often costly, simply because it takes the lab technician a lot of time to do, but there are two ways to get initial observations or estimates of soil texture on your own. Remember, once you measure soil texture you will likely never have to do it again, unless you have severe wind or water erosion.
Soil Texture Ribbon Technique
Advertisement
Supplies
• Water for wetting soil
• Small shovel or other tool to collect your soil sample
Instructions
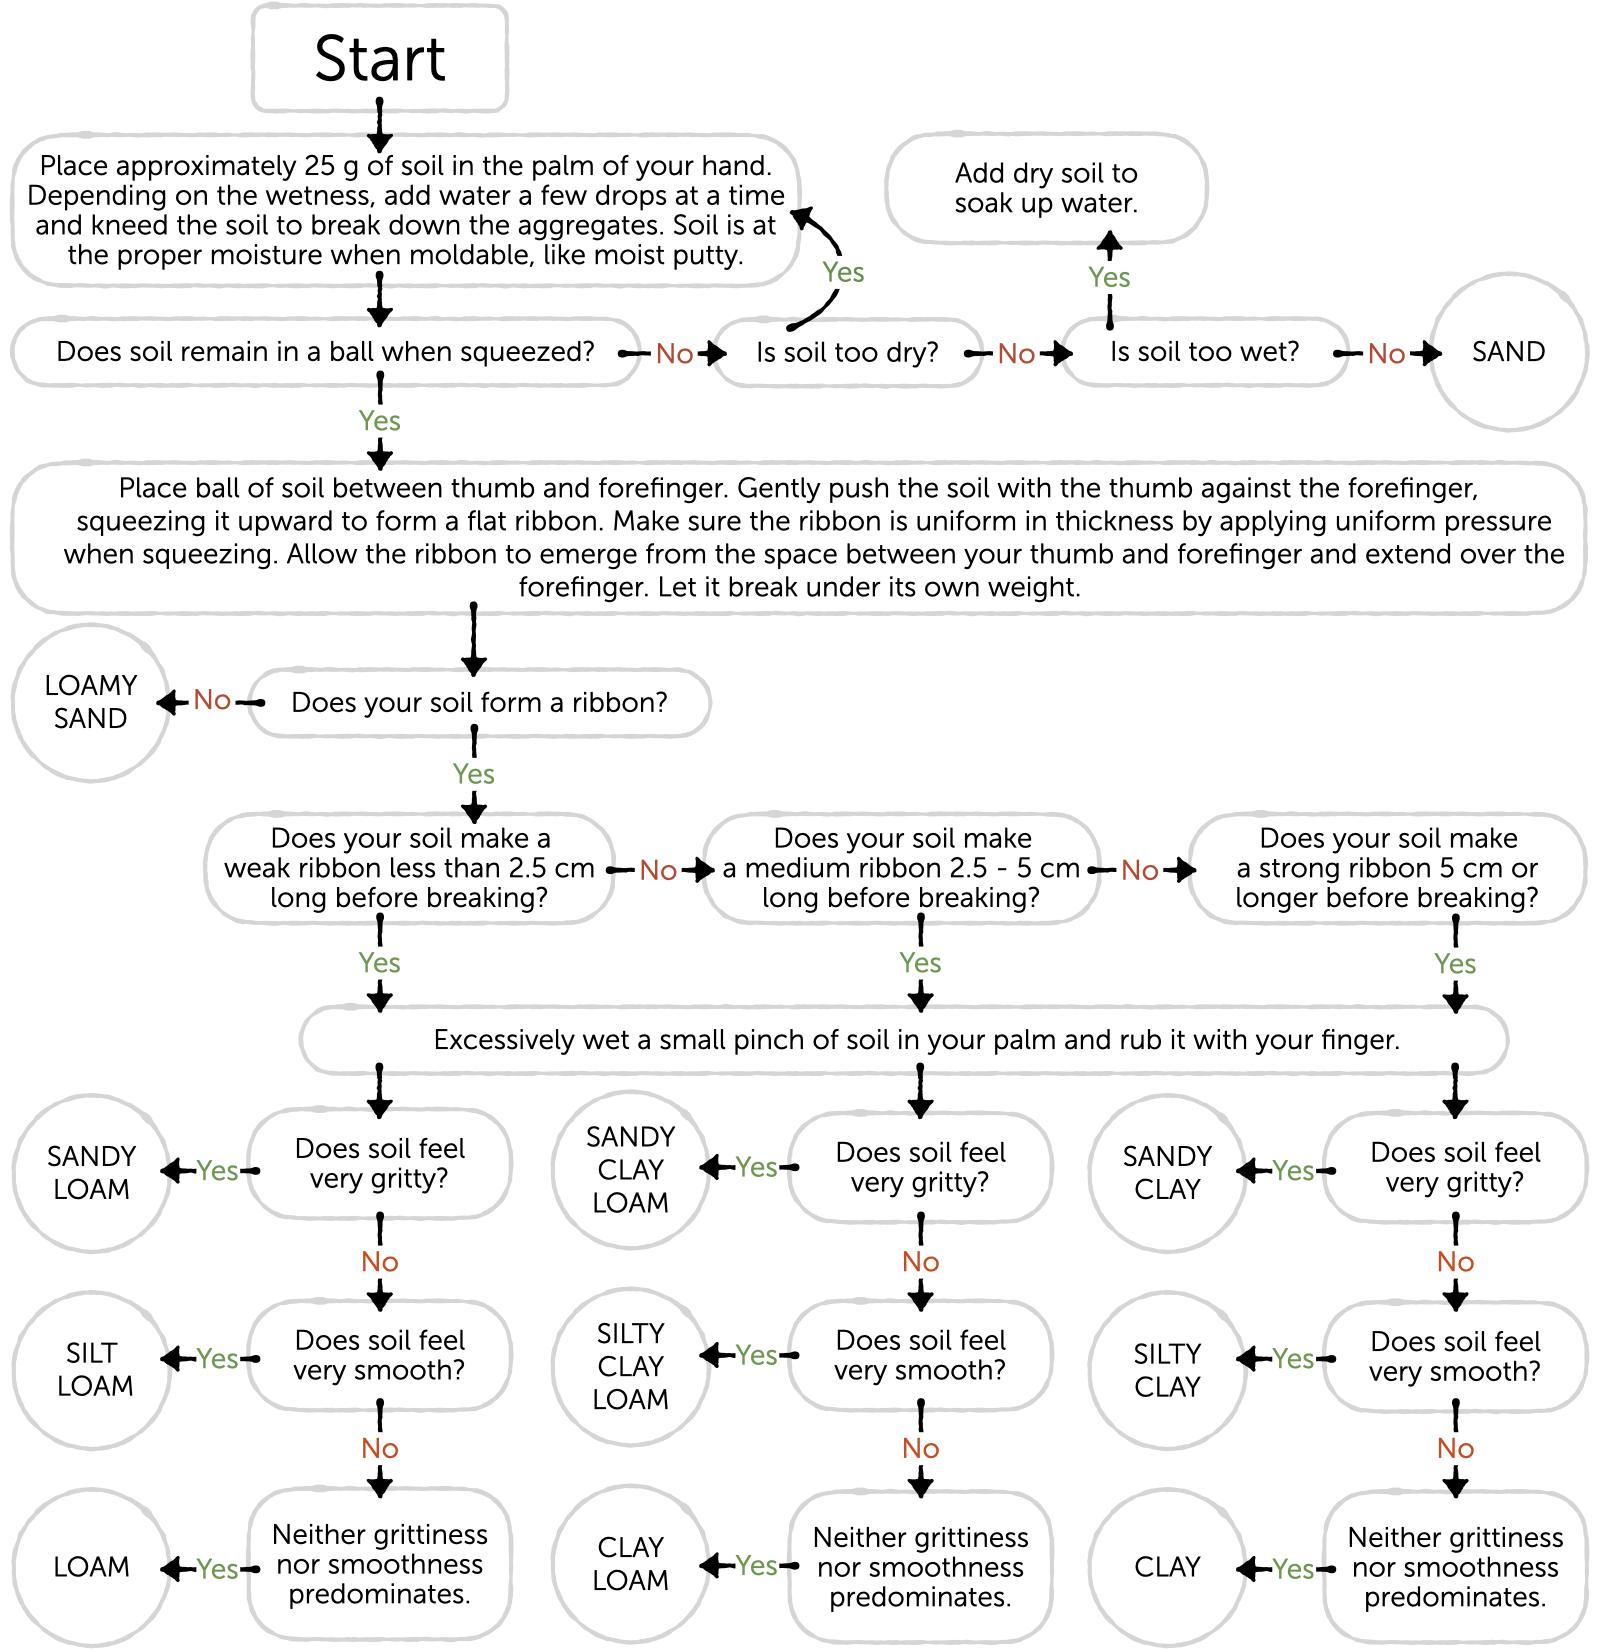
1. Refer to NRCS Texture by Feel Diagram for instructions and texture determination (on next page).
2. It is always good to try a few different times to get used to the technique. In particular, pay attention to how much the quantity of water you add affects the soil texture you determine. Notice how the pressure you use between the thumb and forefinger affects the ribbon formation. Try with a few different soils to get an idea of how different soils feel when forming a ribbon.
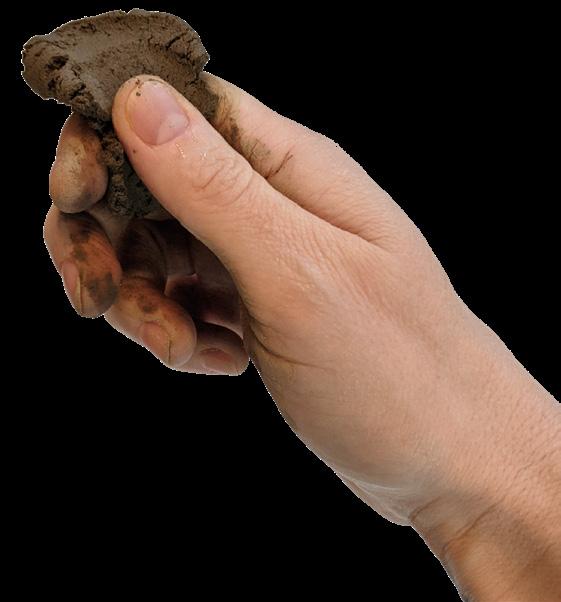
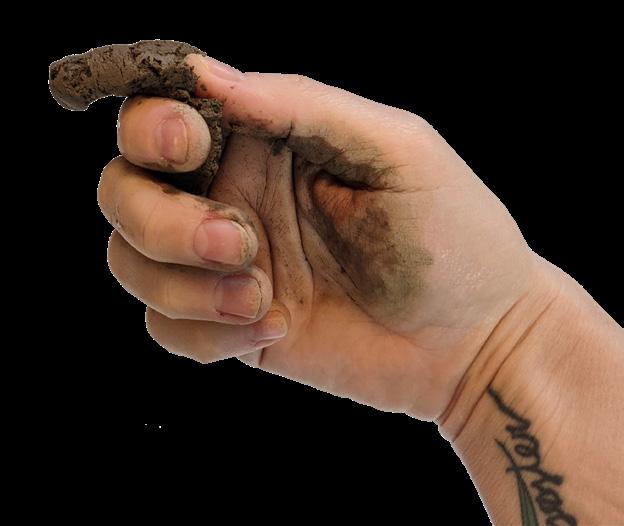
3. This is how you will want to form your ribbon


Interpretation
What texture did you determine?


NRCS Texture By Feel Diagram

Modified from S.J. Thien. 1979. A flow diagram for teaching texture by feel analysis
Journal of Agronomic Education. Issue 8, pp 54-55.
Activity continued on next page
Settlement Technique
Supplies
• Glass or clear plastic jar with a lid
• Water
• Small shovel or other tool to dig up your sample
Instructions
1. Pour a hefty scoop of soil into a clear plastic jar.
2. Fill the jar with water. Put the lid on and shake well. Let it sit.
3. Check the jar every several hours and then over the next few days.
Interpretation
• The many kinds of soil particles swirl in the water when you shake the jar. They eventually settle according to their size and weight.
• Larger, heavier particles settle first (pebbles and sand).
• Smaller, lighter particles settle last (fine silt).
• Clay particles will not settle, and this will cause the water to remain cloudy.
• Sticks and bits of leaf matter float.
Record your observations and the relative amounts of material settling, remaining suspended in the water, and floating.
Day 1
Day 2
Day 3
Soil Texture Class
Glossary
Soil Texture Class
Soil texture class is a soil science classification. Soils are grouped into classifications based on the percentages of sand, silt, and clay in the soil.
Some different combinations of soil particle distributions will have similar properties and can be grouped together.
Soil texture classes are related to the degree of a soil’s:
• Susceptibility to erosion
• Aeration
• Water flow in and out
• Water holding capacity
• Nutrient availability
• Potential/suitability for crops
For example, generally sandy soils promote free water drainage and entry of air, and thus they are prone to drought. Silty soils allow for drainage, but not as fast as drainage through sand particles. Due to the abundance of smaller silt particles, silty soils often decrease the pore space of the soil, causing drainage and aeration issues. Soils high in clay have further effects on water and nutrients. Clay particles hold water tightly on their surface, as well as between layers, and not all of the water that they hold is available to plants. Clay particles are also responsible for nutrient and water holding, due to large surface area and surface area reactivity. They can attract and hold minerals such as calcium, magnesium, potassium, ammonium, sodium, copper, aluminum, and hydrogen. Note: Many of these properties are also affected by the soil’s organic matter component, which is discussed on page 24. Organic matter is different from the mineral component, although organic matter and mineral particles can be mixed together, depending on where they are in the soil profile.
Instead of testing for the exact proportion of silt, sand, and clay in every field or pasture, we can get a lot of information by knowing which class the soil is in, and this is information that you will find on soil maps (see Chapter 3, “Where to Sample” on page 84).


