
Luan
Workshop01
B-Made Facilities learning and Steam Bending 2022.10
Team members: Dongze Luan; Weijun Zhu; Qi Gao; Qiutong Xv; Ziyi Peng
Tutor: Turner-Baldwin, Samuel; Zandavali, Barbara; Van Den Berg, Melis; Dobson-Perez, Patch; Veitch, Hamish; Lucy, Flanders; Claudia ,Toma


Vertical Bandsaw, Jigsaw,Handsaw Steamer,Shaping Desk Piller Drill,Hand Drill Sanding Mechine Lazer Cutting Mechine Horizontal bandsaw Timber Processing Workshop01 Steam Bending Workshop01 General Drilling Clamps Sanding Object Holding Workshop01 CNC Mechine 3D -Printer of Ceramic Plaster Drying and Sanding Processing of Flat objects Workshop01 Cheap metals processing Processing of 3D Objects Milling Workshop03 Ceramic Firing Furnaces Addictive Manufacturing Workshop04 Ceramic Firing Workshop01 Workshop04 Workshop01 Workshop01 Brief of Term01 Facilities learning
Part01

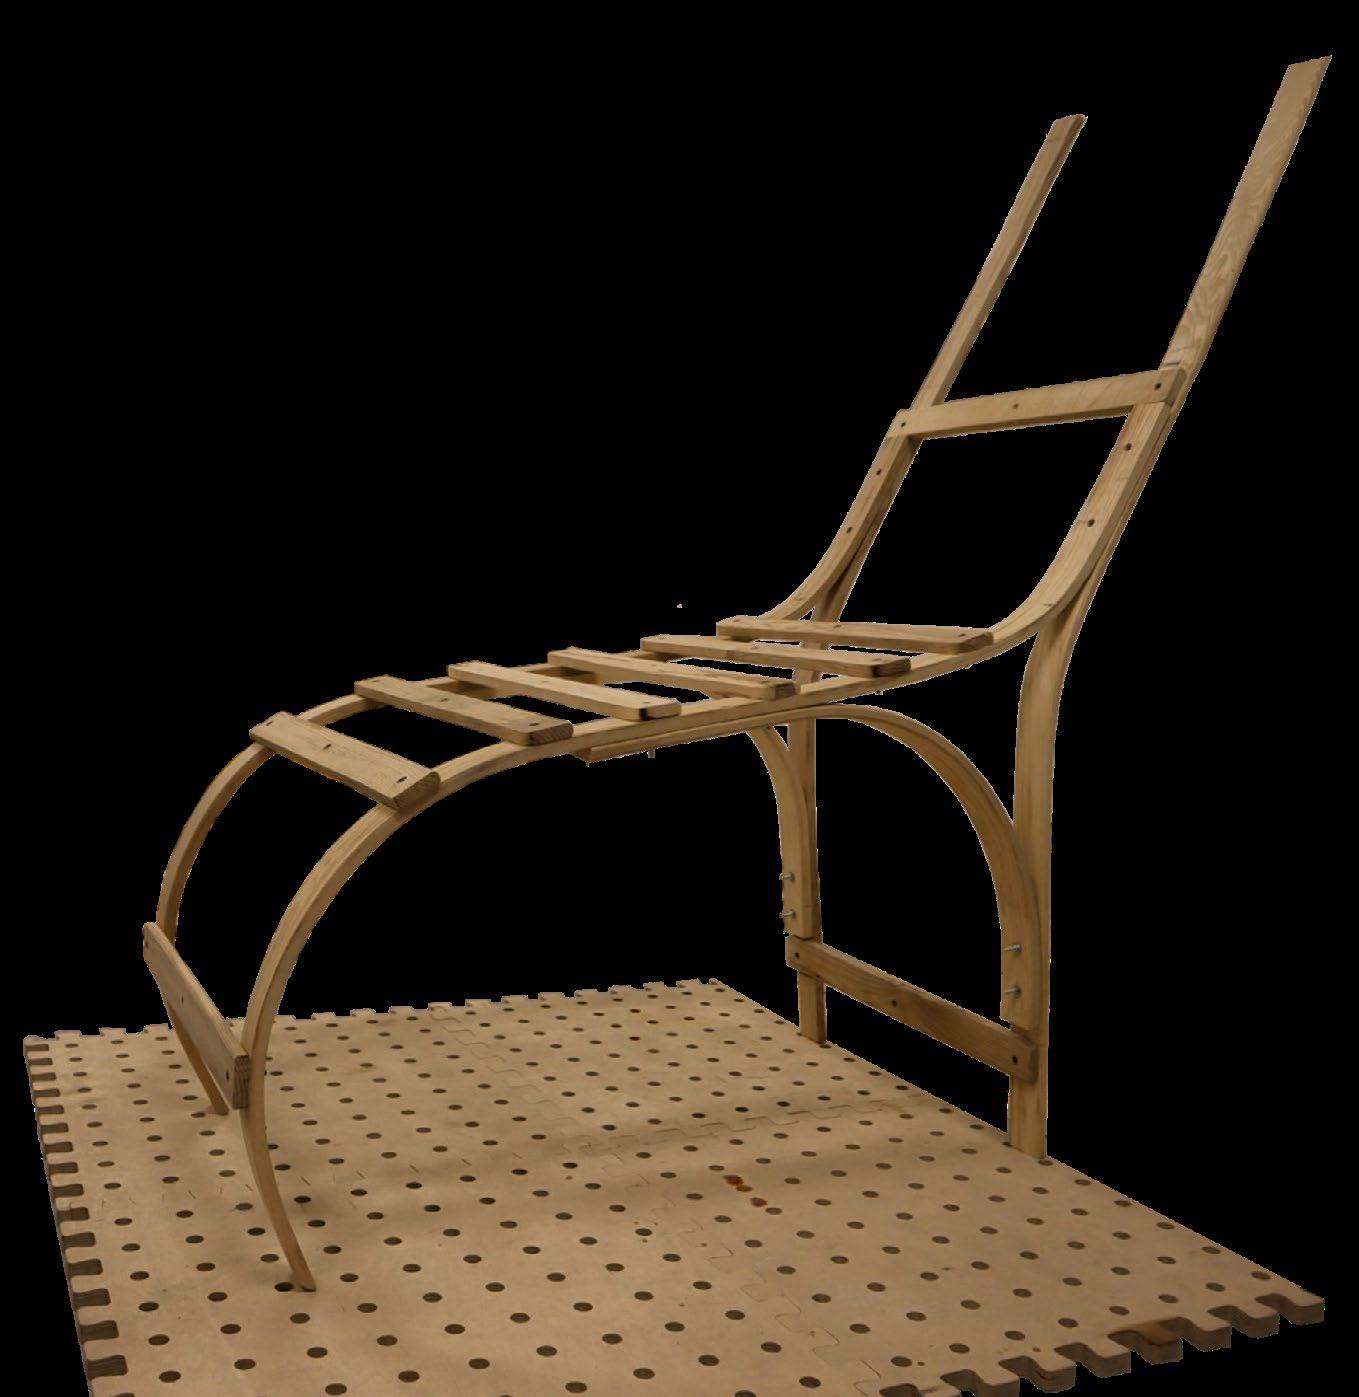
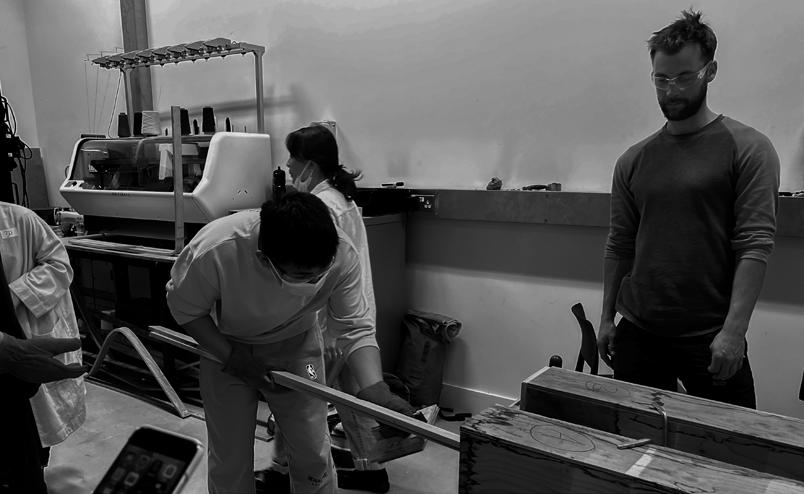
Good-Chair
Wang Shu,A well-known Architect, said:Learn to make chairs before learning Architecture.

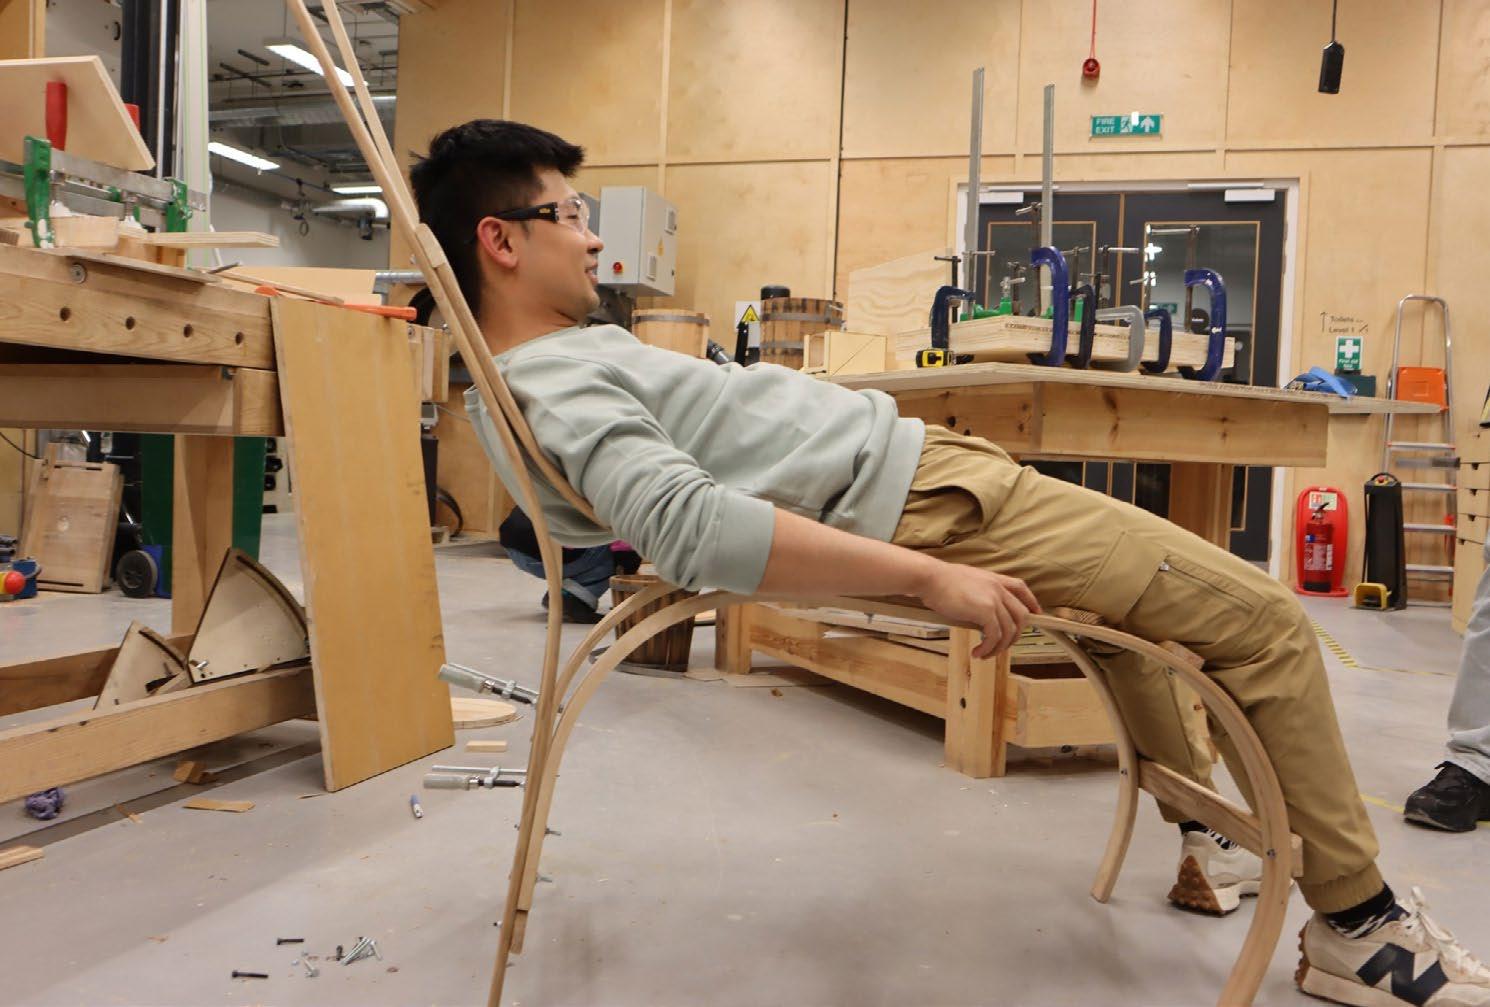
This chair is not quite comfortable, but it was knowledgable when we were beginners and our journey of B-Made starts here.
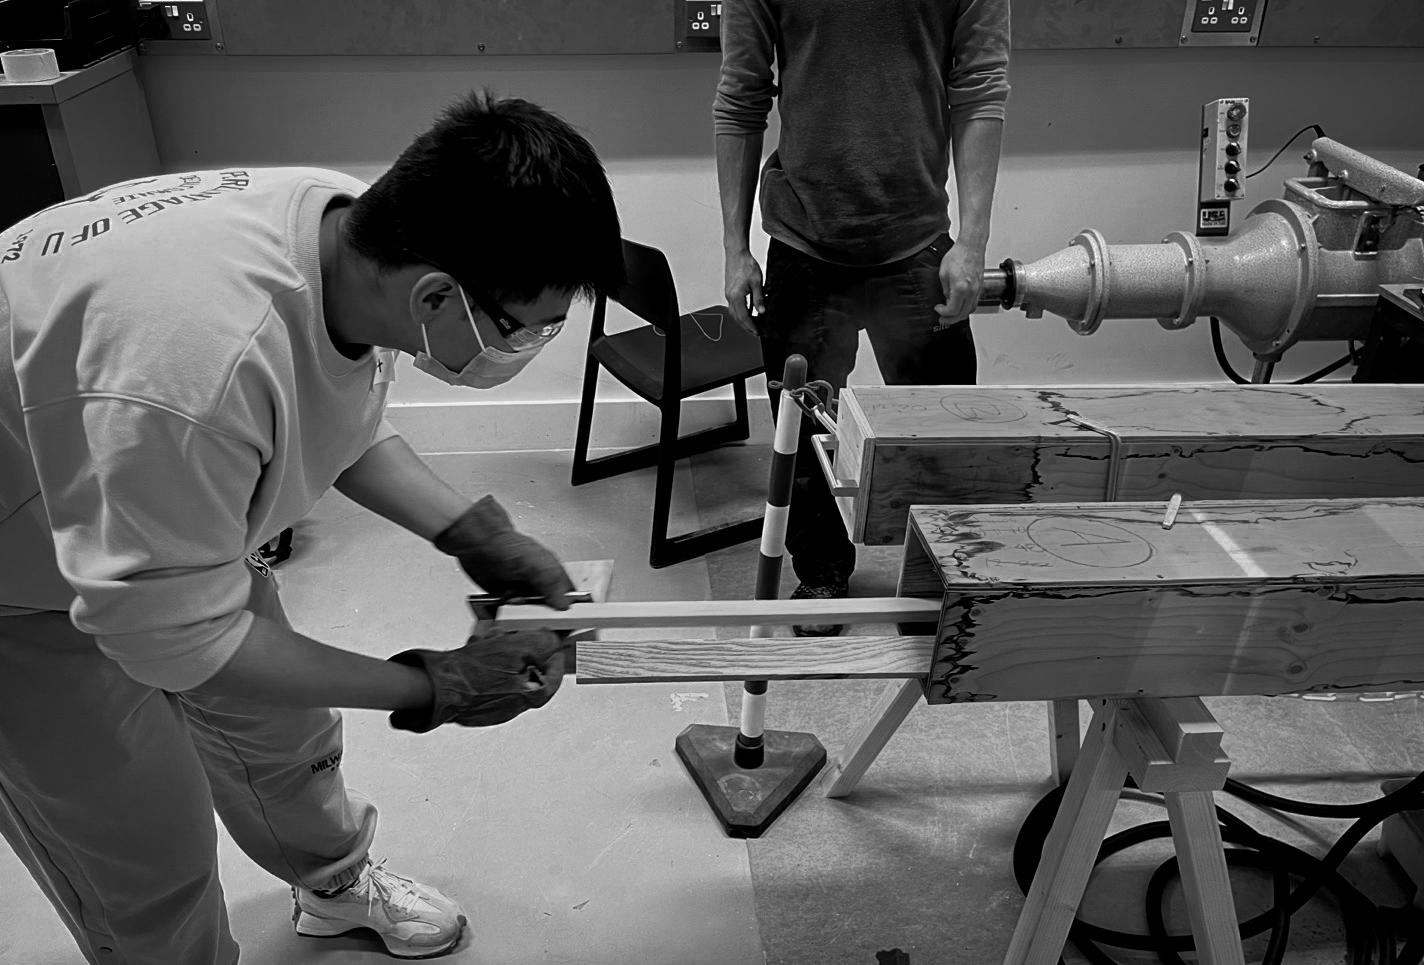
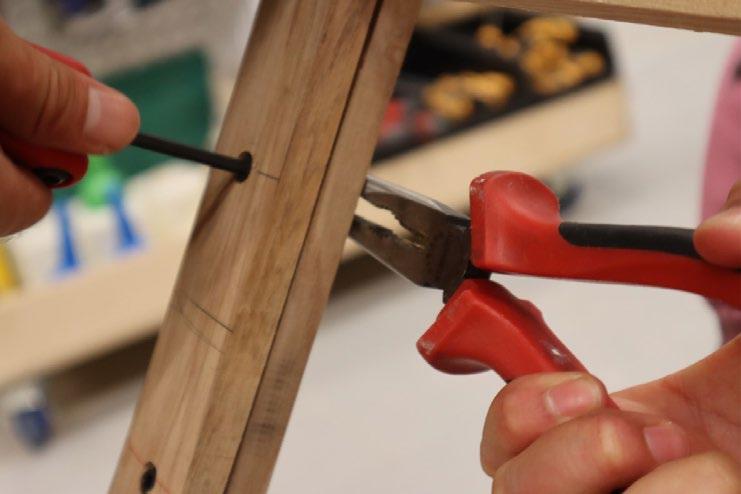
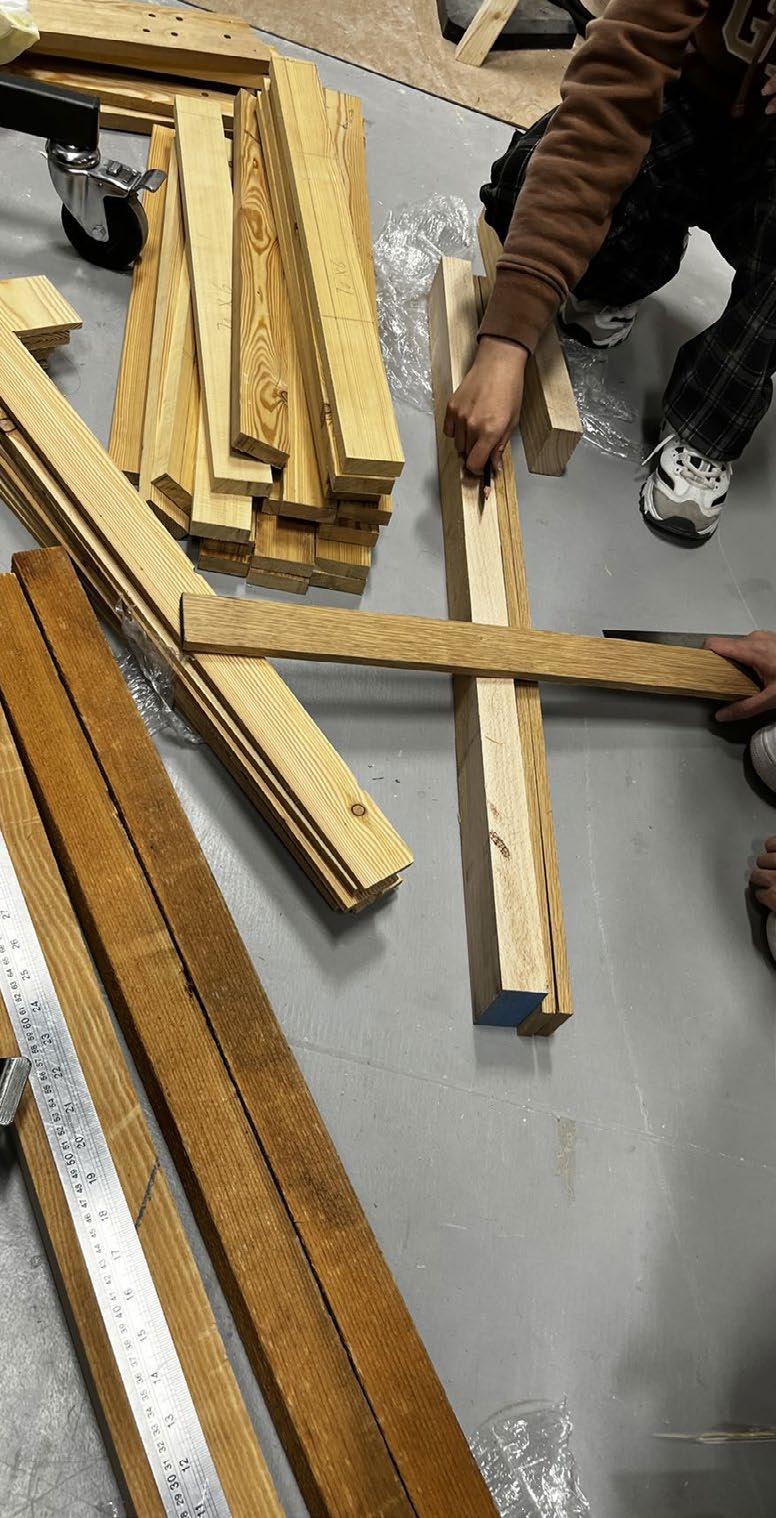
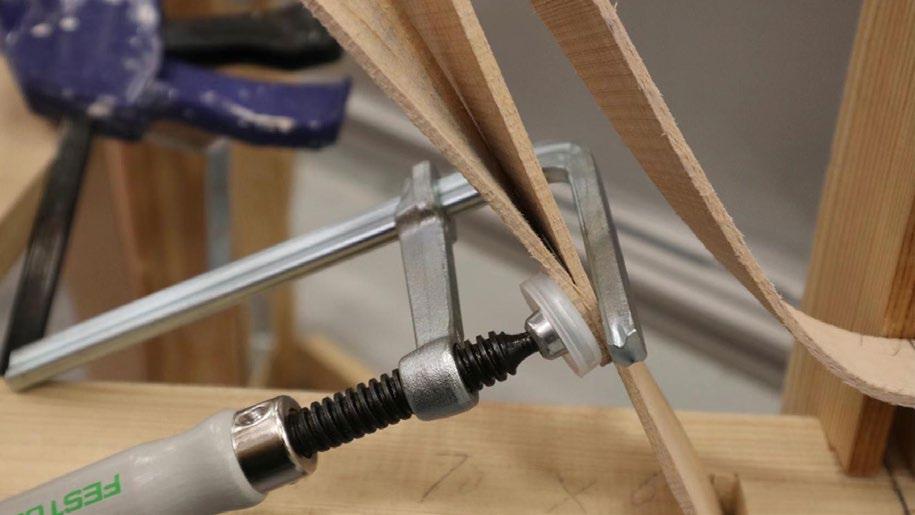
During the steam process, the timber gained the ability of bending because of timber phsicial characteristics.
The time of steam process depend on size and variety of the timber. We open the steamer 20min to warm and steam timber 20min.
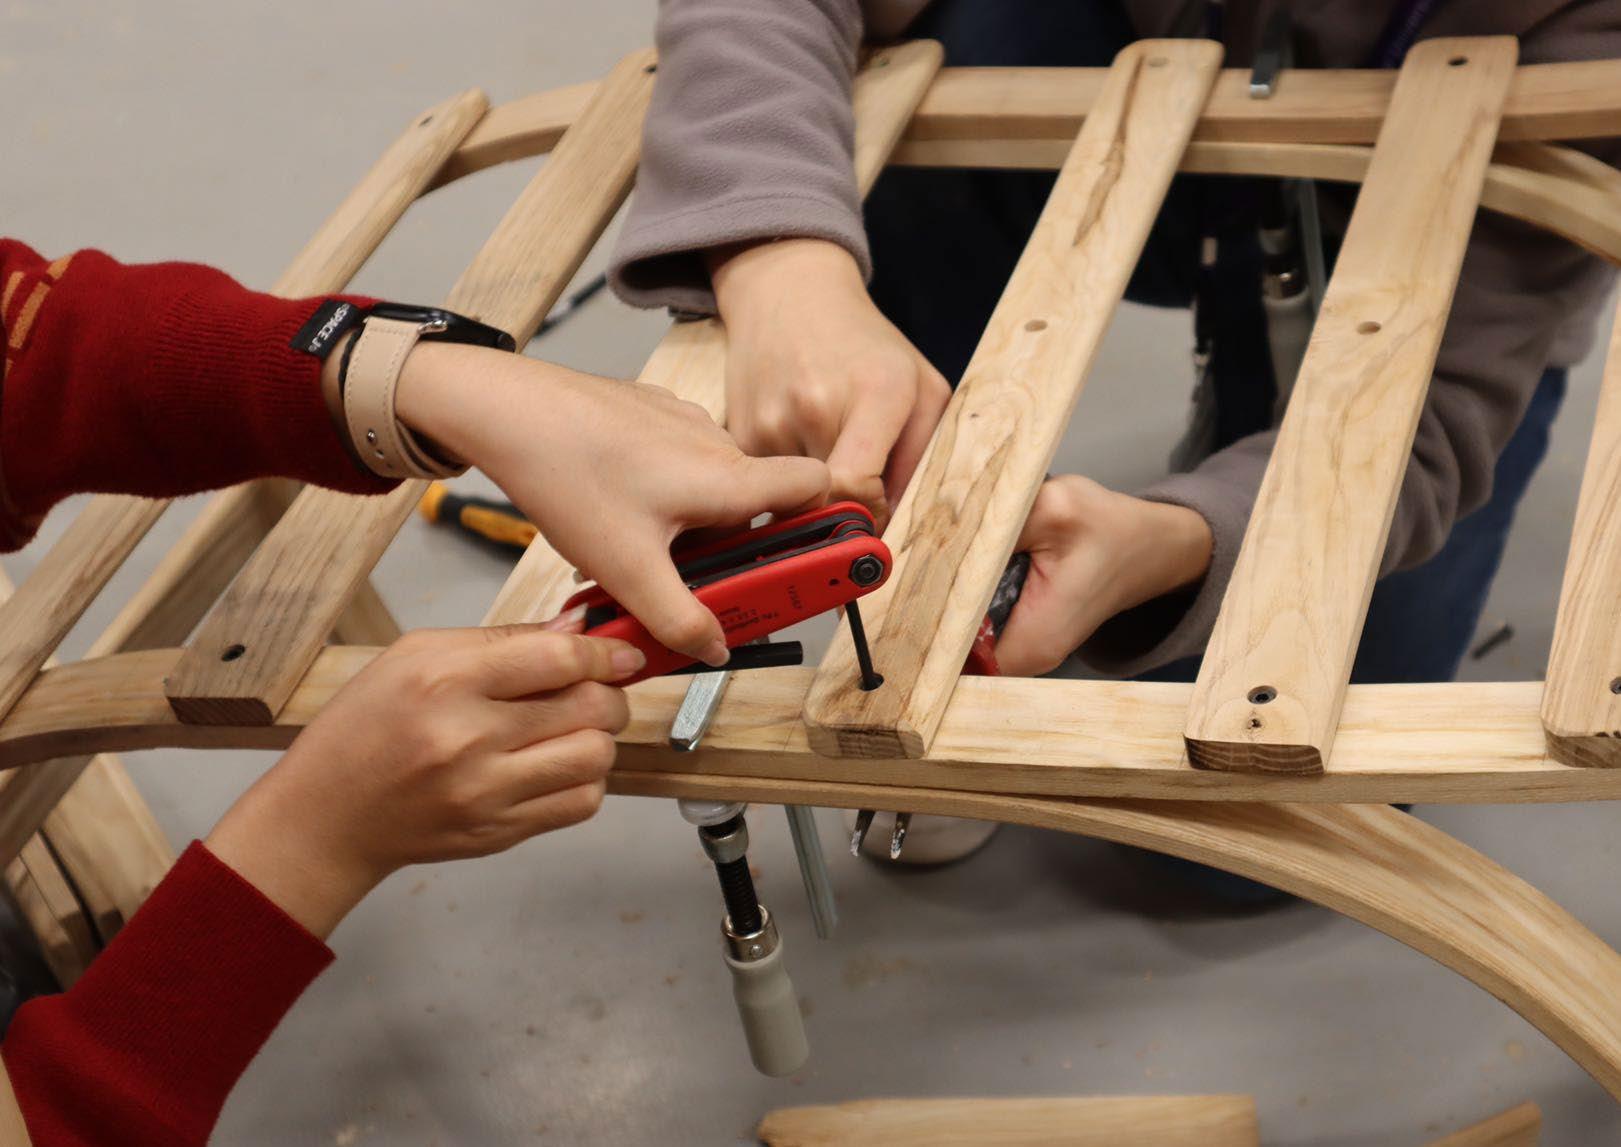
The bending process is a holding process. We add the point of force to shape the timber.


But the point of force is hand-adding, it is not extra. This is the reason why the same parts are different which need to re-shaping the timber.
Cutting the sitting surface and processing the timber by the bandsaw and japanese saw.
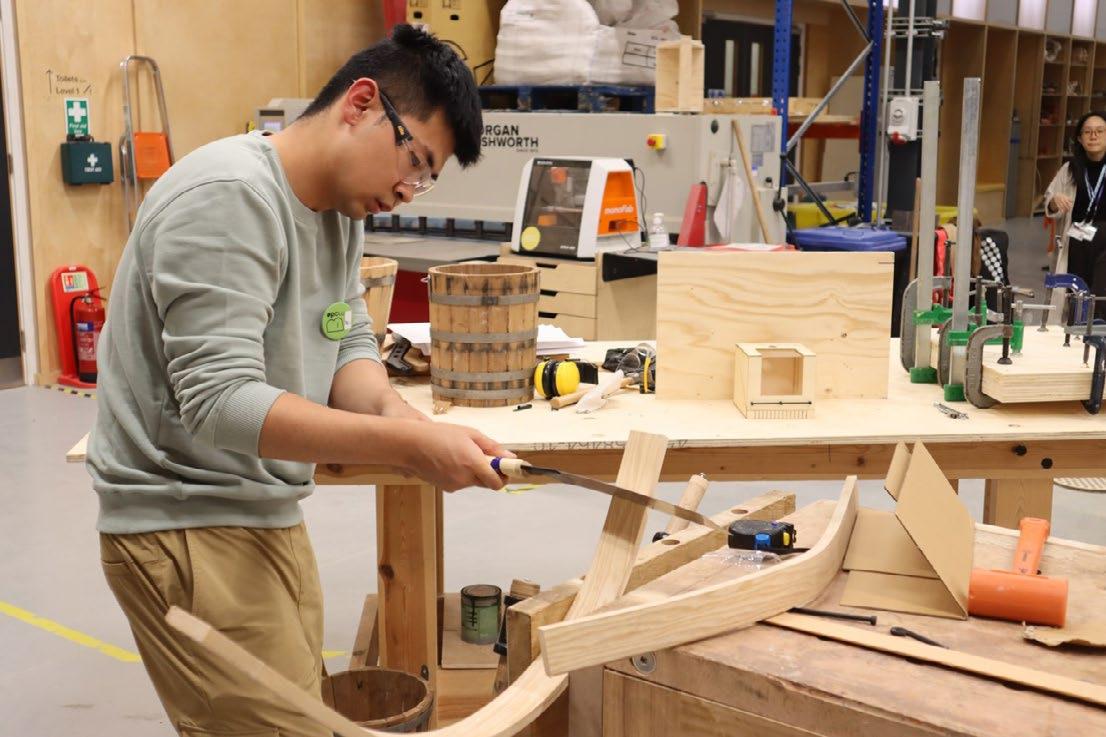
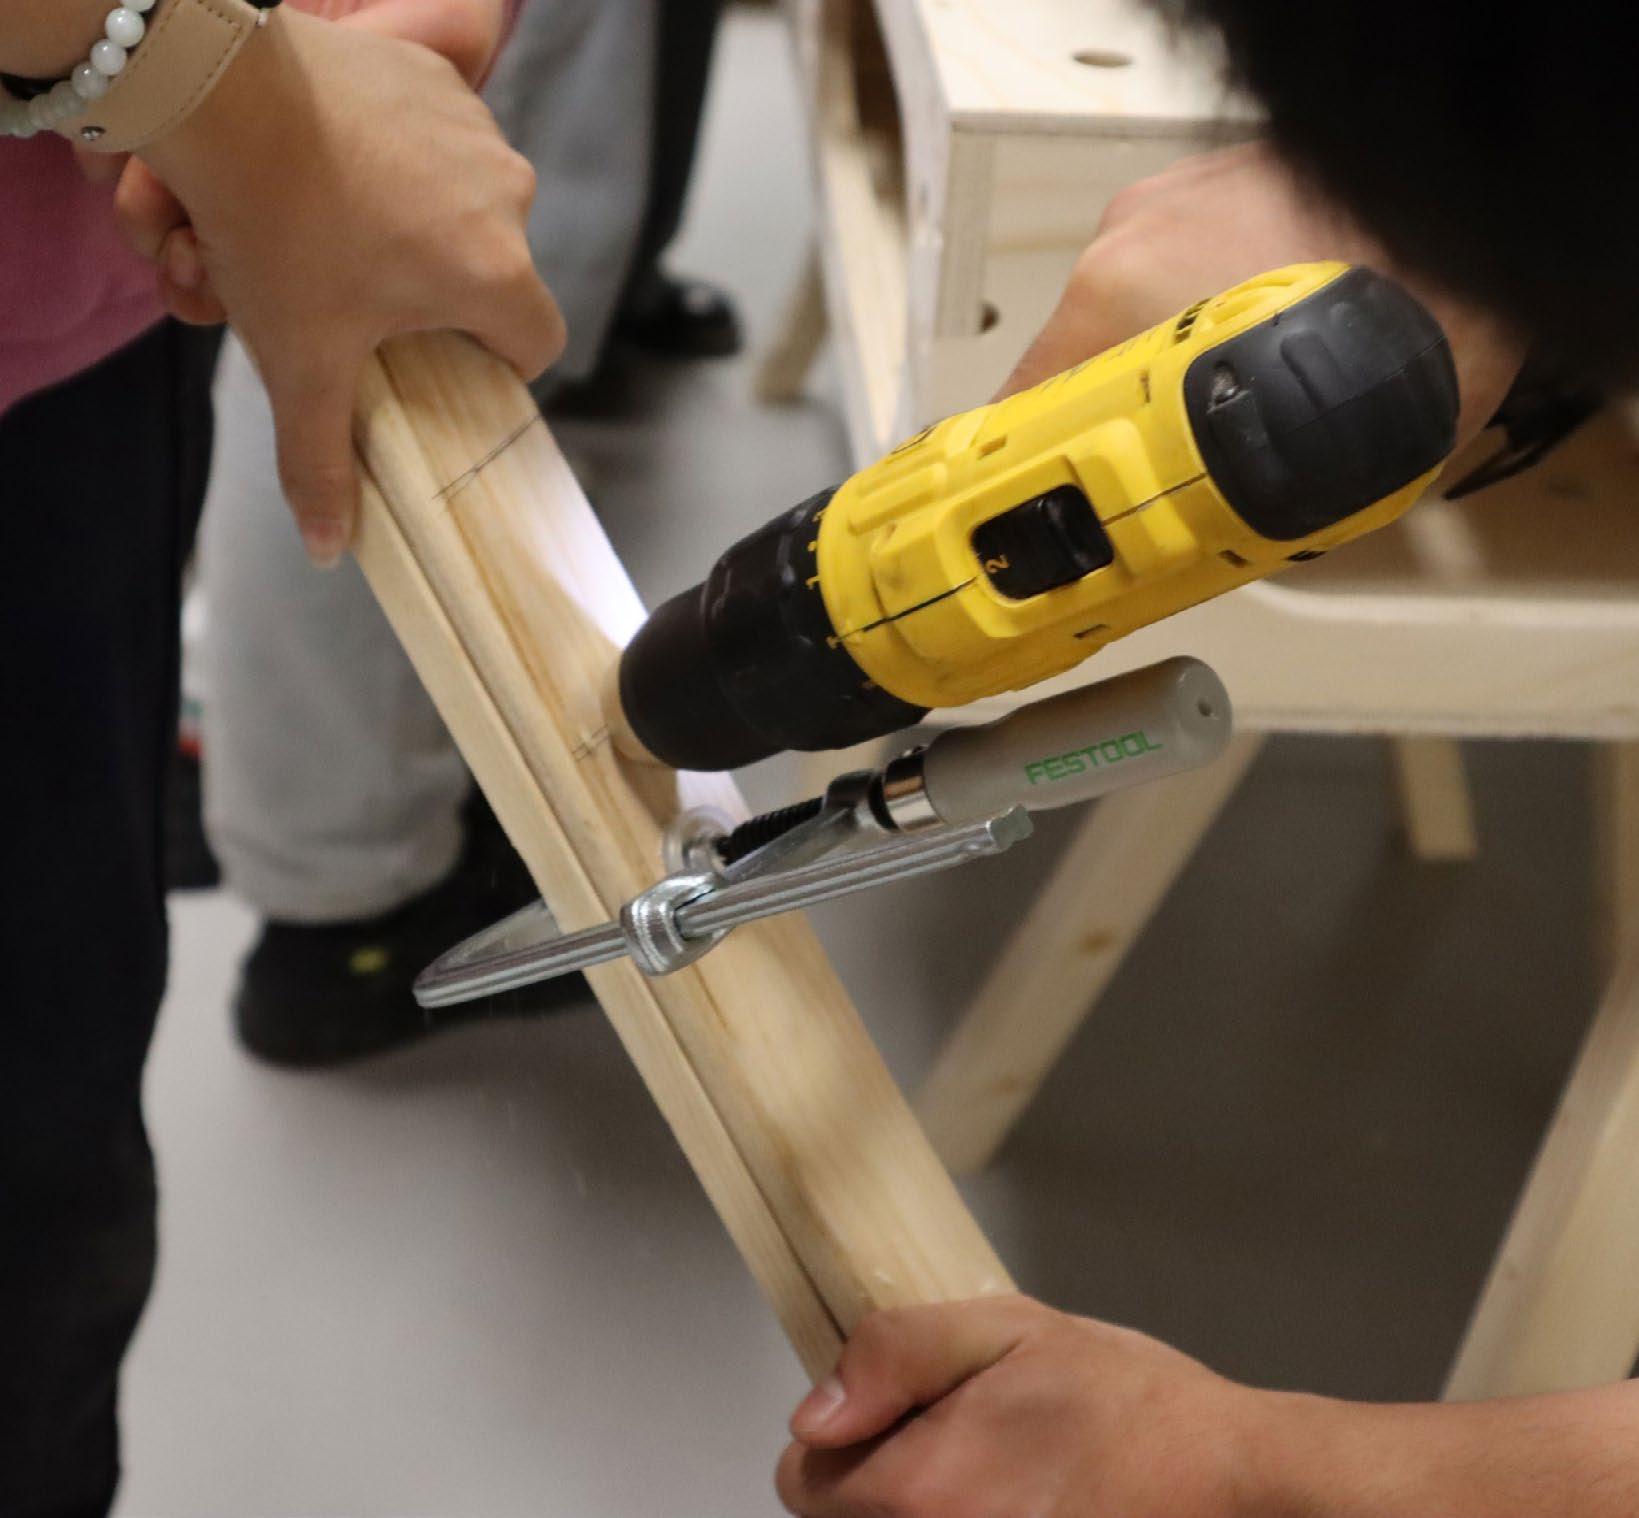
Drilling the hole to assemble the sitting surface and structure.
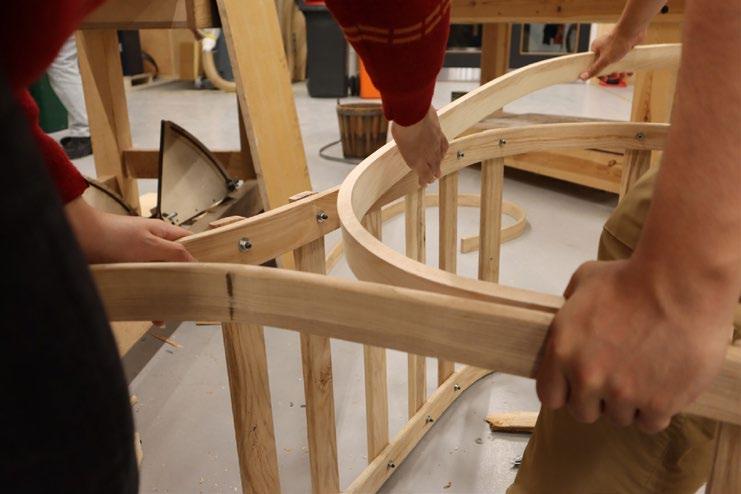
Assembling the chair and testing the Stability.
In this project, we find the disadvantages of hand-making force point. It is rough and difficult to control when we need to make the same part.
In the next project, we are thinking for how to solve this problem.
Part02 Figure-Ground

Concept
Digital Modeling
Experiment Modeling
Rhinoceros
Disscussion
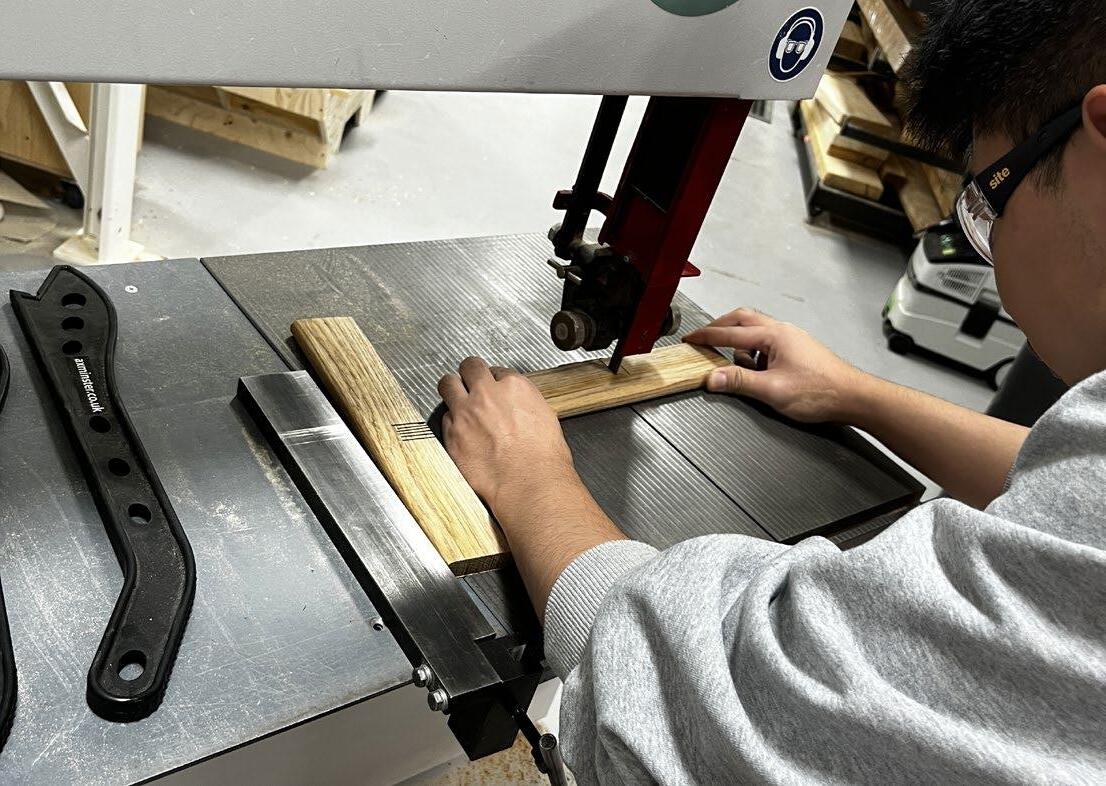
Material select Laser Cutting Machine
Process Simulation
Material Experiment
Bending Ability Test
Material Processing
Framework Assemble

Final Steam Bending
Cooling
Demolding and Assembling
Hand-saw Bandsaw Sanding machine
Bolts
Steamber
40min Waiting
Hand-drill
Hand-drill Jigsaw
Heat-insulating Gloves
Steamber Shaping Desk Clamps
Bolts Hexagonal Spanner
Figure GroudTo test the bending ability of different timber, we go to the wood store to get the different species of wood.
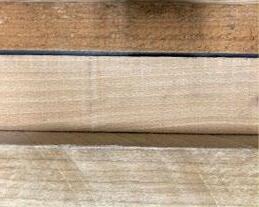

Then we do the experiment and in the comparison test, the beech shows better bending performance, followed by the tulip, but the cedar's bending ability is not well demonstrated in this test.

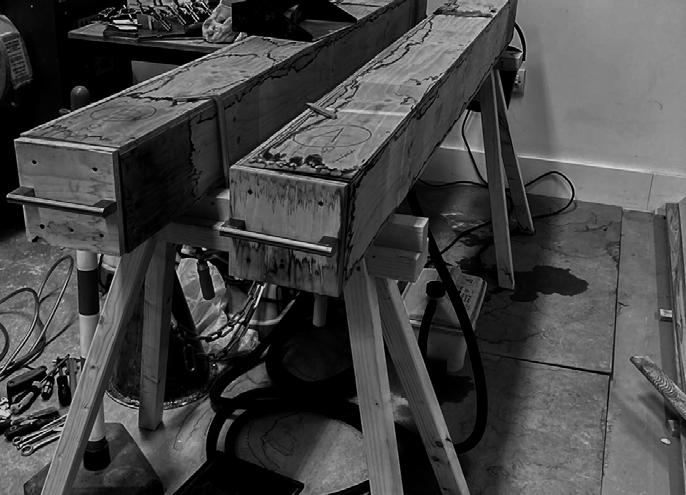
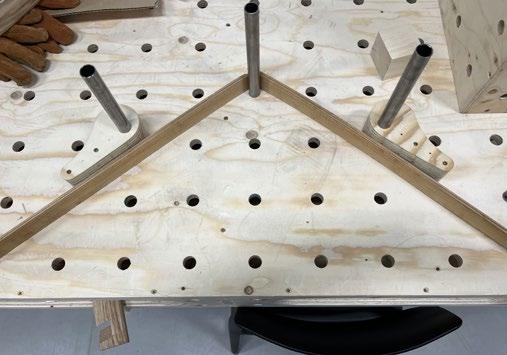
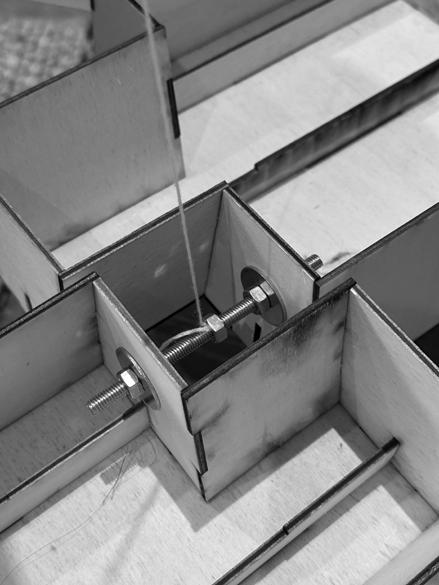
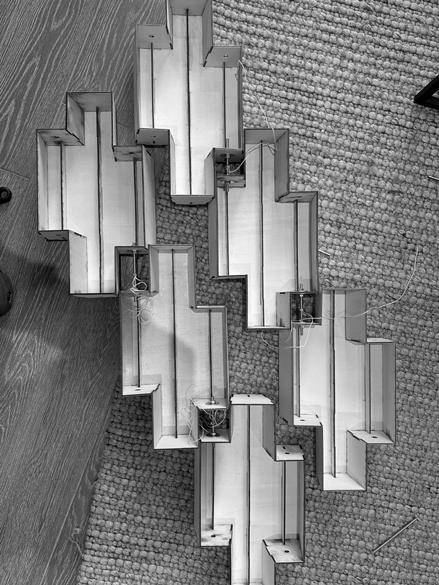
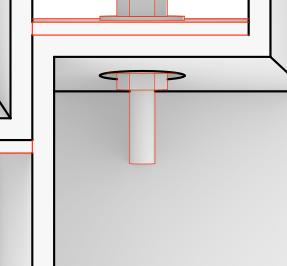
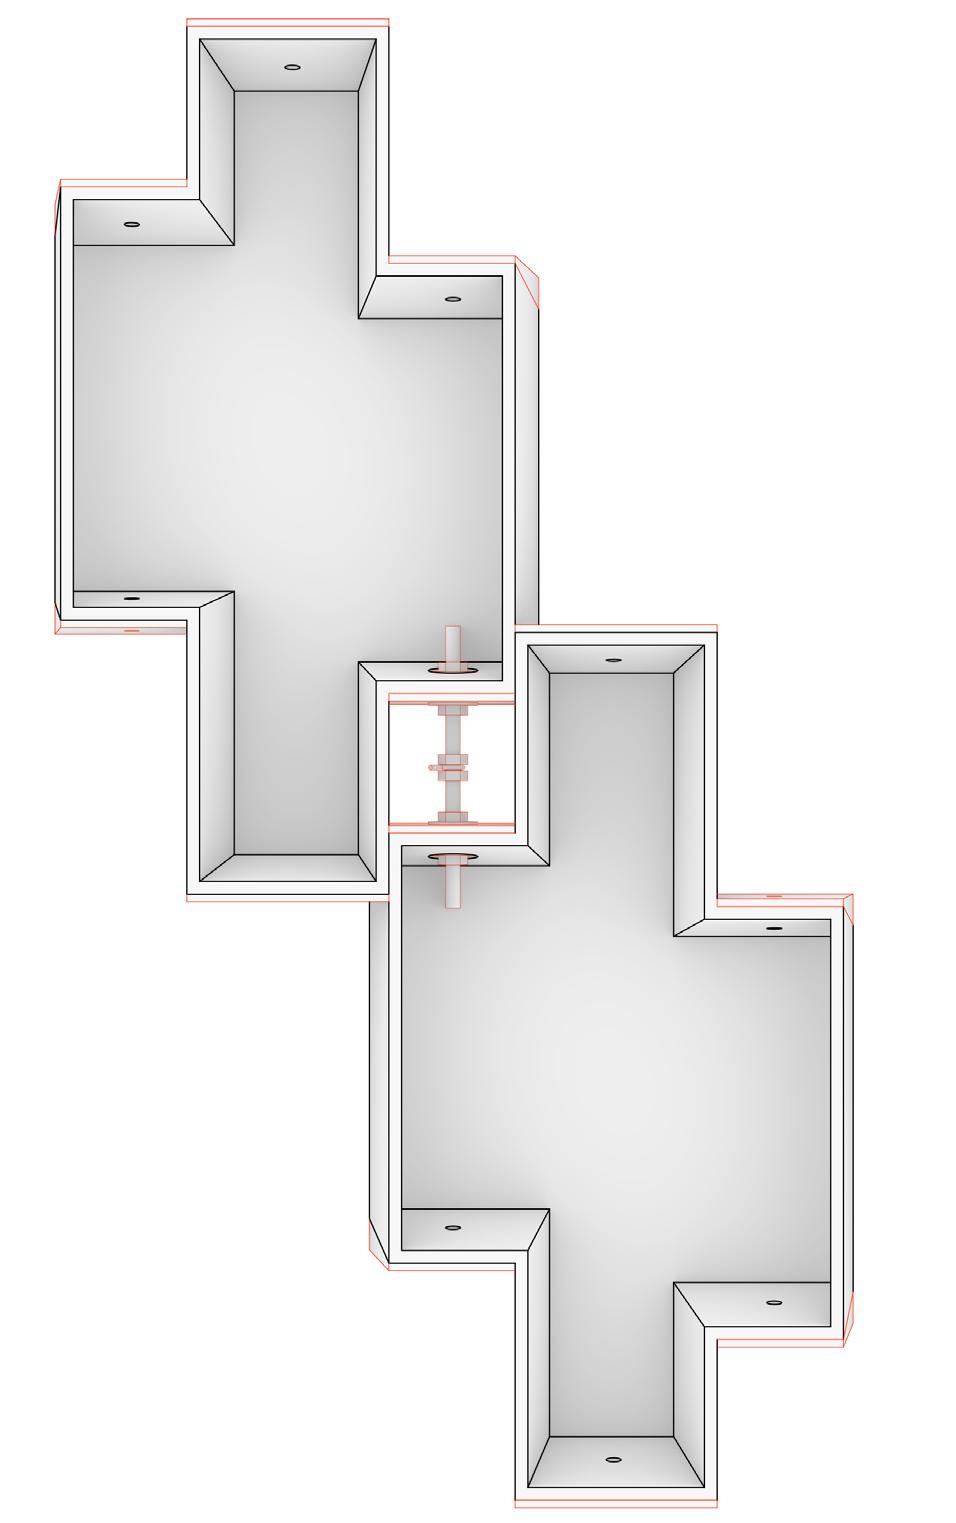
Besides, we design and cutting the bending-structure to prepare the final steam bending process.
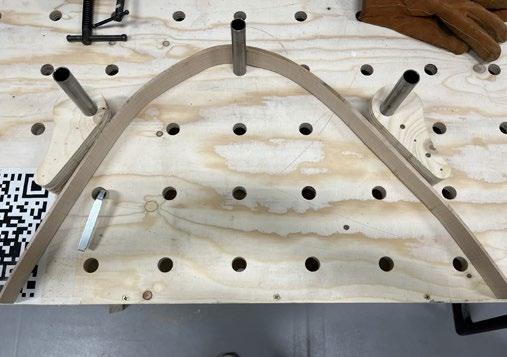
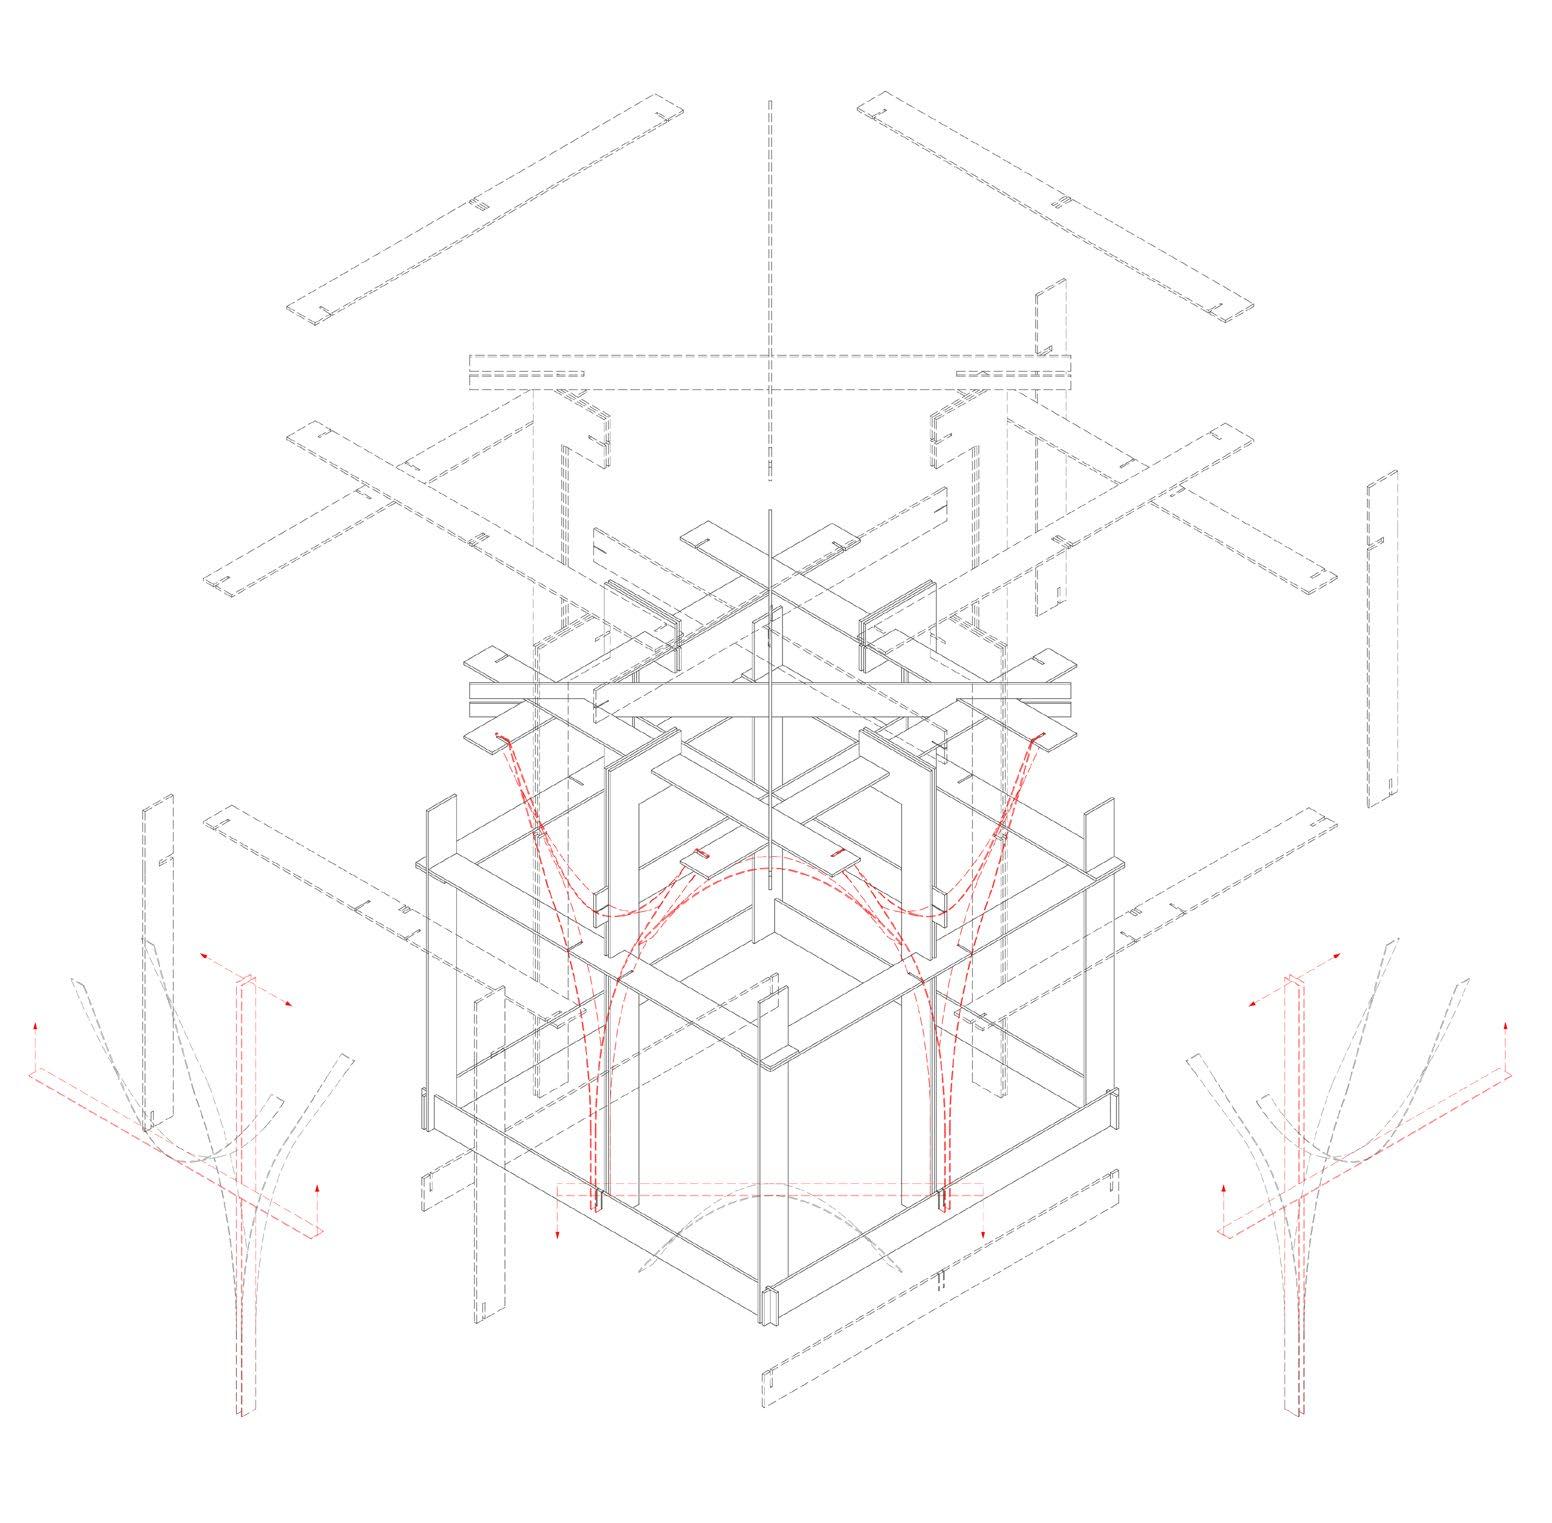
In order to test whether this complex steam bending can be made, we did bend experiments with elastic cardboard.

In the process of experiment, it was found that the size of the bent timber, although just right in the Rhino model, would be too tight for the actual bending process.
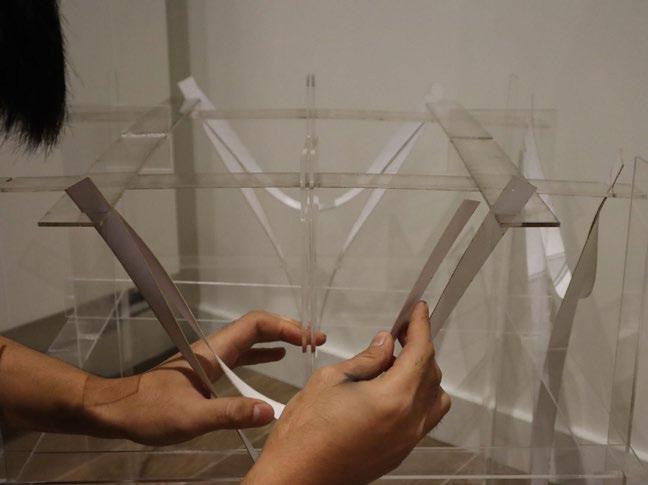

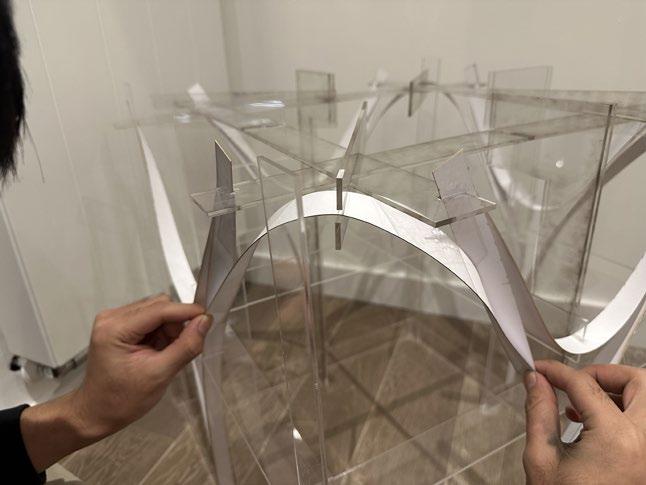
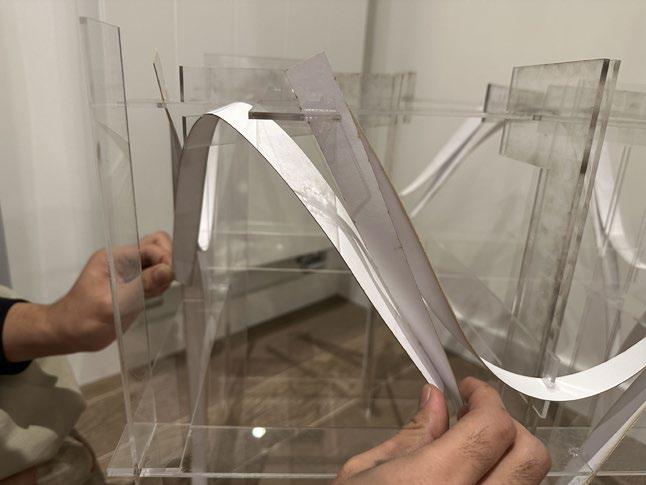
So, we lengthened the size of the bent timber when we finally made the actual model.
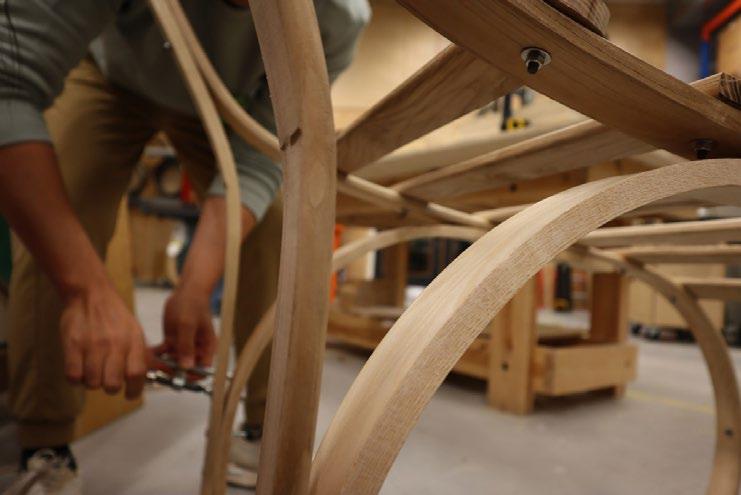
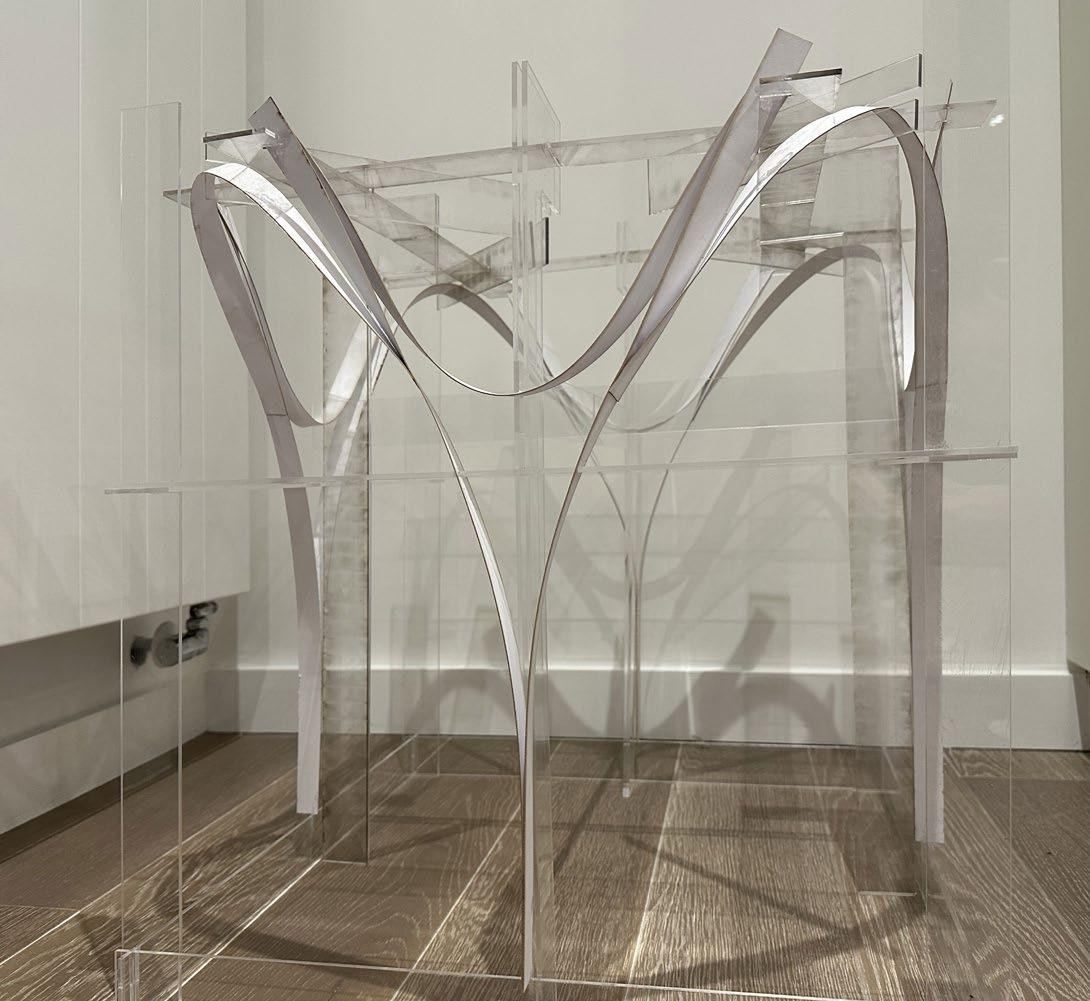
Assembling the structure and bending the timber steamed. The final process is smooth and successful because our structure design and testing model.


The final project display.
We learn how to use the general tool in B-made, understand the characteristics of timber, problem solving ability and research method of manufacture problem.


Workshop02

A Grip on Complex Assemblies through Standardised Interfaces 2022.10-11
Team members: Dongze Luan, Tim Hung, Xizhang Zhao, Wenchen Lin, Shuxuan Wang
Tutor: Turner-Baldwin, Samuel; Zandavali, Barbara; Van Den Berg, Melis; Dobson-Perez, Patch; Veitch, Hamish; Lucy, Flanders; Claudia ,Toma
Part01
Component Prototype Design
The design method is considering aluminium part and ceramics as a whole to create a simple shape which has potential to complex assemble. I optimize the shape for ceramic casting.


 Concept model Casting model
 The manufacture process of ceramic casting.
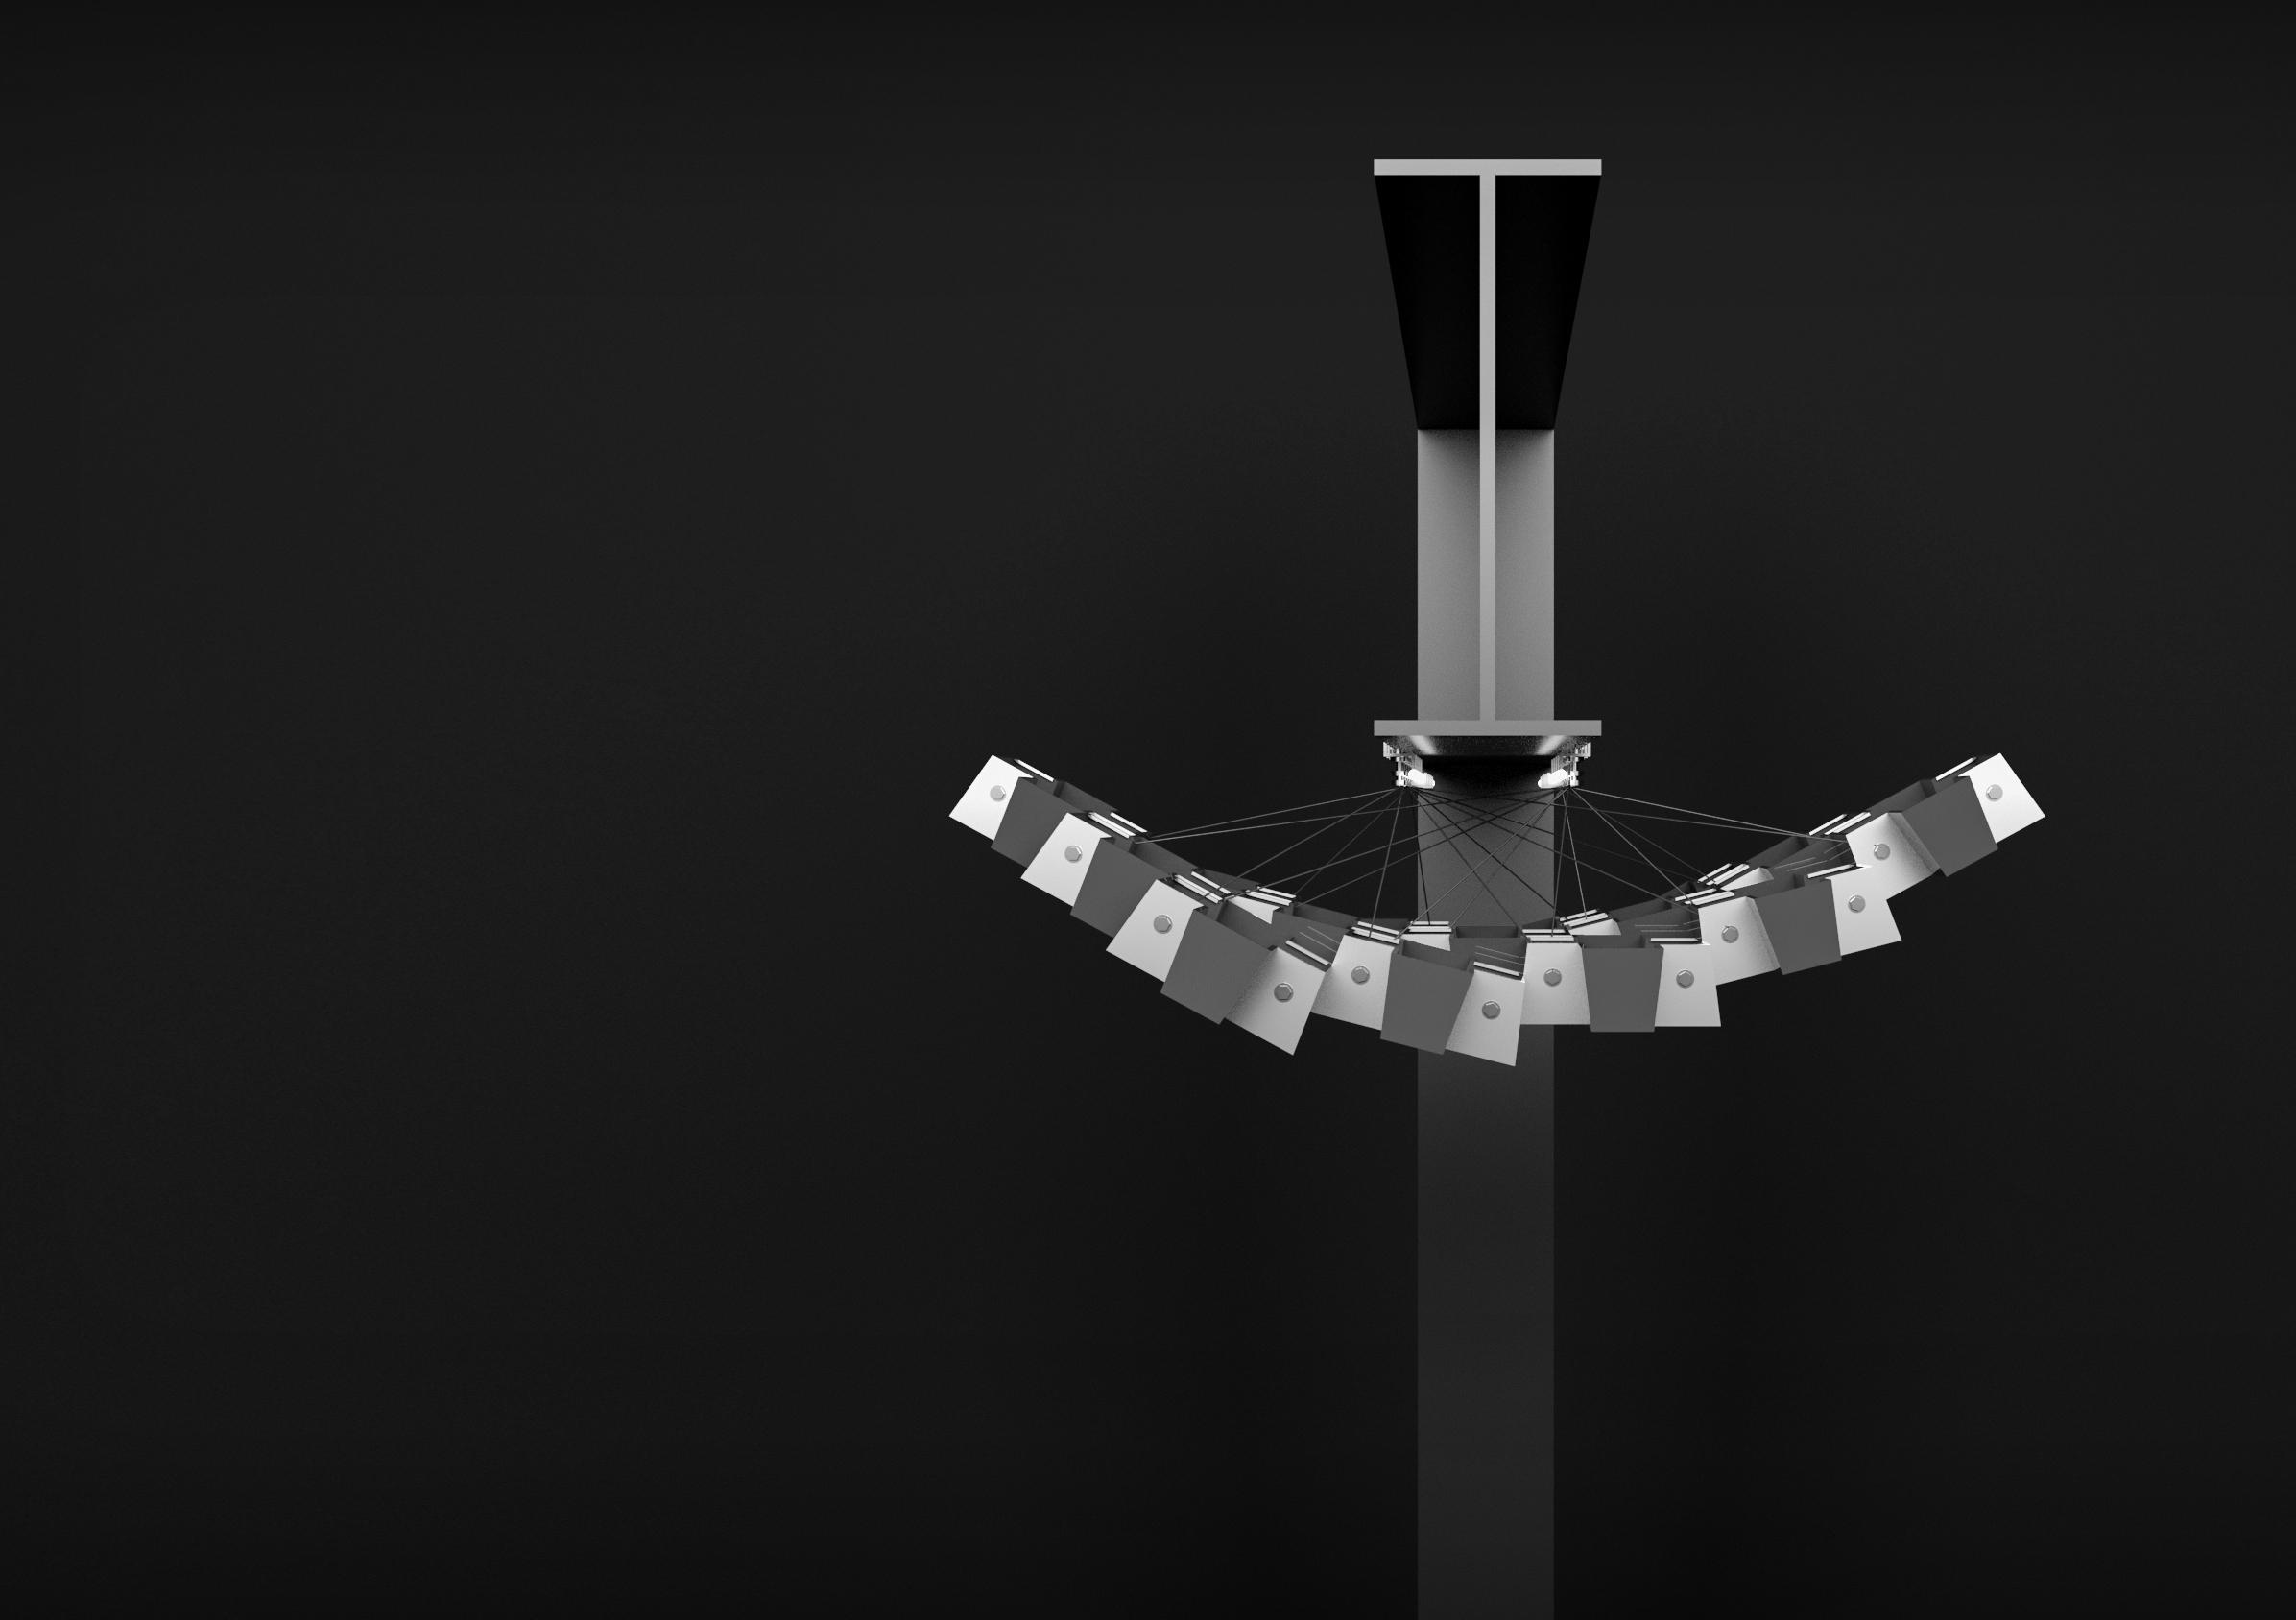
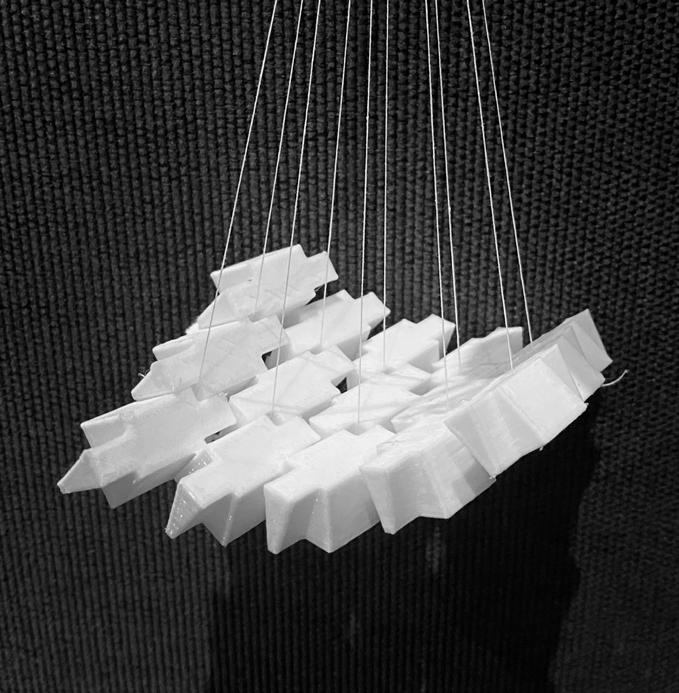
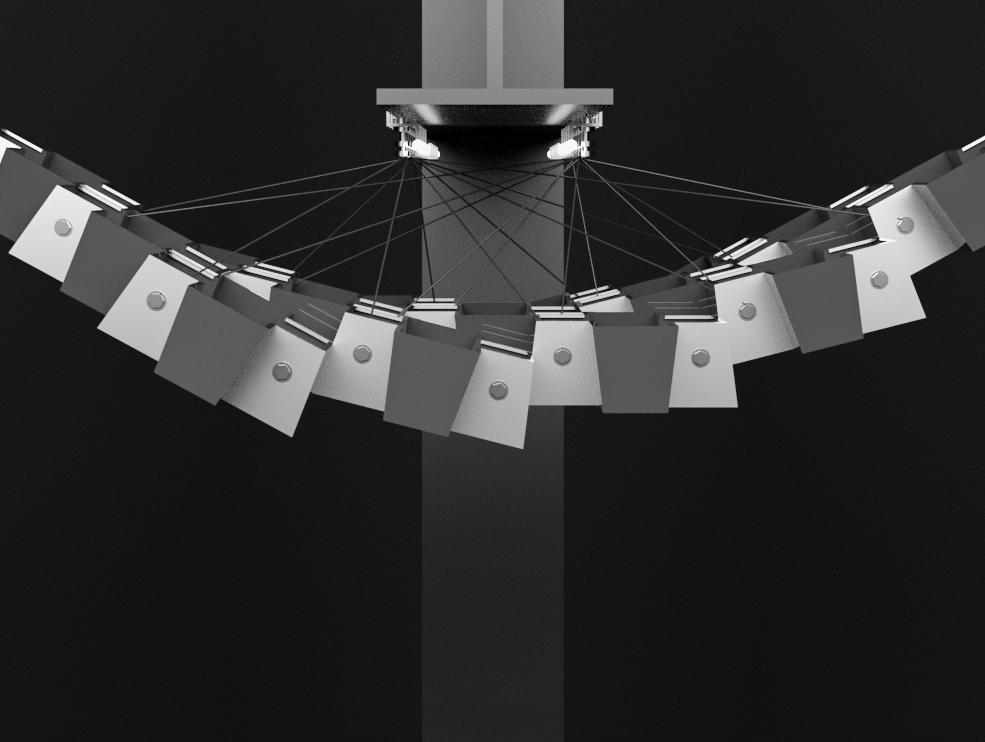
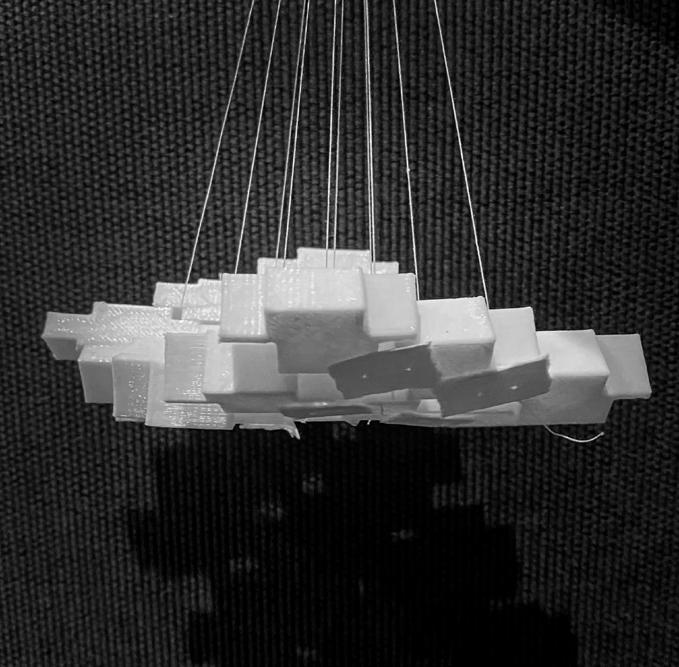 The draft model and digital model to test the suspension method.
Using the lazer cutting to test the physical model to try the 1:1 scale of suspension process.


The assemble process is successful and we find some connect problem. The suspension part is complex which need to organise.
We change the suspension method more organised to assemeble..


The final connect method. During the design process, we learn how to slip casting design and do the alluminum part design. And also we get the ability to solve the assmmble problem.


Workshop03
Subtractive Manufacturing and Slip Casting for Ceramics2022.11-12

Team members: Dongze Luan, Weijun Zhu
Tutor: Zandavali, Barbara; Van Den Berg, Melis; Dobson-Perez, Patch; Veitch, Hamish; Lucy, Flanders; Claudia ,Toma
Modeling
Rhinoceros
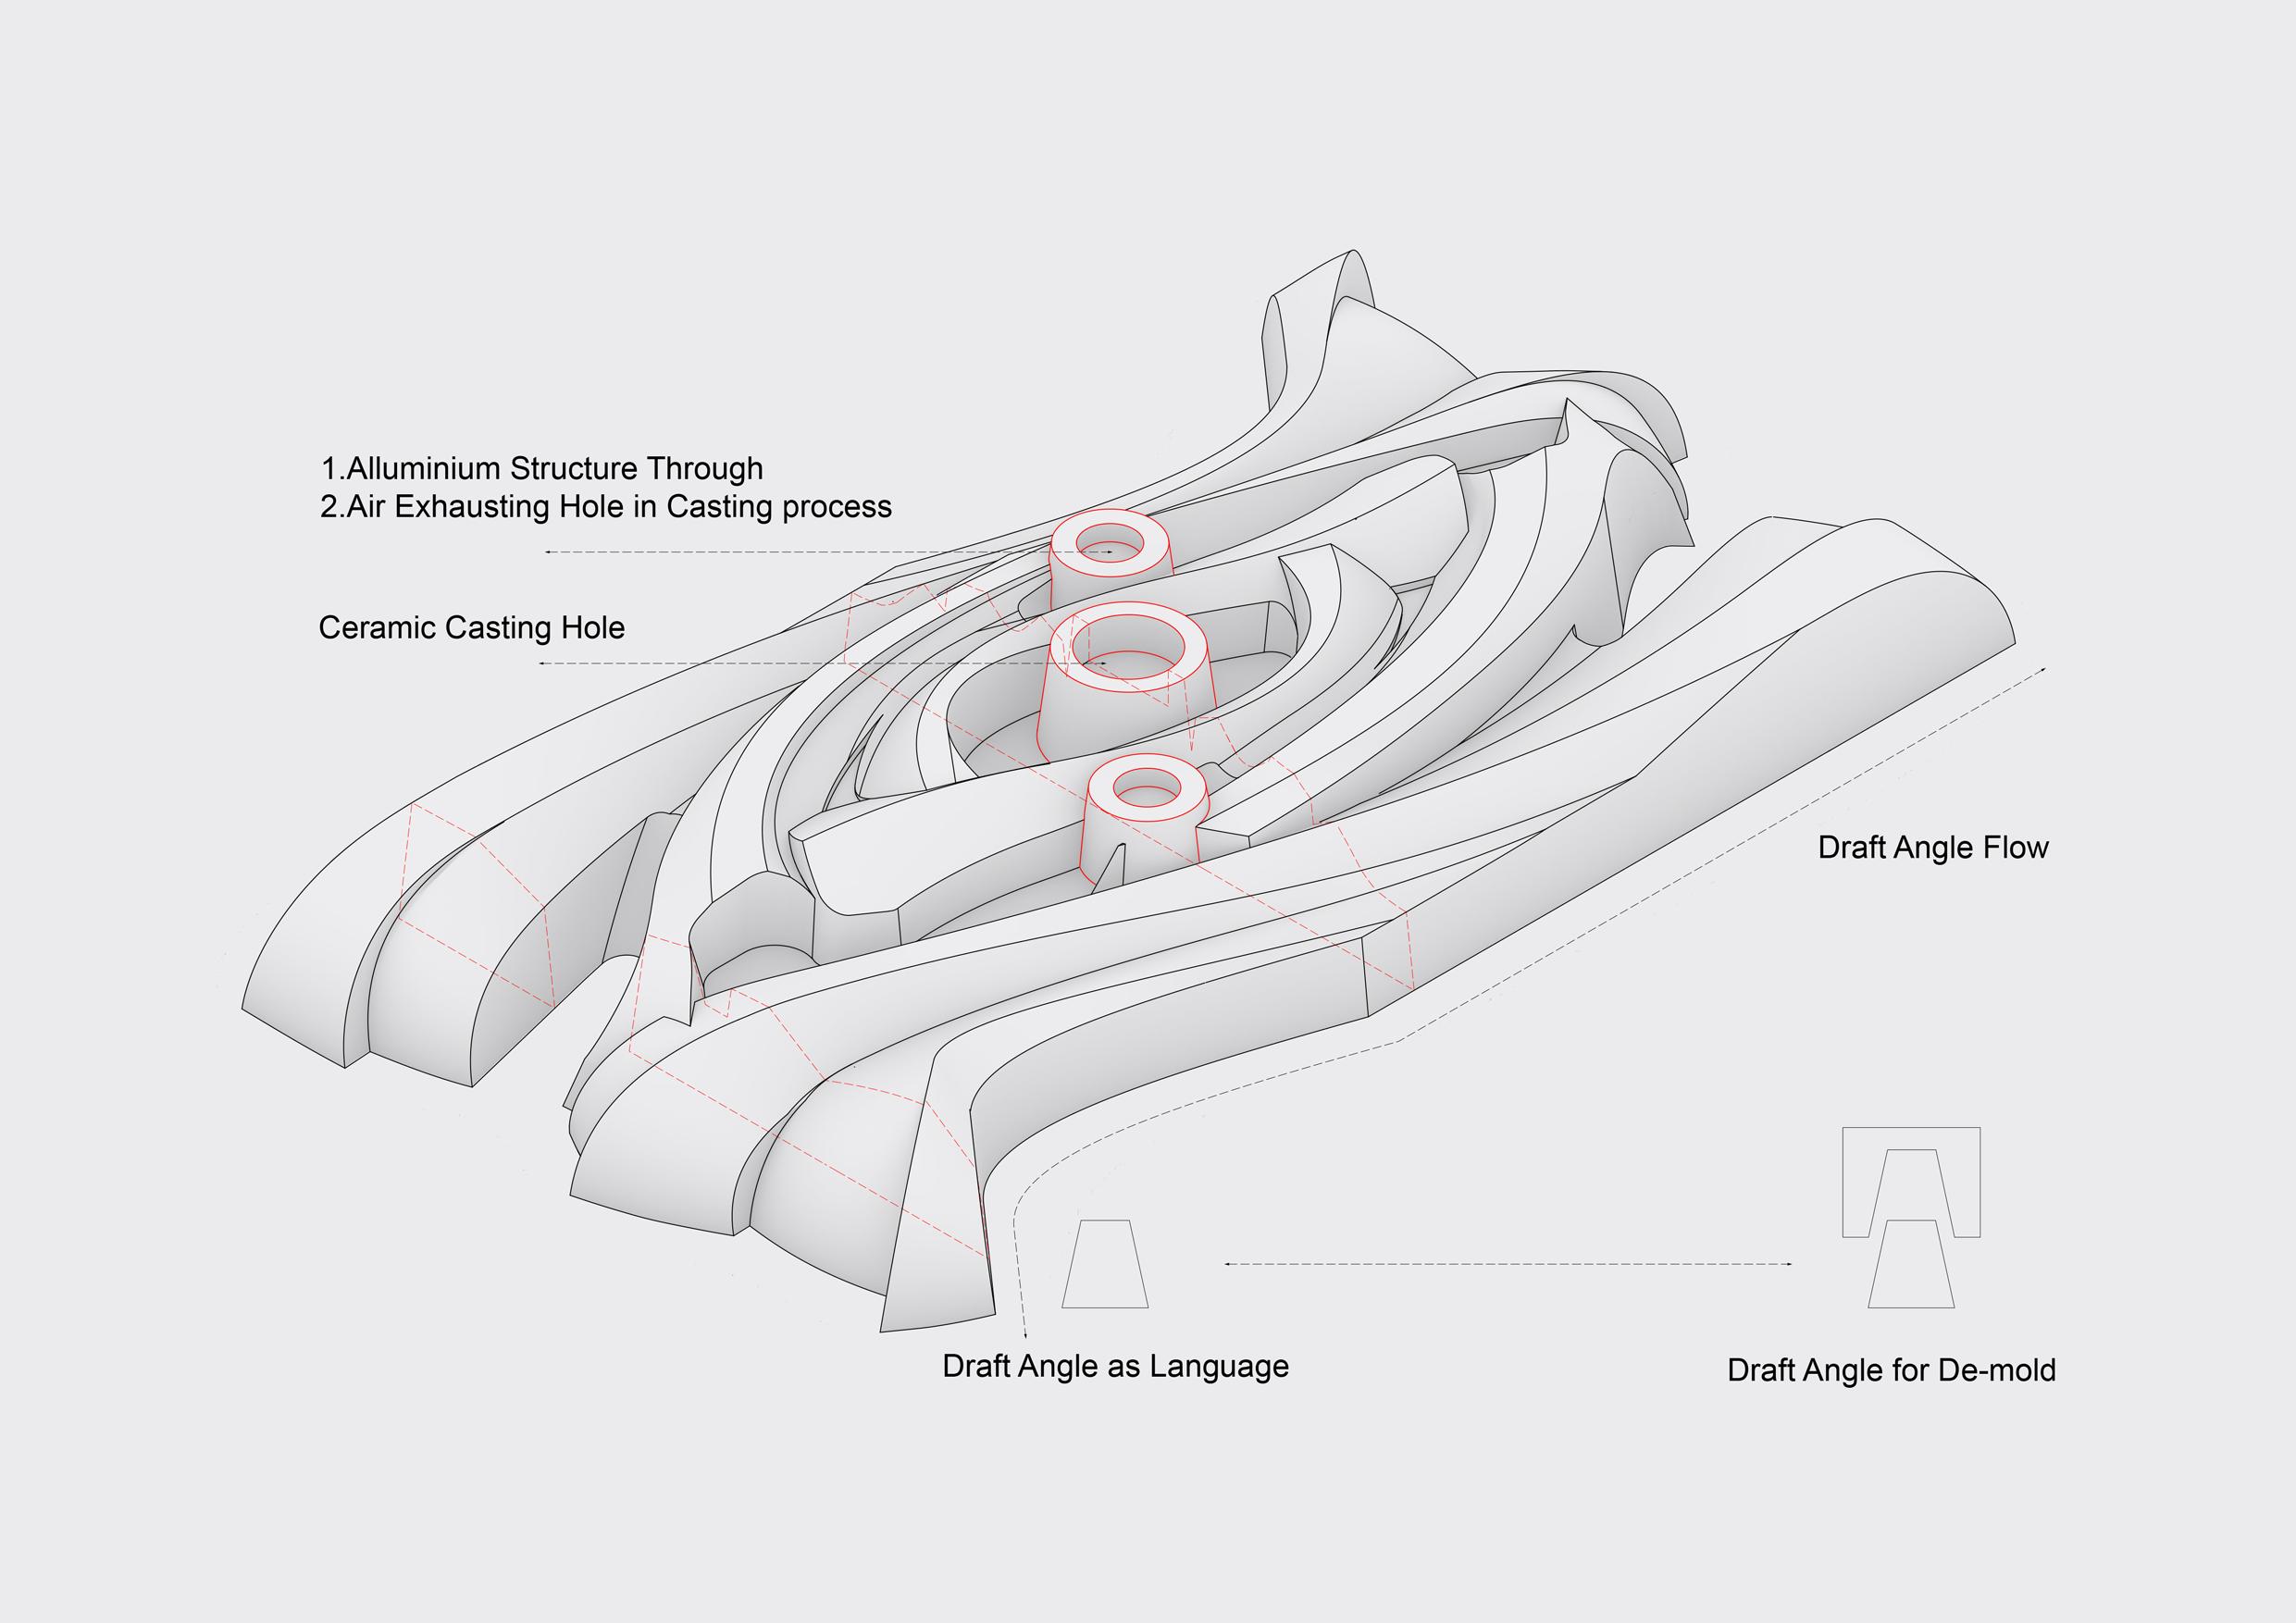
Fusion360 Draft Angle Design
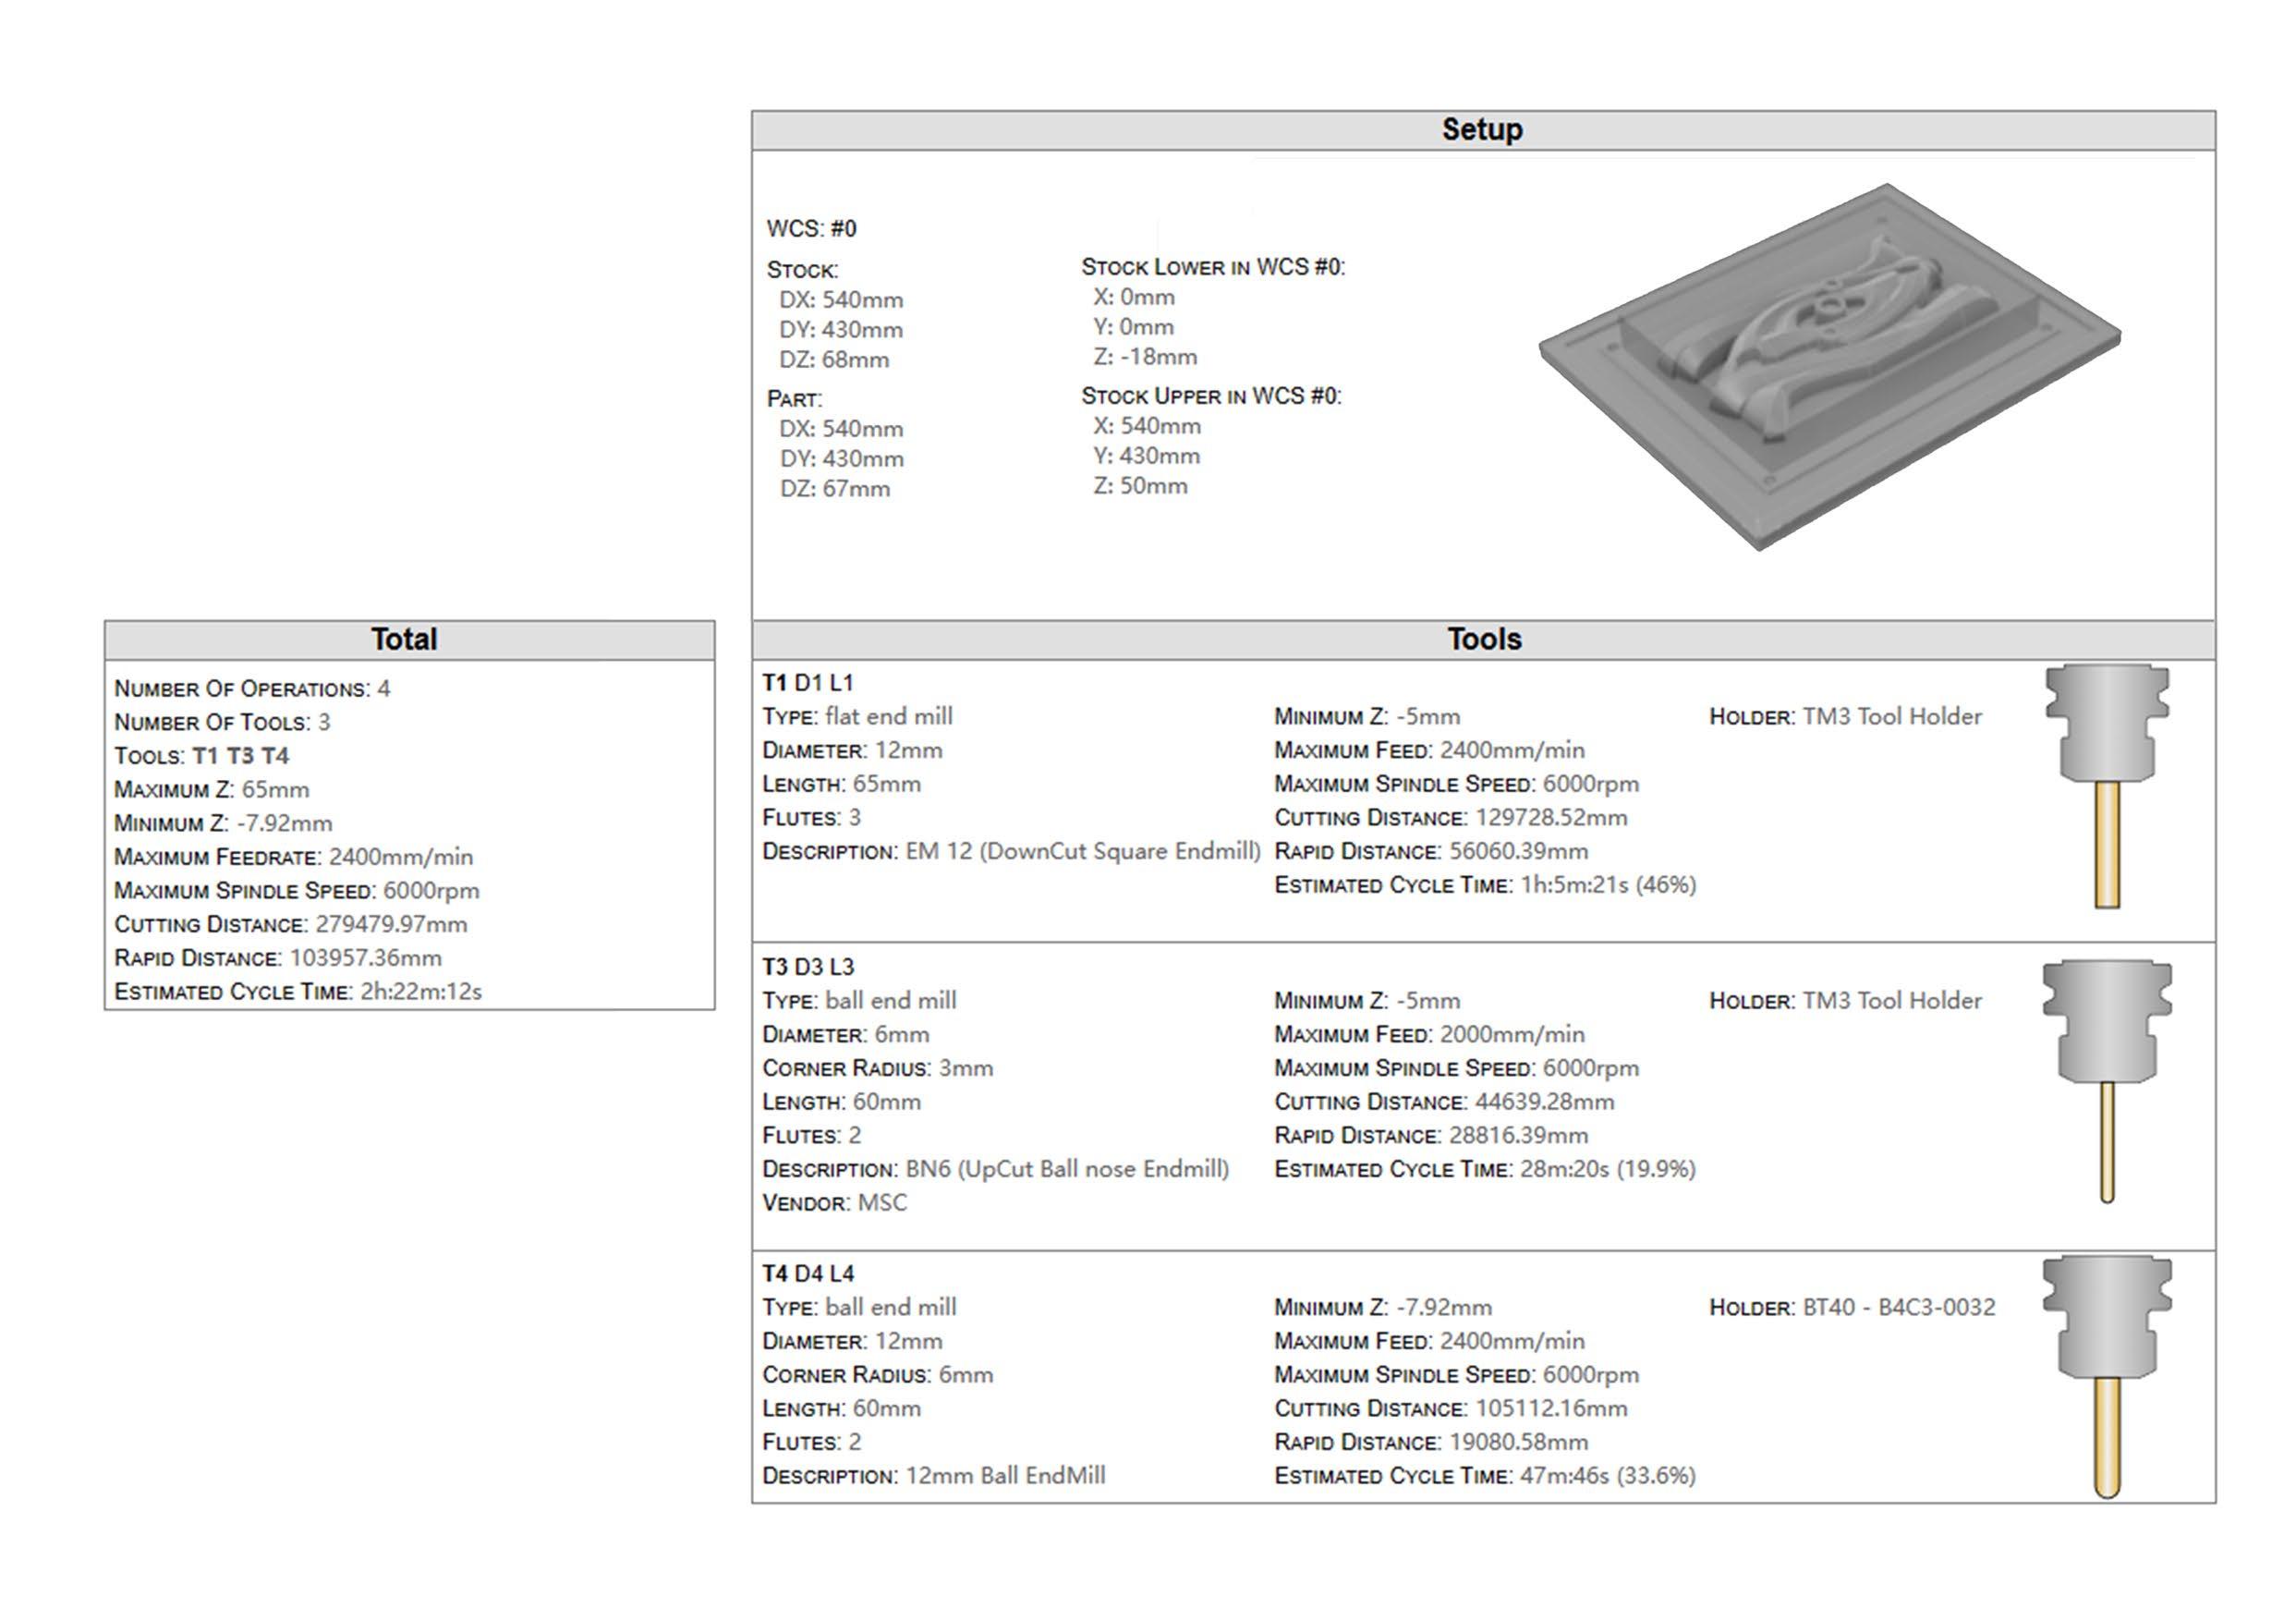
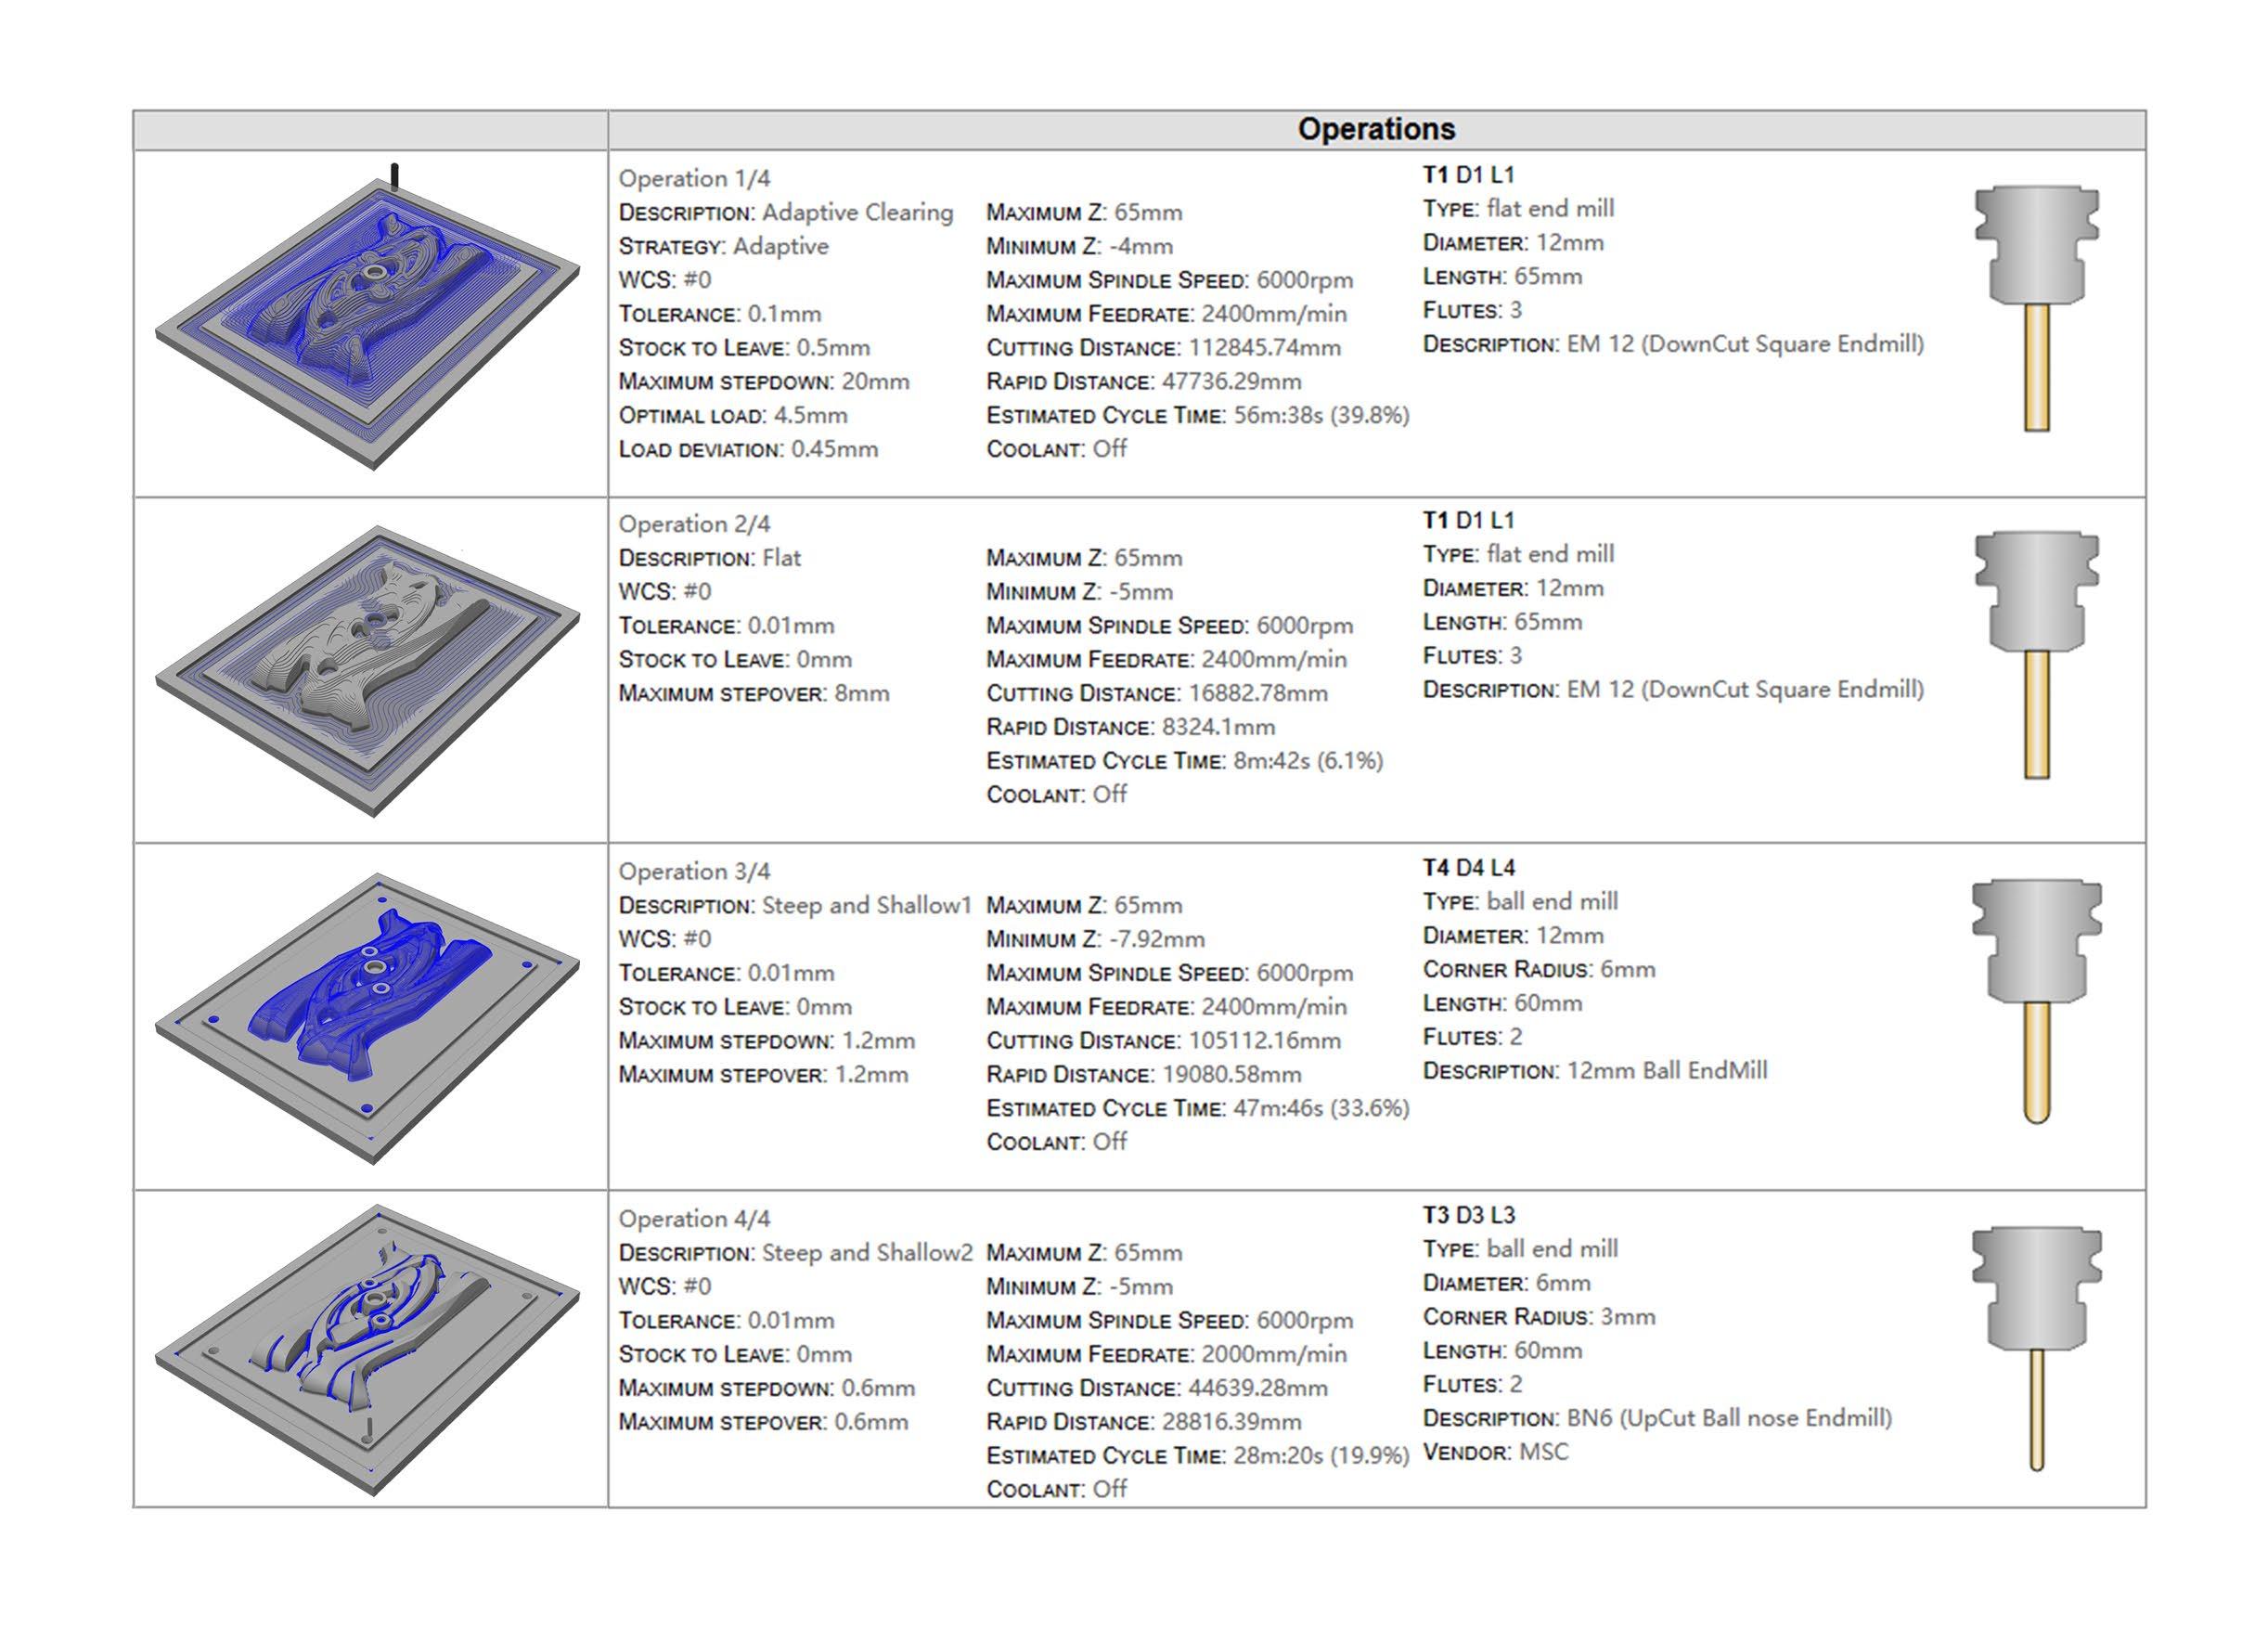
CNC Generation and Simulation
Tool Path Design
Processing Tool and Method Choose
Processing Time Control
CNC Manufacture
Timber Prepare
Holder Prepare
Secondary Processing
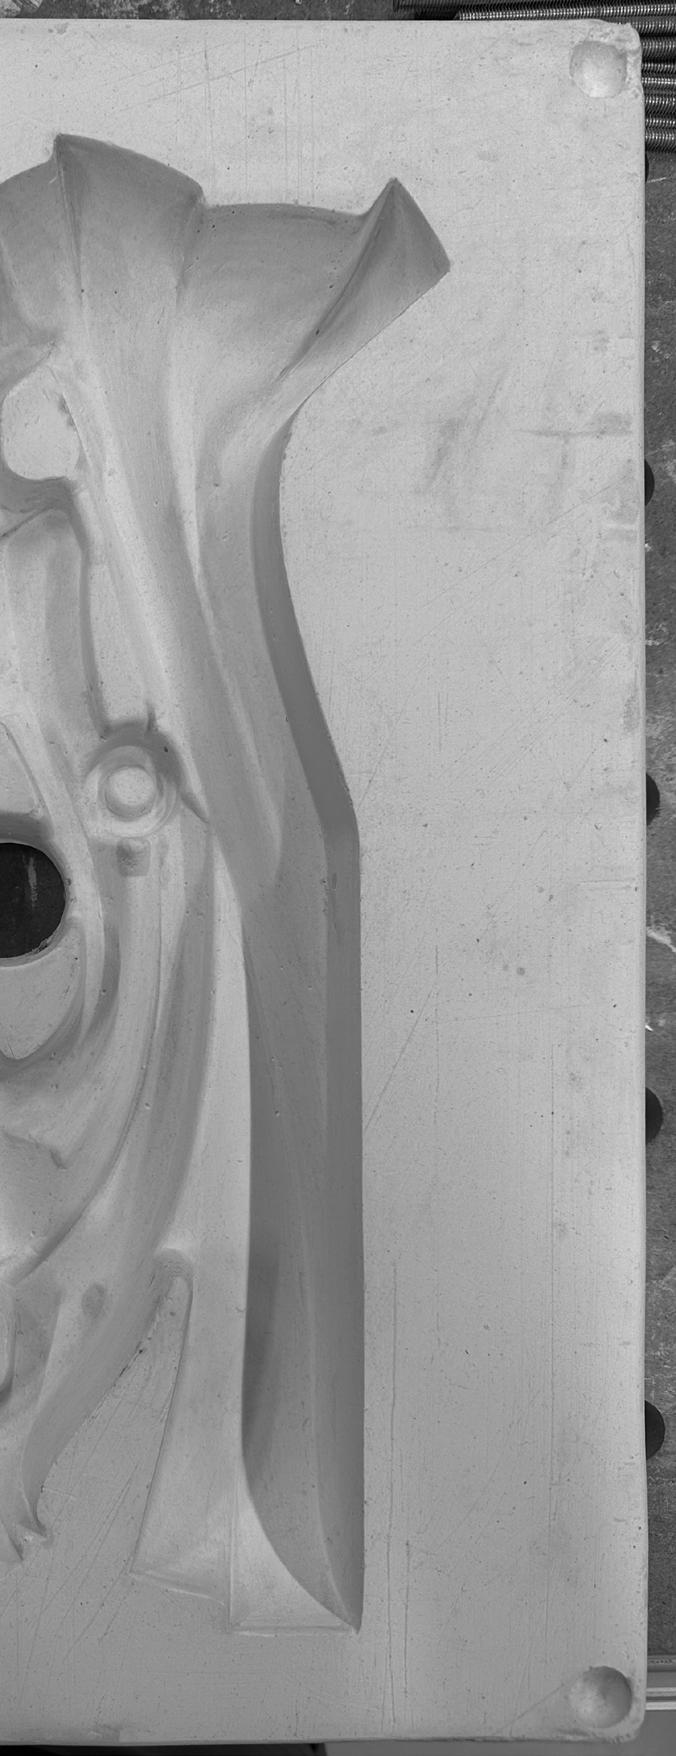
wood-model
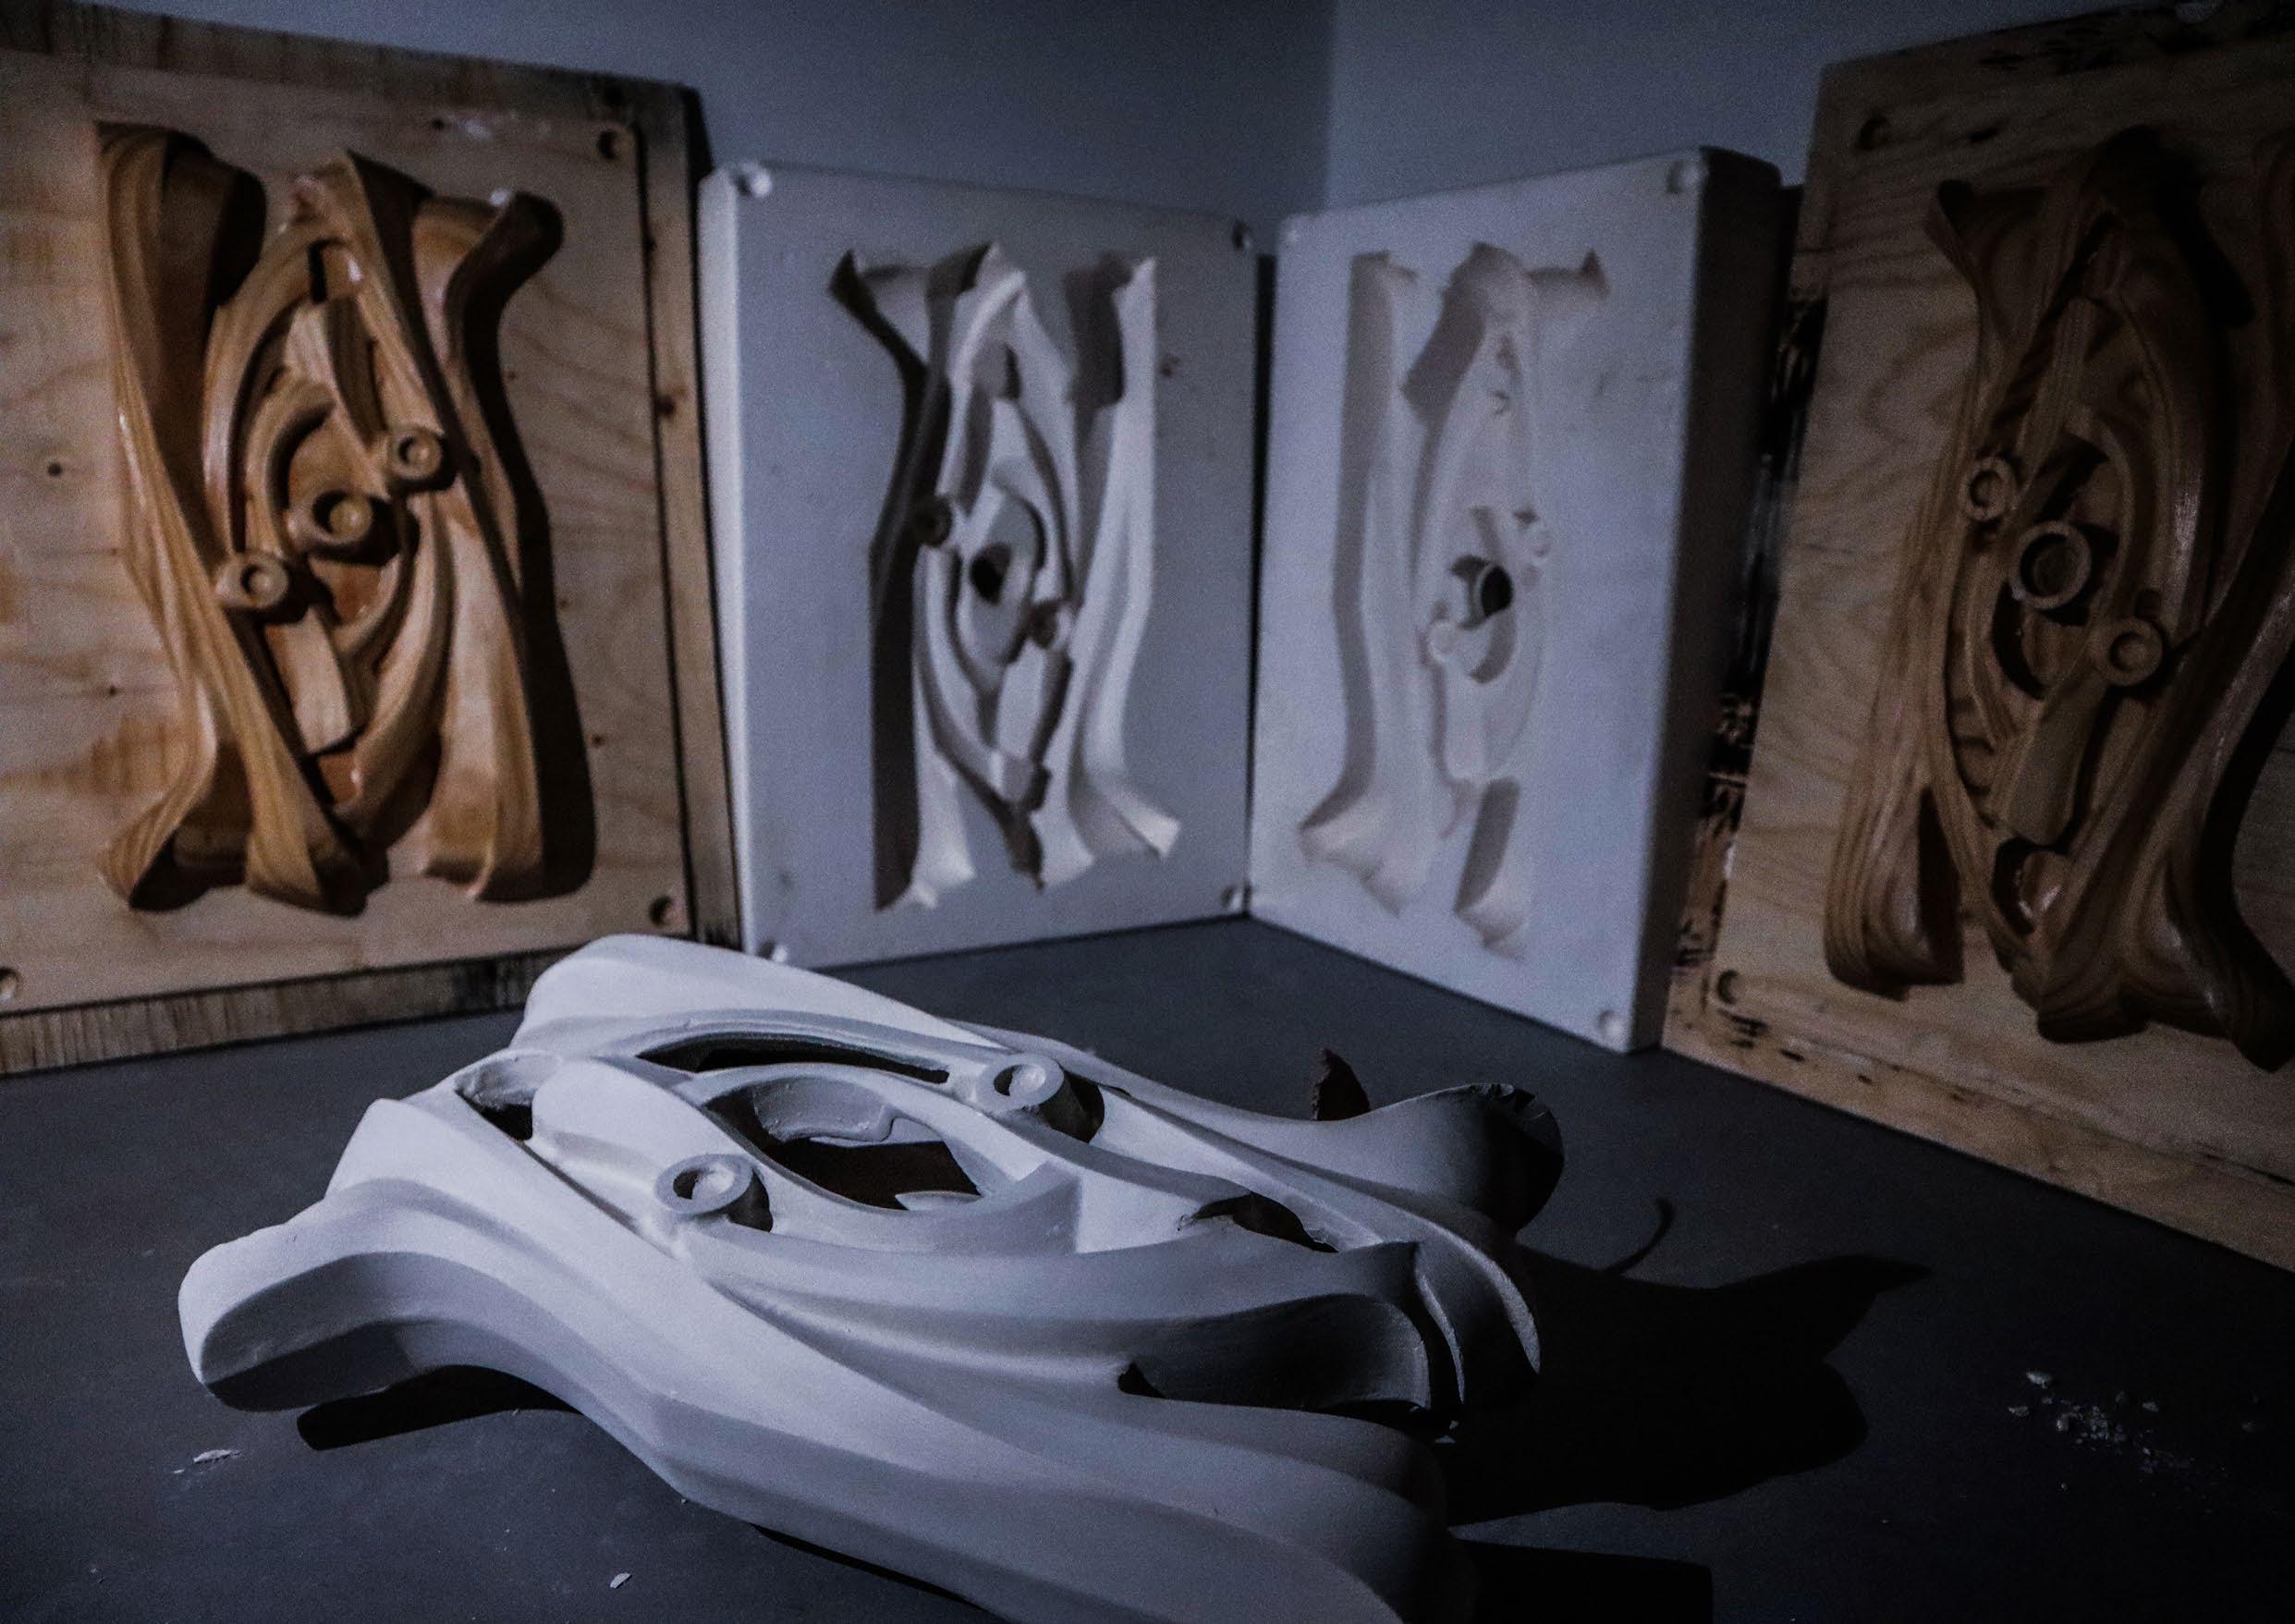
Plaster molds Making
Sanding Vaseline daub
Marble and Plug Prepare
Material calculation
Molds for Plaster
Making
Demolding Plaster
Plaster Drying and Sanding
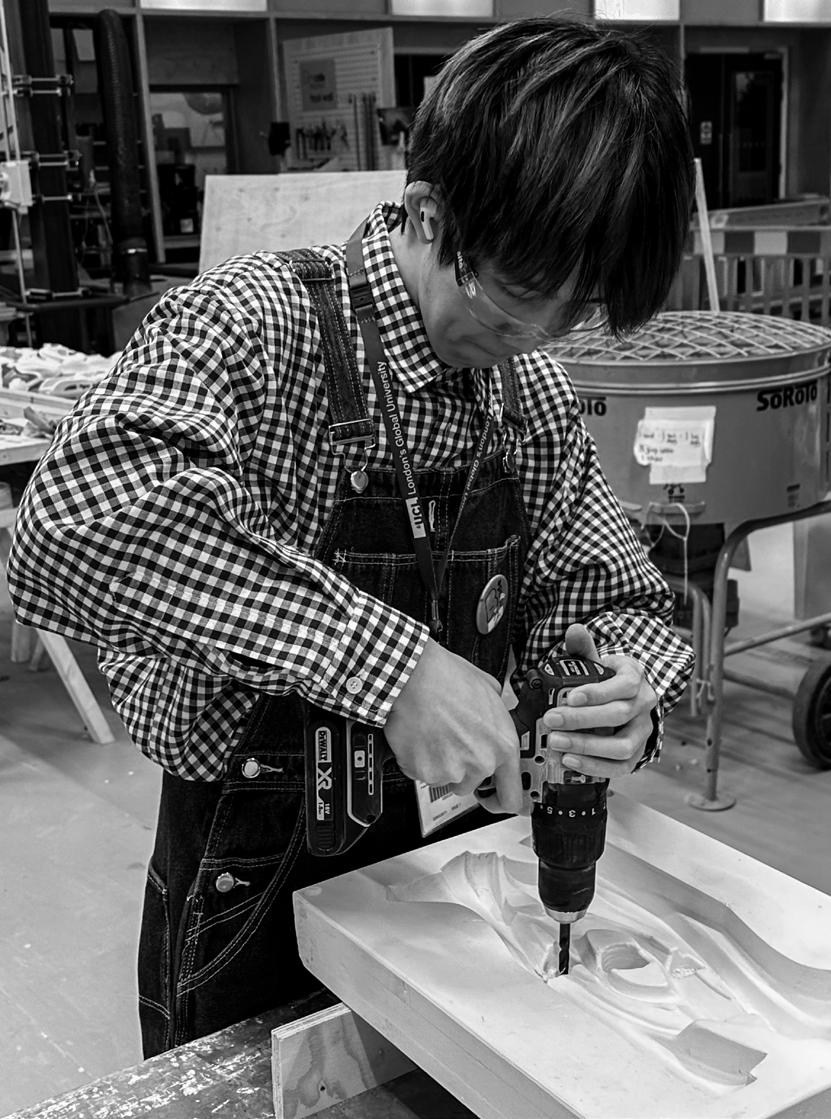
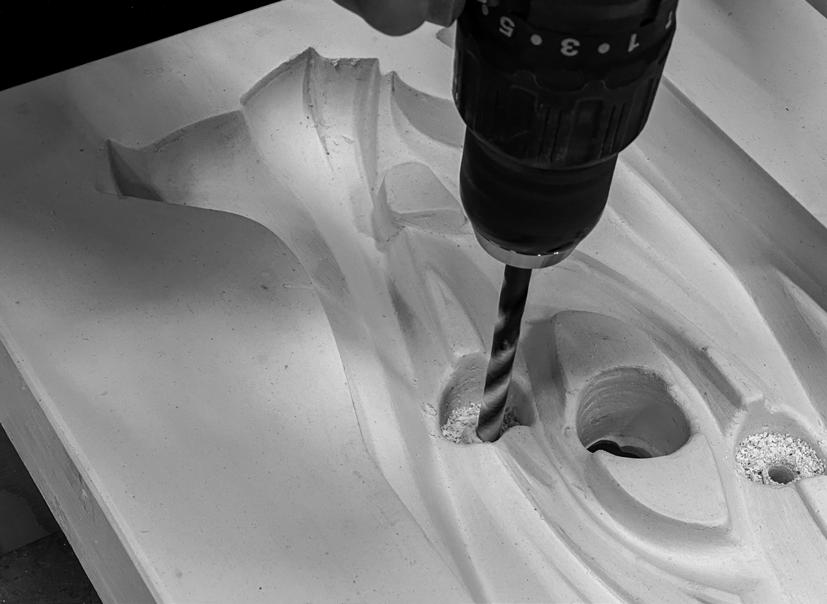
Drill holes
Half Plaster Molds
Combination
Slip Casting Prepare
Ceramic Stirring
Holder and Plug
Prepare
Electric Mixer
Ceramic Slip Casting
Continuous Additions
30min Waiting
Pour out
Demolding Ceramic
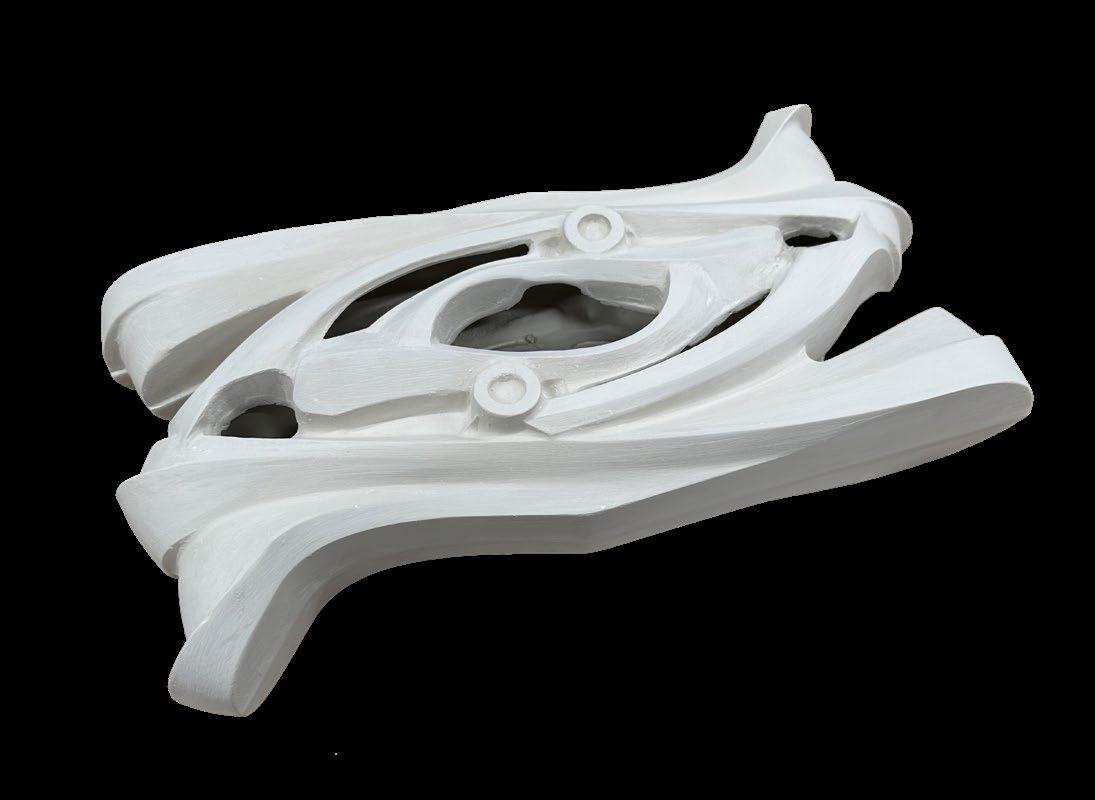
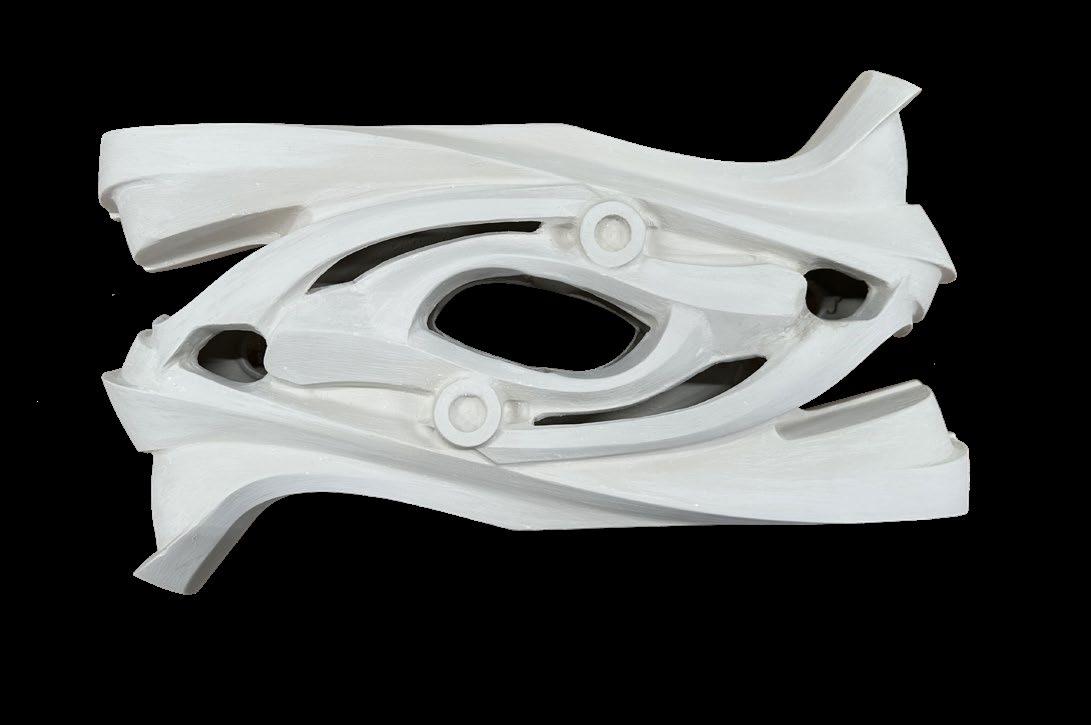
Pattern Carving Ceramic Drying Cracks Repair

Ceramic Firing
Ceramic Firing Furnaces
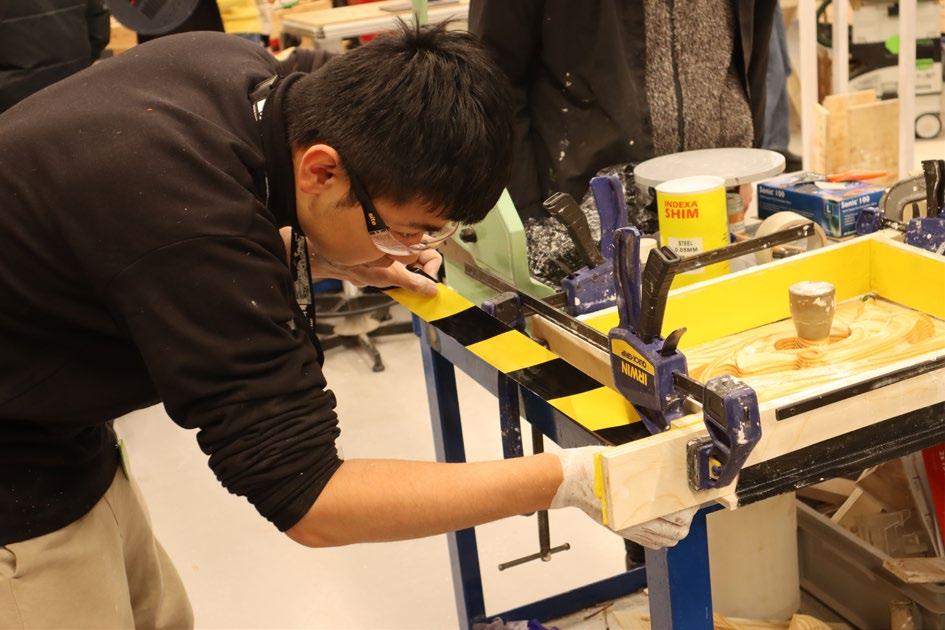
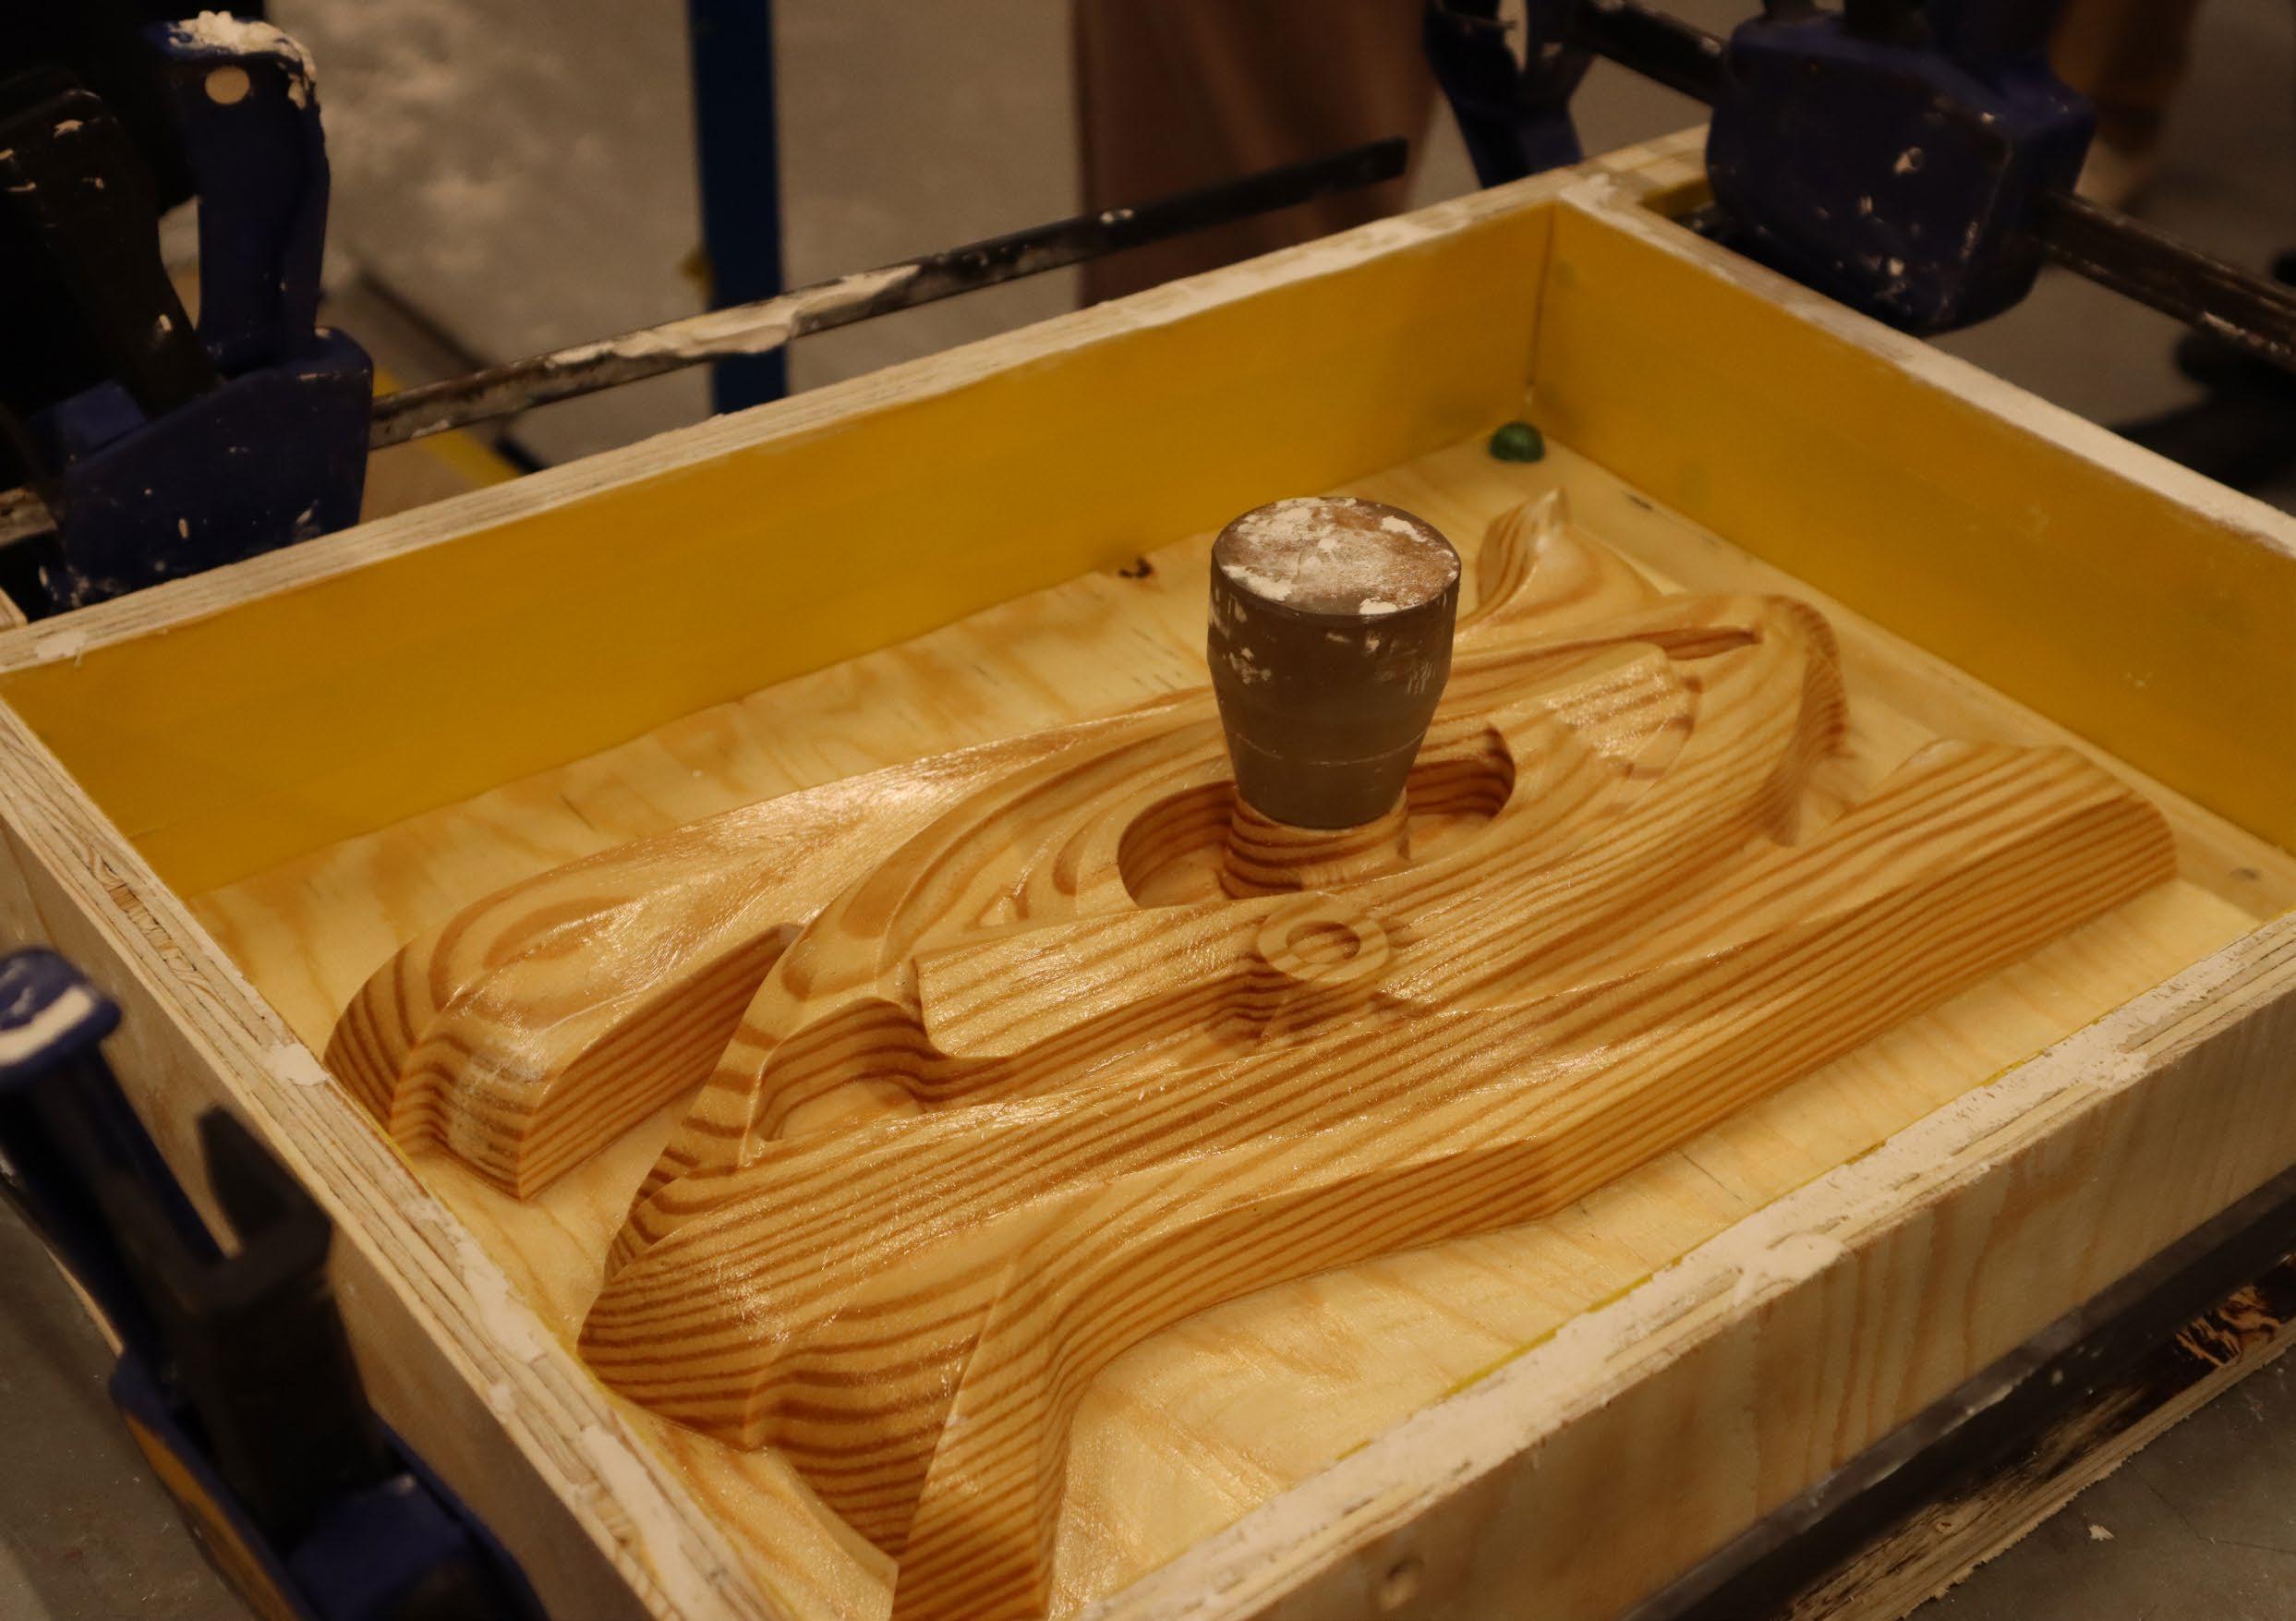
We consider the draft angle as a design language in the slip casting, and make a flowed draft angle to create a shape which fit the CNC machine and slip casting.

After we finish the CNC processing, we sand the timber and assemble the mold for plaster casting. Before the plaster pour in the mold, we Applicat vaseline to make the de-mold process easily.
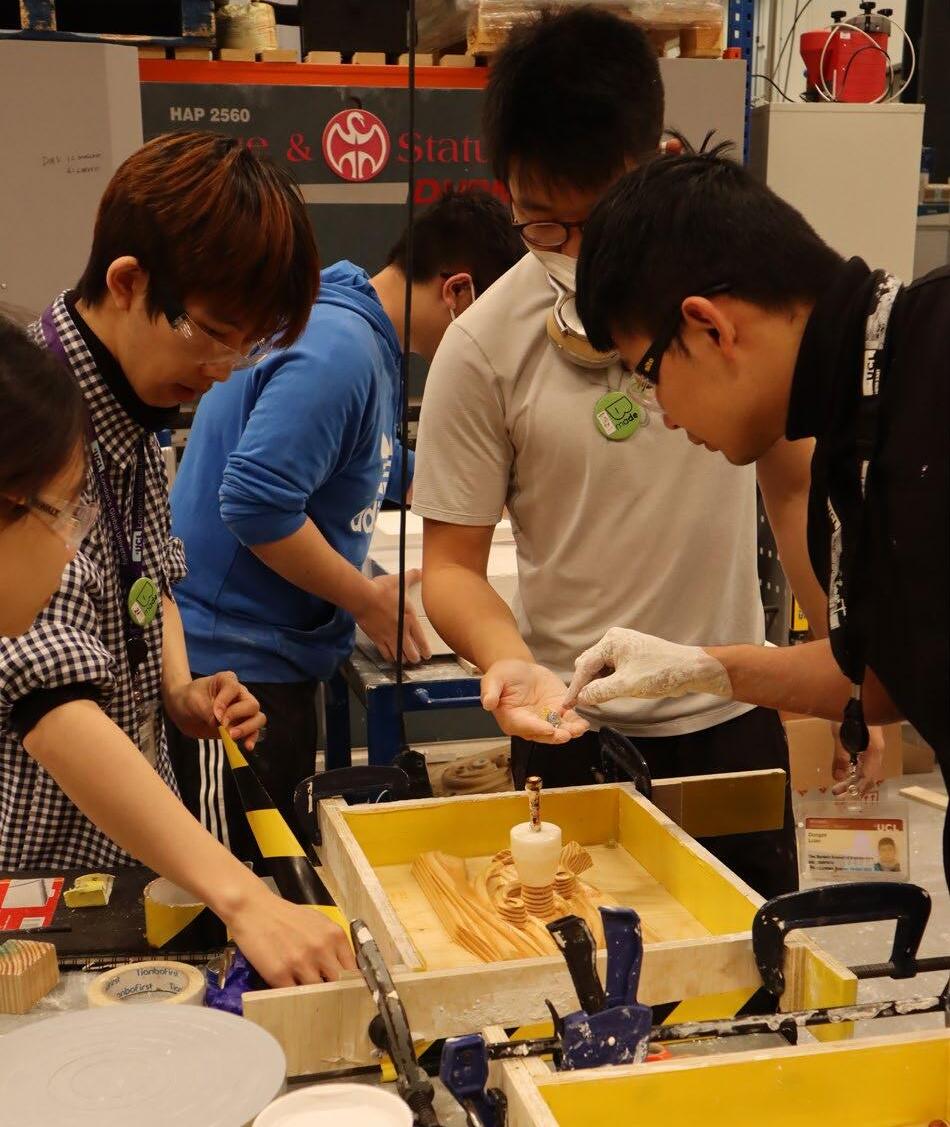
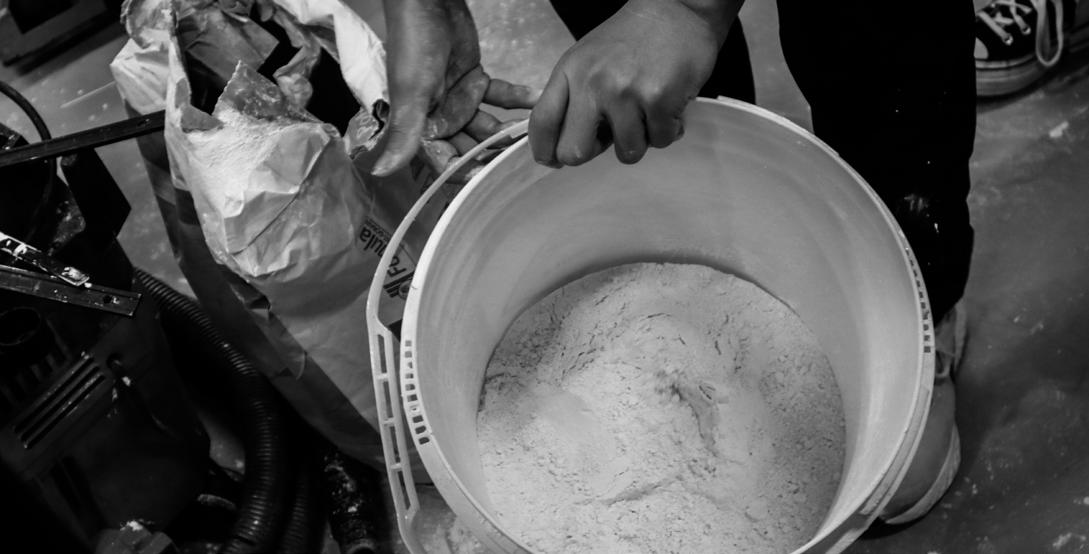
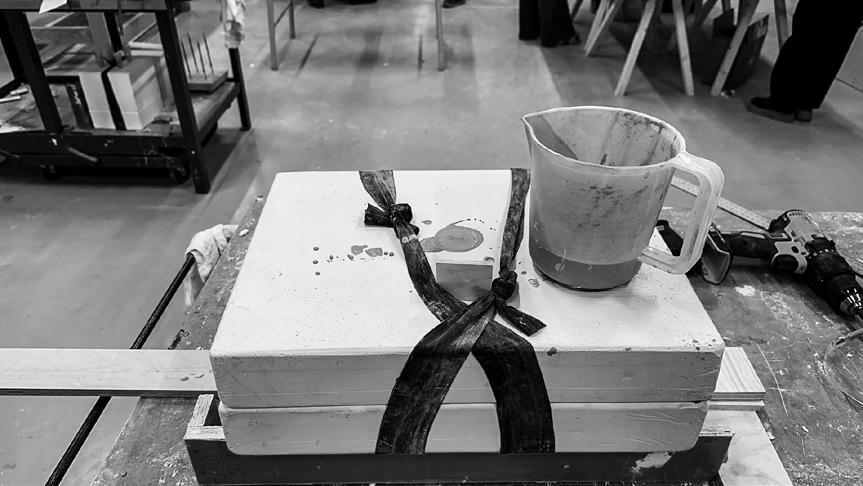
Calculating the plaster and water weight.
Stiring the plaster with water and make sure it is suitable to casting.
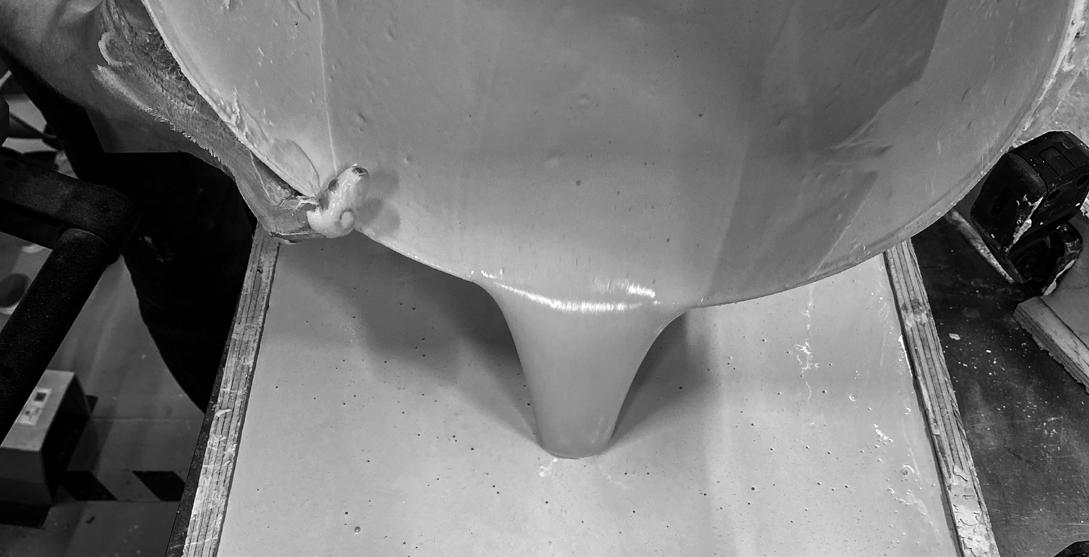
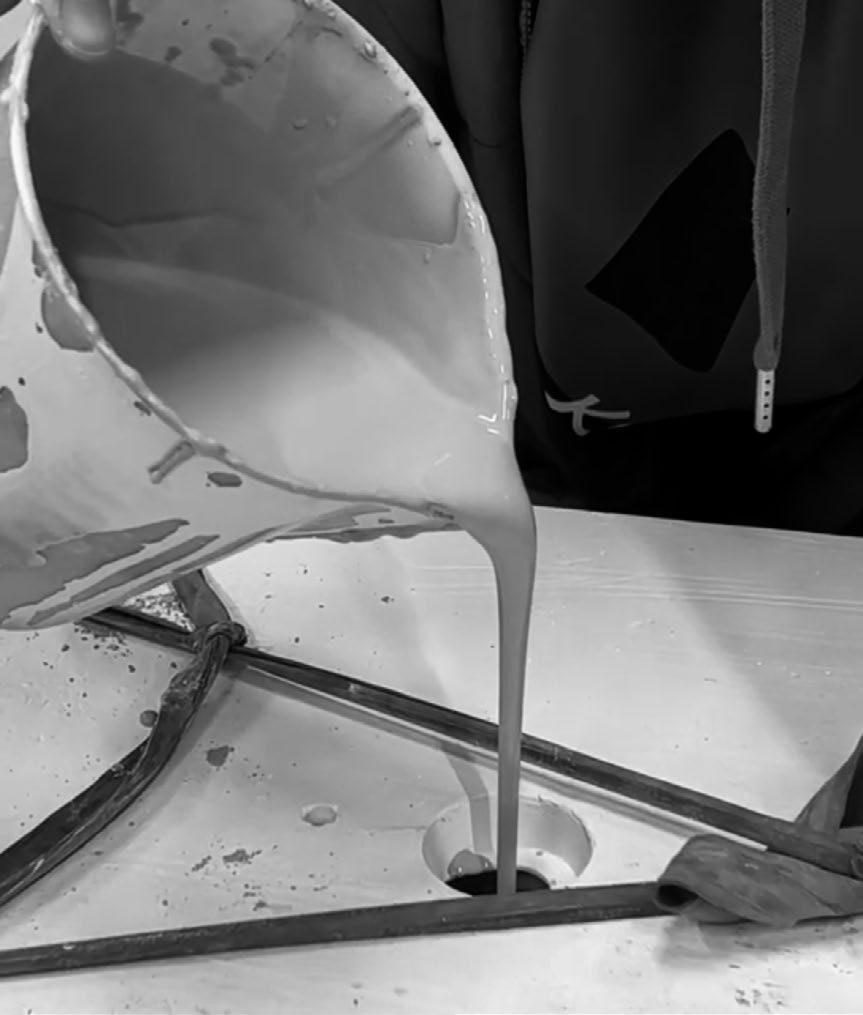
Pouring the plaster in the mold.
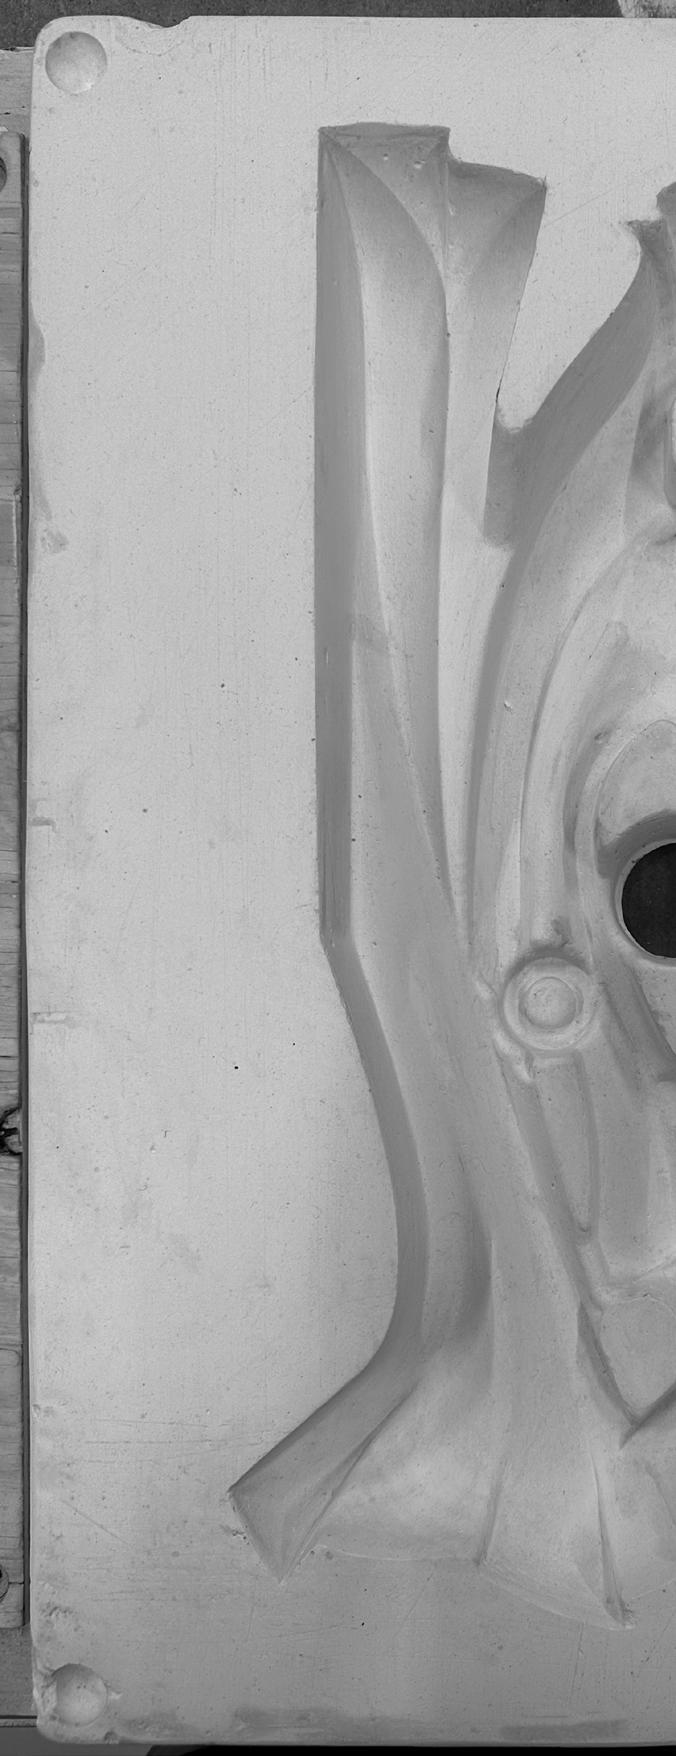
After the plaster casting, we wait 3 day to dry the plaster part. Then we de-mold it from timber mold.
We find that in the casting process, the ceramic pour into mold process need to empty the air. So we drill the hole on the plaster to make the air can be emptied in the ceramic casting process.
Then we have to wait the plaster mold as dry as possible to do casting.
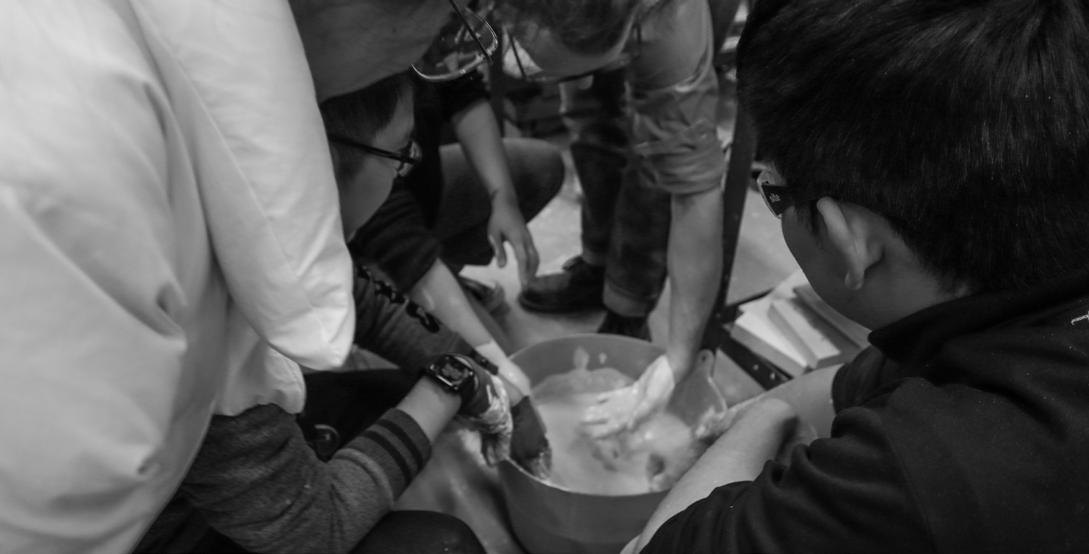
Firstly, we stir the ceramic. Then we pour ceramic into plaster mold. During the casting process, the ceramic will shrinkage. We need to continue to add the ceramic.
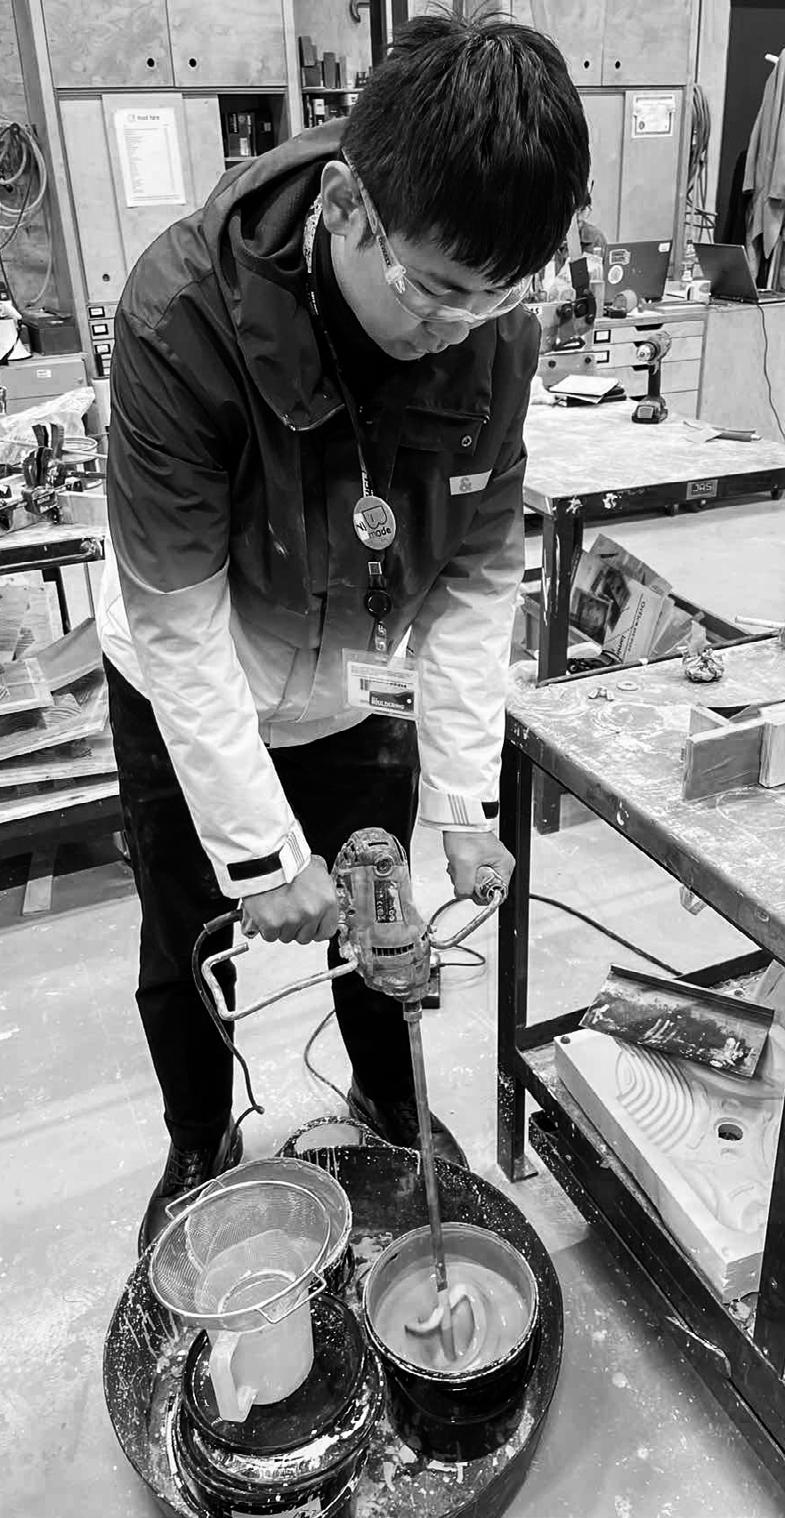
Waiting for 35mins, we pour out the ceramic and wait one day to get a dried ceramic model.

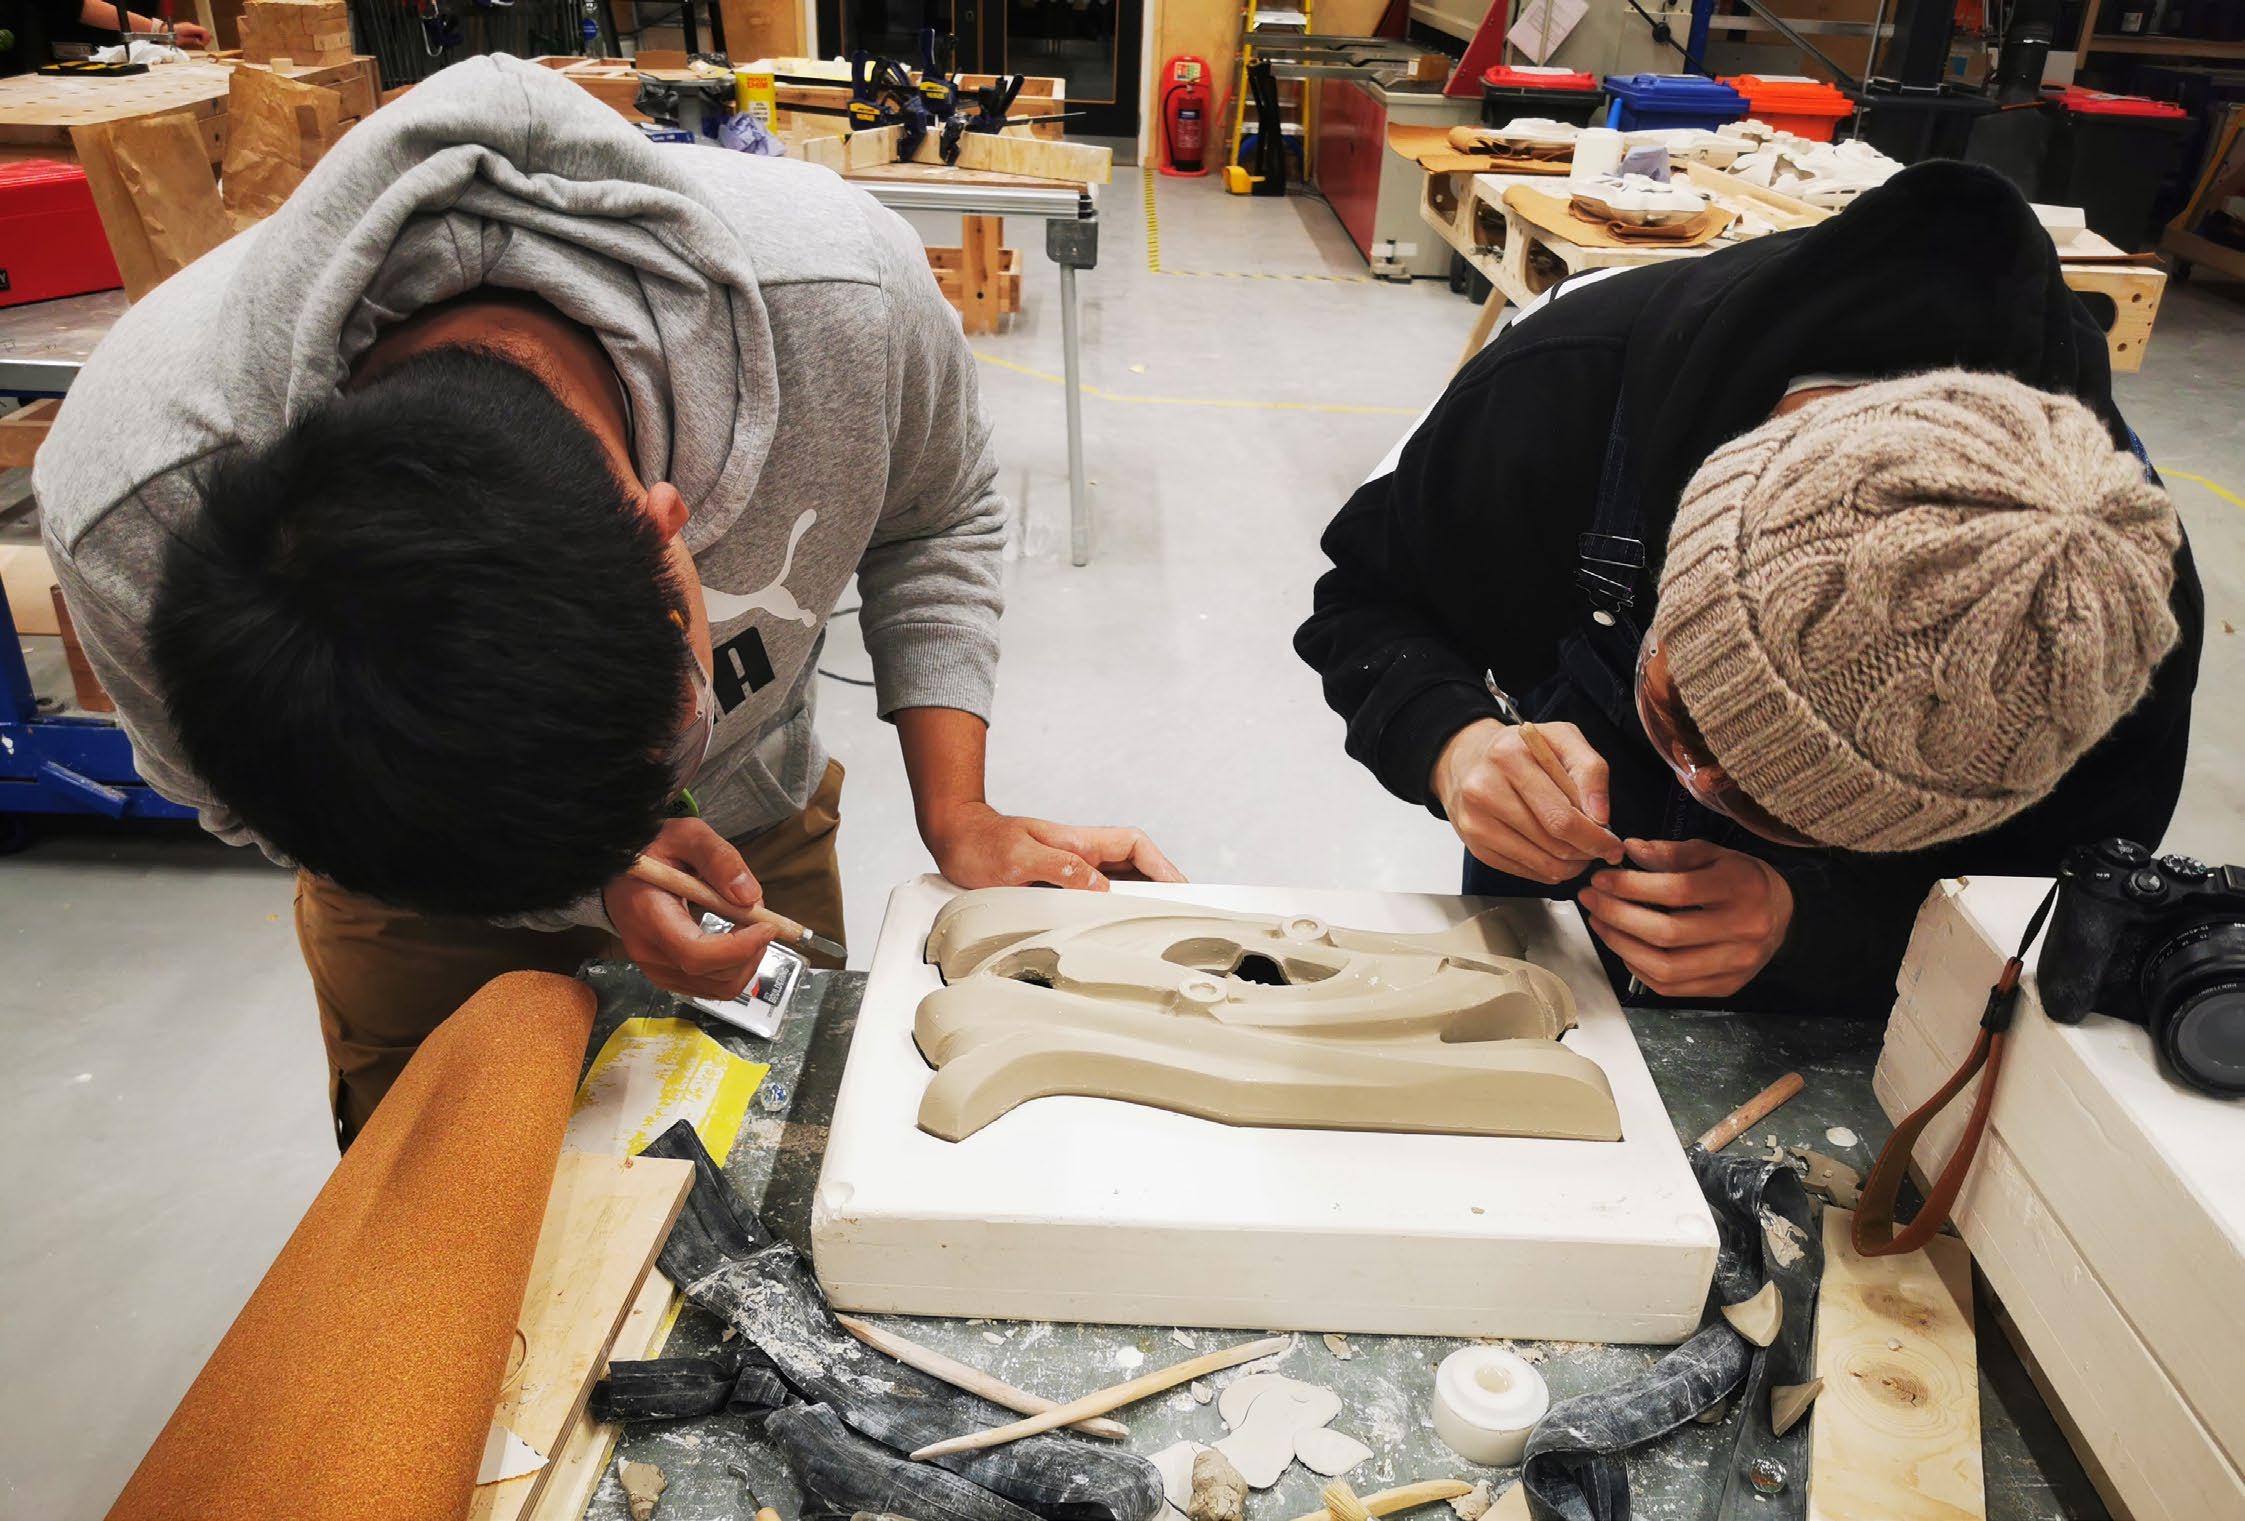
We sand and carve the ceramic model to get a slick surface whcih has pattern.
The ceramic is easily cracked. We put it in a room which has steable humidity to dry the ceramic model.
Workshop04
Ceramic Additive Manufacturing and Block design2022.12
Individual Work
Tutor: Turner-Baldwin, Samuel; Prior, Arthur

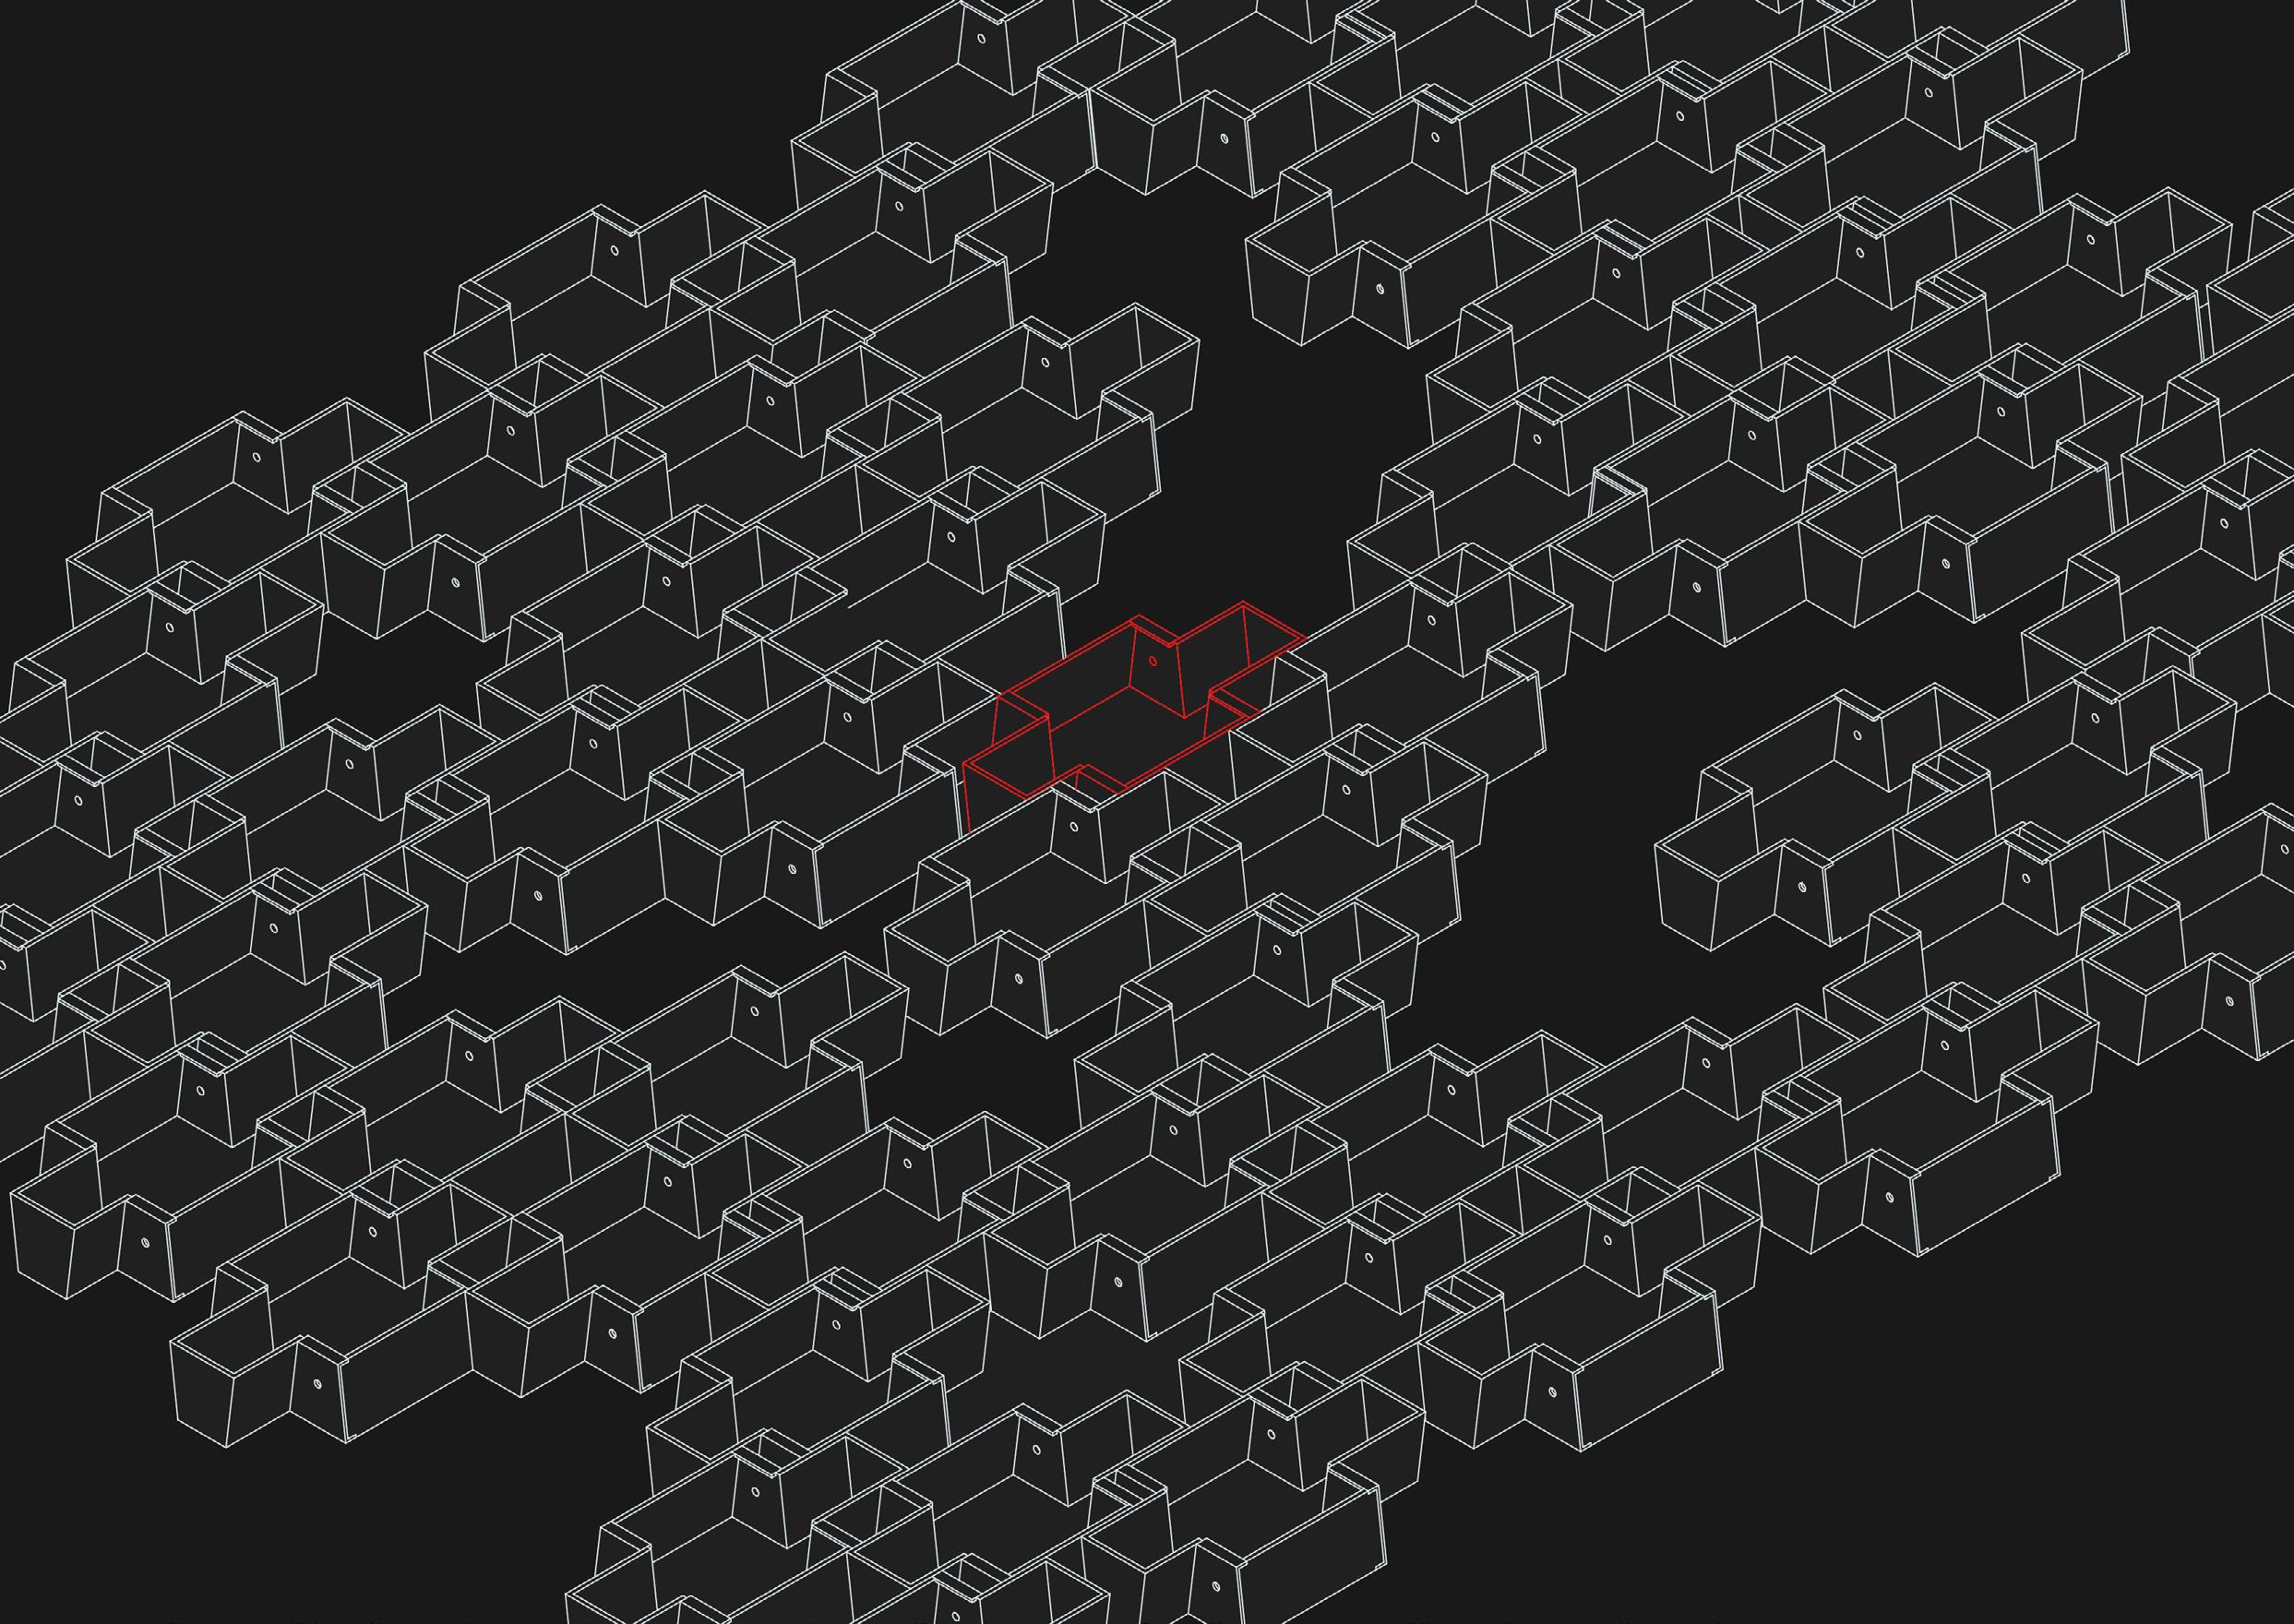
There is a gap between open and close, which is ambiguous. The condition of architecture part should not dichotomous.
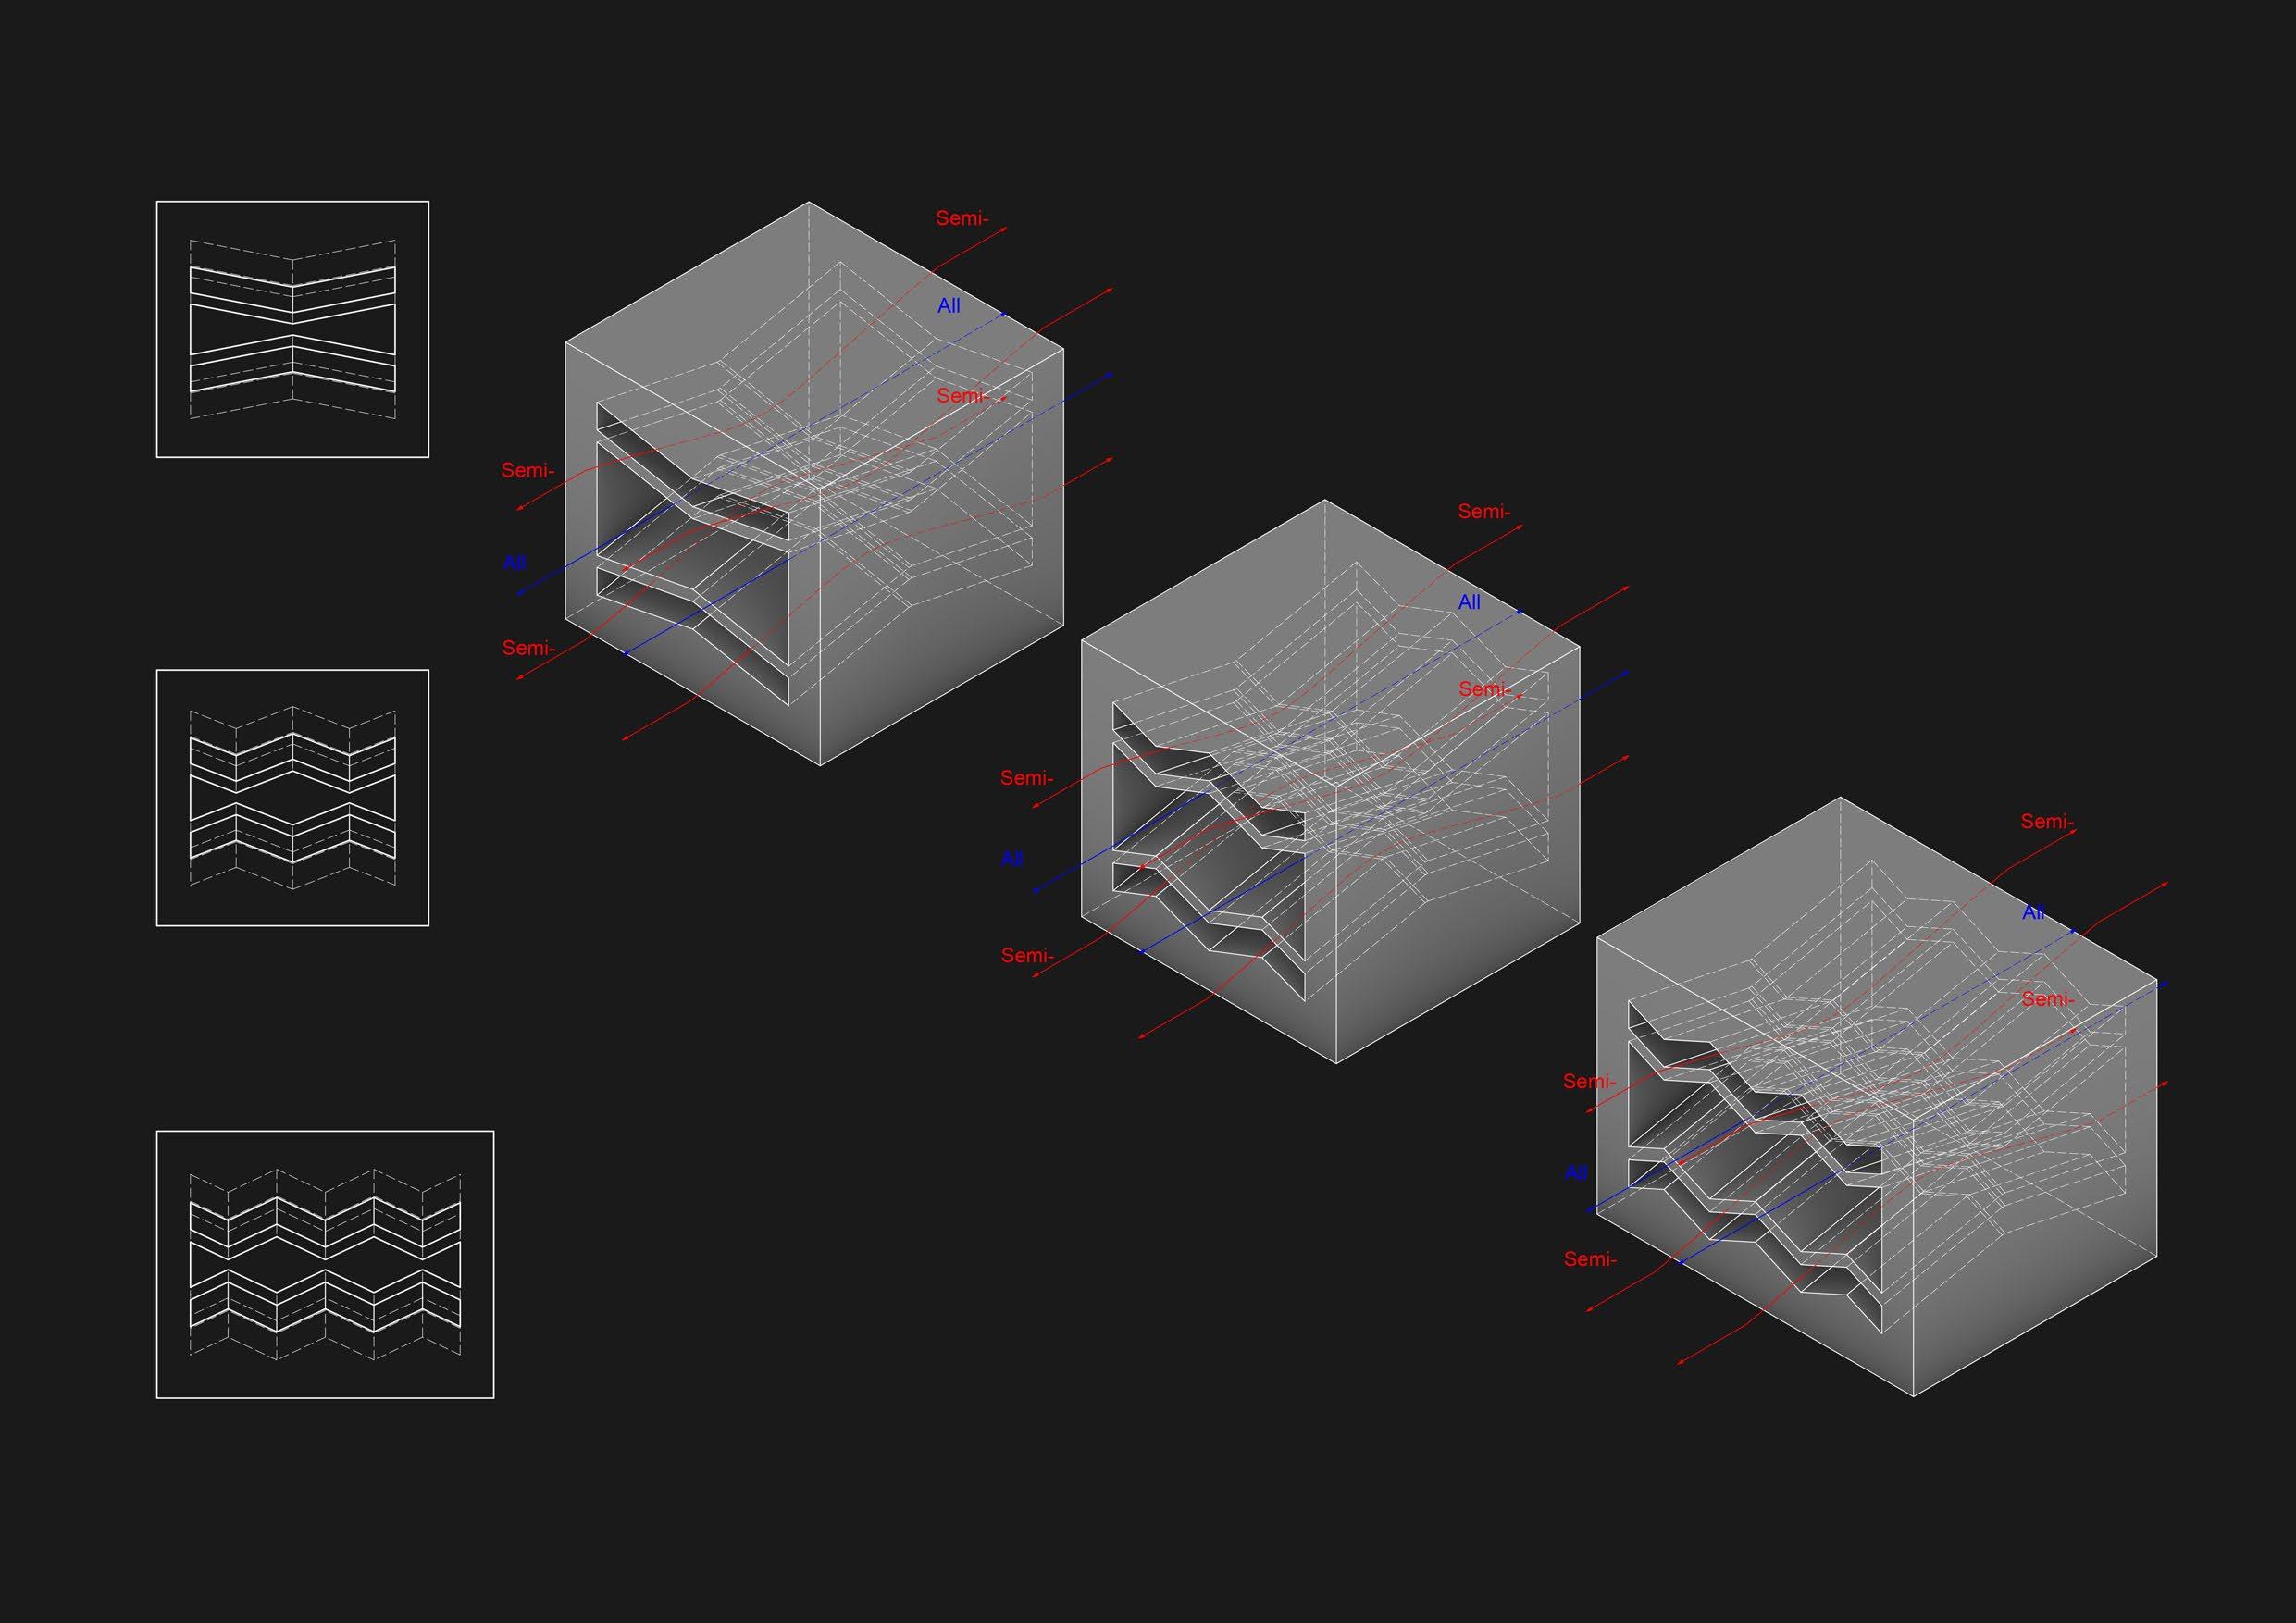
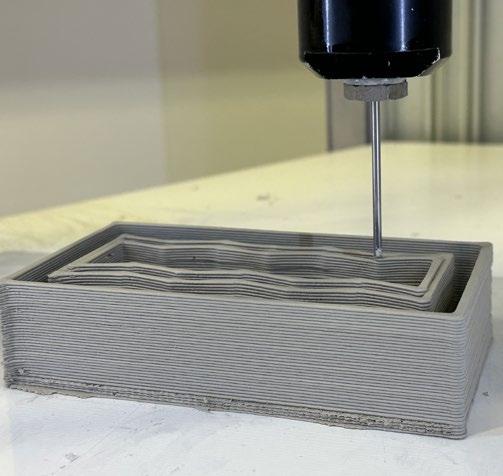
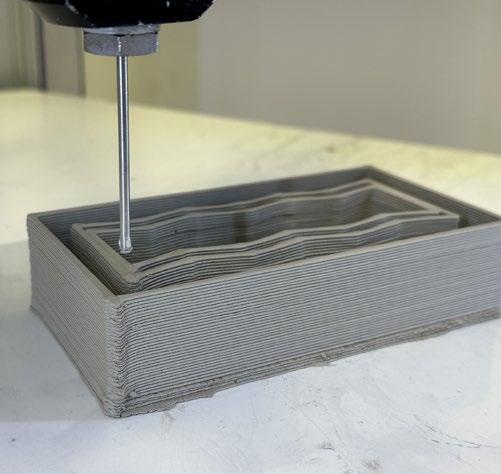


We use the 3D-Printing machine to print the block.
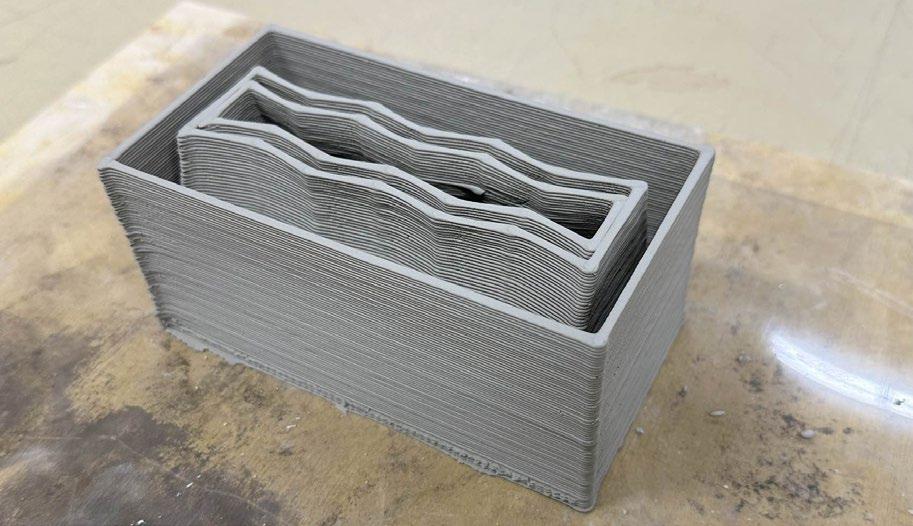

The ceramic tube of the machine need to empty the air to make sure the printing process smoothly.
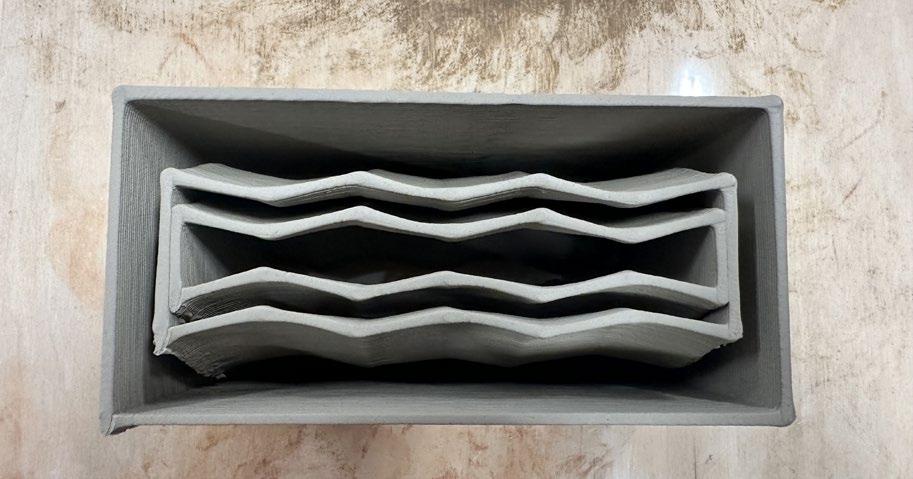
After the design and print test, I design the structure to make the block stronger by grasshopper.
The addictive manufacture process show the potential of the traditional architecture part. The complex part of architecture can be manufactured.
