
3 minute read
Converting to Black and White by Paul Gallagher

Converting to Black and White by Paul Gallagher
There are many ways to convert a raw file from your camera into black and white but some make more use of colour information than others. The following is what I had a to show in a very brief window of opportunity at the RPS Landscape Group AGM some months ago.

Fig 1
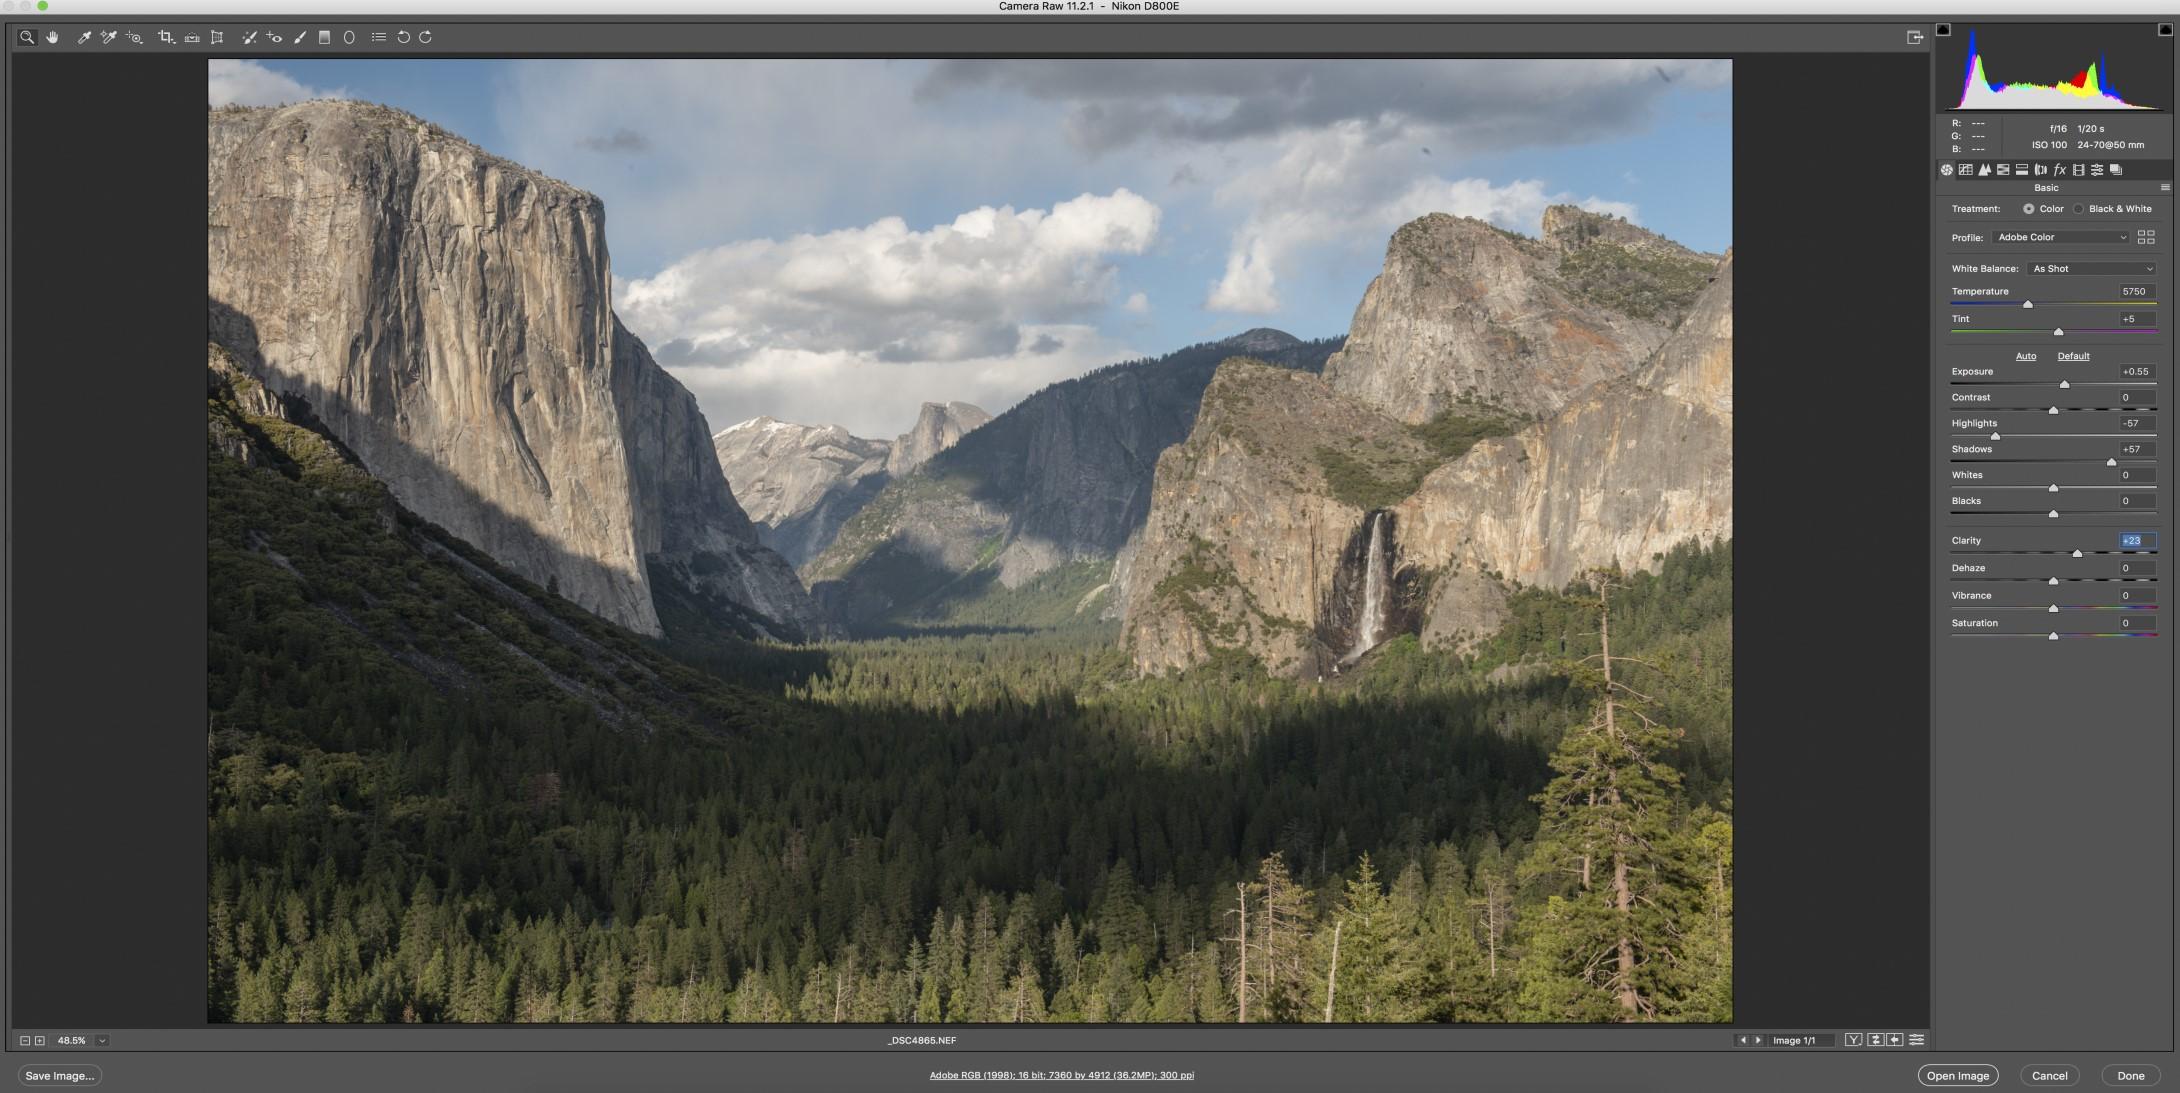
Fig.2
If we begin by opening your raw file into Lightroom or Adobe Camera RAW (both have the same functionality). See Fig 1. Begin by taking a look at your histogram and deciding your initial adjustments such as exposure, shadows and highlights etc.
For this image of Yosemite, I balanced the sky with the foreground by increasing shadows and bringing down highlights after an initial raising of the overall exposure. I followed these adjustments by adding a little clarity as lowering highlights and raising shadows has the effect of flattening your image so clarity will help separate out the mid-tones. Fig.2
Next, I navigated to the HSL Tab (Hue/Saturation/Luminance) and opened up this dialogue box. Clicking on Saturation, I then decided to saturate the dominant colours of the scene which were Blues and Aquas in the sky, and yellow and greens in the valley. Be careful not to push these colour channels too far as we must remember we are only making initial adjustments here.
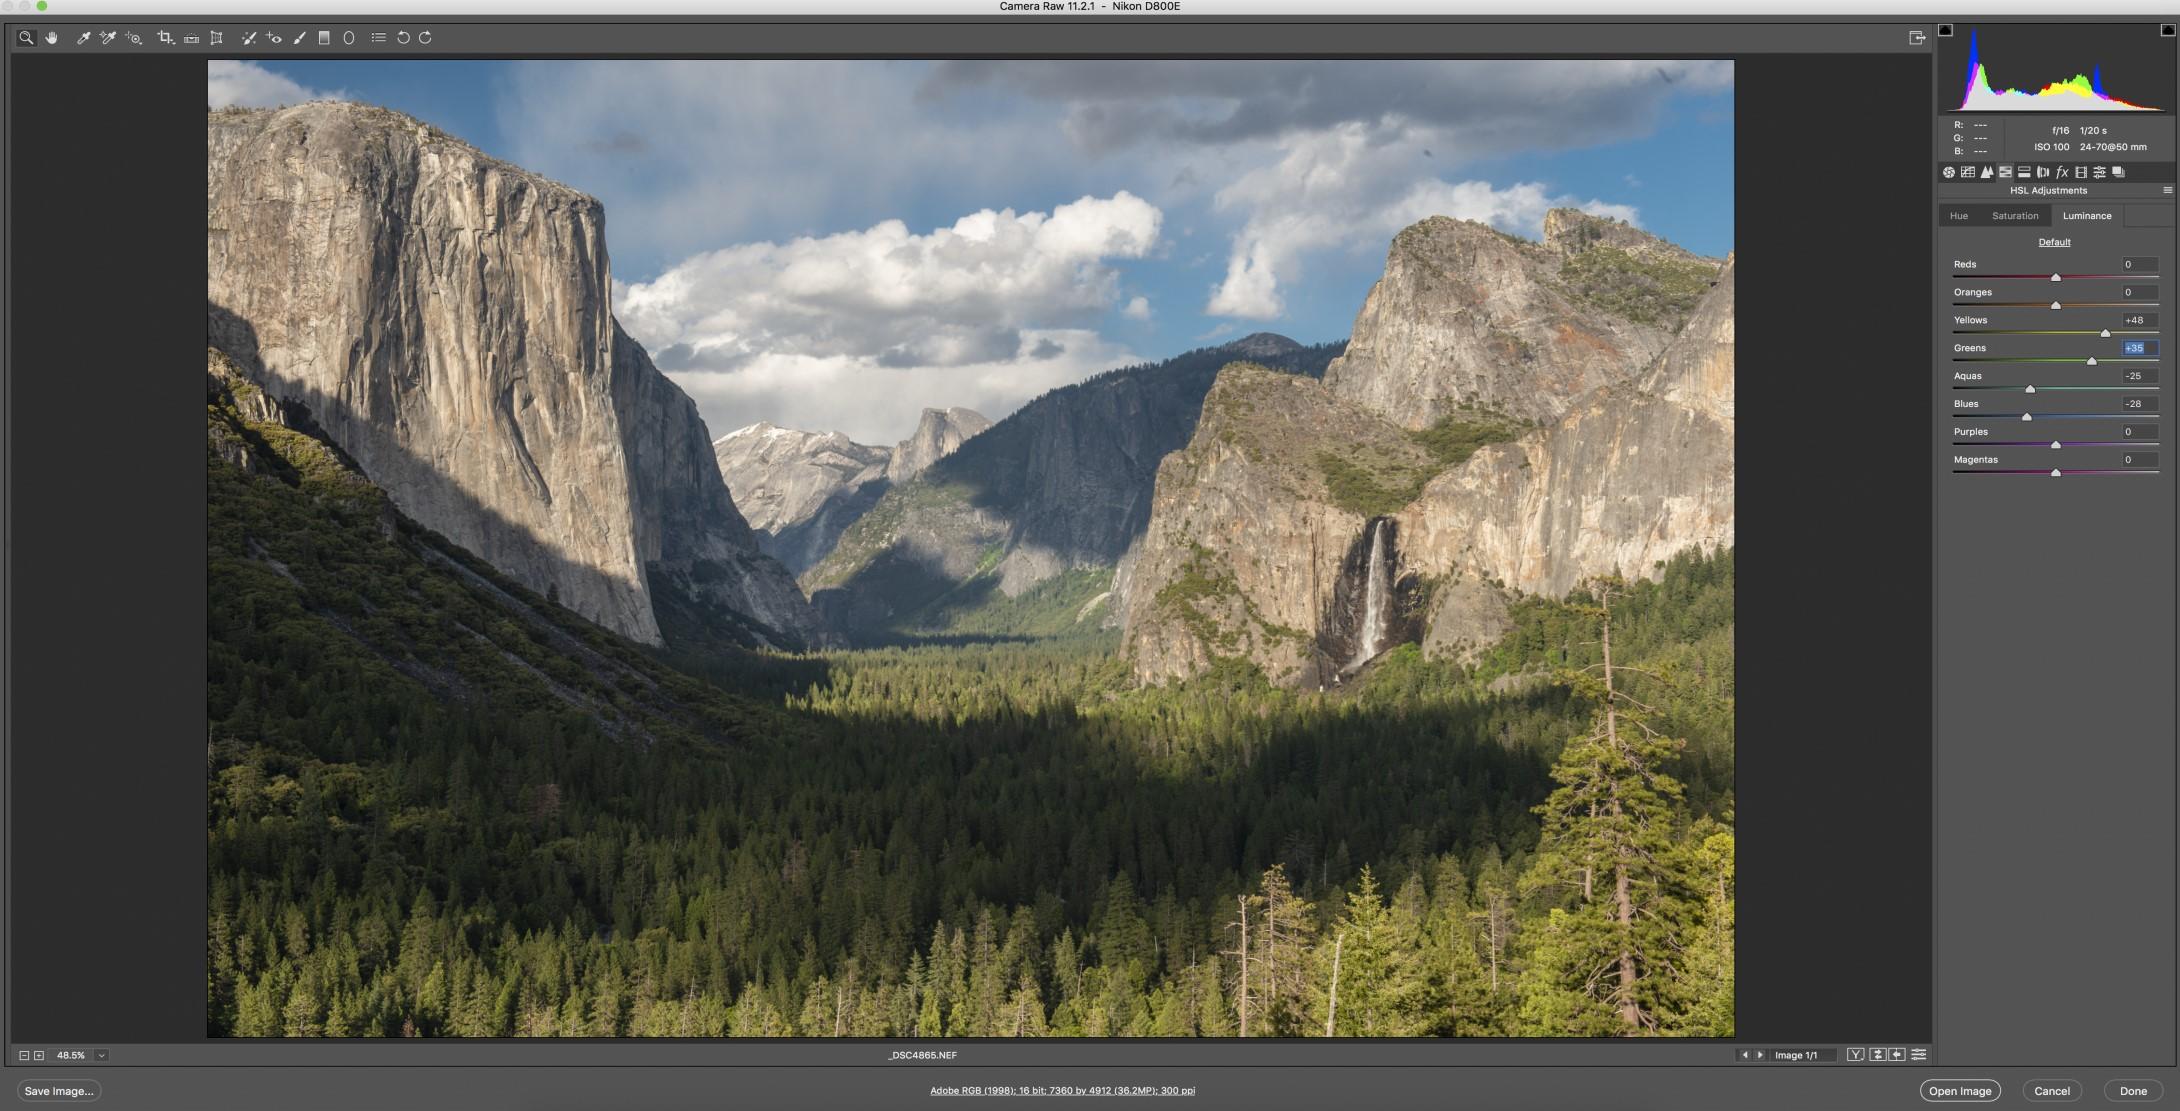
Fig 3
After saturating the chosen colours in the scene, I then clicked on the Luminance Tab and my next decision was how I could use my newly saturated colours to my advantage. Firstly, I decided to lower the luminance of the Aquas and Blues and in doing so I was darkening the sky and also making the white clouds stand out. Next, I turned my attention to the Luminance of the yellows and greens. I chose to raise the luminance of the yellows and greens as this would accentuate the essence of sunlight hitting the trees in the early evening. See Fig 3
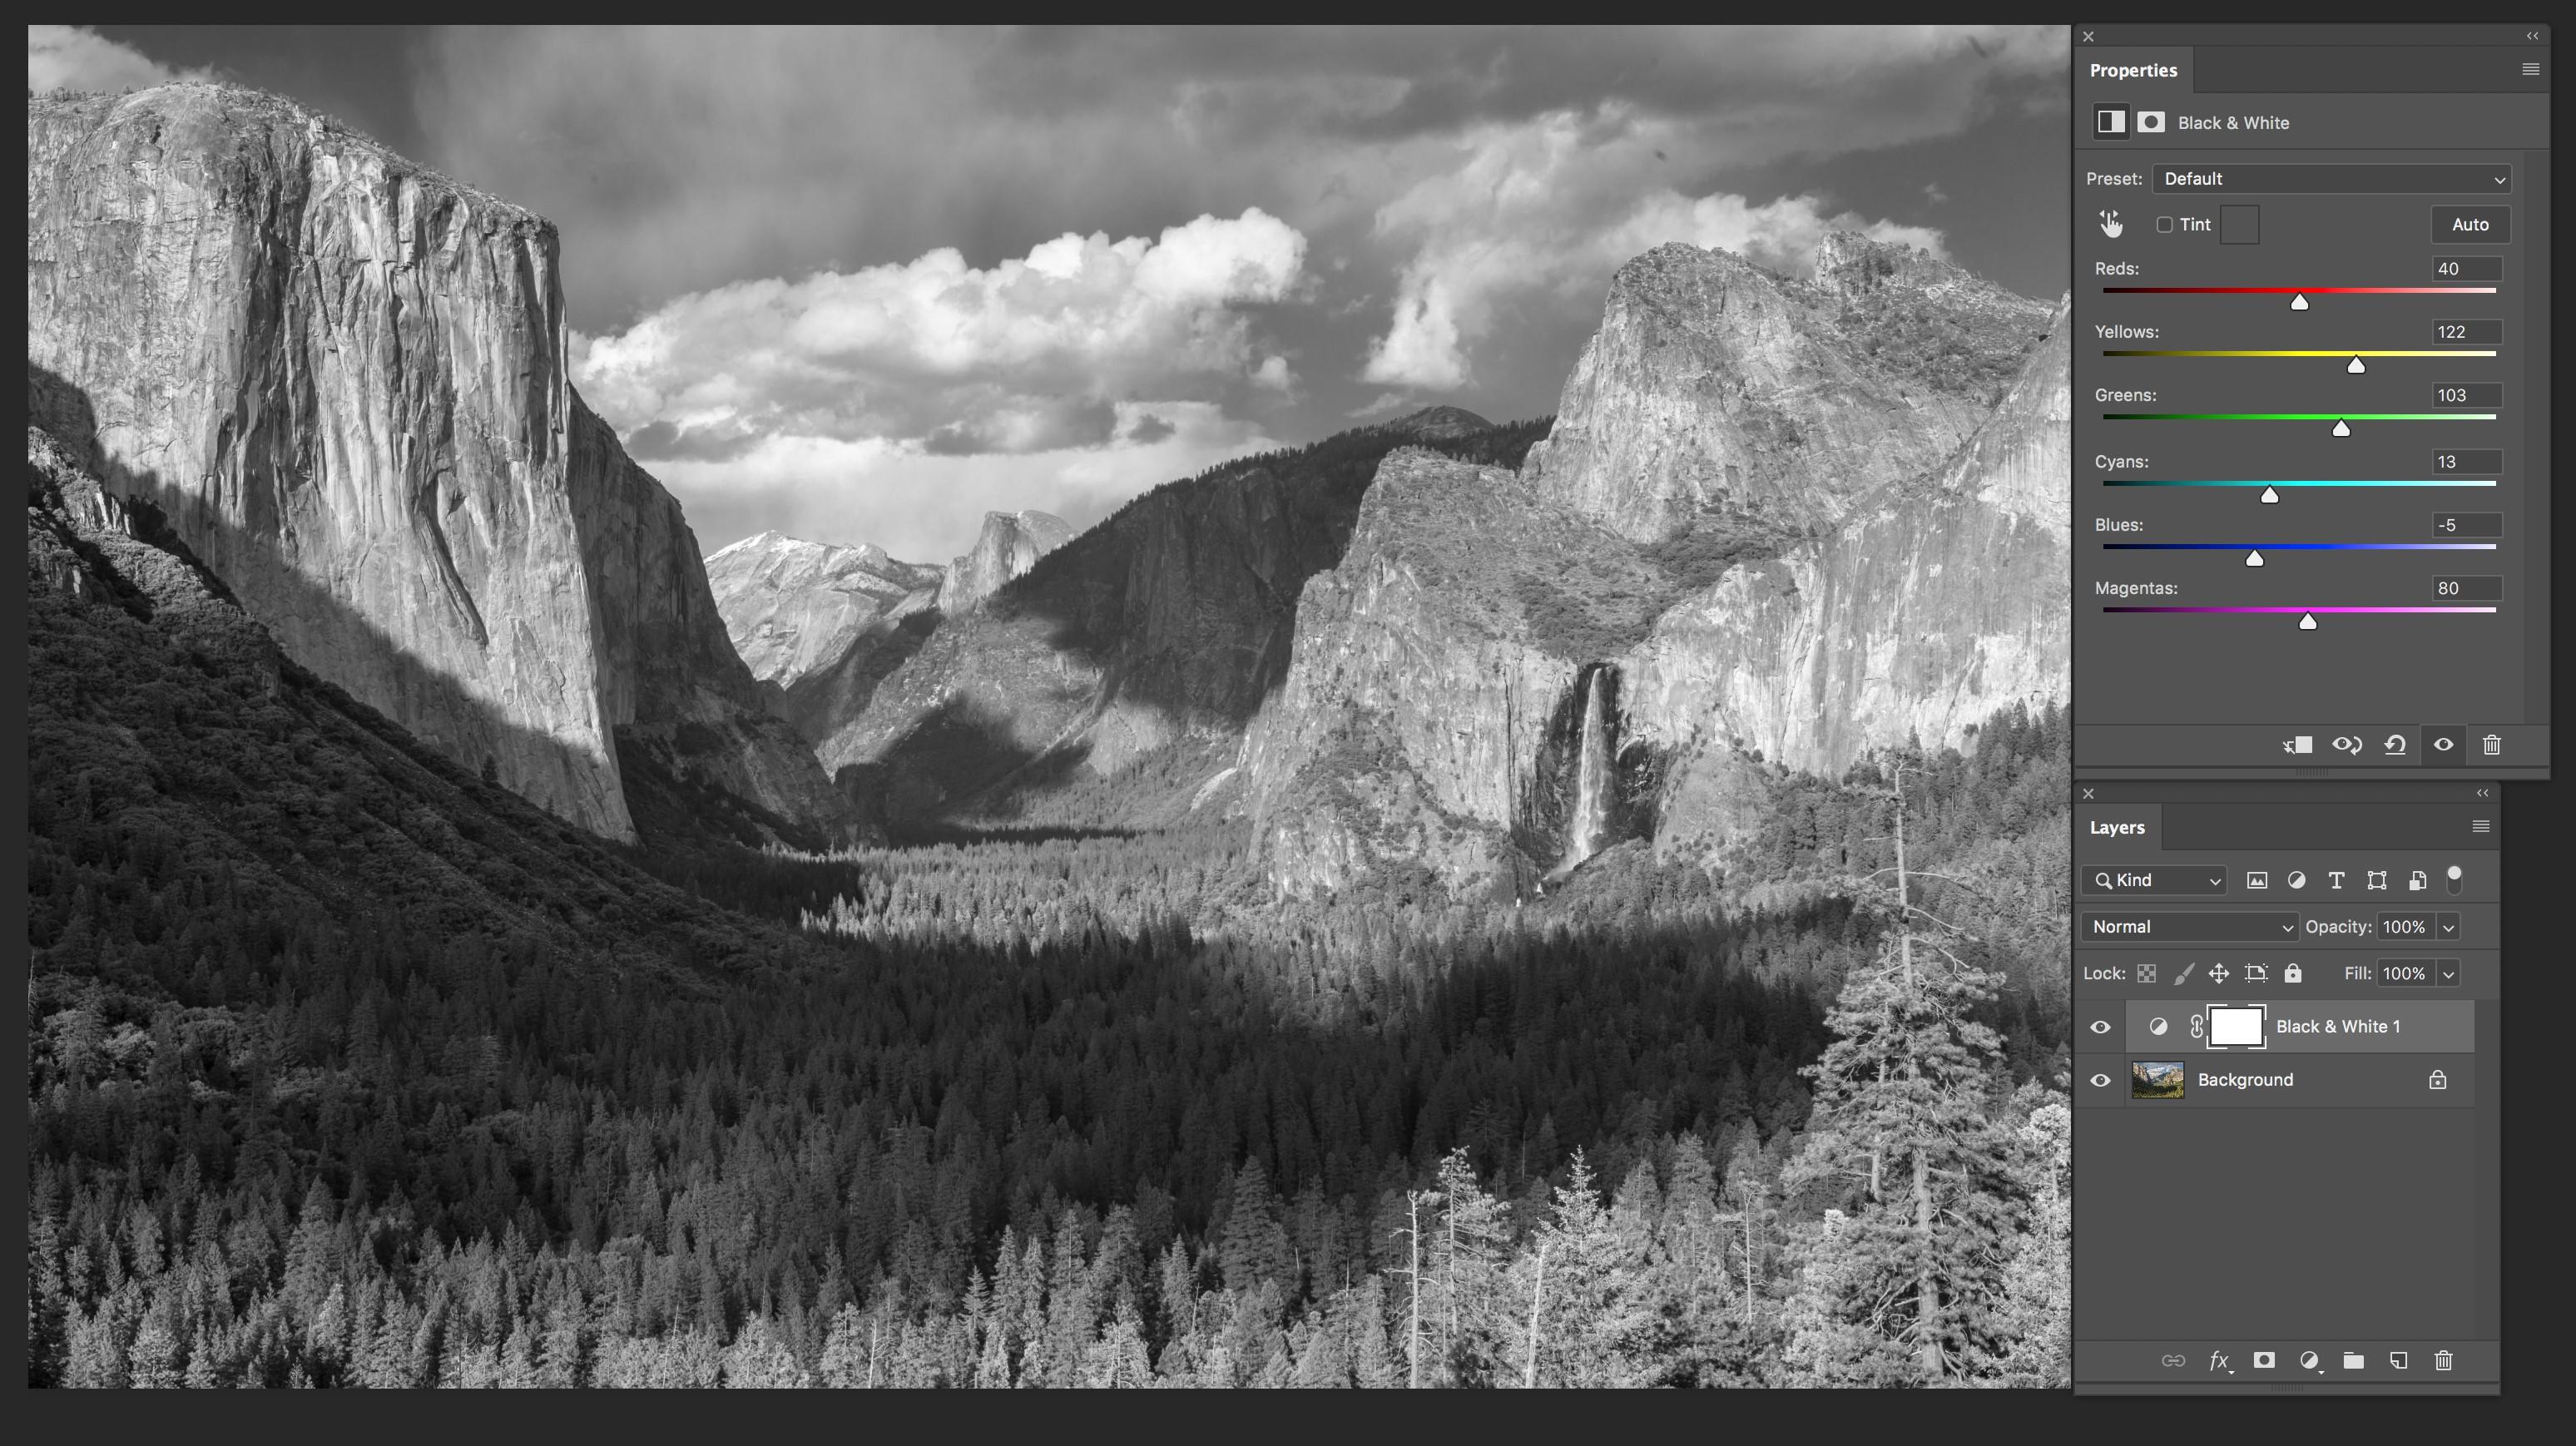
After making these first adjustments I then opened my image in Photoshop. Now it was time to see the image for the first time in black and white and commit to converting the file. To convert the image, I went to the “Create new adjustment or fill layer” at the bottom of the layers palette which is represented by a small black and white circle. I then clicked in the icon which presented me with a drop-down menu and I then clicked on Black and White. See fig.4

Fig 4
When you do this Photoshop creates a new layer and you are also presented with a new dialogue box which looks very similar to what we have already seen. Also, as this dialogue box appears you will see your image convert to black and white at the same time. Do not be too disappointed if the image looks flat and a little lifeless as this is the early stages as a black and white image.
Although this next stage may feel like you are repeating yourself with the same sliders you are not! What we are seeing here is a black and white image with all the powerful colours we created earlier in the process, latent in the background and ready to be brought into action in wonderful tones of grey. Now we must follow the actions of what we did previously by sliding to the left (Darkening) the blues and cyan’s (This is not an error. For some reason, they changed the name from Aquas to Cyans as you leave one programme and go into another!) As you do this you will see your blue sky rapidly darken behind the white clouds. Secondly, it is now time to slide the yellow and green sliders to the right and in doing so you will lighten your trees and the sunlight will appear as wonderful highlights in your image. All of the above is dependent on the level and intensity of colours in your image and other colours may be present that you can consider. Also, it must be remembered that this is the first step in an exciting journey into the world of black and white. You now have the foundations of a great photograph and the fine adjustments can be made in whatever way you please resting in the knowledge that you made the most of the colour image in the first place.
All images © Paul Gallagher www.paulgallagher.co.uk www.aspect2i.co.uk
