THE ANDRIN GUIDE TO


This Guide is designed to provide you with the information you need to care for your new home, even though Andrin Homes provides you with a comprehensive New Home Warranty regulated by Tarion.

Tarion’s Construction Performance Guidelines form the basis of asessment in evaluating your Warranty Claims.
Our guide includes information we have gathered from the Tarion Warrany Corporation and our trade partners and manufacturers who have built and installed their products in your home.
We want you to properly care for your home so you can enjoy it for years to come.
Caring For Your Bathroom Accessories and Fixtures 10
Wall Mirrors 10
Shower Glass Doors 10
The Shower Door Track 10
Toilets, Bathtubs, Sinks, Faucets, Showerheads 10
Toilets 10
How To Check For Toilet Leaks 11
Clogged Drains 11
Clogged Toilets 11
How To Unclog A Toilet Drain 11
How To Unclog A Shower/Tub Drain 12
Tips For Preventing Shower Clogs . . . . . . . . . . . . . . . . . . . . . . . . . . . . . . . . . . . . . . . . . . . . . . . . . . 12
Bathtubs . . . . . . . . . . . . . . . . . . . . . . . . . . . . . . . . . . . . . . . . . . . . . . . . . . . . . . . . . . . . . . . . . . . 12
Bathroom Sinks . . . . . . . . . . . . . . . . . . . . . . . . . . . . . . . . . . . . . . . . . . . . . . . . . . . . . . . . . . . . . . 13
Bathroom Faucets, Showerheads And Fittings . . . . . . . . . . . . . . . . . . . . . . . . . . . . . . . . . . . . . . . . . . 13
Caring for your Cabinets and Hardware 16
Cabinet Interiors 17
Door and Drawer Adjustments . . . . . . . . . . . . . . . . . . . . . . . . . . . . . . . . . . . . . . . . . . . . . . . . . . . . 17
Cabinet Door Handles and Knobs: . . . . . . . . . . . . . . . . . . . . . . . . . . . . . . . . . . . . . . . . . . . . . . . . . . 17
Kitchen Faucets and Drains . . . . . . . . . . . . . . . . . . . . . . . . . . . . . . . . . . . . . . . . . . . . . . . . . . . . . . 17
Caring for your Home’s Exterior Finishes . . . . . . . . . . . . . . . . . . . . . . . . . . . . . . . . . . . . . . . . . . . . . . 19
Paint / Sealant on Siding . . . . . . . . . . . . . . . . . . . . . . . . . . . . . . . . . . . . . . . . . . . . . . . . . . . . . . . . 19
Wood, Hardboard or Panel-type Siding Joints 19
Efflorescence (white, powdery film) is Present on Brickwork. 19
or Mildew is Visible on Exterior Painted Surfaces 19
in Exterior Wall 19
19
Eavestroughs Overflow During Normal Rain 19
or Downspouts Not Performing Properly 19
Caring for your Exterior Concrete Surfaces 20
Caring for your Interior Concrete Surfaces . . . . . . . . . . . . . . . . . . . . . . . . . . . . . . . . . . . . . . . . . . . . . 20
Basement Wall or Floor is Damp 20
Basement Floor Drains . . . . . . . . . . . . . . . . . . . . . . . . . . . . . . . . . . . . . . . . . . . . . . . . . . . . . . . . . 20
Cold Rooms / Cantinas 20
Basement Window Wells 20
Caring for your Countertops . . . . . . . . . . . . . . . . . . . . . . . . . . . . . . . . . . . . . . . . . . . . . . . . . . . . . . 22
Granite Countertops 22
Manufactured Stone Material . . . . . . . . . . . . . . . . . . . . . . . . . . . . . . . . . . . . . . . . . . . . . . . . . . . . . 22
Re-Sealing your Natural Stone Countertops 22
Care and Maintenance for Manufactured Countertops . . . . . . . . . . . . . . . . . . . . . . . . . . . . . . . . . . . . 23
Caring for your Laminate Countertops 23
Caring for your Electrical Fixtures and Systems 25
Breaker Panel . . . . . . . . . . . . . . . . . . . . . . . . . . . . . . . . . . . . . . . . . . . . . . . . . . . . . . . . . . . . . . . 25
Ground Fault Circuit Interrupter (GFCI) 25
Programmable Thermostat . . . . . . . . . . . . . . . . . . . . . . . . . . . . . . . . . . . . . . . . . . . . . . . . . . . . . . 25
Switched Outlet 25
Smoke and Carbon Monoxide Detectors . . . . . . . . . . . . . . . . . . . . . . . . . . . . . . . . . . . . . . . . . . . . . . 25
Exterior
. . . . . . . . . . . . . . . . . . . . . . . . . . . . . . . . . . . . . . . . . . . . . . . . . . . . 28
Bi-Fold
28
. . . . . . . . . . . . . . . . . . . . . . . . . . . . . . . . . . 28
28
Operable Windows 29
Condensation . . . . . . . . . . . . . . . . . . . . . . . . . . . . . . . . . . . . . . . . . . . . . . . . . . . . . . . . . . . . . . . 29
Screens 29
Caring For Your Walls, Trimwork And Doors . . . . . . . . . . . . . . . . . . . . . . . . . . . . . . . . . . . . . . . . . . . . 31
Interior Doors And Frames 31
Caulking 31
Caulking Tips 32
Drywall 33
Cracks . . . . . . . . . . . . . . . . . . . . . . . . . . . . . . . . . . . . . . . . . . . . . . . . . . . . . . . . . . . . . . . . . . . . 33
Unfilled Gaps Between Baseboards And Wall 33
Caring For Your Fireplace . . . . . . . . . . . . . . . . . . . . . . . . . . . . . . . . . . . . . . . . . . . . . . . . . . . . . . . . 35
Doors, Surrounds, Fronts 35
Optional Remote Control 35
Venting . . . . . . . . . . . . . . . . . . . . . . . . . . . . . . . . . . . . . . . . . . . . . . . . . . . . . . . . . . . . . . . . . . . . 35
FAQ’s 35
Caring For Your Flooring . . . . . . . . . . . . . . . . . . . . . . . . . . . . . . . . . . . . . . . . . . . . . . . . . . . . . . . . 38
Laminate Flooring 38
Gaps Developing At Ends Or Along Strips Of Laminate Flooring. . . . . . . . . . . . . . . . . . . . . . . . . . . . . . . 38
Engineered and Solid Hardwood Flooring 38
Floor Squeaks In Wood Flooring 39
Ceramic & Porcelain Tile (Wall And Floor) . . . . . . . . . . . . . . . . . . . . . . . . . . . . . . . . . . . . . . . . . . . . . 39
Cleaning Grout 39
Carpet . . . . . . . . . . . . . . . . . . . . . . . . . . . . . . . . . . . . . . . . . . . . . . . . . . . . . . . . . . . . . . . . . . . . 40
Caring For Your HVAC Systems . . . . . . . . . . . . . . . . . . . . . . . . . . . . . . . . . . . . . . . . . . . . . . . . . . . . 42
Furnace 42
Changing The Air Filter: . . . . . . . . . . . . . . . . . . . . . . . . . . . . . . . . . . . . . . . . . . . . . . . . . . . . . . . . . 43
Further Notes And Guidelines 43
Heat Recovery Ventilator (HRV) 43
Modes Of Operation . . . . . . . . . . . . . . . . . . . . . . . . . . . . . . . . . . . . . . . . . . . . . . . . . . . . . . . . . . . 44
Maintenance Routine 44
Whole Home Humidifier . . . . . . . . . . . . . . . . . . . . . . . . . . . . . . . . . . . . . . . . . . . . . . . . . . . . . . . . 45
Ventilation Fan Switch 45
Air Distribution (Balancing) . . . . . . . . . . . . . . . . . . . . . . . . . . . . . . . . . . . . . . . . . . . . . . . . . . . . . . 45
To Balance Your System: 45
Cold Air Returns 46
Air Conditioners (If Installed By Andrin) 46
A/C Step By Step Guide For Seasonal Power Up: 46
A/C Condensate Line Is Blocked 47
Here Is How To Clear Up Any A/C Drain Line Clogs In Less Than An Hour. . . . . . . . . . . . . . . . . . . . . . . . . 47
KITCHEN AND LAUNDRY APPLIANCES 48
Kitchen Or Bath Fan Allows Cold Air Inside Or Drafts. 49
LANDSCAPING,
DRAINAGE
Painted
On Demand Hot Water Recirculation System . . . . . . . . . . . . . . . . . . . . . . . . . . . . . . . . . . . . . . . . . . 53
Drain Water Heat Recovery System 53
Plumbing Leaks . . . . . . . . . . . . . . . . . . . . . . . . . . . . . . . . . . . . . . . . . . . . . . . . . . . . . . . . . . . . . . 53
Faucet or fixture is leaking. 53
Plumbing pipes are frozen and/or burst. 54
Bathtub or Shower leaks . . . . . . . . . . . . . . . . . . . . . . . . . . . . . . . . . . . . . . . . . . . . . . . . . . . . . . . . 54
Water Hammer 54
Sewer Back-up . . . . . . . . . . . . . . . . . . . . . . . . . . . . . . . . . . . . . . . . . . . . . . . . . . . . . . . . . . . . . . . 54
Caring for your Stairs and Railings . . . . . . . . . . . . . . . . . . . . . . . . . . . . . . . . . . . . . . . . . . . . . . . . . . 56
Oak
Stairs
SPRING HOME MAINTENANCE
Inside . . . . . . . . . . . . . . . . . . . . . . . . . . . . . . . . . . . . . . . . . . . . . . . . . . . . . . . . . . . . . . . . . . . . 58
Outside 58
58
SUMMER HOME MAINTENANCE CHECKLIST 58
June 58
July . . . . . . . . . . . . . . . . . . . . . . . . . . . . . . . . . . . . . . . . . . . . . . . . . . . . . . . . . . . . . . . . . . . . 58
August 58
FALL HOME MAINTENANCE CHECKLIST 58
September 58
October 59
November . . . . . . . . . . . . . . . . . . . . . . . . . . . . . . . . . . . . . . . . . . . . . . . . . . . . . . . . . . . . . . . . . . 59
WINTER HOME MAINTENANCE CHECKLIST 59
December . . . . . . . . . . . . . . . . . . . . . . . . . . . . . . . . . . . . . . . . . . . . . . . . . . . . . . . . . . . . . . . . . . 59
January 59 February . . . . . . . . . . . . . . . . . . . . . . . . . . . . . . . . . . . . . . . . . . . . . . . . . . . . . . . . . . . . . . . . . . . 59
What causes moisture damage . . . . . . . . . . . . . . . . . . . . . . . . . . . . . . . . . . . . . . . . . . . . . . . . . . . . 60
How can I control moisture 60
What else can I do to control moisture . . . . . . . . . . . . . . . . . . . . . . . . . . . . . . . . . . . . . . . . . . . . . . . 60
Outside the Home 60
Inside the Home 60
Your bathrooms include wall mounted mirrors, toilets, bathtubs, shower doors, sinks, faucets and showerheads and their fittings, which all require regular homeowner care. The Andrin
Warranty on these features is 1 Year from your possession date on any material defects or workmanship; however, your care of these features is required to safeguard your warranty.

Wall mirrors provide both an aesthetic and functional feature in your bathrooms. Care for your mirrors as follows:
• Simply and safely clean with fresh warm water and a paper towel or soft rag.
Frequent dusting of mirrors will help prior to using warm water to cleanse.
• Keep your mirrors dry especially after a hot shower / tub soak. Use your bathroom fans to help dry off exhaust moisture in your bathrooms.
• Do not use dirty or gritty rags, emery cloths or scrapers, which can scratch the mirror’s surface.
Avoid using heavy-duty cleaning solutions that may contain abrasives and/or alkali. Also, stay away from cleaners that contain ammonia, chlorine bleach, or any strong chemicals.
• If you want to use a cleaner, do not spray or apply it direct ly to the mirror. Most cleaners will run down the glass and go through the seams and edges – damaging the mirror backing. Either spray the cleaning agent to a clean cloth or dilute it first with some water before applying it to the mirror’s surface.
Andrin installs both framed and frameless glass shower doors as an aesthetic and functional feature in your bathrooms. To maintain these doors, please follow our guidelines: Use a squeegee to swipe away water and residue from the door and then wipe it down with a dry cloth or microfiber cloth each time.
• Complete your routine with a quick spray of daily cleaner and keep doors open to promote air circulation.
• If soap scum and hard-water stains accumulate, consider these tips:
• !ngredients in most varieties of bar soap promote the build-up of soap scum. Switching to a liquid body wash can reduce the amount of hazy film.
• Installing a water softener will reduce the mineral levels that cause hard-water stains.
A framed shower door track will also need regular cleaning when soap scum and grime have built up. White vinegar is a good cleaning product to be used as follows:
• Plug drain holes or slits in the track with a paper towel.
• Carefully fill the track with distilled white vinegar and let sit overnight.
• In the morning, use paper towels to soak up much of the vinegar.
• Use an old toothbrush to scrub stains and loosen debris. Wrap paper towels around the brush to get into tight corners.
• Wipe clean to finish the job.
• To slow the future build-up of stains, use a soft cloth or paper towel daily to dry water that collects in the shower-door tracks.
These bathroom features and fixtures are all installed by Andrin primarily for their functionality. As toilets, tubs, sinks, faucets and showerheads come in many styles, colours, manufacturing material, we can only guide you on the general care guidelines for all the features and fixtures.
While toilets do not require a significant amount of maintenance, some regular care and cleaning is needed to keep them in good working condition. Additionally, if you notice leaks, problems flushing, or other issues with your toilet, please contact Andrin Customer Care if this is observed within your first year of ownership.
Cleaning Products that Can Damage Your Toilet: Avoid using “drop in the tank” cleaners, as these can damage the rubber flaps and other mechanisms inside the tank that are necessary to flush your toilet with each pull of the handle.
Instead, keep your toilet clean by applying an in-bowl solution periodically. Use a porcelain-safe household cleaner to clean off the tank, seat, and handle to disinfect them and prevent stains.
A running toilet occurs when the flapper valve that controls water flow from the tank to the bowl is dislodged or damaged, causing continual water transfer inside your toilet. Running toilets can waste as much as two gallons of water per minute, increasing your water bill very quickly.
You can replace your toilet’s flapper valve with a kit from your local hardware store or contact Andrin Customer Care for assistance, if within the first year of ownership.
The signs of a clogged toilet: Toilet clogs and overflows
• A constantly running toilet that may spontaneously refill.
• Poor flushing or no flush at all
• Leaks around your toilet.
A hissing sound or water trickling inside the toilet tank.
Your toilet’s drain may look large, but it is quite small. Toilets are designed only to handle human waste and toilet paper, so avoid tossing anything else into the bowl. If you do experience a clogged toilet, complete the following steps:
• Turn off the water using the emergency shutoff valve mounted on your wall behind and beneath the tank to pre vent overflowing.
• Use a plunger to try to break up or dislodge the clog so that it can be flushed through your plumbing pipes.
• Never pour a chemical drain cleaner down your toilet; harsh chemicals can irritate your skin and eyes or cause damage to your plumbing pipes.
• If you cannot repair a clogged toilet on your own, contact Andrin Customer Care for assistance within the first year of ownership.
The signs of a clogged drain are as follows:
• Water backs up out of a sink drain. Water pools around a shower drain, then drains out slowly.
• Slow draining of water from your bathtub, sink or another fixture can indicate a clog, even if there’s been no backup yet.
• Gurgling sounds from drains
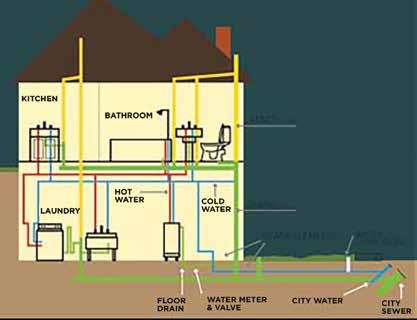
This diagram shows many of the common types of vents and drains in most homes. The green pipes represent outgoing wastewater, the yellow pipes represent ventilation tubes, the red pipes indicate hot water, and the blue lines show cold water.
First: wear rubber gloves and eye-protection when removing clog by any of the following methods:
• Pour a kettle-full of boiling water down the drain, a little at a time. After the boiling water goes down the drain, run some water in the shower to see if the clog is cleared.
• If the drain is still clogged, the problem may be a soapy clump of tangled hair that you can pull out of the drain with your fingers. You can pull it out even if water is standing in the shower, if the water is not too hot to touch.
• If the clog is too far down to reach with your fingers, un screw or pry up the drain cover. Then straighten out a wire coat hanger and make a small hook at the end. Put it into the drain and fish out any debris. Use a flashlight, if needed, to help you see into the drain.
Once you have gotten out as much debris as you can, carefully pour another kettle-full of boiling water down the drain, a little at a time. Replace the drain cover and run the water in the shower to see if the clog has been cleared.
• Remove the drain cover and put the rubber cup of the plunger over the drain opening.
• Then run enough water in the shower stall to cover the lip of the cup.
• Move the plunger handle up and down rapidly to force out the clog.
• Run water in the shower to be sure the clog is gone before you replace the drain cover.
Please contact a professional plumber if the previous method’s fail or Andrin Customer Care within the first year of ownership.
The bathtubs that Andrin has installed in your home are acrylic reinforced with fiberglass, making them more durable. Overall, acrylic is a durable material that tends to hold up well for years. Plus, when a tub does scratch, it’s fairly easy to repair the scratch. Looking after your tubs is very easy. Below is useful information and some FAQ’s on these types of tubs.
How to clean and maintain an acrylic tub?
1. Just use mild, nonabrasive cleaning agents and materials (to avoid scratching) on a regular basis.
2. Try filling the tub with warm water and a few squirts of dish soap, allowing it to sit, and then wipe with a soft cloth or sponge and rinse.
3. Use dish soap or all-purpose cleaner to clean the tub’s exterior.
Will acetone damage an acrylic tub?
1. Acetone, and cleaners containing acetone, are not recom mended for use on acrylic tubs.
2. Avoid using any solvents on your tub to prevent damage.
3. If a spill occurs, rinse it out immediately.
Will baking soda scratch an acrylic tub?
1. No, it will not; in fact, it is a good mild scrubber for more stubborn stains.
2. Sprinkle the wet interior of your tub with baking soda, spray it with water, allow it to sit for a few minutes, and gently scrub with a nonabrasive cloth or sponge.
3. Do not use the rough side of the sponge to clean an acrylic tub.
How to repair an acrylic tub?
Please contact a tub repair specialist.
It is important to keep to a regular cleaning routine to ensure that the sink will always look clean and fresh. Here are some guide lines and maintenance tips:
• Light stains can be easily removed with warm water and soap.
Regularly clean your sinks with a sponge or soft cloth to prevent the build-up of soap-scum or formation of rings with a multipurpose detergent.
Use non-abrasive liquids to maintain spotless appearances. Do not use bleach or acidic chemicals directly to clean as it can lead to permanent damage or even corrosion of the sink.
• Never use a metal or wire scrubber to clean any type of wash basins as they will leave permanent scratches on the surface.
• Avoid using any harsh chemicals or acids to clean the taps or faucets as they can permanently damage the parts being cleaned.
The finish on the faucets, showerheads and fittings is best cleaned with a soft cotton cloth (slightly damp only if necessary):
• By gently wiping away, you will already remove most of the dirt without damaging the material.
Limescale residues are typically deposited in corners and at joints. For this, use a mild, citric acid-based cleanser. Please do not spray the concentrate directly onto the faucet, showerhead or fitting but onto a cloth instead.
• The aerator on a faucet or showerhead is easy to remove for cleaning. If you place it in warm water with a little cleaning agent, the deposits will dissolve after about ten minutes of exposure.
• Thoroughly rinse the faucets, showerheads and fittings with clear water.
Repeat the first step again to remove any cleaning agent residues and give the surfaces a radiant finish.
Choose a cleaning agent that is citric acid based, rather than cleansers based on vinegar, acetic acid, formic acid, sodium hydroxide alkalis and chlorine bleach alkalis, phosphoric acid, or even hydrochloric acid. Some of these substances are highly corrosive. Frequent use will damage the metal, no matter how high-quality the finish.
Your Andrin Home includes cabinetry and door hardware in your kitchen, your bathrooms and laundry room. Learning to care for your cabinetry will ensure that these features in your home continue to enhance your investment over a great span of time.
Your Andrin Warranty on cabinets and hardware is for 1 Year from your date of possession for material defects and workmanship.

Wipe the cabinets clean with a soft, damp cloth and dry immediately with another clean, soft cloth.
• Grease and grime buildup can damage cabinets and destroy the look and feel of a new kitchen. To remove buildup, wipe down cabinets using a soft cloth dampened with warm water. Do so at least once every two weeks or more often depending on the amount of activity that takes place in the kitchen.
• If water alone does not clean cabinets completely, mix a little mild dishwasher soap with the water.
• Wipe down wooden cabinets in the direction of the grain. Use a soft cloth to remove any residual moisture that may be left on the cabinets.
DO NOT USE THE FOLLOWING PRODUCTS AND INGREDIENTS. THEY CAN DAMAGE YOUR CABINETS, SO AVOID USING THEM OR ANY PRODUCT THAT CONTAINS THEM:
• Petroleum-based products
• Solvents
• Bleach
• Strong detergents and soaps
• Nail polish remover / acetone
• Paint thinners
• Plastic brushes
• Steel wool
• Scoring Pad
• Ammonia
Many substances become difficult to remove and may stain or cause other damage upon prolonged contact. If a spill occurs, wipe it promptly with a damp cloth or sponge and dry the surface immediately. Use a blotting action rather than a wiping action to remove the substance.
This is one of the worst enemies of any finish. Cabinetry near the sink and dishwasher and kick plates are most susceptible. Dry off any areas immediately where water has spilled. Avoid draping dish towels or other wet items over doors or placing coffee makers where steam vents directly onto cabinet surfaces.
Extremes in temperature and humidity can cause wood and MDF to expand and contract, swell or warp, and dry out–possibly damaging the finish of your cabinetry. It is important to control the temperature and humidity in your home all year long.
Direct exposure to sunlight can have a damaging effect on your cabinets, especially those made from natural wood. Painted wood cabinets and laminated or Thermofoil surfaces also are susceptible to fading from prolonged exposure to direct sunlight. Use window coverings to help reduce or eliminate damage caused by exposure to direct sunlight.
Harsh cleaners can damage the finish of your cabinetry. Avoid cleaners containing ammonia, bleach, citric acid (including orange and lemon oil) and organic solvents.
Most common self-polishing waxes can damage your finish. Take care to use only high-quality cream furniture polishes available from high-end furniture or paint stores.
Avoid products containing aggressive acids or abrasives as they may cause damage to laminate finishes (Lime-Away, Soft Scrub, Tilex, etc.).
Avoid abrasive cleansers and cleaning tools. Some “stiff” paper towels may leave tiny scratches that dull the surface.
Interiors should be cleaned with a mild soap solution using a clean dampened cloth, and then wiped with a damp water cloth. After cleaning, surfaces should be immediately buffed dry with a clean cloth.
Water or other liquids allowed to sit on the surface of a shelf for a prolonged period may cause staining and/or bubbling.

• Periodically check hinge screws and tighten if required. A screwdriver can be used for the adjustment; however, make sure not to over tighten the screws as this can strip the wood substrate.

• Joints between cabinets and the wall as well as the adjustments on doors and drawers may need to be resealed or adjusted over time as part of your Homeowner Care.

We refer you to the home care guidelines provided in the section titled: Bathroom Faucets, Showerheads and Fittings and Clogged Drains for your kitchen faucet and drain care.
Your home’s exterior building material components form the “cladding” on the house. Cladding includes siding, masonry, concrete, roofing, and the other weatherproofing / waterproofing materials required to create a weather tight home.
Andrin’s warranty on your home’s cladding is for 1 Year against defects in materials and 1 Year for workmanship. Deterioration in your home’s cladding systems has a 2 Year warranty from your date of possession. Below we set out the most relevant information you will need as a homeowner to care for your home to ensure that you do not void your warranty from lack of maintenance.

Siding is installed to accommodate thermal movement and anticipated shrinkage of the structure to which it is attached is normal. Paint and/or sealants on your siding requires you to inspect them each season and apply any paint, if applicable and/ or sealant as needed to keep up the protective layer.
Wood or hardboard or panel-type siding is installed in accordance with the manufacturer’s specifications and the Ontarto Building Code with gaps at joints to allow for expansion. Joints shall be suitably protected to prevent water penetration. Also, this type of siding is expected to expand and contract with fluctuations in outdoor temperature and humidity; gaps in joints may be required to prevent buckling. Caulking over the joints is a way to protect the joints from water penetration. As part of your season al home maintenance program, ensure that any gaps in joints are properly re-caulked as required.
Efflorescence commonly occurs on masonry surfaces and is normal. This condition is caused by the formation of a typically white crystalline deposit on the surface of brick when moisture evaporates from the surface. Efflorescence can be removed using a stiff bristle brush and water. Dark-coloured bricks tend to exaggerate the appearance of efflorescence. Salt and de-icers may also contribute to the formation of efflorescence and we caution all homeowners to use these materials sparingly, if at all.
Mould or mildew is common in the natural environment. It can often form on painted surfaces and can usually be removed during your normal homeowner seasonal maintenance.
Joints and cracks in exterior wall surfaces and around openings are sealed to prevent the entry of water. Caulking and sealants deteriorate under normal weather conditions and should be checked regularly and be part of your annual home maintenance. Weep holes and/or vent holes are necessary in a masonry wall and are not meant to be blocked, sealed, or caulked so take caution of these holes in your annual maintenance.
Heavy loads of ice and snow can damage a roof. Normal home maintenance should include removal of heavy buildups of ice and snow if you have the specialized tools to do so. These tools include telescopic roof rakes and roof shovels. Roofing companies also offer snow removal services when accumulation poses a risk to your roof’s integrity.
You are required to keep eavestroughs and downspouts free from environmental debris or physical damage that could cause blockage or restrict water flow from the date of possession of your home.
Eavestroughs and downspouts are designed to collect water from the roof and drain it to the ground. Where downspouts are not connected to a sewer, extensions are provided to carry rainwater away from your home in a manner that will prevent soil erosion.
Normal home maintenance includes keeping the eavestroughs and downspouts free of debris that can clog the system. Extensions may include splash pads set on the ground. Some minimal amount of standing water is normal around the splash pads even if you keep the areas clear of debris.
Scaling of exterior concrete surfaces including concrete porches, walkways, garage floor slabs, steps (including precast) is often the result from using salt and de-icers during winter seasons to break up snow/ice deposits. Also, be aware that salt or de-icers are often found in road slush deposits.
Cleaning salt deposits off concrete surfaces is part of your normal home maintenance. Where repairs are necessary, be aware that colour and/or texture may not match the surrounding concrete but over time, these variations will blend through the seasons.
Generally, your basement concrete floor slab is not a structural element of your home as they do not have to carry the load of the house. This floor surface will crack during curing due to shrinkage. Shrinkage cracks are generally considered aesthetic and a normal occurance during the first 2 years of a new home’s construction. Repairs are necessary if there is evident vertical or lateral movement and repairs to the concrete may not match the colour and/or texture to the surrounding concrete. Keeping your concrete floor clean of debris and dust/dirt build up (by vacuuming or mopping the floor seasonally) will ensure you can periodically inspect it for shrinkage cracks.
Dampness on wall or floor surfaces is or may be caused by capillary transport or condensation of water vapour.
• Condensation can occur during peak seasonal weather patterns. You should immediately reduce moisture levels to prevent harm to property by a dehumidifier in summer or by increasing the amount of ventilation to the area.
Basement floor drain will facilitate water drainage from your concrete floor in the event of accidental flooding. Basement slabs are generally sloped towards a floor drain and are at the lowest point but not necessarily be located to facilitate drainage over the entire floor area.
Cold rooms/cantinas are built to be adequately ventilated to reduce the likelihood of condensation on interior surfaces. Condensation in cold rooms occurs when warm moist air meets a cold surface. The frequency of condensation may increase under the following conditions:
• Ventilation openings are blocked by homeowner landscaping etc.
The door to the cold room has not been fully closed.
• The cold room is exposed to sun.
Basement window wells are built to provide adequate drainage for rainwater and need to be kept clear of debris and snow accumulation as part of your regular home maintenance, in order to prevent water penetration.
Andrin’s warranty on kitchen and bathroom countertops is 1 Year from your Possession Date against defects in material and workmanship. Any deficiencies found on surfaces of the countertops must be reported on the Pre-Delivery Inspection for Andrin’s Customer Care team to be able to manage the repair of any such defects.
Granite is an extremely durable material resistant to abrasions, heat, and water which makes it easy to clean and to use. As granite is a natural material, it will display natural variations, patterns, and shades. This is a feature of stone and is not a defect in material. Fissures and pits may also be present in crystalline structures such as granite. These are part of the natural structure of stone and do not affect its durability. Seams are visible to sight and touch although the degree will depend upon the granularity, colour, and pattern of the stone.
We recommend that when you clean the granite top, do so with warm water. Most stains will wipe away if cleaned within a reasonable amount of time. Avoid using natural or manufactured oils and dyes. Stains left for an extended amount of time become much more difficult to clean.
Chemical cleansers, abrasive soaps or vinegar are not recom mended to clean your stone top. These products will break down the sealer, leave streaks and/or scratch the surface of your coun tertop. The periodic re-application of a sealer is also recommend ed to help prevent stains.
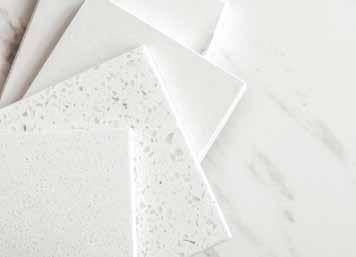
Manufactured stones such as quartz, silestone, etc. are products comprised of natural material and resins to mimic the look of stone. It is extremely durable and offers a multitude of colours and variations. Different colours and sizes of mined quartz are blended with advanced polymer resins and small amounts of colour. These are placed in a mold and compressed under pressure which eliminates any voids, creating a nonporous surface that is then milled and polished into slabs. Clean manufactured stone tops with a clean rag, water, and a small amount of neutral cleanser, such as mild dish soap or a stone soap (available at most hardware and building centres). Rinsing thoroughly is a good practice to avoid soap scum build-up. Dry the surface after cleansing.
• For oily spills that may occur, simply wash with a mild cleanser (such as Palmolive liquid dish soap) wipe with water, dry.
• Rule-of-thumb: wipe up spills as soon as they occur. Prevention is the best policy and preventing spills from sitting on the surface for any great length of time helps to avoid staining.
Some Precautions: Do not to use any commercial detergents or ammonia–based cleansers. This includes products such as VIM, Mr. Clean, S.O.S. Pads, Windex and other similar cleansers.
Coasters are an excellent and easy way to protect your surface from harsh acids contained in most alcoholic beverages and citrus juices.
Avoid exposing a natural stone surface to strong acidic products common in the kitchen like lemons, limes, mustards and the like by using a cutting board during food preparation.
• Use trivets and hot pads to guard against hot items damaging the surface of the stone.
• Avoid ammonia–based cleansers as they will dull the sheen and surface of the stone. Use non-acidic scum removers in the event of soap scum.
• Always use a cutting board when using knives or other cutting utensils.
Natural stone countertops are sealed with a layer of silicone impregnator. Sealing natural stone surfaces is important to prevent staining when accidents occur.
We recommend re-sealing a countertop at a minimum of once every 5 years. Re-sealing is a preventative measure, especially for highly used countertops, to achieve maximum protection and maintain the original appearance for years to come.
The natural manufactured stone,makes it one of toughest interior surfaces available as it resists scratching, staining, and scorching better than other natural stone or solid surfaces.
• Avoid excessive force or pressure because that may mar or chip the surface however manufactured stone does not get stained by coffee, wine, lemon juice, olive oil, vinegar, makeup, and many other common household products. Avoid harsh chemicals and use trivets when placing any hot items to avoid thermal shock.
Regular Cleaning: For manufactured stone with a polished finish, we recommend you use a mild household cleaner, such as 409, Fantastik, Lysol, or Windex.
• In case of stubborn spills or stains, soak the area for up to 10 minutes with one of the above cleaners and vigorously wipe away with a non–scratch Scotch Brite pad.
• Some Precautions: The following will harm engineered quartz: Drano, Liquid Plumr, oven cleaners and floor strippers. Do NOT use these or any other harsh chemicals on your manufactured stone surface.
Do NOT use crock pots or electric skillets while in direct contact with your manufactured stone surfaces. Always place them on a trivet or cutting board to protect your countertop. (Review your electric appliance manual as a reference.).
To assure the long-lasting beauty of your countertops, the following precautions are recommended:
• Avoid any concentration of water. Excessive water standing in the seam may cause glue failure and the swelling/expansion of the substrate. Damage caused by excessive water in the seam area is not warranted by the manufacturer. Please note that even wet cloths should not be left to sit on the countertop.
• Avoid placing hot items directly on surface. Hot pans or activated electrical appliances should not be placed on laminated surfaces.
• Do not use abrasive materials on the countertop. The surface will be damaged if used as a replacement for a cutting board. All cutting should be done on a cutting board or other protective surface.
• Clean with a damp soapy cloth. Never use abrasive cleaners or steel wool to clean your countertops as you will damage the surface.
• Natural shrinkage may cause separation of the countertop from walls, backsplash and around sinks. Re-caulk as necessary to maintain a good seal and prevent warping as part of your regular maintenance.
Electrical fixtures are warranted against defects in material and workmanship for 1 Year from the date of your possession of the home. Electrical supply and distribution systems are warranted against defects in material and workmanship for 2 Years from the date of your possession of the home.

Circuit breakers protect electrical wiring from overloading. There is an independent breaker panel inside each home. The panel provides power to your home and is made up of several breakers. Frequent tripping of circuit breakers could result from faulty appliances and should be investigated. Some appliances have special power requirements. Care should be taken not to overload or bypass electrical circuits. Personal injury or fire can result. Typical household wiring is installed to accommodate residential electrical loads.
Each breaker provides power to a specific part of the home or a particular item in the home (i.e., one breaker will provide power for all the outlets and switches in a room, or one breaker will provide power for the stove etc. – all breakers will be clearly identified.)
If you overload one of the outlets, the breaker will “trip”. If its “trips”, just follow this simple procedure to restore power:
• Unplug everything that was plugged into the outlets serviced by that breaker.
• Locate the breaker that has tripped on the breaker panel.
You will see that the breakers are a series of switches with “ON” and “OFF” positions.
• The tripped breaker will be set in the middle position between ON and OFF.
• First turn the breaker to the OFF position and then turn it back ON.
• This will reset it and power should be restored to the outlets).
The Electrical Safety code requires GFCI outlets be installed in all residential bathrooms in new homes.
In homes with more than one bathroom, one bathroom will have the GFCI and will be wired to protect all bathrooms.
The GFCI is designed to protect against accidental electrical shock.
In the event of an electrical shortage, the GFCI will stop flow of electrical current through the circuit within fractions of a second to prevent further injury.
Test the GFCI regularly to ensure that it is working properly: Make sure power is available as the circuit breaker must be ON in order to conduct the test. The RESET button should always be pushed in.
Testing – To test the function of the RESET button, push the TEST button and immediately the RESET button should pop up. If the RESET button does not pop up, do not use the outlet and call an electrician to investigate further or Andrin Customer Care in the first two years of ownership.
• To restore power after a test – Push RESET button firmly into device until an audible click is heard.
NOTE: If the GFCI trips when an appliance is used, the appliance may be defective and should be repaired or replaced.
Once programmed, these smart devices allow you to fine-tune the temperature in your home for every hour of every day. You can enjoy the optimal level of comfort when you are at home and active; plus, your thermostat will save you money by automatically adjusting the temperatures when you are away or asleep. If you are having any temperature setting issues, please consult your owners manual to adjust any pre-programed settings.
It is common today not to have fixed ceiling outlets in living rooms, family rooms, great rooms or dens. Accordingly, these rooms may have a switched outlet that controls one of the duplex outlets. Simply plug your table lamp into the switched portion of the outlet, turn the lamp to the “ON” position and leave it on. The switch will now control turning the lamp on and off. The other out let of this duplex outlet will operate as a normal outlet.
Your home contains a combination smoke and carbon monoxide detector which is hard wired into your home’s electrical system and therefore does not require batteries. A visual LED (green) power-on indicator confirms the unit is receiving A/C power. There is a red LED to indicate when in smoke alarm and another red LED to indicate when in CO alarm. There is also a test/silence button to check all alarm functions and to silence any nuisance alarms.
The Andrin warranty on your exterior doors and windows is 1 Year Warranty for materials and workmanship and 2 Years for air and water penetration, from the date of your possession of the home.

Your front door has many parts. We have provided a graphic (see opposite page) to label all the parts for your ease of reference whenever you are looking for assistance in the maintenance of these parts and in caring for your doors in general.
The door frame is the entire framework supporting the door, including the sill, jamb and head. This is also known as a door sash
SILL
The door sill is the very bottom part of the door frame that rests on the floor.
The two door jambs are the sides of the door frame that run vertically.
The head is the top piece of the door frame, running horizontally.
PANEL
The panel is the term for the door itself. This is the part that swings open and closed.
If you have a pair of doors in your entry, the astragal is the vertical piece that runs between them, from the sill to the head.
This is the panel of the door in a pair of doors that does not open or close.
A sweep is a piece of weather stripping at the bottom of the door that is weather resistant and forms a seal between the door sill and the door frame. Door sweeps increase the energy efficiency of your home.
A threshold is the transition from the door sill to the floor of the room. A threshold is a decorative element that can be simple or elaborate, depending on your style.
The transom is the horizontal beam that separates the door from the fanlight or window above it.
The strike plate is placed on the door jamb where the hole for the bolt of the door and the bolt meet. It is a small metal plate that is screwed to the door jamb.
Sidelights are fixed glass panels attached to both or either side of the door, outside the frame. These tall narrow windows allow extra light into the home.
The doorknob is the round mechanism used to open and close the door.
The hinge is the jointed device that pivots the door panel.
There are an incredible number of choices when it comes to entry door locks. Two types are the cylinder lock, which moves the bolt by rotating a cylinder, and the multi-point lock, which has several locking points but only one handle.
Your doors have a big impact on every day of your life, and caring for them will enhance your curb appeal, save energy, and increase the value of your home. We recommend that your seasonal maintenance includes inspecting your exterior doors for cracks in any glass and tightness in hinges and locks, which requires lubrication by you.
Exterior doors can warp to some degree due to temperature differential between inside and outside surfaces.
Garage doors between the garage space and the outdoors are not required to be weather-stripped.
Normal home maintenance for sliding doors and screens involves adjustment from time to time the tracks and hardware by cleaning and lubricating.
Weatherstripping becomes worn with use and should be inspected and replaced by you on a regular basis. Interior air movement caused by convection currents should not be confused with actual air leakage through the window and doors.
• Made with aluminum or stainless-steel frames and plastic, vinyl, sponge or felt bristles.
• Use on the bottom interior side of a door.
Doors require two different kinds of weatherstripping: door sweeps for the bottom and foam tape for the top and sides.
Clean the stop moulding with soapy water and allow it to dry completely.
Cut foam tape to fit each side and the top of the door. Peel the back from the foam and press it into the inside of the stop moulding.
Cut the sweep to fit the door. With the door closed, screw the sweep to the door so that its bottom is in contact with the floor.
Bi-fold and sliding doors are designed to operate freely and remain on their tracks during normal operation. These bi-fold and sliding doors require adjustment from time to time to maintain alignment and hardware may need to be cleaned and lubricated as part of your normal home maintenance.
• Vacuum the tracks out to remove hair, insects, stones or anything else that may impede the trackways.
An old toothbrush works well for breaking up clumps of dirt before vacuuming.
• Check and adjust the rollers if applicable. If the door goes “bump, bump, bump” as it is being opened or closed, one of the lower roller wheels may be broken.
• If the door grinds on the lower track when it is being moved, the roller needs to be adjusted lower so that it pushes the door upward.
• To do this, turn the adjusting screw at the bottom of the door between the track rails. Turning the screw clockwise lowers the wheel and raises the door. Turning the screw counterclockwise lowers the wheel and lowers the door. Backing the screw out completely allows you to remove the wheel entirely for replacement.
During the colder months, convection currents are often created on the interior side of windows due to the differences in temperature between a cold window and a warm room. These currents are vertical air movements due to the warm air rising and the cooler air falling close to the window, mimicking a draft. This is normal and should not be confused with a leak of outside air into the home.
Condensation that forms on the home side of the window is due to high humidity in the home and colder outdoor temperatures. It is very important that you control the indoor humidity levels within your home as excessive condensation can lead to peeling paint, floor buckling, the deterioration of insulation and mold and mildew.
Condensation appearing between the panes of glass in the window may indicate a seal failure. Please notify Customer Care immediately if this is the case within the first year of ownership.
As part of your homeowner yearly maintenance, you must ensure that all operable windows are properly closed with the opening/ closing mechanism on the window, that weatherstripping and caulking is present and that drain ports are not blocked. To clean the windows, use mild soap and water and ensure that the windows are sealed prior to spraying water.
Condensation occurs when water vapour in indoor air meets cool surfaces such as window glass. Condensation on interior window surfaces is common during cold seasons. When outdoor temperatures are well below freezing, ice may form at the bottom of windows. Condensation is not water penetration
• It is important for you to maintain proper humidity levels within the home.
• Condensation forming on windows is a common condition even when humidity levels are properly maintained. Damage caused by dampness or condensation due to
failure to maintain adequate ventilation can be extensive on window frames, sills, flooring, drywall, and any window treatment.
• Interior air moving over the windows can help control condensation. Heavy draperies or window coverings that cover windows, and blocked heat diffusers, can prevent this from happening.
• Running the ventilation fan or your heat recovery (HRV) or energy recovery ventilator (ERV) and furnace fan continuously during winter months in conjunction with the principal exhaust fan (or running the HRV/ERV and furnace fan continuously where the HRV/ERV replaces the principal fan) can also help reduce condensation on windows.
Window screens are only installed at the operable window of your window. Periodically washing your window screens will help in keeping your windows clean. They are easily removed by lifting the clips and pulling it away from your windows. Use mild soap and water to clean off any dust and/or other debris and rinse with warm water.
Walls, doors and trim work are warranted by Andrin for a 1 Year period from your possession date for defects in material and workmanship. The home’s settlement can result in wall cracks and nail pops which are not covered by the 1 Year Warranty.

As the components used in new construction go through the drying out process and settling occurs, interior doors may go out of alignment or not latch properly. This is also a typical response to changes in temperature and humidity. Shrinkage of trim and moldings is also typical during the drying out process and in response to humidity levels within your home. Separations at joints and corners can be repaired by you with caulking material or wood filler and touch up paint.
Temperature and time will eventually shrink and dry out caulking, making the seal ineffective. Annually check the caulking around the interior of the windows for cracks and gaps and re-caulk as needed. This is also recommended in your bath rooms around tubs, sinks and all wall joints with countertops and backsplashes.
This guide shows how to caulk around a bathroom sink, including how to remove old caulk, how to apply caulk and how to use a caulk gun.
To remove and reinstall caulking:
1. Clean the surface area of your location to be caulked.
2. Take the time to remove any existing caulk to help ensure a good seal.
Cut old caulk out with a utility knife, razor blade, putty knife or scraper.
• Remove all paint, dirt, dust, grease and debris. If you’re removing silicone caulk, make sure all residue is completely removed.
• Use a rag to wipe the joint surface with rubbing alcohol or an over-the-counter disinfecting spray. Rinse thoroughly with water and dry.
• If the gap you are caulking is greater than 1/2 inch, press foam tape into the space.
3. Tape the Area.
Caulking with tape along the surface will help produce an attractive finish. Apply painter’s tape to mask off areas around the joint where the caulk should not appear. This will give you a straight line of caulk and will improve the final appearance.
Caulk is available in hand-held squeezable tubes or rigid plastic cylinders that require a caulk gun to push out the material. A squeeze tube is recommended for small projects, such as sealing a bathroom sink. See Step 6 for caulking tips when using a caulk gun for larger projects.
• Some squeeze tubes may have a seal under the nozzle cap that will need to be removed or punctured before use. Follow the instructions on the tube and carefully cut the nozzle using scissors or a utility knife with a sharp blade.
A line of caulk is called a “bead” and the width of bead is determined by where the nozzle is cut. To create a narrow bead, cut the nozzle close to its tip. For a wider bead, trim off more of the nozzle.
No matter how wide your caulk bead needs to be, cut the nozzle at a 45-degree angle. You will be applying the caulk with the tube at an angle, so cutting the nozzle on a slant will help get a smooth bead.
• Using a caulk gun is the easiest way to apply caulk.
• Insert the cartridge into the gun frame and make sure it’s snug and secure.
• Press the release at the back of the caulk gun and adjust the rod so the plunger is fully extended.
• Place the nozzle at a 45-degree angle where the sink and countertop meet.
• Grasp the tube and squeeze with enough pressure to force the caulk into the joint.
At the same time, steadily draw the nozzle along the joint. Apply steady pressure to the trigger or tube and fill the gap with an even bead of caulk.
For a neat and professional-looking finish, “tool” or smooth the bead of caulk after sealing the joint. Lightly drag a caulk finishing tool over the bead to smooth it. Alternatively, you can simply use your finger. Moisten your fingertip in warm soapy water and drag it with light pressure along the length of the bead.
• Whichever method you use, the overall goal is to smooth the bead and not to remove excess caulk.
• If caulking with tape to mask the area around silicone caulking, remove the tape before the caulk starts to set. To remove the masking tape, lift the end and pull up at a 45-degree angle, away from surface.
• Wipe away excess caulk with water and a damp cloth before the it dries. Regular caulk fully dries or cures in about 24 hours. Quick-curing products are also available. To remove excess dried caulk, use a putty knife to cut or scrape it away.

• When learning how to caulk a tub or another large proj ect, use a dripless caulk gun for better results. This type of caulk gun releases pressure on the cartridge when you stop squeezing the trigger, giving you more control of the flow.
• The key to learning how to use a caulk gun is to start on one end of your project and try to work in a continuous direction.
• Squeeze the trigger slowly to get caulk from the cartridge.
• Use enough pressure to force caulk into the joint. Steadily draw the gun along the workspace as you squeeze the trigger.
• Release the trigger when it reaches the handle. It will spring back, and you can then continue making a steady bead.
Minor drywall cracks and “nail pops” may also develop due to shrinkage from the drying out process and in response to the humidity level of your home.
Cracks are not unusual in drywall compound at joints, particularly at corners. Most cracks are a result of normal shrinkage and are generally not warranted. The repair of normal shrinkage cracks is at Andrin’s discretion and sanding and repainting is not required. Andrin’s specific policies with respect to drywall repair will vary. These repairs are best left until the framing has settled.
Any gaps between your walls and baseboards are normal as your home is settling and shrinkage of materials is occurring. If the gaps are in excess of 2 mm and are exposed to normal view, contact Andrin Customer Care within the first year of ownership.
To repair gaps, use a filler of compatible material.

If your Andrin Home includes a fireplace, it is warranted for 1 Year from the date of possession for any material defects and workmanship.

It is imperative that control compartments, burners and circulating air passageways of the appliance be kept clean. Any safety screen, guard, or barrier removed for servicing the appliance must be replaced prior to operating the appliance.
Check your owner’s manual for guidelines in the care and maintenance of your fireplace.
• Frequency: Annually
Tools needed: Protective gloves, stable work surface.
• Assess condition of screen and replace as necessary.
• Inspect for scratches, dents or other damage and repair as necessary.
Check that mesh is not obstructed.
• Vacuum and dust surfaces.
Frequency: Seasonally
Tools needed: Replacement batteries and remote-control instructions.
• Locate remote control transmitter and receiver.
Verify operation of remote. Refer to remote control operation instructions for proper calibration and setup procedure.
• Place batteries as needed in remote transmitters and battery-powered receivers.
• Place remote control out of reach of children. If not using your fireplace for an extended period (summer months, vacations/trips, etc), to prevent unintended operation.
• Remove batteries from remote controls.
• Frequency: Seasonally
• Tools needed: Protective gloves and safety glasses.
Inspect venting and termination cap for blockage or obstruction such plants, bird nests, leaves, snow, debris, etc.
Verify termination cap clearance to subsequent construction (building additions, decks, fences, or sheds).
• Inspect for corrosion or separation.
• Verify weather stripping, sealing and flashing remains intact.
• Inspect draft shield to verify it is not damaged or missing.
Condensation on the glass: This is a result of gas combustion and temperature variations. As the fireplace warms, this condensation will disappear.
Blue flames: This is a result of normal operation and the flames will begin to yellow as the fireplace can burn for 20 to 40 minutes.
• Odor from fireplace: When first operated, the fireplace may release an odor for the first several hours. This is caused by the curing of the paint and the burning off any oils remaining from manufacturing. Odor may also be released from finishing materials and adhesives used around the fireplace.
• Film on the glass: This is a normal result of the curing process of the paint and logs. Glass should be cleaned within 3 to 4 hours of initial burning to remove deposits left by oils from the manufacturing process. A non-abrasive cleaner such as gas fireplace glass cleaner may be necessary.
• Metallic noise: Noise is caused by metal expanding and contracting as it heats up and cools down, like the sound produced by a furnace or heating duct. This noise does not affect the operation or longevity of the fireplace.
• Is it normal to see the pilot flame burn continually? In an Intelligent Ignition system, it is normal to see the pilot flame, but it should turn off when ON/OFF is turned off.
Laminated wood flooring, solid and engineered wood flooring, porcelain tile flooring and carpet are warranted by Andrin against defects in material and workmanship for 1 Year from your possession date. Any deficiencies in material and workmanship need to be documented during your Pre-Delivery Orientation.
If your home includes laminate flooring, they are a beautiful addi tion to your home and have been created to ensure that looking after them is easy. laminate floors are made with the Uniclic® joint technology and are easy to care for. The following steps will ensure that your laminate floors will look beautiful for years.
• Dust mop (with a non-treated, clean mop) or vacuum regularly to remove loose soil.
• Wipe up spills quickly with cloth or sponge. Clean as required.
• Never use wet mops, highly acidic or alkaline cleaners, non-rec ommended commercial cleaners or polishes, or a treated mop that has been used to clean other floors or furniture. Use floor-protector pads on furniture feet. Protect your floor from hard castors on moveable furniture.
• Use caution when wearing high heels and keep pets’ nails trimmed.
• Use entryway (non-skid, cotton) mats to capture tracked-in dirt and soil and clean them regularly. Rubber or fiber-backed mats may stain or scratch floor finish. Use a humidifier or dehumidifier to regulate humidity (30%to 60%) and minimize expansion and contraction. This is required to preserve your floor.
Gaps will result in your flooring joints either by normal wear and tear or improper maintenance of adequate ventilation.
As laminate flooring is made up of individual layers (wood particles/paste) pressed and bonded together, with an image on the surface of the substrate or underlying core layer, it is a normal occurrence, that, if the environmental conditions are too dry, the laminate flooring layers may contract, leaving permanent gaps between the strips or at the perimeter of the room or the area. You need to maintain indoor humidity levels through humidification, ventilation, air conditioning or dehumidification to prevent permanent, irreversible damage. A hygrometer can be used to monitor indoor humidity levels. Areas around heat registers and those exposed to concentrated sunlight may be more susceptible.
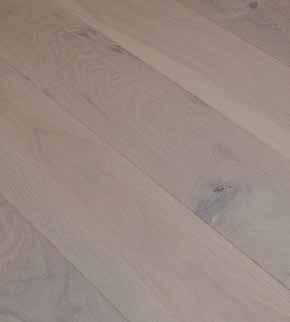
Here are the basics for maintaining your engineered wood flooring, to keep it beautiful and to make it last:
• Never clean your engineered wood floor with a steam mop, water or use a cleaner that is mixed with water. Do not use vinegar or bleach on your flooring.
Keep floor mats at all entranceways to keep dirt and moisture from being tracked on your floor. Place walkoff mats at all exterior entrances. This will capture much of the harmful dirt before it ever reaches the hardwood floor. Shake out, wash and vacuum mats and rugs frequently.
• Avoid water marks, never let spills of any type remain on the surface of the floor. Wipe up spills immediately.
Rotate area rugs occasionally to minimize discoloration from sunlight.
• Use soft protectors under all furniture.
• Vacuum and sweep your floor as often as required to eliminate dust and debris from your floor. This may have to be done on a daily basis, depending on the amount of traffic in your home.
When moving heavy furniture or appliances put a large heavy blanket underneath them to avoid scratches and dents.
Do not wear high heels on your hardwood floor. Spiked shoes exert approximately 1000 pounds per square inch. floor.
• Try to maintain an average humidity level of 45% in order to minimize the expansion and contraction in your floor.
• Use a recommended hardwood flooring cleaner.
If the environmental conditions are too humid, the laminate flooring may expand causing all edges (side and ends of boards) to press against each other and curl upwards. Cupping of laminate strip flooring results from excessive moisture when the humidity below the finished flooring material is substantially higher than above.
Extended low-humidity indoor environments can cause excessive shrinkage in the wood resulting in loose floor connections. Excessive high-humidity indoor environment can cause expansion in the wood resulting in pressure-related floor squeaks. You must maintain indoor humidity levels to prevent excessive drying or expansion of materials.
A permanent squeak-free floor may not be attainable
the list of maintenance instructions below will help you in keeping your flooring (and wall tile) clean and without mishap.
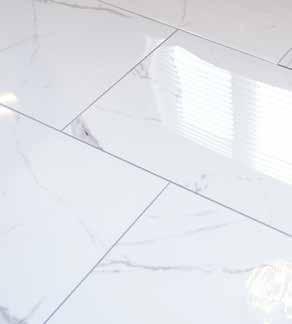
• Wipe up any spills on tile immediately and clean the area using a damp cloth or sponge. Sweep and/or vacuum floors regularly to remove any gritty particles, dust or debris as this can be abrasive to the tile surface.
Use a damp mop or sponge with an all-purpose household cleaner that is not oil-based and has low VOC to clean glazed floor tiles on a regular basis.
• Wipe glazed floor tiles (and wall tiles) periodically using a dampened cloth or sponge and a non oil-based household cleaner.
• Use a mild, soapless detergent with neutral pH for cleaning unglazed tiles.
• Ensure the cleaning product selected is compatible with cleaning the grout joints.
• Thoroughly read & follow all manufacture warnings and instructions for all cleaning products before use and test all cleaning solutions and materials in a small inconspicuous area before full application.
After using cleaning solutions, wipe down entire area with a clean cloth or mop and clear water to remove any residue that may have been left behind.
• Do not use cleaning wax, oil-based cleaners, ammonia, sealants or products containing acid or bleach as part of routine maintenance.
• Avoid abrasive cleaning products such as scouring pads or steel wool pads.
• Regularly inspect tiles for any surface damage after any heavy loads fall onto the tiles.
• Use felt or rubber protective pads under furniture to prevent scratching tile surfaces.
• Place good quality floor mats in high traffic locations and areas that are susceptible to moisture (i.e., near entrance/exit ways).
• Routine grout cleaning can be done with an all-purpose household cleaner that is non-oil-based and has low VOC depending on the application.
• For periodic deep cleaning of grout, use a concentrated tile & grout cleaner.
Look for a cleaner that has non-polluting chemicals and low VOC levels.
• The cleaner should be capable of removing grease, soap scum, mildew and body oils. Always read and follow the instructions on the product label.
• Rinse area with clear water and pat dry with a clean towel or sponge to remove any residue. Do not use acidic solutions / cleaners as part of a regular maintenance routine.
From the time your carpet is installed, the frequent use of an upright vacuum cleaner is recommended to clean your carpet. Make sure it is equipped with beater bars or a tank/canister type of disposal for dirt and dust. High traffic areas should be brushed with a pile groomer on a regular basis.
Carpeting is relatively easy to care for and a simple regular care plan will go far in maintaining the original appearance for many years. To maintain the optimum appearance, the following procedures are recommended:
• Instant removal of spills to prevent spots and stains.
• Daily maintenance of heavy traffic areas to pick up surface dirt and lint.
A thorough weekly vacuuming.
• For those who want the best appearance and longest perfor mance from carpets or rugs, professional cleaning is recom mended every year or two, depending on the appearance.
Please note that the use of professional carpet cleaners to ad dress any type of spills is recommended for best results and the long-term preservation of carpet materials. Some stains need special chemicals and procedures best handled by experts.
The heating and cooling systems in your home are warranted against defects in materials and workmanship for delivery and distribution for a 2 Year period from the date of your possession of the home.

Your brand-new furnace will include an Owners Manual which will not only provide you with details on how to power up and power down your furnace but will also give you detailed information on its maintenance. Below is a graphic showing the parts of your furnace which will be helpful when you need to troubleshoot.
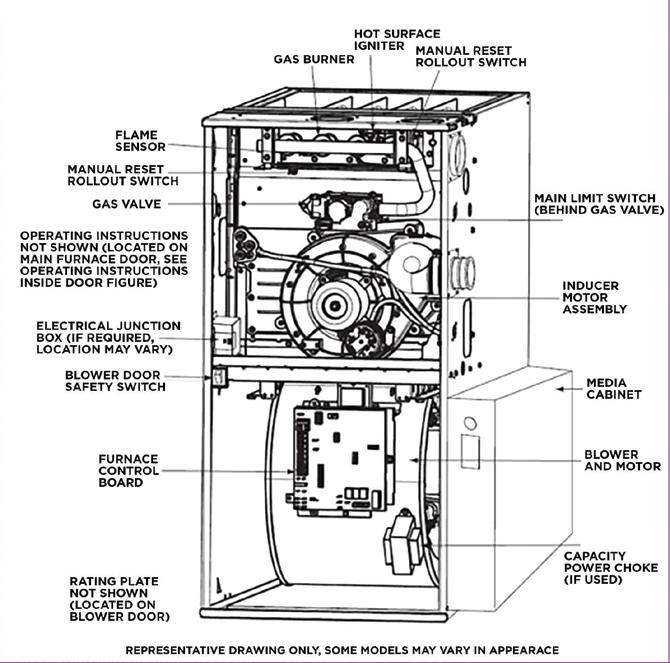
• The air filter for the furnace may be in an external filter cabinet attached to the side or bottom of the furnace casing.
• Turn off electrical supply to the furnace.
• Remove air filter from the filter cabinet.
• Slide air filter out of furnace. Keep dirty side up (if dirty) to avoid spilling dirt.
• Inspect the filter. If torn replace it.
• If washable filter, wash filter (if dirty) in a sink, bathtub, or outside with a garden hose. Always use cold tap water. Mild liquid detergent may be used if necessary. Spray water through filter in the opposite direction of airflow. Allow filter to dry. When dry, replace in furnace filter cabinet.
• Turn on electrical supply to the furnace.
• Visually inspect the combustion area and vent system before each heating season (Refer to your Owner’s Manual for specific steps in completing this inspection)
• Winterization of your furnace at the end of each heating sea son (Refer to your Owner’s Manual for specific steps in completing this inspection)
• The expansion of metal duct work as it heats and contraction when it cools may result in a sharp sound. This is normal and will not affect the performance of your heating system.
• Heat registers and cold air returns must be kept free from obstructions such as carpets, furniture, and wall hangings. Obstructions could impair the air flow and efficiency of your home’s heating/cooling system.
Furnace filters should be cleaned or changed, depending on the type, at least every two months during the heating season. Failure to clean or replace filters may interfere with the quality and quantity of air flow within the home.
For your safety, please do not store any combustible materials within two feet of your furnace.
• If your furnace fails to operate, to avoid the inconvenience and perhaps the cost of a service call, check the following items first:
• Ensure that the home’s thermostat is properly operating and, if applicable, programmed properly
• Ensure that exterior intake and exhaust vents are free of obstruction. Ensure that the furnace emergency on/off isolating switch located in the furnace area is in the ‘on’ position.
• Ensure that the circuit breaker in the electrical panel dedicated for the furnace is in the ‘on’ position.
Review the operating procedures in your furnace manual.
• During the Andrin 2 Year Warranty period, if the problem continues to exist after checking all the above, Andrin Customer Care should be contacted to set up a Service Appointment.
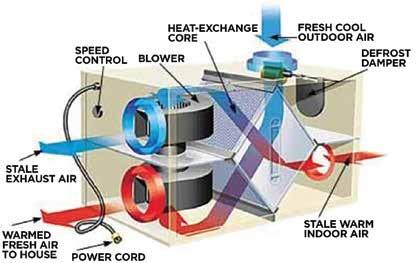
If your home includes an HRV, you will see the unit in your basement at the ceiling, near your furnace and water heater. Andrin will provide you with the Owner’s Manual for your model HRV, as part of your possession documents. All HRV’s work essentially the same in exchanging air so that you need not open your windows in your home:
The HRV is a balanced ventilation system, except it uses the heat in the outgoing stale air to warm up the fresh air. A typical unit features two fans—one to take out household air and the other to bring in fresh air. What makes an HRV unique is the heat-exchange core. The core transfers heat from the outgoing stream to the incoming stream in the same way that the radiator in your car transfers heat from the engine’s coolant to the
outside air. It is composed of a series of narrow alternating passages through which incoming and outgoing airstreams flow. As the streams move through, heat is transferred from the warm side of each passage to the cold, while the airstreams never mix. HRV’s contain filters that keep particulates such as pollen or dust from entering the house.
Although an HRV can be effective in the summer months, when it will take heat from incoming fresh air and transfer it to stale air-conditioned exhaust air, it is most popular in colder climates during the winter. If the temperature falls below zero, however, frost can build up inside the exchange core. To handle this, a damper closes off the cold airstream and routes warm air through the core. After several minutes, a timer opens the fresh-air port and ventilation continues.
A typical HRV for residential use might move as much as 200 cfm of air, but the fan speed can be set to suit the air quality in the home. For example, a slow to medium fan speed may be adequate for normal living, while a house full of guests might require the highest setting. Controls are available for intermittent and remote operation.
Although windows can be opened at any time of the year, they will not necessarily enhance indoor air quality and in many cases will lead to increased heating and cooling costs.
The HRV is intended to operate (at least at low speed) on a continuous basis to remove moisture and pollutants generated by normal human activities and to maintain good indoor air quality.
Shutting off the HRV for prolonged periods can lead to a buildup of indoor air pollutants and humidity and can also potentially void warranties on the system.
As your HRV is interconnected with the furnace system, the furnace fan should be set to operate continuously as well. Filters to be cleaned twice a year.
(Basic Modes / Your Manual will provide additional Modes of Operation)
• Manual Operation requires that you turn the ventilation system on and off. High speed operation may be also be initiated by manual controls.
• Automatic Operation uses controls such as timers, humidistats, and occupancy sensors to operate the ventilation system or to operate it temporarily at higher speeds as needed. You need to understand which sensor or timer is activating the system.
• Continuous Operation ensures that the house is always ven tilated but may result in over‐or under‐ventilation at times.
All ventilation systems must include manual controls, even if you install automatic controls or plan to operate the ventilation system continuously.
Make sure exhaust and fresh air supply hoods are not blocked or restricted by leaves, grass, or snow. In winter, it is especially important to make sure snow is not blocking the hoods or that frost has not built up on the wire mesh (bird screen).
The standard filter equipped with your HRV are removable and washable.
Open access door and slide core out.
• Remove filter clips if present.
• Once clips are removed, filters can be taken off the core to be rinsed with water or a combination of mild soap and water. Do not clean in the dishwasher.
• To re-assemble, place clean filter(s) (wet or dry) back into their positions against the core and return clips to their original positions.
• Slide core back into its original position.
• Open access door. Carefully grip ends of core and pull evenly outward. Core may be snug but will slide out of the cabinet.
• Once removed from the cabinet remove filters.
• Install the clean filters. Install clean core in the cabinet.
• Note: Core installation label on the outer end of the core.
To reinstall the core first position the bottom of the core on the bottom support in the cabinet.
• Carefully align the core with the other 3 supports and fully insert the core.
Push on sides of core, do not push on the center.
• Note: Core may appear to stick out from the cabinet approximately 1/8 in (3 mm). This is designed this way so that the access door will fit tight against the core.
• Do not use cleaning solutions for the HRV core.
• Soak and rinse the HRV core in warm soapy water.
• Do not use bleach or chlorine.
Do not use a pressure washer on the HRV core. Do not place the HRV core in a dishwasher.
WARNING:
• Electric shock hazard: Can cause injury or death. Before attempting to perform any service or maintenance, turn the electrical power unit off at disconnect switch(es). Unit may have multiple power supplies.
• Blockage of hoods may cause an imbalance.
• Inspect drain line, drain spout and “P” trap for blockage, mold or kinks. Flush with warm soapy water and replace if worn, bent or unable to clean.
• The duct work running to and from the HRV may accumulate dirt. Wipe and vacuum the duct once every year. You may wish to contact a heating/ventilation company to do this.
Wipe down the inside of the cabinet with a damp cloth to remove dirt, bugs and debris that may be present.
Your furnace will come equipped with a humidifier to assist in maintaining the indoor air humidity levels during the winter months to improve the indoor comfort level. Ensure that you turn your humidifier on and adjust the settings each weather season.
The ventilation fan switch is located beside the thermostat and it will control the HRV.
Your home has been balanced in accordance with manufacturer’s specifications prior to occupancy. Once you have lived in your home, you may find that the heating system is not balanced to your individual requirements with some rooms too warm, others too cold. Since balancing is a matter of individual preference, homeowners must determine their needs and balance the heating system accordingly.
A common problem is that the upstairs rooms are too cold, although the ground floor is fine. As the thermostat is located on the ground floor, it is the temperature on that level that determines when the furnace starts and how long it operates. Many homeowners find that the ground floor quickly reaches the temperature set on the thermostat, and the furnace shuts off before the upstairs rooms are adequately heated. The solution is to regulate the grills (registers) and dampers on the warm air ducts for the ground floor, so that the furnaces output of heated air is directed to alternate locations.
• Redirect some of the ground floor warm air by closing a few of the sliding adjustable openings in the air registers. Additional control of air entering a room can be achieved by removing the warm air register, reaching just inside the duct, and adjusting the damper. Beware of sharp points and edges when adjusting dampers.
• Central air-conditioning may require readjustments to the air distribution or balancing.
The purpose of cold air returns is to return the air to the furnace heating/cooling circulating system in your home. The cold air return grills may be in the floor or on walls throughout your home.
When you purchase and install a central air conditioner, you should ensure that it is adequately sized for your home. The existing heating device fan is used to distribute cool air through the duct work and air registers. Even distribution of cool air throughout your home may require that you rebalance air distribution.
• Air conditioners remove heat from the air inside your home and discharge the heat through a heat exchanger and fan blower unit mounted on the exterior of your home. Planting bushes or obstructing the flow of air from the exterior unit may result in the compressor overheating and failing to operate.
• When the air conditioner is operating, a small amount of moisture may form on the evaporator coils, which are in the heating device duct work. The water eventually flows through the condensate pipe to the basement floor drain.
Setting the thermostat exceptionally low will not result in faster cooling and will cause an excessive amount of water to form and freeze on the coils. Ice buildup will reduce the efficiency of the unit and may require professional servicing.

• Air conditioner maintenance includes changing the fur
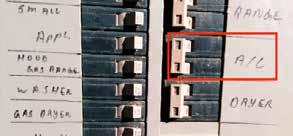
• Check your A/C breaker in the main electrical panel in your home. Ensure that it is in the “ON” position. This breaker is a double switch and should be marked “A/C”.
• Find your “Disconnect Box” on the outside of your home, typically located near the A/C unit. Once found, open the box and pull out the spade and ensure the “ON” is pointing up.
• Once the “ON” is pointing up, close the Disconnect Box and electricity is now powered to your A/C unit.
• Check the filter at your furnace to ensure it is not dirty. A dirty filter affects air flow over the A/C coil and may lead to freeze up and no cooling.
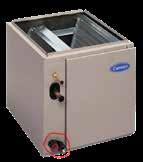
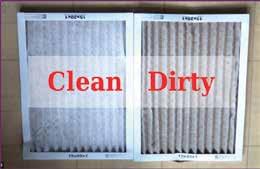
• Set your ther mostat to “Cool” and your fan to “Auto” or “On”. Set your tem perature to 22 degrees Celsius or 72 degrees Fahrenheit.
nace filter regularly and arranging annual professional cleaning and servicing. Clean and cover the exterior unit during winter months to preserve the metal housing.
• If your A/C unit is running but your home is not cooling, check the unit outside where the refrigerant line enters the A/C unit. Check
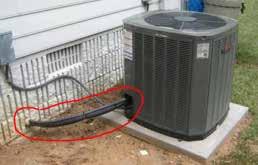
for frost or ice forming. Condensation is normal. If there is frost or ice, turn the A/C unit off.
Check for frost or ice build up at your indoor coil in the basement unit. If frost or ice is present, turn the A/C unit off and check the filter.
If after all steps have been taken and the A/C unit is not cooling your home, contact Andrin Customer Care to set up a Service Appointment with the Contractor.
Condensate lines from furnaces, air conditioning condenser coils and heat recovery ventilators need to be free from blockage. Condensate lines should be inspected and cleaned as part of your regular home maintenance.
The A/C condensate drain line removes the water released when the evaporator in your A/C unit converts refrigerant from a liquid to a gas. Over time, algae and other muck can build up. This may lead to an A/C drain line clog if you don’t maintain your A/C unit regularly.
Luckily, unclogging and cleaning the A/C drain line is easy to do with tools you probably already have in your cleaning closet.
Here is how to clear up any A/C drain line clogs in less than an hour.
A stiff, thin wire brush
• A wet/dry vacuum
• Duct tape
Bleach
• Rubber gloves
• Turn off the power to your A/C unit. You should always turn off your A/C before you clean it.
Find your A/C drain line. Most A/C drain lines are located outside, near the condenser unit.
• Push the stiff, thin brush into the end of the drain line. This might clear any clogs located near the end of the drain line. In most cases, the A/C drain line clog will occur farther down, and you’ll need to do a little more work.
• Attach the end of your wet/dry vacuum to the end of the A/C drain line. Seal it securely using duct tape. Turn the
vacuum on to suck out any debris and hopefully clear your clog.
• After you’ve run the vacuum for about a minute, remove the wet/dry vac and head indoors. If the drain pan is full, vacuum it out and clean it with soap.
Locate the vent tee. This is a pipe fitting that connects your A/C drain line to the drainage tray. Remove the PVC cap from the top of the vent tee.
Poke that stiff, thin wire brush through this end as well, so you can clean out any easily reachable A/C drain line clogs.
• Put on your gloves and pour a mixture of one cup bleach and one cup water into the top of the drainpipe. (Make sure you follow safety guidelines for working with bleach.) Wait thirty minutes.
• Have a helper stand outside and watch to see if water drains out of the A/C drain line. Working alone? Place a bucket at the end of the drain line to see if you’ve cleared the A/C drain line clog.
• Pour water into the vent tee, and head outside to see if it made it all the way through the A/C drain line. If it has, great! You’re done cleaning the A/C drain line and you’ve cleared up the clog!
If these steps don’t help when your A/C drain line is clogged, then it’s time to call Andrin Customer Care, only if this occurs during the first 2 years of the home ownership.
Appliances are delivered and installed after you take possession of your home.
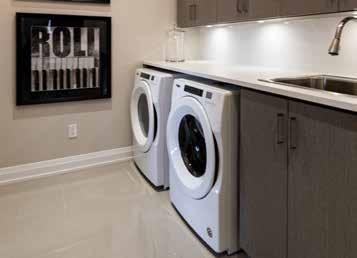
After your possession date, the manufacturer will provide a limited 1-Year Warranty.
Enclosed within each appliance is a warranty package providing you with instructions on operating, care and maintenance for your appliances, as well as registering the product with them for Warranty Coverage.
The contact information for warranty service can be found in the owner’s manual for each appliance.
Please ensure that you have the brand name of the appliance, model and serial number ready when you call.
Kitchen and bath exhaust fans are installed with back draft dampers as per manufacturer’s specifications. Because they are connected to the exterior by a duct, these ventilation fans are indirectly open to outside air. Even though these types of fans come equipped with dampers, they are not completely effective at eliminating cold air infiltration. Sometimes they can become obstructed and not close fully. As part of your regular home maintenance, vent terminations on exterior walls should be inspected periodically to ensure the openings are not obstructed (e.g., by birds or other animals).
 The Andrin warranty on your landscaping (exterior drainage, grass and driveway) is for a 1 Year period from your possession date for material defects.
The Andrin Warranty on painted surfaces (defects in materials and workmanship) is for 1 Year warranty from your possession date. Only painted surfaces that are regularly touched during your ownership are to be uniformly smooth and are to be warranted for defects and workmanship under the 1 Year Warranty. All other painted surfaces are part of your homeowner care.
• Surfaces not touched during your normal home use shall appear smooth when viewed, without magnification, from a minimum distance of 5 feet under normal lighting conditions and from a normal viewing position.
• The open grain in some wood surfaces tends to show a rough appearance yet feel smooth; this is a natural property of wood and is acceptable.
• Andrin uses low volatile organic compound (VOC) paints, sealants and adhesives in the finishing of your wall surfaces and wooden stairs and/or railings.

Woodwork and other surfaces are painted with products particularly suited to the surfaces to which they are applied, and the use expected.
All surfaces that have been painted will eventually require repainting. The frequency of repainting depends upon several factors, which are unique to each home and its occupants.
Other than areas that may have been missed at the time of your pre-delivery orientation, no further painting will be done by Andrin. If you have decorated and Andrin is required to carry out a repair, we will not restore any decorating finishes. We recommend that you wait for one year before repainting and wallpapering your walls.
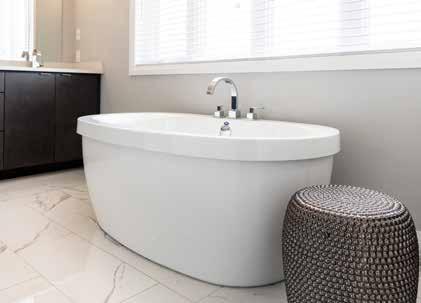
If your home includes an On-Demand Hot Water Recirculating System you will learn how it brings convenience and savings to your home by providing hot water quickly to the Master Ensuite Bathroom when you need it. This unique product can save thousands of gallons of water per year by not having to run the water waiting for the hot water to arrive. You will be provided with an Owner’s Manual on or before your possession date.
Your home includes a Drain Water Heat Recovery System which is installed on the main shower stack. Heat from the drain water is used to pre-temper incoming cold water before it is heated in the storage tank.
In the event of a plumbing leak, be sure to close the main water shut-off valve immediately. The location of the shut-off valve will have been shown to you during your Pre-Delivery Orientation. Minimize the disposal of grease, fat and similar wastes, especially petroleum products, through the plumbing system. Such materials tend to accumulate in the piping, reducing its efficiency. In addition, continuous or large-scale usage of this kind can affect municipal or private sewage treatment systems.
Condensation on piping should not be mistaken for a leaking pipe. Condensation on cold-water supply pipes is not covered by the statutory warranty. High indoor humidity is the main cause of condensation on pipes.
Faucets or plumbing fixtures shall not leak, drip or run on when fully closed or shut off. The typical causes for a leaky faucet include corrosion, mineral deposit on the internal parts, or defective gaskets, o-rings, or washers.
• Shut off water.
• Twist the valve under your sink to turn off the water supply valve or valves. If there aren’t individual shutoff valves under the sink, shut off the water supply for the house.
TIP: Insert a sink stopper or cover the sink opening with a towel to prevent any tools from falling down the drain as you make your repairs.
Remove the set screw and handle.
• How you remove the handle depends on your faucet type:
• If there is a set screw behind the handle, insert a hex key or Allen wrench into the screw and turn it to remove.
If the handle has a top screw cover, pry it off with a flat screwdriver and set aside.
• Then, use a Phillips head screwdriver to loosen the screw underneath the cover.
Pull the handle free.
• Remove the Cartridge or Existing Packing
• Using a crescent wrench, loosen the packing nut in the handle assembly, then remove and set aside.
• Gently pull the cartridge straight up and out of the assembly.
On some models of faucet, you may have to remove the cartridge with a specialized tool, which will be indicated on manufacturer’s instructions.
Cleaning the handle area before installing a new cartridge.
• Clean and dry the area around the handle and all the parts with a cloth.
• Inspect the O-rings around the housing. Replace any that look damaged or worn.
• Cartridges come in many shapes and sizes, and the easiest way to find the right replacement part is to know the name of the faucet’s manufacturer and the faucet’s model number. If you’re not sure, take the old cartridge you’re replacing to the store so you can use a reference guide to match it to the exact cartridge you need.
• Insert a new cartridge, making sure it is aligned correctly.
• Reattach the packing nut and handle cap.
• Reattach the packing nut and tighten with a crescent wrench; be careful not to overtighten.
• Reattach the handle with the set screw. Replace the screw cover, if required.
• Turn your water line back on, remove any debris or towels from your sink, and test out your faucet.
• Run both hot and cold water through your faucet few for a few minutes to ensure your aerator isn’t clogged.
If you find that your faucet is still leaking, contact Andrin Customer Care, within your first 2 years of home ownership.
TIP: The aerator is the piece that screws onto the end of the faucet spout. It can be easily removed and cleaned if buildup is hindering continuous water flow.
You must keep your home’s temperature to 22°C to prevent freezing at all times. If this is not possible, proper precau tions should be taken to prevent freezing such as shutting off and draining the water supply system.
• For exterior hose bibs, shut off any associated interior valves and leave the exterior valve open as part of a regular sea sonal maintenance program. Garden hoses must also be disconnected from the exterior hose bib.
• If a burst pipe is detected in a water supply pipe, the main water supply valve should be turned off immediately until Andrin Customer Care can assess the condition.
• Caulking and seals around bathtubs and shower enclosures and entry door seals require regular homeowner inspection and maintenance to prevent leaks.
• If a leak is detected in a water supply pipe, the main water
supply valve should be turned off immediately until Andrin Customer Care can assess the condition.
To reset your air chambers, turn off your main water shut-off valve, and then open all your faucets and valves. Do not forget to open the lowest faucet you have, which could be on an outdoor hose bib or a basement sink. Opening these will drain any water suspended by pressure and allow the air chambers to clear. Turn all the faucets back off. Turn your water back on, and the water hammer should be resolved!
If a sewer backs up within the warranty period, contact Andrin Customer Care. Please note that if domestic material is found to be blocking the line, the cost of the service call will be your responsibility.
Should a problem develop after the warranty period, contact the plumber of your choice for assistance or the engineering depart ment at the city.
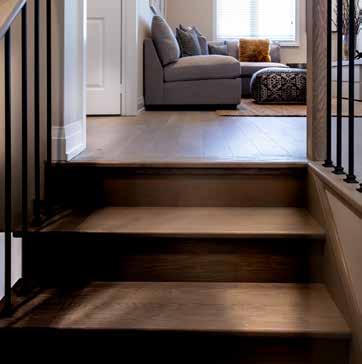
The Andrin Warranty on stairs and railings against defects in material and workmanship is for 1 Year from your date of possession.
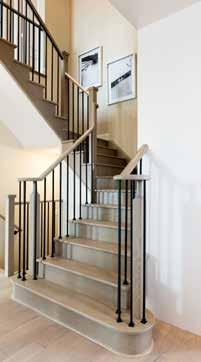
Maintenance keeps wood stairs looking their best, and it can also help the wood itself last as long as possible. Regular cleaning, scratch-and-dent touch-ups and occasional refinishing are the main processes that help maintain wood stairs. Extra measures to prevent damage, such as rugs to keep debris off the floor, can also help wood stairs stay in top shape.
Clean wood stairs regularly by vacuuming and sweeping. Avoid leaving wet spots and spills on the wood for too long as they can soak into the wood and warp it or leave stains. When the stairs need a good cleaning with something wet, use a cleaner designed specifically for the type of floor finish on the stairs.
Prevent damage by putting rugs near entrances. Rugs help keep tiny pieces of gravel off the bottoms of shoes, which prevents them from scratching wood floors and stairs. Avoid wearing dent-causing shoes, such as skinny and hard high heels, on soft wood stairs. Protect stairs from scratches when moving furniture by padding the legs and corners of furniture with soft socks, foam padding or bubble wrap.
With lots of heavy traffic, the finish on wood stairs might become worn or cracked over time. Penetrating finishes can be repaired at worn spots without refinishing the entire stair. To repair worn spots in a penetrating finish, apply new finish to the worn spots with steel wool.

Check air ducts, remove register covers and vacuum out any dust.
Check and clean the heat recovery ventilator (HRV); wash or replace the filter.
Check your basement for leaks or moisture.
Clean humidifier and check for condensation and proper humidity levels.
Check and reset ground fault circuit interrupter (GFCI).
Inspect water heater for leaks.
Check roof for loose or cracked shingles.
Check driveways and walks for frost damage.
Remove snow and ice from roof overhang and vents.
Inspect fences.
Check caulking around windows and doors for air or water leaks.
Lubricate weatherstripping.
Check exterior finishes for signs of deterioration (peeling paint, loose siding, cracks).
Check windows and screens are operating properly.
Test septic system and clean if necessary.
Check and reset ground fault circuit interrupter (GFCI).
Test smoke alarms and carbon monoxide detectors.
Check air conditioning to see if properly functioning.
Check condition of roof shingles, flashing and chimney caps are sealed properly.
Check sheds for wear and tear or damages.
Check garage and garage door tracks for deterioration and lubricate bearings.
Check sealing around windows and doors for air or water leaks.
Test septic system and clean if necessary.
Fertilize lawn.
Inspect water heater for leaks.
Check and reset ground fault circuit interrupter (GFCI). Test smoke alarms and carbon monoxide detectors.
Air out damp basements on dry, sunny days.
Clean air conditioner.
Check or clean exhaust fans.
Check water heater for leaks.
Check and reset ground fault circuit interrupter (GFCI).
Test smoke alarms and carbon monoxide detectors.
Clean or replace air conditioner filter.
Air out damp basements on dry, sunny days.
Inspect driveways and walks for chipping or cracks.
Inspect doors and locks for proper closure and locking.
Check and reset ground fault circuit interrupter (GFCI).
Test smoke alarms and carbon monoxide detectors.
Check exterior finishes for signs of deterioration (peeling paint, loose siding, cracks).
Check garage door tracks and lubricate bearings.
Check caulking around windows and doors for air and water leaks.
Seed the lawn.
Inspect fireplace and chimney dampers, clean if necessary.
Check basement or crawl spaces for leaks or moisture.
Have humidifier, furnace and (heat recovery ventilator) HRV serviced.
Clean and test clothes dryer vent.
Check and reset ground fault circuit interrupter (GFCI).
Test smoke alarms and carbon monoxide detectors.
Check windows and screens for cracks or separations.
Drain exterior water lines.
Check roof including shingles and flashing and ensure vents are sealed properly.
Check weather stripping for damage or wear.
Check sealing around windows and doors for air or water leaks.
Test septic system and clean if necessary.
Winterize landscaping and remove leaves.
Clean or replace furnace filter.
Check and clean the heat recovery ventilator (HRV); wash or replace the filter.
Clean water heater.
Shut off exterior water supply.
Check eavestroughs and downspouts for debris.
Clean humidifier and check for condensation and proper humidity levels.
Check and reset ground fault circuit interrupter (GFCI)
Test smoke alarms and carbon monoxide detectors.
Check attic, basement and crawl spaces for leaks or moisture.
Inspect floor drains to ensure trap is filled with water.
Clean or replace furnace filter.
Check and clean the heat recovery ventilator (HRV); wash or replace the filter.
Check for condensation and humidity.
Check and reset ground fault circuit interrupter (GFCI).
Test smoke alarms and carbon monoxide detectors.
Check air ducts for debris and clean if necessary.
Check for excessive snow on roof and arrange for removal if necessary.
Clean or replace furnace filter.
Check and clean the heat recovery ventilator (HRV); wash or replace the filter.
Clean humidifier and check for condensation and proper humidity levels.
Check and reset ground fault circuit interrupter (GFCI). Test smoke alarms and carbon monoxide detectors.
Clean or replace furnace filter.
Check and clean the heat recovery ventilator (HRV); wash or replace the filter.
Check furnace fan belt for wear or looseness.
Check water heater for leaks.
Check or clean exhaust fans.
Clean humidifier and check for condensation and proper humidity levels.
Remove snow and ice from roof overhang/vents.
Check and reset ground fault circuit interrupter (GFCI).
Test smoke alarms and carbon monoxide detectors.
Clean or replace furnace filter.
Check and clean the heat recovery ventilator (HRV); wash or replace the filter.
Check and ensure air intakes and exhausts are clear of snow.
Remove snow and ice from roof overhang/vents.
Check and reset ground fault circuit interrupter (GFCI).
Today’s energy-efficient homes are built tightly to seal out the cold weather in winter and keep in the air conditioning in sum mer. Because of this, it is possible that a new home can be se verely damaged by lack of ventilation or by excess moisture.
It is important to remember that moisture damage caused by improper or inadequate use of your ventilation system, is not cov ered by the new home warranty.
Your home can be damaged if weather-related water is allowed to enter and remain in the structure. Water from leaking pipes or fixtures that is not immediately cleaned up, and indoor humidity levels that are not properly controlled, can have serious conse quences. Sometimes this damage is easily seen, at other times the damage is hidden inside wall and roof spaces. Regardless of where it occurs, moisture damage can lead to serious problems, such as rot, mould, and even structural failure.
Always use your home ventilation system to control moisture. In a typical home, over 20 litres of water are added to the indoor environment every day. That’s 7,300 litres in a year, enough to fill a medium-sized swimming pool. Bathroom fans, kitchen range hoods and packaged ventilators such as heat-recovery ventilators are specifically installed in your home to help you control mois ture and contaminants. Regular use of your home ventilation system will exhaust excess airborne moisture caused by bathing, showering, doing laundry and cooking.
Here are some extra tips you can follow to help prevent moisture damage to your home.
Keep flowerbeds or landscaping at least six inches or 150 mm away from the top of the foundation. Placing soil near or above the top of the foundation allows moisture to come into direct contact with the structure of the building.
Ensure that land adjacent to the foundation slopes away from the home so that rainwater and snow melt will run away from the foundation.
Clear eavestroughs of debris regularly and extend downspouts so that water is directed away from the building. Water flow can erode the ground near the foundation and create depressions where water collects. Standing water near the foundation can force its way into the basement.
Fix the caulking around windows and doors and on the roof if it becomes cracked or separated.
Have your roof inspected regularly to ensure shingles, flashing and chimney caps are in place and sealed properly.
In the winter, keep the relative humidity in your home in the range of 30-45%. Lower humidity levels may affect your health and because things made of wood to shrink. Excess humidity can cause condensation on windows and damage the surrounding wall. When using a humidifier, follow the manufacturer’s instruc tions.
In the summer, dehumidify the basement to avoid condensation buildup on the cool foundation walls. Relative humidity levels should not exceed 60%.
Repair leaky pipes and fixtures immediately. Clean and complete ly dry any areas that are dampened or wet within 48 hours. Store organic materials such as newspapers and clothes away from cool, damp areas. Keep storage areas tidy so that air circulates freely. Purchase a “hygrometer” to monitor the relative humidity in your home.
If you are adding a hot tub to your home, or have a large collec tion of plants, consider the amount of moisture they will add to your indoor air and ventilate accordingly.
Never vent your clothes dryer inside your home. If you have a gasor propane-fired dryer you may also be venting carbon monoxide inside your home!
Investigate and identify any musty smells and odours. They are often an indicator that there is a hidden moisture problem.
If you are planting any shrubs or trees on your lot when the weather is ideal, such as these common plants:
• Green Boxwoods
• Goldmounds
• Stella D’oro
Big Daddy Hosta
• Lilac Tree
• Yews
• Service Berry
Follow these simple maintenance guidelines:
• Apply water frequently in the early growing phase and during dry weather conditions, every 2 days.
Water the beds of the newly planted trees and shrubs for an approximate 2-week period
• Once established in the soil, watering of the plants can be relaxed based on weather conditions and avoid over-water ing as this will stress the plants.
• In the late Fall, before the ground freezes for winter and before the winter winds and snows begin, you may need to cover some shrubs and plants to protect them through a cold winter
• Burlap is a natural covering and helps insulate the shrubs, keeping them safe from wind, snow, animal damage, freezing and thawing.
• Pictures of any of the plantings can be viewed via the internet using the common name listed above.
For NEW GRASS planted by Andrin, please follow the mainte nance guidelines below:
Once laid, you must water the sod regularly to ensure that the grass takes root.
• Any sod planted at the front, rear and sides of your home is to be watered 3 hours every day for the first week and every other day thereafter for the root system to be established.
• The best time to water is in the early morning with a sprin kler or soaker hose attachment for 1 hour for optimal water ing of the root system.
• Watering in the evenings should be done when the sun is setting, and temperatures have dropped.
• Do not cut your grass for a minimum period of 2 weeks.
Bear in mind that continuous evening watering can promote mold and fungal growths.
LESMILL ROAD
UNIT
TORONTO, ON
M3B 2T5
T: 416.733.3128
F: 416.733.3129
