
Homeowner’s Manual
CONGRATULATIONS ON YOUR NEW HOME, AND WELCOME TO THE LAKEVIEW FAMILY.
IT’S ALMOST TIME FOR YOUR HOME TO CLOSE! WE HOPE YOU’RE AS EXCITED AS WE ARE. WE’VE INCLUDED SOME DOCUMENTS THAT WE THINK YOU’LL FIND USEFUL REGARDING SOME OF THE FEATURES AND FINISHES THAT MAY BE IN YOUR NEW HOME.
Tips for Maintaining Proper Humidity Levels What an HRV (Heat Recovery Ventilator) Unit Does What an HRV Will and Will Not Do Causes of Window Condensation & Remedies Care & Maintenance Information for Engineered Wood Floors Properties of Natural Stone Natural Stone Care & Maintenance Properties of Quartz Quartz Care & Maintenance Thermal Shock Information Kitchen Maintenance & Warranty Information Seasonal Maintenance Checklists Contents 01 03 05 07 09 14 15 16 17 18 19 24 Any additional information regarding warranty issues can be found through the Tarion website, or you can call our After-Sales team with your questions or concerns
MAINTAINING PROPER HUMIDITY LEVELS IN A HOME
A humidifier needs a humidistat (counterpart of the thermostat) which can be adjusted as often as necessary to provide the desired level of humidity. The most recent advancement in humidification is a humidistat that automatically delivers the optimum relative humidity without periodic homeowner adjustment. These humidistats adjust the humidity in the home up to 86,000 times per day.
The amount of humidity required in a home is dependent to a certain extent to the way in which the home was constructed. A well insulated house with vapor barriers in the walls, ceilings and slabs, and properly fitting storm doors and windows may need only three (3) gallons of additional moisture per day. A house of similar size but loosely constructed might require five (5) times as much moisture in the same period.
Properly humidified air can help repel problems aggravated by too dry air, such as asthma or allergies. Dry thirsty air
evaporates moisture from your skin, a cooling process that makes you feel chilly. However, with humidified levels raised to recommended levels you can dial your thermostat down to 68° and still feel comfortable.
Heated air dries out wood framing around doors and windows, too. Shrinkage of the wood occurs, leaving spaces that permit cold, outside air to infiltrate the home, lowering the inside temperature and requiring more heating. Proper humidity reduces annoying wintertime static electricity shocks.
The damaging effects of heated, parched air can cause separation of wood in floors, trim and furniture, excessive wear of fabrics and carpets, cracks in walls or ceilings, and can cause piants, to dry out so they droop and turn brown.
WHAT SHOULD INDOOR RELATIVE HUMIDITY BE? THAT DEPENDS
OUTSIDE TEMPERATURES,
INDICATED BELOW:
The Relative Humidity Should Be At : When The Outdoor Temperature Is At: 45% 40% 35% 30% 25% 23% 15% +40 +30 +20 +10 0 -10 -20
ON
AS
Proper humidification provides the protection that is needed.
Properly humidified air can help repel problems aggravated by too dry air, such as asthma or allergies.

02
WHAT AN HRV (HEAT RECOVERY VENTILATOR) UNIT DOES
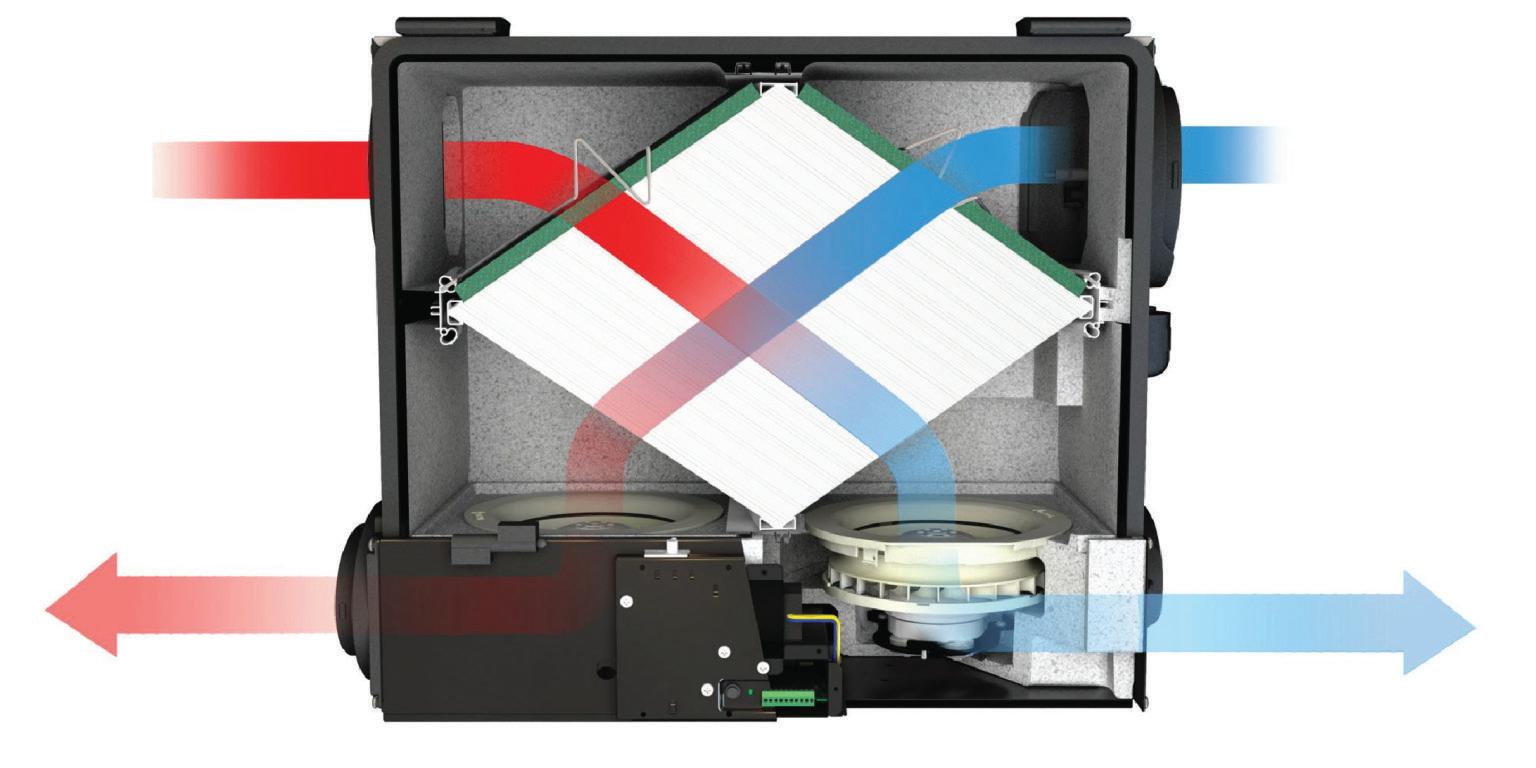
An HRV is a controlled ventilation system that reduces high humidity, pollutants, and odours by replacing stale air with fresh warm air.
Exhaust air is not only stale and damp, but warm. It is this warmth that is used to pre-heat fresh air as it enters your home. All HRVs have two fans and an in-built “Air to Air” Heat
Exchanger, which transfers heat from the exhaust air stream to the cold fresh air supply. By the natural laws of physics, whenever cold air is warmed, humidity is reduced, and condensation control is the result. The two air streams are 100% separated at all times. The fresh air introduced into your home is warm and dry and provides a permanently fresh, healthy, indoor environment.
WHAT DOES A HRV DO?
A Heat Recovery Ventilator (HRV) will continuously:
• Exhaust, stale, polluted, humid air.
• Introduce fresh, dry, warm air.
• Transfer heat from stale, damp, exhaust air to preheat fresh incoming air.
• Reduce condensation, mould, mildew, etc.
HERE’S HOW IT WORKS
Stale, humid air is exhausted from the house.
• As this air passes through the HRV it warms the plates of the heat exchanger core.
Clean, fresh, outdoor air is supplied to the house.
• This air is heated and dried by passing over the warmed heat exchanger plates.
Both Processes Occur Simultaneously.
• Supply and exhaust air streams never mix but heat energy is continously exchanged between the two.
BENEFITS
• Reduces humidity & removes condensation
• Exhausts stale humid polluted air
• Replaces stale air, with fresh, dry, warm outdoor air
• Transfers waste exhaust heat, to incoming fresh air
• Save up to 5 times more energy than it costs to run
• Reduce greenhouse gas emissions, by recycling energy
An HRV can recover up to 5 times more energy than it costs to operate. This level of efficiency is unmatched by any other domestic appliance.
04
WHAT AN HRV SYSTEM WILL AND WILL NOT DO.
THE HRV IS NOT A HEATER OR A HEAT PUMP.
It does not generate heat. It captures and recycles heat (or cooled energy) from other sources, i.e. log fires, gas heaters, electric heaters, heat pumps, hot water heaters & boilers, coal fires, under floor heating, ceiling heating, night store heaters etc. ----- whatever the heat source, the HRV will recover the heat from the exhaust air stream and recycle this heat directly back into the home.
Whatever the source of heat in the home, if ventilation is required, this heat is wasted if ventilation is by opening windows or using exhaust fans.
The HRV captures and recycles heat that is contained in the polluted exhaust air, by using the heat to warm incoming fresh air. By the laws of physics, whenever air is warmed, its humidity is reduced, and so warm air can absorb moisture. Thus cold incoming outdoor air is “dehumidified”, when it is warmed by the re-cycled heat.
The HRV is a most effective method to control condensation, as well as providing a healthy environment, because the only air entering your home is Fresh Outdoor Air which has been warmed and dehumidified.
At the same time, humid warm indoor air, which has absorbed moisture, and contains other indoor air pollutants, is exhausted, and carries with it, the moisture and pollutants.
As the exhaust air passes through the HRV, the exhaust air heat is captured by the Heat Exchanger, and then directly heats the incoming outdoor cold air.
This is energy recycling in a very efficient manner. Effectively, the same heat is used over and over again. On a typical winter’s day the energy re-cycled is over 500% of the cost to run the two fans.
THE HRV IS NOT AN AIR CONDITIONER
In air conditioned homes, indoor air will be cooler than outdoor air, and the HRV recycles cooled energy, in exactly the same way as it recycles heat i.e. the cooled energy is captured by the Heat Exchanger, and used to cool the warm outdoor air as it is introduced into the home for ventilation. This reduces the “load” on the air conditioning system while providing 100% fresh air ventilation.
Most air conditioners simply recirculate, over and over, the same stale, and polluted indoor air. Very few air conditioners have any provision to ventilate the air conditioned space with fresh outdoor air. Thus most air-conditioned spaces in homes still require ventilation. The HRV saves summer “cooled energy”, just as it saves winter “heat energy”.
IN WINTER
The home needs heating -- this is the function of a heating appliance, -- to provide COMFORT. The home needs a healthy indoor environment -- this is the function of the HRV, -- to provide Acceptable Indoor Air QUALITY.
IN SUMMER
The home needs a cooling effect, this is the function of an air conditioner, -- to provide COMFORT. The home still needs a healthy indoor environment -- this is the function of the HRV, -- to provide Acceptable Indoor Air QUALITY. The key words and differences are COMFORT and QUALITY. An HRV ensures QUALITY and it contributes towards COMFORT, but COMFORT is provided by specialised (Heating and Cooling) appliances. HRV’s provide Indoor Air QUALITY, summer and winter. The rate of ventilation to provide indoor air QUALITY is the same, summer and winter.
SUMMARY
An HRV is most effective as a winter ventilation system to:
Dehumidify and ventilate with 100% fresh outdoor air and to maintain INDOOR AIR QUALITY.
In summer, the HRV will maintain Indoor Air QUALITY, and it will contribute to improving Indoor Air COMFORT, but if the home suffers from excessive heat gain from sunshine on hot summer days, the HRV may not have sufficient capacity provide Indoor COMFORT.
The HRV cannot dehumidify outdoor air when the outdoor air is warmer than indoor air, in these conditions it is a controlled ventilation system that supplies air to, and exhausts air from, the home.
06
WINDOW CONDENSATION: CAUSES & REMEDIES
WHAT IS THIS WATER ON MY WINDOWS?
Water or frost on windows is condensation. Condensation is formed when warm moist air comes in contact with cooler, dry air just as a bathroom mirror will “steam up” after a hot shower. The inside or outside of your window can sweat or fog because of temperature differentials.
ARE MY WINDOWS TO BLAME?
Faulty windows do not cause condensation. Glass is usually the place you first notice condensation because glass surfaces have the lowest temperature of any of the interior surfaces in the house.
THEN WHAT’S THE CAUSE?
The moisture in the air causes condensation. The reason you may observe more condensation in your home is because of modern energy efficient homebuilding techniques and products. The insulation and construction materials used today are designed to keep cold air outside. This is especially true of new windows. While energy efficient designs and weather stripping keep cold air outside, they also keep warm moist air inside. Older window designs were less efficient, and consequently allowed moisture to escape.
If you didn’t have as much condensation before replacing your old windows, it’s probably because they were drafty. Good windows and insulation all create barriers to the air exchange of a home. When combined with the additional water vapor (moisture) from showers, cooking, or from clothes dryers not vented to the outside, the result is excess moisture and a high relative indoor humidity level.
HOW CAN CONDENSATION BE REDUCED?
The key lies in controlling the humidity inside your home. First, let’s understand where the moisture comes from. During the hot humid summer, your house absorbs moisture. The same principle applies to a newly constructed or remodeled home, due to the abundance of moisture from the building materials used in construction.
During the beginning of the winter when you start to heat your home, condensation occurs. After a few weeks, your home will begin to dry out and you’ll see less condensation. Opening a window briefly is a quick temporary solution. The dryer cold air will enter the room while the moist air is allowed to escape.
OTHER STEPS TO TAKE INCLUDE:
• Turn on the HRV.
• Cracking open a window or door daily to air out your house.
• Opening a window or running exhaust fans longer in the kitchen, bathroom and laundry room.
• Opening drapes and blinds, allowing air to circulate against windows.
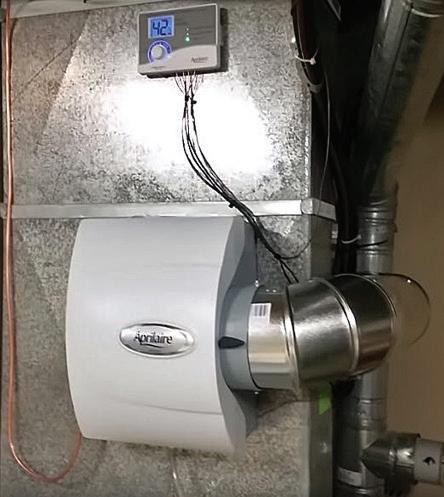
• Turning off any humidifying devices in your home.
• Installing and using a dehumidifier.
If you live in a northern climate, the above as well as the following points may be relevant.
WHEN SHOULD I BE CONCERNED?
Window condensation should only occur during extreme temperature differences and should be of a fairly small amount. During the winter months, condensation will be seen on the inside of the window. Condensation will present itself on the outside of the window during the summer months.
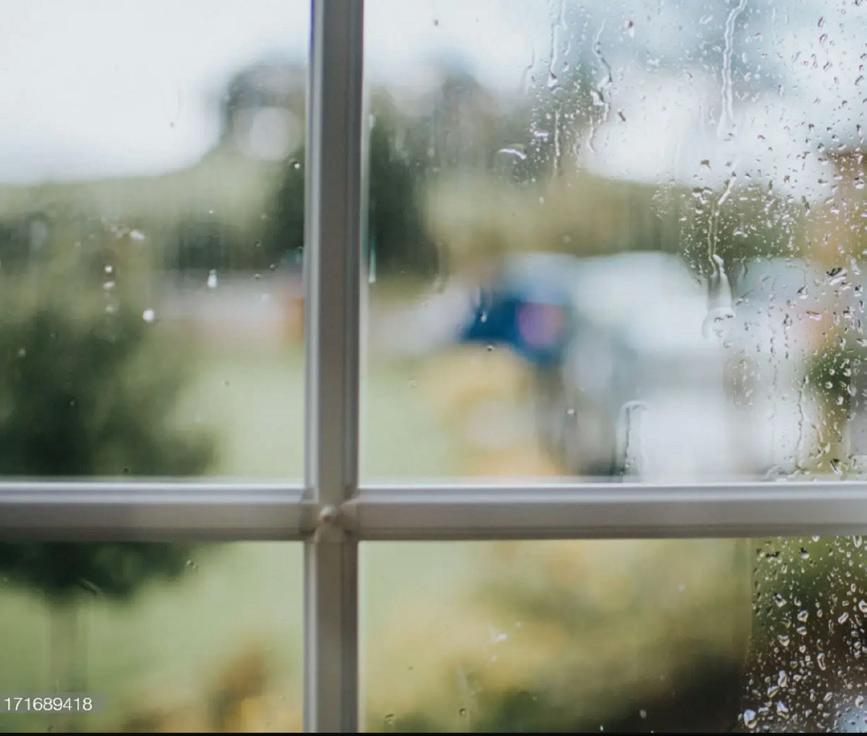
If you find condensation between the two layers of glass in an insulated window, the airtight seal has probably been broken and the glass will need to be replaced.
If there is too much moisture inside the home, you will find evidence during both the cold and warm seasons. Moisture spots on the ceiling or walls, peeling paint, rotting wood or delaminating plywood, moisture on exterior walls, fungus, mold or mildew growth are signs of a more serious moisture problem. Should you experience these symptoms, an expert heating and cooling contractor should be contacted in order to solve your problem.
• Adding storm windows or replacing existing single-pane windows with insulated windows.
• Keeping plants in a sunroom, or in rooms that are infrequently used during extreme cold weather.
• Adding waterproofing protection to basement floors & walls.
• Removing radiator pans until sweating has been eliminated vented to the outside, the result is excess moisture and a high relative indoor humidity level.
Condensation occurs when warm, moisture-laden air comes into contact with a colder surface such as glass. The air temperature in contact with the colder surface suddenly drops, reducing the amount of moisture it can hold. This results in moisture formation, or condensation, occurring on the cold surface.
Condensation is most obvious on uninsulated, heat conductive surfaces like glass, and is less noticeable on surfaces such as plasterboard. Nevertheless, it does occur on all surfaces that are cold enough and becomes apparent by mould growth on walls & ceilings. It can also be seen where ‘pattern’ staining on walls identifies the location of timber framing behind the wall lining.
Condensation causes damage to interior paintwork, the inside surface of wall linings, floor coverings, curtains, and furnishings. It results in increased heating costs (as additional energy is required to convert condensation back into vapour which is taken up by the air as the temperature rises), and presents a health hazard.
Condensation can be controlled in two ways: first, by reducing humidity (by reducing sources of humidity and through effective ventilation as explained above) so that air is less likely to become saturated; second, by reducing the likelihood of warm air coming into contact with cold surfaces. This can be achieved through insulation. Insulated glazing units significantly reduce window condensation.
08
CARE & MAINTENANCE INFORMATION FOR ENGINEERED WOOD FLOORS
PRODUCT WARRANTY CARE & MAINTENANCE GUIDE
For all Kentwood polyurethane finished floors. For information on Natural Oil or UV-Cured Oil finished floors, please visit kentwoodfloors.com or consult your Kentwood dealer.
CARE & MAINTENANCE GUIDE
KENTWOOD TM floors are factory-finished with a durable finish that is designed to provide years of protection and easy care. Some simple care and maintenance procedures will help to keep your KENTWOOD TM floor looking its best and help to protect it from unnecessary wear and damage.
• Sweep or vacuum the floor regularly to keep it clean and free of dust, sand and other abrasive materials.

• Place area rugs or doormats at entryways to help prevent sand, grit, oils, dirt and other abrasive or staining materials from being tracked onto the floor surface from outdoors. (Avoid rubber-backed or similarly dense matting materials that may trap moisture between the mat and the floor; choose mats that enable airflow instead.)
• Place protective mats at high-use work areas such as sinks, ranges, service counters and workstations.
• Protect the floor from any exposure to liquids, water and other forms of moisture. Blot up any spilled food, drink or other liquid immediately. This is especially important for all styles of Elements by KENTWOOD EDGE , Cork and Bamboo flooring. Under no circumstances allow liquid to remain on the surface of these floors longer than 30 minutes. Never wet mop the floor when cleaning. Avoid walking on the floor with wet feet or footwear. Damage caused by flooding, broken pipes, wet mopping or any other exposure to liquid or moisture is not covered by the product warranty.
• Ensure that environmental conditions are maintained with a temperature of 60-80°F (15-26°C) and humidity at 30-50% at all times. Hardwood flooring reacts to changes in the environment. Excessive heat or dryness can result in gapping or splitting; excessive humidity can result in cupping. Gapping, splitting. cupping or other problems resulting from exposure to improper environmental conditions are not covered by the product warranty.
• If the floor is installed over a radiant heating system, never allow the surface temperature of the floor to exceed 82°F (28°C). Avoid dramatic temperature changes; always adjust the system gradually in 5° increments. It is recommended that a dedicated quick recovery thermostat be installed to allow the temperature of the radiant heating system to be accurately controlled. NOTE: This instruction applies only to those styles of KENTWOOD TM floors specifically approved
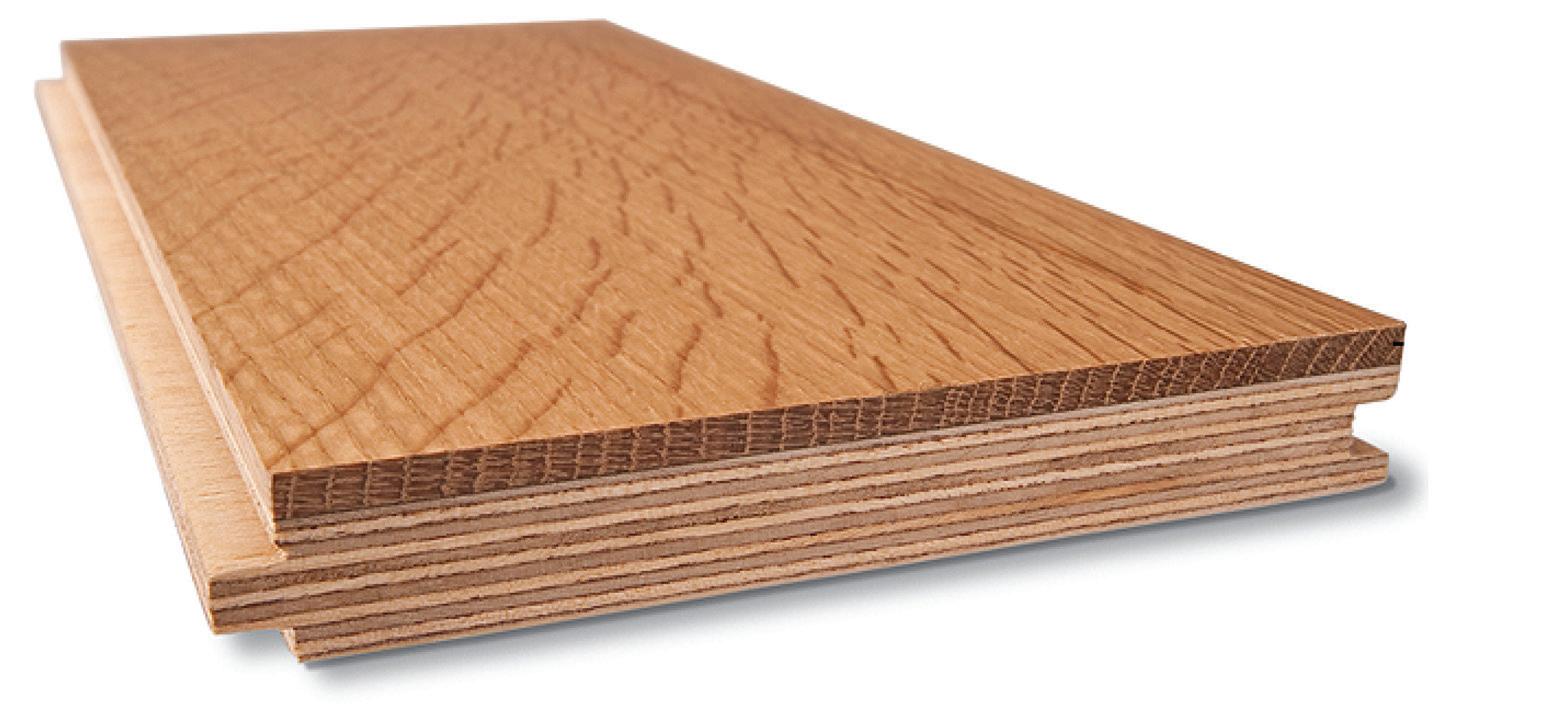
Pywood Core - Helps the flooring retain its shape and stability. A variety of materials such as plywood or HDF can be used
Hardwood Top - Layer made of precious solid hardwood and gives a real solid wood feeling
Backing Layer - This veneer provides additional strenth and foundation to the board
for use over radiant heat.
Installation of KENTWOOD TM flooring that is not approved over a radiant heating system will void the product warranty and may result in damage to the floor.
• Put felt protector pads on the feet of all furniture, display stands, file cabinets and other accessories that will be placed directly onto the floor surface. Inspect regularly for wear and replace as necessary.
• Avoid letting sharp or pointed objects come into contact with the floor surface. Do not walk on the floor with high heeled shoes, sports cleats, or other types of footwear which may damage the finish or cause indentations to the surface.
• Pets’ nails will scratch and mark the floor surface. Keep pets’ nails trimmed to minimize damage to the surface.
• Do not drag, push or roll appliances, furniture or any heavy object across the floor. Use heavy duty moving mats, dollies, or other moving aids to protect the floor surface.
• Hardwood flooring will naturally undergo a change in colour as it adjusts to the ambient light conditions of the installation environment. The degree of colour change varies by species. To ensure a uniform change, it is recommended
that you do not place area rugs on the new floor for sixty days after installation. Thereafter, periodic re-arrangement of furniture and area rugs will help ensure that your flooring colors evenly.
CLEANING
• Sweep or vacuum the floor regularly to keep it free of dust, grit and other abrasive materials.
• Blot up any food, drink or liquid spills immediately. This is especially important for all styles of Elements by KENTWOOD EDGE , Cork and Bamboo flooring. Under no circumstances allow liquid to remain on the surface of these floors longer than 30 minutes.
• For more thorough cleaning, use THERAPY BY KENTWOOD TM Spray Cleanser (available at your dealer). Follow the product instructions.
• Do not use any household cleaners, oils, soaps, waxes or any abrasive materials or scouring agents on the floor.
Failure to follow these floor care instructions may void this warranty.
10
PRODUCT WARRANTY
This warranty applies to the original purchaser and the original site of installation only. The conditions and terms of this warranty are as stated herein and may not be altered by any dealer. installer, agent or distributor of KENTWOOD TM flooring.
MANUFACTURING WARRANTY
KENTWOOD TM warrants that KENTWOOD TM flooring shall not contain manufacturing defects in excess of industry standards (5% of total flooring quantity). If manufacturing defects are present in excess of industry standards, the defective pieces should be returned to the original place of purchase PRIOR TO INSTALLATION. If KENTWOOD TM deems the flooring to be defective, KENTWOOD TM will replace it with an equivalent quantity of the same or similar product at no charge to the customer. If KENTWOOD TM is unable to furnish an equivalent replacement product, KENTWOOD TM may, at its sole discretion, elect to refund to the customer a portion of the original purchase price equivalent to the value of the defective portion of the floor. Under no circumstances will the value of a warranty claim exceed the original purchase price of the product. IT IS THE RESPONSIBILITY OF THE CUSTOMER TO INSPECT ALL PIECES OF FLOORING FOR DEFECTS PRIOR TO INSTALLATION. FLOORING THAT HAS BEEN INSTALLED WILL BE DEEMED TO HAVE BEEN ACCEPTED BY THE CUSTOMER AND WILL NOT BE ELIGIBLE FOR REPLACEMENT. KENTWOOD TM accepts no responsibility for labor costs incurred to remove or install products.
Wood, cork and bamboo are natural products with naturally-occurring imperfections and variations in colour, grain and appearance. Actual flooring products may differ in colour, grain and appearance from illustrations and samples, and variations in colour, grain and appearance will exist in any quantity of the flooring itself. These are not considered defects.
FINISH WARRANTY
When installed in a residential application, KENTWOOD TM warrants that the polyurethane factory finish on KENTWOOD TM floors will not wear through under normal residential traffic conditions and use for a period of:
• 50 years from the date of purchase for products in the COUTURE COLLECTION BY KENTWOOD TM and KENTWOOD ORIGINALS TM product collections.
• 25 years from the date of purchase for products in the ELEMENTS BY KENTWOODT TM product collections.
When installed in a light commercial application, KENTWOOD TM warrants that the polyurethane factory finish on KENTWOOD TM floors will not wear through for a period of 3 years from the date of purchase under light commercial conditions and use. Light commercial applications include salons, professional business offices and reception areas, light retail or specialty stores and boutiques. KENTWOOD TM floors are not recommended for food and beverage service operations, or heavy duty retail stores (eg: food, drug and hardware stores); use in such applications will not be covered by this warranty. Note: KENTWOOD TM floors made from American Cherry or American Walnut are not recommended for commercial use of any kind.
Note: These finish warranties do not apply to KENTWOOD TM products with a Natural Oil or UV-Cured Oil finish.
If wear-through does occur within the warranty period, KENTWOOD TM will, at its sole discretion, either repair the affected portion of the floor or replace it with an equivalent quantity of the same or similar product at no charge to the customer. If KENTWOOD TM is unable to repair the product or is unable to furnish an equivalent replacement product, KENTWOOD TM may, at its sole discretion, elect to refund to the customer a portion of the original purchase price equivalent to the value of the affected portion of the floor. This is the sole
remedy provided by this warranty. Any other incidental or consequential damages or costs incurred by the customer as a result of the imperfect piece of flooring, including any labor costs incurred to remove and re-install affected portions of flooring, will not be covered by this warranty.
To be eligible for a warranty claim, the wear-through must be evident and visible in more than 10% of the total floor surface. Isolated areas of surface wear in high traffic areas (doorways, hallways, service counters, workstations, etc.) are not considered normal wear-through and are not covered by this warranty. Gloss reduction is not considered surface wear.
Scratches, indentations, marks, stains or other damage caused by negligent or accidental exposure to pebbles, grit, sand or other abrasives, pets, insects, high heeled or cleated shoes, fire, product spills, excessive moisture, heat or dryness are not considered normal wear and are not covered by this warranty.
THERE ARE NO OTHER EXPRESS OR LIMITED WARRANTIES EXCEPT AS SET FORTH ABOVE.
WARRANTY EXCLUSIONS AND CONDITIONS
Naturally-occurring imperfections and variations in colour, grain and appearance are inherent to the nature of the product and are not considered defects.
The colour of wood is affected by natural light, and many styles of KENTWOOD TM floors will change color after installation. Colour change is not considered a defect.
New or replacement hardwood flooring may not match display samples, existing flooring, or other products and furnishings in your home.
Installation must be performed in accordance with the installation instructions included with the product and in accordance with local building codes. KENTWOOD TM floors are for indoor residential use only.
Environmental conditions must be maintained as specified, with a temperature of 60-80°F (15-26°C) and humidity at 30-50% at all times. Exposure to higher or lower levels of heal and/ or humidity may result in expansion and/or contraction of the floor boards resulting in separation between joints, cupping or splitting of boards, or other problems. Problems resulting from exposure to levels of heat and/or humidity other than those specified herein are not covered by this warranty.
Where the flooring is installed over a radiant heating system, the installation must conform to the manufacturer’s Special Instructions for Installations Over Radiant Heat, including the placement of approved underfloor heat sensors. After installation, the system must be controlled so that the surface temperature of the floor does not exceed 82°F (28°C) and any changes in temperature are applied gradually to avoid shocking the floor. NOTE: This instruction applies only to those styles of KENTWOOD TM floors are specifically approved for use over radiant heat. Installation of KENTWOOD TM flooring that is not approved over a radiant heating system will void the product warranty and may result in damage to the floor.
Care and maintenance must be carried out in accordance with manufacturer’s instructions.
THESE WARRANTIES ARE NOT TRANSFERABLE. NOINSTALLER, RETAILER, DISTRIBUTOR OR AGENT OF KENTWOOD TM FLOORING HAS THE AUTHORITY TO ALTER THE TERMS OR CONDITIONS OF THESE WARRANTIES.
12
THESE WARRANTIES PROVIDE NO EXPRESS OR IMPLIED COVERAGE AGAINST:
• SCRATCHES, INDENTATIONS, MARKS, STAINS OR OTHER DAMAGE CAUSED BY NEGLIGENT OR ACCIDENTAL EXPOSURE TO PEBBLES, GRIT. SAND OR OTHER ABRASIVES, PETS, INSECTS, HIGH HEELED OR CLEATED SHOES, FIRE, PRODUCT SPILLS, EXCESSIVE MOISTURE, HEAT OR DRYNESS.
• CHANGES IN COLOUR DUE TO EXPOSURE TO LIGHT: VARIATIONS IN COLOUR, TONE, GRAIN PATTERNS AND OTHER NATURALLY OCCURING CHARACTERISTICS OF WOOD.
• PROBLEMS ARISING FROM FAILURE TO FOLLOW MANUFACTURER’S WRITTEN INSTALLATION, CARE AND MAINTENANCE INSTRUCTIONS.
• EXPANSION AND CONTRACTION BETWEEN BOARDS OR ANY OTHER PROBLEMS ARISING FROM EXPOSURE TO IMPROPER HEAT & HUMIDITY LEVELS.
• DAMAGE DUE TO EXPOSURE TO EXCESSIVE MOISTURE FROM ANY CAUSE OR SOURCE, INCLUDING BUT NOT LIMITED TO FLOODING, SPILLS. EXCESSIVE MOPPING OR ANY STANDING LIQUID LEFT LONGER THAN 30 MINUTES ON THE FLOOR SURFACE.
THE FOREGOING IS THE COMPLETE AND EXCLUSIVE STATEMENT OF THE EXPRESS WARRANTIES PROVIDED HEREIN AND IS IN LIEU OF ALL THE OTHER EXPRESS AND/OR STATUTORY WARRANTIES BY THE MANUFACTURER, TO THE EXTENT PROVIDED BY LAW. KENTWOOD TM ASSUMES NO LIABILITY FOR INCIDENTAL OR CONSEQUENTIAL DAMAGES ARISING FROM THE USE OR NON-USE OF THE PRODUCT. HOWEVER, SOME STATES AND PROVINCES DO NOT ALLOW THE EXCLUSION OR LIMITATION OF INCIDENTAL OR CONSEQUENTIAL DAMAGES, SO THIS EXCLUSION MAY NOT
APPLY TO YOU. THIS WARRANTY GIVES YOU SPECIFIC LEGAL RIGHTS AND YOU MAY ALSO HAVE OTHER RIGHTS THAT VARY FROM STATE TO STATE OR PROVINCE TO PROVINCE. THE SOLE REMEDY PROVIDED BY THIS WARRANTY IS THE REPAIR OF IMPERFECT PRODUCTS OR REPLACEMENT OF IMPERFECT PRODUCTS WITH AN EQUIVALENT QUANTITY OF THE SAME OR SIMILAR PRODUCT. IF KENTWOOD TM IS UNABLE TO REPAIR THE PRODUCT OR IS UNABLE TO FURNISH AN EQUIVALENT REPLACEMENT PRODUCT, KENTWOOD TM MAY, AT ITS SOLE DISCRETION, ELECT TO REFUND TO THE CUSTOMER A PORTION OF THE ORIGINAL PURCHASE PRICE EQUIVALENT TO THE VALUE OF THE AFFECTED PORTION OF THE FLOOR. THIS WARRANTY DOES NOT COVER ANY LABOR COSTS INCURRED TO REMOVE OR RE-INSTALL PRODUCTS. UNDER NO CIRCUMSTANCES WILL THE VALUE OF A WARRANTY CLAIM EXCEED THE ORIGINAL PURCHASE PRICE OF THE PRODUCT.
CLAIM PROCEDURE
Claims must be submitted in writing to the KENTWOOD TM dealer where the product was purchased. Please include a copy of the original sales receipt and a photograph showing the cause of claim.
In the event of a claim for an installation over radiant heat, please consult the manufacturer’s Special Instructions for Installations Over Radiant Heat.
The Trademarks KENTWOOD, COUTURE COLLECTION BY KENTWOOD. KENTWOOD ORIGINALS, ELEMENTS BY KENTWOOD and THERAPY BY KENTWOOD are owned by Kentwood Floors Inc. and are used under license. TKC•GenWtty V:i•t

PROPERTIES OF NATURAL STONE
• Natural stone is porous and may stain.
• Small pit holes are common in natural stone. Large pits are filled in by LATITUDE. There may be:
• Extrusions - a small visual crack that does not pose a fault in the material.
• Fissures - a crack with no stone content, commonly no longer than 3” and filled with clear resin.
• Colour and pattern may vary, making it vital to tag the natural stone for your project.
• Colour and pattern may vary from one end of a slab to another.
• Joints and seams are visible and noticeable through touch. Slight variations are to be expected in surface joint seam width and height alignment.
• Seam placement is determined by LATITUDE. Customer input will be considered, but LATITUDE must approve any seam location requests. These requests may affect your quote.
• A signed marble/travertine waiver is required for all marble projects. Marble and travertine are extremely soft and porous.
• Sealing your natural stone every 1 - 3 years is recommended to help prevent staining.
• Natural stone is susceptible to thermal shock. Always use trivets and cutting boards.
• Natural stone can chip with force, especially around the sink (for undermount sinks) and along the edge.
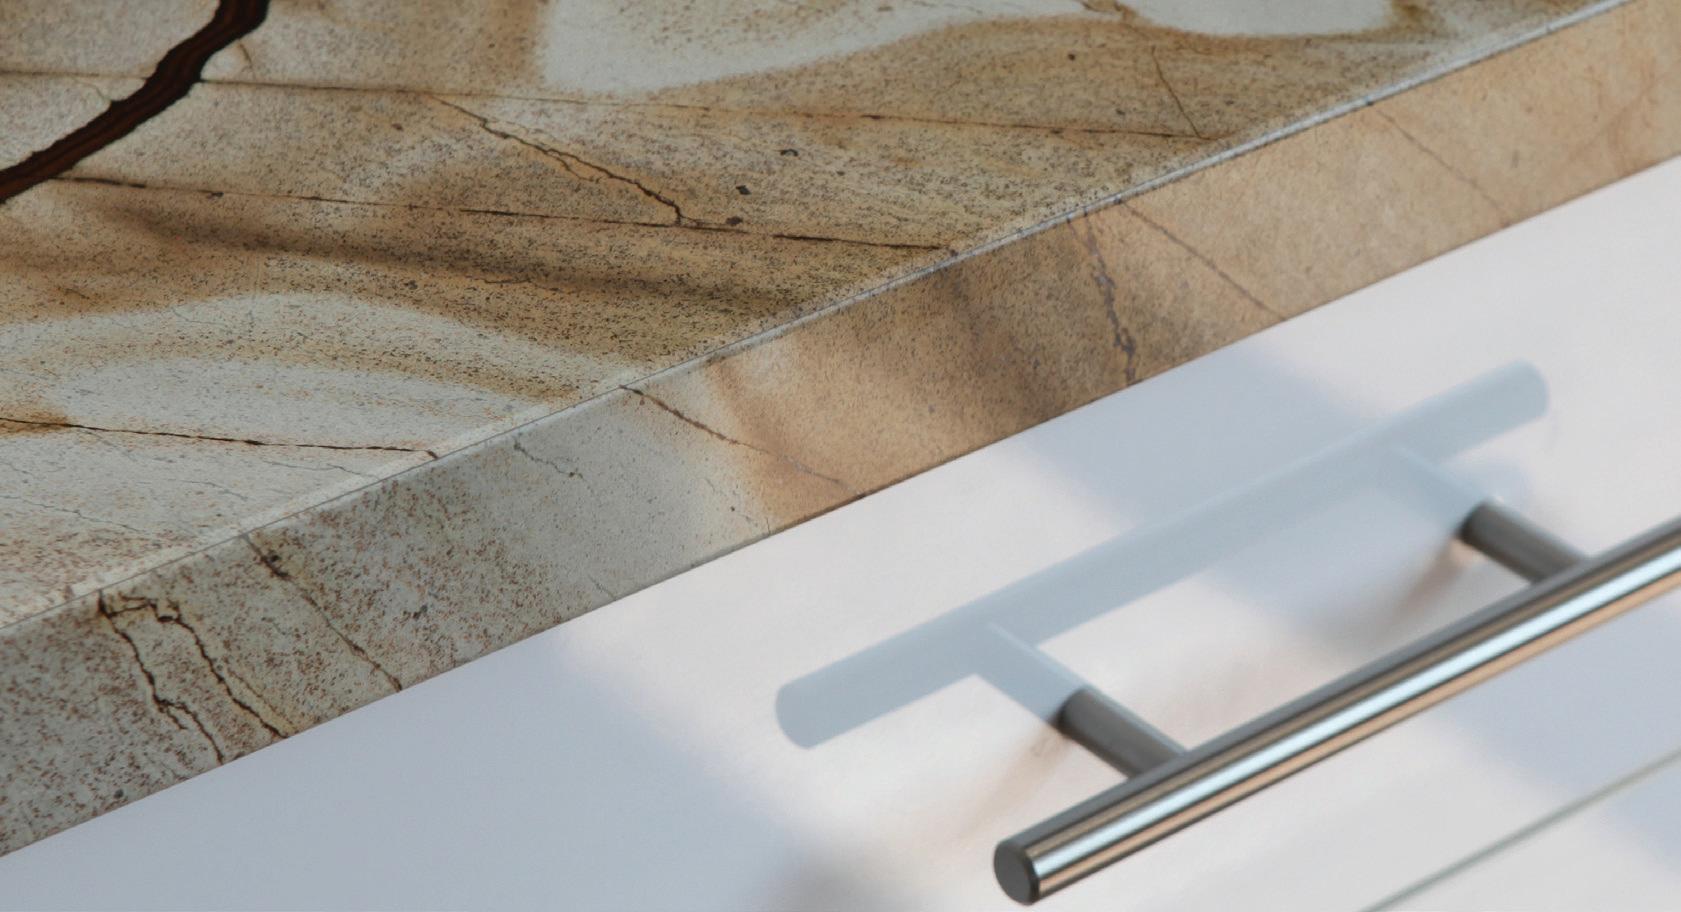
• There is a tolerance of 1/8” or less for gaps between the countertop and wall or gable.
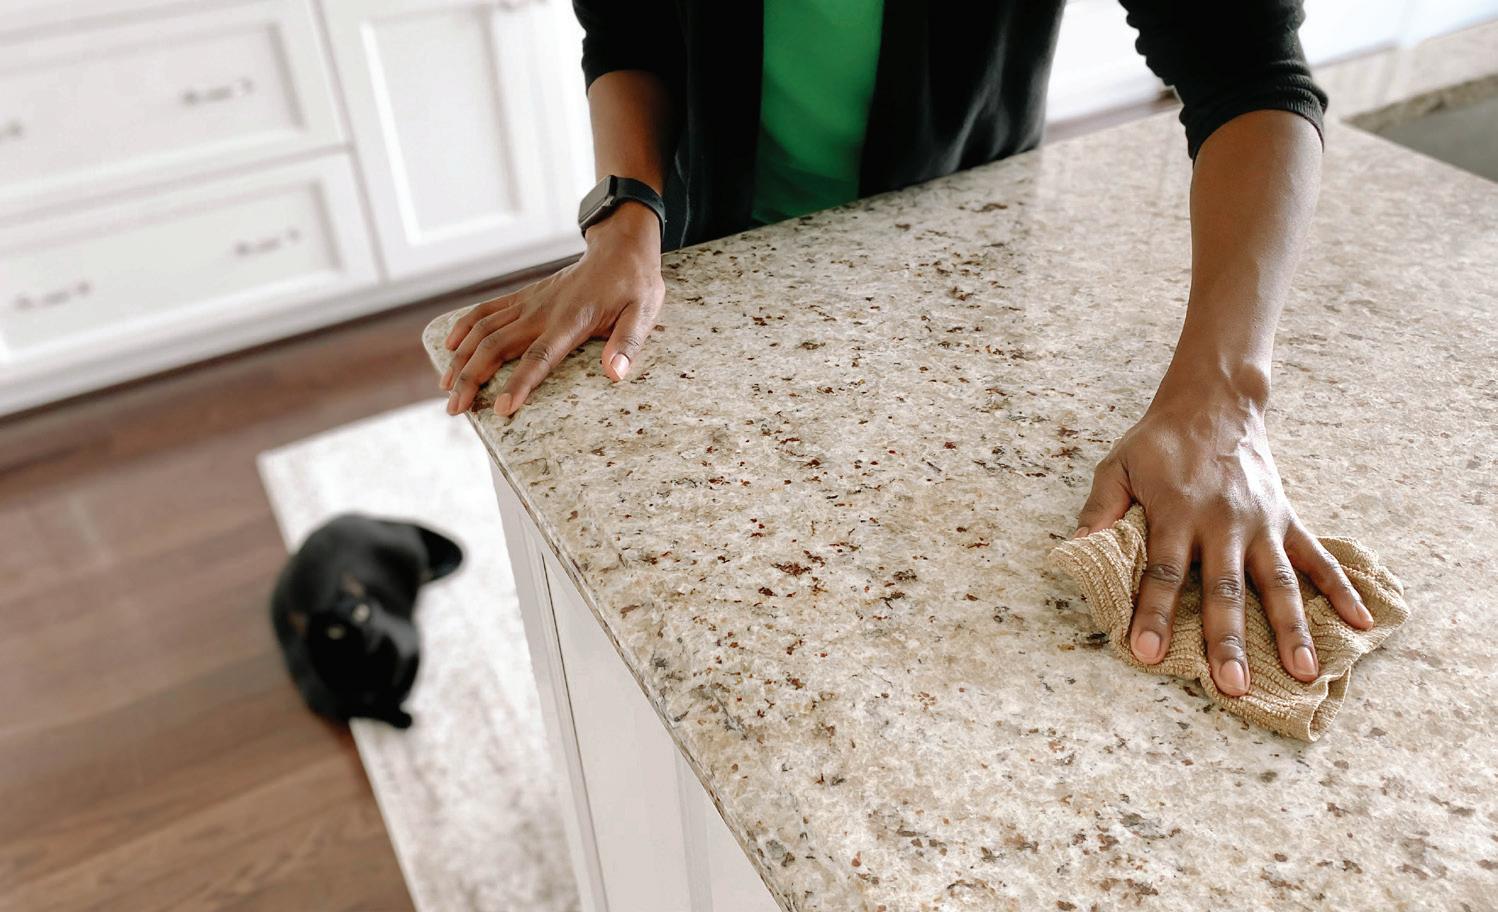
• Dark colours will show seams (including seams in 1 1/2”, 2” and 3” edges) more than lighter colours.
• Does not allow for mitred radiuses in stone surfaces.
• Does not allow for mitres (material is too soft).
14
NATURAL STONE CARE & MAINTENANCE
CARE & MAINTENANCE
Regularly clean natural stone surfaces with mild detergent or with soap and water. Thoroughly rinse and dry the surface after washing. Blot up spills immediately to prevent/minimize permanent staining.
DOS AND DON’TS
• DO use coasters under all glassware, particularly those containing alcohol or citrus juices. Many common foods and drinks contain acids that will etch or dull the surface of many stones.
• DO use trivets or mats under hot dishes to prevent thermal shock.
• DO use place mats under china, ceramics, silver or other objects that can scratch the surface.
• DON’T place hot items directly on the stone surface.
• DON’T use vinegar, lemon juice or other cleaners containing acids on granite, marble, limestone, travertine or onyx surfaces.
• DON’T use abrasive cleaners.
• DON’T mix bleach and ammonia; this combination creates a toxic and lethal gas.
• DON’T ever mix chemicals together unless directions specifically instruct you to do so.
TREATING STAINS
Blot the spill with a paper towel immediately. Don’t wipe the area, it will spread the spill. Flush the area with mild soapy water and rinse several times. Dry the area thoroughly. Repeat as necessary.
STAIN SPECIFIC CLEANING / OIL-BASED
(grease, tar, cooking oil, milk, cosmetics) Clean gently with a soft, liquid cleanser with bleach, household detergent, ammonia, mineral spirits or acetone.
PAINT
Small amounts can be removed with lacquer thinner or scraped off carefully with a razor blade. Paint strippers can etch the surface of the stone; re-polishing may be necessary. Follow the manufacturer’s directions for use of these products, taking care to flush the area thoroughly with clean water. Protect yourself with rubber gloves and eye protection, and work in a well-ventilated area. Use only wood or plastic scrapers for removing the sludge and curdled paint.
WATER SPOTS AND RINGS
Surface markings due to the accumulation of hard water may be buffed out with dry 0000 steel wool.
SCRATCHES AND NICKS
Slight surface scratches may be buffed with dry 0000 steel wool. Deeper scratches and nicks in the surface of the stone should be repaired and re-polished by a professional.
This information is found at: www.marble-institute.com
PROPERTIES OF QUARTZ
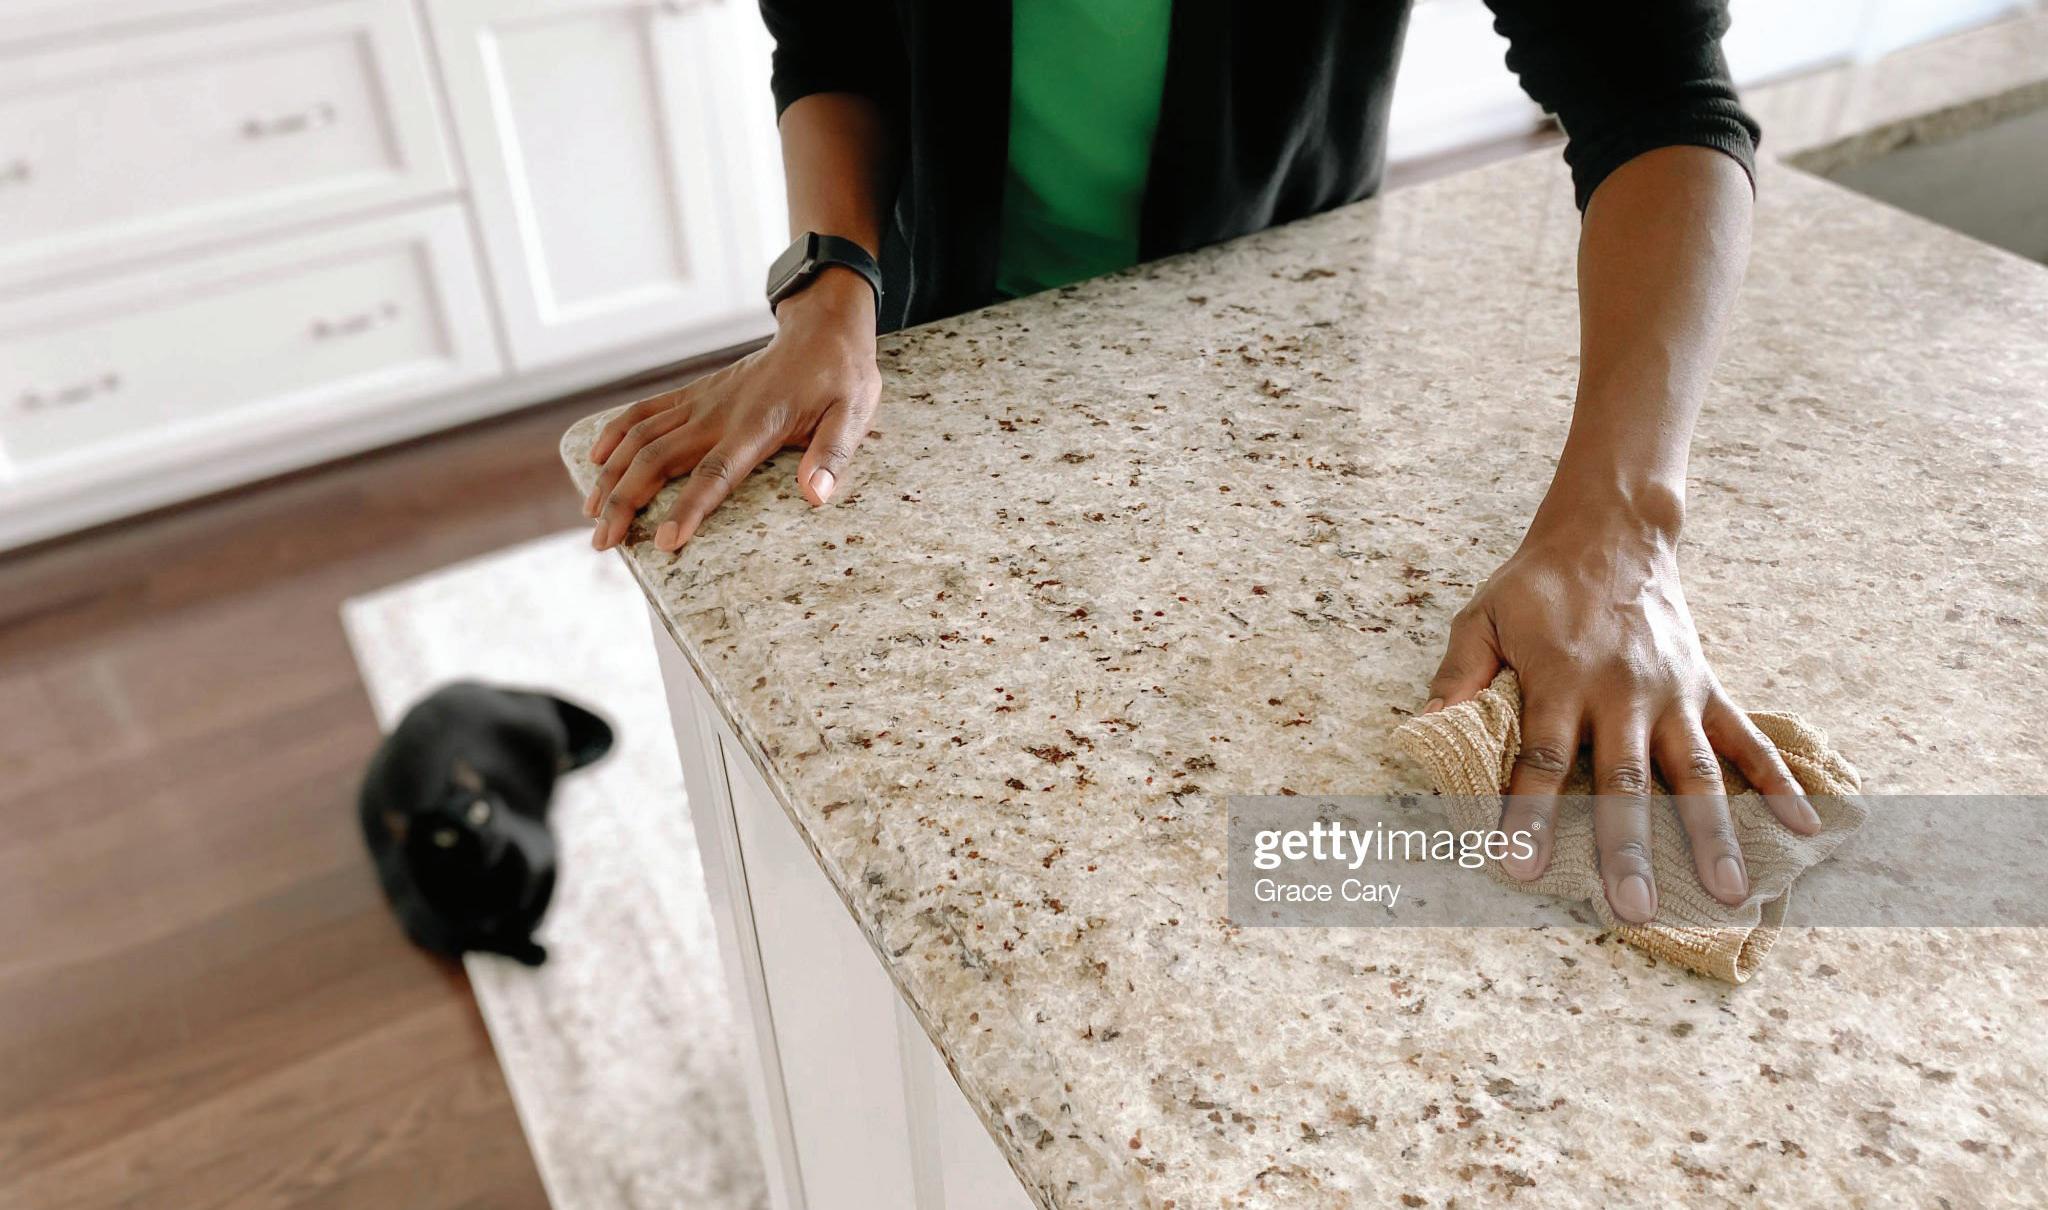
• Quartz surfaces are nonporous and therefore stain resistant.
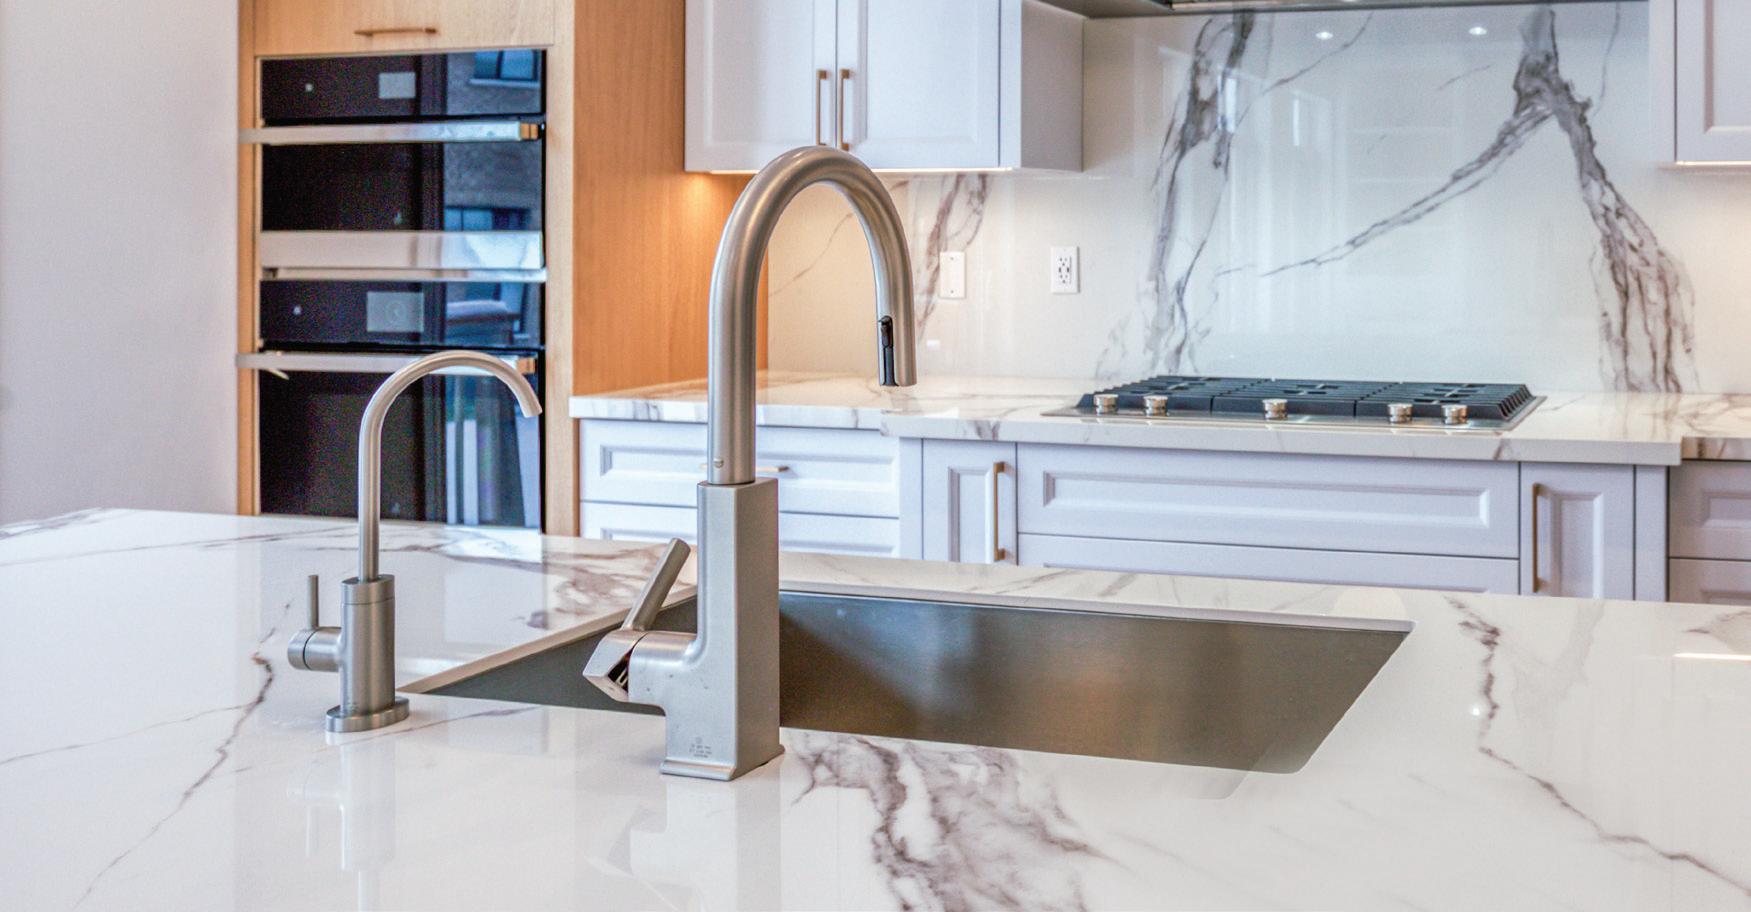
• Quartz surfaces are scratch resistant due to the hardness of quartz.
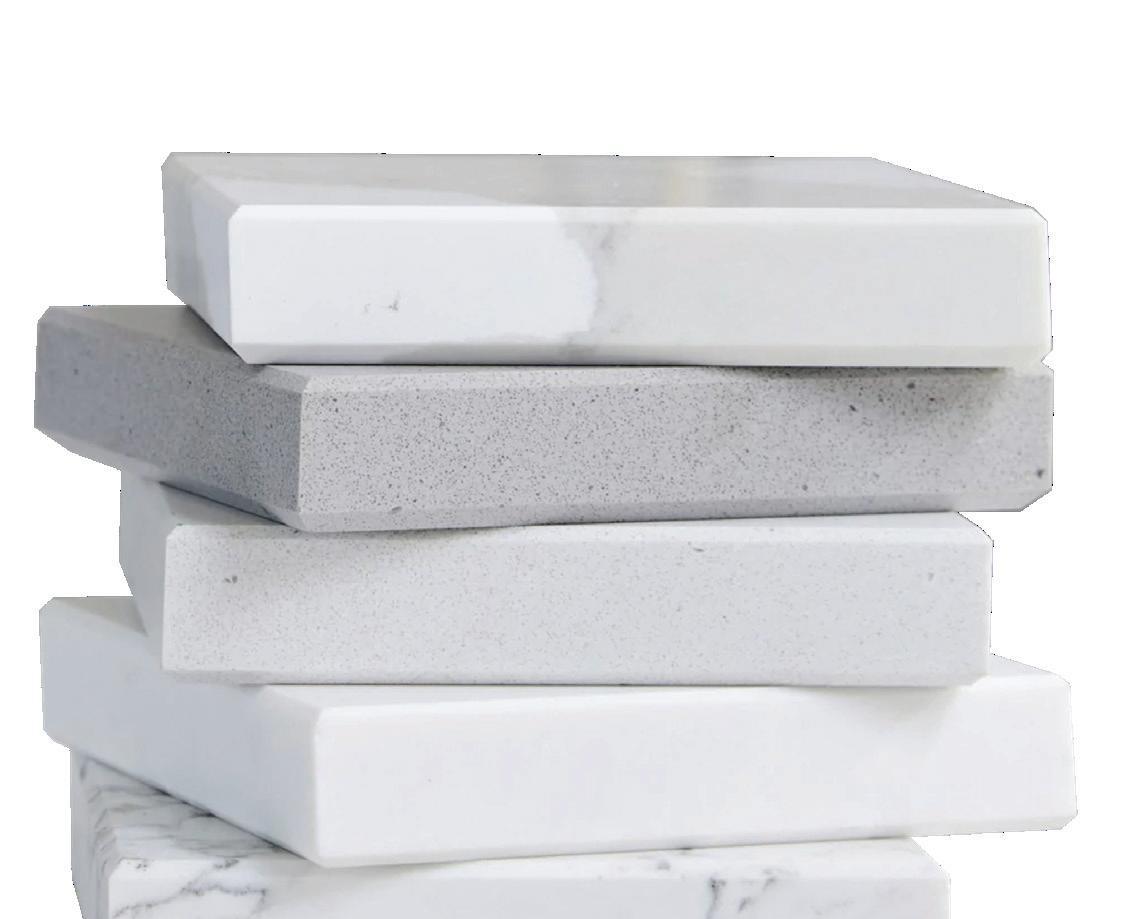
• Quartz surfaces are composed of natural minerals, pigments and binders. There may be slight variances in colour, shade and particle structure. Pooling of particles are not considered defective.
• Joints and seams are visible and noticeable through touch. Slight variations are to be expected in surface joint seam width and height alignment.
• Seam placement is determined by LATITUDE. Customer input may be considered but LATITUDE must approve any seam location requests.
• Quartz surfaces are susceptible to thermal shock. Always use trivets.
• Quartz surfaces can chip with force especially around the
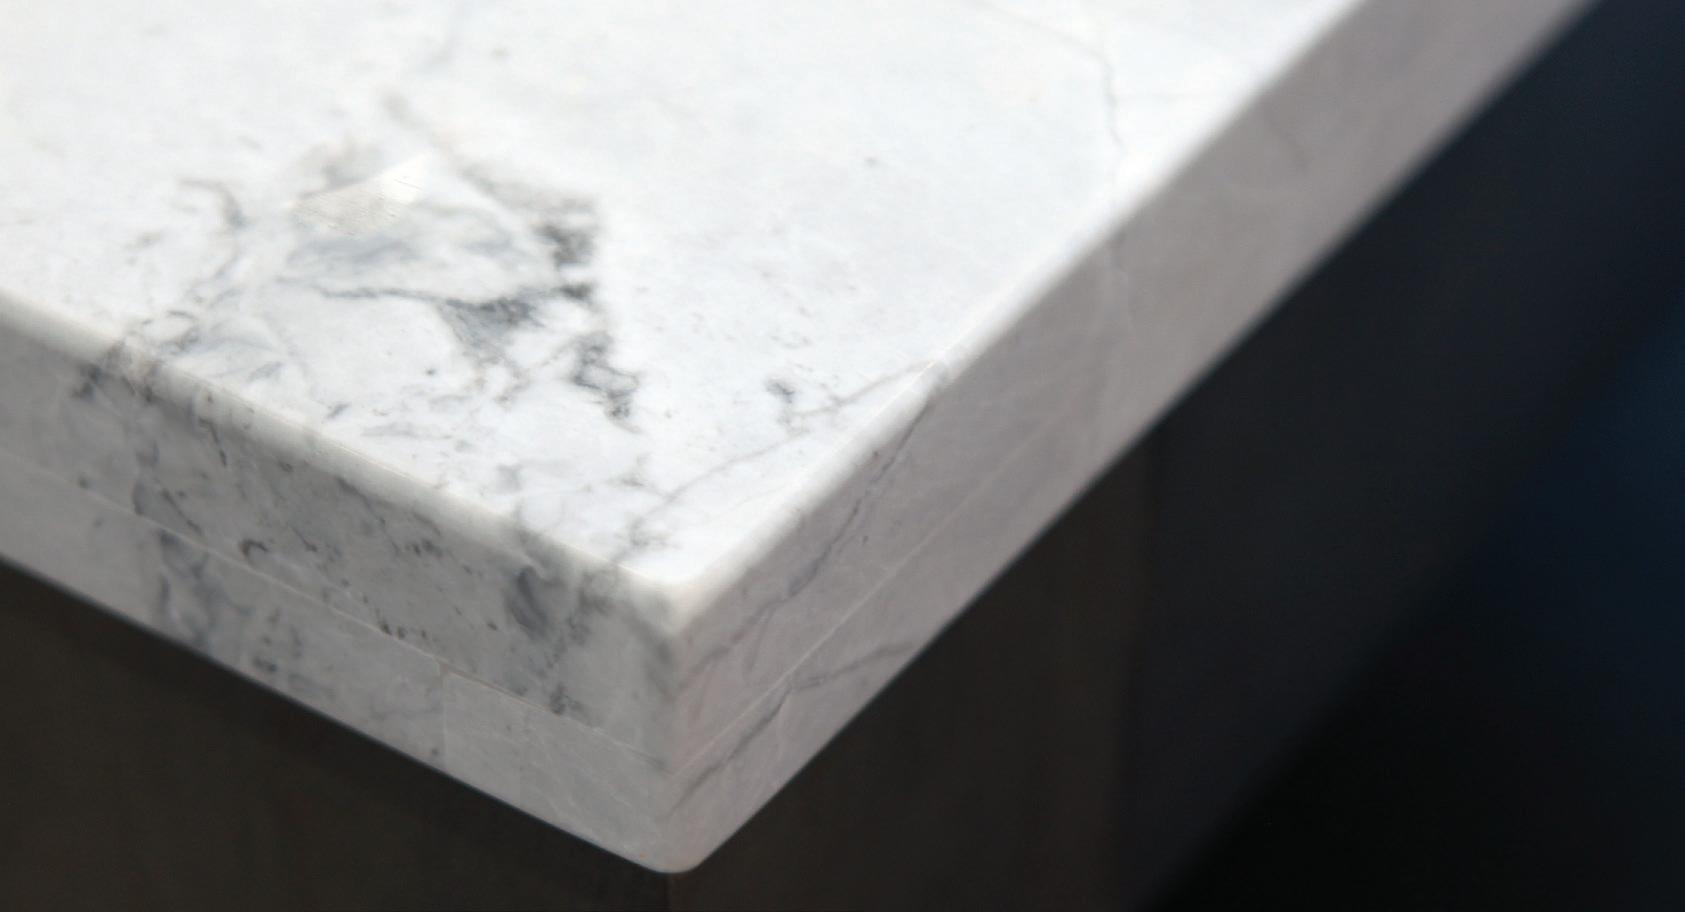
sink (for undermount sinks) and along the edge. Although a 1/8” top radius is now standard procedure for eased edges, this kind of chipping is not covered under warranty.
• There is a tolerance of 1/8” or less for gaps between the countertop and wall or gable.
• Dark colours will show seams (including seams in 1 1/2”, 2” and 3” edges or “lamination seams”) more than lighter colours.
SILESTONE
• ZEN and LIFE series colours reveal a very noticeable surface and lamination seam.
• Leather texture shows daily living more than polished Silestone. It marks and shows finger prints (especially in dark colours). Scrub lightly with a light abrasive cleaner and a Scotch Brite pad®.
• Colour may have slight variations.
16
QUARTZ CARE & MAINTENANCE
CARE & MAINTENANCE
Clean with a damp cloth and a small amount of detergent. Quartz will withstand exposure to tea, soda, wine, vinegar, lemon juice, and strongly coloured spices. Just wipe away and the surface is like new again. We recommend that you remove the stains ASAP and avoid overnight saturation for ease of cleaning.
REMOVING DIFFICULT SPILLS
Any multi-purpose cleaner or detergent can be used on these stains. For extra stubborn spills, use a Mr. Clean Magic Eraser® or a soft scrub to lift the dirt. It will not damage the tough surface. Cleaning liquids such as bleach are also good for removing tough stains.
SPOT REMOVAL
To remove adhered materials such as food, gum, nail polish, dried paint, first scrape away the excess with a sharp blade. If there are any grey metal marks on the surface, one of the regular cleaning agents will remove it. Finally wash and rinse the surface in the normal way.
POLISHING
Quartz is non-porous and will therefore keep its lustrous gloss and ultra-smooth surface without polishing. However, occasional home polishing can enhance stain resistance and ease of cleaning. Granite polishing agents may be used for this purpose.
HEAT RESISTANCE
Quartz is not affected by heat below 400°F and can tolerate moderately hot temperatures for brief periods of time without warping, discolouring or sustaining other damage. This makes our surfaces ideal for kitchens. However, take care to avoid thermal shock by using a hot pad/trivet at all times.
As with any surface, Quartz can be permanently damaged by exposure to strong chemicals and solvents that undermine its physical properties. Do not use products that contain trichlorethane or methylene chloride, such as paint removers or paint strippers. Avoid any highly aggressive cleaning agents such as oven/grill cleaners that have high alkaline/pH levels.
BACTERIA FREE
Although bacteria cannot penetrate the quartz it can form on the surface if left there. As with any countertop, regular maintenance will keep it clean.
THERMAL SHOCK ON QUARTZ COUNTERTOP
CARE & MAINTENANCE
Thermal shock occurs when a very hot object (see the list below) is placed upon a countertop and the surface then cracks. It can occur in both natural stone countertops and engineered stone countertops. The best way to prevent this, is to always use a trivet. Thermal shock is not covered under warranty and is not considered a defect in the material.
Thermal shock occurs when a thermal gradient causes different parts of an object to expand by different amounts. This differential expansion can be understood in terms of stress or of strain, equivalently. At some point, this stress overcomes the strength of the material, causing a crack to form.
OBJECTS THAT MAY CAUSE THERMAL SHOCK
• Extremely hot liquids
• Steam from dishwasher
• Hot electrical appliances or receptacles
• Hot pans or trays from the oven, etc.

18
Always use trivets or hot pads when placing hot objects on any countertop surface.
KITCHEN MAINTENANCE & WARRANTY INFORMATION
CONGRATULATIONS ON BEING THE PROUD OWNER OF A NEW FRENDEL KITCHEN
We trust you are already enjoying your new kitchen. To help you protect your investment, we’ve included some tips for keeping your kitchen looking it’s best for many years to come. You’ll be pleased to know that your purchase also includes a
full two-year warranty against manufacturing defects. Should a problem arise, please don’t hesitate to contact our Customer Care department or visit our website. Again, Thank you for choosing Frendel Kitchens Limited.
THE DO’S
CONTROL HUMIDITY IMMEDIATELY WIPE SPILLS
USE TOUCH UP PUTTY STICKS & STAIN PENS
THE DONT’S
USE MILD SOAP & DAMP CLOTH
BLOT A PASTE OF BAKING SODA & WATER FOR BAD STAINS
AVOID STEAM & HEAT AVOID DIRECT SUNLIGHT AVOID EXCESSIVE WATER
AVOID HARSH CHEMICALS AVOID ABRASIVE CLEANING MATERIALS
DON’T CUT DIRECTLY ON TOP OF LAMINATE COUNTERTOP
EFFECTS OF STRUCTURAL CHANGES IN YOUR NEW HOME
When your new house is being built the structural members and various materials are fitted in place to suit the requirements which exist at the time of construction. Once the house is completed it will start to settle. The settling may cause structural changes in the house. Structural changes in the building may result in changes in your cabinets and/or countertops — cabinet doors may go out of adjustment, or caulked joints may separate. Cabinet doors can be adjusted as per instructions which follow.
CARING FOR CABINETS AND DOORS
GENERAL CARE
Use mild soap and a damp cloth to clean your cabinets. Avoid using harsh chemical cleaners such as bleach, ammonia, paint and gum removal solvents, or abrasive materials. Excess water may damage your cabinets (causing discolouration, peeling or warping). Wipe up excess water immediately.
APPLIANCES
Steam and heat can damage your cabinets. They can warp wood, discolour, delaminate components, peel the finish, leave spots and split joints. In cases of exposure to extreme heat, burn marks or fires could result.
Avoid exposing the upper cabinets to steam from kettles, coffee makers, bottle warmers, rice steamers etc. Also ensure that your stove top is flush with or above the adjacent countertop ends in order to prevent lifting or separation of the countertop edge. In the case of self-cleaning ovens, it is possible that the heat generated through the sides of the oven can cause damage. It is also possible that if pots boil over and liquid runs down the sides of the stove, the adjacent cabinet sides can sustain damage.
AMBIENT ENVIRONMENT
Smoke, sunlight and humidity can be present and cause damage. High humidity can warp wood, low humidity can cause shrinkage
or cracking; also smoke and direct sunlight can discolour finish. The recommended average residential relative humidity level is between 35% and 45%. This range will provide the best comfort for your family, while helping to protect your kitchen cabinets, musical instruments, drywall, wooden furniture and other belongings or materials from the damaging effects of dryness or excessive moisture.
CARE OF LAMINATE COUNTERTOPS
GENERAL CARE
• Avoid dropping heavy objects on them. Laminate countertops are pretty tough, but the laminate itself can be damaged by a particularly nasty drop. Take care when lifting heavy items onto the counters or over them.
• Never place hot pots or dishes directly from the oven or burner on an unprotected laminate surface; such extreme heat can cause cracking or blistering. As a rule, a maintained temperature of 285°F can discolor a laminate. Contact adhesives typically can be reactivated or soften at around 200°F, which will allow the laminate to pull loose.
• Avoid cuts. Make sure not to cut directly on the surface of laminate counters. Use cutting boards, stones or plates instead to protect the finish and surface of the counters. This practice is required for just about every countertop out there. Using the right cutting techniques not only protects the counters, it also protects the knives.
• Never let water or any other liquid sit on the surface of the countertop. Although the laminate is water resistant, it is not waterproof. After cleaning or wiping down the counter, it is equally important to wipe it down with a cloth to dry the surface. Any joints or finished ends are highly susceptible to water damage as they are a point of entry. Avoid locating coffee makers, steamers on the joints of countertops will result in an uneven joint, as the water will have caused the substrate material to expand creating an undulating surface.
• Don’t use harsh chemicals. Harsh chemicals that have acid in the mix do not go well with laminates. Avoid using drain unclogging agents, metal cleaners, ceramic cleaners rust and lime removers and even vinegar and water on or near these counters. Wipe up any spills immediately with water, and dry
20
LAMINATE COUNTER CLEANING RECOMMENDATIONS
• Simple cleaning. Wipe up these counters with a clean, soft cloth for basic, everyday cleaning. This will help remove surface dust and dirt without damaging finish.
• Tough stains. Mild household cleaners generally work very well on getting stains out. Avoid using harsh abrasive cleansers. Do not use abrasive sponges or steel wool on laminates. For really bad stains, create a paste out of baking soda and water. Blot this up rather than scrubbing and scraping. Take care to wipe up spills as quickly as possible as laminates can stain permanently.
ALIGNMENT OF CABINET DOORS AND DRAWERS DOORS
Frendel standard warranty covers initial touch-ups and adjustment of hinges. It is the homeowner’s responsibility to readjust hinges to correct misalignment of doors and drawers caused by normal use.
The diagrams below illustrate how to easily adjust your hinges using only a phillips head screwdriver.
THR E E - DIM ENSIONAL ADJUSTM ENT SIDE ADJUSTMENT
Rot ate front
HEIGHT ADJUSTMENT
Rot ate
adjust
mountin
an
DEPTH ADJUSTMENT
Rot ate rear S p
to adjust d
CLIP hin ges,
reti
s c rew to in c rea se or d e c rea se d o or over lay +/ 2 mm
c am sc rew on mountin g p late to
d o or p osition ( +/ 2 mm) O n non c am
g p lates, lo osen sc rews, adjust d o or
d reti ghten sc rews.
iral Te c h c am s c rew
o or p osition ( + 3 mm, 2 mm). For
lo osen rear sc rews, adjust d o or an d
ghten sc rews. © 2012 Blum, Inc. Subject to technical modifications without notice.12 EXPANDO Pre at tached Ø8 mm expanding dowels INSERTA Tool free at tachment (cup expands into Ø35 mm hole) Thr e e dim ensional adjustm ent Side adjustment Rotate front screw to increase or decrease door overlay +/ 2 mm Height adjustment Rotate c am screw on mounting plate to adjust door p osition ( +/ 2 mm) On non c am mounting p ates, loosen screws, adjust door and retighten screws Depth adjustment Rotate rear Spira Tech c am screw to ad ust door p osition ( +3 mm, 2 mm). For CLIP hinges, loosen rear screws, adjust door and retighten screws M ounting plate to cabinet Screw on EXPANDO INSERTA Hinges and images provided by 1 3 2 ± 1.5 Seitlich verstellen / Side adjustment / Réglage latéral / Regulacja boczna Höhe verstellen / Height adjustment / Réglage de hautuer / Regulacja wysokości 1 2 2 ± 1.8 2 Montage et réglage / Montaż i regulacja Front / Front / Face / Front Seitlich verstellen / Side adjustment / Réglage latéral / Regulacja boczna Höhe verstellen / Height adjustment / Réglage de hautuer / Regulacja wysokości ZML.1510 ZML.1500 ZML.8000.02 ZML.805S 3 1 2 1 2 13 ± 1.8 2 SIDE ADJUSTMENT HEIGHT ADJUSTMENT TILT ADJUSTMENT DOOR ADJUSTMENT DRAWER ADJUSTMENT
COLOUR MATCHING
WOOD GRAIN
It is quite normal to observe slight colour differences in some areas of your kitchen. Different grains and cuts of wood will accept the same finish in varying ways. The angle of viewing and lighting will also effect colour. What you are actually observing is how the wood itself looks under a uniform coat of finish.
EFFECTS OF SUNLIGHT
Natural sunlight contains Ultra Violet (UV) light rays that may the appearance of cabinets. According to the American Society of Testing Materials (ASTM) standards, the actual results in a home will vary depending on these three factors:
Exposure to light (for example, direct from the south, east or west, or indirect from the north).
• The portion of the cabinet that receives the light (top, base, etc.)
• The wood itself. The finish does not change color, the wood itself will.
• Generally, Maple is more susceptible to changes than Oak because it is lighter.
• Maple’s natural colour variation is from nearly white to slightly reddish brown, whereas Oak varies from brown to very dark brown.
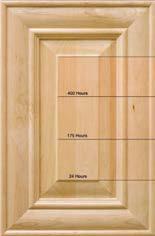
EXAMPLE OF UV EXPOSURE
This picture is a facsimile to illustrate the tested effect of 24,175 and 400 hours of UV exposure equal to that experienced at noon, on a finished maple door.
REPLACEMENT BULBS FOR YOUR EXHAUST FAN
Use the form below to purchase replacement bulbs for your Frendel supplied exhaust fan unit.
Note that adapter sockets are also available at Amazon to convert the European base sockets on our Italian exhaust fans to more readily available North American chandelier bulbs.
TOUCH UP STAIN PENS AND PUTTY STICKS
Kitchens are the focal point of both family activity and social occasions. There is a lot of traffic in the kitchen every day, and some wear and tear is inevitable.
Frendel Kitchens sells touch up putty sticks and stain pens through the Kitchen and Bath Design Studio. Call 866-373-6335 to order.
SLIDE-IN STOVES, IN-COUNTER COOKTOPS
Prospective home buyers are advised to provide their builder with appliance specifications at time of purchase to ensure that the appliances are accommodated in the kitchen design.
Gas Slide-in Stoves and In-Counter Cook tops must delete countertop backsplash per Ontario Building Code.
Prep for Slide-in Stoves and In-Counter Cook tops will be performed by the Service Department only after the appliance is on the premises to allow verification of actual measurements.
It is the homeowner’s responsibility to contact Service at 905-670-7898 to arrange an appliance prep appointment. Allow up to 3 working days for the appointment after the day of contact.
22
Frendel Kitchens warrants, only to the original end-user of the products it manufactures, against material defects and workmanship of its products for a period of two (2) years from either:
a) The date of purchase by the end-user; or (b) the date of installation by an authorized Frendel Kitchens agent (the “Warranty Period”).
If a defect should be detected within the Warranty Period, Frendel Kitchens will repair and/or restore its product to the product’s original specification(s); or replace the product, at its sole discretion.*
This limited warranty is limited solely to the value of defective Frendel Kitchens products and applies only to those products which are stored, handled and installed in the manner recommended within our guidelines. Frendel Kitchens is not responsible or liable for any indirect, consequential or incidental damages sustained to the product during its use by the user.
RESTRICTIONS
This Warranty does not cover or apply to:
a) Physical transformations or alterations occurring to the product due to natural, inherent wood characteristics that predispose the product to changes in grain patterns or finish, or other transformations that may arise due to factors which may include, but are not limited to ambient environmental variables such as: sunlight or artificia lighting, extreme temperatures, humidity, poor ventilation, contact with water, and normal wear and tear;
b) Variances in manually applied specialty finishes;
c) Frendel Kitchens product that has been handled, modified
LIMITED WARRANTY CERTIFICATE
or repaired by persons not employed, approved, or authorized by Frendel Kitchens;
d) Instances where a defect appears or where a repair is required after misuse, abuse, negligence, accidents, improper use or installation, or lack of precaution, care, or normal maintenance during use;
e) Longevity of use of the Frendel Kitchens product;
f) Damage or expenses incurred during removal, shipment and/or installation;
Frendel Kitchens Limited reserves the right to change or alter materials and specifications due to ongoing product development. Material and specification changes compromising aesthetic appeal are not valid reasons for product refusal or replacement under warranty claims. Providing that the product sold is defective, which is to be determined within the terms of this warranty at the discretion of Frendel Kitchens, the original end-user may rely on the warranty by contacting either the dealer or builder from which the product was purchased/acquired by the end-user; or if purchased directly, by contacting Frendel Kitchens
Limited. This warranty is hereby the sole warranty given by Frendel Kitchensand no authorized Frendel Kitchens representative is sanctioned to extend the terms of this warranty on its behalf. All other warranties express or implied are hereby excluded from this limited warranty.
This warranty is limited solely to original end-users, which are qualified as initial purchasers of new Frendel Kitchens products from Frendel Kitchens directly, or through its authorized agents or retailers.
*All Blum drawer systems and hinges are covered by a lifetime warranty.
SEASONAL MAINTENANCE CHECKLISTS
You’ve made a big investment in your home, and proper maintenance not only keeps it in good condition, it also helps ensure your statutory warranty rights are protected. Proper maintenance is a prerequisite for certain warranty claims.
Tarion has developed Home Maintenance Checklists. Each checklist includes a monthly breakdown of items for inspection, and is intended to assist homeowners to set up a regular schedule of check-ups and clean-ups.
Below, you’ll find Checklists for each month specifically to help assist you with preparing your new home for each season’s changes.
WINTER HOME MAINTENANCE CHECKLIST
December
• Check air ducts
• Check for excessive snow on roof
• Clean furnace filter and heat recovery ventilator (HRV)
• Clean humidifier
• Check and reset ground fault circuit interrupter (GFCI)
• Test smoke alarms and carbon monoxide detectors
January
• Clean furnace filter and HRV
• Check furnace fan belt
• Check water heater
• Check exhaust fans
• Clean humidifier
• Remove snow and ice from roof overhang/vents
• Check and reset GFCI
• Test smoke alarms and carbon monoxide detectors
February
· Clean furnace filter and HRV
· Check inside surfaces
· Remove snow and ice from roof overhang/vents
Check and reset GFCI
SPRING HOME MAINTENANCE CHECKLIST
March
• Clean furnace filter and heat recovery ventilator (HRV)
• Check attic
• Check sump pump (if installed)
• Clean humidifier
• Remove snow and ice from overhang and vents
• Check and reset ground fault circuit interrupter (GFCI)
• Test smoke alarms and carbon monoxide detectors
April
• Check eavestroughs and downspouts
• Clean furnace filter and HRV
• Clean humidifier
• Inspect basement or crawl spaces
• Check roof for loose or cracked shingles
• Check driveways and walks for frost damage
• Check water heater for leaks
• Turn on exterior water supply
• Plan landscaping to avoid soil settlement & water ponding
• Check and reset GFCI
• Test smoke alarms and carbon monoxide detectors
24
May
• Inspect fences
• Check caulking for air and water leaks
• Lubricate weatherstripping
• Check exterior finishes
• Check windows and screens are operating properly
• Check septic system (if installed)
• Check and reset GFCI
• Test smoke alarms and carbon monoxide detectors
SUMMER HOME MAINTENANCE CHECKLIST
June
• Inspect air conditioning
• Check roof
• Check sheds and garages
• Check sealing around windows and doors
• Check septic system and clean if necessary
• Fertilize lawn
• Check water heater
• Check and reset ground fault circuit interrupter (GFCI)
• Test smoke alarms and carbon monoxide detectors
July
• Air out damp basements on dry, sunny day
• Clean air conditioner
• Check exhaust fans
• Check water heater for leaks
• Check and reset GFCI
• Test smoke alarms and carbon monoxide detectors
August
• Clean air conditioner filter
• Air out damp basements on dry, sunny days
• Inspect driveways and walks
• Inspect doors and locks
• Check and reset GFCI
• Test smoke alarms and carbon monoxide detectors
FALL HOME MAINTENANCE CHECKLIST
September
• Check exterior finishes
• Check garage door tracks and lubricate bearings
• Check caulking for air and water leaks
• Plant new lawn
• Check fireplace and chimney
• Check basement or crawl spaces
• Have humidifier, furnace and HRV serviced
• Check clothes dryer vent
• Check and reset ground fault circuit interrupter (GFCI)
• Test smoke alarms and carbon monoxide detectors
October
• Check windows and screens
• Drain exterior water lines
• Check roof including shingles, flashing and vents
• Check weatherstripping
• Check sealing around windows and doors
• Check septic system
• Winterize landscaping and remove leaves
• Clean furnace filter and HRV
• Clean water heater
• Shut off exterior water supply
• Check eavestroughs and downspouts
• Clean humidifier
• Check and reset GFCI
• Test smoke alarms and carbon monoxide detectors
November
• Check attic
• Inspect floor drains to ensure trap is filled with water
• Clean furnace filter and HRV
• Check for condensation and humidity
• Check and reset GFCI
• Test smoke alarms and carbon monoxide detectors

Lakeview Homes Head Office / 200 Bridgeland Avenue, Toronto, Ontario / Canada M6A 1Z4 / 416-785-8172 LAKEVIEWHOMESINC.COM


