10 minute read
PROPS
Overhaul or LPIP?
Ruth Kelly’s RV-8’s constant speed propeller goes to Proptech for its six-year inspection. Will it be LPIP or complete overhaul?
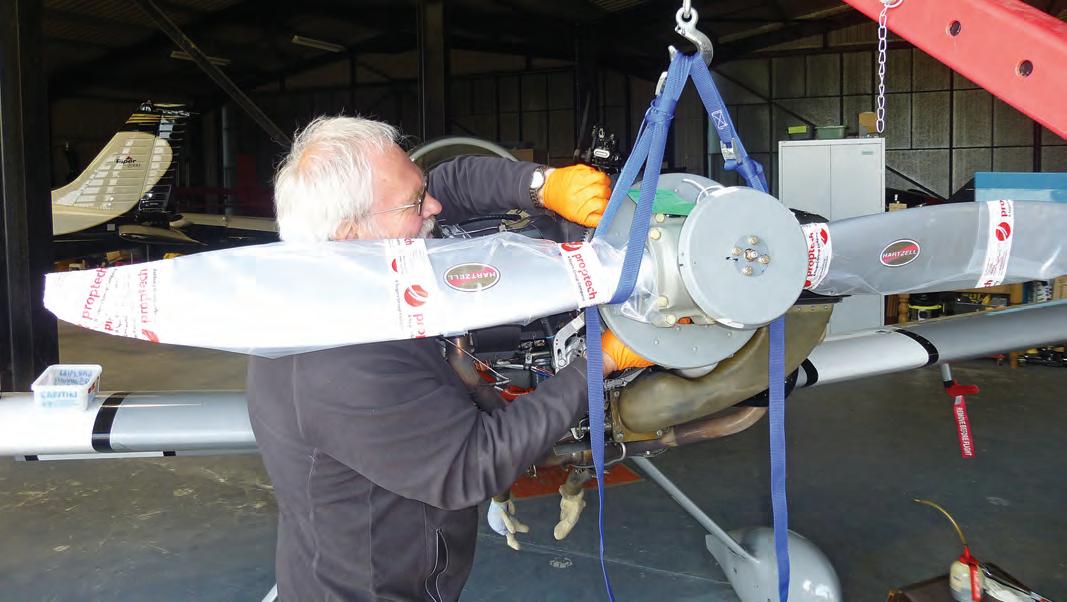
As Ian Fraser and I grappled with lock-wiring the six bolts that retain the propeller hub to the engine flange, Ian asked, “Do you really need a constant speed prop?” He might well ask. Lock wiring is a hard job. But I had been ruminating about the entire, rather expensive, proposition of owning a CS prop myself, as well as the slightly awkward installation task. So why? Well… my Van’s RV-8 has an ex-RAF Bulldog
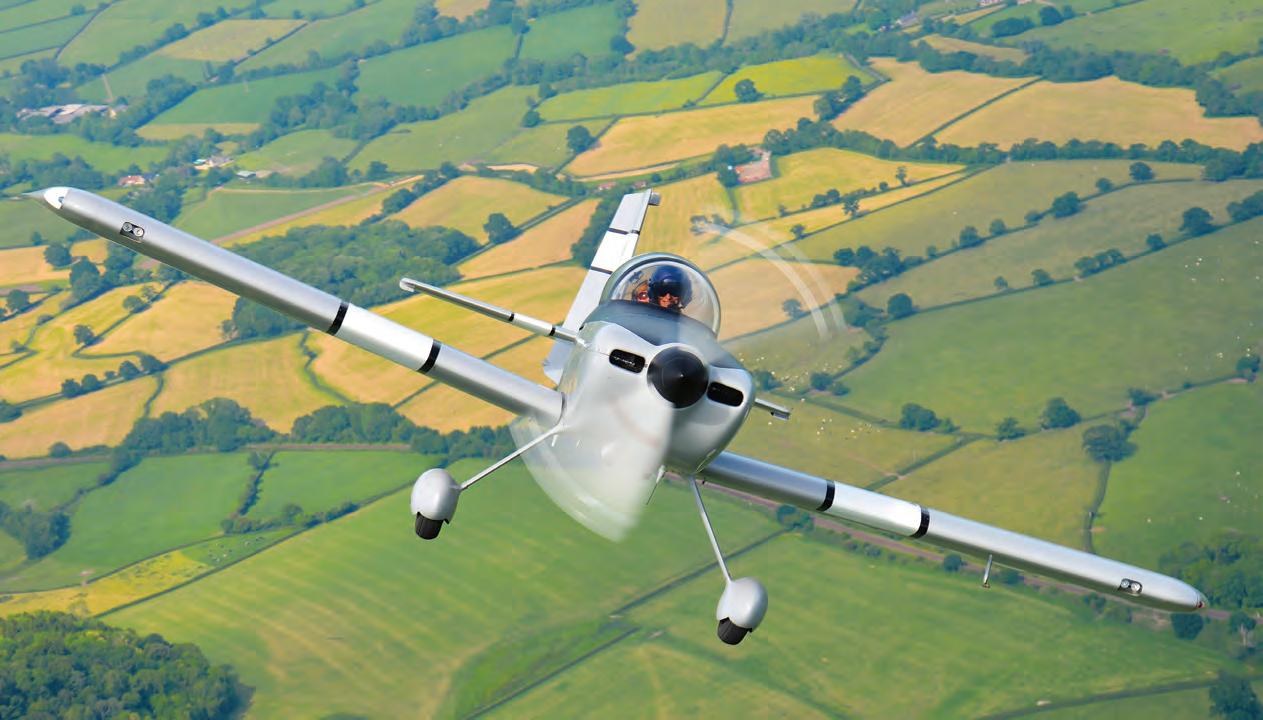
Lycoming IO-360, which churns out 200hp. A CS prop is arguably essential to make the most of all that power – and to be sure my aeroplane has sparkling take-off and climb performance, yet also be economical (and still fast) in the cruise. At 2,300rpm and 23in of manifold pressure you can aerobat all day without touching the throttle. And the propeller helps slow the aeroplane very effectively when the throttle is pulled back during landing. But yes, it comes at a cost. The propeller is heavier than a fixed-pitch equivalent, reducing the payload and taking the C of G further forward, which can be an issue Top Ruth’s prop does the business prior to going off to Proptech for its LPIP inspection on an RV-8 if you want to fly solo. Mine is well within limits (the battery is mounted aft which helps balance it out), but you really do notice heavier stick loads in the flare when you’re on your own. And then there’s the cost of overhaul. This wasn’t any kind of surprise for me, I accepted it as part of the deal when I bought the aeroplane. My prop is a Hartzell two-blade type which (the manual says) must be overhauled every 2,400 hours or six years, whichever comes first. Let’s face it, you don’t want your prop to fail in flight any more than you want an engine failure – and those heavy metal blades whirling round at up to 2,750rpm are absolutely lethal. A safe and smoothly working propeller is an absolute must. I had two years’ grace when I bought the aeroplane – but 2,400 hours was nowhere in sight! Now, a full overhaul is a fairly massive undertaking. The prop is completely dismantled. All the paint is stripped off to allow a thorough visual inspection and non-destructive testing designed to reveal the presence of cracks and any other latent defects that might result in failure. Nicks and scratches are dressed out and the
blades repainted. Many parts are replaced, others are re-plated or painted before the whole lot is reassembled with new seals and fasteners. The final task is static balancing, and on completion you have, in essence, a new propeller and indeed it is zero-timed in the logbook. But there’s a limit to the number of times a propeller can be overhauled before it must be scrapped, as there is only so much metal that can be parred off the blades before they are at their minimum size limitation. But how many privately owned light aircraft fly 2,400 hours in six years? That’s 400 hours a year. Maybe 10 times what most pilots aspire to complete (and rarely achieve). Happily, our chums at the LAA have a solution – the Low Hours Propeller Inspection Protocol, or LPIP, which Malcolm McBride touched on in Safety Spot recently. Specifically geared to the realities of private GA, the LPIP still involves dismantling, inspection and renewal of oil seals but the more intrusive aspects of a full overhaul are not deployed. The paint is not stripped off and there is no non-destructive testing apart from visual inspection. Not all CS propellers have been approved for LPIP but happily my Hartzell – one of the simplest CS props – definitely qualifies. Alistair Mant has been in the propeller industry for more than 30 years and is the GA and Light Regional Technical Manager at Proptech Aero, based at Lee-on-Solent Airfield in Hampshire. He will freely offer information and advice to LAA members for Hartzell, MT, McCauley and Sensenich propellers. The company was instrumental in working with the LAA in developing LPIP as a more realistic inspection process for what Below left The hub (left) is fastened to the engine flange by six studs which also retain the starter gear and alternator pulley; each stud has a nut locked in place by a roll-pin. The lock wires are threaded through the roll-pins. Photo:
Ruth Kelly
Below The propeller after removal, complete with spinner bulkheads. The bowl contains the oil which drained from the hub during removal. Photo:
Ruth Kelly
Below right Ali Mant is the man to talk to at Proptech. He’s also a regular on their stand at AeroExpo and the LAA Rally. Photo:
Neil Wilson
amount to lightly used propellers. The protocol is based on the process used by Hartzell to inspect a new or overhauled propeller following a period of long-term storage (over two years), provided it has not been fitted and operated. My six-yearly deadline was due in April, so in March I contacted Ali – he’s easy to contact by email and replied very promptly. In answer to my questions, he confirmed that Proptech was still operating despite the coronavirus lockdown (which was only just being implemented), that my propeller qualified for an LPIP and that they would discuss additional work / conversion to a full overhaul if required once they had completed an initial inspection. On completion it would be issued with a Certificate of Conformity to cover the work, and not an EASA form one. He also gave me indicative quotes for both an LPIP and a full overhaul. So, I got clearance from the airfield manager to go into the hangar, and then lined up a suitably experienced helper to get the prop off. It’s not difficult, just a bit fiddly, not to say quite heavy as well! First the
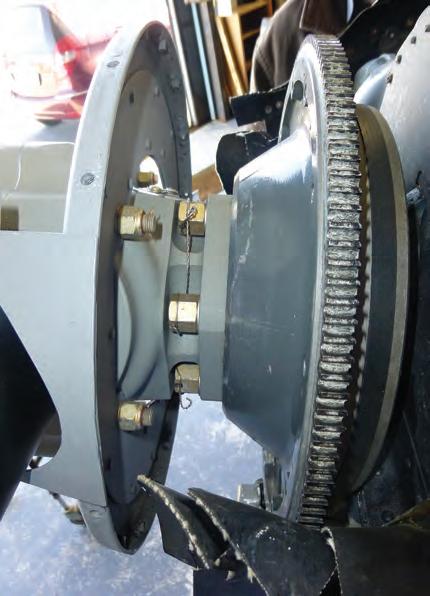
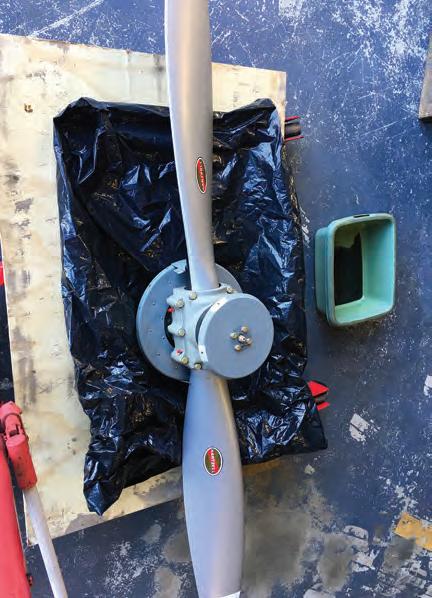

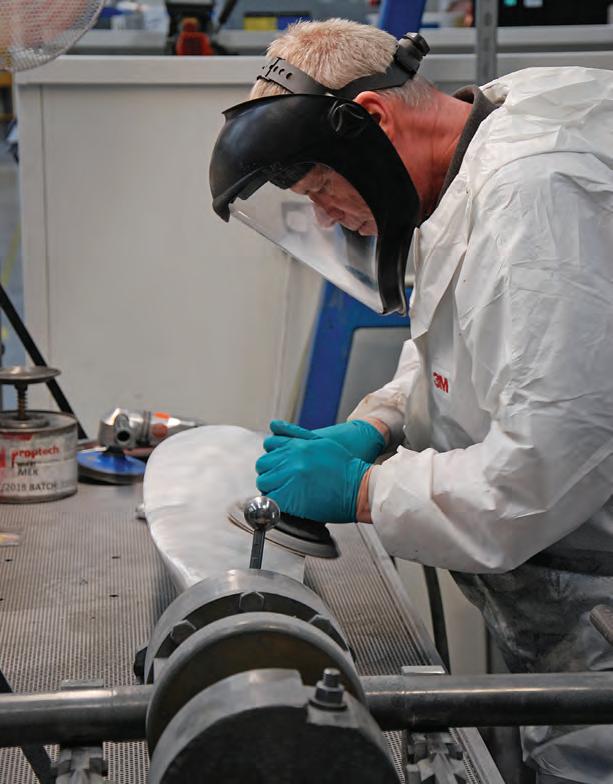
cowlings and spinner have to come off, then the lock wiring connecting the six retaining nuts is cut away. With an engine crane supporting the weight of the propeller the nuts and their associated studs are gradually wound out of the engine flange, half a turn each at a time. They’re torqued down quite hard so a long spanner with fairly narrow, open jaws is required to get them started. Fingers were sufficient once they had been freed off. A drip tray under the prop catches the half litre or so of engine oil that drains out of the hub when the O-ring seal is broken. Eventually it was done – the prop was dangling free and we lowered it gently onto a sheet of plywood spanning the legs of the engine crane. For transport we wrapped the hub in a bin liner to contain any dribbles of oil and then lashed it with a couple of webbing straps onto an old aircraft tyre, which provided a strong but yielding support for the hub and the now-protruding studs. With the rear seats folded forward the prop fitted quite neatly into the back of my car, with the blades supported on piles of cushions and more webbing straps deployed to stop it moving about. An hour or so later I was met by Wayne Potter, Below left There are some jobs on propeller overhaul that a skilled tradesman can still do better than a machine, and dressing the blades is one of them.
Photo: Neil Wilson
Below right Every prop is checked on the 3-D laser scanner to ensure it is within defined tolerances. Photo:
Neil Wilson
maintenance team leader at Proptech. After obligatory hand-washing and greetings exchanged at more than two metres separation, we lifted the prop out of the car (one person on each end of its 74in span is very nearly two metres!) and loaded it onto a workshop trolley. I handed over the logbook and left them to it. Five days later I received an email confirming that, following an initial inspection, the propeller was suitable for LPIP rather than requiring full overhaul, albeit with a few parts that would need replacement, which added a bit to the original estimate. I happily gave the go-ahead. Three weeks after that the prop was ready for collection, my thanks going to Sarah Walters, Charlotte Edmonds, and Desiree Hodge, for keeping me informed by email throughout the process. When I arrived to pick the propeller up, Wayne gave me a brief (and socially distanced) show around the workshop.
Proptech Aero
Proptech moved into its new purpose-built facility in late 2017 and, as you would expect of a company whose primary work is in the Commercial Air Transport sector, it is equipped with an array of high tech equipment.
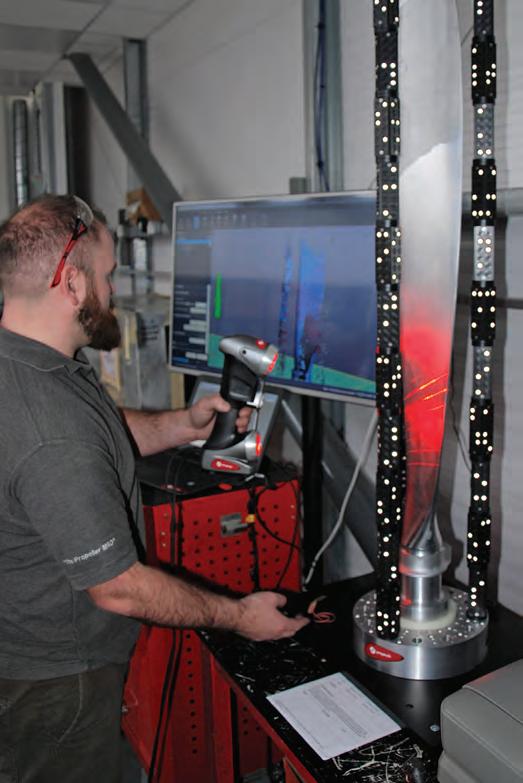
It has a fully equipped machine shop, which can be used for other than for propeller work if called upon, and a comprehensive NDT department which includes fluorescent dye penetrant, magnetic particle and eddy current options. Proptech’s expertise is in the metal and composite blades used on turboprops and as well as repair and overhaul, they also carry out manufacturing processes on certain new blades for Dowty. As you can imagine, inspection is key to any precision engineering function, and every blade that goes through the workshop is checked on a 3-D laser scanner that logs half a million points of data a second, comparing the results to the manufacturer’s data to ensure the blade is within accepted tolerances. My visit culminated in getting reacquainted with my prop, mounted on a bench stand with blades neatly wrapped. We transferred it to the car and using exactly the same packing method, off I went, logbook in hand, complete with stapled-in worksheet. Back in the hanger I took the opportunity to put on a new alternator belt. The existing one appeared to be in reasonable condition, but it was a little too long, and the tension adjustment bracket was at full extension. The new belt was a much better fit – better tension would mean less chance of slippage under load and reduced risk of the alternator pulley fouling on the cowling – a known problem with some RVs. Refitting the prop was straightforward, a new O-ring (provided by Proptech) to provide an oil seal being installed to the flange, the engine crane taking the weight, careful lining-up and patient winding in of the studs, again half a turn each at a time. The final torque-down (with my flange 60-70 ft-lb) was fiddly as you can’t use a socket on the end of a torque wrench, as there isn’t room. Instead, we used a common dodge which employs a little stump of an open-ended spanner, one end on the nut and the other mating with the half-inch drive on the torque wrench. It’s very easy to drop various bits while you’re working, and I have subsequently acquired a tool specially made for the job. It’s called the ‘ultimate prop wrench’ by Antisplat Aero, I got mine through LAS. The lock wiring called for further reserves of patience. It’s a bit of an art anyway, and most of us don’t do enough to develop the fluency I have seen exhibited by professional aircraft engineers. The access is awkward too and the wire necessarily thick. It has to be threaded through the roll-pins securing the nuts to the studs, twisted, wrapped around (make sure you’re going in the right direction!) and then taken to its neighbour for another wrap, thread-through and twist. The ends are then trimmed off and the sharp protruding twist curled over with long-nosed pliers. The final act was a ground run, including cycling of the propeller to pump oil into the hub and prove the pitchcontrol mechanism. On completion a careful visual inspection confirmed the absence of oil leaks. The final act was to align the front spinner bulkhead before tightening and lock wiring its bolts, and then re-fitting the spinner. All I needed then was a sign-off from my inspector, the end of the lockdown restrictions on flying and some nice weather, now thankfully with us. Time to go flying! ■
Below Ian Fraser lends a hand to re-fit the freshly inspected propeller. Photo:
Ruth Kelly
