
LEDs Module

1 - SimHub
1.1 - Installation of SRC LEDs RPM
1.2 - Configuration of SRC LEDs RPM
1.3 - Multiple devices with LEDs
1.4 - Button mapping to change the profile and brightness of the LEDs
1.5 - Different effects for SRC LEDs RPM

Download and install SimHub:
https://www.simhubdash.com/
Once installed, it is recommended to purchase the license so that all devices communicate through the USB port at the máximum frequency by this Software: 60Hz.

Once the licence file is downloaded from the email we receive after making the appropiate donation to the creator of SimHub, we click on “LOAD MY LICENSE FILE” to load it.
The message will automatically disappear and we will be able to use this Software in its intirety.

Settings / General
Lastly, it is advisable to enable the “Run as Administrator” option found in “Settings / General” to avoid conflicts with any antivirus or the Windows Firewall.


1.1 – Installation of SRC LEDs RPM
Arduino / My Hardware/ Multiple arduinos
Connect the USB extensión cable where the SRC button panel is plugged into a direct USB port on the computer (using USB hubs is not recommended).
Once on this screen, click the “Clear all devices and scan” or “Scan for new devices only”.


The device will be detected as SRC LEDs RPM and will assign a number to the LEDs, defaulting from 1 to 8. However, if there are more devices with LEDs installed, it will start adding the initial LED numbers from each of them.


Click the button “Apply changes”.

SRC LEDs RPM
1.2 – Configuration of the SRC LEDs RPM
We download the profiles from this link:
Profiles for the SRC LEDs Module
We click on “Profiles manager ”

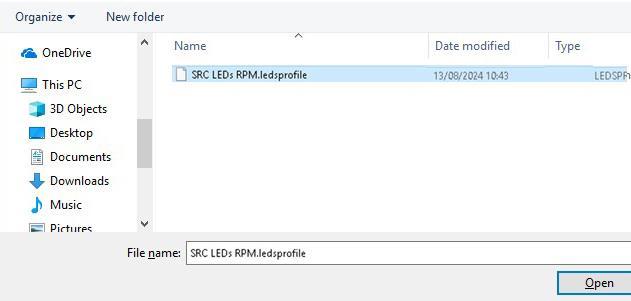
We click on “Import profile” and select the desired profile
SRC LEDs RPM.leds.profile: From left (Green) to right (Red)
SRC LEDs RPM Outside To Center.ledsprofile: From the outside (Green) to the center (Red)


Arduino / RGB Leds
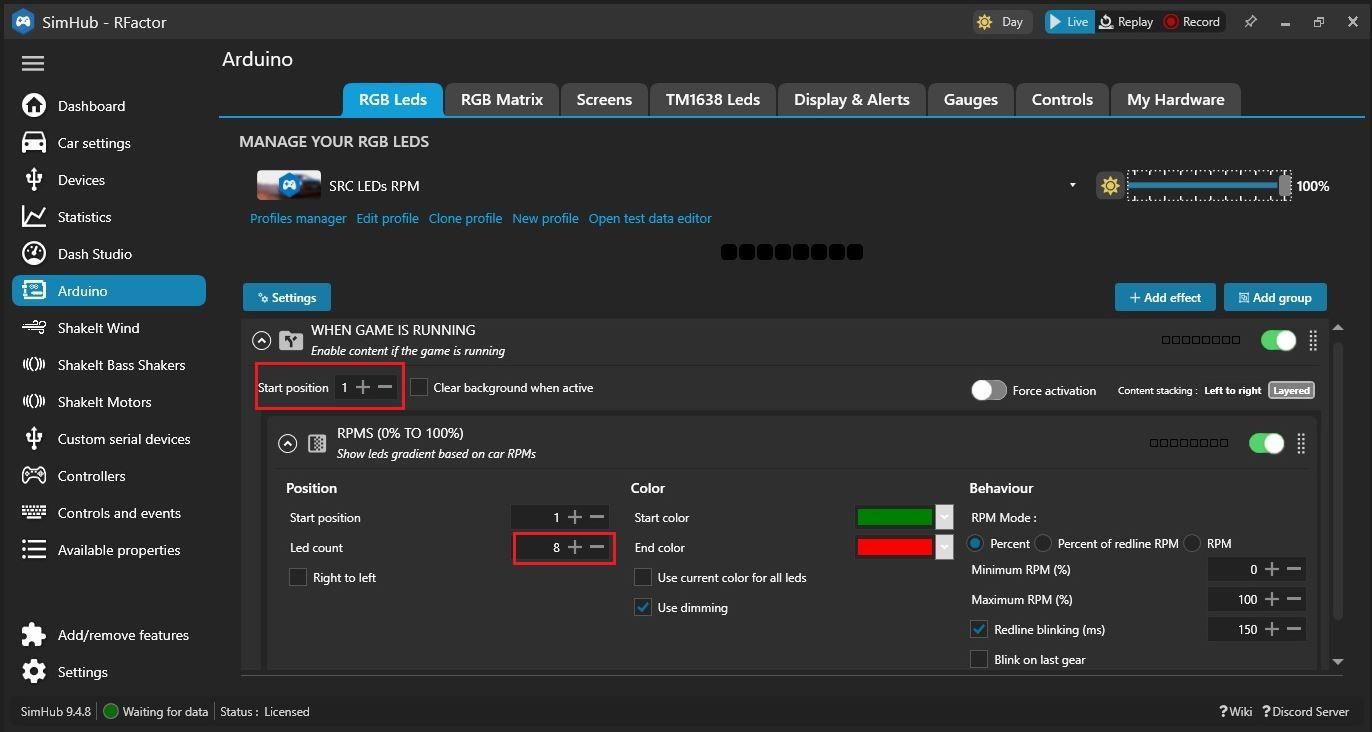
If you have more “Arduino” devices, you must take into account the ”Start position” value of the profile, as it will determinate the starting position of the LEDs.
For example, if in setp 1.1, SimHub detects our “SRC LEDs RPM” from 9 to 16, we should enter “9” in the “Start position”
The “Led count” value refers to the total number of LEDs in the SRC LEDs RPM (8)

The default SRC LEDs RPM profile lights up the LEDs from left to right depending on the engine’s RPM percentage.
The default starting color is Green, and the last one is red, with a gradient of colors between them.
The colors can be changed by clicking on the “Start color” and “End color”.
The brightness can be adjusted from 1% to 100% in the top right corner.
You can also set the minimum or maximum RPM percentage for the LEDs to light up.
If you enable the “Redline blinking (ms)”, the LEDs will blink when the redline RPM is exceded. In the box to its right, you can choose the milliseconds between blinks.

Keep the “Use dimming” option enabled for better brightness optimization of the LEDs.

Lastly, we can enable or disable each effect by clicking the round button on the green background for each group or individual effect.


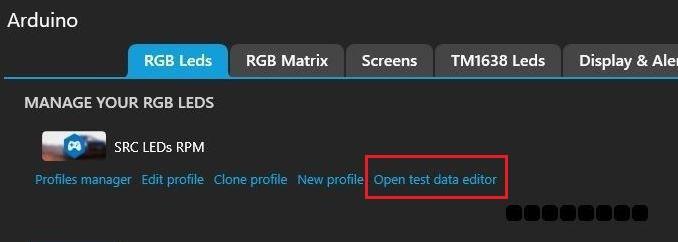
RGB Leds / Open test data editor
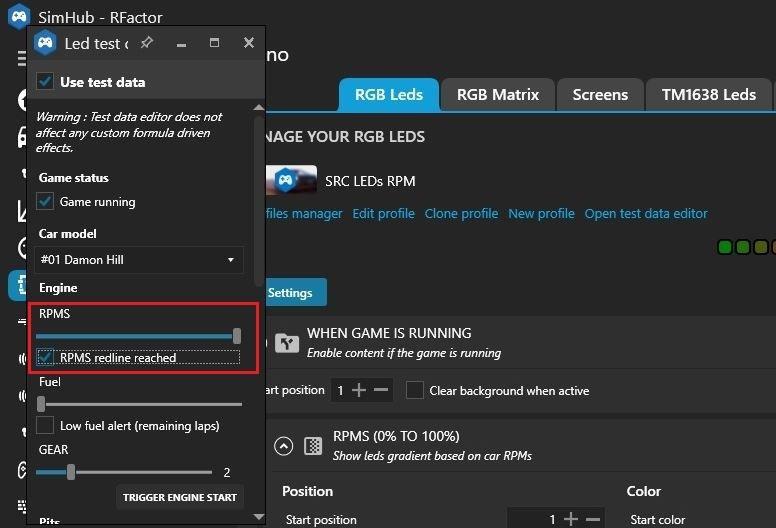
To test the LEDs, click on the “Open test data editor”.

Another Windows will be open where we can simulate the car’s RPMs and enable or disable the blinking


1.3 – Multiple devices with LEDs
In the case that we have multiple “Arduino” devices with LEDs and want to use the same profile for all of them, we can add a group of effects or individual effects and assign to each of them the position of the LED detected in the “My Hardware” window


Additionally, we can drag each device up or down with the mouse to choose the order of the LEDs


1.4 – Button mapping to change the profile and brightness of the LEDs
Arduino / Controls
In the Controls tab, we can assign any button from our SRC button panel or another device to change the profile or adjust the brightness of the LEDs.

We click on “Click to configure” for the option we want to map.


A Windows will open where we can select the type of press we want.
Default: This option is recommended for a standard press.
ShortPress: For a short press, in case that button is assigned to another function in the simulator.
LongPress: For a long press, in case that button is assigned to another function in the simulator
Once done, we click on “SAVE”.


Arduino / RGB Leds
Our LEDs module offers many more functions and customizable settings. We encourage you to add and text new effects, as well as fine-tune the current ones to your liking.
Example 1 – RPMs and Spotter:
Leds 2 to 7 for engine RPMs
Leds 1 and 8 to signal any flags on the track (Green, yellow, red, black, etc.) or if we have a car alongside
Example 2 - RPMs and Car controls:
Leds 2 to 7 for engine RPMs.
Leds 1 and 8 to alert if we are in the pit lane or if we have activated the speed limiter, ABS, DRS or traction control.
Example 3 - Delta:
Leds 1 to 4 in red color if our DELTA is getting worse.
Leds 5 to 8 in Green color if our DELTA is improving.
Suscribe to our Newsletter or visit SimracingCoach.com regularly.
We will be publishing new custom profiles.

