


Something special happens this time of year. The lights adorning houses twinkle extra bright, snowflakes float to the ground. Holiday magic is in the air.
As the days grow shorter and the calendar is full of celebrations, we crave festive traditions: the fresh pine scent from the tree, grandma’s cookies just out of the oven, and the prime rib, perfectly caramelized on Christmas Eve. Being home for the holidays is its own kind of luxury.
In this festive time, we share with you our family favorites — and hopefully soon to be some of yours too. When you start with ingredients this good, the holidays are bound to be spectacular.
Happy holidays.


Pro skiers and snowboarders discover the delicious combo of SRF products grilled on a Big Green Egg.
Chef Erik Johnson shares basic knife skills for home cooks. Includes a knife buyer’s guide.
The SRF Smoked Prime Rib makes it easy to serve an impressive holiday roast with minimal effort.
Some of our favorite chefs use SRF Wagyu ground beef to bring elevated flavor to classic dishes.
Inside information, suggestions and advice for a successful, stress-free holiday season.
Serve a sumptuous holiday feast that’s surprisingly simple thanks to clever short cuts from Chef Mandy Tanner.
Uncover the most popular SRF products to give or enjoy all by yourself.
Snake River Farms helps Team USA prepare for “The Olympics of Food” in 2025.
Make short work of your gift list with these 10 special boxes from Snake River Farms.


I’m working furiously to slice and plate a huge stack of SRF NY strip steaks. There’s a crew of 20 hungry skiers and snowboarders headed my way, and I can’t let them wait. They’ve been out all day on a snowcat trip, skiing and riding the backcountry surrounding Brundage Mountain near McCall, Idaho.
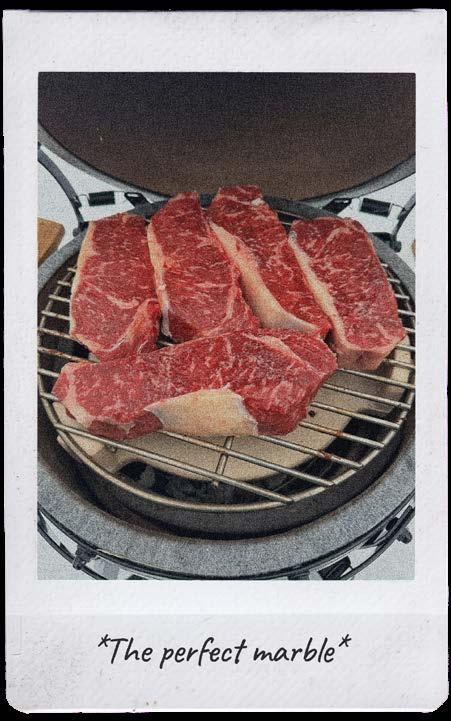
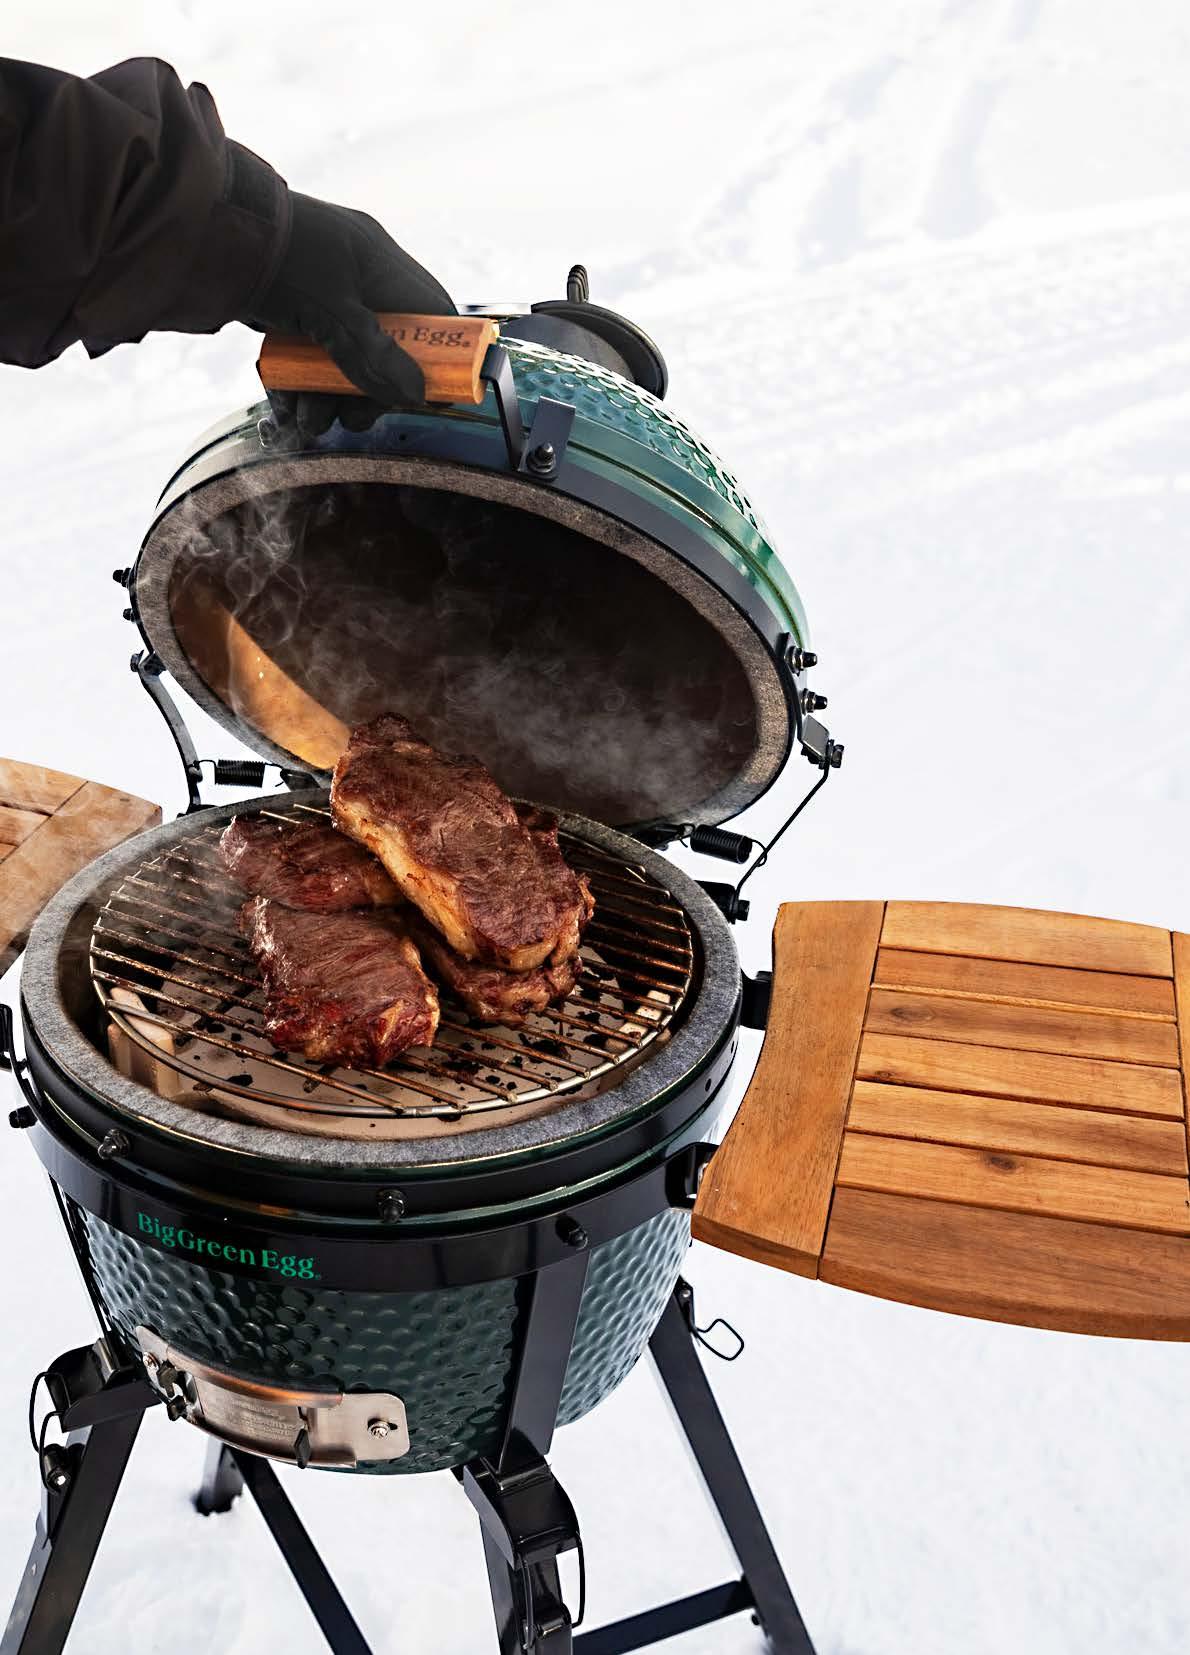
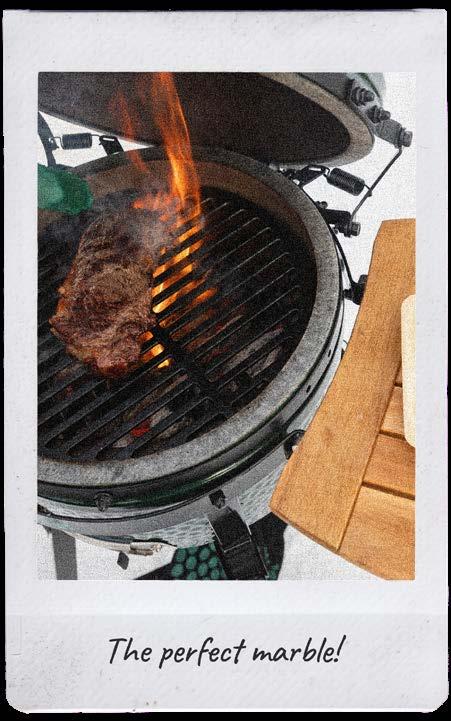
My teammate is Bob Atkinson, Marketing Manager for Big Green Egg, the iconic kamado grill. He’s a hardworking partner and arrived with a truckload of grills. One of the Big Green Eggs is set up for indirect grilling and we use it to bring the steaks up to 1150F. We use two blazing hot grills to put a final sear on the NY strips.
The backcountry snow was plentiful, and the crew arrives later than scheduled. Bob sears the steaks, and I slice them. I load each plate with portions of medium rare SRF NY strip steak, smashed Yukon Gold potatoes seared in SRF American Wagyu tallow topped with a spicy aioli, and garnish with a grilled scallion.
The group includes members of 10 Barrel Brewing, pro athletes sponsored by the brewery and editors from Sunset, Gear Patrol, The Inertia and Newschoolers.com. The hungry folks grab and eat faster than I can plate.
The payoff is the comments we receive. “This is the best steak I’ve ever eaten!” says one editor. I cook a lot of steaks, and must admit a SRF American Wagyu steak prepared on a Big Green Egg is hard to beat. Bob and I toast our success with a 10 Barrel Pub Beer.
Big Green Egg and 10 Barrel Brewing share the same PR agency, and a six-week promotion called “The Beer Lodge” was planned at Brundage. This brought numerous pro athletes to town to ski and ride with editors, share the stories of the sponsors and produce content to promote the brands.





The night before we did a fast and simple dinner of SRF Wagyu hot dogs and homemade lentil stew at the official 10 Barrel Beer Lodge, a huge property where the athletes spend their time. The deluxe rental includes a game room complete with a bar, spa and indoor swimming pool.


It was a great opportunity to meet the entire group. After dinner we did a guided beer tasting and ended the evening with a group contest that included a cocktail mixing tournament, a beer pong match and “build a raft with junk and pull it across the pool” event. With world class athletes in the mix, the competition was intense. Fortunately, I was able to lean into my college party experience to help my team take second place.

The final day was amazing. A foot of new powder, a bluebird sky and dinner at The Bear’s Den located on the mountain. Two extra large Big Green Eggs were hauled by snowcat to the venue. It was no easy feat to load and set-up the heavy ceramic grills. Chef Keith Moreno from 10 Barrel in Boise prepared a feast that featured SRF Kurobuta rack of pork served with a zesty salsa verde. The completed dish was juicy, robust and delicious. The perfect end to a winter adventure.
Working for Snake River Farms affords me with amazing experiences like these. It’s fantastic to introduce people to our American Wagyu beef and Kurobuta pork. When the location is out of the ordinary, like in the backcountry of Idaho or a chilly hut on a ski hill, somehow our amazing products just taste a little bit better. When Bob pitched the idea to work together, he said he wanted to combine skiing and grilling and call it “Fire on the Mountain.” After three successful days serving SRF cooked on flaming Big Green Eggs, we definitely achieved his goal.
Mission accomplished.


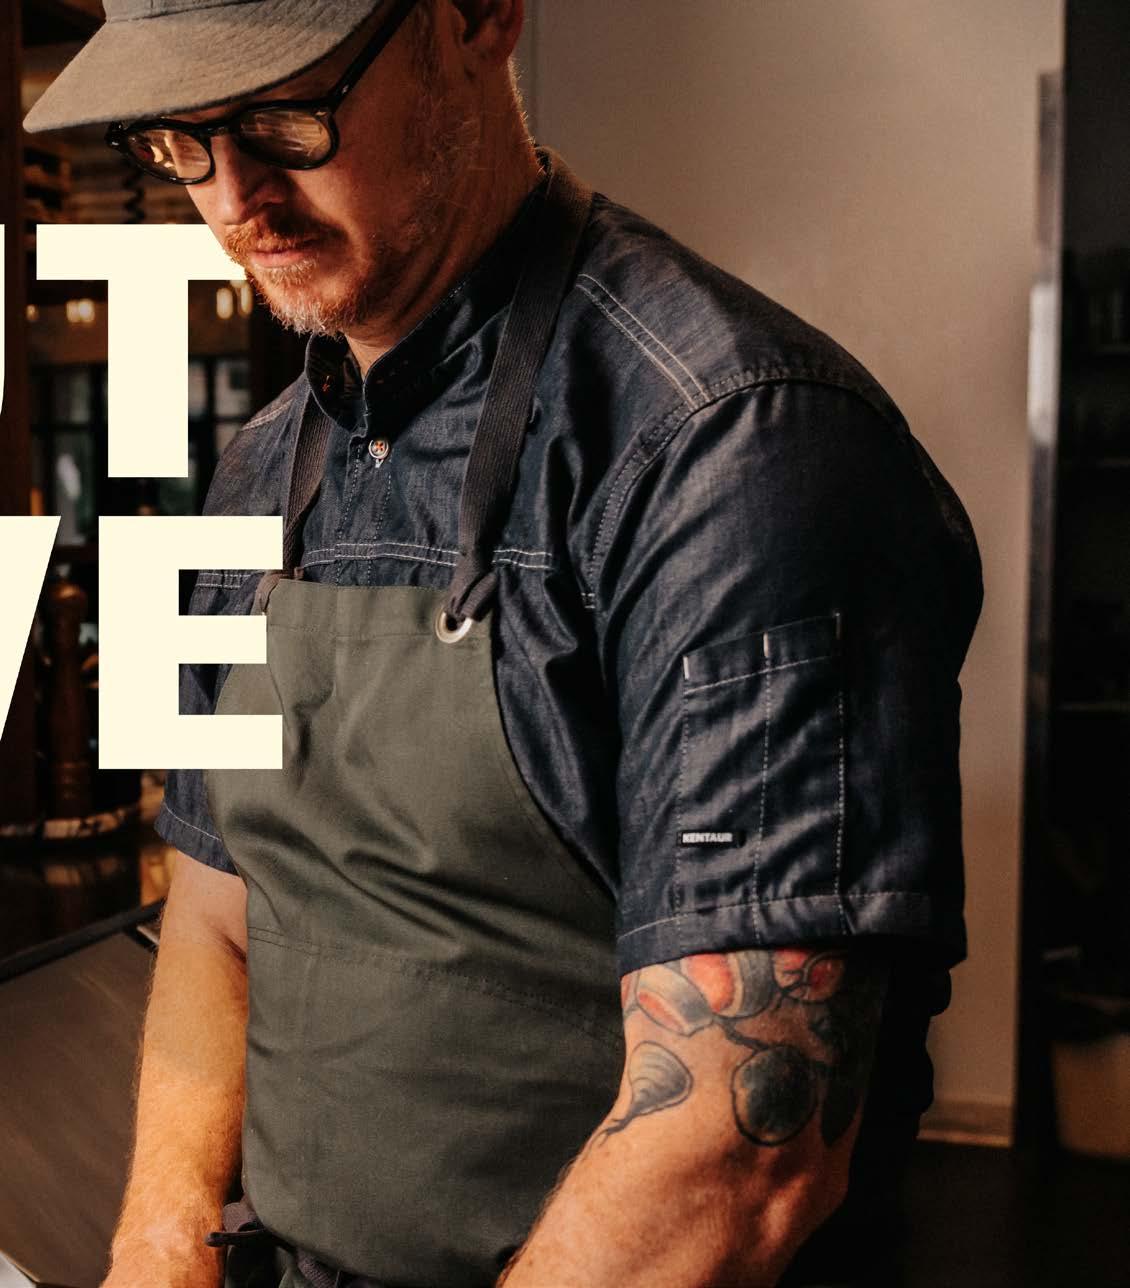


Good cooking starts with good knife skills. We spoke with Chef Erik Johnson of Saltbrush restaurant in Boise, Idaho to learn some tips for home cooks to get the most from knives in their kitchen.
Erik Johnson Executive Chef/Partner
Saltbrush Boise, Idaho

Erik Johnson was raised in Boise from the age of 10 and attended the Culinary Arts program at Boise State University. He moved to the Bay Area and worked in top kitchens in San Francisco and Sonoma County for 13 years. He opened Saltbrush with business partner Neil Grant in April 2024.
His culinary style reflects his time in the Northern California wine country with an ingredient focused approach. He likes to start with a high-quality ingredient and see what technique he can use to highlight its natural flavor. He often uses Snake River Farms American Wagyu and Kurobuta pork for his menu.
Chef Johnson is a self-professed knife enthusiast (although his wife says he might have a “knife problem”). Early in his career he used German knives like Henckels and Wüsthof. Then he fell down the rabbit hole of boutique knives from Japan. He maintains a revolving collection of work knives in different blade shapes for specific tasks. Currently his primary chef’s knife is a Steelport, but he also has Hattori, Takeda, Misono and Shun knives in his arsenal.


Controlling your knife starts with holding it correctly. “Pick up the knife and find its center of balance,” says Chef Johnson. “Grip the knife with your thumb and forefinger and move the knife slightly back and forth until you feel where its natural center lies.”
Once you find the center point, let your hand rest naturally on the handle. This will position your hand so you’re holding the blade with three fingers wrapping around the handle. “This position lets you control the entire knife and make precise movements,” recommends Chef Johnson.

“A chef’s knife is designed with a curve so you can rock it back and forth,” says Chef Johnson. “Don’t shove your knife vertically straight down. Rocking keeps the knife in place and makes clean cuts.” Gently push the blade forward and down to create a rocking motion so the knife naturally makes consistent, even slices. This is the technique to master for chopping vegetables and mincing herbs.

“Vegetables are typically round. It’s not ideal to make your cuts when something is moving,” according to Chef Johnson. “With your initial cut, try to create a flat base so it’s more stable and you’re less likely to cut yourself.”
Three knives belong in every kitchen — chef’s, paring and serrated (bread). Each is available in a wide range of prices. Experts recommend putting most of your knife budget toward a chef’s knife since it’s the tool you’ll use the most.
Chef Johnson recommends adding two additional knives when you expand your collection. A boning knife for trimming meat and cleaning fish and a long carving knife for slicing roasts and hams.


The chef’s knife is a versatile workhorse in the kitchen and has a distinctive rounded blade to facilitate a rocking motion. You’ll find this knife in lengths of 6 to 10 inches. 8 inches is the sweet spot and works best for most home cooks.

Made in Portland, Oregon, this knife is made with American 52100 carbon steel using traditional forging techniques. Each heirloom quality knife is handcrafted with a distinctive maple burl wood handle and a sheepsfoot shaped blade. steelportknife.com

This Japanese made knife starts with a carbon steel core with a layer of stainless steel on each side. This hybrid construction provides the benefits of both Japanese and Western style knives in a clean design. shun.kaiusa.com

Rated the “best knife” by numerous media outlets due to its balance, light weight and ability to hold a sharp edge. In the world of premium knives, it’s an excellent value. macknife.com
Check online for the best price. Many of these knives are readily available at less than retail. TIP!

Think of the paring knife as a miniature version of a chef’s knife. The small blade works well when more precision is required for peeling fruit, coring tomatoes or mincing a small amount of aromatics like onions or garlic.

This top-of-the-line knife features an elegant design with a hammer-finished blade that functions to reduce drag and keep food from adhering. It flawlessly performs peeling and trimming with a thin, razor sharp blade. shun.kaiusa.com

A high quality German knife with a clean, simple design that makes concise cuts. The grip is comfortable for most hand sizes. The solid build feels sturdy with an easy to hold handle and a blade that seems very durable, but feels slightly less sharp.
wusthof.com
This is a favorite of many online reviews due to its slip-proof handle, sharp blade and great price. It weighs a bit more than other knives which, is noticeable in hand, but doesn’t deter when peeling and cutting an apple.
misen.com
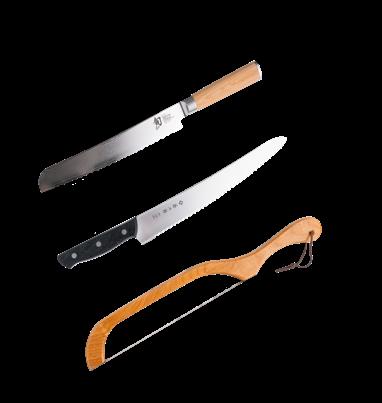
Commonly known as a bread knife, the serrated blade works well for cutting soft foods like tomatoes and are handy for cutting up a leftover beef or poultry. Of course, they are also excellent for cutting clean slices of crusty bread.

A handcrafted Japanese knife with ample length to slice large loaves of firm crust breads without damaging the soft interior. 34 layers of stainless Damascus cladding surround the core of the blade. A beautiful knife that feels balanced in hand.
shun.kaiusa.com
This attractive knife has a blade that is longer than most serrated knives and has serrations that are more rounded than pointed which makes it more adept at slicing meat, soft pastries, like cake, and tomatoes.

tojiro-japan.com
We found this unique tool at a local kitchen store and it is an inexpensive option to a traditional bread knife. It looks like a hacksaw for bread and works well with smaller loaves and is serviceable for cutting delicate vegetables and fruit.
outofthewoodsoforegon.com


The holiday season brings friends and family to town. While the focus is on festive celebrations and elaborate meals, everyone still needs to be fed for non-holiday meals. We have a simple solution for the days before the big dinner or after the leftovers are gone: SRF Wagyu ground beef.
This restaurant quality product has a flavor profile that transcends grocery store ground beef and makes everyday dishes special. Some of our favorite chefs share five recipes for dishes that take advantage of the same ground Wagyu used by top chefs.

For variety, we included a recipe using our Kurobuta ground pork with a rich, slightly sweet flavor. Stock up on these convenient one-pound packs and break new ground for elevated, but easy, comfort food for the dinner table.
Sarah Kelly
Meatloaf is so versatile. You can serve it with tomato base accompaniments (can you say ketchup?) or fancy it up with a quick gravy. I love to slice it cold and make a sandwich. SRF Wagyu ground beef really brings up the flavor of this classic dish. You can make this in less than an hour, but try the two day method for the best results. Prepare the mix and let it sit overnight so all the flavors meld together. Bake it the day before serving to let it firm up, then serve it the next day. C
2 pounds SRF Wagyu ground beef
8 to 12 strips of bacon — preferably NOT thick cut
1 red bell pepper, super finely chopped
1/2 yellow onion, super finely chopped
3 celery ribs, super finely chopped
2 cups breadcrumbs
2 eggs, whisked
1/2 cup milk
1/2 cup Parmesan cheese, grated
1 tablespoon Dijon mustard
1 tablespoon horseradish
1 teaspoon black pepper
1 teaspoon red chili flakes
1 teaspoon salt
1 tablespoon soy sauce
2 tablespoon capers, chopped
1/2 cup mix of fresh chopped basil/ oregano/rosemary or sub dried herbs totaling 2 tablespoons


This recipe works with a standard 9” x 5” bread pan. You can also use several smaller pans.
1 Place breadcrumbs and milk in a medium bowl. Let soak and sit while you prepare the rest.
2 Fine dice up all vegetables and sauté in a pan until soft, about 5 minutes. Let cool. Add to soaked breadcrumbs.
3 Add all remaining ingredients except the bacon to the breadcrumbs bowl. Mix. Cover with plastic and refrigerate overnight.
4 The next day line a 9” x 5” baking pan with the bacon tight up against the next piece and the ends overhanging to the outside of the pan.
5 Place the meat mixture on top of the lined bacon pan pressing down firmly and really packing it in tight. Fold the overhanging bacon ends over the top.
6 Place the pan on a baking sheet and bake in oven uncovered at 325°F degrees for 70 to 90 minutes until the internal temperature reaches 150°F.
7 Remove from the oven and let cool for 3 hours or overnight before serving.
8 When ready to serve, gently remove the cold meatloaf from the pan. Place on a sheet tray, bottom side up. Reheat in the oven for about 15 to 20 minutes at 350°F. Slice and serve.
Optional: Cut the cold meatloaf into nice thick slices. Sear each piece in a sauté pan on the stove-top. Serve.
Marge Perry
Rich and deeply flavorful Kurobuta ground pork transforms this simple but satisfying dish into one worthy of center stage at your next gathering. To that end, the ragù may be made ahead and warmed over low heat.
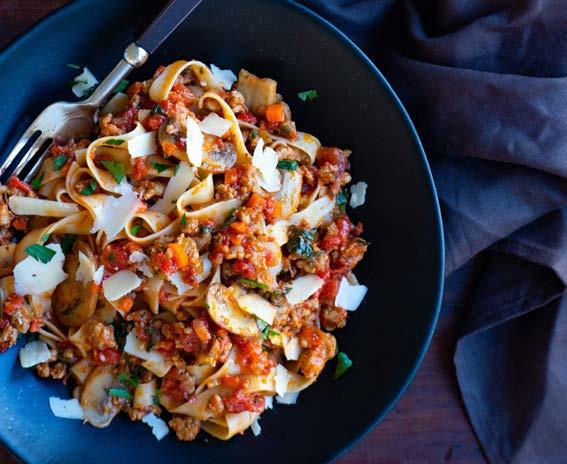
1 pound SRF American Kurobuta ground pork
2 tablespoons olive oil
10 ounces white mushrooms, sliced
1/2 teaspoon salt, divided
1 medium onion, finely chopped
1 celery rib, finely chopped
1 carrot, finely chopped
5 garlic cloves, minced
1 teaspoon dried basil
1/4 teaspoon crushed red pepper flakes
28-ounce can diced tomatoes
2 tablespoons tomato paste
1/4 cup fresh parsley, coarsely chopped
1/2 cup aged Asiago cheese, shredded
12 ounces tagliatelle pasta
1 Heat the oil in a large skillet over medium-high heat. Add the mushrooms and 1/4 teaspoon of the salt; cook, stirring occasionally, until the mushrooms are nicely browned, about 7 to 8 minutes. Transfer to a bowl and reserve.
2 Return the skillet to the heat and add the ground pork. Cook, breaking the pork into smaller pieces with a wooden spoon, until no longer pink, about 3 to 4 minutes. Stir in the onion, celery, carrot, garlic, basil, and red pepper flakes. Cook, stirring occasionally, until the vegetables are tender and the pork begins to brown, about 5 to 6 minutes.
3 Pour in the diced tomatoes and tomato paste; bring to a boil, reduce the heat to medium-low, cover, and simmer until slightly thickened, about 30 minutes. Stir in the 1/2 cup of cheese and the parsley.
4 Meanwhile, bring a large pot of salted water to a boil.
5 Add the tagliatelle and cook according to package directions; drain.
6 Toss the pasta with the sauce and serve. Garnish with additional parsley and cheese if desired.
Katy Osuna
The silky smooth cheese sauce in this homey dish uses sodium citrate, a culinary salt easy to buy online. It acts as an emulsifier, so the cheese sauce doesn’t require a binder, like a roux, to hold it together. The combination of fontina, taleggio, and smoked gouda cheeses perfectly accents the flavor of the SRF beef. Recommended types of cheese, plus the brands I used, are listed but tasting multiple kinds of cheese to pair with your palate is half of the fun!
G re D ient S
1 pound SRF Wagyu ground beef
1 tablespoon of beef tallow or other neutral fat
1 teaspoon salt
½ teaspoon pepper
¼ of a yellow onion, thinly sliced
½ tablespoon of unsalted butter
½ teaspoon salt
S tru C tion S

1 tablespoon tomato paste
¼ cup full-bodied red wine
1 cup milk
½ tablespoon sodium citrate
1 teaspoon Dijon mustard
5 teaspoons Worcestershire sauce
6 ounces fontina or gruyere (we used Point Reyes Toma), grated
1 Heat a stainless steel or enamel-coated cast iron pot over medium-high heat. Add the tallow and allow to melt. Once the tallow is near the smoke point, crumble the ground beef into the pan in as thin a layer as possible and season with salt and pepper.
2 Don’t turn the beef until the first side is browned and crispy. Then scrape it with a wooden spoon or spatula to turn and brown the other side.
3 Once the beef is cooked, remove it with a slotted spoon and set aside, leaving as much of the fat in the pot as possible.
4 Turn the heat to medium-low and in the same pan add the butter and thinly sliced onions. Let the onions caramelize for about 20 minutes, stirring every few minutes to prevent burning. They will develop a golden brown color and start to fall apart. Add a pinch of salt to season.
5 Meanwhile, cook the pasta according to the package instructions, making sure to season the water with a generous amount of salt. When it is ready, set it aside as you make the sauce.
6 When the onions are ready, add the tomato paste, stirring until it coats the onions.
3 ounces taleggio (we used Ca De Ambros Taleggio), grated
2 ounces young smoked gouda (we used Artikaas Youngsters Hickory Smoked Gouda), grated
½ pound cavatappi (or substitute your favorite pasta)
7 Add the wine to deglaze, scraping the bottom of the pot to loosen the browned bits of beef and onion. The wine should cook off quickly until it is thick enough to coat the onions. But don’t let it get too thick and start sticking to the bottom of the pot.
8 Add the milk, scraping the bottom of the pot again to remove any remaining brown bits.
9 Heat the milk until it just starts to simmer, then turn the heat to medium-low. Do not let the milk come to a boil.
10 Whisk in the sodium citrate until it is dissolved.
11 Slowly start adding your cheeses, a small handful at a time, whisking vigorously. Do not add the next handful until the previous one is fully melted. The milk will start to froth and foam, but once enough cheese is added, it will settle.
12 Add the ground beef and the pasta into the sauce and turn the heat up to medium, stirring until everything is heated through. Serve as is, or put into a casserole dish and broil in an oven for about 5 minutes until the top is golden brown.
Susie Heller & Jorge Velazquez
Kofte, a Turkish ground meat mixture loaded with flavor from a variety of spices, is often made into meatballs. We like to make kebabs, shaping this flavorful meat around a wooden skewer and grilling it, either over hardwood lump charcoal or a gas grill. Each skewer is served on a piece of naan (or in a lettuce cup) with tzatziki. The Kofte pairs well with a simple salad of ripe tomatoes and sweet onion seasoned with red wine vinegar and mint.

Kebabs
1 pound SRF Wagyu ground beef
1/4 cup panko breadcrumbs
1/4 cup milk
1 teaspoon kosher salt
1 teaspoon ground cumin
1/2 teaspoon allspice
1/2 teaspoon ground coriander
1/2 teaspoon onion powder
1/2 teaspoon paprika
1/4 teaspoon ground sumac
1/8 teaspoon cayenne
1/4 cup flat leaf parsley, finely minced
1/4 cup fresh mint leaves, minced
8 pieces of mini naan bread
tzatziki
1 small English cucumber Kosher salt
16-ounce container whole milk Greek yogurt
1/4 cup flat leaf parsley, finely minced
1/4 teaspoon garlic, grated on a microplane
1/4 teaspoon fresh ground black pepper
Lemon juice

Kebabs
1 Soak eight 10-inch wooden skewers in water for at least 1 hour.
2 Place the panko crumbs in a small bowl and add the milk. Soak the panko for 15 minutes. Squeeze the crumbs to remove any excess milk.
3 Dry the ground meat with paper towels. Place the ground meat in the bowl of a stand mixer fitted with the paddle. If you don’t have a mixer, this can be done by hand. Combine the meat with the panko and remaining kofte ingredients (except the naan). Be sure that all ingredients are evenly distributed. Cover with plastic wrap and refrigerate for at least 4 hours or up to 1 day.
4 To shape the kebabs: Divide the meat into 8 pieces, about 2 ounces each. Wet your hands with cold water and mold the meat around the skewers into long sausage shapes, about 1 inch in diameter. Refrigerate the skewers for at least 30 minutes or up to 2 hours.
5 Make a fire with hardwood lump charcoal for indirect cooking. When ready, most coals will be covered in gray ash with some glowing red embers. If using a gas grill, heat one side on high heat and the other on the lowest setting.
optional: You can also cook the kebabs using a skillet, turning them every few minutes until the meat is cooked.
6 Just before cooking, spray the hot grill grate with non-stick spray. Arrange the meat over the high heat and the skewers over the cooler area or lip of the grill to prevent burning them.
7 Once the kebabs mark and are not sticking to the grate, turn them to cook all sides evenly, until the meat is fully cooked.
8 Place the naan on the grill and warm it, marking each side with grill marks. Serve the skewers with the naan and tzatziki.
tzatziki
1 Peel the cucumber, cut in half lengthwise, scrape out the seeds and thinly slice crosswise. Toss with about 1 tablespoon salt and place in a large strainer over a bowl to sit for 20 minutes.
2 Squeeze the cucumbers to remove excess moisture and drain on paper towels.
3 Put the yogurt in a bowl. Stir in the parsley, garlic, pepper and cucumbers. Add salt and lemon juice to taste. Refrigerate.
Meredith Deeds
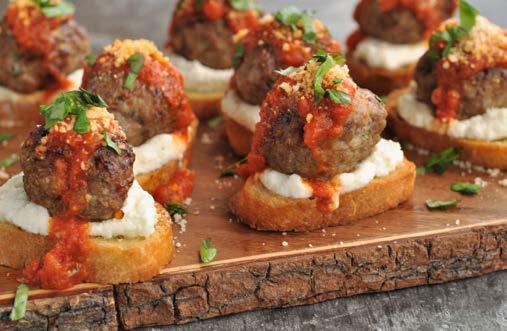
Tender, moist and ultra-beefy, these SRF Wagyu ground beef meat balls adapt to your mood and menu. They’re right at home on top of a plate of spaghetti, tucked into a meatball sub or served as an appetizer. The air fryer cooks them quickly, giving the outside a nice crust, without drying out the inside.
P ro ti P #1
If you like your meatballs extra cheesy, add 1/4 cup of grated Parmesan, along with the ricotta, to the ground beef mixture.
P ro ti P #2
Make these meatballs the star of the show. Cook the meatballs as directed. Season ricotta cheese with salt and pepper and place a dollop on top of a crostini. Set a cooked meatball on top of the ricotta. Spoon a little warm marinara sauce over the top and garnish with grated Parmesan and chopped basil.

in G re D ient S
1 pound SRF Wagyu ground beef
1/2 cup whole milk ricotta cheese
1/2 cup fresh breadcrumbs
1/4 cup basil, chopped
1 egg, lightly beaten
2 garlic cloves, finely chopped
1 teaspoon salt
1/4 teaspoon freshly ground black pepper
1/4 teaspoon red pepper flakes
in S tru C tion S
1 In a large bowl, combine the beef, ricotta, breadcrumbs, basil, egg, garlic, salt, pepper, and red pepper flakes and gently mix together. Form into 15 (about 2-inch) meatballs.
2 Arrange meatballs in an air fryer basket, spaced evenly apart. They should not touch (cook the meatballs in batches, if necessary). Place the basket in the air fryer and set the temperature to 400°F.
3 Cook meatballs until lightly browned and register 160°F, 12 to 14 minutes, rotating meatballs after 9 minutes.


AND
Creating an impressive holiday dinner doesn’t have to be hard work. Chef Mandy Tanner shares her secrets for serving an elegant meal with less stress by using clever short cuts and advanced prep to keep things casual.
The holidays are always a special time of year. Family gatherings and visits from friends bring new memories. The aroma from the prime rib cooking in the oven guides everyone to gather in the kitchen and makes me a bit nostalgic.
Over the years I’ve developed some tricks to keep prep to a minimum the day of a holiday feast. I prepare dishes in advance and add storebought ingredients to the menu so I can spend less time cooking and more time with the people I love.

@CHEFMANDYTANNER
This classically trained chef studied pastry arts at the French Culinary Institute in New York City. After working for several years in restaurants in California and Tennessee, she now works as a recipe developer and food photographer for major brands. She lives in Nashville with her husband, daughter, and two dogs, Chuck Short Rib and Ziti.
C har C uterie & C hee S e boar D
SRF AMERICAN WAGYU BONE-IN PRIME RIB
C ae S ar S a L a D W ith P ar M e S an , S ee D & nut C ri SPS
P otatoe S au G ratin
roa S te D W inter SQ ua S h
berr Y C ri SP W ith M a SC ar P one C rea M
This restaurant worthy menu might look daunting, but short cuts like preparing dessert in advance and using store-bought salad dressing make prep on the day of the holiday meal casual and easy.
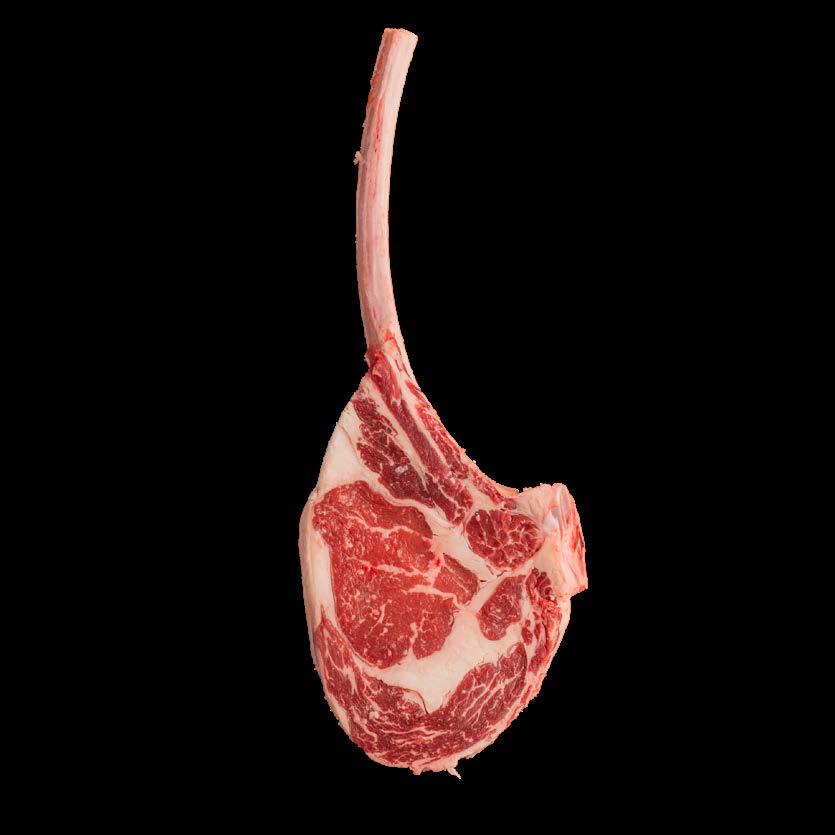
The showstopper centerpiece is a SRF Silver™ Wagyu bone-in prime rib. It has the incredible characteristics of American Wagyu beef with a bit less marbling and a lower price point.
The potatoes au gratin and roasted squash add richness and homey flavors your guests will love while the Caeser salad is bright, light and adds an acidic bite to balance the meal. The homemade berry crisp is surprisingly easy to make but is a crowd pleasing finish.
Whether you are hosting or helping, our favorite holiday recipes are sure to be enjoyed with the people you love. Gather in the kitchen and around the table and make some memories together this holiday season.
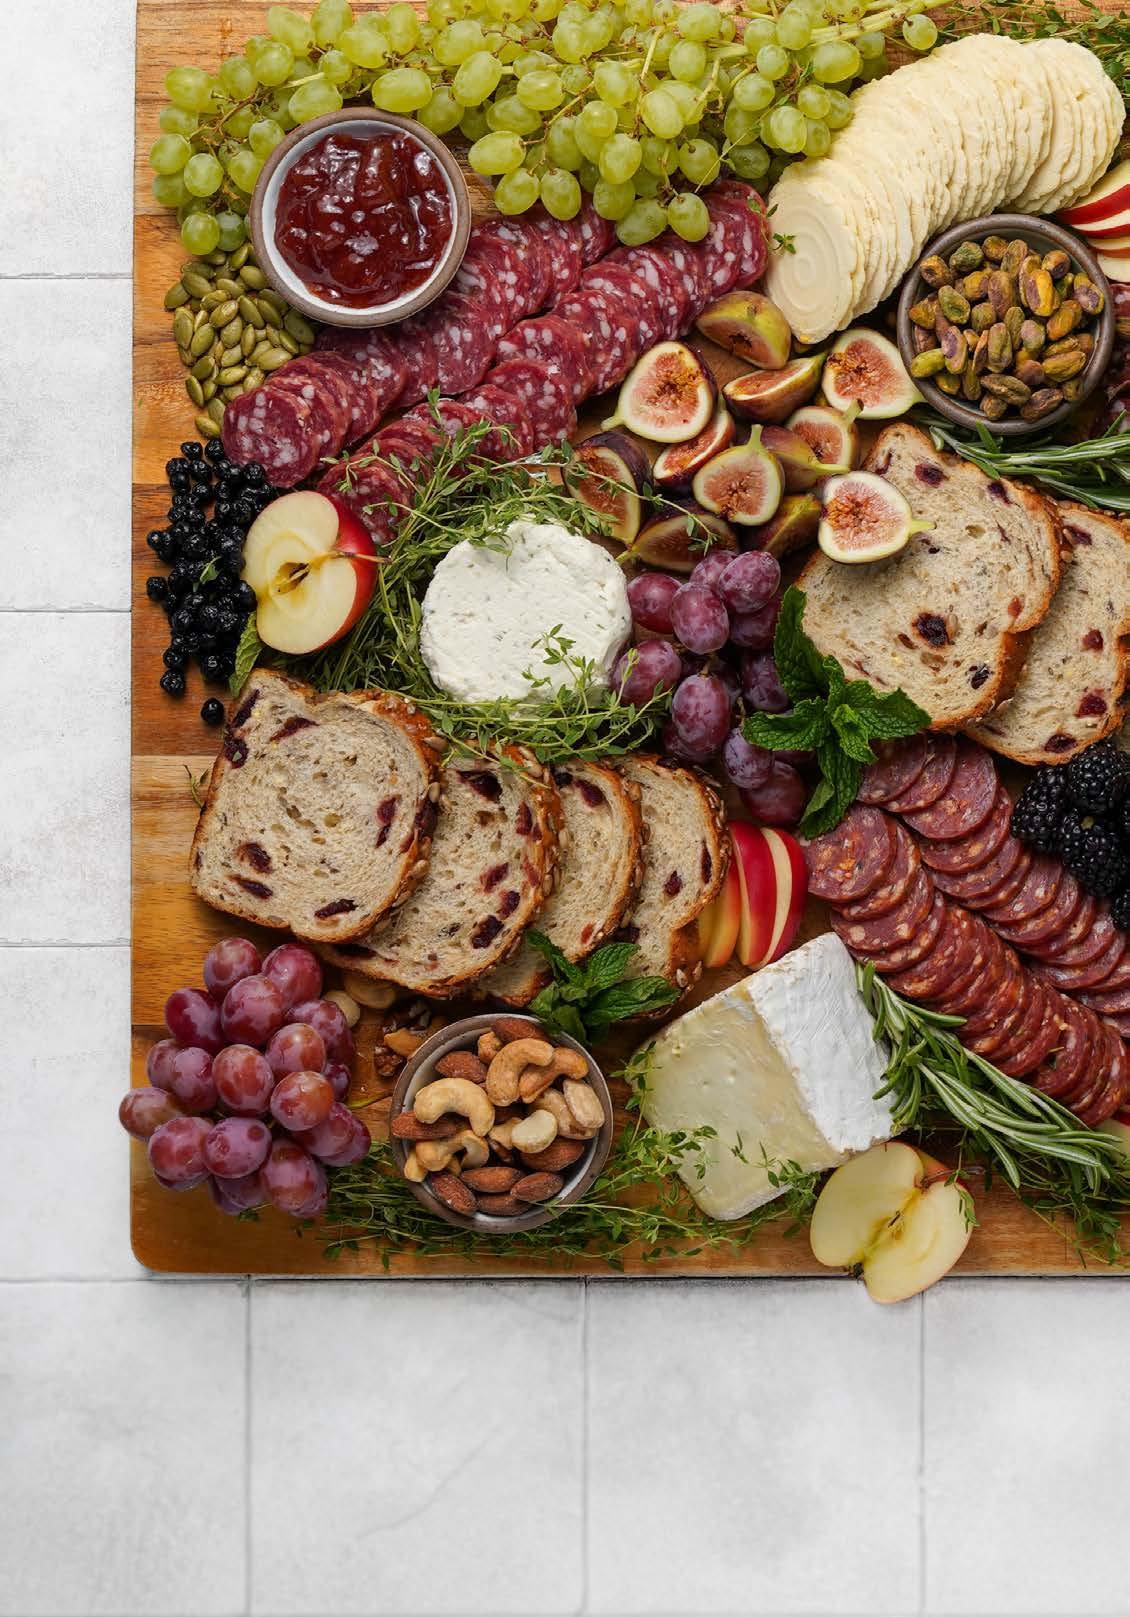
A grazing board of thinly sliced SRF Kurobuta salami and assorted cheeses is impressive and can be enjoyed by your guests while waiting for the meal to cook. Add fresh fruit, nuts, dried berries, crackers, sliced cranberry nut bread and any of your favorite items to round out the platter. Arrange everything on a rustic wood board to create a delicious introduction to your special holiday meal.
W ith au J u S
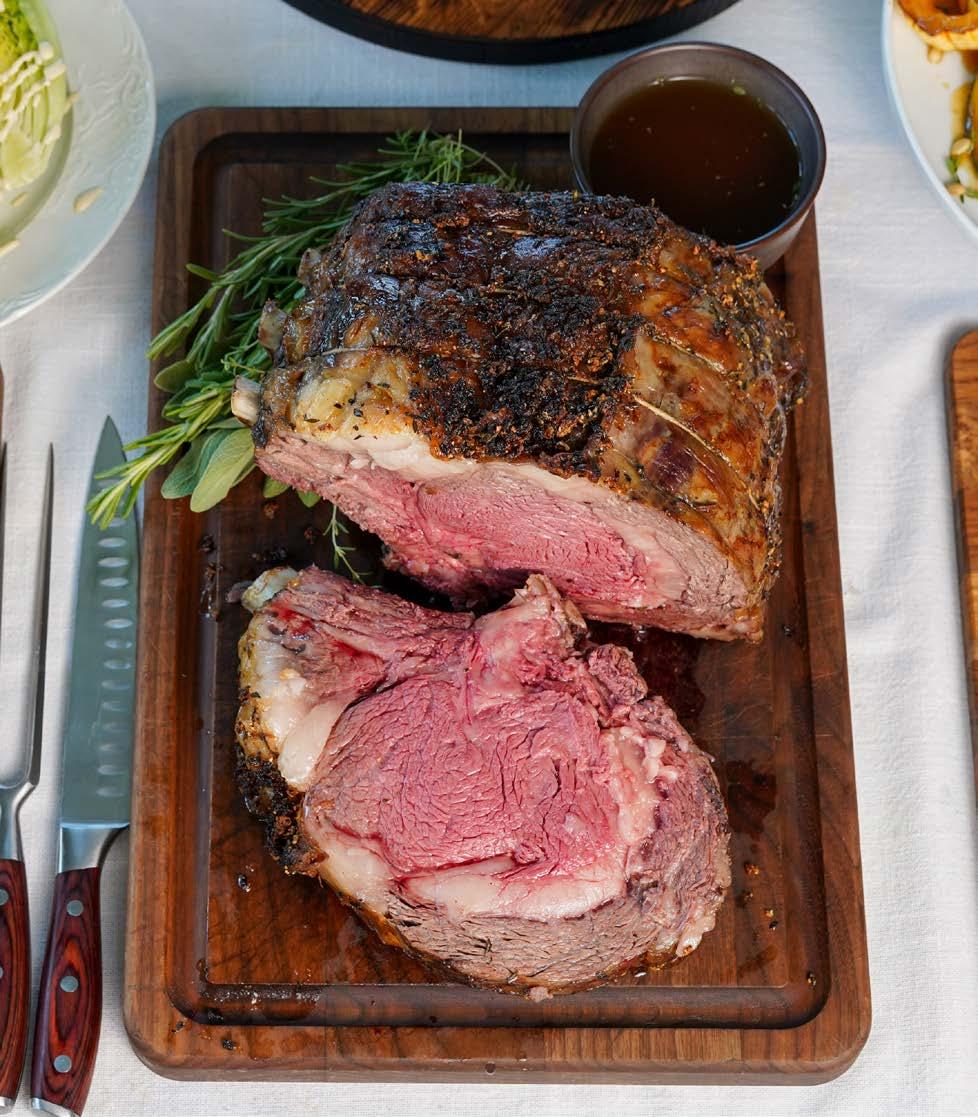
This year make a SRF American Wagyu bone-in prime rib the showstopper centerpiece of your holiday meal. It comes tied with butcher’s twine, ready to prepare.
This easy oven method starts by cooking the prime rib at a lower temperature and finishes with high heat to get that delicious outside crust. An au jus made with the pan drippings and roasted vegetables is enriched with store-bought beef broth to deepen the flavor.
20 M inute S P re P
3½ to 4 hour S C oo K in G
1 SRF Silver™ Wagyu bone-in prime rib
2 tablespoons kosher salt, or as needed
2 tablespoons olive oil
4 cloves garlic, minced
1 tablespoon fresh thyme leaves
1 tablespoon fresh sage, chopped
1 tablespoon fresh rosemary leaves, chopped
2 teaspoons freshly ground pepper
1 medium yellow onion, quartered
2 carrots, each cut into 2 to 3 pieces
2 celery stalks, each cut into 2 to 3 pieces
au Jus
¼ to ½ cup pan drippings
Roasted vegetables from cooking
4 cups beef broth
1 tablespoon Worcestershire, optional
1 tablespoon soy sauce or Tamari, optional
Kosher salt, as needed

24 hour S ina C tive
8 to 10 S ervin GS
1 Plan ahead. this step is done the day before. Remove the roast from the packaging and pat dry with a paper towel. Season the roast on all sides with a generous amount of kosher salt. Place on a rack over a rimmed baking sheet or roasting pan, and refrigerate overnight. This step helps enhance flavor and browning.
2 Remove the roast from the refrigerator 2 hours before you plan to cook, and allow to sit at room temperature. (Continue with seasoning preparation any time before cooking.)
3 Tie the roast with butcher’s twine between the bones, if this has not already been done. (This step helps the roast keep its shape and cook more evenly.)
4 In a small bowl, add the olive oil, garlic, thyme, sage, rosemary leaves, and pepper and stir to combine. Rub the mixture on all sides of the roast, starting with the bottom (bone-side) and sides and finishing with the top.
5 Place the onion, carrots and celery in the bottom of a roasting pan and top with a wire rack. Place the seasoned roast, bone side down on the rack.
6 When ready to cook, preheat the oven to 275°F. If available, insert a wireless probe thermometer into the center of the roast, avoiding the bone, if possible.
7 Place the roasting pan on a rack in oven and cook for 2 to 2 ½ hours, then begin monitoring the internal temperature. Continue cooking until the internal temperature reaches 125°F for medium rare. (The internal temperature will continue to rise 5 to 10 degrees as it finishes cooking and rests.)
8 Increase the oven temperature to 450°F. The blast of heat will create a deep golden crust on the outside of the prime rib. This step takes about 5 to 10 minutes. Monitor closely so the roast does not burn or overcook.
9 Remove the roast from the oven. Carefully transfer to a large cutting board, tent with foil, and allow to rest for 30 minutes. Meanwhile prepare the au jus.
10 For the au jus: In a saucepan, add the pan drippings, as desired, and the roasted vegetables. Add 4 cups beef broth and bring to a simmer over medium heat. Cook for 10 to 15 minutes to allow the flavors to come together. Add the Worcestershire and soy sauce, if using, then taste for seasoning. Strain the vegetables or remove with a slotted spoon and discard. Keep the au jus warm for serving.
11 Once the roast has rested, remove and discard the butcher’s twine. Slice the bones off of the roast. Then slice and serve with au jus. Enjoy!
W ith P ar M e S an S ee D an D nut C ri SPS
This refreshing Caesar salad replaces croutons with Parmesan, seed and nut crisps for a festive twist. The crisps look elegant but are so simple to make. Use any seeds, nuts, and spices you enjoy or have on hand, or keep it simple with just salt and pepper.
I recommend freshly grated Parmesan cheese for best results. The Parmesan crisps make a wonderful addition to a charcuterie and cheese board as well.
10 M inute S P re P
in G re D ient S
10 M inute S C oo K in G
Parmesan Seed and nut Crisps
1 ½ cups (6 oz.) finely grated
Parmesan cheese
¼ cup sunflower seeds
¼ cup pistachios, roughly chopped
¼ cup hazelnuts, roughly chopped
1 teaspoon fennel seed
1 teaspoon coriander seed
1 teaspoon cumin seed
½ teaspoon flaky salt
½ teaspoon freshly ground pepper
¼ teaspoon garlic powder, optional
¼ teaspoon onion powder, optional
Caesar Salad
4 romaine hearts, halved from root to tip
½ to 1 cup Caesar dressing, homemade or store bought
Parmesan seed and nut crisps
10 M inute S ina C tive
in S tru C tion S
8 to 10 S ervin GS
1 For the Parmesan crisps: Preheat the oven to 350°F. Line a rimmed baking sheet with parchment paper.
2 Sprinkle the grated Parmesan in an even layer on the parchment paper. Combine all seasonings and sprinkle evenly over the layer of cheese.
3 Place the sheet pan on a rack in the center of the oven and bake for 10 minutes, or until the cheese is light golden brown.
4 Remove the pan from the oven and allow to cool completely before breaking into large pieces. This can be made in advance and stored in an air tight container at room temperature for up to a week.
5 For the Caesar salad: When ready to serve, arrange the romaine hearts on a serving platter and drizzle with Caesar dressing, as desired. Top with the Parmesan seed and nut crisps. Enjoy!


Au gratin by definition means sprinkled with cheese or breadcrumbs, or both, and browned, creating a delicious texture on top. This recipe uses only cheese for the topping, making it a delicious and gluten-free side dish.
Gold potatoes are peeled and thinly sliced and layered with a garlic and herb infused cream and shredded cheese. Avoid soaking the potatoes in cold water so they retain their starch and help thicken the sauce naturally. This recipe can be prepared in advance and reheated for serving.
15 M inute S P re P
in G re D ient S
3 to 4 pounds (5 to 6 medium) gold potatoes, peeled and thinly sliced
2 tablespoons butter, plus more for greasing the baking dish
5 cloves garlic, minced or grated
1 teaspoon kosher salt
½ teaspoon pepper
2 teaspoons fresh thyme leaves
2 teaspoons (5 leaves) sage leaves, chopped
2 cups heavy cream
½ cup finely grated Parmesan cheese, divided
3 ½ cups freshly grated cheese, such as cheddar and Gruyère
Fresh chives, thinly sliced
1 hour C oo K in G
8 to 10 S ervin GS
in S tru C tion S
1 Preheat the oven to 425°F. Lightly grease a large (10-inch) pie dish or casserole dish with butter.
2 In a medium saucepot, over medium heat, add the butter, garlic, salt, pepper, thyme, and sage. Cook stirring constantly, until the butter is bubbly, garlic is fragrant and lightly golden, 1 to 2 minutes. Immediately add the cream, and reduce the heat. Cook over medium-low just until the cream is warmed and garlic and herbs begin to infuse the cream, 2 to 3 minutes. Remove from heat and stir in 2 tablespoons of Parmesan cheese.
3 In a bowl, combine the remaining Parmesan cheese with the shredded cheddar and Gruyère. Arrange a layer of thinly sliced potatoes in the bottom of the baking dish. Sprinkle with about 1 cup of the cheese. Pour about 1/3 of the cream mixture over the potatoes. Repeat with additional potatoes, cream and cheese, ending with cheese on the final layer.
4 Place the pie plate on a rimmed baking sheet to keep the oven clean if it spills over. Cover with foil, and place on a rack in the oven and bake for 45 minutes.
5 Remove the foil and continue baking until the potatoes are cooked and the top is golden brown, about 15 to 30 minutes.
6 Remove the potatoes from the oven and allow to cool slightly before serving. Top with fresh chives if desired and serve warm. Enjoy!
Winter squash transforms into a colorful side dish by simply roasting in the oven with a little oil and salt. A quick brown butter and maple sauce makes this side dish one you will use year after year.
Winter squash comes in a variety such as kabocha, red kuri, delicata, acorn, and butternut. Kabocha and delicata are featured in the photo, but any variety or mix will be delicious.
Pine nuts are optional but add great texture. Substitute another nut if you prefer. Try roasted pecans, walnuts, or hazelnuts. The squash can be roasted in advance and warmed for serving.
10 M inute S P re P
in G re D ient S
Winter Squash
3 to 4 winter squash, such as kabocha, red kuri, delicata, or butternut squash
2 tablespoons olive or avocado oil
1 tablespoon kosher salt
¼ cup toasted pine nuts, or other nuts, for garnish, optional
2 teaspoons fresh thyme leaves, for garnish, optional
Maple brown butter
8 tablespoons butter
½ cup maple syrup
Pinch of salt
35 to 40 M inute S C oo K in G
8 to 10 S ervin GS
in S tru C tion S
1 Preheat the oven to 425°F.
2 Prepare the winter squash: Wash and cut the squash into large pieces (6 to 8 pieces for kabocha or red kuri, 1-inch-thick slices for butternut or delicata squash). Remove and discard the seeds with a spoon. Place the squash on a rimmed baking sheet in a single layer. Drizzle the squash with oil and season with salt, tossing to combine.
3 Place the baking sheet on a rack in the oven, and cook until the squash is tender and there is little to no resistance when pierced with the tip of a knife or toothpick, 35 to 40 minutes.
4 Prepare the maple brown butter: In a small saucepot over medium-low heat, add the butter and cook until melted and bubbling. The milk solids will begin to brown and sink to the bottom, and the butter will have a nutty smell, 3 to 5 minutes. You may swirl the pan or use a wooden spoon or spatula to see the color. When it is a light golden brown, remove the saucepot from the heat and add the maple syrup and a pinch of salt. Stir to combine. Cook on low for 2 to 3 minutes to warm the maple syrup and thicken the mixture slightly. Remove from the heat and rewarm if needed, just before serving. (This can be cooled and then covered and refrigerated if making in advance.)
5 Remove the squash from the oven and transfer to a serving dish. Top with warm maple brown butter, toasted pine nuts, and fresh thyme leaves, as desired. Enjoy!


This elegant and easy berry crumble dessert fills your kitchen with warm and sweet aromas as it bakes. In the winter it works beautifully with frozen berries, which are picked at their peak season. Whipped mascarpone cream with a hint of nutmeg is the finishing touch.
Use mixed berries, cherries, blueberries, strawberries, or a combination of your favorites. This dessert can be served at room temperature or enjoyed warm. A good quality vanilla ice cream instead of the mascarpone is a time-saving short cut. Either way, this dessert is a sweet way to finish a memorable meal.
M inute S P re P
in G re D ient S
berry Crisp
2 pounds (6 to 8 cups) frozen fruit, such as pitted cherries and mixed berries, thawed
Zest and juice of ½ lemon
¼ cup brown sugar
1 teaspoon vanilla bean paste, or vanilla extract, optional
2 tablespoons granulated sugar
2 tablespoons cornstarch
¼ teaspoon salt
berry Crisp topping
¾ cup all-purpose flour
¾ cup brown sugar
½ cup rolled oats
½ teaspoon ground cinnamon
¼ teaspoon salt
8 tablespoons butter, melted
Mascarpone Cream
1 cup heavy cream
½ cup powdered sugar
½ teaspoon vanilla bean paste, or vanilla extract
1/8 teaspoon nutmeg, or cinnamon
½ cup (4 oz.) mascarpone
in S tru C tion S W ith M a SC ar P one C rea
inute
1 When ready to bake, preheat the oven to 375°F.
2 For the berry crisp: In a large bowl, add the berries and their juices, lemon zest and juice, brown sugar, vanilla, and salt, and gently stir to combine.
3 In a small bowl combine the cornstarch and granulated sugar. This will prevent it from clumping together. Then add it to the berry mixture and stir to combine. Transfer the mixture to a 2 to 3 quart baking dish.
4 Prepare the topping: In a medium bowl, add the flour, brown sugar, oats, cinnamon, salt and melted butter, and stir with a wooden spoon or spatula to combine.
5 Sprinkle the topping evenly over the berries, breaking up any pieces larger than a golf ball.
6 Place the baking dish on a rimmed baking sheet (in case of overflow) and then on a rack in the oven. Bake until the berries are bubbling and thickened, and the topping is golden brown, 30-35 minutes.
7 Meanwhile, prepare the mascarpone cream: In the bowl of a stand mixer with the whisk attachment, or with a hand mixer, add the cream and whisk to soft peaks. Add the powdered sugar, vanilla, and nutmeg and continue whisking until stiff peaks form. Add the mascarpone and mix until just combined. Transfer to a bowl or container, and cover and keep refrigerated until ready to serve.
8 Remove the berry crisp from the oven and allow to cool before serving with mascarpone cream. Enjoy!
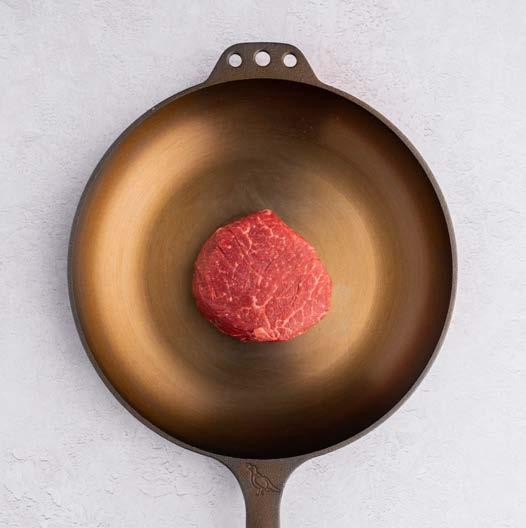
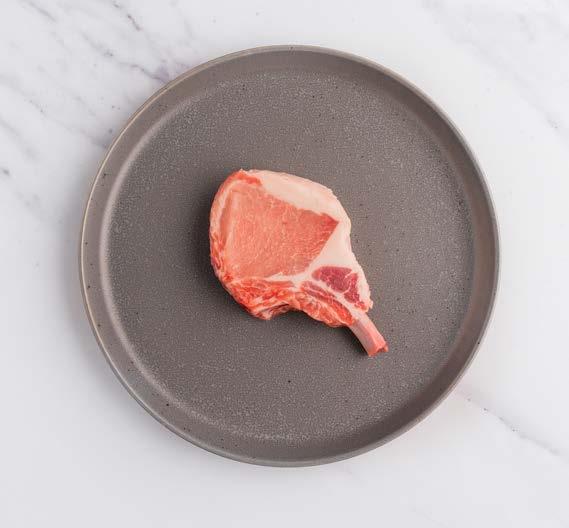
It’s always tough competition when it comes to narrowing down these cuts. Here are this season’s winners to add extra pizzazz to your festivities.


04 06 07 10 08 09 05


P hoto S an D S tor Y b Y robert J a C ob L er M a
THE BOCUSE D’OR IS THE MOST PRESTIGIOUS CULINARY COMPETITION IN THE WORLD, BUT EVEN KNOWLEDGEABLE FOOD LOVERS ARE UNFAMILIAR WITH THIS BIENNIAL EVENT.

Referred to as “The Olympics of Food,” the Bocuse d’Or gathers teams from 24 countries to compete over two days in Lyon, France for the Gold Medal and to be named the best chefs in the world.
The teams representing their countries in Lyon are chosen through a rigorous process. The prep is demanding. The selection, even more arduous. It can be intimidating for even the most accomplished chef. In the United States, Ment’or is the organization that selects the American team.
Team USA has competed at Bocuse since 1987, but American chefs were outmatched by international teams who were better organized and funded. In 2008 the Ment’or Foundation was created to institute a structure and procure funding to assist U.S. chefs in the competition. Ment’or was established when Paul Bocuse, legendary chef and founder of the Bocuse d’Or, asked celebrated
Chef Daniel Boulud to develop an organization to develop a competitive team for the U.S.
The foundation’s Board includes Chef Boulud (Chairman), Chef Thomas Keller (President) and Jérôme Bocuse, son of Paul Bocuse (Executive Vice President). The board is flanked by the Culinary Council for expertise and guidance. The Council’s members include esteemed chefs Grant Achatz, José Andrés, Tom Colicchio, Timothy Hollingsworth, Daniel Humm, Emeril Lagasse, Wolfgang Puck and Jacques Pépin.
With some of the world’s culinary icons paving the way for the next generation of great chefs, it’s no surprise Team USA has improved on the world stage. In 2017 Chef Matthew Peters and Commis (or assistant chef) Harrison Turone won America’s first Gold Medal at the Bocuse d’Or.
"The best chefs in the country using the best pork products around. How could that not be amazing?"
In September 2023, I was selected to photograph the Team USA National Selection competition, held at The Culinary Institute of America on the Copia campus in Napa, California. It was one of the highest honors and privileges I’ve had as a photographer. Three teams, comprised of a Chef (or Candidate) and Commis, competed for the coveted top spot to represent the United States in 2025.
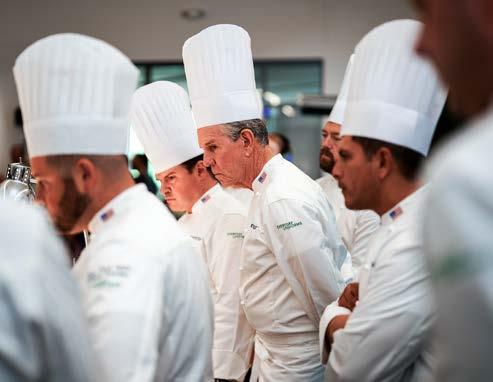
Just like presidential elections, there are age requirements for the teams. A Candidate must be at least 23 years old, and their Commis can be no older than 22 by January 2025. Each team was assigned an experienced coach who assisted in organization, documentation and prep. The competition serves as a dress rehearsal for the international competition.
“Team USA is chosen through a national selection process that mimics the format and atmosphere of the competition that is held in Lyon biennially,” according to the foundation.
The winning team trains for the Bocuse d’Or for a full year at the Ment’or facilities in Napa. The foundation provides coaches, advisors and designers to prepare the winning Candidate and their Commis for the two-day competition in February 2025.

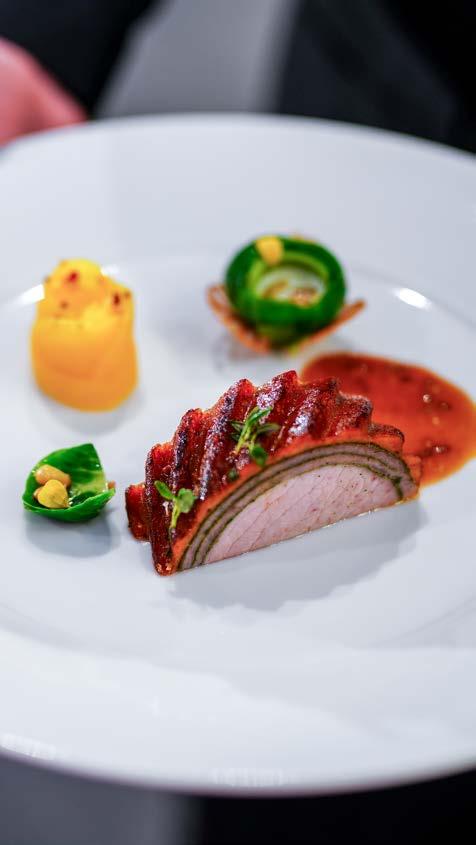
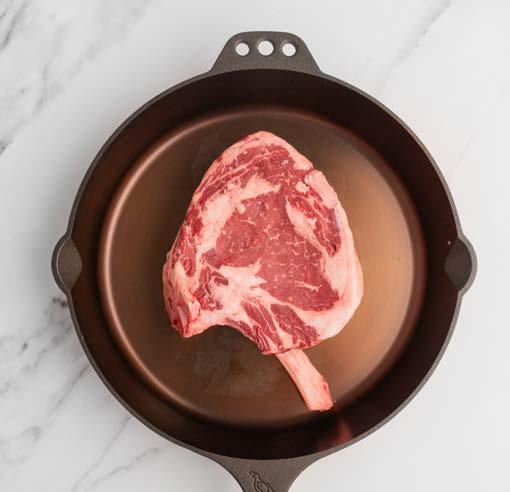
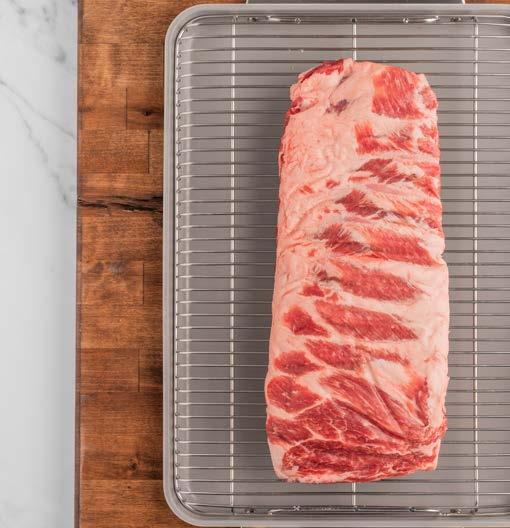
Snake River Farms has sponsored Ment’or since 2015. For the September 2023 competition SRF supplied two types of Kurobuta pork. The Candidates were tasked with creating two presentations, a “theme on a platter” with the SRF rack of pork and a “theme on a plate” using SRF pork collars. The best chefs in the country using the best pork products around. How could that not be amazing?
To say photographing the competition was intense would be an understatement. It was one of the most rigorous assignments I’ve received. I followed the teams for two days and documented their dishes. It is the closest an outsider can get to experiencing the flow and tension of the event. The stress was palpable. I didn’t envy their positions, though I admired their tenacity, their creativity, their drive. Years of preparation would be culminating on this single day. Only one team would win. And according to Ricky Bobby, “If you’re not first, you’re last.” Which each team passionately believed. No pressure.
What these teams did to the pork racks and collars was nothing short of remarkable. They conceptualized and crafted dishes with a mindnumbing level of imagination and culinary skill.

"They conceptualized and crafted dishes with a mind-numbing level of imagination and culinary skill."
A panel of jurists comprised of top tier chefs judged the entries. The jury included Josiah Citrin, Michelle Karr-Ueoka, Paul Bartolotta, Timothy Hollingsworth, Junior Borges and Team USA 2019 Chef Matthew Kirkley. Again, no pressure.
The teams were judged for the originality and execution of their dishes, but were also judged on their adherence to process, final presentation and kitchen organization. Chefs were also scrutinized for their ability to communicate, teach and mentor their Commis.

Restaurants rise and fall based on the strength of their teams and the collective ability to execute a comprehensive vision. Successful chefs clearly communicate with their teams, so each member’s contribution moves them toward the kitchen’s goals. This mindful approach is critical to the development of the next generation of culinary talent. It’s for this reason why the mentor aspect is so critical to the evaluation process.

"While every team delivered world class dishes, it was Chef Stefani that stood out for her composure, precision and ability to mentor her Commis."

When the chef’s scores were tallied by the judges and the plates were cleared, Chef Stefani De Palma of Addison, a 3-star Michelin restaurant in San Diego, and Commis Bradley Waddle were selected to Team USA 2025. While every team delivered world class dishes, it was Chef Stefani that stood out for her composure, precision and ability to mentor her Commis.
“All the competing chefs showed a hyper-focused drive this year, and they displayed incredible skill. Chef De Palma and Commis Waddle emerged with a unique approach, remarkable plating, and a taste profile that impressed the judges,” said Team USA President, Chef Gavin Kaysen.
Oui Chef! I couldn’t agree more. And good luck Team USA!


