4 minute read
INSPECTION & QUALITY ASSURANCE
ON CLOSER INSPECTION
We hear from two expanding QA labs – Owlett-Jaton’s in the UK and a bolt maker in Spain…
OWLETT-JATON INVESTS IN NEW QA FACILITY
Significant investment in a new laboratory at Owlett‐Jaton’s Head Office in Staffordshire will provide a new base for its Quality Assurance Team. Moving locations has presented an opportunity for Group Quality Manager Steve Phillips to improve the existing facilities into a single dedicated fit‐for‐purpose department located within the Stone operation.
“The move has allowed us to expand and has provided us with two dedicated rooms, one for sample preparation and limited re‐working of products, whilst the other room provides a clean environment for performing inspection and conducting investigations.
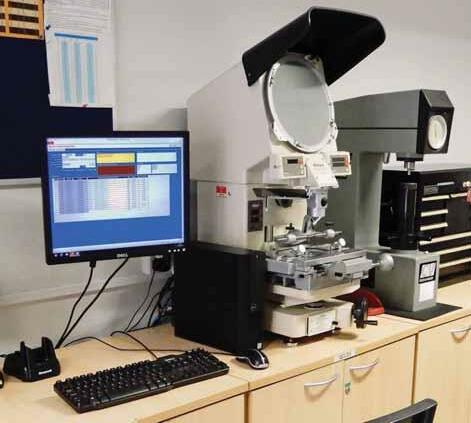
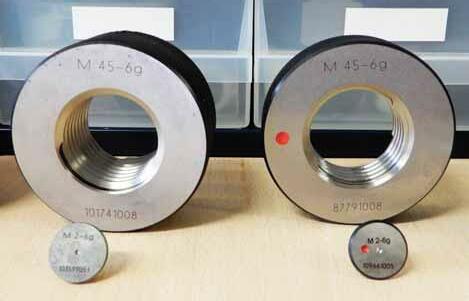
“Our optical inspection equipment includes both a Keyence IM-7000 Image Dimension Measuring System together with a more traditional Mitutoyo shadowgraph, allowing us to inspect parts to a high level of accuracy. We also carry out on‐site hardness determination to Rockwell B&C scales, and a significant range of the traditional ring, plug and caliper gauges are still invaluable and enable us to inspect a large sample of incoming products.”
Owlett-Jaton’s goods inwards inspection process is rigorous, spot-checking ~50% of inbound fasteners ensuring they conform to the relevant national and international manufacturing standards. A bespoke fastener orientated inspection system is employed, the system provides the dedicated goods inwards inspector with all the information he needs to effectively assess the products without having to reference the applicable manufacturing standard. The inspection system is integrated with the purchasing supplier approval system, providing the inspector with insight as to which manufacturers or products he should focus on if required.
The majority of critical fasteners are sourced from reputable approved manufacturers and are supplied with certification, typically a 3.1 to DIN‐EN‐10204. The quality department are also equipped and have access to NAMAS (The National Measurement Accreditation Service) approved test facilities which allow more advanced product verification documents to be produced, such as an ISIR (Initial Sample Inspection Report). Customers at the enquiry stage can also request a PPAP (Production Part Approval Process) submission from the manufacturer, an essential requirement for the supply of auto‐motive components.
Regarding changes in customer requests and market trends, Phillips explains: “There is an increasing focus on environmental issues and we are being asked more and more often for product conformance to REACH (Registration, Evaluation, Authorisation and Restriction of Chemicals) and RoHS (Restriction of Hazardous Substances). This isn’t a trend which is going to go away, it will only grow in momentum and our purchasing practices are changing to reflect this. We are also keeping a close eye on developments such as the EU SCIP database (substances of concern in articles, as such or in complex objects/products)”.

Ring gauges
www.owlett-jaton.com
BOLT MAKER PICKS GENERAL INSPECTION’S HALO
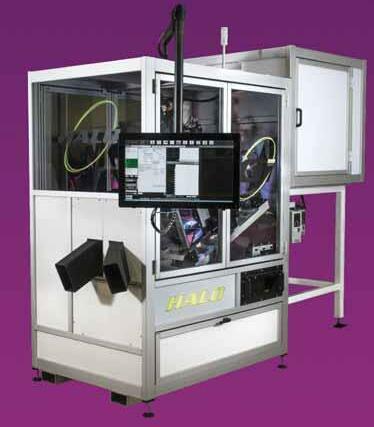
Davisburg, Michigan‐based General Inspection (Gi) has installed another HALO inspection system, this time for a bolt maker in Spain. This particular HALO is equipped with a total of eight cameras providing 360° dimensional inspection, 360° visual defect detection, crack detection, recess inspection and recently developed bottom cameras for bearing surface analysis. The standard HALO uses four cameras that produce eight images through a patented light sequencing process. HALO measures all profile features including; threads, lengths, diameters, tapers, angles, straightness, perpendicularity and concentricity with back lighting. Simultaneously, HALO detects surface defects such as; dents, scratches, knurl damage, thread nicks and patch quality/presence with front lighting positioned from the top and bottom. Additionally, two cameras positioned from the top are used to detect cracks and recess defects. A special lens plus Gi’s software algorithms combine to deliver opti‐mum crack detection capability at unmatched inspection rates, says Gi. A second special lens is used to view the inner walls of recesses to detect small chipped punch defects, plating fill and dimensional measurements of recess features. Finally, three cameras mounted from the bottom provide bearing surface inspection. Defects such as cracks, burrs, dents and other damages are detected using Gi’s sophisticated algorithms, advanced lighting techniques and a special “unobstructed view” part handling technique. After searching the world for an inspection system that provides complete part coverage the Spanish bolt maker selected Gi. Defect detection was key to the purchase decision, but inspection rates at a minimum of 285 parts per minute and less than 10 minute part changeover time were important factors. want to build on.

General Inspection HALO for cutting B-1 with Feeder

