6 minute read
QC LABORATORIES
OWLETT-JATON > READY FOR INSPECTION
Quality is king. Torque Magazine speaks with key suppliers about their quality processes, starting with Owlett-Jaton…
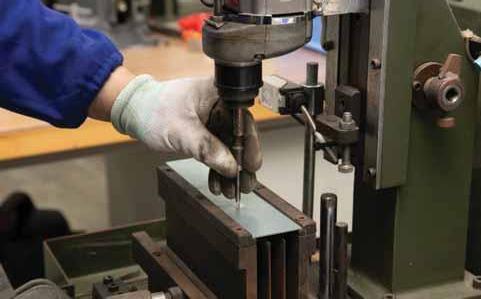
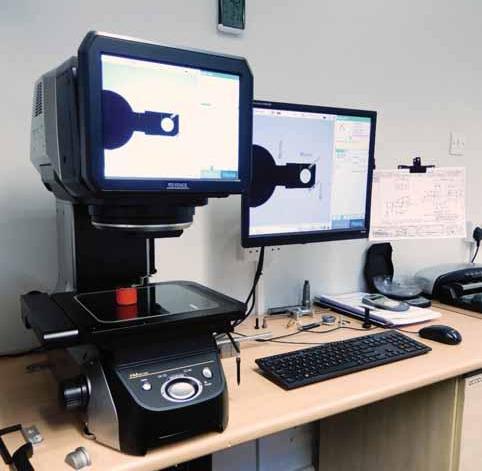
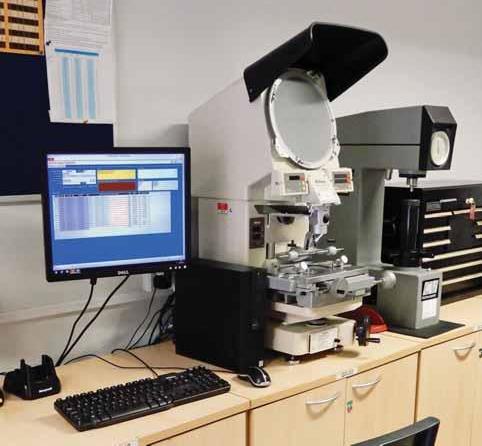
Anew laboratory at Owlett‐Jaton’s Head Office provided an opportunity for the prominent wholesale supplier to improve its existing quality facilities into a single dedicated fit‐for‐purpose department, located within its Stone operation. The significant expansion allowed for the incorporation of two dedicated rooms, one for sample preparation and limited re‐working of products, the other offering a clean environment for performing inspection and conducting investigations on fasteners and fixings. ISO 9001:2015 accredited, its purchasing department carries out rigorous checks on manufacturers before engaging, to ensure products conform to the quality standards required. Regular audits focus on what quality controls and traceability factories have within the production process. Checks include how the raw material is stored, the specific grades of materials they can produce, even what type of housekeeping they have on the production floor. These checks, coupled with assurances from the manufacturers, help to ensure that the products which reach the lab, pass any quality control checks carried out. Owlett‐Jaton’s goods inwards inspection process is rigorous, spot‐checking ~50% of inbound fasteners, ensuring they conform to the relevant national and international manufactur‐ing standards. A bespoke fastener‐orientated inspection system is employed; the system provides the dedicated goods inwards inspector with all the information he needs to effectively assess the products without having to reference the applicable manu‐facturing standard. The inspection system is integrated with the purchasing supplier approval system, providing the inspector with insight as to which manufacturers or products they should focus on if required. The optical inspection equipment includes both a Keyence IM‐7000 Image Dimension Measuring System together with a more traditional Mitutoyo shadowgraph (pictured left), facilitating the inspection of parts to a high level of accuracy. Owlett‐Jaton also carries out on‐site hardness determination to Rockwell B&C scales, and a significant range of the traditional ring, plug, and caliper gauges are still invaluable and enable inspection of a large sample of incoming products. Critical fasteners are sourced from reputable approved manu‐facturers and are supplied with certification, typically a 3.1 to DIN‐EN‐10204. The quality department is also equipped and have access to NAMAS (The National Measurement Accredita‐tion Service) approved test facilities which allow more advanced product verification documents to be produced, such as an ISIR (Initial Sample Inspection Report). Customers at enquiry stage can also request a PPAP (Production Part Approval Process) submission from the manufacturer, an essential requirement for the supply of automotive components.
Keyence IM-7000 Image Dimension Measuring System is among OJ’s optical inspection equipment
www.owlett-jaton.com
CERTIFIED LABS FOR FASTENER TESTING
Brighton-Best International’s quality commitment saw it establish a mechanical testing lab to supplement its quality procedures…
Brighton‐Best International (BBI) is among the largest master suppliers of fastener products to global distribu‐tion and naturally understands the critical nature of every joint – and therefore the importance of each and every fastener supplied. Quality is what drives the company, and the industry. Reliability is key and paramount to long‐term success. That is why, BBI aims to lead the supplier market in quality sourcing and in‐house test‐ing, to guarantee that product supplied through them meets or exceeds all specifications and requirements. In 1994, BBI saw the need to expand beyond ISO Quality Management Systems to include accredited laboratory capabil‐ities that would make sure its distributors had up‐to‐the‐minute access to address all user questions and be able to verify the voracity of the product backed by government‐certified testing. So, a mechanical testing lab was created in the New Jersey facil‐ity and certified that same year. As BBI grew and expanded its reach and product lines, new equipment and enhanced testing capabilities were added. The expanded lab, located within the BBI Los Angeles facility, was accredited and became operational to offer even faster service, covering all time zones. Brighton‐Best International strives to lead the fastener market and remains committed to its Tested, Tried and True motto, continuing to operate both A2LA (American Association of Labo‐ratory Accreditation) certified labs in New Jersey and Los Angeles, with both facilities certified to ISO/IEC 17025:2017 standards. BBI’s QA Lab in New Jersey was recently approved for contin‐ued accreditation by the A2LA until July 2023. Since 1925, Brighton‐Best has been committed to providing distributor partners with the highest quality products. Today the business believes that it carries the most complete line of fasteners –including U.S. Anchor and Proferred drywall and self‐drill screws –Proferred hand tools, and Ironclad Performance Wear’s full line of high performance work gloves.
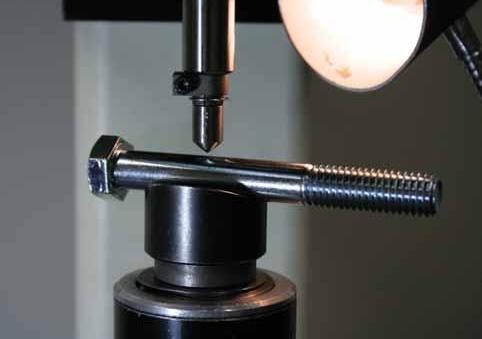
One bolt undergoes a hardness test...
Scaling up: BBI has ramped up its testing capabilities as the company has grown over the years
www.brightonbest.com
LEDERER AND FQC > EXACTING QUALITY STANDARDS
In addition to its own QA testing department, Lederer's commitment to quality also includes its own testing laboratory: the joint FQC facility in Shanghai...
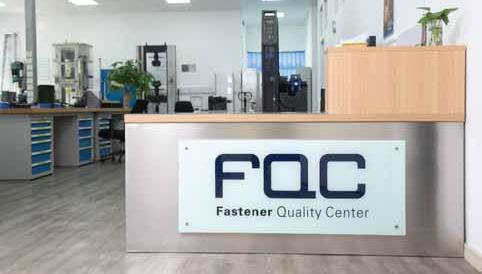
The FQC – Fastener Quality Centre – is a quality testing facility based in Shanghai, China. Testing industrial fasteners is the specialism of this independently‐run company, which is joint‐owned by Lederer and Fastbolt. Founded almost 15 years ago, FQC not only has an enviably well‐equipped quality facility but it also visits external suppliers to carry out on‐site audits and pre‐shipment inspections. The FQC’s comprehensive facilities allow it to perform tensile tests, impact tests, torsion tests, analytical tests, coating thickness tests, structural examination by microscope, function tests, dimensional and true to gauge inspections, determination of corrosion resistance, head soundness tests… and more besides. Staff take part in ongoing training programmes, while the FQC also undergoes on‐time maintenance and calibration of its inspec‐tion equipment and the optimisation of its internal processes aiming to always meet customer set completion deadlines. The independent certification authority CNAS (China National Accred‐itation Service) has approved this competence for FQC by accred‐iting the laboratory according to ISO 17025:2005.
THE TESTING LABORATORY FQC MEANS LEDERER CAN PERFORM EVEN MORE DETAILED INVESTIGATIONS AND ISSUE CERTIFICATES. THE LAB’S CAPABILITIES INCLUDE >
Tensile tests for full-size bolts and screws Tensile tests under wedge loading Proof load test for nuts Breaking torque test Drill speed test for self-drilling screws Hardness test for core and surface hardness Miscellaneous manual tests Salt spray tests Issuing of test certificates 3.1C
LEDERER > CONSISTENTLY HIGH QUALITY IS THE PRIORITY In addition to the resources of the FQC, which is accredited as a testing laboratory according to ISO/IEC 17025, Lederer also has its own QA testing department. All incoming and outgoing parts undergo a systematic quality analysis and assessment. Physical and chemical properties are examined with modern measuring instruments to ensure they measure up to desired levels and properties.
THE CRITERIA THAT CAN BE EXAMINED INCLUDE >
Dimensions Coatings Hardness according to Rockwell (HRC) and Vickers (HV) Thread Material types
www.lederer-online.com www.fqc-shanghai.com
