Subscriptions and Distribution Fatima Dramat fatimad@picasso.co.za
Printing CTP Printers, Cape Town
MANAGEMENT
Management Accountant Deidre Musha
Business Manager Lodewyk van der Walt General Manager, Magazines Jocelyne Bayer
CONTENTS
BITS ‘N’ BOBS
4 NEW PRODUCTS AND INNOVATION
If you want to make your own vinyl decals for your walls or need customised organisation labels, then Cricut Joy is the perfect cutting-edge mini machine to own; Find out what exciting innovations Corobrik has for new brick colours and brick shapes.
6 NEW SPACES AND PLACES
Builders and Hirsch’s have new retail spaces for all your home appliances and DIY products and services.
SPRING 2024
13 11 EXPENSIVE RENOVATION MISTAKES TO AVOID
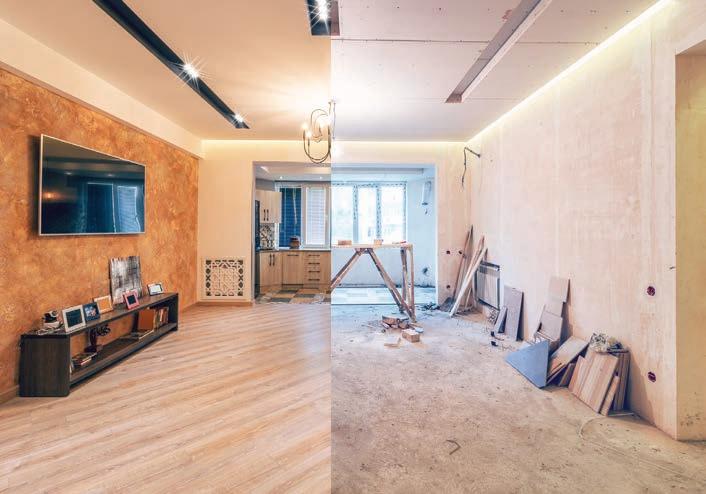
Home renovation or upgrades usually add to the value of the property. However, there are myriad potential pitfalls along the way – some will cause frustration and can become very costly.
17 4 HOUSEHOLD ACCESSORY TRENDS TO MAKE YOUR HOME LIFE EASIER
Copyright: Picasso Headline. No part of this publication may be reproduced in any form without written permission from the publisher. The publisher is not responsible for unsolicited material. EasyDIY is published by Picasso Headline. The opinions expressed are not necessarily those of Picasso Headline. All advertisements/advertorials and promotions have been paid for and therefore do not carry any endorsement by the publisher.
With more people working remotely, our homes have become multifunctional spaces – places where we live, work and relax. Utilising useful accessories to create inviting, inspiring spaces can make life easier and improve personal wellbeing.
21 TRANSFORM TIGHT SPACES
A guide to space-saving bathroom ideas when designing for small bathrooms.
DIY EXPERT GUIDANCE
9 WHAT TO CONSIDER BEFORE DIVING INTO YOUR HOME DIY
DIY projects may save you money, but being inexperienced or unqualified to perform certain renovations could lead to unnecessary accidents and liability issues in the long run.
PROJECTS
23 A NEW LOOK FOR AN OUTDATED ROOM
Creating a stylish modern bathroom from an unused dressing room requires the right design, know-how and products.
DIY
25 THROUGH THE TIMBER PORTAL: BUILDING A STURDY GARDEN GATE
Building a classic and strong garden gate is easier than you think – we show you how.
THE DIY COMPANION
As we embrace the changing seasons, it’s the perfect time to dive into home improvement projects that not only enhance our living spaces, but also reflect our personal style. In this issue, we’re thrilled to introduce you to the Cricut Joy, your ultimate DIY companion for creating custom vinyl decals and organisation labels that will transform your home.
Explore the latest retail spaces from Builders and Hirsch’s, where you can find everything you need for your DIY endeavours. Our expert guidance section is packed with essential tips on what to consider before embarking on your DIY journey, as well as crucial renovation mistakes to avoid. We want to ensure your projects are successful, safe and cost-effective.
Discover the latest household accessory trends that cater to our evolving lifestyles, especially for those who work from home. And don’t miss our bathroom upgrade feature, which proves that with the right design and products, style and functionality can be achieved.
Finally, we’ll guide you through building a sturdy garden gate, making it easier than ever to enhance your outdoor space. Let’s get started on those DIY dreams.
Raina Julies
The ultimate HOME DIY COMPANION
If you want to make your own vinyl decals for your walls or you need customised organisation labels, then Cricut Joy is the perfect cutting-edge mini machine to own. By Raina Julies
Developed by tool manufacturer Cricut, the compact Cricut Joy has impressive features. Not only does it offer unparalleled convenience, but also vast versatility in one small package. It’s easy to use and very portable, making it a great choice for both beginners and experienced crafters looking for a versatile tool for smaller projects.
The Cricut Joy’s size is undeniably impressive. At a mere 21.3 x 13.7 x 10.9cms and weighing only 1.8kgs, it is perfect if you want to move about with it or if your crafting area at home is restricted.
Despite its size though, the machine doesn’t skimp on functionality. You can slice through an extensive variety of materials, such as vinyl, paper, cardstock and even certain fabrics, with so much ease. Its adaptability renders it a perfect tool for numerous projects, from creating bespoke decals for your walls and creating customised labels to fabricating and personalising presents.
SIMPLICITY OF USE
Its user-friendliness is intentional. It can be set up easily, uses Bluetooth connectivity and effortlessly connects wirelessly to your gadgets without complications. The Cricut Design Space software accommodates both mobile and desktop devices and its selection of templates and design options cater for different skill levels, allowing you to create simple or intricate designs.
THE CUTTING FUNCTION
The machine has a clever cutting function that intuitively modifies the blade pressure and depth to match the composition of the material being used. With this feature, accuracy is guaranteed without any fuss or estimation required. As an added perk, its mat-free Smart Vinyl cutting capacity allows users to create uninterrupted cuts up to six metres long. This precise cut functionality and gentle operation produce clean results.
WHAT TO DO WITH IT
1. Card making: cut and write custom greeting cards, invitations and thank-you notes.
2. Labels and stickers: create personalised labels, stickers and decals for organisation or decoration.
3. Home decor: make custom vinyl decals for walls, windows and other surfaces.
4. Iron-on projects: design and apply iron-on transfers to T-shirts, tote bags and other fabric items.
5. Crafts and gifts: craft personalised gifts such as custom mugs, notebooks and scrapbooks.
6. Party decorations: create banners, cupcake toppers and other decorations for special events.
7. Organisation: design and cut labels for storage bins, jars and other household items.
Want one now, then scan the link to shop
SHO P NOW
DID YOU KNOW?
The Cricut Joy supports a range of Cricut tools and accessories, including the Fine Point Blade, Pens and the new Joy Blade.
GUINNESS WORLD RECORD STATUS
Cricut South Africa has officially been crowned the Guinness World Record holder for creating the world’s largest display of rolled paper flowers. The Cricut team needed to create at least 1 001 paper flowers to beat the previous existing record and they exceeded this goal significantly with a total of 6 696 intricate paper blooms using Cricut cutting machines.
The record, which was officially verified by the Guinness World Records team, was achieved on 5 May 2024 at the Hobby-X exhibition in Johannesburg, with the Cricut Team, Cricut ambassadors, members and the public all pitching in to nab the record title.
The result is a 3.5m x 6m rolled paper flower display wall in a vibrant array of colours proudly surrounding the Cricut name.
ALL THE PERKS OF CRICUT ACCESS, FREE FOR 30 DAYS
• 1 000 000+ cut ready images
• 1300+ professional fonts
• 100 000+ customisable projects
• Exclusive design space features
• Priority member care Find out more here.
How does Cricut work?
HO W TO
IMAGINE ANY CLAY BRICK COLOUR OR SHAPE, AND COROBRIK CAN MAKE IT
Brickmaker Corobrik is once again pushing the boundaries of innovation by adding colours to bricks. Heinrich von Wielligh, factory manager at Corobrik’s Midrand facility, shares that the process of adding colours to bricks is meticulous. “We integrate the colours into the clay body itself using oxides or pigments,” he explains. “This ensures that the colour is an inherent part of the brick, not just a surface coating.”
Corobrik’s commitment to quality is evident in its extensive testing and product development processes. “Our central laboratory here in Midrand is accredited for various tests. We conduct small sample runs to develop new colours and ensure they meet our stringent standards before full-scale production,” notes von Wielligh.
The company’s bespoke capabilities extend beyond just colour variations. “We have a special plant dedicated to creating unique shapes and offering CPD presentations to showcase our capabilities,” says von Wielligh. “For special projects, we can produce custom
shapes and colours. For instance, we have recently collaborated with Prasa to develop specific shapes and colours.”
When it comes to colour trends, there is a noticeable shift towards earth tones.
“There is a growing demand for colours such as white, black, grey and brown. We have recently developed several new colours that are becoming increasingly popular,” says von Wielligh.
Corobrik’s dedication to innovation and quality makes it a preferred choice for architects looking for high-tech products and custom solutions.
DID YOU KNOW?
Another of Corobrik’s latest developments is a new breeze block. “We are in the final stages of creating a breeze block similar to an imperial brick but with different core configurations for unique patterns,” reveals von Wielligh.
A new Builders store has opened in Wonderboom, Pretoria
More and more people are embracing hands-on projects, drawn to the creative freedom, cost savings and innovative technologies making DIY even more accessible. This new location offers residents a wider selection of DIY and home improvement products and services.
Global and local research indicates that the global DIY home improvement market is predicted to grow substantially between 2024 and 2029.
“South Africa is no exception to the trend,” says Katherine Madley, vice president of banner marketing at Massmart. “The decision to open the new Builders store in Wonderboom was driven by the growing wave of DIY enthusiasts across the country and the chance to expand within an existing centre, offering a convenient location for our valued customers.”
WHAT’S ON OFFER?
The store will provide a range of services, including paint mixing, deliveries, online shopping, pool water testing, a comprehensive nursery and garden centre, made-to-measure glass services, key cutting, roofing solutions, installation services, plan estimations, prepaid services and various credit facilities.
HOME SHOPPING
Have you just renovated your home? If so, you’ll need to visit the new Hirsch’s store in Claremont in the Western Cape Cape Town’s retail scene just got lot more exciting with the grand opening of the newest Hirsch’s Homestore. It swung open its doors to the public in July and Allan Hirsch, founder of Hirsch’s, said: “This is a state-of-the-art store with the latest technology, appliances, beds and furniture. We truly look forward to serving the southern suburbs community.” www.hirschs.co.za
What to consider before DIVING INTO YOUR HOME DIY
Iperform certain renovations could lead to unnecessary accidents and liability issues in the long run, writes Siyakha Masiye, spokesperson at MiWay Insurance
If you’re itching to make those long-awaited alterations to your space or upgrade your home without a hefty price tag, taking the DIY approach may be a good option. But, before you dive into revamping your home, you must make sure you understand the insurance implications. The rule of thumb when deciding whether to take the DIY approach to home renovations is that anything aesthetic or cosmetic is generally less risky than anything structural. A great starting point is to review your home insurance policy before executing any of your DIY plans.
In most cases, insurers do not provide cover for damage or destruction caused by poor or defective workmanship. Since certain renovations will affect your home’s resale value, those installations and alterations may result in a higher insurance premium. Therefore, before going ahead, it is important to understand the implications on long-term affordability.
SOME DIY-FRIENDLY HOME IMPROVEMENTS
Aesthetic upgrades that won’t have any material effect on your insurance cover include:
• painting walls;
• landscaping a garden;
• installing shelving or storage units; and
• conducting minor plumbing repairs (such as fixing a leaking tap).
ADVICE: These kinds of tasks don’t require a high level of technical expertise and are generally low risk. If, however, you make a critical mistake, for example, cracking the plaster when hanging a painting or using cheap materials that don’t last, these incidents will not be covered by your insurer. For this reason, it’s important to follow any safety guidelines provided and have enough self-insurance funds available should you need to fix a mistake.
WHEN TO CALL IN AN EXPERT
Some tasks should be left to the experts for safety reasons. These include:
• any electrical installations such as installing new light fixtures or additional plug-points;
• repairing faulty wiring; and
• adding or fixing any distribution boards.
CREATING A SMART HOME
Creating a smart home, where appliances and fixtures are wirelessly connected and run on an automated system, is one of the most popular renovation trends. However, doing these kinds of major upgrades will have insurance implications and will typically mean that your premium will increase to account for the rise in value. It is important to check these kinds of details to avoid being underinsured.
The good news is that some home upgrades could reduce your insurance premium or save you money in the long run. Installing security features, such as electric fencing, an alarm system or CCTV monitoring, could reduce the cost of your premium. For this reason, it is essential for homeowners to keep their insurers in the loop when it comes to renovation plans. Brokers can provide valuable guidance and advice on the insurance implications and whether it’s safe to go the DIY route on certain elements or not. The most prudent thing to do is to factor these insurance cost implications into your renovation plan – in doing so, you will ensure that making the upgrades to your home will improve aspects of life and save you money in the long run.
WHAT IT MEANS FOR YOUR INSURANCE PREMIUM
Before going ahead with renovations, it is vital to check whether the alteration will affect the value of your home. For example, installing a swimming pool comes with a list of safety and compliance requirements and can also significantly increase your home’s resale value. The same goes for the installation of features such as a fireplace, or upgrading your kitchen or bathrooms.
ADVICE: Any electrical work not conducted by an expert will increase the risk of fire hazards in your home, posing a safety risk and could cause unnecessary complications in the event of an insurance claim.
The same applies to major plumbing renovations such as installing new pipes and fixtures, adding a new water point or upgrading or adding a water heating system. Faulty plumbing can pose a serious risk as it can lead to water damage, sanitation issues, the growth of mildew and bacteria (a significant health hazard) and chemical exposure.
In both the case of electrical and plumbing installations, you also need to consider the issue of compliance. Insurers will not provide cover for systems that are not compliant with the requirements set out by the South African Bureau of Standards, which outline the technical requirements for the safety, health and sustainability of buildings. This is also important if you are considering eventually selling your home –without the relevant certificates of compliance, you will not be able to process the sale or transfer.
EXPENSIVE RENOVATION MISTAKES TO AVOID
Home renovation or upgrades usually add to the value of a property. However, there are myriad potential pitfalls along the way – some will cause frustration and can become very costly, writes Claude McKirby, co-principal of Lew G S I R S S
Renovating a property can significantly enhance its value, improve functionality and increase aesthetic appeal, however, while the benefits are substantial, it’s crucial to approach renovations with careful planning and consideration because mistakes will not only be frustrating and stressful, but can also prove to be very costly.
The following are potentially expensive renovation mistakes that should be avoided.
out what elements of the current layout work and which don’t work. From where you drop the groceries after a trip to the supermarket and how the living zones flow to where the coldest and warmest corners of the house are, it’ll help you hone a practical and comfortable design rather than purely focusing on aesthetics.
2. Neglecting to formulate a comprehensive budget
Optimise returns: renovating a home has multiple significant benefits in both the short and long term, not least adding value to the property, but numerous potential pitfalls can end up being expensive.
PRACTICAL CONSIDERATIONS
Depending on the scope of your renovation project, you may need to make temporary living arrangements while the work is being undertaken. Planning ahead will help minimise disruption to your daily life during the renovation process.
If you’re staying put, give some thought to where you will cook, eat, shower and sleep. Be prepared to minimise the mess – make sure you have something to cover furniture and shelves, plastic wrap to contain dust from entering the rest of the home and consider using humidifiers to keep dust from spreading. 1 2
1. Renovating too soon
If you’ve just purchased your home and it’s in a habitable state, it’s a good idea to live in it for a little while before beginning renovations so you can figure
One of the most common and costly mistakes is failing to set a realistic and comprehensive budget. Without a detailed budget, unexpected expenses can quickly add up, leading to financial strain. Ensure you account for all materials, labour and permits as well as a contingency fund for unforeseen issues.
3. Ignoring building permits and codes
3
Skipping necessary building permits and ignoring local building codes can lead to serious legal and financial consequences. Unpermitted work can result in fines, require costly modifications to comply with regulations and complicate future property sales. Always ensure your renovation plans are up to code and properly permitted.
4. Underestimating the importance of planning
Rushing into renovations without a clear plan can lead to disjointed results and costly changes down the line. Spend time meticulously planning every aspect of the renovation, from design and materials to timelines and contractor schedules. A detailed plan helps prevent mistakes and ensures a cohesive final product.
5. Overlooking the ROI of renovations
While personal enjoyment is important, consider the return on investment (ROI) for each renovation. Some upgrades, such as kitchen and bathroom remodels, typically offer higher ROI than others. Prioritise renovations that increase property value, especially if you plan to sell in the near future.
6. Choosing inexpensive, low-quality materials
Opting for the cheapest materials can be tempting, but it often leads to higher costs in the long run. Low-quality materials often wear out quickly, requiring frequent repairs or replacements. Invest in durable, high-quality materials that ensure longevity and maintain the value of your renovation.
7. Skipping professional help
Attempting complex renovations without professional assistance can result in below-par workmanship and costly mistakes. While DIY projects can be satisfying, recognise when it’s necessary to hire experienced professionals. Contractors, architects and designers bring valuable expertise that can save money and ensure a high-quality outcome.
8. Over-improving for the neighbourhood standard
Renovating a property far beyond the standard of neighbouring homes can result in diminished returns. Over-improving can make it difficult to recoup renovation costs if the home is priced too high for the area. Check the ceiling price for similar homes in your area as it’s no use spending R200 000 on renovations when you can realistically only recoup R50 000 when the time comes to sell.
9. Ignoring structural issues
Focusing solely on aesthetic improvements while neglecting structural issues can lead to significant problems. Structural deficiencies, such as foundation cracks or outdated electrical systems, can compromise safety and lead to costly repairs. Address these critical issues before embarking on cosmetic upgrades.
10. Inadequate research on contractors
Hiring the wrong contractor can be one of the most expensive mistakes. Poor workmanship, delays and unforeseen additional costs can derail your renovation. Conduct thorough research, check references and ensure contractors are licensed and insured. A reliable contractor is key to a successful renovation.
11. Neglecting to create a contingency plan
Even with meticulous planning, renovations can – and often
THE ESSENTIAL PRE-RENO CHECKLIST
1. Set your home renovation goals.
2. Assess structural and functional needs.
3. Identify your renovation priorities.
4. Gather inspiration.
5. Get quotes and determine your budget.
6. Select your renovation team.
7. Obtain necessary permits and approvals.
8. Create a detailed renovation plan.
9. Communication and paperwork.
do – encounter unexpected challenges. Not having a contingency plan can lead to significant stress and financial strain. Set aside at least 10–20% of your budget for unforeseen issues, ensuring you can handle surprises without derailing the entire project.
Renovating a property offers numerous benefits, from enhancing comfort and functionality to increasing market value, however, avoiding costly mistakes is crucial for a successful renovation. While upfront quality costs may sting, avoiding those expenses is ultimately far more expensive due to the inevitable rework and remediation needed down the line. Investing in your renovation from the start is truly the most cost-effective approach. Approach your renovation with care and diligence to create a home that brings joy and lasting value.
household accessory trends TO MAKE YOUR HOME LIFE EASIER
With more people working remotely, our homes have become multifunctional spaces – places where we live, work and relax. Utilising useful accessories to create inviting, inspiring spaces can make life easier and improve personal wellbeing. By Suraya Pandor, Irvine Partners
Aplethora of new cleaning, organising, work-related and home-comfort-related gadgets are on the market, available to purchase on online marketplace platforms that are rapidly gaining popularity among consumers for the ease with which they allow consumers to buy items to improve their home living.
Household technology tools have become an integral part of our lives because of their practical and functional uses in the home. For example, smart speakers can connect wirelessly to mobile phones or laptops for excellent sound for virtual meetings, or be used to listen to music while relaxing. Smart bulbs, such as LED Wi-Fi bulbs, allow you to connect wirelessly, change the colour of the room lighting or stream via their Bluetooth function.
2.
LESS IS MORE – MINIMALISM IS BACK
The trend of minimalism has long been popular, with homeowners clearing out the clutter in favour of more open and organised spaces.
According to one Instagrammer, Chrisne Cable, there are several new tools that can be used to simplify reorganising rooms in your home, such as the kitchen. For example, Chrisne smartly demonstrates how you can neatly store and access black bags by clipping bag holders into a utility cupboard. These cupboard accessories can be purchased on the Temu online marketplace in various colours, according to your preference. To hide cables, velcro cable wires are a seamless hack for tying wayward wires together so that they are less visible, giving the home a less cluttered look.
Lack of clutter doesn’t only make a room look neater and more spacious; research has shown that de-cluttering in itself creates feelings of ease, and frees mental space in the mind.
Minimalism can be applied to any room in your home. For the bedroom, look for bed frames that include storage drawers, or see where organisers can be added into cupboards or drawers so they are present, but invisible unless you open them. Other great gadgets include stackable shoe organisers or closet bag storage dividers that are practical and functional.
WAT CH
Chrisne Cable’s declutter hacks
1. SMART WIRELESS HOMES
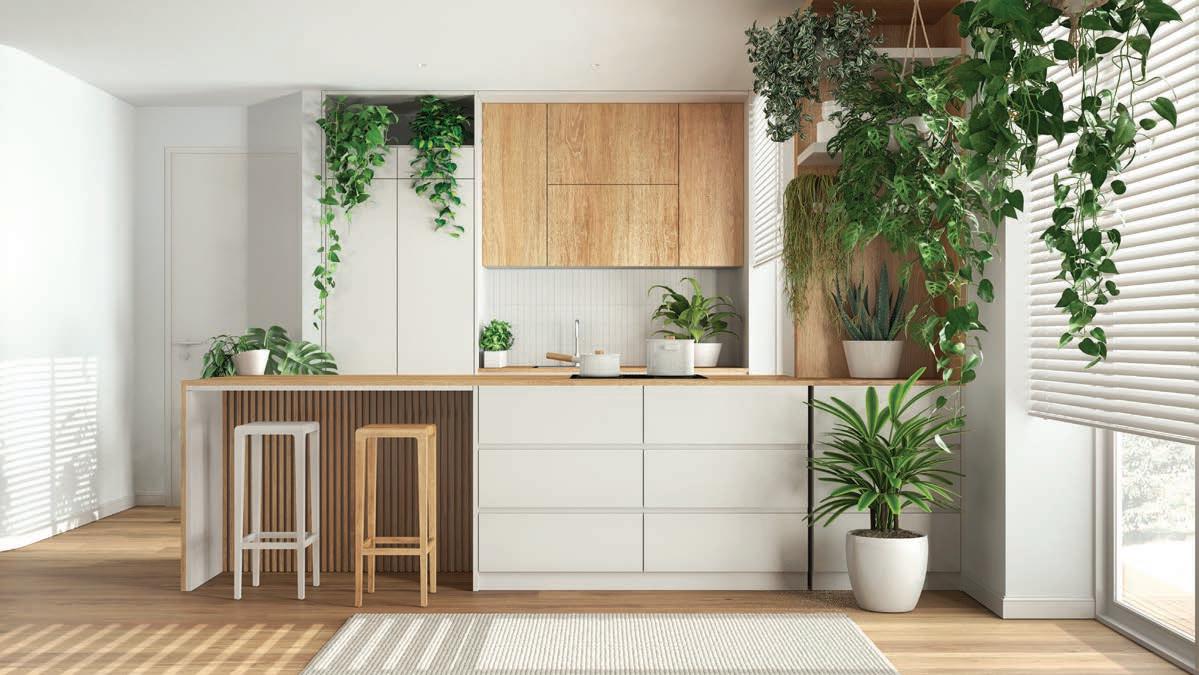
3. BLENDING INDOOR AND OUTDOOR SPACES
Biophilic design is the incorporation of natural elements into our homes to bring nature closer to us while we are indoors.
Natural textures, such as wood, stone and potted plants, are a great way to bring a touch of nature into your home. Wooden soap holders and pots for your plants add this element to your bathroom, while wooden hanging shelves can be attached to any wall in your home. Natural stone coasters and tea light holders for your coffee table add a lovely natural touch to your living room. This trend is very popular as it not only enhances the visual appeal of spaces in your home, but also brings a feeling of wellbeing and balance.
4. UNUSUAL BUT USEFUL KITCHEN ITEMS
The kitchen is often where you spend most of your time, so having items and gadgets that make it easier for you to make a meal, a cup of tea or coffee, or clean the dishes is essential.
Johns Paul, a South African TikTokker, cleverly uses see-through storage boxes, affordably purchased on the Temu online marketplace, in his kitchen to ensure that while items are packed away neatly, they don’t have clashing colours. The storage boxes blend into where they are placed, therefore appearing not really present.
Some unusual but practical gadgets could include a tomato slicer for perfectly shaped tomato slices for family burger night, or a nifty storage box for all your taco ingredients
There are so many accessories for the home that make life easier. Many South Africans are enjoying using the Temu online marketplace because of the breadth of goods available to purchase in the household, furniture, appliance, clothing and beauty categories, to name a few. After all, a home is your sanctuary, and its style should be uniquely yours.
to keep them separate and fresh. Soup is very popular in South Africa in winter, but chopping vegetables can be laborious and time-consuming – a very useful product is a multifunctional vegetable chopper that quickly chops all types of veggies for a hearty winter soup.
Johns Paul clever kitchen organising hacks
WAT CH
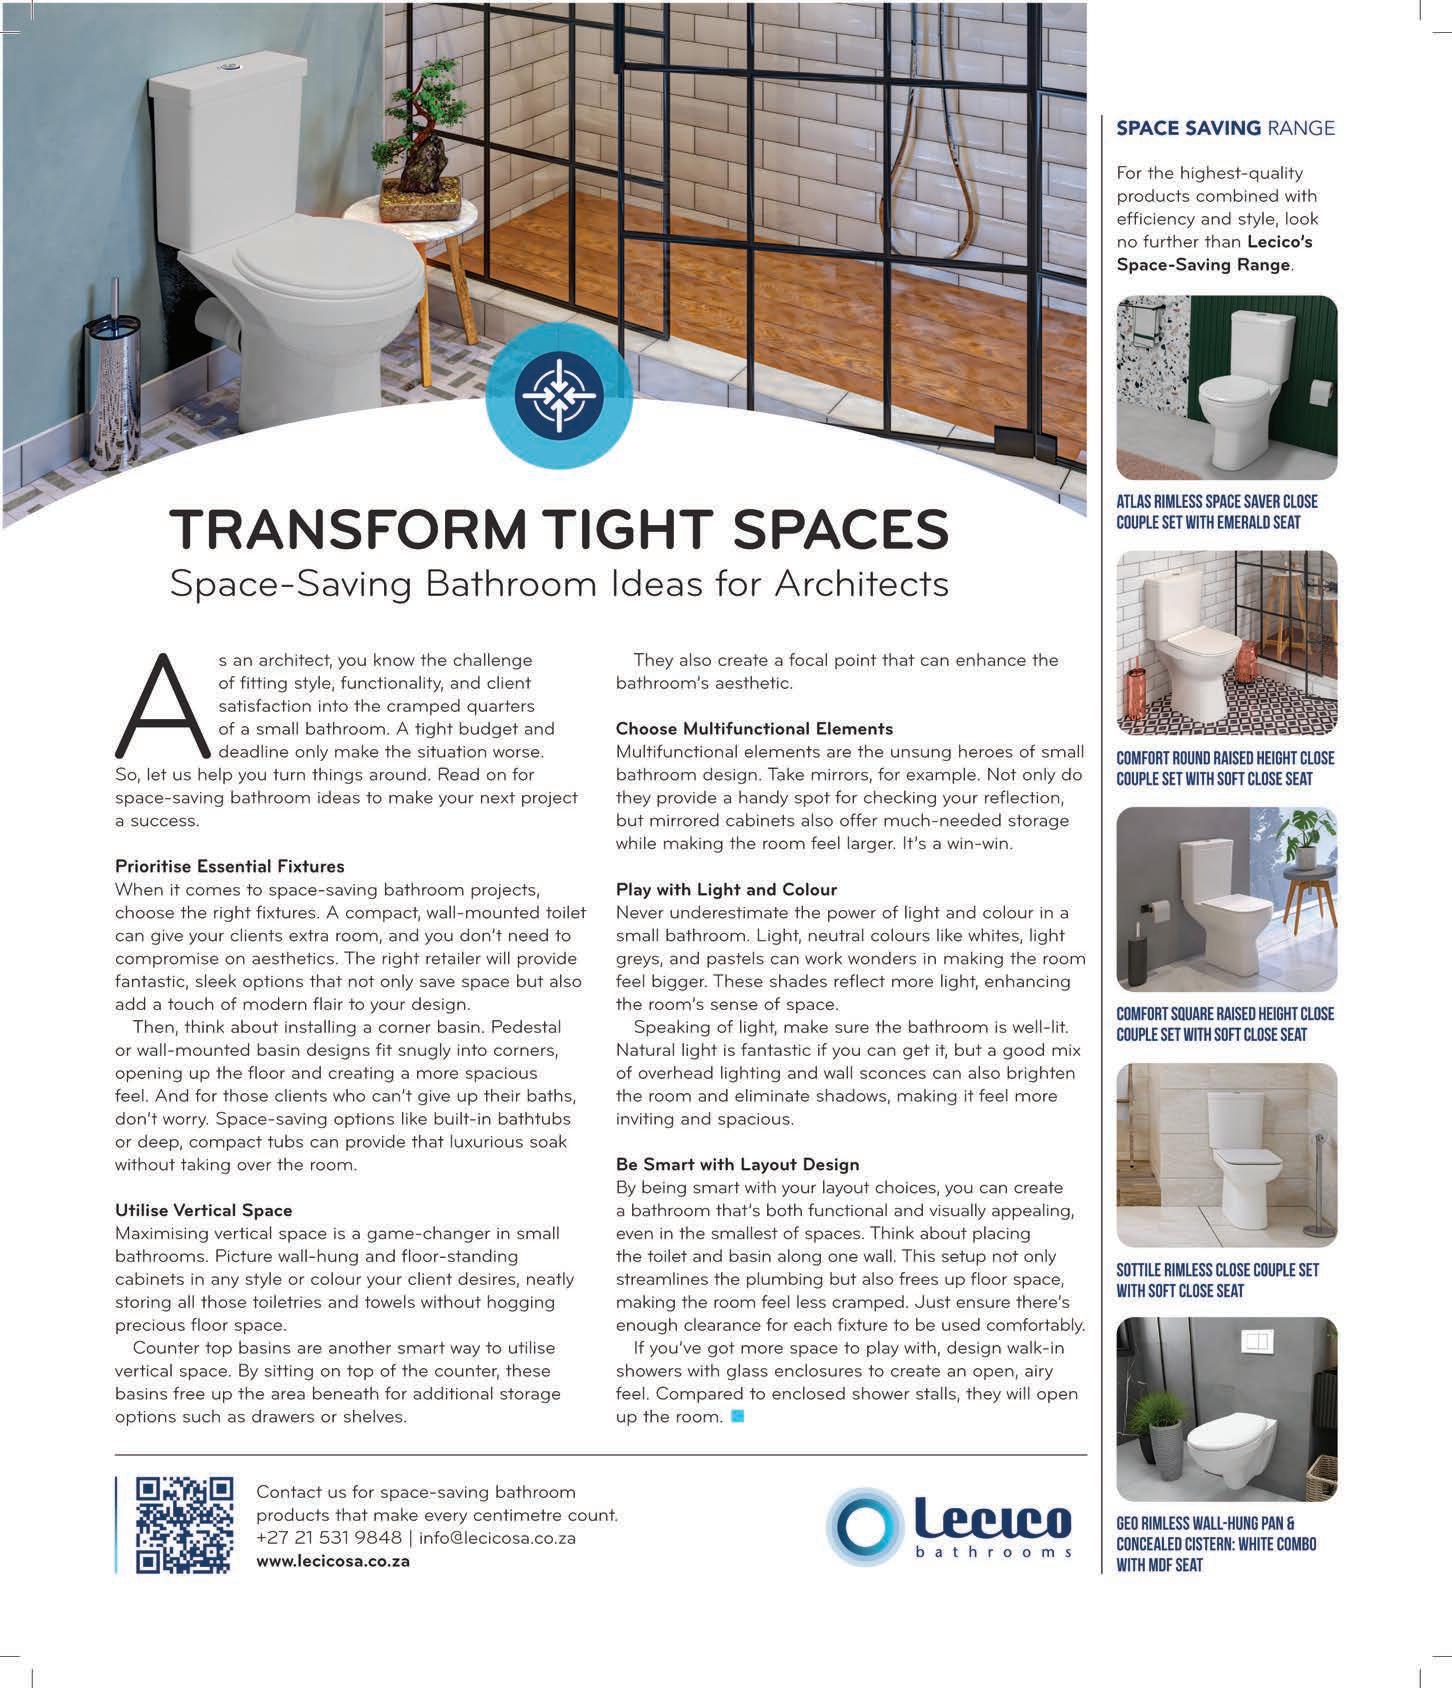
TRANSFORM TIGHT SPACES
A guide to space-saving bathroom ideas for architects when designing for small bathrooms. By Lecico
Architects know the challenge of fitting style, functionality and client satisfaction into the cramped quarters of a small bathroom. A tight budget and deadline only make the situation worse. So, let us help you turn things around.
PRIORITISE THE ESSENTIAL AND RIGHT FIXTURES
When it comes to space-saving bathroom projects, choose the right fixtures. A compact, wall-mounted toilet can create extra room, and you don’t need to compromise on aesthetics. The right retailer will provide fantastic, sleek options that not only save space, but also add a touch of modern flair to your design. Then, think about installing a corner basin. Pedestal or wall-mounted basin designs fit snugly into corners, opening up the floor and creating a more spacious feel. And for those clients who can’t give up their baths, don’t worry: space-saving options such as built-in bathtubs or deep, compact tubs can provide that luxurious soak without taking over the room.
UTILISE VERTICAL SPACE
Maximising vertical space is a game-changer in small bathrooms. Picture wall-hung and floor-standing cabinets in any style or colour, neatly storing all those toiletries and towels without hogging precious floor space. Countertop basins are another smart way to utilise vertical space. Sitting on top of the counter, these basins free up the area beneath for additional storage options such as drawers or shelves. They also create a focal point that can enhance the bathroom’s aesthetic.
OPT FOR MULTIFUNCTION
Multifunctional elements are the unsung heroes of small bathroom design. Take mirrors, for example. Not only do they provide a handy spot for checking your reflection, but mirrored cabinets also offer much-needed storage while making the room feel larger. It’s a win-win.
PLAY WITH LIGHT AND COLOUR
Never underestimate the power of light and colour in a small bathroom. Light, neutral colours, such as whites, light greys and pastels, can work wonders in making the room feel bigger. These shades reflect more light, enhancing the room’s sense of space. Speaking of light, make sure the bathroom is well-lit. Natural light is fantastic if you can get it, but a good mix of overhead lighting and wall sconces can also brighten the room and eliminate shadows, making it feel more inviting and spacious.
BE SMART WITH LAYOUT DESIGN
By being smart with your layout choices, you can create a bathroom that’s both functional and visually appealing, even in the smallest of spaces. Think about placing the toilet and basin along one wall. This setup not only streamlines the plumbing, but also frees up floor space, making the room feel less cramped. Just ensure there’s enough clearance for each fixture to be used comfortably. If you’ve got more space to play with, design walk-in showers with glass enclosures to create an open, airy feel. Compared to enclosed shower stalls, they will open up the room.
BEST SPACE-SAVING PRODUCTS FOR THE SMALL BATHROOM
For those seeking the highest-quality products combined with efficiency and style, look no further than Lecico’s Space-Saving Range. These products allow you to maximise every square centimetre of a bathroom without compromising aesthetics.
• Space-saving basins: our small bathroom basins are made from germand scratch-resistant vitreous china and suit a variety of settings, from hospitality and warehouses to public bathrooms and residential.
• Space-saving toilets: our space-saving toilets feature dual-flush systems, slimline cisterns and ultra-compact designs, making them ideal for various environments, from residential to public bathrooms. These models are also perfect for medical and elderly care facilities, offering comfort height options and compact depth extensions.
• Space-saving wall-hung pans: introducing the Geo Rimless WHP Combo, a sleek space-saving wall-hung pan with an MDF seat, concealed cistern and a choice of three stylish PurePress actuator plates (white, chrome, black). Ideal for commercial, retail, residential, and hospitality use, it features germ- and scratch-resistant vitreous china, supports up to 300kg and ensures easy installation.
Lecico Space-Saving Range
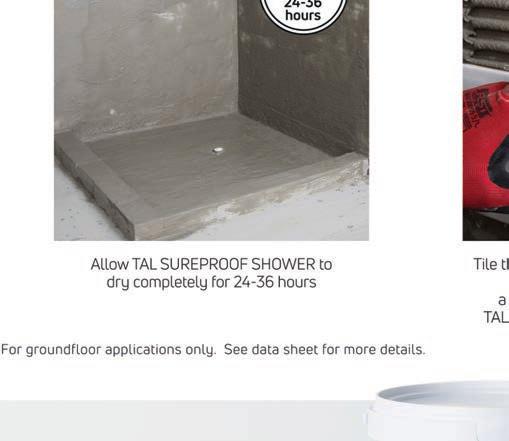
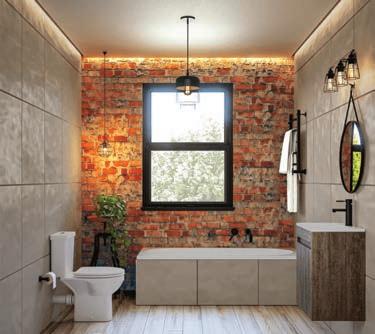
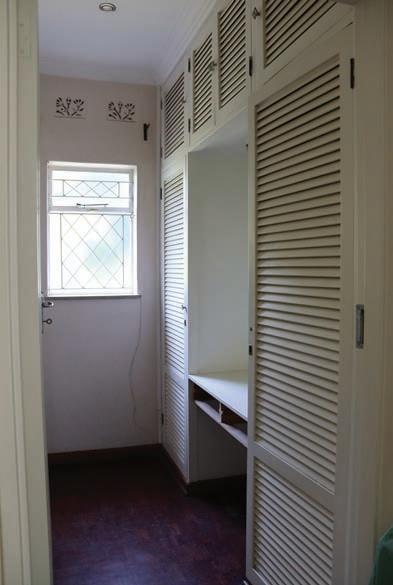
A new look for AN OUTDATED ROOM
Italtile
THE PROJECT
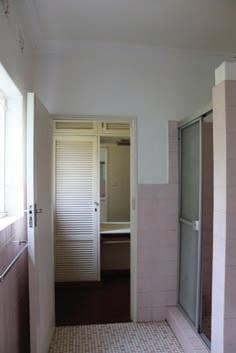
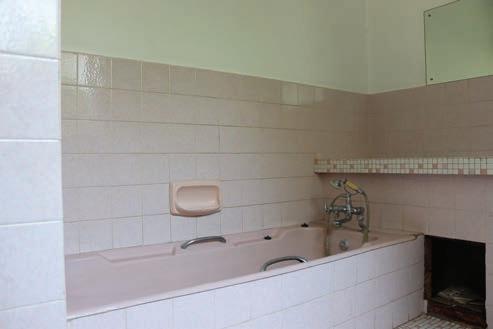
THE DESIGN CHALLENGE
Savva Pafitis was faced with a “before” scenario of a somewhat outdated ’70s-style room with no real purpose other than being a dumping ground for unwanted items. It was a smallish space stuck between the master bedroom and the main bathroom that was, at one time, an old-fashioned dressing room.
House Harare, a residential project on the drawing board of the highly imaginative Zimbabwe-based Savva Nicholas Pafitis Design (SNP), was briefed to Italtile Webstore’s Sandisiwe Mncube in early 2023.
THE SOLUTION
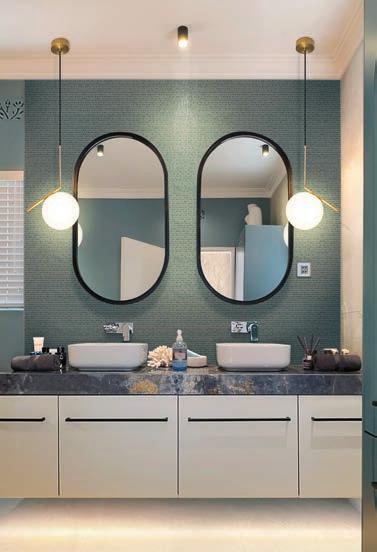
Pafitis convinced the homeowners to break through the space and incorporate it into the existing bathroom, thereby increasing its size by one-third. The luxury of spaciousness was an irresistible prospect, and the project was given the go-ahead, with plans for the clients’ dream of a walk-in shower area, a much-desired double vanity and extra storage. A built-in bath was also required.
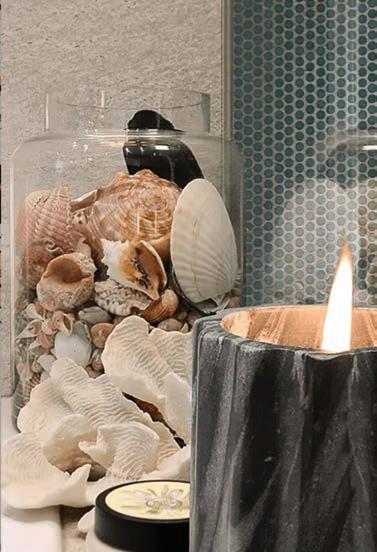
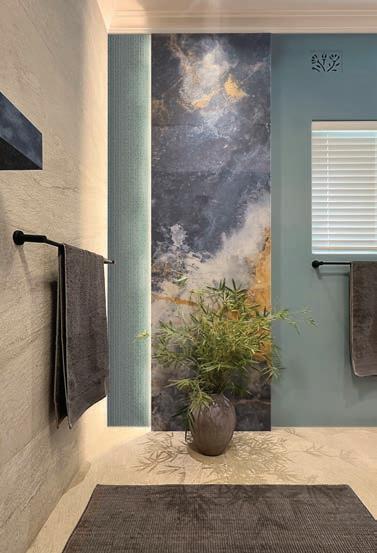
Several mood boards were presented for approval, but it was Pafitis’ “Ocean Jewels” that got the nod. Passionate about storied spaces, Pafitis created a beautifully textured and layered symphony of sea, sun and sand: a biophilic and luxuriant look that respected the Mid-century aesthetic of the home and
resonated with the clients’ love of the ocean and memories of beach holidays. The colour palette features a biophilic array of teals, aquamarines and blues, against a base canvas of neutrals.
Mncube created the perfect, eco-chic “rocks, sand and sea” combination. On the bold colour front, she proposed Micro Teal Enviro-Glass Mosaics (310 x 312), locally manufactured from 100% recycled glass, to elevate the vanity and shower walls. Then she suggested the neutral “anchor” of Klif Silver (750 x 1 500), a magnificently varianced stone-look porcelain tile by Italian tilemakers Atlas Concorde. Both the mosaics and the stone-look porcelain tiles are exclusive to Italtile and carry Italtile’s LiveGreen label.
For more information on the products used in SNP Design’s House Harare renovation or for a speculative chat (in-person or online) on how Italtile can add value to your next sustainable Southern African residential project, please contact: www.italtile.co.za
Kilf Silver Matt Glazed Porcelain Tile
Microteal Enviro-Glass Mosaics
Through the timber portal: BUILDING A STURDY GARDEN GATE
Building a classic and strong garden gate is easier than you think. We show you how.
By Builders.co.za
CUTTING LIST
• 7 x 22mm x 94mm x 1 700mm PAR pine planks (upright slats)
• 3 x 22mm x 94mm x 840mm PAR pine planks (cross-pieces)
• 2 x 22mm x 94mm x 1 200mm (diagonal braces – these will be trimmed in Step 5)
• 2 x 38mm x 114mm x 1 800mm CCA-treated pine (wall braces) HERE’S HOW:
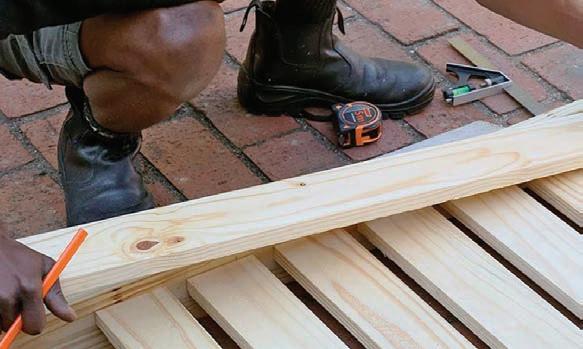
First, measure the opening in which the garden gate will hang. The measurements we have given are for a doorway that is 1.8m high by 940mm wide. You may need to modify these dimensions to fit your doorway.
Step 3
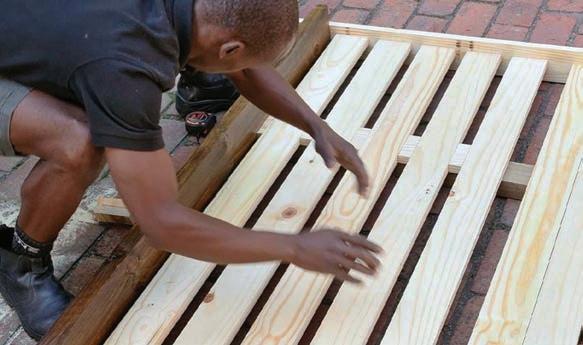
The CCA timber will be mounted to the brick wall to form a mounting frame for the gate. The opening is 940mm wide, the CCA timber is 38mm wide and we want a 12mm gap between the mounting frame and the gate. Therefore the gate itself needs to be 840mm wide (940 mm-76 mm-24 mm = 840mm). Lay all seven of your pine slats next to each other, with a 30mm gap between each one. The easiest way to make this 30mm spacing accurate is to cut 30mm spacers from scrap wood and use them between each slat.
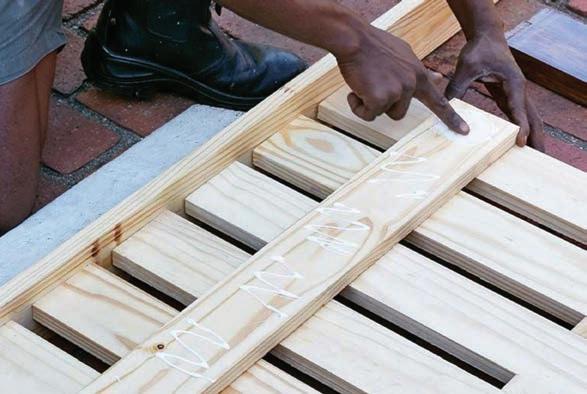
Place the first cross-piece on top of the slats, 250mm from the top edge. Using wood glue and 4mm x 30mm screws, secure it in place. Repeat with a second cross-piece 250mm from the bottom edge. Now attach the third cross-piece in the middle of the gate between the other two cross-pieces. The middle of the gate will be 850mm from the top edge. Make a mark here, mark the middle of the cross-piece and line up the marks before attaching it.
Step 1
Step 4
Cut your timber according to the cutting list. Step 2
Step 5
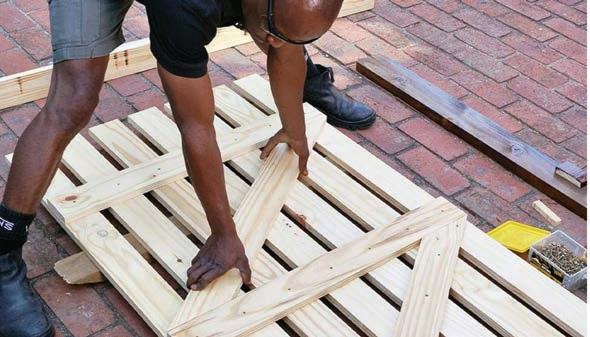
Diagonal braces between the three cross-pieces will give the gate far more rigidity and strength. The trick is to cut the ends at the correct angle to be flush with the cross-pieces. Line up the diagonal brace between the top cross-piece and the middle one. Draw a line at the angles needed to fit snugly against the cross-pieces and cut. Secure it in place with glue and 4mm x 30mm screws. Repeat the process for the second diagonal brace on the bottom half of the gate.
Step 6
Now that the gate is assembled, treat the timber for outdoor conditions. Cover the screw holes with wood filler and give them a light sanding once dry. Apply three coats of Fired Earth Velvet Wood Varnish in “Burnt Brown” to the gate and the side braces. This wood preservative will add UV protection and protection against other weather elements. Allow 24 hours between coats.
Step 7
Once everything has dried, secure the wall braces to the wall using 8mm x 100mm rawl bolts. Position the timber against one side wall and drill an 8mm hole through the timber with a wood bit, gently marking the brickwork. Drill a 14mm hole into the wall with an SDS drill and masonry bit, ensuring your depth stop is set. Place the rawl bolt through the timber and into the hole, then tighten with an impact driver. Repeat with bolts in the middle and at the bottom of the wall brace. Repeat on the other side of the doorway with the other wall brace.
8
You will be hanging the gate with T-hinges. Remember that you don’t want your gate resting against the floor, so lift it up 50mm before fitting it. Secure T-hinges to the wooden wall brace in line with the top and bottom cross pieces using 4mm x 30mm wood screws and an impact drill. Now fasten the hinges to the two cross-pieces of the gate – you’ll need a hand to do this. Add a barrel bolt to the middle cross-piece and drill a corresponding hole in the wall for the bolt to go into.
And that’s it! Another satisfying DIY project with Builders. Building a classic garden gate is a rewarding project that makes your home and garden look better while fulfilling a vital function. All it takes is careful measurements, the right materials, good tools and a bit of elbow grease.
All the DeWalt tools we used for this project, as well as the timber and varnish, are available from Builders, both in-store and online at builders.co.za