9772221941042 23049 9772221941042 23049


Published by:
Picasso Headline, a proud division of Arena Holdings (Pty) Ltd
Hill on Empire, 16 Empire Road (cnr Hillside Road), Parktown, Johannesburg, 2193
Postal Address: PO Box 12500, Mill Street, Cape Town, 8010 easydiy.co.za
businessmediamags.co.za
EDITORIAL
Content Manager Raina Julies rainaj@picasso.co.za
Contributors Stephanie Durrant, Geoff Hollingdale, Orlando Luis, Ross Mains-Sheard, Cobus Odendaal, Kim Williams
Copy Editor Brenda Bryden
5 Must-have tools for every DIYer.

9 Smarter, cordless, innovative and. user-friendly tech tool trends.
11 Subscribe to EasyDIY
INSIGHTS
12 DO YOU REALLY KNOW YOUR HOME?
Interesting and unexpected facts about your home.
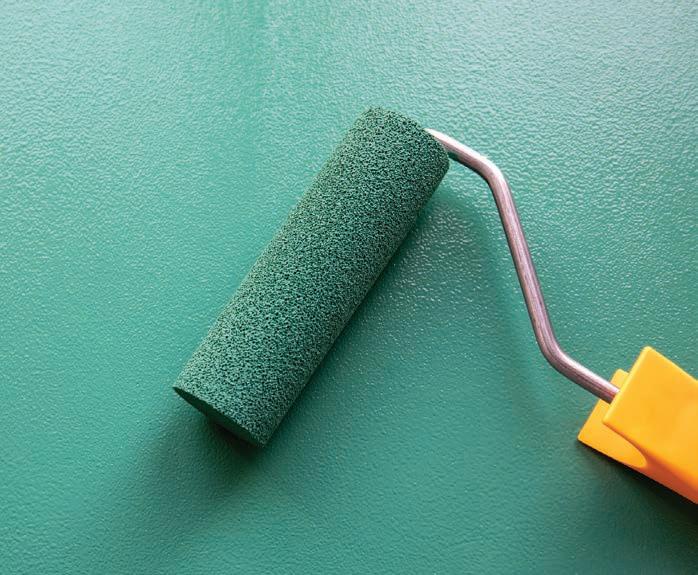
14 PLAN YOUR PAINTING PROJECT
Paint experts share five top tips to ensuring your painting project goes smoothly.
15 DESIGN AND DECOR TRENDS

Home upgrades to give your interior space a much-needed revamp.
16 SOLAR FAQS

Some of the most frequently asked questions around solar installations answered.

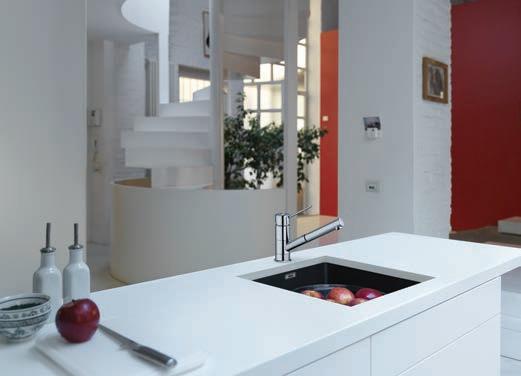
19 THE KITCHEN SINK
The sink has become such a part of the kitchen landscape that we often take it for granted. So, where did this ubiquitous kitchen helper originate?
22 WAYS WITH WALL PANELLING


Bring architectural shape to a featureless room by adding wall panelling, cladding or moulding.
30 DIY CAR CLEAN-UP
Regular cleaning not only improves your car’s appearance, but also helps preserve its value.
32 THE JIGSAW
Cutting wood, plywood, metal and tile
Content Co-ordinator Natasha Maneveldt
ART
Head of Design Studio Jayne Macé-Ferguson
Senior Designer Mfundo Archie Ndzo
Advert Designer Bulelwa Sotashe
Cover Image futurecontenthub.com/ magazinefeatures.co.za, Supplied
SALES
Project Manager Gavin Payne gavinp@picasso.co.za
+27 21 469 2477 I +27 74 031 9774
PRODUCTION
Production Editor Shamiela Brenner
Advertising Co-ordinator Johan Labuschagne
Subscriptions and Distribution Fatima Dramat fatimad@picasso.co.za
Distribution On the Dot
Printing CTP Printers, Cape Town
MANAGEMENT
Management Accountant Deidre Musha
Business Manager Lodewyk van der Walt
General Manager, Magazines Jocelyne Bayer
Copyright: Picasso Headline. No part of this publication may be reproduced in any form without written permission from the publisher. The publisher is not responsible for unsolicited material. EasyDIY is published by Picasso Headline. The opinions expressed are not necessarily those of Picasso Headline. All advertisements/advertorials and promotions have been paid for and therefore do not carry any endorsement by the publisher.

From cordless power tools to garden carts, we round up the latest ranges for the DIYer
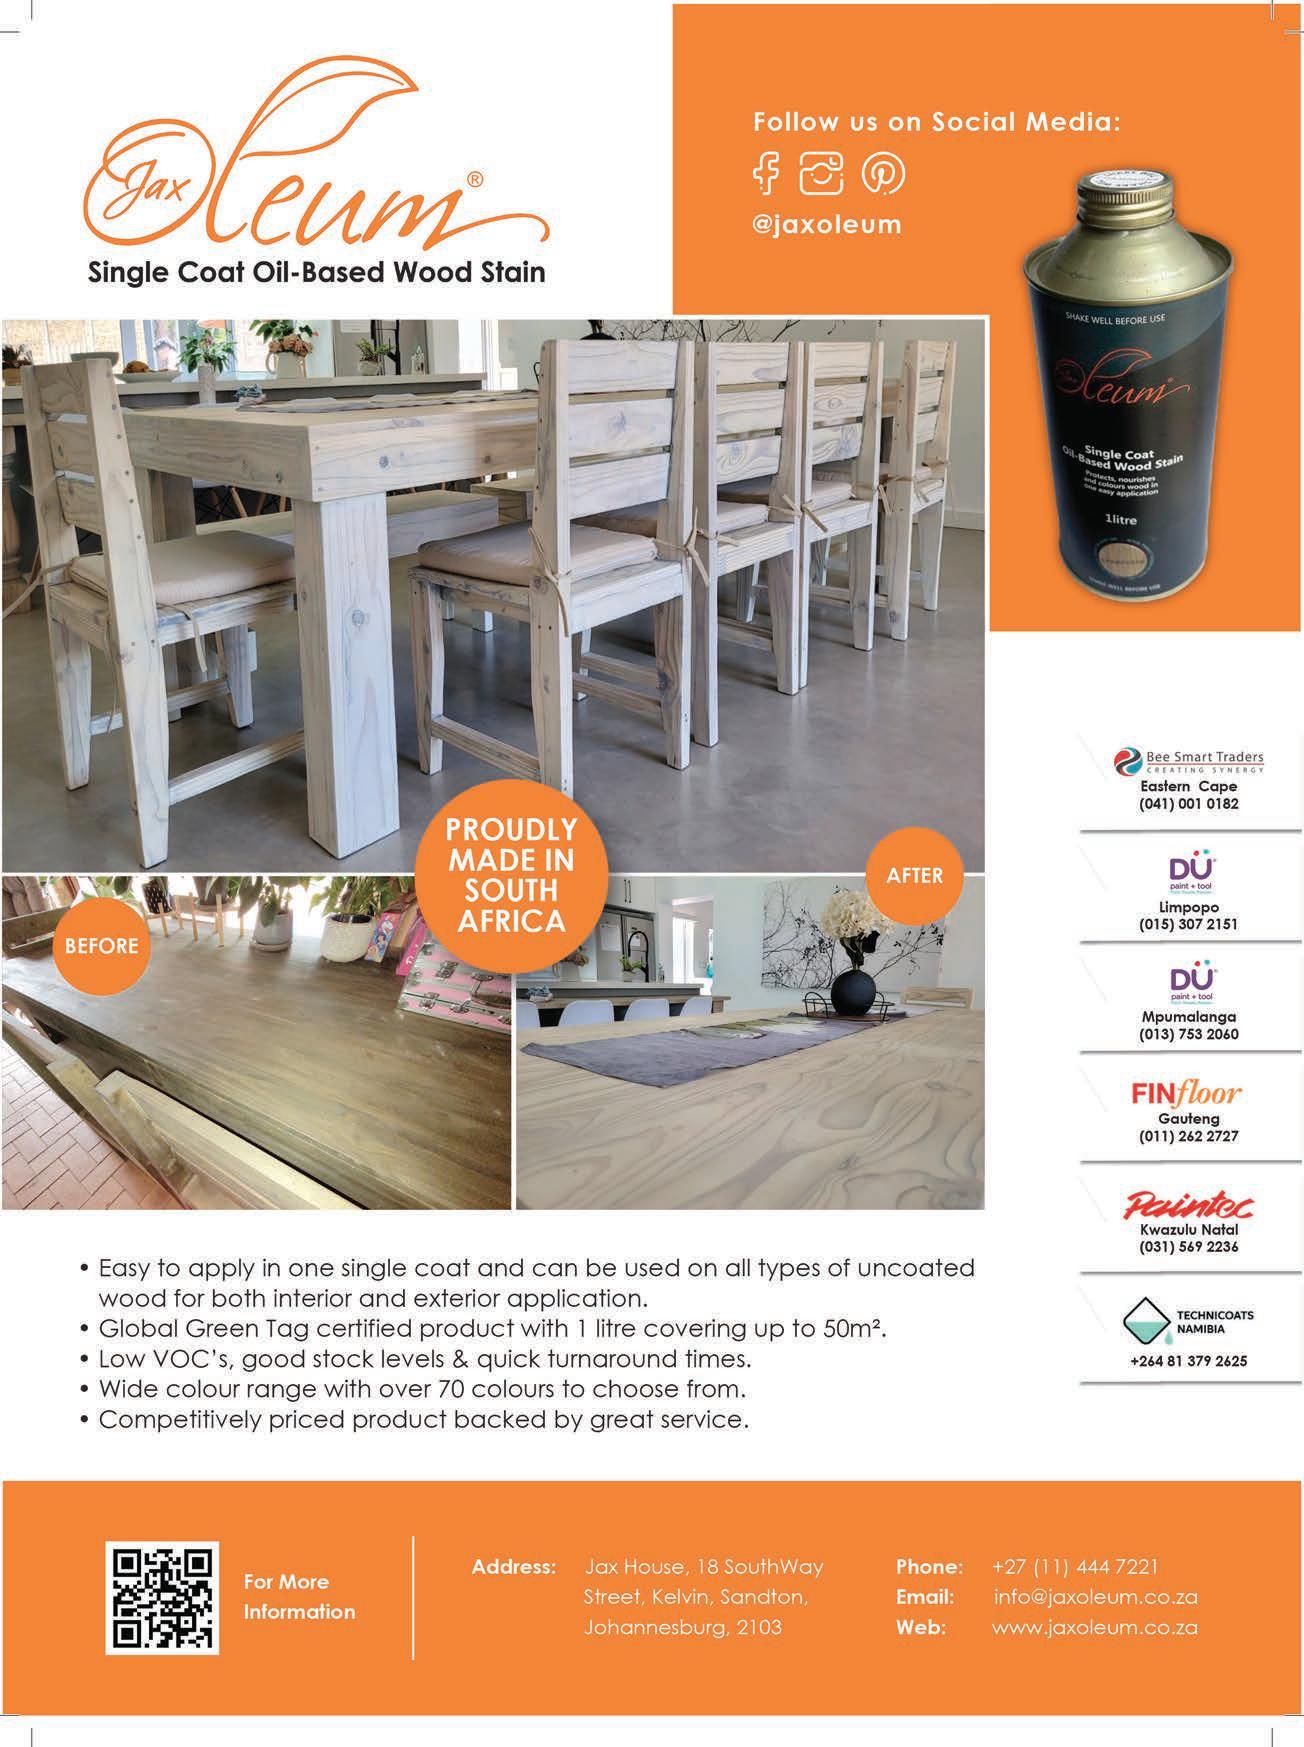
The RawlPlug PID18-XL2 RawlWrench is a versatile tool capable of tackling the biggest project, drilling metal and wood, or rapidly removing or torquing up wheel nuts on a race car in the pit box.
It features a multihead tool holder with a 1/4” hexagonal shank for bits and a 1/2” square drive for sockets. This impact driver boasts a powerful durable and highly efficient 18-volt brushless motor to deliver an electronically adjustable torque range for any specific application up to 210Nm.
It can rotate at up to 3 200rpm and has a 3 800bpm maximum impact frequency. Its lightweight, compact construction reduces fatigue in use and features auto-stop control torque cut-off to prevent damage to material surfaces during screwing. Electronic anti-jamming protection guards the user against injury.
Comfortable, light and reassuring to work with, the RawlWrench boasts an ergonomically profiled and rubberised high-grip handle. LED job point illumination ensures ultimate user comfort and safety, while a convenient hook enables you to hang your RawlWrench on your belt when working in tight confines.
This driver is primarily designed to fix metal and timber screws and frame pins of up to 14mm and install up to 10mm R-LX concrete screws, quickly, easily and permanently. The highly versatile RawlWrench PID18-XL2 also has an efficient drilling mode perfectly suitable to bore 10mm diameter holes in sheet metal, wood or chipboard up to 30mm.
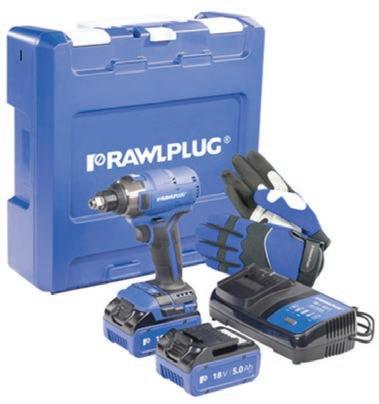
The PID18-XL2 RawlWrench is fully compatible with RawlPlug’s 18V power tool battery system. It comes with
two 5.0Ah capacity Li-ion batteries and a 50-minute fast charger to ensure uninterrupted work. The tool and all its accessories, as well as a pair of stylish RawlPlug gloves, pack neatly into a cool blue RawlCase for compact and easy transport.
This 210Nm RawlWrench and its more even powerful 18V 1000Nm R-PIW18-XL2 sibling come in a variety of configurations, from just the units to convenient ready-to-use RawlPlug packages.
Find out more about RawlPlug’s market-leading RawlWrenches and the rest of its range of fitting equipment and accessories at www.vermontsales.co.za
The WORX Clamping Sawhorses with Bar Clamps WX065 now come with integrated bar clamps to fasten big or small projects securely in both vertical and horizontal positions. Weighing only 3.6kg each, you can toss them into the back of a vehicle or store them in the corner between projects.

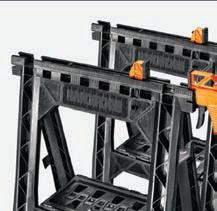
On the bottom of these sawhorses is a place to hold a power strip or supplies to give your workspace an extra shelf or more storage. Engineered with innovative technology, the clamps provide up to 136kg of clamping force, allowing you to hold heavy projects securely in place for as long as you need. The bar clamps detach, so if you have a project on another workspace, you can take that 136kg of pressure wherever it is needed. The WORX Clamping Sawhorses WX065 are made from rugged, moulded ABS, and the bar clamps are ABS and steel.
To view the full range of WORX products available and see the videos, go to https://worxSA.co.za

The new WORX Pruning and Cutting WG324E one-handed cordless 20V Mini Chain Saw is a safe cordless cutter that provides controlled and vibration-free cuts with a cutting depth of 120mm. This cordless saw provides one-handed operations, with a saw chain that can


be changed simply within a few seconds at a touch of a button. Designed with both a hand guard and upper safety guard, you will always be protected when using the WORX WG324E. It can be used for day-to-day tasks as well as for more specific projects, from cutting branches and battens to creating outdoor furniture.


FOR MORE INFORMATION ABOUT WORX


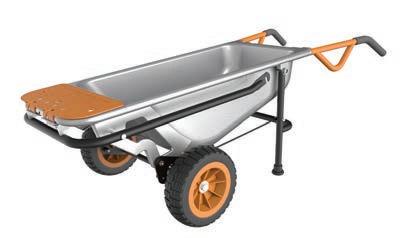
Meet the unique 8-in-1 WORX Aerocart that makes the job a lot easier, it’s a must-have for all homeowners, gardeners, builders, factories, landscapers and DIYers. The additional options add even more features to this versatile workhorse.
The WORX Aerocart specialises in making enormous jobs manageable, it holds up to 136kgs and will move almost anything from one place to the next with much less effort than a normal wheelbarrow would require. “They are multifunctional barrows, with available accessories to add even more additional uses, and they are much lighter than a normal wheelbarrow, easy to store and transport,” says Dean Lotter, MD of Brandroid, the official agents in Southern Africa for WORX. “It’s also the coolest multifunctional, quality and practical wheelbarrow in the country.”
The intelligent design uses a cantilever of your body weight. No
heavy lifting! If you would generally need a second person to help you do landscape projects, such as moving rocks or large potted plants, Aerocart has come to your rescue. Its innovative design lets you zip around the yard like a gardening superhero. No more waiting for the gardener or someone to get home from work or asking your neighbour for help. The Aerocart lets you turn what used to be two- or three-person jobs into something you can do yourself. Just load and lean, the Aerocart’s wheels are positioned by WORX engineers in exactly the right place to perfectly balance an awful lot of weight with the least amount of required effort. Open extension arms and dolly flap create a front carrier excellent for hay bales, grass cuttings, garbage bags, firewood, and other large, bulky loads. It has been tried and evaluated by Digger DIY.
The WORX Aerocart Wheelbarrow Wagon Kit WA0228 conveniently converts your WORX wheelbarrow

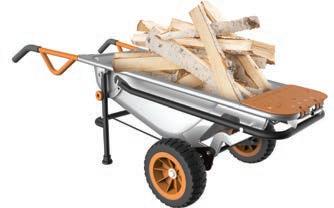


into a wagon. It is designed to work with the WORX Aerocart only. Pull up to 135kg with just one hand when you attach the wheelbarrow wagon kit with no tools required. Outdoor work is no longer a chore, even a pleasure, with the included seat and detachable storage tray with a drink holder. It Includes a handy seat for sitting and pruning, picking fruit, pulling weeds or just resting. Changing from dolly to wagon takes only seconds. The Wagon has the same flat-free tyres as the Aerocart.
FOR MORE INFORMATION ABOUT BRANDROID


It’s hard to imagine a world without tools as part of our daily lives. They are essential items that humanity has relied on for centuries, and today, the innovations within this space are exciting, writes
 Orlando Luis, CEO of Brights Hardware
In ancient times, humans created tools out of rocks. The first-ever power tool is said to be a hand-powered lathe created by the ancient Egyptians. The humble screwdriver can be traced to the 1400s, and in 1859, an electric motor was combined with a manual drill – revolutionising the tool industry. Tools have continued to evolve, and our modern tools are carefully designed and technologically advanced, with frequent advancements.
Here are some insights into current tool trends and developments that are shaping product development and consumer buying behaviour.
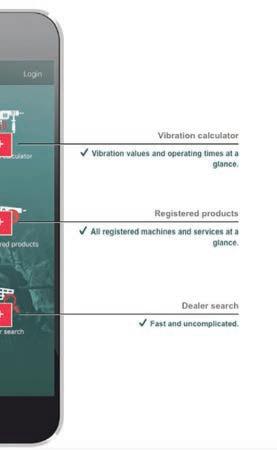
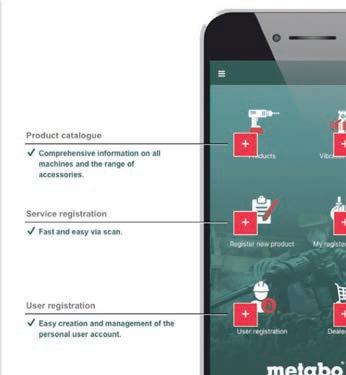
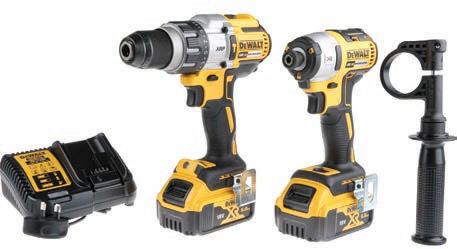
There is an app for everything – tools included! Dewalt and Metabo have developed Bluetooth batteries and power tools that can be tracked and monitored remotely through an app. This app allows you to see how often the machine is working in a day and lets you activate and deactivate the tool, for example, in a case of theft.
The market in South Africa has been slow so far in the uptake of these new developments, however, I predict they will grow in popularity as they offer great benefits for contractors that, for example, can monitor the number of man-hours put in by their workforce.


In response to a growing trend towards DIY home maintenance and repairs, tool manufacturers are making power tools more and more user-friendly so that they are accessible for the average person to operate. Examples of userfriendly tools include any power tool that is cordless, those that can operate for longer because of extended battery life, and power tools that require less maintenance because they do not have carbon brushes. Also, any power tool with additional operator safety features would be considered user-friendly.
When it comes to hand tools such as spanners, sockets, pliers, saws, hammers, chisels, screwdrivers and so forth, ergonomic design features have been adapted and improved to assist the user with increased efficiency, productivity, comfort and safety –with less user fatigue and, of course, better lifetime use.

With sales increasing for current power tools and batteries, exciting new products are being developed all the time, and the brand research and development teams are working hard to not only boost tool strength and lifespan, but also offer new, innovative power tools.

Battery-operating versions of most tools are being developed and will be able to do all the functions of manual tools. We will see larger applications coming to market that will allow machines to do much of the manual work that people did
About 80% of corded machines are available in a wireless format. Cordless tools are used for cutting, welding, sanding, metalworking, and more. Other advancements in the market mean that modern cordless tools can last much longer than they used to as well.
In South Africa, our power tool purchase trends currently show a 50/50 split in the sales of cordless versus corded tools, compared with 80% cordless and 20% corded in the United States or Europe. However, we expect to see these numbers change in South Africa as more cordless power tools are developed.

Examples of power tools available in a cordless format include jigsaws, circular saws, drills, impact drivers, screwdrivers, sanders, routers, grinders, rod cutters, and more. Even a cordless heated jacket, which keeps the wearer warm in extreme climates, has been developed.
before – right up to laying bricks and plastering walls. Robotic power tools are also coming. No operator will be needed, and you will simply enter a command, then sit back, watch and wait to see the finished product.
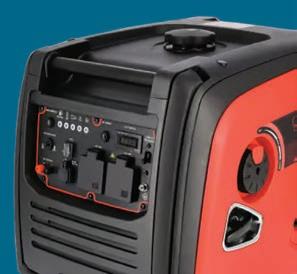
Although not power tools per se, a new range of LPG gas-driven gardening tools, compressors, pumps, generators and engines have been developed that replace petrol-powered units. They are more eco-friendly, require less maintenance and are more costeffective to run.
The modern tool market is all about going cordless, increasing battery life and becoming smarter
and more user-friendly. In the face of all these developments, consumers should look for good quality brands that offer backup spares and repair services.

Brights has on-site experts in all of its stores to provide advice and guidance on tools and power tools. Stores are located in Boston, Blackheath, Langebaan, Mitchells Plain, Montague Park, Plattekloof, Stonewood, Brackengate and Sunningdale.

Battery manufacturers are constantly dealing with the challenge of making batteries that last longer and produce more power. The advancement of lithium-ion batteries means that manufacturers have new ways to increase battery life and power.
A big trend we have seen in South Africa is the adoption of a single battery system or platform that fits all tools (with
the most popular battery voltage system being the 18V/36V brands). So if you are buying cordless tools, opt for 18V or 20V systems in lithium-ion technology – then as you grow your range of machines, your battery systems will fit in all the different power tools in the brand range – this will allow you to rotate batteries to ensure no downtime while waiting for the other one to charge.

Also, choose a brand that has intelligent chargers that can charge a

battery in under 30 minutes. Makita has the most comprehensive range of longer-lasting 18V batteries, with over 100 different machines able to operate from one battery platform. Metabo, Bosch, Dewalt, Ryobi, Festool, Ingco, Hitachi and Black & Decker also have 18V or 20V battery options.
Brights Hardware is giving three lucky EasyDIY readers the opportunity to won R1000 vochers redeemable at any Brights Hardware store nationwide. To stand a chance to win and be included in our Business Media Mags newsletter database, SMS EasyDIY BRIGHTS HARDWARE 1, followed by your full name, email and physical address to 33089. SMSes cost R1.50 each. To enter without inclusion in the newsletter, SMS EasyDIY BRIGHTS HARDWARE 2, followed by your full name, email and physical address to 33089.
SMS errors are billed; free SMSes do not apply. For full terms and conditions, visit easyDIY.co.za. Competition ends 1 September 2023.
Brights Hardware stores have on-site experts in all branches ready to provide advice and guidance on any product, building and renovating trends. Stores are located in Boston, Blackheath, Langebaan, Mitchells Plain, Montague Park, Plattekloof, Stonewood, Brackengate and Sunningdale. An online store shopping experience is available at www.brights.co.za, which offers delivery to anywhere in South Africa. Brights offers same-day delivery in the Western Cape for products purchased online, and also has a tool hire service.

Make sure you have your bank details handy when you call. Lines are open Monday to Friday,
2 3 4 5
SMS 'subs EDIY' to 43331 (standard rates apply)
EFT OR DIRECT DEPOSIT
Payable to: Arena Holdings - Media Circulation Subs Bank: FNB
Branch code: 255-005
Account number: 62793068034
Reference: Your name, surname and cellphone/subscription number
Email your proof of payment to: Feedback@arena.africa
debit order) 0860 52 52 00
We all think we know our homes pretty well, but several interesting and unexpected facts about them would astonish most people, writes
Cobus Odendaal E I RMost of us assume we know everything about our homes, especially if we’ve lived in them for some time, but, while we may be familiar with the geyser’s location and how many square metres of living space we own, there are numerous things that most people would be very surprised to know.
Homes have evolved over decades – and most features were designed with a purpose in mind, even if we are no longer aware of the original intention. Here are seven interesting facts that you probably didn’t know – and would certainly serve as a great ice-breaker for easy conversation around the dinner table.
In most kitchens, the lower cabinets are lifted and protrude slightly, and it’s not just aesthetic. This area is called a toe kick and it allows you to stand closer to the counter while you’re cooking. It also raises the cabinet doors off the ground so they can swing over your toes.
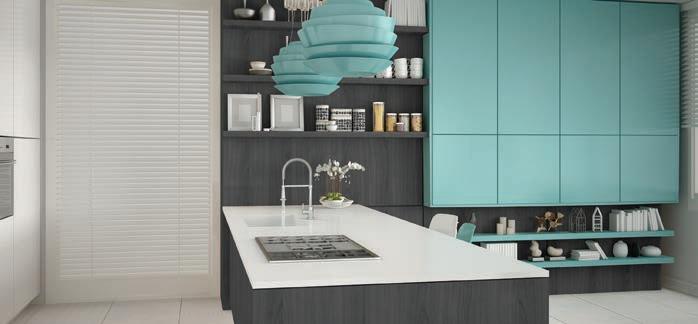
Furthermore, the toe kick can be used as a decorative element in the kitchen

design – it can be finished with a matching material or a contrasting colour to create a striking visual element. Some homeowners also install lighting in the toe kick to create a unique ambience in the kitchen.
Overall, the toe kick is an essential element of a well-designed kitchen that serves both functional and aesthetic purposes.
2 3
It’s also highly unlikely to be ghosts. Creaking sounds in a house are often caused by the movement of building materials, particularly wood, in response to changes in temperature and humidity. As wood expands or contracts, it can cause movement in other parts of the house such as the subfloor or the framing of the walls.


Doorknobs are a major source of germs and also areas we often overlook while cleaning, but you don’t have to worry about that if you have brass or copper knobs in your house because they can naturally self-disinfect every few hours.
Copper and brass both contain metal ions that are toxic to a wide range of micro-organisms, including bacteria, viruses and fungi. When these metals come into contact with micro-organisms, they can disrupt the cell membranes and cause oxidative damage, which can ultimately lead to the death of the microbe.
Many studies, including ones done by the Environmental Protection Agency in the United States, have shown that copper and brass surfaces can reduce the levels of harmful micro-organisms on surfaces by up to 99.9% within just a few hours. This makes them a great choice for frequently touched surfaces, such as doorknobs, where germs can easily accumulate.
IMAGES: ARCHIDEAPHOTO/ISTOCKPHOTO.COM, ELOISACONTI/ISTOCKPHOTO.COM, BITSANDSPLITS/ISTOCKPHOTO.COM, RAYLIPSCOMBE/ISTOCKPHOTO.COM, RAWF8/ISTOCKPHOTO.COM, U. J. ALEXANDER/ISTOCKPHOTO.COM,KATARZYNABIALASIEWICZ/ISTOCKPHOTO.COM, PETEGALLOP/ISTOCKPHOTO.COM
Yip! The cabinet under the sink is not primarily designed for storage, but rather for accessing the plumbing fixtures located there. This is especially important in case of leaks or other plumbing issues that may require repair or maintenance. Having easy access to the plumbing under the sink allows homeowners or professional plumbers to quickly and easily address any issues that may arise.
While it’s common for homeowners to use the space under the sink for storage, it’s important to keep in mind that this can make it more difficult to access the plumbing fixtures if needed – especially in an emergency.
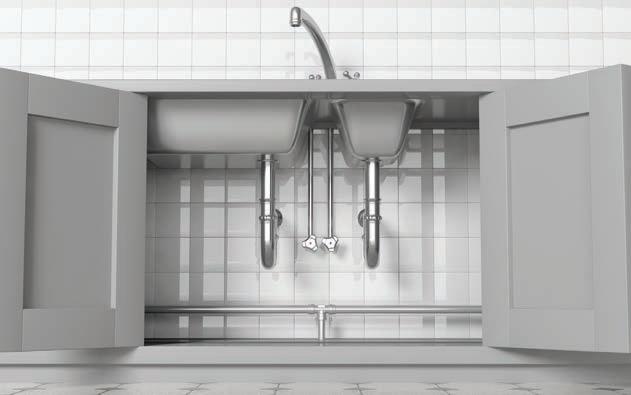
To ensure easy access, it’s a good idea to keep the space under the sink relatively clear and organised and avoid storing items that may leak or spill, such as cleaning products or household chemicals.
They’re called “weep holes”, and are actually an essential part of brick structures because there is an air gap between a home’s exterior brick and the plywood beneath, which functions as a rain screen, so any moisture that gets behind the brick drains down to the bottom of the wall and out through the weep holes.
Without weep holes, water can get trapped and cause damage to the structure over time. Weep holes also allow for ventilation, which can help prevent mould and mildew growth. It’s important to ensure that weep holes remain unobstructed so that they can function properly.
There’s a specific reason for your sink having two taps. In older homes, traditionally, the cold-water tap was linked to the local water supply, which had been treated and was safe to drink, while the hot-water tap was connected to a tank stored in the homeowner’s attic, which would often be contaminated by bugs, rats and random detritus, and was therefore considered non-potable and potentially hazardous.

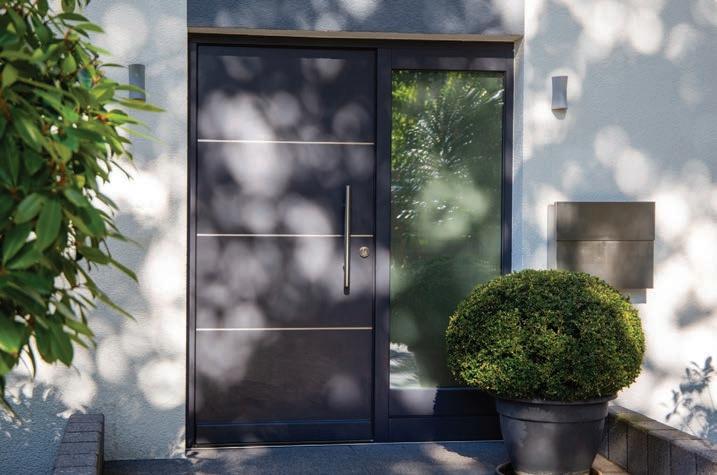
Interesting fact. Research has shown that homes with black or grey front doors tend to sell for higher prices, as do homes with different coloured top and bottom kitchen cabinets, while homes tend to sell for less if they’re painted yellow.

By separating the hot- and cold-water taps, homeowners could avoid accidentally consuming contaminated water and potentially becoming ill. However, in modern homes, it’s more common to have a single tap that mixes hot and cold water to provide a consistent temperature for washing and cleaning.
Turn to page 28 for more on the kitchen sink
It is essential to refer to the back of the pack application guidelines or, for more detailed information, the product technical data sheet, which will serve as a guide to correct drying times.


Products will take longer to cure in cool, wet and humid conditions.

For exterior painting, ensure that painting does not continue late in the afternoon, as the sun will set earlier in the winter months. Exposed exterior surfaces may then be exposed to overnight dew, which may lead to streaking on freshly applied coatings. We recommend that the newly coated surface should not be cleaned within seven days of application.
Look at the weather conditions before painting commences to ensure that the conditions are suitable for the application to take place, this is particularly pertinent when cooler temperatures can be expected during the autumn and winter months.
When planning your painting, it is always best to ensure good weather conditions have been forecasted for several days following your planned paint application.
Should temperatures be below 10°C, it is not recommended to paint – painting should commence once temperatures increase to ensure that the coating has the correct drying conditions.


For interior applications, cooler temperatures will require additional drying time in between coats. While the coating may be dry to the touch, it may not yet be sufficiently dry to receive additional coats.

FOR MORE TIPS, FOLLOW DULUX’S BEST PAINTING PRACTICE
Interior designer Kim Williams shares some home upgrades to give your interior space a much-needed revamp

A fantastic emerging trend is where old, cherished memories from past generations are brought to life in beautiful quilts and wall hangings that act as bespoke decor pieces in the home are fast becoming a decor must-do as it is such a unique way to tell a story and invoke interest.


The muted tones that had a calming and healing effect on us during the pandemic are being replaced with brighter colours and bolder designs. We are likely to see a big uptick in rooms filled with mood-boosting colours that reflect personal style and taste. Plascon’s colour combination for 2023 really captures the different stages of light and cheerfulness for the year.
Our desire for sustainable, eco-conscious living transcends to all parts of the design and decor sphere. We are likely to see more use of locally sourced materials, such as rattan, wood, stone and weaves, interspersed with soft furnishings and decor pieces made by local craftspeople. There is also going to be a stronger effort to be deliberate with decor, with every item carefully considered for the value it will add to the overall objective, feeling or experience before it is introduced to a room. We’re likely to see people not just using decor for its aesthetic appeal, but also to help create or contribute towards the entire energy and experience of the space.


Expect to see bold art pieces and expressive accent colours on fabrics and wall coverings. They might not conform to typical design and interior decor conventions, but they are effective in adding pops of colour, an element of intrigue and interest, and celebrating the different voices, cultures and individual personalities that make up life.
OR FOLLOW HER ON: Facebook and Instagram
@kim_williams_design
Ross Mains-Sheard, director at Versofy SOLAR, answers 10 of the most frequently asked questions about solar power
Thanks to load shedding and the soaring cost of electricity, thousands of South Africans are investigating their options with regard to solar power. Understandably, they have a lot of questions.
3. Can solar panels be installed on a flat roof? While there are some aspects to consider, solar panels will perform efficiently on a flat roof, provided they are mounted securely and installed at the optimum angle. The optimum angle for a solar panel’s performance in Johannesburg and Cape Town, South Africa, would depend on latitude and other local factors.


4. How many solar panels are needed for a typical house?
The average home will use between 6 and 12 panels, but the exact number depends on the area of your home, inverter capabilities and electricity needs. Choose an experienced supplier who can correctly assess your property and energy demands and offer flexible package options suited to your home and your budget.
1. Is one brand of solar panel as efficient as another? The efficiency of your solar panels depends on the amount of sunlight they receive and their technical specifications. Some panels are more technologically advanced than others.


2. How long does it take to install a household solar system?
Installing the solar panels, inverter and battery can be done within one to three days.
5. Will the system work in extreme conditions?
Most are designed to withstand high winds, heavy rain and hail. Solar panels may actually operate more efficiently at lower temperatures than at very high temperatures, but extreme cold can reduce their efficiency. Make sure your panels are installed correctly to prevent damage and that you are covered by your insurance.
6. Is it covered by a warranty?
In terms of performance, all of Versofy SOLAR’s equipment is backed by robust warranties for the term of your agreement. Check that your supplier offers the same.
7. What are the payment options?
Solar as a service: this is a pure rental product; there is no ownership of the system. Installation, monitoring and support are included. This option gives users all the benefits of solar at a lower monthly cost and without the associated costs of ownership.
Rent to own: rent to own is just like a cellphone contract for solar. You can benefit from the full savings of owning the system after the contract is finished. If you sell your home, you should be able to transfer your rental agreement into the new owner’s name, subject to the new owner agreeing to the original terms and conditions. Cash: this is when you buy the system outright. The positives are that you start to get a return on investment immediately. It also requires substantial upfront capital.

8. & 9. What is the lifespan of a solar panel and how much maintenance does a household solar panel system require?
The lifespan of solar panels should be 20 to 30 years. They may require cleaning once or twice a year with water and a soft bristle brush, and you’ll occasionally need to check that they aren’t being obstructed by trees or debris.


9.
10. How does one monitor the performance of the solar system?
Discuss inspections with your supplier upfront – this should be included if you’re on a monthly contract. There is still a long way to go to get people switched to solar and less reliant on the grid. South Africans are very interested, but understandably hesitant. I hope that by supplying these answers, we can allay some of the fear around the “unknown” aspects of solar and reassure readers that installing solar is neither a mammoth task nor requires huge capital.

FOR MORE INFORMATION ABOUT SOLAR, VISIT THE FAQ PAGE ON THE VERSOFY SOLAR WEBSITE

The sink has become such a part of the kitchen landscape that we often take it for granted. It has given its name to a certain kind of gritty realism in writing – “kitchen sink realism”. “Everything but the kitchen sink” was the phrase coined in WW2 to describe an intense bombardment. So, where did this ubiquitous kitchen helper originate?
The kitchen wasn’t always the kitchen, so it follows that the sink wasn’t always the sink. Thousands of years ago, the primitive kitchen was nothing more than a pit where a fire was made. There may well have been a stone nearby where the unfortunate hunted animal was prepped for cooking. The early hearth was made from clay or stone and used to keep the fire going. But no sink.
the very wealthy, these vessels were lined with lead or zinc, and because they were linked to a water pump system became known as wet sinks. Once used, the water still had to be emptied by hand.


By the fifth century, the ancient Greeks (yes, them again!) had begun building a separate structure adjacent to the home for food prep. There was a clay oven. A cellar was dug to preserve ingredients. By the Middle Ages, a smokehouse was added. But still, no sink ... because ... no indoor plumbing. Water was collected by hand from the local stream or lake in a primitive bucket. After use, the dirty water was probably chucked over the nearby crops!
It was really only in the 1800s that the concept of the kitchen sink as we know it started emerging. Around 1820, a large bowl-shaped vessel – called a dry sink – had the sole purpose of standing on a table or a windowsill to hold water, still brought from the closest water source. This roughly fashioned bowl was made of wood or metal or stone. In the homes of
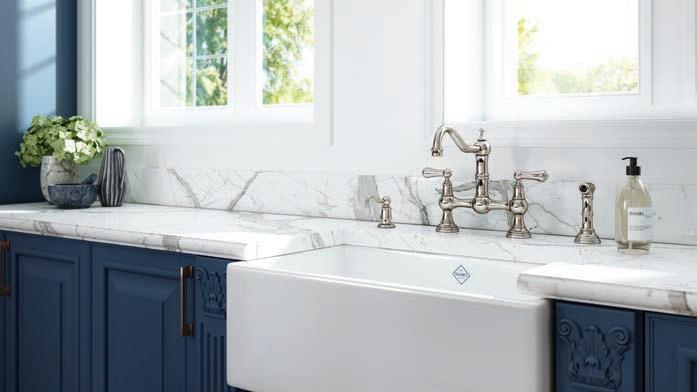
Cut to nearly 100 years later. The Industrial Revolution had revolutionised much in the workplace and at home. The old-style bowls were replaced by enamel, steel or stone sinks. Plumbing and drainpipes modernised the system of pumping the water in and out. These sinks were mounted on the wall and had legs. If you were lucky, your sink contraption came with a draining board. The Butler’s Pantry emerged at this time ... a storage space, mostly. But it was also the space where the Butler’s Sink was placed, also on legs. Italtile stocks an exclusive, limited edition range of Butler’s Sinks – Shaker Sinks by Shaws of Darwen –handcrafted from fireclay in the same time-honoured way as they were by earlier generations in the late 1890s.
The years after the two great wars saw the start of the functional kitchen with maximum efficiency – a triangular system of fridge, stove and sink. By this time, the kitchen sink was mounted on the kitchen cabinetry. So began the era of the streamlined kitchen with the modern kitchen sink as we know it.
Famous Chef Julia Child, during the 1960s, had a startlingly new stainless-steel double sink with draining boards. She also had several pantries and more than one fridge! By the 1980s, the kitchen island became vogueish, with its separate prep sink. And by the time the 2000s rolled around, the kitchen, with everything including the kitchen sink – or more than one kitchen sink – became the heart of the home.
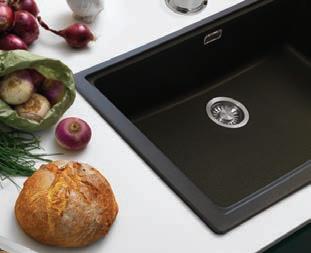
Today, stainless steel sinks, while still popular, have to arm wrestle with ever-evolving sink technology that has brought us heat-, impact- and bacteria-resistant materials as showcased in Italtile’s collection of Franke Fragnite and Teconite Sinks.
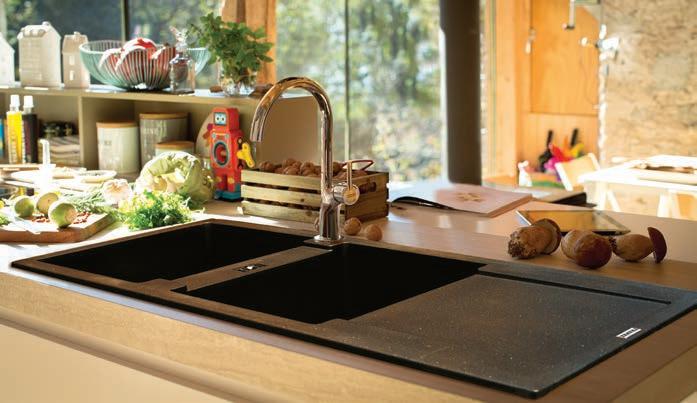
Add up how much time you spend at your kitchen sink: filling pots, preparing veg and washing up after a big meal. It’s a place you will stop at countless times each day, so innovation within this space makes sense. The kitchen sink is no longer just an ordinary bowl. Sink innovation is on the rise, and one such innovator, GROHE, has introduced sinks with clever features that will make washing up less of a chore. The new technology makes it easier to clean, reduces water noise and introduces remote-controlled waste.
Sinks are being designed to fit multiple needs. Today, you can find integrated drainers, large double sinks for when you need to spread out, and chic built-in sinks that fit flush to your worktop. GROHE has innovated sinks with features such as whisper technology – for composite sinks, the material reduces the noise from water flow and for GROHE stainless steel sinks, special integrated insulation achieves the same effect. And draining the bowl can now be done remotely.
A last word on the latest 21st-century “sinkspiration” ... weirdly, we’ve gone full circle ... remember those primitive outdoor food prep areas our ancient ancestors used? Today, we have seen the rise of the fully-kitted out outdoor kitchen, complete with prep and double sinks.
(Source:https://www.worldcoppersmith.com/articles/complete-historykitchen/#:~:text=Around%201820%2C%20the%20type%20of,lined%20with%20lead%20 or%20zinc


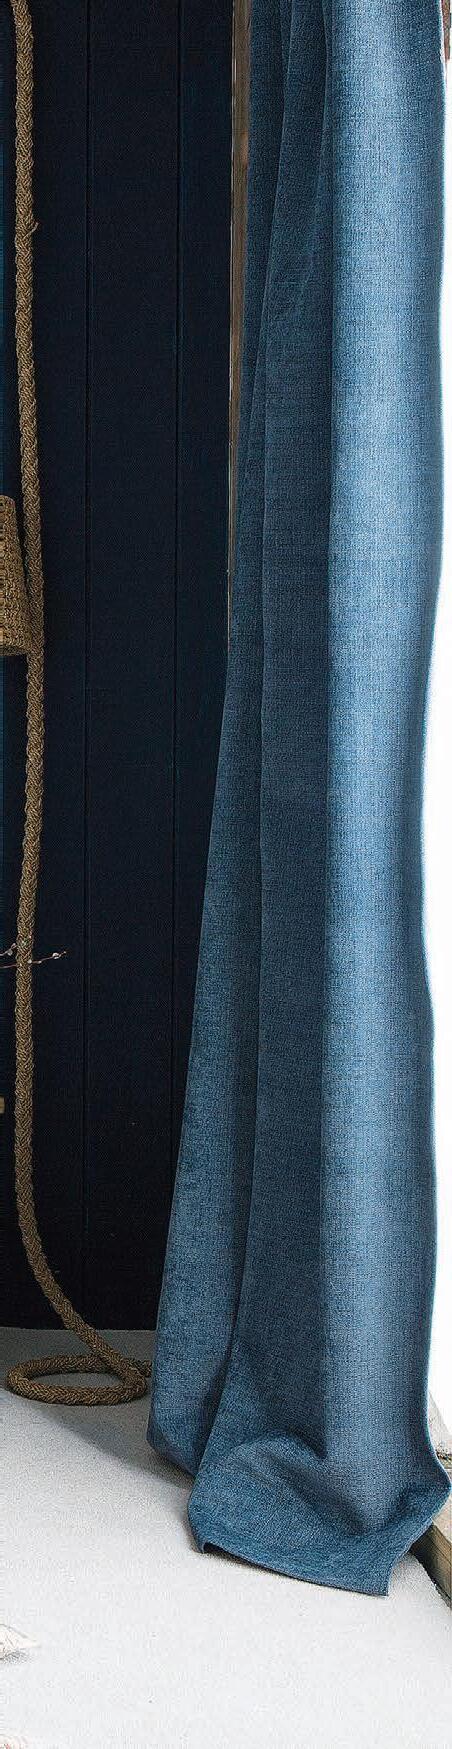
Team angular panelling with a soft and luxurious velvet sofa in a deep shade.

Paint wall panelling in a rich shade to create an opulent backdrop that contrasts with furnishings and accessories
• Mix panelling patterns. Contrast slim lengths of wood wall panelling attached in a vertical formation and painted a deep navy blue with a headboard featuring a herringbone design that’s left untreated in a natural finish. The two patterns layered on top of each other add interest and depth to a modern country bedroom.
• Fake original features. Adding wooden mouldings will create the look of panelling and is quick and easy to do. Simply measure out rectangles at even distances along your wall, then cut lengths of moulding to stick onto
the drawn-out shapes. Make sure you cut your moulding at a 45-degree angle so the corners slot nicely together, and paint the same colour as your wall.
• Update with paint. Wall panelling and mouldings painted in shades of deep blue and green make for a modern alternative to wallpaper, offering both colour and texture without a busy pattern.
• Introduce wall art. Hang a canvas or piece of artwork in the centre of one of the rectangles and it will create a frame for it to sit within.
• Add dimension. Whether you choose to clad your walls with reclaimed timber or new wood, panelled walls are a great way to boost a flat space and create a focal point. The natural patina of antiqued or reclaimed boards creates a characterful, rough-luxe finish.
• Get the look on a budget. Reclaimed wood can be a great eco-friendly way to create a feature wall in a kitchen. It can be a little more expensive than tongue-and-groove panelling if purchased from a specialist. However, if you are willing to do some

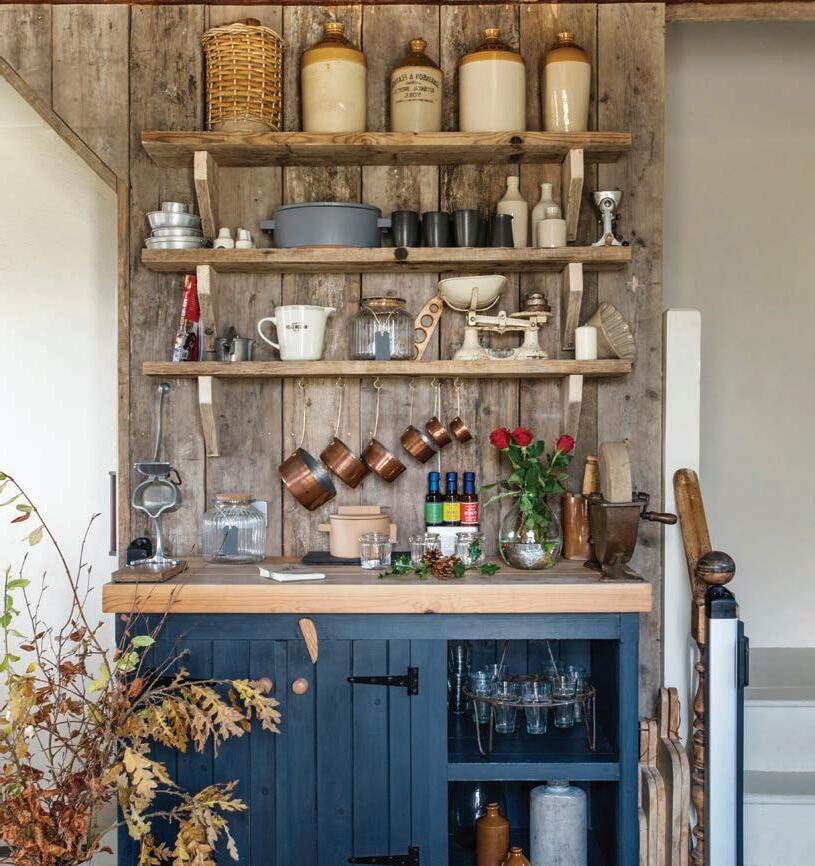
rummaging at a salvage yard and put in a little elbow grease with a saw and sandpaper, it could be a great way to score serious style points on a budget. Make sure you check for woodworms.
• DIY a temporary headboard. If you live in rented accommodation or aren’t ready to commit to wood panelling in your room, you can always fake it with a headboard like in this simple white coastal bedroom. The bleached rustic design is far wider than the bed and adds an extra layer of texture and colour to the scheme.
Wind LED fairy lights round a wire shape.
• Protect and insulate. Wall panelling is also a practical choice, as it can add protection to walls, avoiding general wear and tear from family life (or cover up signs of previous accidents). Plus, it can add a level of insulation, too.
• Update a chimney breast. Instead of covering a chimney breast with statement wallpaper, why not use wood panels for an eclectic look? Create a weathered effect by giving bare boards a ‘wash’ of paint, rather than covering them completely.


• Swap wood for paper. Versatile wallpaper can be used to create a stand-out feature wall, as a central wall panel to frame furniture or a fireplace, or as a half-height design in living rooms and bedrooms.

• Make a style statement. Take a twist on the traditional wooden headboard with a striking panelled section. Make it a super-sized statement by taking the panelled piece right up to the ceiling for a smart finish worthy of a boutique hotel.
GREAT IDEA
Pair with industrial lighting like this a ngular tripod lamp.
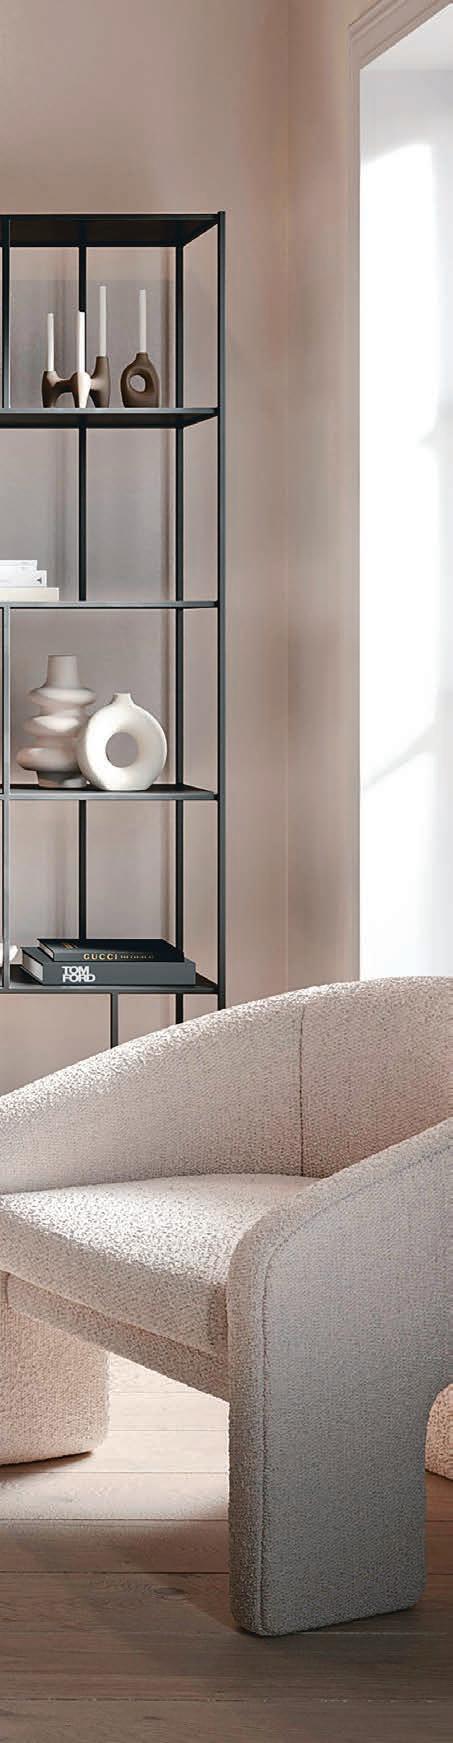
Create a chic, minimalist look with slim slatted wall panelling – pre-made or DIY, it’s up to you!

• Save time with pre-made panels The tones and textures found in tongue-and-groove wood slats provide an added layer of texture and create depth. Cut out the hard work with readymade panels that are easy to install and come in various wood finishes.
• Make a feature with MDF strips Give a plain white box room a new lease of life by adding a simple strip of wood panel. Using lengths of MDF and attaching to the wall with a strong adhesive, the offcuts create an abstract pattern to the wall beside it, too.
• Go back to black. Charcoal black is the perfect addition to any interior as the colour is striking yet elegant, complementing all styling trends ranging from minimalist Scandi to boho chic. Use on panelling, then add contrast by painting a warm neutral on the rest of the walls.
• Cheat the look. When you want wood panelling without the cost or work involved, you can fake it with a clever printed wallpaper. Slim slatted wall panels instantly conjure up a minimalist look, and wallpaper will ensure walls remain in immaculate condition.
A heavy-duty adhesive such as No More Nails is your best friend for DIY panelling.
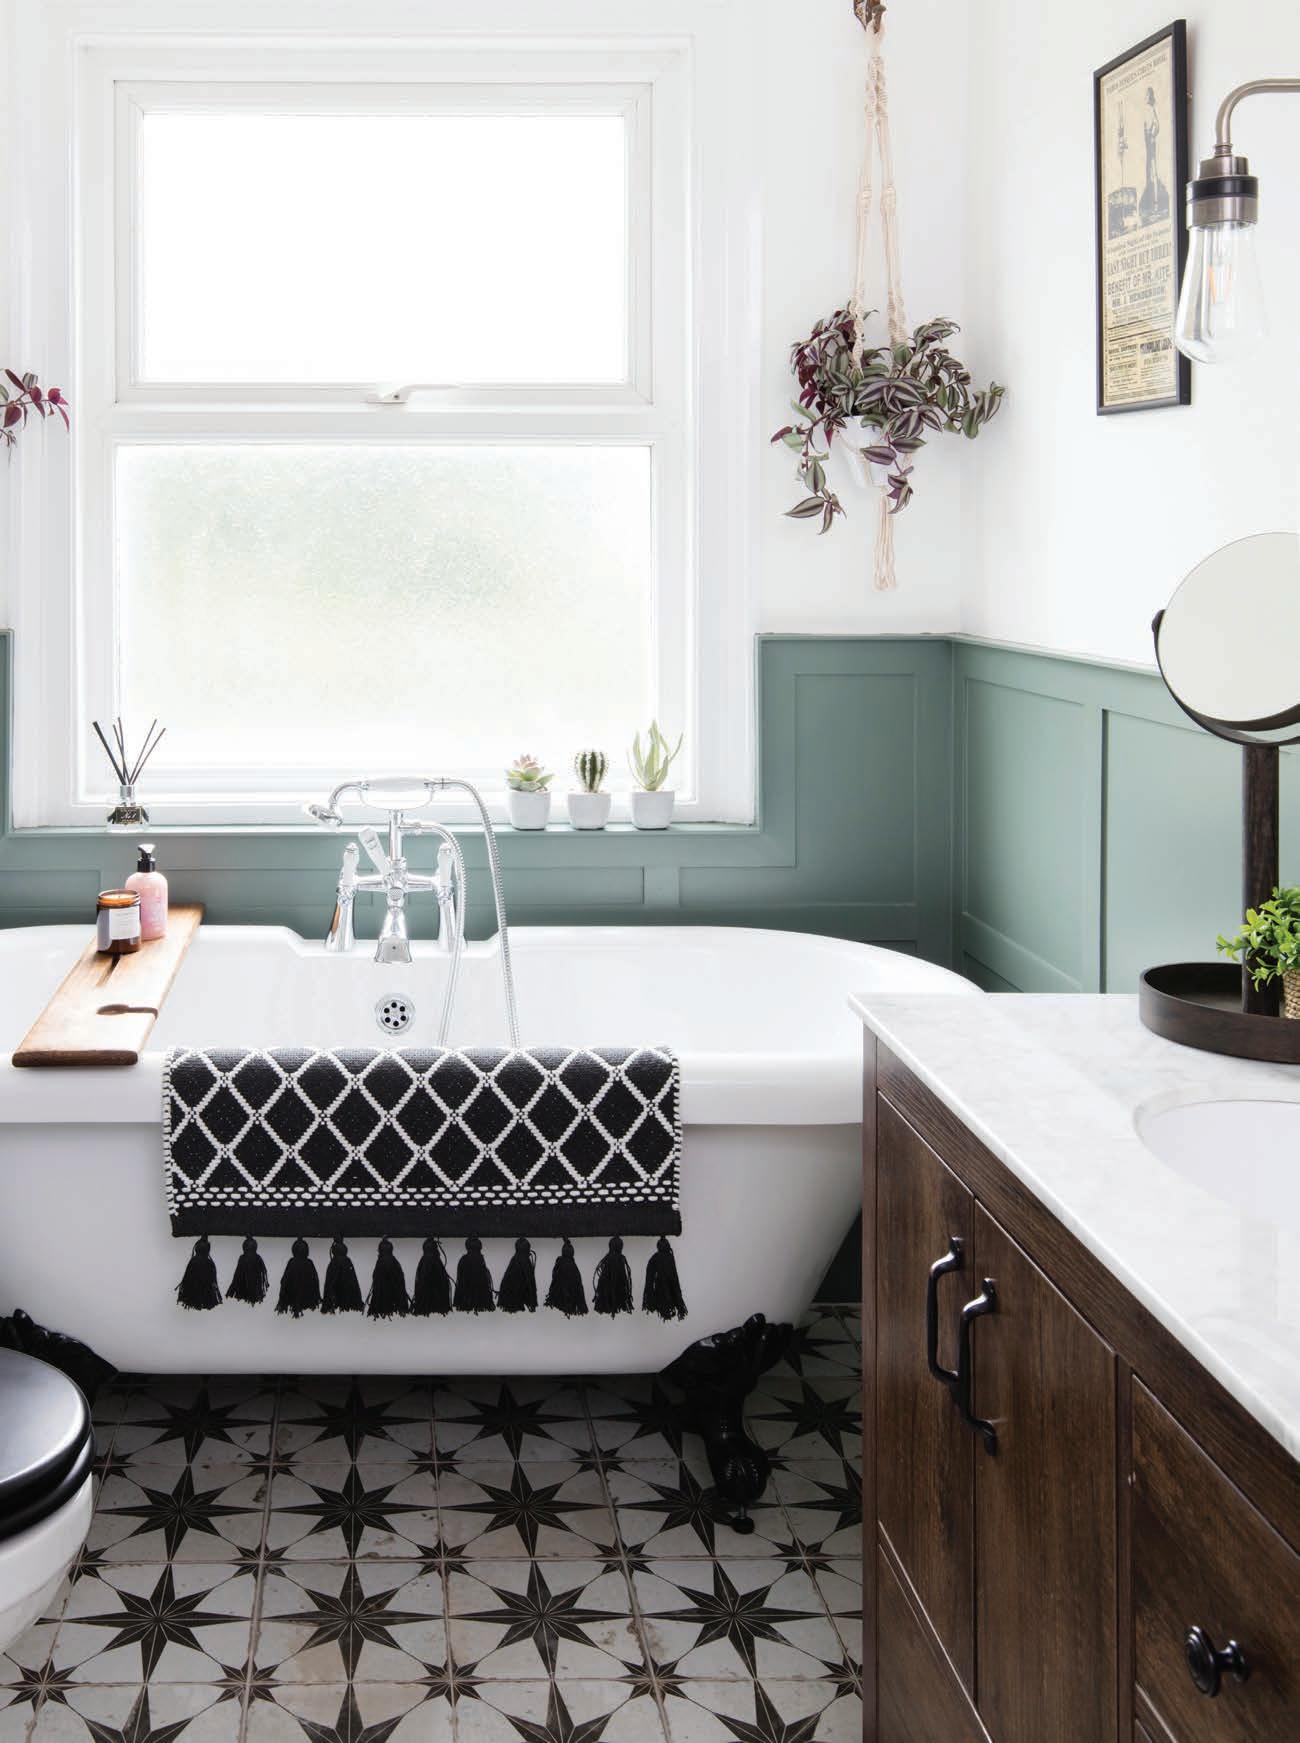
Not just for living rooms and bedrooms, wall panelling can breathe new life into your bathing space, too

• Mix and match panelling styles. Mixing ornate ribbed and portrait panels will make the walls stand out. Perfect for spaces where you want to feel as if they’re closing in on you for a cosy, cocooning feel. Paint it in an on-trend colour such as dark grey or bold blue.
• Factor in handy storage. Panelling is a great way to make a statement in a bathroom instead of wall tiles, and you can top it with a narrow shelf to provide storage for toiletries or candles that will make bathtime all the more relaxing.

• Work round a window. A large window shouldn’t get in the way of adding wall panelling in your bathroom. Jacobean-style panels do a great job of mimicking the shape of the window and framing it beautifully.
• DIY half-wall panelling. Faking the Jacobean panel look is easier than it seems – simply use thin strips of MDF to create a grid. Space the strips as close together or as far apart to achieve the size of panel you’re going for and adhere with heavy-duty glue. Conceal gaps with filler and paint in your chosen colour.

GREAT IDEA
Frame a window with a pair of hanging planters.
• Play with contrast. If you’re going wall-to-wall in one colour, the addition of panelling will create an instant lift by creating light and shade on what would have been a flat, dimensionless area.
• Pick a modern classic. A large-scale Jacobean grid adds impact, especially when used at full height. Plus, while it’s a historic style, it’s simple enough for modern spaces, too. Paint it in a flat eggshell finish to keep it looking contemporary.
Motus Select shares that regular cleaning not only improves your car’s appearance, but also helps preserve its value and makes it more comfortable to drive.
Your car is more than just a mode of transportation; it’s an extension of yourself. And just like anything else, it needs to be properly maintained and cleaned to keep it in top shape.
Here are five top tips for cleaning your car from top to bottom.
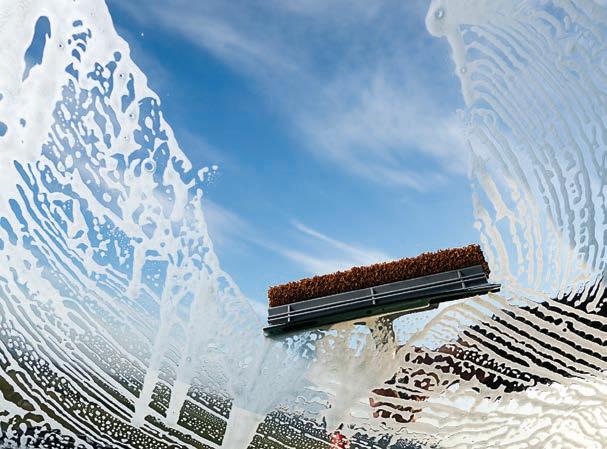
Clean windows improve visibility and give your car a polished look. Use a glass cleaner and a microfibre cloth to remove dirt, grime and fingerprints from the windows and mirrors.
Cleaning the inside of your car should be the first step in your cleaning process. Vacuum the seats, carpets and floor mats, and wipe down the dashboard, door panels and other surfaces with a microfibre cloth and an all-purpose cleaner.

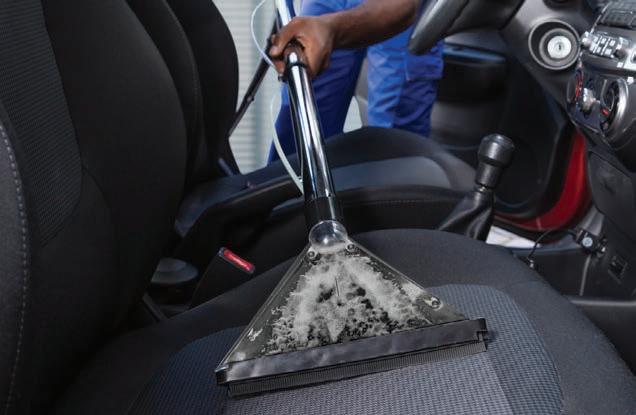
Stains on your car’s upholstery and carpets can be tough to remove, but it’s important to take care of them as soon as possible. To remove difficult stains, use a specialised cleaner or a mixture of baking soda and water.
Tyres and rims can get dirty and greasy quickly, especially if you drive on dirty roads. Use a tyre cleaner and a tyre brush to clean the tyres and rims and make them look new.

1. Air filter
Typical replacement timeframe: every 12 months or 20 000km.
Difficulty: easy
To check if your car’s air filter needs to be replaced, unclip and open the plastic housing and remove. Hold it up against the sun or a bright light source. If you can see light coming through the filter, it should be fine to keep it for another few months. If not, replacing it is as easy as removing it.

2. Headlights – lens and bulbs
Regular checks: every 12 months.
Difficulty: easy to medium.
• Lens – your car’s headlights should be regularly inspected and cleaned. The plastic lens covering should be crystal clear, but over time, it can become yellow or cloudy. Dust and debris can also accumulate inside the housing. Headlight restoration kits are available to sand, wax, and buff them back to life. This can be labour-intensive, and since this is a home DIY project, toothpaste and a damp cloth are a better option and a whole lot easier.
• Bulbs – if you find a bulb needs replacing, choose LED and replace both so that both lights are at an even intensity. Adjustments can also
be made to get optimal performance out of them.
3. Windshield wipers
Typical replacement timeframe: every 6–24 months.


Difficulty: easy.
You can’t easily control the environment your car is subjected to daily, which influences how long the car’s wiper blades will last. However, you can extend their life by cleaning them once a month to remove the grime that collects over time and by keeping your windscreen clean.
Typical replacement timeframe: +-3–5 years.
Difficulty: easy
The white residue on your battery terminal posts causes corrosion, resulting in problems starting your car
Use a high-quality car shampoo and a microfibre wash mitt to gently clean the exterior of your car.

and putting stress on the alternator. Just two easy checks will go a long way to keeping your car running smoothly.
• Keep the connection clean – use one tablespoon of baking soda to one cup of very hot water and a brush to clean minor corrosion. Alternatively, remove terminals and dip in plain, very hot water.
• Check the water levels – all ports should have an equal amount of water and plates covered. If you need to top up, use distilled water only. Maintenance-free batteries do not require topping up.
Difficulty: easy
The more tread you have on your tyres, the better the grip and traction they will have on the road. Based on the South African National Road Traffic Act, the legal limit is either 1.0mm or more than the Tread Wear Indicator (TWI), which, by design, is equal to at least 1.6mm. The TWI is a raised bump that can be found on passenger tyres in each tread groove. It appears once the tyre tread has worn to its level – this means it’s time to replace the tyre. That said, remember that wet conditions have a more detrimental effect on road grip and a minimum of 3mm tread is recommended.
Source:Supaquick.com
Geoff Hollingdale demonstrates the versatility of using a jigsaw to cut wood
With a jigsaw, you will be able to make straight cuts, cross cuts, bevel cuts, and mitre cuts. It will help you to cut circles as well as make plunge cuts. The variety of uses is really wide, which makes a jigsaw one of the best tools for woodwork beginners and DIYers.

A jigsaw is a versatile tool for cutting shapes in a variety of materials. All you need is the right blade. This article tells you how to use this versatile power tool for cutting intricate shapes and for making compound and bevel cuts in boards and other materials.
A jigsaw cuts in a rapid up-and-down motion. The key to excellent results with a jigsaw is to match a specific blade to the type of material you’ll cut: wood, metal, plastics and tile, among others. The blade package will indicate which material the blade cuts best.
Most blades are carbon steel, 50 to 90mm long and either 6mm wide for making tight radius cuts or 9.5 mm wide for general
purpose cutting. Six-teeth-per-inch blades cut fast, but roughly. Finer blades with 10 or more teeth per inch deliver smoother cuts. When buying blades, consider investing in quality blades. They can last 10 times longer and are less likely to break.
When purchasing a saw, check to see what type of blades it uses. Most jigsaws accept blades with a 6mm universal tang that locks into the blade clamp with a set screw. Some saws accept only specially designed blades (like bayonet mount) from their own manufacturer.
Unless you are going to do a lot of work with a jigsaw, invest in just a basic model jigsaw driven off the AC mains. When you’re ready to move up, you can invest in a battery-powered model that gives you the benefit of portability, and with load shedding at least you can finish a job!
A jigsaw can shape a range of materials including sheet metal, ceramic tiles, metal tubing and plastic. Different jigsaw blades are designed to cut different materials, so choosing the right blade is an extremely important step in using a jigsaw effectively. You also need to know what type of blades your jigsaw accepts.
U-shank and T-shank blades are the two main types of jigsaw blades. The only difference between U-shanks and T-shanks is the way that they connect to the jigsaw: U-shanks are attached via a small screw, whereas T-shanks are held in place by a blade clamp.
These days, most manufacturers use T-shanks since it’s typically easier to switch between different blades with the clamp setup.
High-carbon steel: high-carbon steel (HCS) blades are probably the most common jigsaw attachments, thanks to their versatility and the range of materials they’re compatible with. An HCS blade is perfect for cutting softer materials, including softwood, fibre boards and flexible plastics.
HCS blades are flexible, allowing the user to create curved cuts with ease. They’re also lower priced, so you don’t have to worry too much about them getting damaged while you’re cutting.
High-speed steel: if you’re working with harder materials, then it’s likely that your HCS blades aren’t going to cut it. This is where high-speed steel (HSS) blades come into play. If you’re cutting sheet metal or perspex, HSS is a far better choice.
HSS blades are stiffer than HCS blades, so are typically not as flexible. As a result, it’s harder to cut curved edges with an HSS attachment, and they are more prone to breaking during use.
However, the hard nature of HSS blades means they are very durable and can last for a long time. It’s always worth having a couple of HSS blades in your tool kit for when you want to slice into some tougher materials.
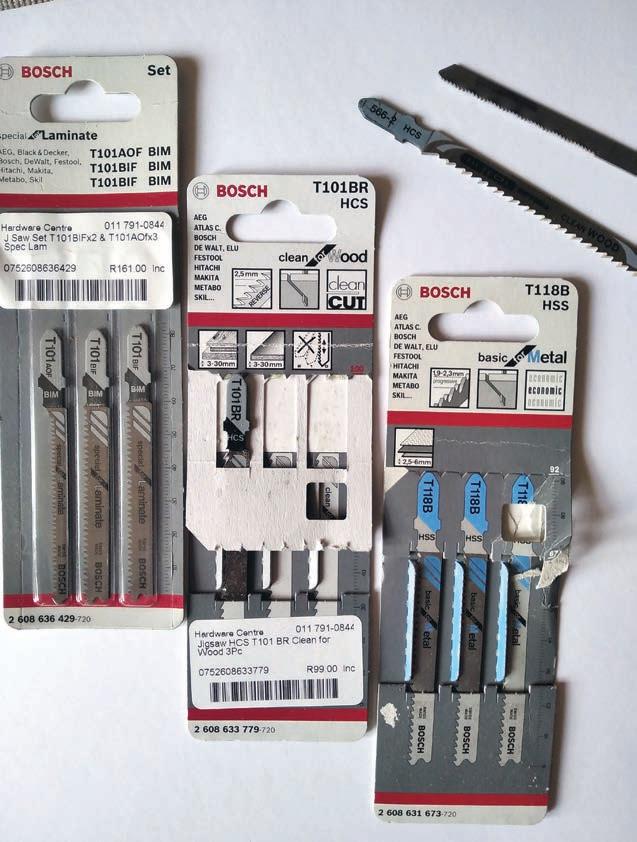
Bi-metal: a bi-metal (BIM) blade combines the flexibility of HCS with the strength and cutting power of HSS. This is achieved by taking the teeth from an HSS blade and placing them along the body of an HCS blade. This innovative approach is attractive to many jigsaw users and is a great solution for anyone who finds themselves working on different materials a lot.
BIM blades are significantly more expensive than their HCS and HSS counterparts, thanks to the complicated process that goes into crafting them. However, their level of durability means you’ll be able to use them for a long time before they need replacing.
Tungsten carbide: a tungsten-carbide (TC) blade is extremely hard and is used for cutting through very abrasive materials, such as ceramic tiles and reinforced plastic.
Most people won’t require a TC blade, but if you’re working on a kitchen or bathroom, then it might be worth looking into.
There are a couple of other tools that you’ll require if you want to use your jigsaw safely and effectively.
Clamps: a clamp is used to hold the material against a workbench while you cut it with the jigsaw. You don’t want your piece of wood or metal to be sliding around while you cut it – this will make it almost impossible to follow a cutting line and, more importantly, it will be unsafe. Use small, spring and bar type clamps.
Safety equipment: when you’re working with power tools that can cut straight through sheet metal, safety should always be your number one concern. Before attempting any cutting, make sure you’ve got gloves, goggles, earplugs and sensible footwear.
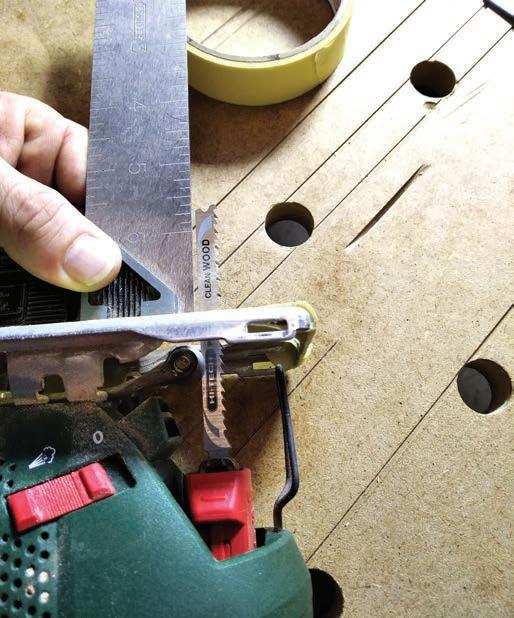
If you’ve picked out that correct blade and length for the material you’ll be cutting, then the final check is to see if the blade is at right angles to the base plate. A screw in the base plate allows setting of the base plate to 45 or 90° as marked and other angles in between, but I’ve never used this feature.
We can’t stress enough how important and helpful it is to mark out a cutting line on your work before you begin. This way, you’ll always know where you’re up to with your cut and it’s much easier to stay in control of what you’re doing.
We’ve already mentioned why it’s important to use a clamp in the previous section. Making sure your work is securely fastened in place will make the cutting experience run much more smoothly, and you’re less likely to have any problems.

Ensure that the correct blade is fully in place inside the saw. Check that it doesn’t move when you apply pressure and satisfy yourself that it isn’t going to come loose when you start cutting. Make sure the blade teeth are pointing away from you since you’ll be pushing the saw rather than pulling it.
Place the saw into position. If you’re cutting a shape out of your work, then you’ll need a starter hole that you can insert the blade into. Use a 6mm drill to cut the hole.
Once the saw is lined up with the edge of your work or inserted into a starter hole, you’re ready to start cutting.
Gently pull on the trigger and slowly push the saw along your cutting line. It’s very tempting to want to push harder against the work to speed up the cut, but this makes the saw much harder to control. Instead, let the saw do the work and gently guide it along your desired line or curves.
If the jigsaw is fitted with a variable speed adjuster, you can increase the speed of cut if you come up against more resistance and the blade is struggling to cut through. Once you’ve finished your cut, let the excess material drop to the floor, release your grip on the trigger and allow the blade to come to a stop before you lift the saw away from the work.
The material you’re cutting is going to have a big impact on how your saw performs. Whether you’re cutting a piece of metal, plywood, plastic or ceramic, it’s always good to know a few tips and tricks to give you the best result.
Wood is probably the easiest material to work with when using a jigsaw. However, wood comes in many different variations –softwood, hardwood, plywood, MDF, and many more. Each of these types is going to feel different underneath the saw.
The main thing to remember with wood is to let the saw do the work. As soon as you push forward too much, your blade will be thrown straight off your guideline. Resist the urge to do so and only ever apply gentle forward pressure.
Jigsaws are not good for making fast, long, straight cuts. Use a circular saw instead. When cutting wood, follow these guidelines:
• Jigsaws work best for cutting softwood that’s no more than 35mm thick and hardwood up to 20mm thick. Jigsaw blades tend to bend when cutting curves in thicker boards, especially chipboard, leaving a bevelled edge rather than a square one. To keep the cut square, use a sharp blade and avoid forcing the saw through the cut.
• For quick cutting, use a coarser blade. But note that the coarser the blade, the more sanding later.
• Most wood-cutting blades for jigsaws are designed so the teeth cut on the upstroke. For fine work demanding less chipping, for example, in wood veneers, choose a “downstroke-cutting” blade.
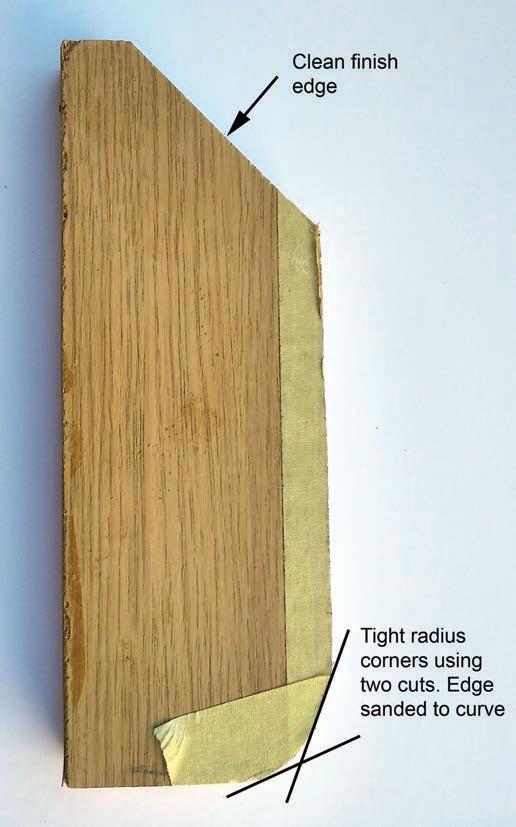
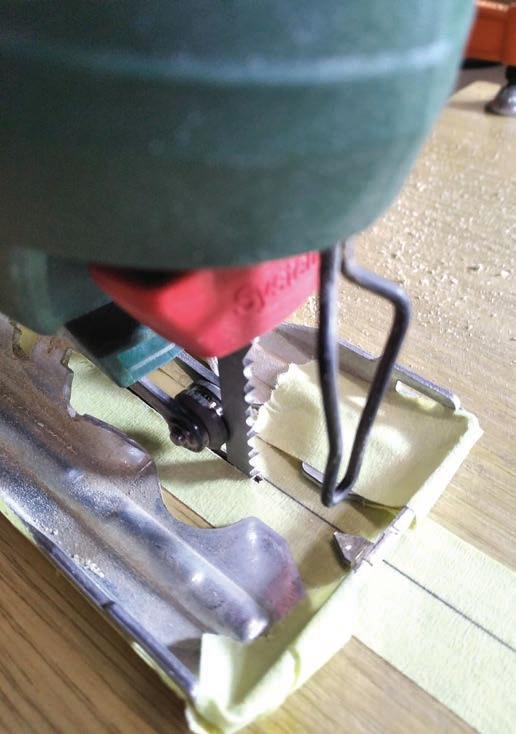
Most jigsaw blades cut on the upstroke, so chips and splinters occur mostly on the top of the wood. If you value one side of a board more than the other, make sure you keep the good side face down and mark and cut the less important side. You can buy reverse-cut or down-cut blades that do cut on the down stroke. These blades are used when you want as little tear-out on the top surface as possible. Cutting out a sink hole in a laminate countertop is one common use for reverse-cut blades. When making a cut, you need to firmly hold down the saw to keep the blade from chattering, and even then, it may vibrate a bit. The combination of upward or downward cutting
force and vibration is tough on the work surface. As most saws for laminate cut on the upstroke, using masking tape minimises “tear-out”. You can reduce marring by applying a layer or two of masking tape to the base of the jigsaw. Remove the tape when you’re done so it doesn’t leave a sticky residue on the base.
Jigsaws are ideal for cutting curves and complex shapes in wood. Begin by pressing the saw shoe firmly on the workpiece with the blade away from the edge. Start the motor, guide the blade along the outside of the cutting line (for finer sanding later) and move from curves to inside corners. Always move the saw forward at a pace that allows the blade to cut without deflecting and doesn’t make the motor labour. Prevent the saw blade from binding on tight curves by using relief cuts to remove waste.
If you want to cut metal, the best tip is to use the right jigsaw blade. A BIM blade is going to be your most efficient bet, but HSS blades are good too. By choosing a decent blade, you’ll be able to cut metal without damaging your work or your saw.
When you’re cutting metal with metal, you can get some serious rattle going through the work. To stop this from happening and to keep your line steady, be sure to apply plenty of downward pressure to hold everything in place.
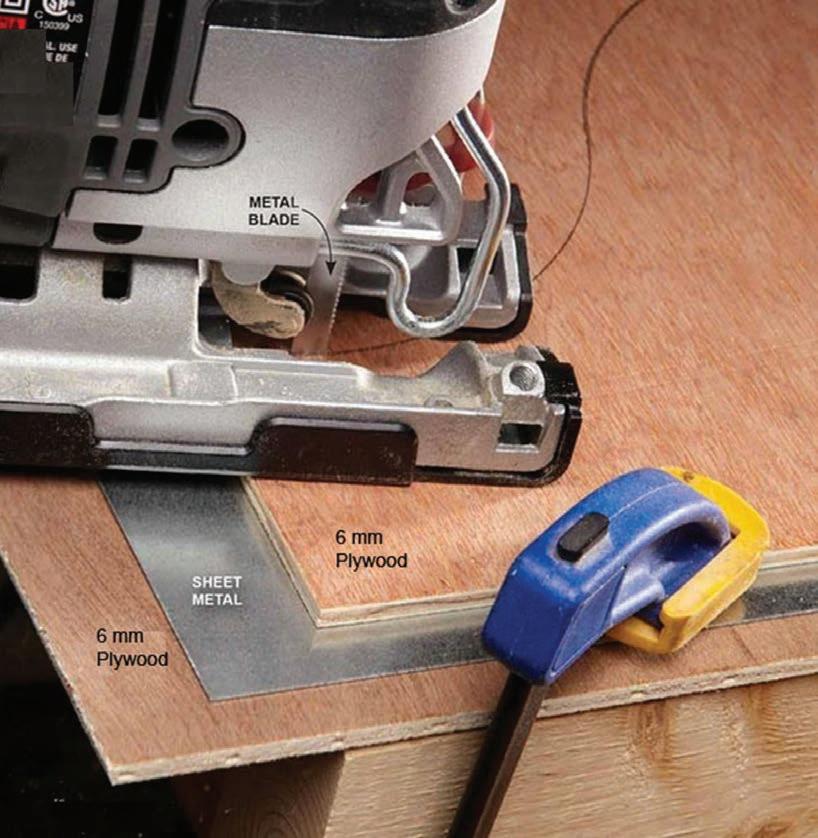
For cutting sheet metal, choose a finer blade with 21 to 24 teeth per inch. To avoid shredding sheet metal or raising a lot of edge burrs, tightly sandwich the metal between two layers of thin plywood. Cut metal plate and pipe on low speed. For pattern cutting, drill blade starter holes instead of making plunge cuts. Expect it to take a while to cut through the sandwich. When cutting over a workbench or sawhorses, prop the sandwich on rails for adequate blade clearance below.
Features such as higher saw power, long blade stroke, variable speeds and
orbital cutting action are all pluses for cutting metals and are found on more costly jigsaws. Saws equipped with vacuum hose connections to keep the pattern cut sightlines free of dust are also a plus. Cutting pipe and mild steel plates wears out blades fast. Keep plenty of blades on hand, select a coarser blade (such as 14 teeth per inch) and lubricate the saw cut with cutting oil.
Use a carbide-grit abrasive blade to make curved cuts in ceramic wall tile that’s up to 6.35mm thick. Speed the work and reduce tile breakage by clamping the tile and using a light mist of water to lubricate the saw cut. This is slow work that demands patience, blade changes and relief cuts to open the tightest turns.
Cutting curves and shapes into tile with tile nippers and ceramic rod saws is slow and results in plenty of tile breakage. If you’re cutting wall tile no more than 6.35mm thick, try your jigsaw for this task.
Use special toothless, carbide-grit blades for tile cutting. For thin tile, apply water frequently to lubricate the saw cut. Thicker tile requires lubricating the saw cut with cutting oil.
To minimise tile breakage, it’s imperative that you clamp your tile down tightly and hold the saw firmly on the tile to control saw and blade vibration. Avoid marring the tile by applying masking tape to the saw shoe. Go slow, using short relief cuts to remove waste and ease the blade through the turn.
For jigsaws, ceramic might well be the most difficult medium to work with. Ceramic is very brittle and can easily crack when using power tools. To prevent this, make sure you’re carefully controlling the blade speed and letting the cutting edge slowly make its way through the ceramic.
You also need to be using a specialist blade. Standard HSS or HCS teeth aren’t going to be enough. Instead, you want a tungsten ceramic or diamond-tipped blade. Keep a bottle of water handy with a spray grip to continually mist the surface being cut.
It’s true that jigsaws can be used to make cuts in plastic, but plastic is a very broad term that encompasses a lot of different materials. Some plastics are very soft and pliable, while others are almost as hard as metal.
You can’t just attach a blade and expect it to work with every kind of plastic. If you are going to use your power tool with plastic, it’s important to know the properties of the particular piece that you’re working with.
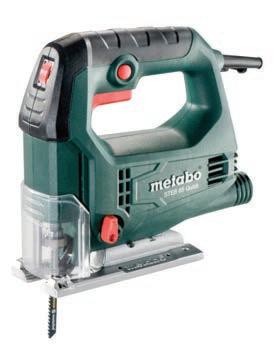
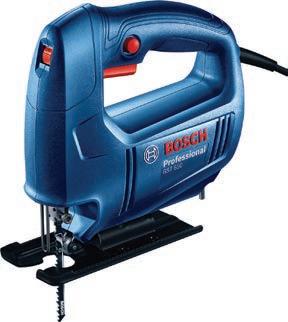
To demonstrate the capability of the tool, two reasonably priced models – the Bosch GST 650 and the Metabo Steb 65 (supplied by the Hardware Centre Randburg) – were used to demonstrate the versatility of the jigsaw. Bosch blades were used for all tests.