9 minute read
WILDLIFE PHOTOGRAPHY


PRO TIPS FOR WILDLIFE PHOTOS
Forge a bond between viewer and subject with Tamron’s suite of wildlife-friendly lenses.
Wildlife photography isn’t for the faint of heart. It takes perseverance, flexibility, and, in some cases, a bit of daring—if you’ve ever come relatively close to a big cat or brown bear, or stared down a bald eagle, you know that adrenaline jolt we’re talking about. No matter what the situation, Tamron has a suite of lenses ready to capture photos of creatures great and small, including wide-angle lenses like the 11-20mm F/2.8 and 17-28mm F/2.8 to incorporate more of your subjects’ habitat, to all-in-one telephoto lenses like the 18-400mm VC, to ultra-telephoto zooms like the 150-500mm VC and 150-600mm VC G2 for the longest reach with the least intrusiveness. Read on for guidance from Tamron’s photographic experts on how to craft stunning images, whether your subjects are roaming the savannas of Africa, trekking over the Arctic tundra, or bursting out of Monterey Bay in a splash-filled breach.
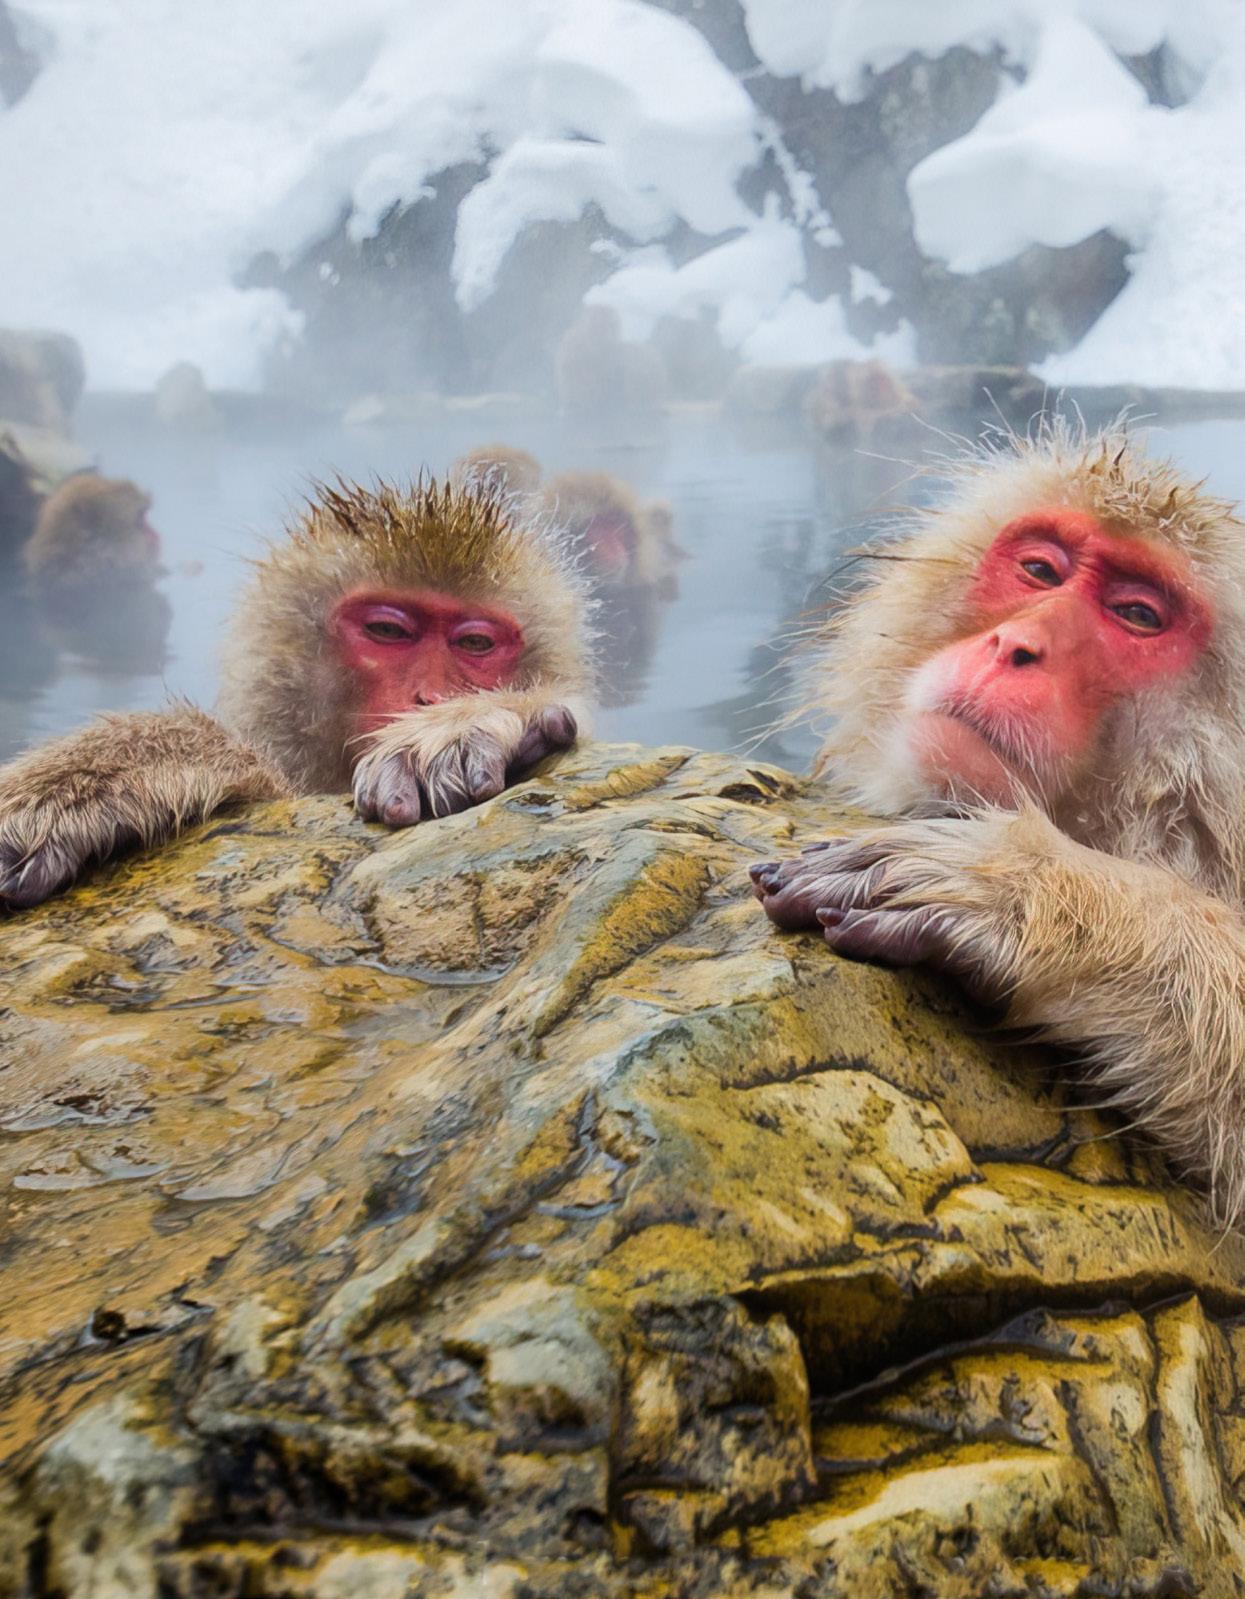
1 - KNOW YOUR LOCATION.
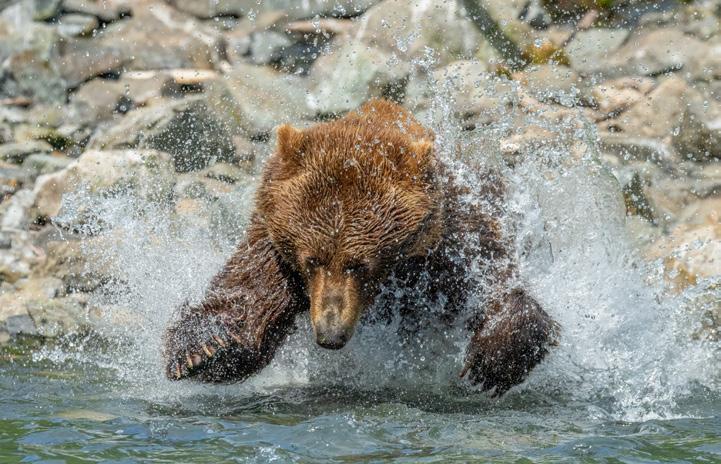
Alyce Bender with Tamron 150-600mm (550mm), F/7.1, 1/800th sec., ISO 3200
Research the rules for wildlife viewing in the destinations you’re visiting. Understanding potential subject behavior so you’ll know if an animal is stressed or uncomfortable with your proximity is an important step in the planning process. A rule of thumb: If the animal changes its behavior (e.g., stops eating, moves away, freezes while staring at you), you’re too close. If you’re working with animals that are habituated to people, and the rules allow for an ethical close approach, consider utilizing an ultra-wide lens to give the viewer a sense of being right there next to the animal with you.
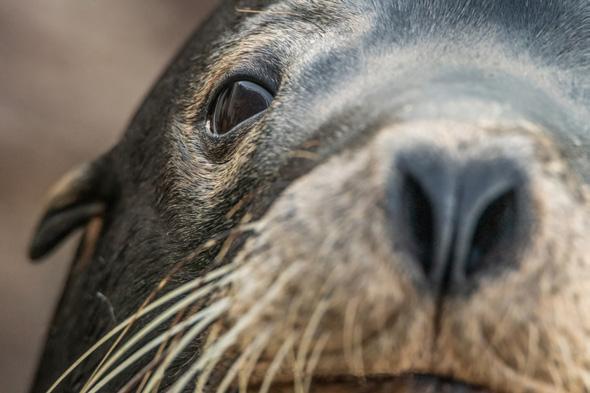
2 - LOOK FOR UNIQUE WAYS TO PHOTOGRAPH YOUR SUBJECT.

Seth Macy with Tamron 150-600mm (483mm), F6.3, 1/1250 sec., ISO 12,800
This can help diversify your wildlife portfolio. You can do this by isolating just a portion of your subject’s body or face to convey a more intimate moment, rather than taking a traditional portrait. In the case of the sea lion shown here, the photographer was within close range, with a retaining wall between themselves and the animal. The photographer waited until the sea lion happened to look their way before capturing this image with their Tamron 150-600mm G2 and a shallow depth-of-field.
3 - KEEP A LOW PROFILE.
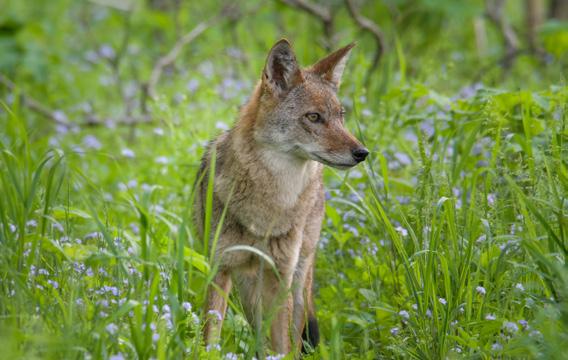
Cecil Holmes with Tamron 150-500mm (470mm), F/6.3, 1/100 sec., ISO 4000
Disturbing the animal as little as possible is best practices when it comes to wildlife ethics. Position yourself in a spot so you can ensure an optimal composition, instead of having to chase or track your subject down. You’ll achieve photographs with more authentic animal behavior that way, as they (hopefully) won’t be affected by your presence. Set up in a sheltered, wooded area behind trees or in concealing grass to keep yourself out of sight. You might want to consider wearing camouflage and purchasing camouflage camera body and lens cover kits. This will help break your shape up, allowing you to blend more naturally into your subject’s environment.
4 - USE AUTO ISO.
By doing so in manual mode, this allows the photographer to set their shutter speed and aperture while the camera adjusts the ISO based on its meter reading. The reason this is so helpful is that many times your subject can move from one lighting extreme to another, causing variances in proper exposure. Using Auto ISO, the camera will adjust for those variances, giving the photographer one less thing to think about. It ensures the shutter speed is kept high enough so that you don’t get motion blur.
5 - SEEK OUT COLOR.
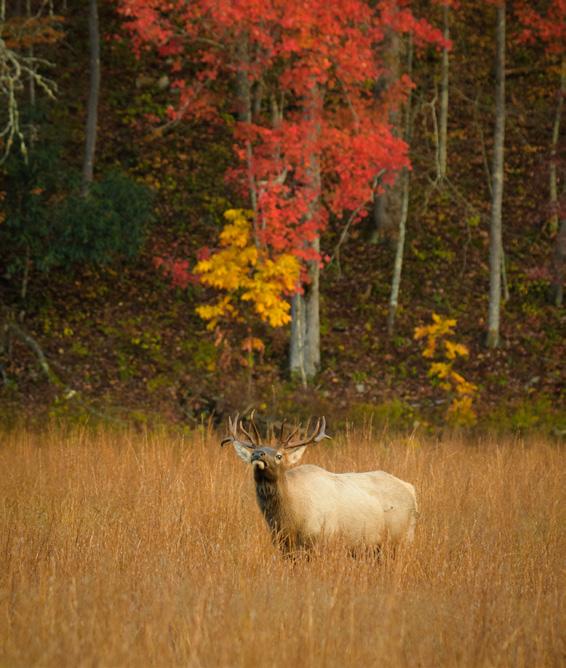
Cecil Holmes with Tamron 150-500mm (200mm), F/6.3, 1/800 sec., ISO 160
That might mean incorporating spring flowers in the foreground or vibrant fall colors in the background. Adding that bit of color can add extra pop to your wildlife images. Also, not every wildlife photo has to be shot at 600mm—zoom out and include some of your subject’s background to show that color, and more of the environment.
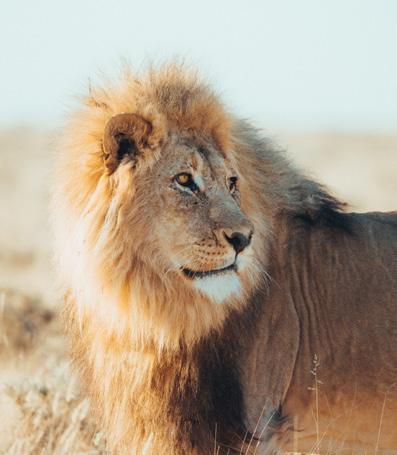
6 - CAPTURE AN ANIMAL’S STARE.

Luke Stackpoole with Tamron 150-600mm (600mm), F/8.0, 1/100 sec., ISO 1250
We have a natural inclination to make eye contact. When you zoom in on an animal’s eyes, especially a larger animal that we don’t typically get to see up close, it forges an immediate intimacy and connection between the animal and the viewer.
Luke Stackpoole with Tamron 150-600mm (320mm), F/6.1, 1/250 sec., ISO 1000
7 - EXPERIMENT WITH DIFFERENT LIGHTING ANGLES.
Luke Stackpoole with Tamron 150-500mm (500mm), F/8.0, 1/250 sec., ISO 250
Although it’s conventional wisdom to have the sun behind you when taking wildlife photos, capturing an image where your subject is sidelit or backlit can also offer dramatic images.
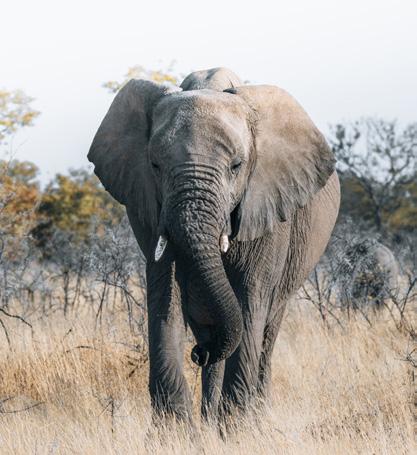
8 - POSITION YOURSELF AT EYE LEVEL WITH YOUR SUBJECT AS IT’S ON THE MOVE.
Especially with larger animals, like the ones you might encounter on an African safari, this offers the viewer the feeling that they’re right there with you as an animal makes its approach. Just be sure to use an ultra-telephoto lens with plenty of reach so you’re able to keep a safe distance.
9 - BE PREPARED FOR FASTER-MOVING BIRDS.
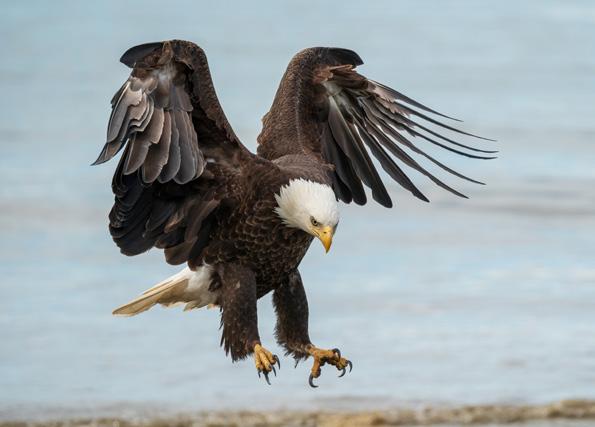
David Akoubian with Tamron 150-500mm (444mm), F/8.0, 1/4000 sec., ISO 1250
This is especially true for birds in flight. In such cases, a shutter speed of at least 1/1000th of a second is crucial to freeze their movements and capture details. You’ll also want to pinpoint the places where birds frequent. For instance, if eagles are flying down to a beach to scoop up fish that’s washed up on the shore, you can position yourself upwind so the eagles will be facing you as they land. Simply set your focus system to continuous tracking and get ready for some great pictures.
10 - OBSERVE HOW THE ANIMALS MOVE AND INTERACT.
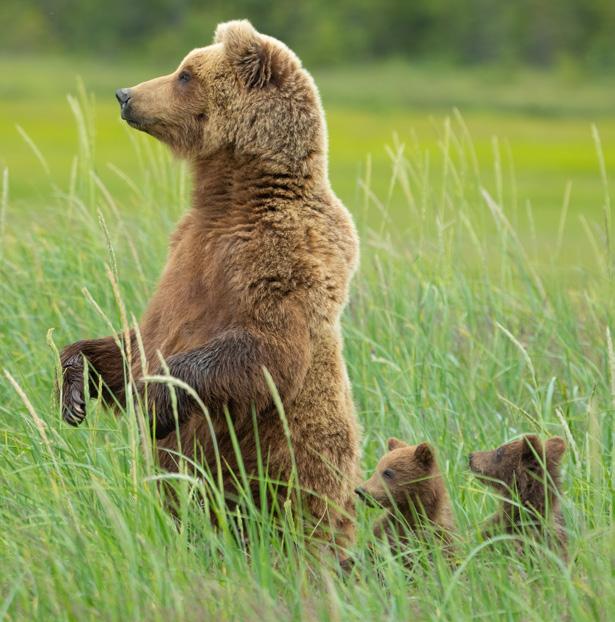
David Akoubian with Tamron 150-500mm (500mm), F/7.1, 1/640 sec., ISO 640
Position yourself where you can study the animals to see how they engage with their environment and each other. For instance, if you see a mother bear with cubs who keeps rising up out of the grass every time another bear approaches, you’ll know to look for that indicator of another bear nearing so you can ready yourself for a photo.
11 - LOOK FOR ENVIRONMENTAL HINTS ON HOW YOUR SUBJECT WILL REACT.
David Akoubian with Tamron 150-500mm (301mm), F/8.0, 1/2500 sec., ISO 1000
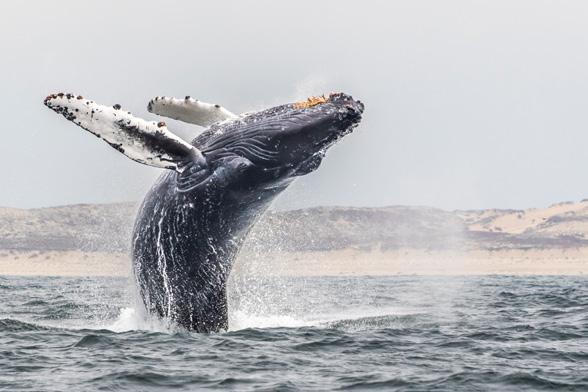
If you’re on a boat photographing a bear hunting for its dinner, for example, observe the bear for a while to give yourself a sense of what prompts its dives. Because salmon are brightly colored, if you see the fish swim in front of a bear, you can be sure the bear will soon be making that dive. Whale-watching is another instance when other animals can offer a hint on what your subject might do next. A fun activity to photograph with these marine creatures is surface lunge-feeding, when humpbacks trap schools of fish at the surface and surge through them with their mouths agape, catching as many as they can. A feeding frenzy can sometimes last for hours. Even though you may not know where this type of event will take place, if you see a lot of birds gathering in one spot, that’s a sign that that’s where the fish are—meaning the whales won’t be far behind.
12 - REMEMBER THE TWO “P’S”: PERSISTENCE AND PATIENCE.
Dalton Johnson with Tamron 150-600mm (600mm), F/7.1, 1/800 sec., ISO 400
These points will keep you alert for photo opps, whether you’re wandering the landscape or waiting things out at an observation point. Set your exposure and keep your camera in “sleep” mode to save battery power. Once the wildlife appears, you can quickly tap your camera on and start firing off frames.
13 - CONCENTRATE ON THE FUNDAMENTALS.
Typically that means exposure, focus, and framing. Wildlife won’t “do that just one more time,” and animals often won’t appear in the exact place you were hoping for. That’s why you might want to set your camera up for slight overexposure (in case the animal appears in the shade), nail how to quickly focus (one suggestion is to use back-button focus), and preframe your shots by predicting all the potential areas where the wildlife might enter the frame.
14 - LOOK FOR PATTERNS.
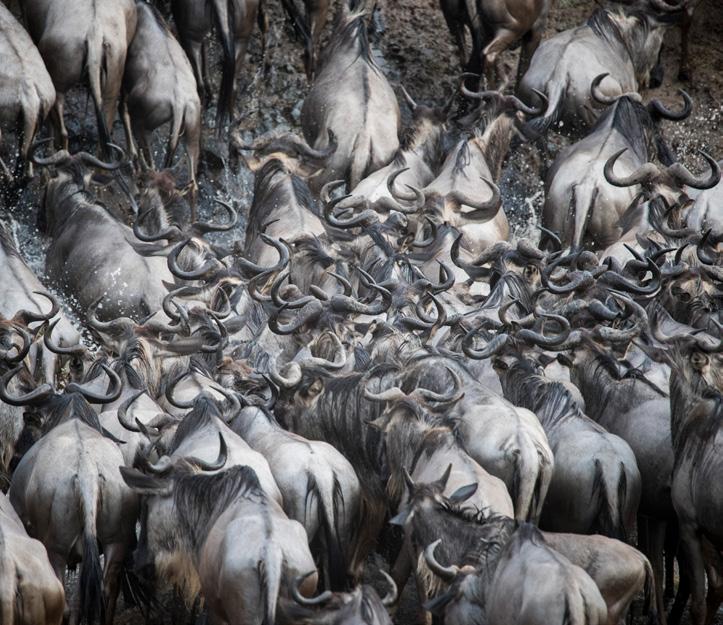
Ian Plant with Tamron 150-600mm (600mm), F/6.3, 1/400 sec., ISO 1000
Large groups of wildlife offer you opportunities to get creative with pattern compositions. For a photo of a massive herd of wildebeest crossing a river, for example, you can use an ultra-telephoto lens like the Tamron 150-600mm, zooming in and out until you find the perfect focal length to capture the radiating pattern they create while climbing one of the riverbanks.
15 - WAIT FOR THE PERFECT POSE.
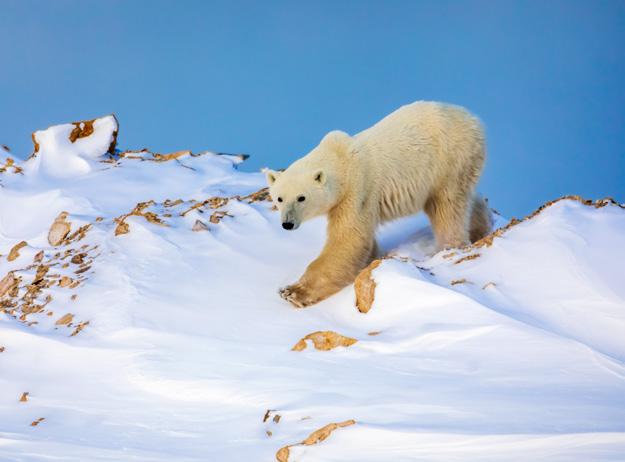
Ian Plant with Tamron 150-600mm (600mm), F/6.3, 1/400 sec., ISO 1000
Make sure your subject strikes a dynamic and flattering pose. You typically want to ensure that your subject’s face is in favorable light, and that you’re seeing an attractive profile or portrait of the animal. To be more blunt: You want to avoid photographing the butt end of your subject. For this photo of a polar bear in the Canadian Arctic, waiting until it was staring at the camera and putting its best foot forward made the shot.
16 - USE A VERSATILE LENS THAT’S READY FOR THE UNEXPECTED.
Douglas Croft with Tamron 18-400mm (300mm), F/11.0, 1/1000 sec., ISO 400
Whale watching can be incredibly exciting. Photographing marine mammals is different than other wildlife photography, as everything is moving (including you in the boat), and you don’t know quite where or when the action, like a breach, will happen. A lens like the Tamron 18-400 is perfect for this type of situation—no matter where the action happens, you’re covered.
17 - MAKE YOURSELF AS NONINTIMIDATING AS POSSIBLE.
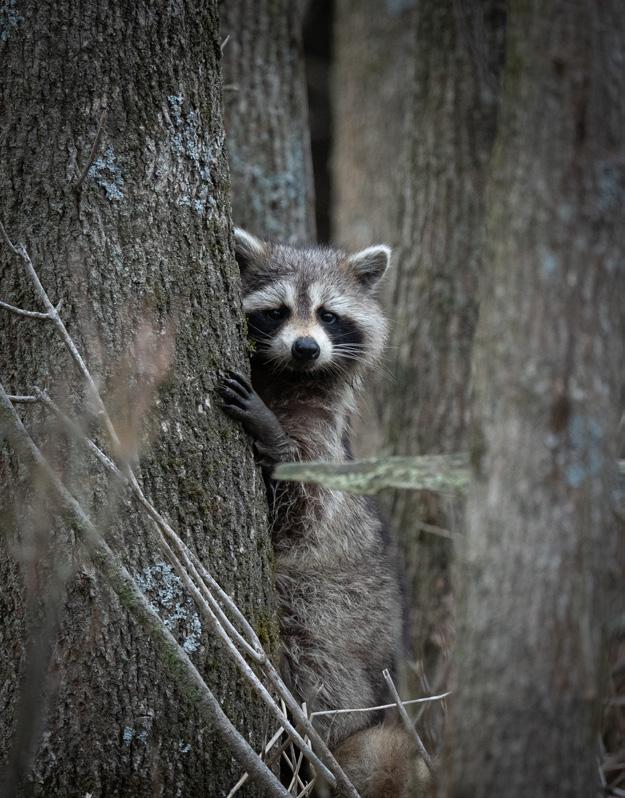
Tiffany Tang with Tamron 150-500mm (500mm), F/7.1, 1/1600 sec., ISO 3200
Smaller animals especially can get spooked and run to hide behind bushes or trees. As they try to assess how much of a threat you are, squat down to make yourself smaller. It also helps if you have your ISO, shutter speed, and aperture already set, so when the animal does finally poke its head out, you’ll be ready.

Photo by Alyce Bender. See Tamron magazine at www.tamron-americas.com for full size version of this image.

