9 minute read
PRO TIPS FOR SUNRISE & SUNSET PHOTOS


Our Tamron pros offer tips and techniques for capturing spectacular sunrises and sunsets.
There’s nothing more captivating than when the sun rises above the horizon, casting its golden rays upon the world, or when it bids farewell with a kaleidoscope of colors during a breathtaking sunset. These moments offer photographers the perfect canvas on which to create stunning images. Our Tamron experts dive into the art of sunrise and sunset photography, unlocking the secrets to capturing the ethereal beauty that these celestial events offer. From finding the ideal location and understanding the nuances of light, to crafting compelling compositions and harnessing the interplay of colors, here’s how to master the magic of sunrise and sunset photography.
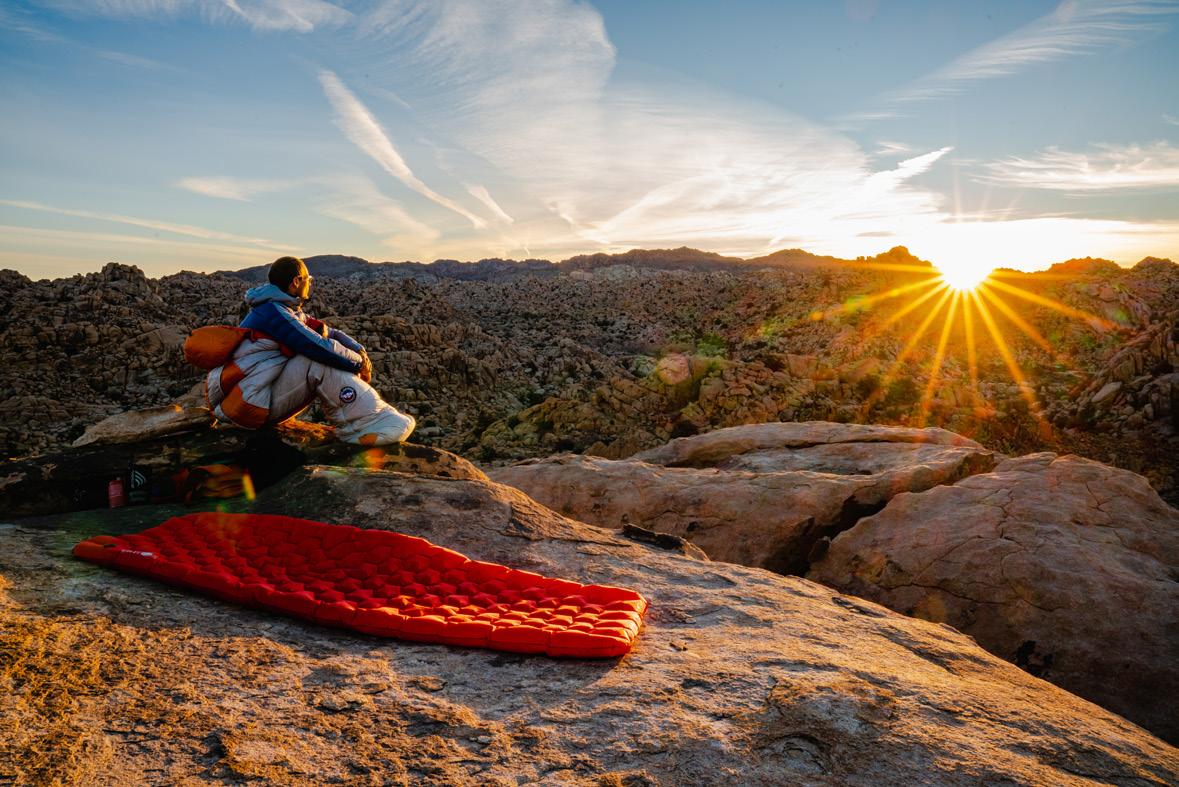
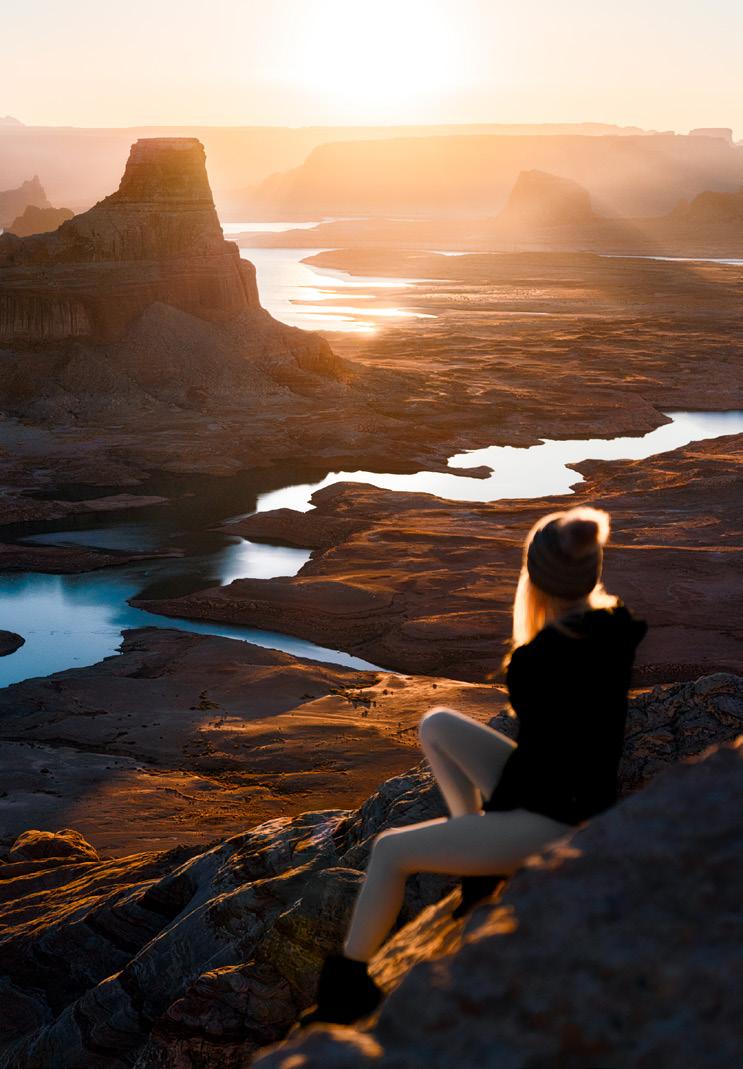
ADD HUMANS FOR SCALE.

What would a sunset be without people to see it? Incorporate humans into your shot in a way that allows for separation between your subject and the scene, and so that the subject stands out. In this red rocks photo, the photographer placed the human subject in the upper right third of the image, which was the highest point in the frame. Make sure the people in your photos are noticeable, but not distracting. The human element should add value to your image, not hurt it.
PAY ATTENTION TO SHAPES IN SILHOUETTES.
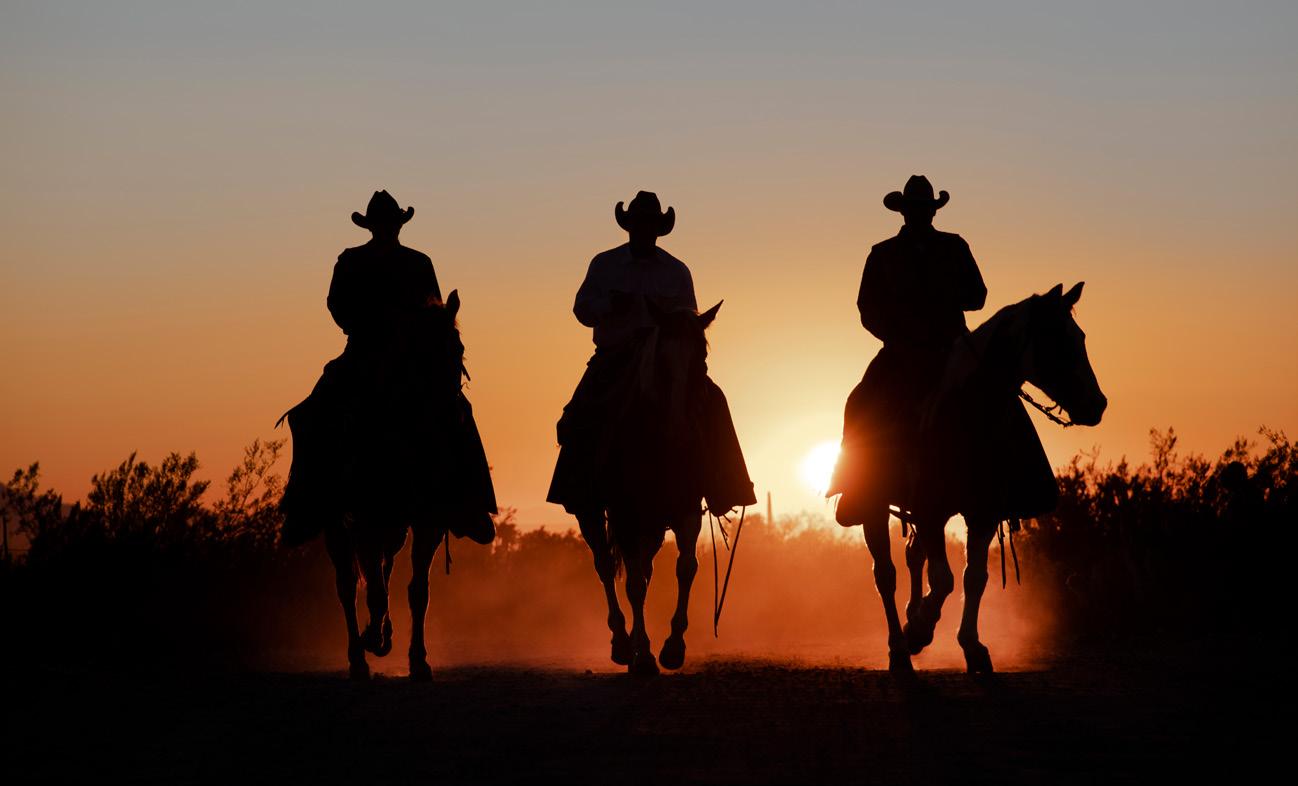
This can be a spectacular way to use this precious lighting. That said, your camera may not give you the best exposures if you capture images on “auto” or priority-type settings. First, ensure the shapes of each subject don’t merge with one another or with the background. Subject separation is crucial for an effective silhouette. So often, photographers aren’t mindful that the entire shape of the subject usually needs to be visible for the shot to be visually effective.
In this photo of the cowboys on their horses, notice the horses’ legs. One can see them all the way from the riders’ hats to the horses’ feet. The light sky stops at the horizon, at which time the backlit dust keeps doing the job of continuing the silhouette. Without the dust, the image would showcase only the upper halves of the horses; the lower halves would be black and blend with the black background.
SUBJECT SEPARATION IS CRUCIAL FOR AN EFFECTIVE SUNSET SILHOUETTE.
NAIL EXPOSURES FOR SILHOUETTE PHOTOS.
Expose for the sky first, set your settings, then introduce your subject. Don’t forget to account for the correct shutter speed needed to freeze the action. You may need to underexpose by 1/3 to 2/3 of a stop to get the best look when the sun is a bit higher in the sky. As the sun approaches very close to the horizon (actual sunrise or sunset) or below the horizon (the blue hour), you may need to expose with your meter at or near zero.
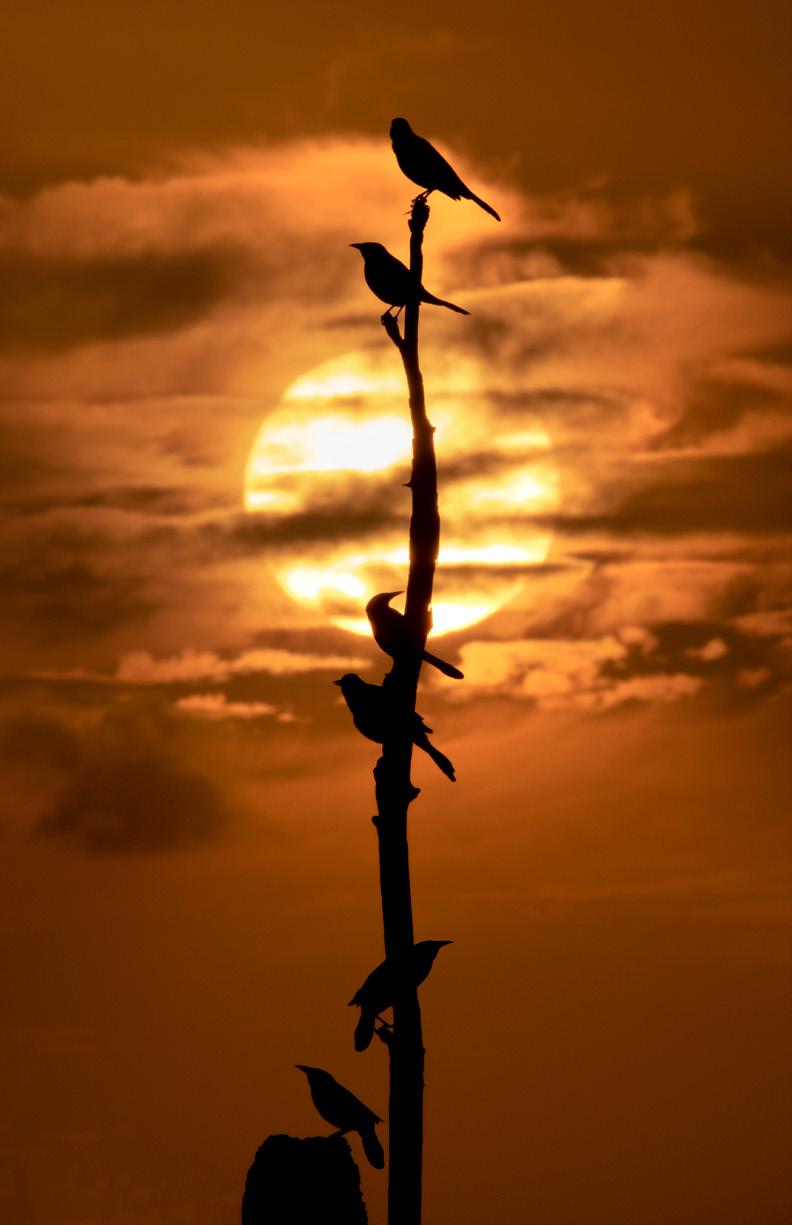
DON’T ALLOW THE SUN ITSELF TO TURN INTO A DISTRACTION.
It can become a large white spot on your image, which draws attention away from your subject. By partially or completely blocking the sun, you draw greater attention to your subject and the silhouette. Ensure the sun is obfuscated by a few clouds or dust, or either partially or completely by your subject. This will help achieve a better visual balance with your silhouetted subjects.
CAPTURE A STARBURST.
Crank your f-stop to between F13 and F22 and include the sun in your frame. If you’re looking for the effect to be a half-sun, make sure to cover half of the sun in some manner. One way to achieve that is with the horizon line at sunrise or sunset. The starburst effect works with all strong light sources, so practice creating this kind of image using a headlamp or city streetlight.
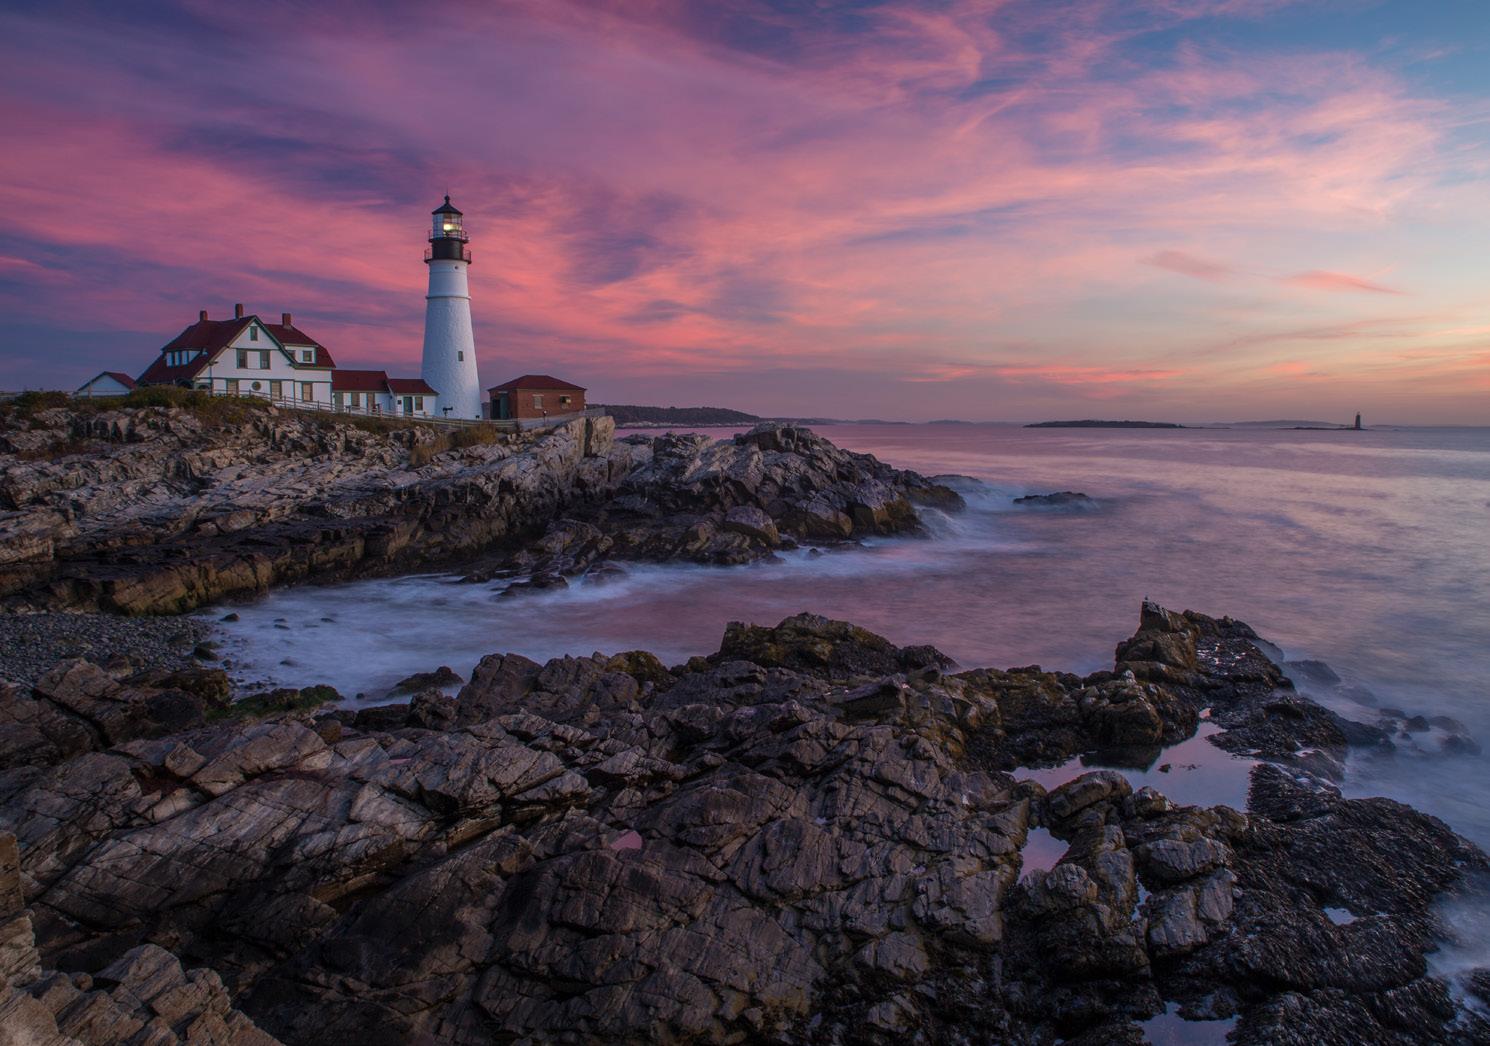
COMPLEMENT A SUNRISE OR SUNSET SKY WITH WATER.

The texture of water can play a big compositional role. Besides getting the right conditions in the sky, try to experiment with different shutter speeds for capturing the movement in the water. You can also combine different waves or textures during exposure blending to create the best composition and flow in the image.
PLACE ELEMENTS IN THE FOREGROUND.
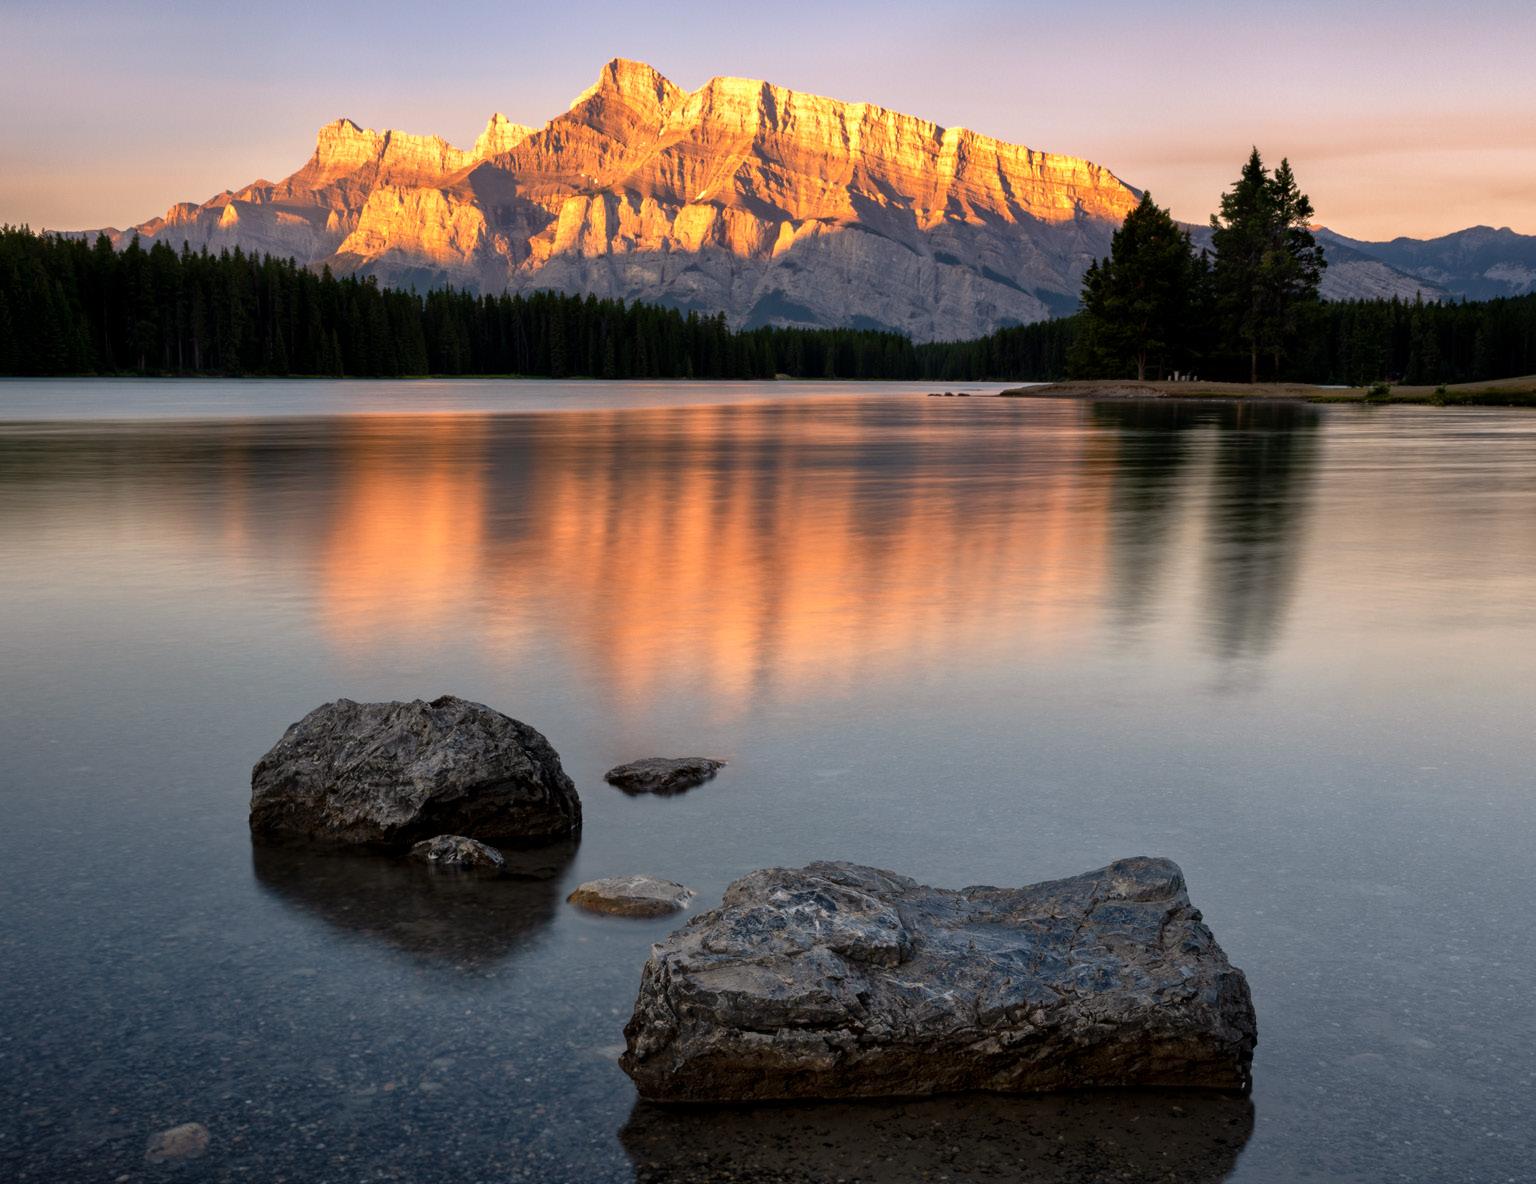
Not only do they add depth and visual interest to the image, like the rocks in Alberta’s Two Jack Lake do here, but they can also serve to guide the viewer’s eye toward the setting sun, or the main subject lit by the setting sun—in this case, the mountains in the background.
USE FOCUS-STACKING.

When you do place elements in the foreground, such as wildflowers, get as close to those subjects as your lens allows and use focus-stacking to keep everything in the image sharp. You might need to capture dozens of images to achieve that sharpness, so take as many images as you think you’ll need, and then some just to be safe.
Focus-stacking was key as well for this photo of rocks in Glacier National Park’s Lake MacDonald. Using a tripod, the photographer first captured the foreground with the colorful rocks, using a circular polarizer to help cut down on the glare from the water. From there, the photographer moved on to capture the higher parts of the photo, using the brighter water above the foreground rocks to make them pop in the image. Focus-stacking was achieved during post-processing.
FOLLOW THE LIGHT.
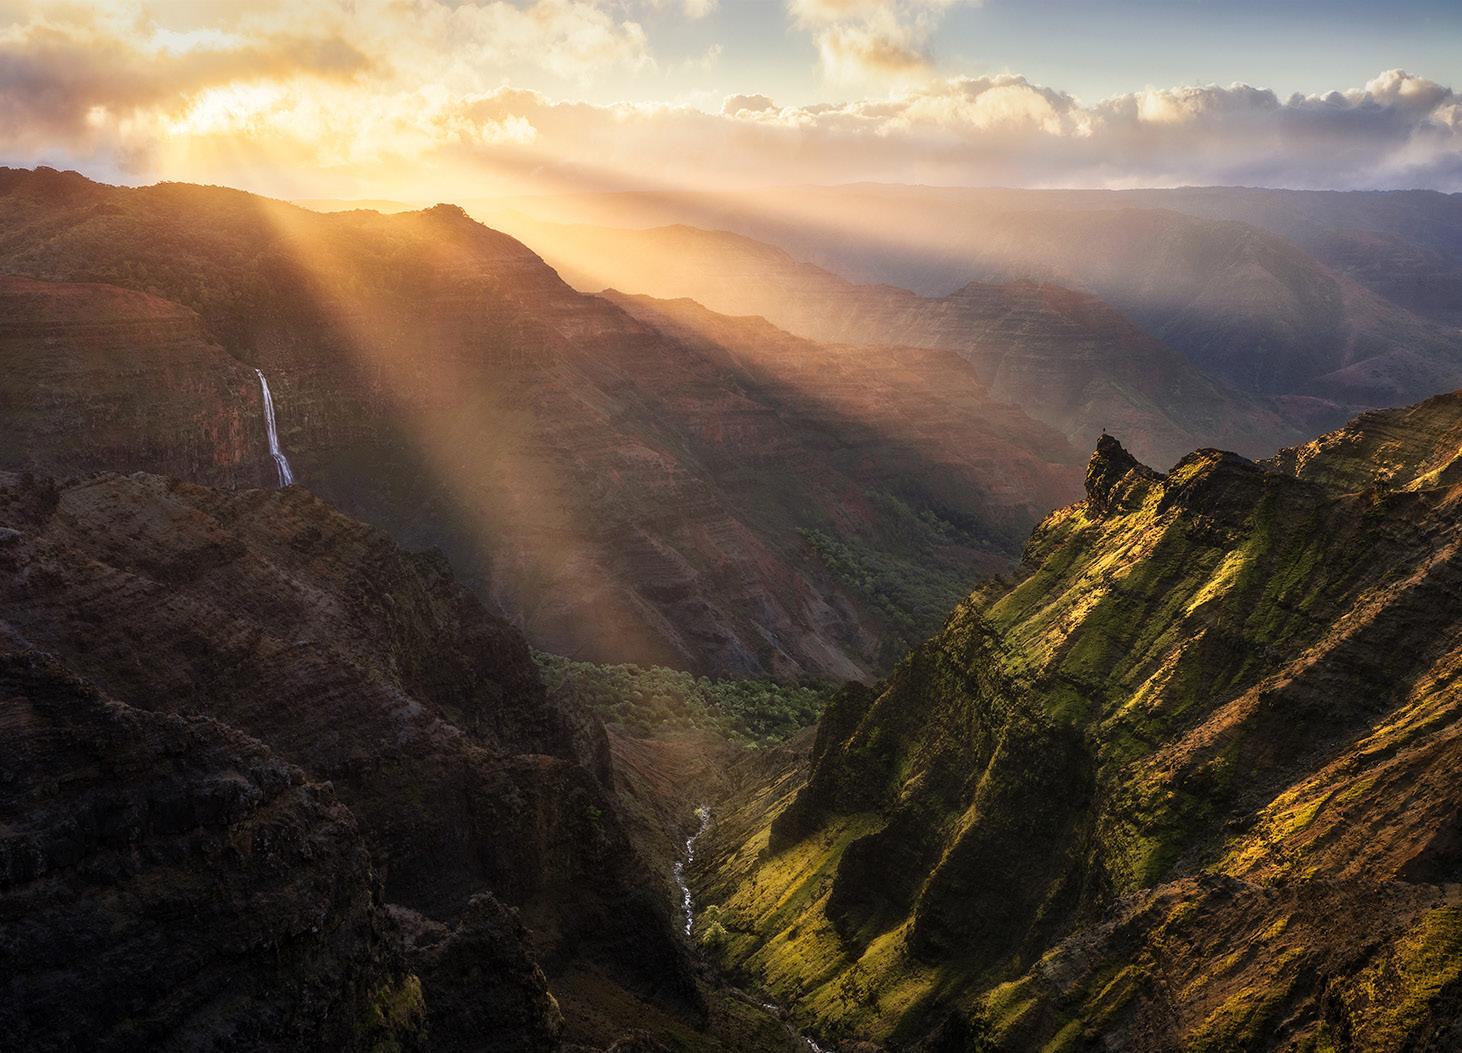
Your sunrise or sunset plans may not always work out exactly as you’d hoped. Don’t be afraid to move around or even completely switch your location based on how the light is turning out. For this image in Hawaii’s Waimea Canyon State Park, the photographer had planned to shoot the sunrise from beyond the waterfall seen in the distance, but instead they had to drive back to another location because the original spot was completely fogged in.
BE READY FOR THAT OPTIMAL MOMENT.

We only get the kind of warm, golden-hour light you see near sunrise and sunset for a few minutes each day. Planning ahead and knowing where the light will hit your subject are key to achieving a stunning sunrise or sunset image. Arriving early and setting up well before sunrise or sunset will give you time to adjust your gear and settings and find the perfect composition without being rushed.
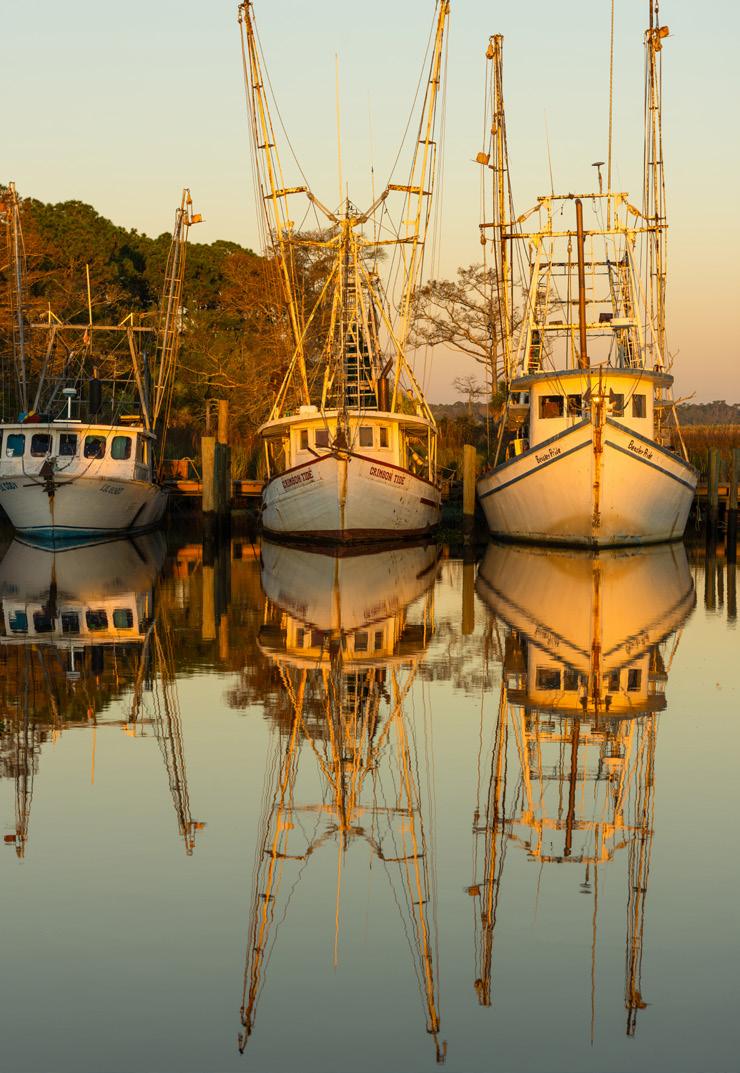
Think about how the angle of the sun will affect your subject. Backlighting, for instance, can create silhouettes, while side lighting can create dramatic shadows. Finding the right angle of the sun can be done by using various apps like PhotoPills, or by visiting a location multiple times. For the photo of the boats in the harbor, the sun was hitting them from about a 45-degree angle from the camera, which helped bring that warm light into the reflection and across the entire scene.
UNDERSTAND HOW THE LIGHT WORKS WHERE YOU’RE SHOOTING.

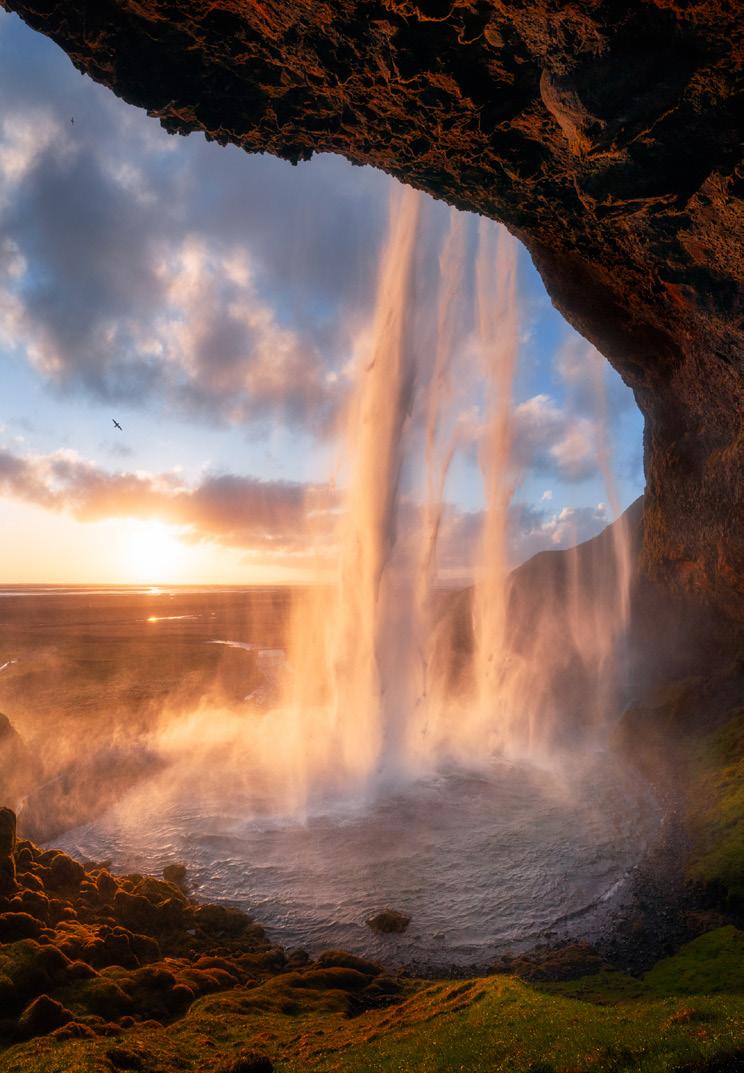
Timing a sunrise or sunset when you visit particular sites is important. For this photo inside a rock cave, for instance, the photographer arrived right at sunrise but waited just a bit longer, until the sun was higher and more light entered the cave, filling it with illumination and color. The angle of the sun in photos taken earlier and later than that exact moment wouldn’t have offered the same effect.
Depending on your location, the light at sunrise and sunset can also act in different ways. For this shot of Clingmans Dome in Great Smoky Mountains National Park, the “smoke” in the mountains transforms from a grayish blue to a warmer yellow or orange as the sun sets. Sometimes waiting until the sun is either just setting or has just set will offer the best light to capture the mood.
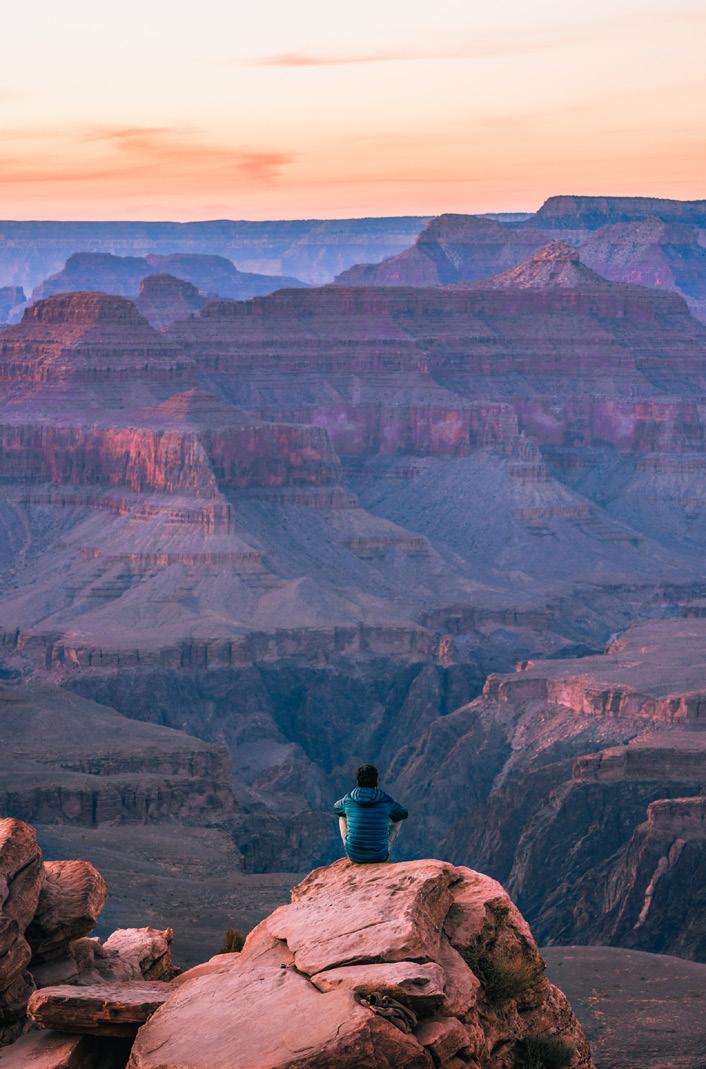
EXPERIMENT WITH DEPTH-OF-FIELD.
This is especially important if you have a person in your frame. If your subject is up close, shoot wide open and focus on the glow of the landscape to keep it as your main subject as the sun goes down (or comes up). Your subject will exist for scale and as a storytelling element, yet the viewer will still be gazing past her at the amazing sunlit textures.
INCORPORATE HUMANS INTO YOUR SUNRISE AND SUNSET IMAGES IN A WAY THAT ALLOWS FOR SEPARATION BETWEEN YOUR SUBJECT AND THE SCENE.
TWO WORDS: TRIPOD AND INTERVALOMETER.
A sturdy tripod is your best friend when going on a sunset photographic adventure alone, especially if there’s a good amount of wind. To place yourself in the frame, turn on your built-in intervalometer, let it shoot continuously, and walk into the frame, trying out different poses. That gives you a variety to choose from later on.
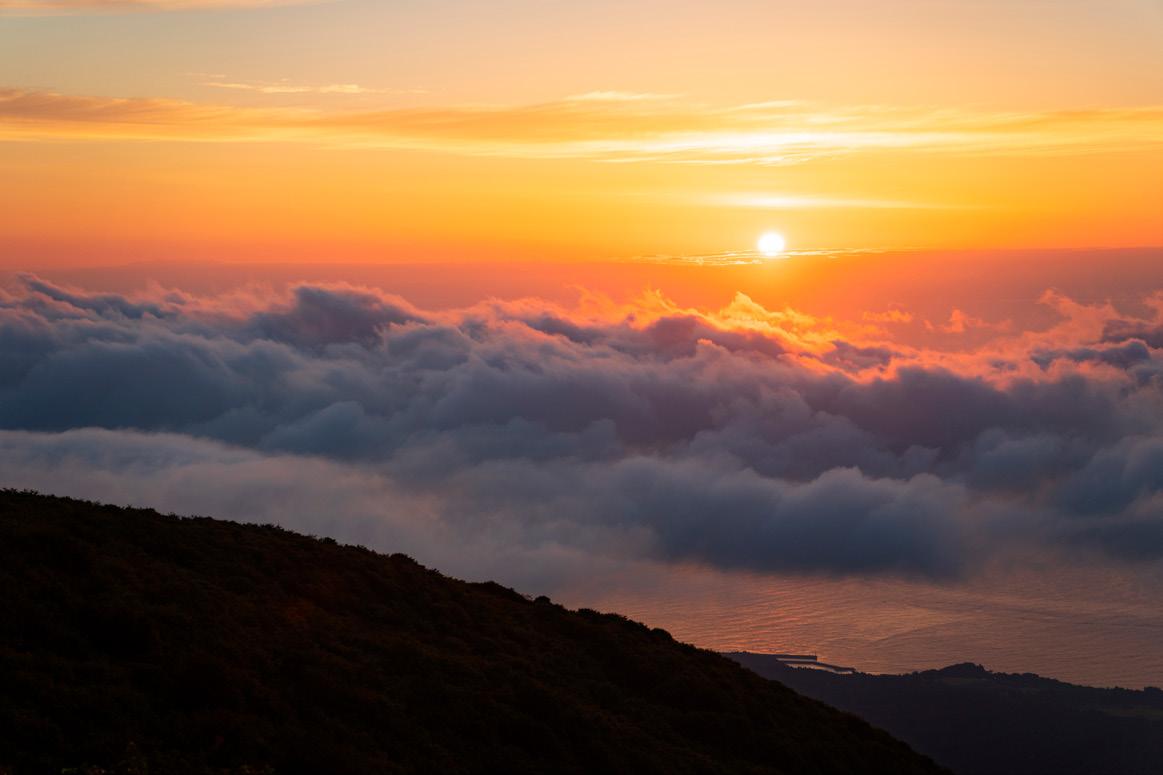
CAPTURE A SUNRISE OR SUNSET OVER CLOUDS.
DON’T GIVE UP ON THE LIGHT.