

NEP 2020 based | Digital coding platform included
4
Teacher Manual

COMPUTER SCIENCE Teacher Manual 4

Uolo’s Tekie program offers a coding-focused curriculum for grades 1 to 8, preparing students for the technology-driven world. We present a carefully crafted Teacher Manual to assist teachers in delivering effective and engaging lessons to students. Rather than prescribing teaching methods, the manual provides examples and demonstrates how and why teachers can apply these examples in their classes.
The Teacher Manual includes a suggested implementation plan to help teachers navigate the curriculum better throughout the academic year. Within the academic year, the Tekie program prescribes the following types of chapters and sessions:
Familiarisation: this period builds familiarity with the Tekie program and the digital platform.
Theory: these periods are dedicated to the Computer Science Theory chapters. These topics are mostly delivered in the classroom.
Tools: these periods are dedicated to the Computer Tools chapters. These topics involve almost equal numbers of classroom and computer labs sessions.
Coding: these periods are dedicated to the Coding chapters. These topics have more computer lab sessions.
Additional Hands-on Time: these are additional computer lab periods that teachers can use to revise topics or dedicate for completion of projects.
Revision: these are additional classroom periods that teachers can use to revise topics or cover syllabus backlogs.
Each chapter in this manual is structured to provide a comprehensive lesson plan. The chapters are divided into multiple sessions, each following the Warm up, Engage, Build, and Sum up (WEBS) strategy. The Warm up phase sets the stage for learning by connecting to prior knowledge and building curiosity. The Engage phase captures the students’ attention and motivates them to participate actively. In the Build phase, questions from various sections are discussed to build the understanding of the students. Finally, the Sum up phase reinforces learning through easy-to-recall activities and questions. Time duration for each section has been suggested based on the requirements of the students. Additionally, an answer key for every chapter is provided to assist teachers in assessing their students’ understanding and guiding their learning effectively.
Lastly, we understand that the Indian education landscape is quite diverse. To suit the needs of all types of schools, we have built-in extra higher-order chapters in the content books. These extra chapters are clearly marked in the table of contents of this manual. We suggest that the teacher completes the main chapters first and then move to higher-order optional chapters only if there is sufficient time left in the academic year and learners are ready for more challenging content.
We hope that this teacher manual will empower teachers to use the curriculum effectively, support the learning of all students thoroughly, create learning opportunities and design interactive learning environments that cater to the students’ needs and interests.
Mel and Conji are talking about magic and computers in the school when they hear a beeping sound in the Computer Lab. They see Eva being pulled inside the computer screen, with some dark magic. There is a secret message on the screen that they have to decode. They explore the school library to gain some knowledge about it. They see a puzzle, and after solving it, they get inside a dark, mysterious chamber. They find a computer screen and a pile of books inside. They learn about a MagiTech Keystone which holds unimaginable power. They get to know from the Elders that no one has come close to finding it. By solving clues, they get a piece of the Keystone and find out that Elder Robot is behind it. He was under a dark spell, and the Keystone could only break it. They find the other piece and join the pieces together to break the spell. Mel and Conji fight a battle with Lord Ero. They cast a powerful spell with the help of the Elders on Lord Ero, and he loses his power. They finally break the spell on Eva.
Story
● Conji reminds Mel that she promised to teach him about computers.
● Mel jokingly tells him that she wishes to use a spell to erase that from his memory.
● Conji requests that Mel keeps her magic away from him. Mel agrees to this.
● Conji asks her if she kept the ingredients of the magic drink safely in the storage room.
● Mel tells him that she always stores her data properly.
● Conji doesn’t understand what Mel means.
● Mel then pulls out a thick book from the library to teach Conji about data and storage on computers.
At the end of the session, the students will be able to:
● describe ancient devices and modern smart devices, including computers.
● describe the concept of Data, Processing, and Information.
Keywords
● Devices: Things around us that perform specific tasks are called devices.
● Computer: It is an electronic device or a machine that performs various calculations and carries out different tasks for us based on the instructions that we give it.
● Data: It is facts, numbers, or symbols that we collect and enter into the computer.
● Information: It is the knowledge or understanding that we gain when the computer analyses and puts together the data that we entered into it.
● CPU: The CPU is like the brain of the computer. It takes our inputs and processes them.
Ask the students what devices were there in ancient times, for instance, to know the time of the day.
Ask the students what devices are used in modern times and how the present-day devices are different from the older ones.
Explain about the various devices, including computers.
Explain about data, processing, and information.
● Ask the students what devices were there in ancient times to know the time of the day.
● Tell the students that people used sundials. They used the sun’s shadow to know what time it was.
● Ask the students what devices are used in modern times and how these devices are different from the old ones. Tell them that nowadays smartwatches are being used that not only tell us the time but also allow the use of the internet. Tell them that a computer is also one of these smart devices.
Engage
Explain the following concepts:
Learning Outcomes Explanation
Describe ancient devices and modern smart devices, including computers.
Describe the concept of Data, Processing, and Information.
15 mins
Tell them that things around us that perform specific tasks are called devices. Explain ancient and smart devices as given on pages 4 and 5.
Tell the students that a computer takes inputs from us in the form of ‘data’, processes them, and finally provides us with output in the form of ‘information’. Then explain the concept of Data, Processing, and Information as given on pages 5, 6, and 7.
● Read aloud the questions provided in the Do It Yourself 1A section and encourage the students to solve the questions. Instruct the students to write the answers in their book.
Correct Responses:
1. a. Virus
2. a. F
b. T
c. F
d. T
3. Steps
b Processing the input
c Looking at the movement of the mouse on the screen
a Moving the mouse on the table
Build
7 mins
● Ask the students to give the answer to the question, “Name a few devices around you and say how you use them.” asked in the Think and Tell section, given on page 4.
Possible Responses: I use Television to watch educational shows and cartoons. I use my parents’ smartphone to call my friends, take photos, and access educational apps to make learning fun.
● Conduct a group discussion in the class among the students based on the topic, ‘‘Give one example of data and information with your partner.” provided in the Discuss section as mentioned on page 6.
Possible Response: Data: (32°C, 50% chances of rain), Information: It’s warm, and it might rain today.
● Ask the students to give the answer to the question, “Can you think of some more examples of input and output in computers?” asked in the Think and Tell section, given on page 7.
Possible Response: Input: Typing on the keyboard and Output: Displaying text on the monitor screen.
3 mins
● Conclude the session by summarising that the things around us that perform specific tasks are called devices. Similarly, computers perform various calculations and carry out different tasks based on the instructions that we give them. A computer takes inputs from us in the form of ‘data’, processes them, and finally provides us with the output in the form of ‘information’.
● Assign the following from the Chapter Checkup given at the end of the chapter as homework.
A. Fill in the Blanks: Questions 1, 2, and 3
B. Tick the Correct Option: Question 5
C. Who Am I?: Question 2
E. Answer the Following: Questions 1 and 5
At the end of the session, the students will be able to:
● describe computer memory.
● describe primary memory and its types.
● describe secondary memory and secondary storage devices.
● Memory: A computer has memory to store data and information.
● Bytes: Computer memory is measured in units called bytes.
● Cloud storage: It is like a big storage space on the internet where you can keep all your files and access them anytime, anywhere, and from any device as long as you are connected to the internet.
Ask the students to name the devices that can be used for storage, such as your diary, where you store all the details about your day-to-day activities.
Explain to the students what computer memory is.
Explain to them about the primary memory and its types.
Explain to them about the secondary memory and the various secondary storage devices.
Think and Tell Conclude the concepts
Assign homework
5 mins
● Ask the students to name a few storage devices from their surroundings.
● Tell them that similar to the diary that stores the details of your entire day, a computer has memory to store the data and information. Everything that we do on the computer is stored in its memory.
15 mins
Explain the following concepts:
Describe computer memory. Tell the students that the computer has a memory to store data and information, as given on page 8.
Describe primary memory and its types.
Describe secondary memory and secondary storage devices.
Explain to the students that the primary memory is of two types—RAM and ROM, as given on pages 9 and 10.
Explain to the students about the secondary memory and secondary storage devices, like Hard Disk Drive (HDD), Pen Drive, Memory Card, etc., as given on pages 10 to 12.
● Read aloud the questions provided in the Do It Yourself 1B section and encourage the students to solve the questions. Instruct the students to write the answers in their book.
Correct Responses:
1.
a. CD: Secondary Memory Device
b. HDD: Secondary Memory Device
c. DVD: Secondary Memory Device
d. ROM: Primary Memory
e. Pen Drive: Secondary Memory Device
f. RAM: Primary Memory
2. a. RAM
b. ROM
c. ROM
d. RAM
3. Cloud Storage → HDD → Pen Drive → DVD → CD
Note: These are general trends and the actual storage capacity may vary from model to model and with advancements in technology.
7 mins
Build
● Ask the students to give the answer to the question, “Sometimes, our computers hang, or programs suddenly crash. Is this problem related to RAM or ROM?” asked in the Think and Tell section, given on page 10.
Correct Response: RAM
● Conclude the session by summarising that everything that we do on the computer is stored in its memory, for example, saving a file, storing pictures, and downloading something from the internet. Primary memory is the computer’s internal memory where it stores data related to currently running programs. Secondary memory is the computer’s external storage beyond the primary memory.
● Assign the following from the Chapter Checkup given at the end of the chapter as homework.
A. Fill in the Blanks: Questions 4, 5, 6, and 7
B. Tick the Correct Option: Questions 1, 2, 3, and 4
C. Who Am I?: Questions 1, 3, and 4
D. Write T for True and F for False: Questions 1, 2, 3, and 4
E. Answer the Following: Questions 2, 3, and 4
F. Apply Your Learning: Questions 1, 2, and 3
2
Mel and Conji are learning about magic and computers in school when they hear a beeping sound in the Computer Lab. They see Eva being pulled inside the computer screen with some dark magic. There is a secret message on the screen, which they have to decode. They explore the school library to gain some knowledge about it. They see a puzzle, and after solving it, they get inside a dark, mysterious chamber. They find a computer screen and a pile of books inside. They get to know about a MagiTech Keystone, which holds unimaginable power. They get to know from the Elders that no one has come close to finding it. By solving clues, they get a piece of the Keystone and find out that Elder Robot is behind it. He was under a dark spell, and the Keystone could only break it. They find the other piece and join them together to break the spell. Mel and Conji fight a battle with Lord Ero. They cast a powerful spell with the help of the Elders on Lord Ero and he loses his power. They finally break the spell on Eva.
● Mel and Conji decide to inform the Elders of the incident with Eva right away.
● On hearing them, Elder Wizard tells them that they must learn about computers and technology in order to understand the secret message.
● Elder Robot advises them to explore the school’s hidden library in order to acquire the knowledge they need.
● In the library, they meet Ms Idea. The library looked magical, as if they could talk to the books and ask for help.
● Mel’s last word, ‘help’ echoes through the library and leads them to a special book named ‘Operating System’.
● Both lean into the book to learn about operating systems.
This chapter is divided into the following classroom sessions
1. Operating Systems and Desktop Elements
2. Shortcut Menus and Keys
3. Desktop Settings
At the end of the session, the students will be able to:
● describe an operating system and its features.
● describe about the Windows 10 operating system.
● discuss the different elements of the Windows 10 desktop.
● Operating system: An Operating System is a software that helps us to communicate with the computer and tell it what to do.
● Software: It is a set of instructions that tells a computer what to do.
● Booting: When you press the power button to turn on your computer, the computer starts getting the system ready for you to use it. This process is called booting.
Ask the students what things they can do on a computer.
Ask the students if they know what makes a computer run smoothly and do multiple things.
Explain to the students about the operating system and its features. Also tell them about the popular operating system— Windows 10 and the different elements of the desktop.
● Ask students what tasks they can do on a computer.
Think and Tell
● Tell the students that they can do a lot of things on computers—play music, watch videos, play games, etc. And then tell them that the operating system makes the computer run smoothly.
Explain the following concepts:
Describe an operating system and its features.
Describe about the Windows 10 operating system.
Discuss the different elements of the Windows 10 desktop.
Explain to the students that an operating system is a software that helps us communicate with the computer and tell it what to do. Also, explain its features, as given on page 21.
Introduce the students to the Windows 10 operating system and tell them the steps to start a computer with this operating system. Also, brief them about the taskbar, start button, icons and wallpaper, as given on pages 22 and 23.
Explain to the students about the taskbar and its components. Describe the Aero Peek feature of Windows 10. Also, tell them the steps to change the taskbar location, as given on pages 24, 25, and 26.
● Read aloud the questions provided in Do It Yourself 2A and Do It Yourself 2B, Questions 1 and 2. Encourage the students to solve the questions. Instruct the students to write the answers in their book.
Correct Responses:
Do It Yourself 2A
1. d. All of the above
of
7 mins
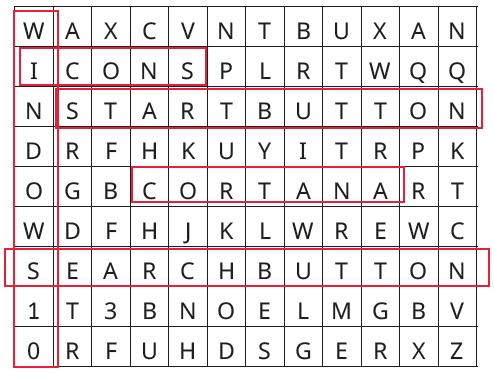
● Ask the students to give the answer to the question ‘’Which icons do you think we should have on our desktop?’’ asked in the Think and Tell section, as given on page 22.
Possible Responses: Recycle bin, Google Chrome
● Conduct a group discussion in the class among the students based on the topic ‘’How can you take Cortana’s help to quickly open your favourite game?’’ provided in the Discuss section, as mentioned on page 25.
Possible Response: We can quickly open our favourite game by giving a voice command to Cortana, for example, saying “Hey Cortana, open [your favourite game]”.
3 mins
Sum Up
● Conclude the session by summarising that an operating system helps us to communicate with the computer and tell it what to do. An operating system has features such as easy-to-use interface, file management, multitasking, etc. Booting is the process that starts getting the system ready for you to use it when you turn on the computer. The Taskbar is the bar in the bottom of the window.
● Assign the following questions from the Chapter Checkup given at the end of the chapter as homework.
A. Fill in the Blanks: Questions 1, 2, 3, 4, and 5
B. Tick the Correct Option: Questions 3 and 4
C. Who Am I?: Questions 1, 3, 4, and 5
D. Write T for True and F for False: Questions 1, 3, and 4
E. Answer the Following: Questions 1, 2, 3, 4, and 5
At the end of the session, the students will be able to:
● open the shortcut menu to personalise the desktop.
● open the icon shortcut menu to change the properties of an application.
● apply few shortcut keys for Windows 10.
Keyword
● Shortcut menus: They are the menus that pop up when we right-click on the desktop and icons.
Ask the students where do they keep their belongings (clothes, notebooks, toys, etc.) that they frequently use.
Explain the students about shortcut menus and the Windows 10 shortcut keys.
Action Plan
Group discussion Conclude the concepts
Assign homework
● Ask the students where do they keep their belongings that they frequently use.
● Tell them that we place our frequently used things on the tabletop. This is similar to putting our most important apps, files, and folders on the desktop.
15 mins
Engage
Explain the following concepts:
Learning Outcomes
Open the shortcut menu to personalise the desktop.
Open the icon shortcut menu to change the properties of an application.
Apply few shortcut keys for Windows 10.
Explanation
Tell the students that the shortcut menus are menus that pop up when we right-click on the desktop and icons. Also tell them the steps to open the shortcut menu, as given on pages 26 and 27.
Tell students the steps to open the icon shortcut menu to change the properties of an application, as given on page 27.
Tell the students that the windows key is a special key at the bottom-left of the keyboard. Also, tell them about a few shortcut keys and their functions, as given on pages 27 and 28.
● Read aloud the questions provided in Do It Yourself 2B section Question 3. Encourage the students to solve the questions. Instruct the students to write the answers in their book.
Correct Response:
3. c. To personalise the desktop
● Name the option from the shortcut menu that lets you change features such as the desktop background, windows colour, etc.
Correct Response: Personalize
Build
7 mins
● Conduct a group discussion in the class among the students on the topic ’Use of Shortcut Menu’. Possible Responses: We can choose a few options such as making new files or folders, sorting icons, opening or renaming the names of apps, etc.
3 mins
Sum Up
● Conclude the session by summarising that the shortcut menus are menus that pop up when we right-click on the desktop and icons. You can personalise your desktop and change the properties of an application in Windows 10. The windows key is used in combination with other keys to make the shortcut keys.
● Assign the following questions from the Chapter Checkup given at the end of the chapter as homework.
C. Who Am I?: Question 2
1. What is the shortcut key to open the Task View?
Correct Response: Windows key + Tab
● Name the option in the icon shortcut menu that helps you change the property of an application.
Correct Response: Properties
At the end of the session, the students will be able to:
● set the theme colour and theme font of the desktop.
● set the desktop background.
● set the screen saver.
● change mouse pointer.
● set date and time.
● adjust the volume.
Keywords
● Screen saver: It is a fun and colourful display that appears on a computer screen when you are not using it for a while.
● Toggle: It means switching between two options by pressing or clicking.
Ask the students if they know that they can change the background, theme colour, etc., of the desktop.
Explain to the students how to set the theme colour and theme font of the desktop.
Explain the students how to set the desktop background and screen saver.
Explain to the students how to change the mouse pointer.
Explain to the students how to set the date and time.
Explain to the students how to adjust the volume.
Action Plan
Think and Tell Conclude the concepts
Assign homework
5 mins
Warm Up
● Ask the students if they know that they can change the background or the theme colour of the desktop.
● Then, build the concept by telling them how to customise the colours on their computer.
Engage
Explain the following concepts:
Learning Outcomes Explanation
Set the theme colour and theme font of the desktop.
Set the desktop background.
Set the screen saver.
Change mouse pointer.
15 mins
Tell the students the steps to customise the colours on their computers. Also tell them the steps to adjust fonts on their computers, as given on pages 29, 30, and 31.
Tell the students that they can change their desktop background by right-clicking on the desktop and selecting the Personalize option, as given on page 31.
Tell the students that a screen saver is a fun and colourful display that appears on a computer screen when you are not using it for a while. Also, tell them the steps to change the same, as given on pages 31 and 32.
Explain the steps to change the mouse pointer from the Control Panel app, as given on pages 32, 33, and 34.
Set date and time. Explain to the students the steps to set the date and time, as given on pages 34 and 35.
Adjust the volume. Tell the students the steps to adjust the volume, as given on pages 35 and 36.
● Read aloud the questions provided in Do It Yourself 2C section. Encourage the students to solve the questions. Instruct the students to write the answers in their book.
Correct Responses:
1. d. Open the Start menu and click on “Time and Date”.
2. a. T b. T c. F d. F
Build
7 mins
● Ask the students to give the answer to the question ‘’What are some creative or fun screen savers that you have come across or would love to have on your computer?’’ asked in the Think and Tell section, as given on page 31.
Possible Responses: Bubbles, ribbons, photos, etc.
● Ask the students to give the answer to the question ‘’Which style of mouse pointer would you like to use?’’ asked in the Think and Tell section, as given on page 34.
Possible Responses: Normal select, text Select, etc.
3 mins
● Conclude the session by summarising that we can apply various settings such as theme colour, font, background, screen saver, mouse pointer, date and time, volume on the computer desktop, etc.
● Assign the following questions from the Chapter Checkup given at the end of the chapter as homework.
B. Tick the Correct Option: Questions 1 and 2
D. Write T for True and F for False: Question 2
F. Apply Your Learning: Questions 1, 2, 3, 4, and 5
3
Mel and Conji are learning about magic and computers in school when they hear a beeping sound in the Computer Lab. They see Eva being pulled inside the computer screen with some dark magic. There is a secret message on the screen which they have to decode. They explore the school library to gain some knowledge about it. They see a puzzle and after solving it, they get inside a dark, mysterious chamber. They find a computer screen and a pile of books inside. They get to know about a MagiTech Keystone which holds unimaginable power. They learn from the Elders that no one has come close to finding it. By solving the clues, they get a piece of the Keystone and find out that Elder Robot is behind it. He was under a dark spell, and the Keystone could only break it. They find the other piece and join them together to break the spell. Mel and Conji fight a battle with Lord Ero. They cast a powerful spell with the help of Elders on Lord Ero, and he loses his power. They finally break the spell on Eva.
Story in This Chapter…
● Mel and Conji are in a dark chamber, with a mysterious voice echoing around them.
● Mel is scared of the dark and asks Conji to cast a spell to bring light into the chamber.
● Conji uses the spell “LUMSI,” and the lights come back, revealing a computer screen and books.
● They find files on the computer and a pile of books on the table, but everything is disorganised.
● Mel suggests organising files into folders and subfolders for easier access to information.
● Conji plans to create magical labels for the books to help organise them.
● Mel and Conji feel excited about working together to find new information that may lead them to Eva.
This chapter is divided into the following classroom sessions
1. Introduction to Files and Folders
2. Working with Files and Folders and Shortcut Icons
3. Good Practices While Using a Computer
At the end of the session, the students will be able to:
● work with files and folders.
● create a file, folder, and subfolder on the desktop.
Keywords
● File: A file is a digital space used to store different types of information on a computer. It acts like a container for items, like images, videos, texts, etc.
● Folder: A folder is a container that stores files. Folders help organise files, making them easier to find.
Ask the students how they keep their toys or books organised and why do they think it is important to have a designated place for everything.
Describe that just like we organise our physical belongings, we also organise our digital information on a computer using files and folders. Also, explain the steps to create files, folders, and subfolders to the students.
Group discussion
Conclude the concepts
Assign homework
● Ask the students that how they keep their toys or books organised and why do they think it is important to have a designated place for everything.
● Relate the concept of organising the items on the computer to files and folders.
Explain the following concepts:
Work with files and folders.
Create a file, folder, and subfolder on the desktop.
15 mins
Explain the concept of files and folders to students. Describe how all the information is stored in files on a computer system. A file is a digital space used to store different types of information on a computer, as given on page 46.
Explain the steps to create a Word file, folder, and sub-folder to the students as given on page 47. Also, tell them that we can create different types of files.
● Read aloud the questions provided in the Do It Yourself 3A section and encourage the students to solve the questions. Instruct the students to write the answers in their notebook.
Correct Responses:
1. T 2. F 3. T 4. T
2. Steps to create a folder are:
a. Right-click on the desktop.
b. Position the cursor over the New option.
Build
c. Click on the Folder option. d. Give it a name.
7 mins
● Conduct a group discussion in the class among the students based on the topic ”When we are at school, we take notes in our notebooks. Can we compare a computer file with a notebook?” provided in the Discuss section as mentioned on page 46.
Possible Responses: Yes, we can compare a computer file with a notebook. Just like we write and store information in a notebook at school, we can create and save information in a computer file. Both notebooks and computer files help us keep our thoughts, ideas, and important information organised and accessible.
3 mins
● Conclude the session by summarising that files are digital containers that store different kinds of information on a computer, and folders help us organise these files. We learnt how to create a Microsoft Word file and folders or subfolders on the desktop to manage information effectively on a computer.
● Assign the following questions from the Chapter Checkup given at the end of the chapter as homework.
A. Fill in the Blanks: Questions 1 and 3
B. Tick the Correct Option: Questions 2, 3, and 4
C. Who Am I?: Questions 1 and 2
D. Write T for True and F for False: Questions 1 and 2
E. Answer the Following: Question 1
F. Apply Your Learning: Question 4
At the end of the session, the students will be able to:
● rename files and folders.
● select files and folders.
● duplicate and move files and folders.
● create shortcut icons on desktops.
Keywords
● Renaming: Renaming a folder or a file means changing the name of the digital files and folders.
● Duplicate: To duplicate is to make an exact copy of a file or folder.
● Move: To move is to transfer a file or folder to a different location.
● Shortcut icons: Shortcut icons are quick-access symbols on the desktop for frequently used files or folders.
● Delete: To delete is to remove a file or folder from the computer.
Ask the students if they label the boxes containing their important things. Now, relate them to the concept of renaming the files and folders according to their preferences.
Explain to the students how to rename files and folders and how to select them.
Explain how to create a duplicate file and how to move a file or folder to a different location.
Also, describe how to create shortcut icons on the desktop.
Think and Tell Conclude the concepts Assign homework
● Restore: Restore is to bring back a deleted file or folder from the recycle bin. 5 mins
Action Plan
Ask the students if they label the boxes containing their important things. Now, relate them to the concept of renaming the files and folders according to their preferences.
Explain the following concepts:
Rename files and folders.
15 mins
Explain to the students that the new files and folders are assigned the default names once they are created. However, they can be renamed later, according to our preferences. Describe the steps to do so as given on page 48.
Select files and folders. Explain that to do any operation on a file or folder, we first need to select it. Discuss that there are various methods to select single or multiple files and folder, as given on pages 50 and 51.
Duplicate and move files and folders.
Create shortcut icons on desktops.
Explain to the students that we can create a duplicate file or a folder by using the Copy and Paste options as given on pages 51 and 52. Also, describe the steps to do so.
After that, explain the concept of moving a file or folder to a different location on the computer along with the steps as given on page 53.
Explain to the students that the shortcut icon helps us quickly open a file or folder, as given on page 53. Also, describe the steps to do so as given on page 54.
● Read aloud the questions provided in the Do It Yourself 3A and Do It Yourself 3B sections and encourage the students to solve them. Instruct them to write the answers in their book.
Correct Responses: (Do It Yourself 3A)
1. a. T b. F c. T d. T e. F
Correct Responses: (Do It Yourself 3B)
1. Left 2. Ctrl 3. Shift 4. Copy 5. Cut 6. Shortcuts
Build
7 mins
● Ask the students to give the answer to the question “Why do you think it is important to give correct names to folders?” asked in the Think and Tell section given on page 49.
Possible Response: Giving correct names to folders is important for efficient organisation and easy access to files.
● Ask the students to give the answer to the question “How is moving files and folders different from duplicating them?” asked in the Think and Tell section given on page 53.
Possible Response: Moving files and folders relocates them, while duplicating creates copies of them.
● Conclude the session by summarising that we can rename the files and folders in our computer. We need to select the files before performing any operations on them. We can also create duplicate files using Copy and Paste options and move the files using Cut and Paste options. At last, revise the steps of creating the shortcut icons on the desktop.
● Assign the following questions from the Chapter Checkup given at the end of the chapter as homework.
A. Fill in the Blanks: Questions 2, 4, and 5
B. Tick the Correct Option: Question 1
C. Who Am I?: Questions 3 and 4
D. Write T for True and F for False: Questions 3 and 4
E. Answer the Following: Questions 2 and 3
F. Apply Your Learning: Questions 2 and 5
At the end of the session, the students will be able to:
● follow good practices while using a computer.
Ask the students whether they follow the teacher’s instructions to move in a line or to keep quiet in the class. Tell them that just as they practice good manners in daily life, we also have a few good practices when using a computer.
Discuss the various good practices with the students that they should follow while using the computer.
Group discussion
Conclude the concepts
Assign homework
● Ask the students whether they follow the teacher’s instructions to move in a line or to keep quiet in the class.
● Tell them that just as they practice good manners in daily life, we also have a few good practices when using a computer.
Engage
Explain the following concept:
Learning Outcome
Follow good practices while using a computer.
15 mins
Explain to the students that they should follow a few good practices when using a computer, such as naming and storing the files and folders properly, organising the files in labelled folders, being respectful of others’ files, etc., as given on page 56.
● Read aloud the questions provided in the Do It Yourself 3C and encourage students to solve them. Instruct them to write the answers in their book.
Correct Responses:
1. T 2. T 3. F 4. F
Build
● Conduct a group discussion in the class among students based on the topic provided below: Discuss why it is important to name and store files properly.
7 mins
Possible Responses: It helps to keep the computer organised, especially when many people share one computer.
3 mins
● Conclude the session by summarising that students should follow a few good practices when using a computer, such as naming and storing the files and folders properly, organising the files in labelled folders, being respectful of others’ files, etc.
● Assign the following questions from the Chapter Checkup given at the end of the chapter as homework.
F. Apply Your Learning: Questions 1 and 3
Mel and Conji are learning about magic and computers in school when they hear a beeping sound from the Computer Lab. They rush there and reach just in time to see Eva being pulled inside the computer screen. There is a secret message on the screen which they have to decode. They explore the school library to know more about it. They see a puzzle and after solving it, they get inside a dark, mysterious chamber. They find a computer screen and a pile of books inside. They learn about the MagiTech Keystones which holds unimaginable power. They get to know from the Elders that no one has come close to finding it. By solving clues, they get a piece of the Keystone. They also find out that Elder Robot, under Lord Ero’s control, is behind Eva’s kidnapping. They find the other piece of the Keystone, join them, and break the Dark spell. With the help of the Elders, they battle Lord Ero and defeat him. Finally, they free Eva.
● Mel and Conji are in the computer lab looking for a document that has some strange name.
● They find the document as it has a strange name called ‘Infinity Stone’, so they decide to open it.
● The document talks about a magical keystone with unimaginable power.
● Conji is curious about the MagiTech keystone and wants to learn more.
● Mel suggests using the internet to find information about MagiTech.
● Conji is interested in the internet and asks Mel to tell more about it.
● Mel explains that the internet is easy to use and very useful for finding information.
This chapter is divided into the following classroom sessions
1. About the Internet and Basic Requirements
2. Basic Terminologies of the Internet
At the end of the session, the students will be able to:
● define internet.
● describe about the history of the internet.
● identify the basic requirements for an internet connection.
Keywords
● Internet: The internet is a network of networks that connects computers and devices from all over the world.
● Network: A network is a group of computers connected to each other.
Ask the students what makes it possible to video call a friend who may be in a different part of the world.
Explain the term ‘internet’ to the students. Tell the students about the history of the internet and how it began. Also, discuss the basic requirements for an internet connection.
Action Plan
Group discussion
Think and Tell
Conclude the concepts
Assign homework
5 mins
● Ask the students what makes it possible to video call a friend who may be in a different part of the world.
● Then relate the concept by telling them that internet helps them do so.
Engage
Explain the following concepts:
Learning Outcomes
15 mins
Explanation
Define internet. Explain to the students that the internet is a network of networks that connects computers and devices from all over the world. Also, get them familiar with the term network, as given on page 63.
Describe the history of the internet.
Identify the basic requirements for an internet connection.
Discuss the timeline of the internet with the students and tell them how the internet started, as given on pages 63 and 64.
Tell the students that we need a computer and an internet connection to start exploring the internet. Tell them to set up an internet connection, we need a modem, ISP, and communication media as given on pages 65 and 66.
● Read aloud the questions provided in the Do It Yourself 4A and encourage students to solve them. Instruct them to write the answers in their notebook.
Correct Responses:
● Conduct a group discussion in the class on the topic “What would our lives be without internet?” provided in the Discuss section on page 65.
Possible Responses: Without the internet, our lives would be limited in terms of communication, access to information, and everyday conveniences.
● Ask the students to answer the question, “Can you think of more examples of Analog and Digital signals?” asked in the Think and Tell section on page 65.
Possible Responses: Analog signals: Human voice transmitted through airwaves. Digital signals: Text message sent over a cellular network.
● Conduct a group discussion in the class based on the topic “Find out which type of internet connection your house or school has.” provided in the Discuss section on page 66.
Possible Response: Cable networks are used in homes. A cable from a local central office (CO) runs to our homes or schools and provides internet.
● Conclude the session by summarising that the internet is like a web that connects computers and phones all over the world, letting us send messages, pictures, and even see each other on video calls. It started many years ago with just a few computers and has grown so much that we can now shop online, learn new things, and make friends in faraway places. To connect to the web, our computers use a special box called modem and an ISP. The fastest connection is through fibre optic cables as they carry information in the form of light.
● Assign the following questions from the Chapter Checkup given at the end of the chapter as homework.
A. Fill in the Blanks: Questions 1 and 2
B. Tick the Correct Option: Questions 1 and 5
C. Who Am I?: Questions 4 and 5
D. Write T for True and F for False: Questions 1, 2, 3, 4, and 5
E. Answer the Following: Questions 1, 2, and 4
F. Apply Your Learning: Questions 1 and 2
At the end of the session, the students will be able to:
● define the basic terminologies of internet.
● Describe about Google Chrome, search engines, URL, and Net Surfing.
Tell the students that whenever they pick a new hobby, they need to learn some basic terms about it. Similarly, before using the internet, they need to know some basic terms about it.
Discuss the basic terminologies of the internet such as Web page, Website, WWW, Web browser, Search Engine, URL, and Net Surfing.
Discuss Google chrome and the steps to use Chrome and its components.
Action Plan
Group discussion
5 mins
Warm Up
● Tell the students that whenever they pick a new hobby, they need to learn some basic terms about it. Similarly, before using the internet, they need to know some basic terms about it.
● Build the concept to introduce and explain to them the basic terminologies of internet.
Engage
Explain the following concepts:
Learning Outcomes Explanation
Define the basic terminologies of internet.
Describe about Google Chrome, search engines, URL, and Net Surfing.
Describe the basic terminologies of the internet, such as webpages, websites, WWW, etc., to students, as given on pages 67 and 68.
15 mins
Explain to the students that Google Chrome is a web browser made by Google. It is one of the most popular browsers in the world. Explain the steps to open Chrome. Also, describe about search engines, URL, and net surfing to students, as explained on pages 68 to 70.
a World Wild Web
● Read aloud the questions provided in the Do It Yourself 4B and encourage the students to solve them. Instruct them to write the answers in their notebook.
c Web World Wide
Correct Responses:
Match the column:
1. b. World Wide Web
2.
Column A Column B


Build


Opera Microsoft Edge Google Chrome Safari
7 mins
● Conduct a group discussion in the class on the topic ‘Net Surfing’.
Possible Responses: Net surfing is used to visit websites, watch videos, listen to music, and shopping. We require an internet connection and web browser for it.
3 mins
● Conclude the session by summarising that digital documents, called webpages, when grouped together, form a website. We use programs called web browsers to explore websites and find information through search engines such as Google Chrome, all by typing in unique addresses called URLs. Net surfing involves using a computer or mobile device with an internet connection and a web browser to visit websites, watch videos, listen to music, and discover new things online.
● Assign the following questions from the Chapter Checkup given at the end of the chapter as homework.
A. Fill in the Blanks: Questions 3, 4, and 5
B. Tick the Correct Option: Questions 2, 3, and 4
C. Who Am I?: Questions 1, 2, and 3
E. Answer the Following: Questions 3 and 5
F. Apply Your Learning: Questions 3 and 4
5
Mel and Conji are learning about magic and computers in school when they hear a beeping sound in the Computer Lab. They see Eva being pulled inside the computer screen with some dark magic. There is a secret message on the screen which they have to decode. They explore the school library to gain some knowledge about it. They see a puzzle and after solving it, they get inside a dark, mysterious chamber. They find a computer screen and a pile of books inside. They get to know about a MagiTech Keystone which holds unimaginable power. They learn from the Elders that no one has come close to finding it. By solving the clues, they get a piece of the Keystone and find out that Elder Robot is behind it. He was under a dark spell, and the Keystone could only break it. They find the other piece and join them together to break the spell. Mel and Conji fight a battle with Lord Ero. They cast a powerful spell with the help of Elders on Lord Ero, and he loses his power. They finally break the spell on Eva.
● In the Council Room, Mel and Conji inform Elder Wizard and Elder Robot about Lord Ero’s pursuit of the MagiTech Keystone, a device of unimaginable power.
● The Elders suggest investigating the Museum, where there was an attempted break-in.
● Mel and Conji head to the Museum, finding it dark and gloomy.
● They discover a piece of the Keystone, but it disappears when Mel tries to pick it up.
● The muses appear and explain that the pieces can disappear to protect themselves when they sense danger, similar to the Internet of Things, which Mel explains to Conji.
This chapter is divided into the following classroom sessions
1. Introduction to Internet of Things
2. Smart Devices
1. Introduction to Internet of Things
Learning Outcomes
● explain the internet of things.
● describe features of IoT.
Keywords
● describe IoT-enabled devices.
● explain the applications of IoT.
● Internet of Things: It is a network of devices that can all be connected over the internet and can work with one another.
● IoT-enabled devices: Devices that can be connected to the internet and communicate with other devices in the network are called IoT-enabled devices.
Ask the students for the full form of the internet. Also, ask them to define the term internet.
Group discussion Think and Tell 5 mins 15 mins 7 mins 3 mins 5
Conclude the concepts Assign
homework
● Ask the students for the full form of the internet. Also, ask them to define the term internet.
● Now, build the concept that, similar to the internet, IoT is a network of devices that can all be connected over the internet and can work with one another.
Explain the following concepts:
Learning Outcomes Explanation
Explain the internet of things. Tell the students that the Internet of Things (IoT) is a network of devices that can all be connected over the internet and can work with one another, as given on page 79.
Describe features of IoT. Explain to the students about features of IoT like connectivity, automation, safety, security, and scalability, as given on page 79.
Describe IoT-enabled devices.
Explain the applications of IoT.
Discuss with the students that devices that can be connected to the internet and can communicate with other devices in the network are called IoT-enabled devices, as given on page 80.
Explain to them about the different fields in which IoT applications are used, like agriculture and medicine, as given on pages 80 and 81.
● Read aloud the questions provided in the Do It Yourself 5A section and encourage the students to solve the questions. Instruct the students to write the answers in their book.
Correct Responses:
1. a. devices, work b. optimise, efficiently c. increase or decrease
2. a. F b. T c. T
Build
7 mins
● Conduct a group discussion in the class among the students on the topic “What do you think we would need to have such an IoT-based home?” given in the Discuss section on page 79.
Possible Responses: We would need Internet Connectivity, IoT devices, Power Source, etc.
● Ask the students to give the answer to the question “Which are the connected devices that are communicating in this case?” asked in the Think and Tell section given on page 80.
Possible Responses: Smartwatch and doctor’s screen.
3 mins
● Conclude the session by summarising that the Internet of Things (IoT) is a network of devices that can all be connected over the internet and can work with one another. Describe the features of IoT, like connectivity, automation, safety, security, and scalability. Also, discuss that the devices that can be connected to the internet and communicate with other devices in the network are called IoT-enabled devices. Tell them about the different fields in which IoT applications are used, like agriculture and medicine.
● Assign the following questions from the Chapter Checkup given at the end of the chapter as homework.
A. Fill in the Blanks: Questions 2 and 4
B. Tick the Correct Option: Questions 1, 2, and 3
C. Who Am I?: Questions 1 and 2
D. Write T for True and F for False: Questions 4 and 5
E. Answer the Following: Questions 1 and 2
F. Apply Your Learning: Question 1
At the end of the session, the students will be able to:
● explain smart devices.
● describe smart speakers.
● describe smartwatches.
● describe smart TVs.
Keyword
● explain smart refrigerators.
● explain smart cars.
● describe smart light bulbs.
● Smart devices: Devices that can be connected to the internet and have many advanced features are called smart devices.
Ask the students whether they have seen or used a smartwatch.
Describe to them what smart devices are. Explain different smart devices, such as smart speakers, smartwatches, smart TVs, etc.
Action Plan
Group discussion
Conclude the concepts
Assign homework
5 mins
Warm Up
Ask the students whether they have seen or used a smartwatch. Now, relate the concept that a smartwatch is a smart device that not only tells us the time, but we can do many other things. 15 mins
Engage
Explain the following concepts:
Learning Outcomes
Explanation
Explain smart devices. Describe to the students that devices that can be connected to the internet and have many advanced features are called smart devices, as given on page 81.
Describe smart speakers.
Describe smartwatches.
Explain to the students that a smart speaker can do many things that a regular speaker cannot, as given on page 81.
Define that a smartwatch is a watch that not only tells us the time, but we can do many other things, as given on page 82.
Describe smart TVs. Tell them that a smart TV can be connected to the internet, just like our smartphone or computer, as given on page 82.
Explain smart refrigerators.
Explain to them that a smart refrigerator is a high-tech refrigerator, as given on pages 82 and 83.
Explain smart cars. Tell them that a smart car is a car with amazing features, like smart sensors, voice control sensors, smartphone connectivity, etc., as given on page 83.
Describe smart light bulbs.
Explain to them a smart light bulb looks like a normal bulb but it has many interesting features, as given on page 83.
● Read aloud the questions provided in the Do It Yourself 5B section and encourage the students to solve the questions. Instruct the students to write the answers in their book.
7 mins
Build
● Conduct a group discussion in the class among the students on the topic ‘How are smart devices making our lives easier?’.
Possible Response: Smart devices are enhancing our lives by providing convenience, automation, and remote access. They save energy, offer instant information, and provide entertainment. Smart devices also monitor health metrics, improving our well-being.
3 mins
● Conclude the session by summarising that devices that can be connected to the internet and have many advanced features are called smart devices. A smart speaker can do many things that a regular speaker cannot, like listen to what you say and reply. A smartwatch can count the number of steps you take when you walk or run. A smart TV can be connected to the internet. A smart refrigerator can auto-adjust the temperature, etc.
● Assign the following questions from the Chapter Checkup given at the end of the chapter as homework.
A. Fill in the Blanks: Questions 1 and 3
B. Tick the Correct Option: Question 3
C. Who Am I?: Questions 3, 4, and 5
D. Write T for True and F for False: Questions 1, 2, and 3
E. Answer the Following: Questions 3 and 4
F. Apply Your Learning: Questions 2 and 3
6
Mel and Conji are learning about magic and computers in school when they hear a beeping sound in the computer lab. They see Eva being pulled inside the computer screen by some dark magic. There is a secret message on the screen which they have to decode. They explore the school library to gain some knowledge about it. They see a puzzle, and after solving it, they get inside a dark, mysterious chamber. They find a computer screen and a pile of books inside. They get to know about a MagiTech Keystone which holds unimaginable power. They get to know from the Elders that no one has come close to finding it. By solving clues, they get a piece of the Keystone and find out that Elder Robot is behind it. He was under a dark spell, and only the Keystone could break it. They find the other piece and join them together to break the spell. Mel and Conji fight a battle with Lord Ero. They cast a powerful spell with the help of the Elders on Lord Ero and he loses all his power. They finally break the spell on Eva.
Story in This Chapter…
● Mel and Conji arrive at a dark stairwell, similar in darkness to the Museum, indicating someone was there to take a piece of the Keystone.
● They discover that the MagiTech Keystone is placed on the window. So, they are relieved that the thief failed to take it away.
● Conji suggests using a spell to freeze the Keystone in place to prevent it from disappearing, allowing Mel to safely pick it up.
● As they proceed up the stairs, Conji successfully casts the spell “FREEZEALL” to fix the Keystone piece in one place.
● Mel successfully picks up the Keystone piece after the spell takes effect.
● During their hunt, they discover a golden piece of metal left by someone who tried to steal the Keystone before them.
● Realising the golden piece of metal is a clue, they try to identify the person behind the theft.
● Mel proposes using “stepwise thinking” as a method to solve the mystery of the person who attempted to steal the Keystone.
This chapter is divided into the following classroom sessions
1. Understanding Stepwise Thinking
2. Learn with Examples
At the end of the session, the students will be able to:
● describe problem solving.
● solve problems using stepwise thinking.
● use reasoning with better solutions.
● Problem solving: Problem solving means to find a solution to a problem.
● Stepwise thinking: Stepwise thinking means to think step by step to complete a task or solve a problem.
Ask the students what steps they would take to clean their rooms.
● Reasoning: Reasoning refers to the act of thinking about the facts in order to make a decision. 5 mins
Explain stepwise thinking to the students.
Encourage the students to consider the reasoning behind their problemsolving approach. Explain reasoning to the students.
● Ask the students what steps they would take to clean their rooms.
● Discuss the step-by-step problem-solving process to clean rooms.
Explain the following concepts:
Describe problem solving.
Solve problems using stepwise thinking.
Use reasoning with better solutions.
Discuss with the students that when we try to find a solution to a problem, it is known as problem solving. Explain the concept of problem solving with the help of an example of cleaning the room, as given on page 91.
Describe that stepwise thinking means to think step by step to complete a task or solve a problem. Explain stepwise thinking to the students, as given on page 91.
Define that the act of thinking about the facts to make a decision is called reasoning. Explain reasoning to the students, as given on page 92.
● Ask the following questions to the students to check their understanding.
1. Why is it important to break a problem down into smaller parts?
a. It makes the problem look bigger.
b. It helps to solve the problem more easily.
c. It is not important.
d. It makes the problem more complicated.
Correct Response:
b. It helps to solve the problem more easily.
2. What should you do after identifying the problem?
a. Solve it immediately.
b. Break it down into smaller parts.
c. Ignore it.
d. Tell someone else to solve it.
Correct Response:
b. Break it down into smaller parts.
7 mins
● Conduct a group discussion in the class among the students based on the topic ‘What role does reasoning play in solving problems?’
Possible Response: Reasoning helps us think about the facts and make better decisions, ensuring we choose the best solution to a problem.
3 mins
● Conclude the session by summarising that solving a problem is like cleaning an untidy room; it involves identifying the problem, breaking it down into smaller parts, and then solving each part one by one. Also, reasoning helps us make good decisions by thinking carefully about our choices.
● Assign the following questions from the Chapter Checkup given at the end of the chapter as homework.
A. Fill in the Blanks: Questions 1, 2, and 3
B. Write T for True and F for False: Questions 1, 2, and 3
At the end of the session, the students will be able to:
● plan a picnic using stepwise thinking.
Ask the students to create a list of picnic activities. Also, ask them how would they find their favourite watch if they had lost it at the school.
● find a lost watch using stepwise thinking. 5
Warm Up
Encourage the students to brainstorm activities for a picnic. Help the students to prepare a list of to-do things on a picnic.
Encourage the students to consider losing their favourite watch at school. Brainstorm with the students to follow the steps to find the lost watch.
Action Plan
● Ask the students to create a list of picnic activities.
● Also, ask them how would they find their favourite watch if they had lost it at school. Relate the examples with identifying the problem and then breaking the problem in smaller steps in order to solve it.
Engage
Explain the following concepts:
Learning Outcomes
Plan a picnic using stepwise thinking.
15 mins
Explanation
Explain to the students how to arrange a picnic step-by-step to ensure they have the best experience possible. Explain the process to the students, as given on page 92.
Find a lost watch using stepwise thinking.
Discuss with the students what steps they would take if they have lost their favourite watch at school. Explain the stepwise process to the students, as given on page 94.
● Ask the following questions to the students to check their understanding.
1. What would you do if you found your watch?
Correct Responses: Finally, when you find your watch, thank the person who found it and returned it. Make a promise to yourself to be more careful in future.
2. How will you and your guests get to the picnic location?
Correct Responses: By taking a car, or a rented van, or a school bus.
7 mins
● Conduct a group discussion in the class among the students based on the topic ‘Imagine you want to go on a picnic. List the stepwise approach to have clear and better solutions.’
Possible Responses:
1. Identify the problem.
2. Break the problem down into smaller sub-problems.
3. Solve each part of the problem separately.
3 mins
● Conclude the session by summarising that in order to plan a fun picnic, we first decide who will join, then pick a spot and time, post that, choose yummy foods to eat, then plan games and activities, then decide what to wear, and finally figure out how to get there. Also, tell the students that if they lose something, like a watch at school, they can think about where and when they last saw it, ask people who might have seen it, let everyone know by putting up notices, and remember to say thank you when they find it.
● Assign the following questions from the Chapter Checkup given at the end of the chapter as homework.
C. Number the Steps in the Correct Order: Questions 1 and 2
D. Apply Your Learning: Questions 1, 2, and 3
Mel and Conji are learning about magic and computers in school when they hear a beeping sound in the computer lab. They see Eva being pulled inside the computer screen with some dark magic. There is a secret message on the screen which they must decode. They explore the school library to gain some knowledge about it. They see a puzzle, and after solving it, they get inside a dark, mysterious chamber. They find a computer screen and a pile of books inside. They get to know about a MagiTech Keystone which holds unimaginable power. They learn from the Elders that no one has come close to finding it. By solving the clues, they get a piece of the Keystone and find out that Elder Robot is behind it. He was under a dark spell, and the Keystone could only break it. They find the other piece and join them together to break the spell. Mel and Conji fight a battle with Lord Ero. They cast a powerful spell with the help of the Elders on Lord Ero, and he loses his power. They finally break the spell on Eva.
● Mel and Conji reach the Council Room.
● Conji tells Elder Wizard that Elder Robot is the one who is helping Lord Ero.
● Mel further adds to this by saying that they found Elder Robot’s earpiece in the stairwell, where they found the piece of the keystone.
● Elder Wizard tells them that he has known Elder Robot for a long time. He can never betray them.
● Elder Wizard advises them to go to Ms Idea. She must know what is happening.
● Mel and Conji then go to the Idea Centre to get answers to their questions from Ms Idea.
● Mel asks Ms Idea if she knew Elder Robot was the traitor. She replied with a yes to the question.
● Conji asked Ms Idea why she hadn’t told them this before.
● Ms Idea then gave them a document that had all the required information in this context.
● Conji tells Ms Idea that he can’t understand anything in the document. The letters are so close and would take weeks to decode.
● Ms Idea then tells them to format the document to make it more presentable and easier to read.
● Conji then asks Ms Idea what formatting is. He then asks Ms Idea to teach them to do formatting.
At the end of the session, the students will be able to:
● describe what a word processor is.
● create a Google document.
● identify the components of a Google document.
● add a text.
● format the text.
Keywords
● Word processor: A word processor is a software used to type and edit text.
● Google docs: It is a free online word processor.
● Formatting: Formatting refers to the process of changing the appearance and layout of a written document or text to make it more visually appealing, organised, and easier to read and understand.
Ask the students how they will write a paragraph on a computer.
Explain to the students what a word processor is. Also, tell them the steps to create a Google document. Explain the different components of a Google document. Also, tell them the steps to add and format a text in Google Docs.
Action Plan
Think and Tell Conclude the concepts
Assign homework
5 mins
Warm Up
● Ask the students how they will write a paragraph on a computer.
● Tell the students that a word processor is a software which is used to type and edit text. Microsoft Word and Google Docs are the two most popular ones.
Explain the following concepts:
Describe what a word processor is.
Tell the students that a word processor is a software that is used to type and edit text. Also tell them the features of Google Docs, a free online word processor, as given on page 103.
Create a Google document. Explain the steps to create a Google document, as given on page 103.
Identify the components of a Google document.
Add a text.
Tell the students about different components of the Google document window, such as the menu bar, toolbar, working area, etc., as given on page 104.
Tell the students the steps to add text to a Google document, as given on pages 104 and 105.
Format the text. Tell the students about formatting the text. Also tell them the steps to format text, as given on pages 106 and 107.
● Read aloud the questions provided in the Do It Yourself 7A section, Questions 1 and 2 (part a, b, and c). Encourage the students to solve the questions. Instruct the students to write the answers in their book.
Correct Responses:
1. a. Type text
2. a. Google Docs
b. Text
c. Bold
Build
7 mins
● Ask the students to give the answer to the question, “Would you ever make the title of your paragraph bold? Why or why not?” asked in the Think and Tell section given on page 107.
Possible Responses: Yes/No
Correct Response: Yes, because the title of the paragraph should look thicker and darker than the rest of the text.
3 mins
● Conclude the session by stating that a word processor is a software which is used to type and edit a text. The two most popular ones are Microsoft Word and Google Docs. There are different components of the Google document window, such as the menu bar, toolbar, working area, etc. Formatting text refers to the process of changing the appearance and layout of a written document or piece of text to make it more visually appealing, organised, etc. Also summarise the steps to create a Google document, format text, and edit text.
● Assign the following from the Chapter Checkup given at the end of the chapter as homework.
A. Fill in the Blanks: Questions 1 and 5
C. Who Am I?: Question 1
At the end of the session, the students will be able to:
● describe what a word processor is.
● create a Google document.
● identify the components of a Google document.
● add a text.
● format the text.
Keywords
● Word processor: A word processor is a software used to type and edit text.
● Google Docs: It is a free online word processor.
● Formatting: Formatting refers to the process of changing the appearance and layout of a written document or a piece of text to make it more visually appealing, organised, and easier to read and understand.
Let the students watch the video or the learning slides related to the topic on the digital panel.
Explain to the students what a word processor is. Also, demonstrate the steps to create a Google document. Explain the different components of a Google document. Also, demonstrate to them the steps to add and format text in Google Docs.
Attempt the activity on the Assignment page.
Conclude the concepts
Assign homework
5 mins
● Instruct the students to go to the Tekie’s Digital platform and open a Lab session on Formatting Documents-I.
● Show the learning slides one by one and discuss the concepts shown on the slides in the panel.
15 mins
Explain the following concepts:
Describe what a word processor is.
Create a Google document.
Identify the components of a Google document.
Add a text.
Tell the students that a word processor is a software used to type and edit text. Also, tell them the features of Google Docs, a free online word processor, as given on page 103.
Demonstrate to the students the steps to create a Google document, as given on page 103.
Tell the students about different components of the Google document window, such as the menu bar, toolbar, working area, etc., as given on page 104.
Demonstrate to the students the steps to add text to a Google document, as given on pages 104 and 105.
Format the text. Tell the students about formatting the text. Also, demonstrate to them the steps to format text, as given on pages 106 and 107.
● Ask the questions provided on the slides one by one to assess the students’ understanding. Discuss the answers to the questions with the students. If necessary, ask additional relevant questions.
7 mins
Build
● Instruct the students to attempt the assignment by clicking on the Assignment tab.
● Explain the activity to the students.
3 mins
● Conclude the session by summarising that a word processor is a software which is used to type and edit text. There are different components of the Google document window, such as the menu bar, toolbar, working area, etc. Formatting text refers to the process of changing the appearance and layout of a written document or a piece of text to make it more visually appealing, organised, etc. Also, summarise the steps to create a Google document, format text, and edit text.
● Assign the additional activity given on the panel to the students as homework.
At the end of the session, the students will be able to:
● use the Paint format tool.
● use superscript and subscript formatting styles.
● add a header and a footer to a document.
● insert a page break in a document.
● insert a line break in a document.
Keywords
● Superscript: It is a formatting style where the text or number is made smaller and raised above the regular text line.
● Subscript: It is a formatting style where the text or number is made smaller and lowered below the regular text line.
● Header: The header is the text that appears at the top of every page in a document.
● Footer: The footer is the text that appears at the bottom of every page in a document.
● Page break: A page break is an instruction to the computer that tells it where to start a new page, when writing or printing.
Ask the students if they want to apply the same formatting to more texts in the document. Should they repeat the steps, one by one, or all over again?
Explain the use and the steps to apply the features of Google Docs—the Paint format tool, superscript, subscript, header and footer, page break, and line break.
Action Plan
Think and Tell Conclude the concepts
Assign homework
5 mins
Warm Up
● Ask the students if they want to apply the same formatting to more texts in the document. Should they repeat the steps one by one, or all over again? Now build the concept of the Paint format.
Explain the following concepts:
Use the Paint format tool.
Use superscript and subscript formatting styles.
Add a header and footer to a document.
Insert a page break in a document.
Insert a line break in a document.
Tell the students that the Paint Format tool helps us copy the formatting from one piece of text and apply it to another text. Tell students to use the Paint Format tool, as given on pages 107 and 108.
Tell the students that applying a superscript makes the text or number smaller and raised above the regular text line, and applying a subscript makes it smaller and lowered below the regular text line. Also tell them the steps to apply the two features, as given on page 109.
Tell the students that the header is the text that appears at the top and the footer at the bottom of every page in a document. Also tell them the steps to add a header and footer to a document, as given on pages 110 and 111.
Tell the students the steps to insert a page break, as given on page 111.
Tell the students the steps to insert a line break, as given on page 112.
● Read aloud the questions provided in the Do It Yourself 7A section, Question 2 part d and e and Do It Yourself 7B section, Questions 1, 2, and 3. Encourage the students to solve the questions. Instruct the students to write the answers in their book.
Correct Responses:
Do It Yourself 7A
2. d. Paint format
e. Superscript, Subscript
Do It Yourself 7B
1. Header, Footer
2. Page break
3. line
Build
7 mins
● Ask the students to give the answer to the question “What information can you include in headers and footers?” asked in the Think and Tell section given on page 111.
Possible Response: The header can include the company logo, title of the document, author name, etc., while the footer can include the page number, notes, etc.
● Conclude the session by summarising that the Paint Format tool helps us copy the formatting from one piece of text and apply it to another text. Applying a superscript makes the text or number smaller and raised above the regular text line, and applying a subscript makes it smaller and lowered below the regular text line. The header is the text that appears at the top, and the footer is at the bottom of every page in a document.
● Assign the following from the Chapter Checkup given at the end of the chapter as homework.
A. Fill in the Blanks: Question 2
B. Tick the Correct Option: Questions 2, 3, and 5
C. Who Am I?: Questions 2 and 5
D. Write T for True and F for False: Questions 1, 2, and 4
E. Answer the Following: Questions 1, 3, and 4
F. Apply Your Learning: Question 1
At the end of the session, the students will be able to:
● use the Paint format tool.
● use superscript and subscript formatting styles.
● add a header and a footer to a document.
● insert a page break in a document.
● insert a line break in a document.
Keywords
● Superscript: It is a formatting style where the text or number is made smaller and raised above the regular text line.
● Subscript: It is a formatting style where the text or number is made smaller and lowered below the regular text line.
● Header: The header is the text that appears at the top of every page in a document.
● Footer: The footer is the text that appears at the bottom of every page in a document.
Let the students watch the video or the learning slides related to the topic on the digital panel.
Demonstrate to the students how to apply the features of Google Docs— the Paint format tool, superscript, subscript, header and footer, page break, and line break.
● Page break: A page break is an instruction to the computer that tells it where to start a new page, when writing or printing. 5 mins
Attempt the activity on the Assignment page.
Conclude the concepts
Assign homework
● Instruct the students to go to the Tekie’s Digital platform and open a Lab session on Formatting Documents-III
● Show the learning slides one by one and discuss the concepts shown on the slides in the panel.
Explain the following concepts:
Use the Paint format tool.
Use superscript and subscript formatting styles.
Add a header and footer to a document.
Insert a page break in a document.
Insert a line break in a document.
15 mins
Tell the students that the Paint Format tool helps us copy the formatting from one piece of text and apply it to another text. Demonstrate how to use the Paint format tool, as given on pages 107 and 108.
Tell the students that applying a superscript makes the text or number smaller and raised above the regular text line, and applying a subscript makes it smaller and lowered below the regular text line. Also demonstrate the steps to apply the two features, as given on page 109.
Tell students that the header is the text that appears at the top and the footer at the bottom of every page in a document. Also demonstrate the steps to add a header and a footer to a document, as given on pages 110 and 111.
Demonstrate to the students the steps to insert a page break, as given on page 111.
Demonstrate to the students the steps to insert a line break, as given on page 112.
● Ask the questions provided on the slides one by one to assess the students’ understanding. Discuss the answers to the questions with the students. If necessary, ask additional relevant questions.
7 mins
Build
● Instruct the students to attempt the assignment by clicking on the Assignment tab.
● Explain the activity to the students.
3 mins
● Conclude the session by summarising that the Paint Format tool helps us copy the formatting from one piece of text and apply it to another text. Applying a superscript makes the text or number smaller and raised above the regular text line, and applying a subscript makes it smaller and lowered below the regular text line. The header is the text that appears at the top, and the footer is at the bottom of every page in a document.
● Assign the additional activity given on the panel to the students as homework.
At the end of the session, the students will be able to:
● insert a column in a document.
● change the page margins, orientation, and paper size of a document.
● indent text.
Keywords:
● Page margins: These are the spaces around the edges of your paper where you don’t type.
● Page orientation: Page orientation is about choosing if you want your paper to be longer or wider when you type on it.
● Paper size: Page size refers to the size of the paper on which we are going to take a printout.
● Indentation: It refers to the process of adjusting the horizontal positioning of text within a document.
Ask the students if they have ever noticed how a newspaper is set up.
Explain the steps to insert a column, change page margins, orientation, paper size, and indent text in a document.
Action Plan
Group discussion Conclude the concepts
Assign homework
mins
5 mins
● Ask the students if they have ever noticed how a newspaper is set up.
● Tell them that the newspapers use a column format. We can use the column format in Google Docs as well.
Engage
Explain the following concepts: Learning Outcomes Explanation
Insert a column in a document.
15 mins
Tell the students the benefits of using a column format in a document. Also tell them the steps to use the column format in Google Docs, as given on pages 112 and 113.
Change the page margins, orientation, and paper size of a document.
Tell the students that the page margins are the spaces around the edges of your paper where you don’t type. Page orientation is about choosing if you want your paper to be longer or wider when you type on it. Paper size refers to the size of the paper on which we are going to take a printout. Also tell them the steps to change page margins, orientation, and paper size of a document, as given on pages 113, 114, and 115.
Indent text. Tell the students that indentation refers to the process of adjusting the horizontal positioning of text within a document. Also tell them the steps to indent text, as given on pages 115 and 116.
● Read aloud the questions provided in the Do It Yourself 7B section, Questions 4 to 8. Encourage the students to solve the questions. Instruct the students to write the answers in their book.
Correct Responses:
Do It Yourself 7B
4. column
5. margins
6. landscape, portrait
7. paper size
8. indentation
Build
7 mins
● Conduct a group discussion in the class among the students on the topic ‘Benefits of using a Column Format’.
Correct Response: Easy reading, organised look, space saving, etc.
3 mins
● Conclude the session by summarising that the newspapers use a column format. Page margins are the spaces around the edges of your paper where you don’t type. Page orientation is about choosing if you want your paper to be longer or wider when you type on it. Paper size refers to the size of the paper on which we are going to take a printout. Indentation refers to the process of adjusting the horizontal positioning of text within a document.
● Assign the following from the Chapter Checkup given at the end of the chapter as homework.
A. Fill in the Blanks: Question 4
B. Tick the Correct Option: Questions 1 and 4
C. Who Am I?: Questions 3 and 4
D. Write T for True and F for False: Questions 3 and 5
E. Answer the Following: Questions 2 and 5
F. Apply Your Learning: Questions 2, 3, and 4
At the end of the session, the students will be able to:
● insert a column in a document.
● change the page margins, orientation, and paper size of a document.
● indent text.
Keywords
● Page margins: These are the spaces around the edges of your paper where you don’t type.
● Page orientation: Page orientation is about choosing if you want your paper to be longer or wider when you type on it.
● Paper size: Page size refers to the size of the paper on which we are going to take a printout.
● Indentation: It refers to the process of adjusting the horizontal positioning of text within a document.
Let the students watch the video or the learning slides related to the topic on the digital panel.
Demonstrate to the students how to insert a column, change page margins, orientation, paper size, and indent text in a document.
Attempt the activity on the Assignment page.
Conclude the concepts
Assign homework
5 mins
● Instruct the students to go to the Tekie’s Digital platform and open a Lab session on Formatting Documents-V
● Show the learning slides one by one and discuss the concepts shown on the slides in the panel.
Engage
Explain the following concepts:
Learning Outcomes Explanation
Insert a column in a document.
15 mins
Tell the students the benefits of using a column format in a document. Also demonstrate to them how to use the column format in Google Docs, as given on pages 112 and 113.
Change the page margins, orientation and paper size of a document.
Tell the students that page margins are the spaces around the edges of your paper where you don’t type. Page orientation is about choosing if you want your paper to be longer or wider when you type on it. Paper size refers to the size of the paper on which we are going to take a printout. Also, demonstrate them how to change the page margins, orientation, and paper size of a document, as given on pages 113, 114, and 115.
Indent text. Tell the students that indentation refers to the process of adjusting the horizontal positioning of text within a document. Also demonstrate them the steps to indent text, as given on pages 115 and 116.
● Ask the questions provided on the slides one by one to assess the students’ understanding. Discuss the answers to the questions with the students. If necessary, ask additional relevant questions.
7 mins
Build
● Instruct the students to attempt the assignment by clicking on the Assignment tab.
● Explain the activity to the students.
Sum Up
3 mins
● Conclude the session by summarising that newspapers use a column format. Page margins are the spaces around the edges of your paper where you don’t type. Page orientation is about choosing if you want your paper to be longer or wider when you type on it. Paper size refers to the size of the paper on which we are going to take a printout. Indentation refers to the process of adjusting the horizontal positioning of text within a document.
● Assign the additional activity given on the panel to the students as homework.
Mel and Conji are learning about magic and computers in school when they hear a beeping sound in the Computer Lab. They see Eva being pulled inside the computer screen with some dark magic. There is a secret message on the screen which they have to decode. They explore the school library to gain some knowledge about it. They see a puzzle and after solving it, they get inside a dark, mysterious chamber. They find a computer screen and a pile of books inside. They get to know about a MagiTech Keystone which holds unimaginable power. They learn from the Elders that no one has come close to finding it. By solving the clues, they get a piece of the Keystone and find out that Elder Robot is behind it. He was under a dark spell and the Keystone could only break it. They find the other piece and join them together to break the spell. Mel and Conji fight a battle with Lord Ero. They cast a powerful spell with the help of Elders on Lord Ero, and he loses his power. They finally break the spell on Eva.
● Mel and Conji go to the Control Room to find the last piece of the Keystone.
● They plan to use a spell to freeze the piece and join it with the other half to save Elder Robot.
● Conji casts a spell, “FREEZEALL!” to freeze the Keystone piece.
● Mel carefully joins the Keystone pieces together, and Conji uses a spell to try and break the dark spells.
● They aim to disconnect Elder Robot from the dark spell using the Keystone’s energy.
● Elder Robot wakes up free from the spell, grateful to Mel and Conji for saving him.
● Elder Robot realises he was under a spell and decides to help Mel and Conji fight against Lord Ero.
● Mel suggests preparing their reasons to fight Lord Ero and plans to explain their strategy to Conji.
At the end of the session, the students will be able to:
● work with shapes in Google Docs.
● insert shapes in Google Docs.
Keywords
● Shapes: Shapes are the outlines of things we see around us.
● 2D shapes: 2D shapes are flat shapes with only length and width, such as circles and squares.
● 3D shapes: 3D shapes are shapes with depth, like spheres and cubes.
Ask the students whether they have ever thought about how they can make their documents more interesting by adding shapes, like circles, squares, etc.
Discuss what shapes are and how to insert shapes in Google Docs.
Action Plan
Group discussion
Conclude the concepts
Assign homework
5 mins
Warm Up
● Ask the students whether they have ever thought about how they can make their documents more interesting by adding shapes, like circles, squares, etc.
● Build the concept of shapes and how to insert them in a document.
Engage
Explain the following concepts:
Learning Outcomes
Work with shapes in Google Docs.
15 mins
Explanation
Shapes are the outlines of things we see around us. Shapes can be 2D or 3D shapes. Explain working with shapes to the students, as given on page 126.
Insert shapes in Google Docs.
Explain the steps to insert shapes in a document to the students as given on page 126. You can take the example to create a Chandrayaan-3 model using shapes in Google Docs.
● Ask the following questions to the students to check their understanding.
1. What are flat shapes and shapes with depth, also known as?
Correct Response:
The two types of shapes mentioned are 2D (flat) shapes and 3D (shapes with depth).
2. To colour the shape, which tool should be used?
Correct Response:
To colour the shape, use the Fill colour tool.
7 mins
● Conduct a group discussion in the class among the students based on the topic ‘Which shapes would you use and why to better represent and understand the Chandrayaan-3 mission to the moon?’
Possible Responses:
● Circles would be great for the rocket’s base and the moon to show their round shapes.
● Triangles could represent the rocket’s fins or the mountains on the moon’s surface.
● We might use a cylinder (a 3D shape) if we are trying to show the rocket in a more realistic way.
3 mins
● Conclude the session by summarising how adding shapes in a Google document makes the project on Chandrayaan-3 model more interesting and realistic.
● Assign the following questions from the Chapter Checkup given at the end of the chapter as homework.
A. Fill in the Blanks: Question 1
D. Write T for True and F for False: Questions 4 and 5
F. Apply Your Learning: Questions 1, 4, and 5
At the end of the session, the students will be able to:
● work with shapes in Google Docs.
● insert shapes in Google Docs.
Keywords
● Shapes: Shapes are the outlines of things we see around us.
● 2D shapes: 2D shapes are flat shapes with only length and width, such as circles and squares.
● 3D shapes: 3D shapes are shapes with depth, like spheres and cubes.
Let the students watch the video or the learning slides related to the topic on the digital panel.
Demonstrate to the students how to insert shapes in a Google document. Attempt the activity on the Assignment page.
Action Plan
Conclude the concepts
Assign homework
mins
5 mins
Warm Up
● Instruct the students to go to the Tekie’s Digital platform and open a Lab session on Enhancing Documents-II.
● Show the learning slides one by one and discuss the concepts shown on the slides in the panel.
Engage
Explain the following concepts:
Learning Outcomes Explanation
Work with shapes in Google Docs.
10 mins
Explain the different types of shapes, like 2D shapes and 3D shapes, to the students, as given on page 126. Give examples, too.
Insert shapes in Google Docs.
Demonstrate the steps of inserting shapes in a Google document to the students as given on page 126. Take the example of making a Chandrayaan-3 model using shapes.
● Ask the questions provided on the slides one by one to assess the students’ understanding. Discuss the answers to the questions with the students. If necessary, ask additional relevant questions.
12 mins
Build
● Instruct the students to attempt the assignment by clicking on the Assignment tab.
● Explain the activity to the students.
Sum Up
3 mins
● Conclude the session by summarising that working with different types of shapes in Google Docs makes the projects interesting and realistic. Also, summarise the steps to insert shapes in a Google document.
● Assign the additional activity given on the panel to the students as homework.
At the end of the session, the students will be able to:
● insert images in Google Docs.
● insert clipart in the projects.
● crop images.
Keywords
● Image: An image or a picture is a visual representation. It can be a drawing, painting, or photograph.
● Clipart: A clipart is a computer-made image which is available on the internet.
● Cropping: Cropping is to remove unwanted parts of an image.
Ask the students that why do they find the comics more interesting than their school books.
Explain the different ways of inserting images in a Google document.
Explain how to insert a clipart in a document.
Explain how to crop an image.
Action Plan
Group discussion Conclude the concepts
Assign homework
5 mins
Warm Up
● Ask the students that why do they find the comics more interesting than their school books.
● Relate the question to the concept of images and importance of adding an image in an existing document.
15 mins
Explain the following concepts:
Insert images in Google documents.
Insert clipart in the projects.
Explain the ways to insert images from different sources, such as the computer and the web, to the students, as given on page 129.
Explain that clipart is a computer-made image which is available on the internet. Also, discuss the steps to insert a clipart image in a Google document with the students, as given on page 131.
Crop images. Explain that cropping an image means removing unwanted parts of an image. Also, discuss the steps to crop an image in a Google document with the students, as given on page 132.
● Read aloud the questions provided in the Do It Yourself 8A section and encourage the students to solve the questions. Instruct the students to write the answers in their book.
Correct Responses:
1. a. iii b. i
2. a. F b. F c. T d. T e. F
Build
7 mins
● Conduct a group discussion in the class among students based on the topic “What is the difference between an image and a shape?” provided in the Discuss section, as mentioned on page 133.
Possible Response: An image or a picture is a visual representation. It can be a drawing, painting, or photograph. Images are used to show people, objects, places, or ideas in a visual way. Shapes are the outlines of things we see around us. Shapes can be flat or have depth.
3 mins
● Conclude the session by summarising that in documents, you can add pictures or clipart from your computer or the internet to your projects. Also, summarise that if a picture is too big or has unwanted parts, you can use the crop tool to cut it just the way you like it.
● Assign the following questions from the Chapter Checkup given at the end of the chapter as homework.
A. Fill in the Blanks: Question 4
B. Tick the Correct Option: Questions 1 and 2
C. Who Am I?: Question 1
D. Write T for True and F for False: Question 3
E. Answer the Following: Questions 3 and 4
F. Apply Your Learning: Question 3
Learning Outcomes
● insert images in Google Docs.
● insert clipart in the projects.
● crop images.
Keywords
● Image: An image or a picture is a visual representation. It can be a drawing, painting, or photograph.
● Clipart: A clipart is a computer-made image which is available on the internet.
● Cropping: Cropping is to remove unwanted parts of an image.
Let the students watch the video or the learning slides related to the topic on the digital panel.
Explain to the students what images are. Also, demonstrate the steps to insert images in a Google document.
Demonstrate how to crop an image in a document.
Action Plan
Conclude the concepts Assign homework
5 mins
Warm Up
● Instruct the students to go to the Tekie’s Digital platform and open a Lab session on Enhancing Documents-IV.
● Show the learning slides one by one and discuss the concepts shown on the slides in the panel.
10 mins
Explain the following concepts:
Insert images in Google documents.
Insert clipart in the projects.
Demonstrate how to insert images from different sources, such as from a computer and from web to the students, as given on page 129.
Demonstrate how to insert a clipart in a Google document to the students, as given on page 131. Take an example of the clipart of an astronaut. Crop images. Demonstrate how to use the Crop tool to crop the unwanted parts of an image to the students, as given on page 132.
● Ask the questions provided on the slides one by one to assess the students’ understanding. Discuss the answers to the questions with the students. If necessary, ask additional relevant questions.
12 mins
Build
● Instruct the students to attempt the assignment by clicking on the Assignment tab.
● Explain the activity to the students.
Sum Up
3 mins
● Conclude the session by summarising that in documents, you can add pictures or clipart from your computer or the internet to your projects. Also, summarise the steps of cropping an image to remove the unwanted parts using the Crop tool.
● Assign the additional activity given on the panel to the students as homework.
At the end of the session, the students will be able to:
● wrap text in different styles in a document.
● add watermarks to the documents.
● find and replace words in Google Docs.
Keywords
● Text Wrap: Text wrap refers to the automatic adjustment of text in a text editor, such as Google Docs, to ensure that it fits neatly without exceeding the boundaries.
● Watermark: A watermark is like a stamp that you put on a card or notebook.
● Find: Find means to look for a piece of text or a word and discover where it is.
● Replace: Replace means to take out the old text and add a new text instead.
Ask the students how they wrap a gift. Then, relate the topic to wrapping text around images.
Explain how text can be wrapped in different styles.
Explain how to insert a watermark in a document.
Explain how to find a text or a word, replace the old text, and add a new text in its place.
Group discussion
Conclude the concepts
Assign homework
Action Plan
5 mins
Warm Up
● Ask the students how they wrap a gift.
● Relate the above question to the concept of text wrapping.
Explain the following concepts:
Wrap text in different styles in a document.
Add watermarks in the documents.
Find and replace words in Google Docs.
Explain text wrapping to the students. Also, explain to them the default text wrapping style for a shape or an image, as given on page 134.
Explain to the students that watermarks are like a stamp that you put on a card or notebook. Also, explain the steps to insert the watermark in a document, as given on page 135.
Explain to the students that find means to look for a piece of text or a word and replace means to take out the old text and add a new text instead, as given on page 137.
● Read aloud the questions provided in the Do It Yourself 8B section and encourage the students to solve the questions. Instruct the students to write the answers in the book.
Correct Responses:
1. Icon

Style
Inline with text
Break text
In front of text
Wrap text
Behind text
7 mins
Build
● Conduct a group discussion in the class among the students based on the topic “Imagine a real-life situation where you might find the “Find and Replace” feature in Google Docs really handy.” provided in the Discuss section as mentioned on page 137.
Possible Response: Imagine you’re working on a group project called ‘Water Cycle’ for school. After completing the document, you realise that you’ve incorrectly referred to ‘evaporation’ as ‘vaporisation.’ This is where the ‘Find and Replace’ feature in Google Docs becomes incredibly handy. By using this feature, you can quickly search for every instance of the word ‘vaporisation’ and replace it with ‘evaporation’ in just a few clicks.
3 mins
● Conclude the session by summarising that we can make our text wrap around pictures in different ways, like having the text go around the image or behind it. We can also add a special see-through picture called a watermark to the background of our document. Also, if we need to change a word everywhere it appears in our document, we can use the ‘Find and Replace’ feature to do it quickly.
● Assign the following questions from the Chapter Checkup given at the end of the chapter as homework.
A. Fill in the Blanks: Questions 2, 3, and 5
B. Tick the Correct Option: Questions 3 and 4
C. Who Am I?: Questions 2, 3, and 4
D. Write T for True and F for False: Questions 1 and 2
E. Answer the Following: Questions 1, 2, and 5
F. Apply Your Learning: Question 2
At the end of the session, the students will be able to:
● wrap text in different styles in a document.
● add watermarks to the documents.
● find and replace words in Google Docs.
● Text Wrap: Text wrap refers to the automatic adjustment of text within a given space, such as a text editor or a web page, to ensure that it fits neatly without exceeding the boundaries.
● Watermark: A watermark is like a stamp that you put on a card or notebook.
● Find: Find means to look for a piece of text or a word and discover where it is.
● Replace: Replace means to take out the old text and add a new text instead.
Let the students watch the video or the learning slides related to the topic on the digital panel.
Demonstrate text wrapping with different styles to the students.
Demonstrate how to insert a watermark in Google Docs.
Demonstrate how to find and replace words in a document with the help of an example.
Attempt the activity on the Assignment page.
Conclude the concepts
Assign homework
5 mins
● Instruct the students to go to the Tekie’s Digital platform and open a Lab session on Enhancing Documents-VI
● Show the learning slides one by one and discuss the concepts shown on the slides in the panel.
10 mins
Explain the following concepts:
Wrap text in different styles in a document.
Add watermarks in the documents.
Find and replace words in Google Docs.
Demonstrate text wrapping to the students, as given on page 134. Also, demonstrate how to change the text wrapping style of the Chandrayaan-3 model in the document.
Demonstrate inserting watermarks in the Google Docs to the students, as given on page 135. Explain that watermarks can be words, logos, or even pictures.
Demonstrate the steps to find and replace words in Google Docs to the students, as given on page 137.
● Ask the questions provided on the slides one by one to assess the students’ understanding. Discuss the answers to the questions with the students. If necessary, ask additional relevant questions.
Build
● Instruct the students to attempt the assignment by clicking on the Assignment tab.
● Explain the activity to the students.
12 mins
3 mins
● Conclude the session by summarising that we can make our text wrap around pictures in different ways, like having the text go around the image or behind it. We can also add a special see-through picture called a watermark to the background of our document. Also, if we need to change a word everywhere it appears in our document, we can use the ‘Find and Replace’ to do it quickly.
● Assign the additional activity given on the panel to the students as homework.
Mel and Conji are learning about magic and computers in school when they hear a beeping sound in the Computer Lab. They see Eva being pulled inside the computer screen with some dark magic. There is a secret message on the screen which they have to decode. They explore the school library to get some knowledge about it. They see a puzzle and after solving it, they get inside a dark, mysterious chamber. They find a computer screen and a pile of books inside. They get to know about a MagiTech Keystone which holds unimaginable power. They get to know from the Elders that no one has come close to finding it. By solving clues, they get a piece of the Keystone and find out that Elder Robot is behind it. He was under a dark spell and the Keystone could only break it. They find the other piece and join them together to break the spell. Mel and Conji fight a battle with Lord Ero. They cast a powerful spell with the help of Elders on Lord Ero and he loses his power. They finally break the spell on Eva.
● Mel and Conji reach a battleground to face their enemy, Lord Ero, who possesses knowledge of magic and technology.
● They decide to team up against him, believing their combined power can overcome his darkness.
● As they engage in battle, sparks fly as their powers clash with Ero’s dark magic.
● Meanwhile, Eva is seen trapped in an energy field, appearing weak and pale.
● Mel and Conji recognize Eva’s distress and resolve to save her.
● Mel recalls an Elder Wizard’s presentation containing a powerful spell that can both save Eva and defeat Lord Ero.
● They rush to Elder Wizard’s office to seek assistance and learn how to utilize the presentation and its spell.
● The passage ends with Mel and Conji seeking help from Elder Wizard to confront the threat of Lord Ero and save Eva.
At the end of the session, the students will be able to:
● define and identify the uses of a presentation.
● create a presentation.
● identify the components of the Google Slides window.
● provide a name and add a title to a presentation.
Keywords
● Presentation: It is a tool to create, showcase and share information in an interactive, interesting, and visually appealing way.
● Slide workspace: It is the main area where you can add and arrange content like text, pictures, and videos on a slide.
● Slides panel: It is a section where you can see small versions of all your slides, helping you to navigate through your presentation easily.
● Speaker notes: It is a space to write notes for each slide that can help the presenter remember what to say during the presentation.
Ask the students how they will share the information in a more presentable and interesting way.
Introduce them to what presentations are and the uses of presentations.
Introduce Google Slides to make the presentations and explain its components.
Introduce how to name a presentation and add title to a presentation.
Think and Tell
Conclude the concepts
Assign homework
5 mins
● Ask the students how they will share the information in a more presentable and interesting way.
● Build the concept that a presentation is a tool to share information in a more presentable and interesting way.
Explain the following concepts:
Define and identify the uses of a presentation.
Explain that a presentation is a tool to create, showcase and share information in an interactive, interesting, and visually appealing way. Discuss with them that presentations are used to share information, add visuals, stay organised, visualise and present. Presentations are used at various places like education, training, workshops, etc. as given on page 147. Create a presentation. Tell them Google Slides is an online presentation tool that lets you create and share exciting presentations as given on page 148.
Identify the components of the Google Slides window.
Provide a name and add a title to a presentation.
Explain the components of Google Slides windows to the students as given on page 148 and 149. Also, get them familiar with using Google Slides.
Explain that before adding more things to the presentation, they should give a name to the presentation. After giving a name, add the title to the presentation as given on pages 149 and 150.
● Read aloud the questions provided in the Do It Yourself 9A section and encourage the students to solve the questions. Instruct the students to write the answers in their notebook.
Correct Responses:
1. d 2. a 3. b.
7 mins
● Ask the students to answer the question “Where else can we use presentations?” given in the Think and Tell section on page 147.
Possible Responses: marketing, seminars, hospitals, etc.
3 mins
● Conclude the session by summarising that a presentation is a tool to create, showcase and share information in an interactive, interesting, and visually appealing way. Presentations are used to share information, add visuals, stay organised, visualise and present. Presentations are used at various places like education, training, workshops, etc. Google Slides is an online presentation tool that lets you create and share exciting presentations. Google Slides window has various components like Rename box, Menu bar, Toolbar, Slide workspace, Speaker notes, etc. Everything we do gets saved automatically, and we can identify a presentation by giving a name and adding a title to it.
● Assign the following questions from the Chapter Checkup given at the end of the chapter as homework.
A. Fill in the Blanks: Questions 1, 3, and 4
B. Tick the Correct Option: Questions 1 and 2
C. Who Am I?: Question 1
D. Write T for True and F for False: Question 1
E. Answer the Following: Question 4
At the end of the session, the students will be able to:
● define and identify the uses of a presentation.
● create a presentation.
● identify the components of the Google Slides window.
● provide a name and add a title to a presentation.
Keywords
● Presentation: It is a tool to create, showcase and share information in an interactive, interesting, and visually appealing way.
● Slide workspace: It is the main area where you can add and arrange content like text, pictures, and videos on a slide.
● Slides panel: It is a section where you can see small versions of all your slides, helping you to navigate through your presentation easily.
● Speaker notes: It is a space to write notes for each slide that can help the presenter remember what to say during the presentation.
Let the students watch the video or the learning slides related to the topic on the digital panel.
Introduce them to what are presentations and the uses of presentations.
Introduce Google Slides to make the presentations and explain its components.
Introduce how to name a presentation and add title to a presentation.
Action Plan
Attempt the activity on the Assignment page.
Conclude the concepts
Assign homework
5 mins
Instruct the students to go to Tekie’s Digital platform and open a Lab session on Creating Presentations-II
Show the learning slides one by one and discuss the concepts shown on the slides in the panel.
10 mins
Explain the following concepts:
Learning Outcomes
Define and identify the uses of a presentation.
Explain that a presentation is a tool to create, showcase and share information in an interactive, interesting, and visually appealing way. Discuss with them that presentations are used to share information, add visuals, stay organised, visualise and present. Presentations are used at various places like education, training, workshops, etc. as given on page 147.
Create a presentation. Tell them that Google Slides is an online presentation tool that lets you create and share exciting presentations as given on page 148.
Identify the components of the Google slides window.
Provide a name and add a title to a presentation.
Show the components of the Google Slides windows to the students as given on pages 148 and 149. Also, get them familiar with using Google Slides.
Demonstrate that before adding more things to the presentation, they should give a name to the presentation. After giving a name, add the title to the presentation as given on pages 149 and 150.
● Ask the questions provided on the slides one by one to assess the students’ understanding.
● Discuss the answers to the questions with the students. If necessary, ask additional relevant questions.
12 mins
Build
● Instruct the students to attempt the assignment by clicking on the Assignment tab.
● Explain the activity to the students.
3 mins
● Conclude the session by summarising that a presentation is a tool to create, showcase and share information in an interactive, interesting, and visually appealing way. Presentations are used to share information, add visuals, stay organised, visualise and present. Presentations are used at various places like education, training, workshops, etc. Google Slides is an online presentation tool that lets you create and share exciting presentations. Google Slides window has various components like Rename box, Menu bar, Toolbar, Slide workspace, Speaker notes, etc. Everything we do gets saved automatically, and we can identify a presentation by giving a name and adding a title to it.
● Assign the additional activity given on the panel to the students as homework.
At the end of the session, the students will be able to:
● add and change the position of the text box after adding text in it.
● add new slides.
● insert shapes on a slide.
● add and edit image in a slide.
Keyword
● Text box: A space on the slide where you can add text.
Ask the students to imagine preparing a presentation on renewable energy. Do you think incorporating visual aids could enhance the impact of their presentation and make the concepts more accessible?
Explain the text box to add text and get them familiar with changing the position of the text box.
Introduce adding new slides to an existing presentation.
Introduce inserting shapes in a slide and also, get them familiar with adding and editing images.
Group discussion Conclude the concepts
Assign homework
Action Plan
5 mins
Warm Up
Ask the students to imagine preparing a presentation on renewable energy. Do you think incorporating visual aids could enhance the impact of their presentation and make the concepts more accessible?
Build the concept that Google Slides allows us to add visuals to our presentations which makes the presentation more attractive and informative.
Engage
Explain the following concepts:
Add and change the position of the text box after adding text to it.
15 mins
Explain to the students how to add a text box and move the position of the text box after adding text to it as given on pages 150 and 151.
Add new slides. Describe to the students how to add new slides as given on page 152. Insert shapes on a slide. Discuss with the students how to insert, move, resize and colour shapes on a slide as given on pages 152 to 155.
Add and edit image in a slide. Explain to the students how to add and edit image in a presentation as given on pages 156 and 157.
● Read aloud the questions provided in the Do It Yourself 9A, Do It Yourself 9B, and Do It Yourself 9C sections and encourage the students to solve the questions. Instruct the students to write the answers in their notebook.
Do It Yourself 9A
Correct Response: 4. a
Do It Yourself 9B
Correct Responses: 1. c 2. a
Do It Yourself 9C
Correct Responses: 1. Insert image 2. Resizing 3. crop
7 mins
● Conduct a group discussion in the class among students based on the topic ‘How would you decide which shapes to use for each planet, and what colours would you choose to make a presentation on Solar System?’
Possible Responses: For the sun, we should use a big yellow circle because the sun is really big and bright. For Earth, we can use a smaller circle but colour it blue and green to show the water and land. For Saturn, we should also use a circle but add rings around it. Mars can be a red circle because it’s called the Red Planet. Jupiter is the biggest planet, so we should make its circle bigger than the others, except for the sun. Venus is similar to Earth in size, so we can use a circle of the same size as Earth. For Mercury, we need a small grey circle because it’s the smallest planet and Uranus and Neptune can be light blue and dark blue circles because they’re known as ice giants and have a lot of water and ice.
3 mins
● Conclude the session by summarising how to work with text boxes, slides, shapes, and images in a presentation. It explains how to add text, move text boxes and shapes by clicking and dragging with the mouse, add new slides and add images. It also covers resizing shapes and images by clicking and dragging the blue squares, and cropping images using the Crop tool.
● Assign the following questions from the Chapter Checkup given at the end of the chapter as homework.
A. Fill in the Blanks: Question 2
B. Tick the Correct Option: Questions 3 and 4
C. Who Am I?: Questions 2, 3, and 4
D. Write T for True and F for False: Question 3
E. Answer the Following: Questions 1, 3, and 5
F. Apply Your Learning: Questions 1, 2, 3, 4, and 5
At the end of the session, the students will be able to:
● add and change the position of the text box after adding text to it.
● add new slides.
● insert shapes on a slide.
● add and edit images in a slide.
Keyword
● Text box: A space on the slide where you can add more text in it.
Let the students watch the video or the learning slides related to the topic on the digital panel.
Demonstrate to the students how to add a text box and change position of text box after adding text in it.
Demonstrate adding new slides and inserting shapes on a slide.
Demonstrate how to add and edit an image on a slide.
Action Plan
Attempt the activity on the Assignment page.
Conclude the concepts
Assign homework
5 mins
Warm Up
Instruct the students to go to Tekie’s Digital platform and open a Lab session on Creating Presentations-IV.
Show the learning slides one by one and discuss the concepts shown on the slides in the panel.
10 mins
Explain the following concepts:
Learning Outcomes
Add and change the position of the text box after adding text to it.
Add new slides.
Insert shapes on a slide.
Add and edit images in a slide.
Demonstrate to the students how to add a text box and move the position of the text box after adding text to it as given on pages 150 and 151.
Show them how to add new slides as given on page 152.
Demonstrate to the students how to insert, move, resize and colour shapes on a slide as given on pages 152 to 155.
Tell them how to add and edit images in a presentation as given on pages 156 and 157.
● Ask the questions provided on the slides one by one to assess the students’ understanding.
● Discuss the answers to the questions with the students. If necessary, ask additional relevant questions.
12 mins
Build
● Instruct the students to attempt the assignment by clicking on the Assignment tab.
● Explain the activity to the students.
Sum Up
3 mins
● Conclude the session by summarising how to work with text boxes, slides, shapes, and images in a presentation.
● Assign the additional activity given on the panel to the students as homework.
At the end of the session, the students will be able to:
● create a copy of a slide.
● delete a slide.
● showcase a presentation.
● open a presentation.
Ask the students what a photocopy machine does.
Introduce how to duplicate a slide. Explain the steps to delete a slide. Also, get them familiar with presenting slides and steps to open an existing presentation.
Action Plan
Ask the students what a photocopy machine does.
Build the concept that like the photocopy machine
Explain the following concepts:
Group discussion
Conclude the concepts
Assign homework
5 mins
Google Slides allows us to duplicate a slide.
15 mins
Create a copy of a slide. Explain to the students how to create a duplicate slide as given on page 158.
Delete a slide. Discuss the steps of deleting a slide if it’s not needed anymore in the presentation as given on page 159.
Showcase a presentation. Tell them how to showcase a presentation as given on pages 159 and 160.
Open a presentation. Explain to the students how to open a presentation as given on page 160.
● Read aloud the questions provided in the Do It Yourself 9C section and encourage the students to solve the questions. Instruct the students to write the answers in their notebook.
Correct Responses: 4. Duplicate 5. Deleted
Build 7 mins
● Conduct a group discussion in the class among the students based on the topic ‘Will you be able to retrieve the presentation, if you accidentally deleted your presentation?’
Possible Response: Deleted presentations go to a “Trash” or “Recycle Bin” where they stay for a while before they’re deleted permanently. Yes, a deleted presentation can be restored.
3 mins
● Conclude the session by summarising how to make a copy of a slide, delete a slide that we don’t need, show the presentation to others, and open an existing presentation.
● Assign the following questions from the Chapter Checkup given at the end of the chapter as homework.
D. Write T for True and F for False: Questions 2 and 4
E. Answer the Following: Question 2
Mel and Conji are learning about magic and computers in school when they hear a beeping sound in the Computer Lab. They see Eva being pulled inside the computer screen with some dark magic. There is a secret message on the screen which they have to decode. They explore the school library to gain knowledge about it. They see a puzzle and after solving it, they get inside a dark, mysterious chamber. They find a computer screen and a pile of books inside. They get to know about a MagiTech Keystone which holds unimaginable power. They get to know from the Elders that no one has come close to finding it. By solving clues, they get a piece of the Keystone and find out that Elder Robot is behind it. He was under a dark spell and the Keystone could only break it. They find the other piece and join them together to break the spell. Mel and Conji fight a battle with Lord Ero. They cast a powerful spell with the help of the Elders on Lord Ero, and he loses his power. They finally break the spell on Eva.
This
1. Introduction to AI
2. Creative AI
At the end of the session, the students will be able to:
● identify what AI is and know how AI works at a basic level.
● recognise examples of AI in daily life.
Keywords
● AI (Artificial Intelligence): Artificial intelligence refers to the simulation of human intelligence in machines that are programmed to think and learn like humans.
● Chatbot: The word Chatbot is made from two words—chat, which means to talk, and bot, from the word ‘robot’. So, when you give voice or text commands to a chatbot, it responds to you as if it is talking to you, like a human would.
● Self-driving cars: Self-driving cars are smart cars that have AI and can move without a person driving them.
Ask the students if they think that the machines can also have ‘intelligence’. Also, ask them if they have ever wondered how Alexa responds to their voice commands.
Introduce the concept of artificial intelligence to the students.
Explain voice assistants with the help of some examples.
Action Plan
Group discussion
Conclude the concepts
Assign homework
Warm Up
● Ask the students if they think that the machines can also have ‘intelligence’.
● Also, ask them if they have ever wondered how Alexa responds to their voice commands.
● Relate the questions to the concept of artificial intelligence.
15 mins
Explain the following concepts:
Identify what AI is and know how AI works at a basic level.
Recognise examples of AI in daily life.
Introduce the students to the concept of Artificial Intelligence as given on page 166. Explain to them that artificial intelligence is the simulation of human intelligence in machines that are programmed to think and learn like humans.
Explain the concept of chatbots and self-driving cars to the students as given on page 166. Explain to them that machines with AI are common and useful in many aspects of our life. A voice assistant is an example of an AI application.
● Ask the following questions to the students to check their understanding.
● How do self-driving cars ‘see’ the road?
Correct Response:
Self-driving cars use AI to ‘see’ the road by using sensors and cameras to gather data about their surroundings. This information is then processed to navigate the road, avoid obstacles, and understand traffic conditions, allowing the car to drive safely.
7 mins
Build
● Conduct a group discussion in the class among students based on the topic “What aspects of natural intelligence do you think machines will never be able to copy?“ provided in the Discuss section as mentioned on page 167.
Possible Responses:
● Expressing Emotions
● Understanding others
● Being creative in unique ways
● Making choices from the heart
3 mins
● Conclude the session by summarising that Artificial Intelligence, or AI, is how we make machines smart, like teaching them to understand what we say and help us with tasks, such as playing music or driving cars all by themselves. It is like giving machines a brain through coding so they can think and learn.
● Assign the following questions from the Chapter Checkup given at the end of the chapter as homework.
A. Fill in the Blanks: Questions 1, 2, 3, 4, and 5
B. Tick the Correct Option: Questions 1, 3, 4, and 5
At the end of the session, the students will be able to:
● discuss how creative AI can make its own art, stories, and music.
● identify how AI can turn our drawings into animations.
● discuss how big film companies use AI to help make animated films.
Keyword
● Creative AI: The capability of AI to create things like arts, narratives, animated films, games, music, and much more is referred to as creative AI.
Ask the students that how big film companies like Disney, Warner Bros, and Sony Pictures make their characters move and talk in animated films.
Encourage the students to brainstorm about how AI can be creative.
mins
Action Plan
Group discussion
Conclude the concepts
Assign homework
mins 3 mins
5 mins
● Ask the students how big film companies like Disney and Pixar make their characters move and talk in animated films.
● Relate the questions with Creative AI.
Engage
Explain the following concepts:
Learning Outcomes
Discuss how creative AI can make its own art, stories, and music.
15 mins
Explanation
Discuss with the students that one of our natural intelligence abilities is to be creative. Similarly, creative AI refers to the capability of AI to be able to create things like art, stories, and music. Explain how AI generates the image that we are looking for, as given on page 167.
Identify how AI can turn our drawings into animations
Discuss how big movie companies use AI to help make animated films.
Discuss with the students that we can upload our handmade drawings, and the AI will animate them for us. Explain how these applications use AI to identify and locate different parts of our drawing as given on page 167.
Discuss with the students that companies, such as Disney, Warner Bros, Sony Pictures, and Netflix that make animated films use AI applications. Explain how these companies use AI in their animation process, as given on page 168.
● Ask the following questions to the students to check their understanding.
1. How does AI help turn our drawings into animations?
Correct Responses:
AI can animate our handmade drawings by identifying and locating different parts of the drawing.
2. How do you think that companies like Disney and Netflix use AI in their animation processes?
Correct Responses:
These companies use AI in their animation process which includes story development, character animation, scene creation, facial expression, etc.
7 mins
Build
● Conduct a group discussion in the class among the students based on the topic ‘Discuss why adding animations to stories can make them more fun to watch’.
Possible Responses:
● The characters and scenes come to life right before our eyes.
● Animations add movement and expression, making the story more exciting and easier to imagine.
3 mins
● Conclude the session by summarising that Creative AI helps to create its own pictures, bring drawings to life, and even help create films, making things more fun and enjoyable.
● Assign the following questions from the Chapter Checkup given at the end of the chapter as homework.
B. Tick the Correct Option: Question 2
1. Which of the following is an example of an AI application?
(a) A bicycle
(b) A traditional alarm clock
(c) Siri from Apple
(d) A mechanical typewriter
Correct Response:
(c) Siri from Apple
2. What happens when you ask a voice assistant to play a song?
(a) It writes down the lyrics.
(b) It starts playing the song.
(c) It ignores the command.
(d) It draws a picture of the song.
Correct Response:
(b) It starts playing the song.
3. Why self-driving cars are called so?
(a) Because they can only drive in circles.
(b) Because they require a human driver at all times.
(c) Because they are controlled remotely by a human.
(d) Because they can navigate and move without a person driving them.
Correct Response:
(d) Because they can navigate and move without a person driving them.
This chapter is divided into the following lab sessions
1. Introduction to Coding
2. Creating a Project and Components of Scratch
At the end of the session, the students will be able to:
● explain what coding is.
● describe block-based coding.
● explain about Scratch 3.0.
● Coding: Coding is a way of giving instructions to tell a computer what to do.
● Block-based coding: It is a computer language where we use colourful coding blocks to make computers do a task.
● Scratch 3.0: Scratch 3.0 is a free and simple platform where we use colourful blocks to create our own games, stories, and art.
Let the students watch the video or the learning slides related to the topic on the digital panel.
Explain to them what coding is; tell them about blockbased coding; and introduce them to Scratch 3.0.
5 mins
Warm Up
● Instruct the students to go to the Tekie’s Digital platform and open a Lab session on Introduction to Coding.
● Show the learning slides one by one and discuss the concepts shown on the slides in the panel.
15 mins
Engage
Explain the following concepts:
Learning Outcomes Explanation
Explain what coding is. Tell the students that coding is a way of giving instructions to tell a computer what to do, as given on page 1.
Describe block-based coding.
Tell the students that block-based coding is the language in which we use colourful code blocks to tell computers what to do, as given on page 2.
Explain about Scratch 3.0. Introduce students to Scratch 3.0. Tell them it is a free and simple platform that lets you create your own games, stories, and art, as given on page 2.
● Ask the questions provided on the slides one by one to assess the students’ understanding. Discuss the answers to the questions with the students. If necessary, ask additional relevant questions.
7 mins
Build
● Instruct the students to attempt the assignment by clicking on the Assignment tab.
● Explain the activity to the students.
Sum Up
3 mins
● Conclude the session by summarising that coding is a language used to give step-by-step instructions to computers. Block-based coding, such as Scratch 3.0, employs colourful coding blocks to create games and perform tasks. It’s a free and user-friendly platform that allows individuals to express their creativity by designing games, stories, and art through visual programming.
● Assign the additional activity given on the panel to the students as homework.
● Assign the following from the Chapter Checkup given at the end of the chapter as homework.
A. Fill in the Blanks: Question 1
E. Answer the Following: Questions 1 and 2
F. Apply Your Learning: Question 1
At the end of the session, the students will be able to:
● create a project in Scratch.
● identify and define the components of the Scratch window.
Keywords
● Sprite: A sprite can be a character or an object in a Scratch project.
● Stage: A script is a set of blocks that are placed on top of each other to make a sprite do something.
Warm Up Engage
Let the students watch the video or the learning slides related to the topic on the digital panel.
Explain to the students how to create a project in Scratch and the various components of the Scratch window.
Action Plan
Build Sum Up
Attempt the activity on the Assignment page.
Conclude the concepts
Assign homework
5 mins
Warm Up
● Instruct the students to go to the Tekie’s Digital platform and open a Lab session on Creating a Project and Components of Scratch.
● Show the learning slides one by one and discuss the concepts shown on the slides in the panel.
15 mins
Engage
Explain the following concepts:
Learning Outcomes
Explanation
Create a project in Scratch. Demonstrate to the students how to create a project in Scratch, as given on pages 2 and 3.
Identify and define the components of the Scratch window.
Introduce the students to the various components of the Scratch window, such as Menu bar, Tabs, Blocks panel, Blocks palette, Coding area, Backdrop, etc., as given on pages 3 and 4.
● Ask the questions provided on the slides one by one to assess the students’ understanding. Discuss the answers of the questions with the students. If necessary, ask additional relevant questions.
● Read aloud the questions provided in the Do It Yourself 1A section and encourage the students to solve the questions. Instruct the students to write the answers in their book.
Correct Responses:
a. Sprite
b. Sprites pane
c. Block panel
d. Script area
e. Block palette
Build
● Instruct the students to attempt the assignment by clicking on the Assignment tab.
● Explain the activity to the students.
7 mins
3 mins
● Conclude the session by summarising how to create a project in Scratch. The Scratch editor holds all the components needed to create and run a Scratch project. Some of these components are Menu bar, Tabs, Blocks panel, Blocks palette, Coding area, Backdrop, etc. Revise these components with the students.
● Assign the additional activity given on the panel to the students as homework.
● Assign the following from the Chapter Checkup given at the end of the chapter as homework.
A. Fill in the Blanks: Questions 2, 3, 4, and 5
B. Tick the Correct Option: Questions 1, 2, 3, 4, and 5
C. Who Am I?: Question 1
D. Write T for True and F for False: Questions 1, 2, 3, 4, and 5
E. Answer the Following: Questions 3, 4, and 5
F. Apply Your Learning: Questions 2, 3, 4, and 5
This chapter is divided into the following lab sessions
1. Deleting a Sprite and Ways to Add a Sprite
2. Ways to Add a Backdrop and a Costume to a Sprite
3. Project
Deleting
At the end of the session, the students will be able to:
● explain what a sprite is.
● explain what a costume is.
● delete a sprite.
● add a sprite.
Keywords
● Sprite: A character or an object on the stage.
● Costume: It is the appearance of a sprite.
● Sprites library: A collection of ready-to-use sprite images.
Let the students watch the video or the learning slides related to the topic on the digital panel.
Explain to the students what a sprite is; tell them about the costume; show them how to delete a sprite; demonstrate them how to add a sprite; also tell them how to add a backdrop.
Attempt the activity on the Assignment page.
Conclude the concepts Assign
5 mins
● Instruct the students to go to the Tekie’s Digital platform and open a Lab session on Deleting a Sprite and Ways to Add a Sprite.
● Show the learning slides one by one and discuss the concepts shown on the slides in the panel.
Engage
Explain the following concepts:
Explain what a sprite is.
Explain what a costume is.
8 mins
Tell the students that a sprite is a character or an object on the stage in Scratch, as given on page 9.
Tell the students that a costume is an appearance of a sprite that you can change to make the sprite look as if it is moving, changing, or doing many things in your project, as given on page 9.
Delete a sprite. Demonstrate to the students the steps to delete a sprite, as given on pages 10.
Add a sprite. Discuss about the different ways to add a sprite. Demonstrate to the students the steps to add a sprite, as given on pages 11 to 14.
● Ask the questions provided on the slides one by one to assess the students’ understanding. Discuss the answers to the questions with the students. If necessary, ask additional relevant questions.
14 mins
Build
● Instruct the students to attempt the assignment by clicking on the Assignment tab.
● Explain the activity to the students.
3 mins
● Conclude the session by summarising that sprites are characters that can move, talk, and do things on the stage in a project. Also, explain the students the steps to delete and add a sprite on the stage.
● Assign the additional activity given on the panel to the students as homework.
● Assign the following questions from the Chapter Checkup given at the end of the chapter as homework.
A. Fill in the Blanks: Questions 1, 2, and 3
B. Tick the Correct Option: Questions 1 and 5
C. Who Am I?: Question 2
D. Write T for True and F for False: Questions 1 and 2
E. Answer the Following: Questions 1, 3, and 5
F. Apply Your Learning: Questions 2 and 5
At the end of the session, the students will be able to:
● add a backdrop.
● add a costume to a sprite.
● duplicate the costume of a sprite.
Keyword
● Backdrops: These are the backgrounds used to set the stage for a project.
Let the students watch the video or the learning slides related to the topic on the digital panel.
Explain to the students how to add a backdrop; demonstrate them how to add a costume to a sprite; also tell them how to duplicate the costume of a sprite.
Action Plan
Attempt the activity on the Assignment page.
Conclude the concepts
Assign homework
5 mins
Warm Up
● Instruct the students to go to the Tekie’s Digital platform and open a Lab session on Ways to Add a Backdrop and Add a Costume to a Sprite.
● Show the learning slides one by one and discuss the concepts shown on the slides in the panel.
8 mins
Engage
Explain the following concepts:
Learning Outcomes Explanation
Add a backdrop. Demonstrate to the students the steps to add a backdrop, as given on pages 14 and 15.
Add a costume to a sprite.
Show to the students the steps to add a costume to a sprite, as given on pages 16 and 17.
Duplicate costume of a sprite.
Demonstrate to the students the steps to duplicate the costume of a sprite, as given on pages 18 and 19.
● Ask the questions provided on the slides one by one to assess the students’ understanding. Discuss the answers to the questions with the students. If necessary, ask additional relevant questions.
● Read aloud the questions provided in the Do It Yourself 2A and Do It Yourself 2B sections and encourage the students to solve them. Instruct the students to write the answers in their book.
Do It Yourself 2A
Do It Yourself 2A
Correct Responses:
1.
1 Match the following. Backdrop Theme Forest Theatre Farm Party

2. c Do It Yourself 2B
2 Which of the following is the default sprite in a Scratch project? a b c d
Correct Responses:
1. a. T b. F c. T
2. d.
Build
● Instruct the students to attempt the assignment by clicking on the Assignment tab.
14 mins
Just like the way we can add sprites and backgrounds, we can also add costumes to a sprite. Steps to add a costume to a sprite:
● Explain the activity to the students.
1 Select a sprite.
2 Click the Costumes tab.
3 On the left, you will see the Costumes Pane.
4 At the bottom of the Costumes Pane, we have the option to add costumes to a sprite.
Costumes Pane
● Conclude the session by summarising that backdrops are backgrounds that we use to set the stage for our projects. Also, summarise the steps to add a costume of a sprite and duplicate the costume of a sprite.
● Assign the additional activity given on the panel to the students as homework.
● Assign the following questions from the Chapter Checkup given at the end of the chapter as homework.
A. Fill in the Blanks: Questions 4 and 5
B. Tick the Correct Option: Questions 2, 3, and 4
C. Who Am I?: Questions 1, 3, 4, and 5
D. Write T for True and F for False: Questions 3, 4, and 5
E. Answer the Following: Questions 2 and 4
F. Apply Your Learning: Questions 1, 3, and 4
At the end of the session, the students will be able to:
● create a project.
Warm Up Engage Build Sum Up
Let the students watch the video or the learning slides related to the topic on the digital panel.
Demonstrate to the students how to add sprites and backdrop. Also demonstrate them how to add a costume to a sprite.
Attempt the activity on the Assignment page.
Conclude the concepts
Assign homework
● Instruct the students to go to the Tekie’s Digital platform and open a Lab session on Project
5 mins
● Show the learning slides one by one and discuss the concepts shown on the slides in the panel.
7 mins
Engage
Explain the following concept:
Learning Outcome Explanation
Create a project. Discuss a project challenge with the students. Tell them how to add the apple, farmer, and the basket sprites on the stage. Also tell them how to upload Apple Farm backdrop. To make a farmer move on the stage with a basket and catch the falling apples, add and duplicate a costume to the apple sprite.
● Ask the questions provided on the slides one by one to assess the students’ understanding. Discuss the answers to the questions with the students. If necessary, ask additional relevant questions.
15 mins
● Instruct the students to attempt the assignment by clicking on the Assignment tab.
● Explain the activity to the students.
3 mins
● Conclude the session by summarising that you can add sprites from the Sprites Library of Scratch or from your device. A costume is the appearance of a sprite. You can change the sprite’s costume to make it look like it is moving, changing, or doing many things in your project. You can also draw or edit your own sprite as per your need.
● Assign the additional activity given on the panel to the students as homework.
This chapter is divided into the following lab sessions
1. Events Blocks
2. Loops
3. Project
At the end of the session, the students will be able to:
● explain what an event is.
● explain what Events blocks do.
● create a script to make an Apple sprite appear randomly.
● explain what Motion blocks do.
Keywords
● Event: They tell us when an action will happen.
● Action: An action happens when an event occurs.
● Events blocks: They tell the computer when to run a script.
● Motion blocks: They control the movement of the sprite on the stage.
Let the students watch the video or the learning slides related to the topic on the digital panel.
Explain to them what an event is; tell them about various Events blocks and their uses; tell them about various Motion blocks and their uses; Also, tell them how to make an Apple sprite appear randomly.
Attempt the activity on the Assignment page.
Conclude the concepts
Assign homework
5 mins
● Instruct the students to go to the Tekie’s Digital platform and open a Lab session on Events Blocks.
● Show the learning slides one by one and discuss the concepts shown on the slides in the panel.
8 mins
Explain the following concepts:
Learning Outcomes Explanation
Explain what an event is.
Explain what Events blocks do.
Make an Apple sprite appear randomly.
Explain what Motion blocks do.
Tell the students that an event tells us when an action will happen, as given on page 24.
Tell the students that Events blocks tell the computer when to run a script. Also tell them about some of the Events blocks and their uses, as given on pages 24 and 25.
Tell the students that the go to random position block from the Motion block category makes a sprite go to a random location on the stage. Demonstrate how to make an Apple sprite appear randomly, by using blocks from the Events and Motion category, as given on pages 25 and 26.
2 Which block is used to make the ball bounce back when it touches
Tell the students that Motion blocks control the movement of the sprite on the stage. Also, tell them that a sprite’s X position is its location on the X (horizontal) axis of the stage, and the Y position is where the sprite is on the Y (vertical) axis of the stage. Tell them the uses of some of the Motion blocks, as given on pages 26 and 27.
● Ask the questions provided on the slides one by one to assess the students’ understanding. Discuss the answers to the questions with the students. If necessary, ask additional relevant questions.
● Read aloud the questions provided in the Do It Yourself 3A section and encourage the students to solve them. Instruct the students to write the answers in their book.
Correct Responses:
1.


2
2. b.
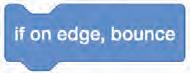
14 mins
● Instruct the students to attempt the assignment by clicking on the Assignment tab.
● Explain the activity to the students.
3 mins
● Conclude the session by summarising that an event tells us when an action will happen. The Events blocks tell the computer when to run a script, and the Motion blocks control the movement of the sprite on the stage.
● Assign the additional activity given on the panel to the students as homework.
● Assign the following questions from the Chapter Checkup given at the end of the chapter as homework.
A. Fill in the Blanks: Questions 1, 2, 4, and 5
B. Tick the Correct Option: Questions 1, 3, and 5
D. Write T for True and F for False: Questions 1, 4, and 5
E. Answer the Following: Questions 2 and 3
F. Apply Your Learning: Questions 4 and 5
At the end of the session, the students will be able to:
● explain what a loop is.
● explain what Control blocks do.
● make a sprite fall.
● move a sprite.
● duplicate a script.
● fix the rotation style for a sprite.
● duplicate the script of a sprite to another sprite.
Keywords
● Loop: It means doing something over and over again.
● Control blocks: They are used to control the flow of scripts based on a criteria.
Let the students watch the video or the learning slides related to the topic on the digital panel.
Explain to the students what a loop is; tell them about various Control blocks and their uses; demonstrate to them how to write a script to make a sprite fall, move a sprite, duplicate a script, fix the rotation style for a sprite, and duplicate the script of a sprite to another sprite.
Attempt the activity on the Assignment page.
Conclude the concepts
Assign homework
Action Plan
Warm Up
● Instruct the students to go to the Tekie’s Digital platform and open a Lab session on Loops.
● Show the learning slides one by one and discuss the concepts shown on the slides in the panel.
8 mins
Explain the following concepts:
Explain what a loop is. Tell the students that loop means doing something over and over again, as given on page 29.
Explain what Control blocks do.
Tell the students that the Control blocks are used to control the flow of scripts based on criteria. Tell them the uses of some of the Control blocks, as given on page 29.
1 Select the correct code to make the sprite move in the right direction.
Make a sprite fall. Demonstrate the steps to make a sprite fall, as given on pages 29 and 30.
Move a sprite.
Duplicate a script.
Fix the rotation style for a sprite.
Duplicate the script of a sprite to another sprite.
Demonstrate the steps to move a sprite, as given on pages 30 and 31.
Demonstrate the steps to duplicate a script, as given on pages 31 and 32.
Demonstrate the steps to fix the rotation style for a sprite, as given on page 32.
Demonstrate the steps to duplicate the script of a sprite to another sprite, as given on pages 32 to 34.
● Ask the questions provided on the slides one by one to assess the students’ understanding. Discuss the answers to the questions with the students. If necessary, ask additional relevant questions.
● Read aloud the questions provided in the Do It Yourself 3B section and encourage the students to solve them. Instruct the students to write the answers in their book.
Correct Responses:
1. c.
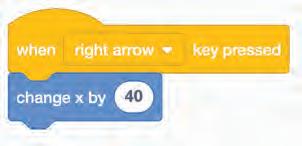
2. b. X-axis
Build
● Instruct the students to attempt the assignment by clicking on the Assignment tab.
● Explain the activity to the students.
14 mins
● Conclude the session by summarising that loops means doing something over and over again. The Control blocks are used to control the flow of scripts based on a criteria and these blocks appear in orange colour. Examples of the Control blocks are repeat(), forever, and wait() seconds.
● Assign the additional activity given on the panel to the students as homework.
● Assign the following questions from the Chapter Checkup given at the end of the chapter as homework.
A. Fill in the Blanks: Question 3
B. Tick the Correct Option: Questions 2 and 4
C. Who Am I?: Question 1
D. Write T for True and F for False: Questions 2 and 3
E. Answer the Following: Questions 1, 4, and 5
F. Apply Your Learning: Questions 1, 2, and 3
At the end of the session, the students will be able to:
● create a project.
Warm Up Engage Build Sum Up
Let the students watch the video or the learning slides related to the topic on the digital panel.
Demonstrate to the students how to create a project using the blocks from the Events, Motion, and Control category.
Action Plan
Attempt the activity on the Assignment page.
Conclude the concepts
Assign homework
● Instruct the students to go to the Tekie’s Digital platform and open a Lab session on Project.
5 mins
● Show the learning slides one by one and discuss the concepts shown on the slides in the panel.
8 mins
Engage
Explain the following concept:
Learning Outcome Explanation
Create a project. Discuss a project challenge with the students. Tell them how to use the Events, Motion, and Control blocks to create a project. To make an apple sprite appear randomly and start falling, make a farmer and basket sprites move to the left and right. Make the apple sprite disappear if the falling apple touches the basket, but if the falling apple touches the ground, the apple should break.
● Ask the questions provided on the slides one by one to assess the students’ understanding. Discuss the answers to the questions with the students. If necessary, ask additional relevant questions.
14 mins
● Instruct the students to attempt the assignment by clicking on the Assignment tab.
● Explain the activity to the students.
3 mins
● Conclude the session by summarising that the Events blocks tell the computer when to run a script and the Motion blocks control the movement of the sprite on the stage. The Control blocks are used to control the flow of scripts based on a criteria.
● Assign the additional activity given on the panel to the students as homework.
This chapter is divided into the following lab sessions
At the end of the session, the students will be able to:
● define conditional bocks.
● describe sensing blocks.
● make a sprite disappear on touching another sprite.
Keywords
● Conditional blocks: These are the blocks that help a computer make decisions depending on the condition it checks.
● Sensing blocks: These are the blocks that detect other sprites, colour on the stage, keypress, mouse click, and user input.
Let the students watch the video or the learning slides related to the topic on the digital panel.
Explain the students what conditional and sensing blocks are. Also tell them how to make a sprite disappear on touching another sprite.
Attempt the activity on the Assignment page.
Conclude the concepts
Assign homework
5 mins
● Instruct the students to go to the Tekie’s Digital platform and open a Lab session on Conditional and Sensing Blocks-I.
● Show the learning slides one by one and discuss the concepts shown on the slides in the panel.
Explain the following concepts:
Define conditional bocks.
Describe sensing blocks.
Make a sprite disappear on touching another sprite.
Explain to students that conditional blocks are the blocks that help a computer make decisions depending on the condition it checks, as given on pages 42 and 43.
Explain to students that sensing blocks are the blocks that detect other sprites, they also detect the colour on the stage, keypress, mouse click, and the user input, as given on page 43.
Demonstrate the steps to the students on how to make a sprite disappear and then come back from a random place, as given on pages 43 to 45.
● Ask the questions provided on the slides one by one to assess the students’ understanding. Discuss the answers to the questions with the students. If necessary, ask additional relevant questions.
● Instruct the students to attempt the assignment by clicking on the Assignment tab.
● Explain the activity to the students. Sum Up 3 mins
● Conclude the session by summarising that conditional blocks are the blocks that help a computer make decisions depending on the condition it checks, and sensing blocks are the blocks that detect other sprites, they also detect the colour on the stage, keypress, mouse click, and the user input. Also, discuss the steps on how to make a sprite disappear on touching another sprite.
● Assign the additional activity given on the panel to the students as homework.
● Assign the following questions from the Chapter Checkup given at the end of the chapter as homework.
A. Fill in the Blanks: Questions 1, 2, 3, and 4
B. Tick the Correct Option: Questions 1 and 3
D. Write T for True and F for False: Questions 1, 2, 3, 4, and 5
E. Answer the Following: Questions 1, 2, 3, 4, and 5
F. Apply Your Learning: Question 2
At the end of the session, the students will be able to:
● make a sprite disappear on touching a colour.
● change the costume of a sprite.
Let the students watch the video or the learning slides related to the topic on the digital panel.
mins
Explain the students about how to make a sprite disappear on touching a colour and how to change the costume of a sprite.
mins
Attempt the activity on the Assignment page.
Conclude the concepts Assign homework
mins 3 mins
5 mins
Instruct the students to go to the Tekie’s Digital platform and open a Lab session on Conditional and Sensing Blocks-II
Show the learning slides one by one and discuss the concepts shown in the panel.
Engage
Explain the following concepts: Learning Outcomes
Make a sprite disappear on touching a colour.
15 mins
Demonstrate the steps to the students on how to make a sprite disappear on touching a colour, as given on pages 45 to 47.
Change the costume of a sprite. Demonstrate the steps to the students on how to change the costume of a sprite, as given on pages 47 and 48.
● Ask the questions provided on the slides one by one to assess the students’ understanding. Discuss the answers to the questions with the students. If necessary, ask additional relevant questions.
● Read aloud the questions provided in the Do It Yourself 4A section and encourage students to solve them. Instruct them to write the answers in their book.
Correct Responses:
Build
● Instruct the students to attempt the assignment by clicking on the Assignment tab.
● Explain the activity to the students.
Sum Up
7 mins
3 mins
● Conclude the session by summarising the steps to make a sprite disappear on touching a colour. Also, discuss the steps to change the costume of a sprite.
● Assign the additional activity given on the panel to the students as homework.
● Assign the following questions from the Chapter Checkup given at the end of the chapter as homework.
B. Tick the Correct Option: Questions 2, 4, and 5
C. Who Am I?: Question 1
F. Apply Your Learning: Questions 1, 3, 4, and 5
This chapter is divided into the following lab sessions
1. Looks Blocks
2. Making a Sprite Say Something
At the end of the session, the students will be able to:
● describe about Looks blocks.
Keyword
3. Sound Blocks
4. Making a Sprite Make Sound
● Looks blocks: The Looks blocks are the blocks that control how a sprite looks.
Warm Up Engage Build
Let the students watch the video or the learning slides related to the topic on the digital panel.
Describe what Looks blocks are. Tell them about some of the Looks block.
Action Plan
Attempt the activity on the Assignment page.
Sum Up
Conclude the concepts
Assign homework
5 mins
Warm Up
● Instruct the students to go to the Tekie’s Digital platform and open a Lab session on Looks Blocks.
● Show the learning slides one by one and discuss the concepts shown on the slides in the panel.
Engage
Explain the following concept:
Describe about Looks blocks.
Demonstrate to them what Looks blocks are. Also explain some blocks from the Looks block category such as say hello for 2 seconds, next costume, etc., as given on pages 54 and 55.
● Ask the questions provided on the slides one by one to assess the students’ understanding. Discuss the answers of the questions with the students. If necessary, ask additional relevant questions.
7 mins
Build
● Instruct the students to attempt the assignment by clicking on the Assignment tab.
● Explain the activity to the students.
Sum Up
3 mins
● Conclude the session by summarising that the Looks blocks are the blocks that control how a sprite looks. Tell them about some of the blocks from the Looks block category, such as say hello for 2 seconds, next costume, etc.
● Assign the additional activity given on the panel to the students as homework.
● Assign the following questions from the Chapter Checkup given at the end of the chapter as homework.
A. Fill in the Blanks: Question 3
At the end of the session, the students will be able to:
● make a sprite say something.
Warm Up Engage Build Sum Up
Let the students watch the video or the learning slides related to the topic on the digital panel.
Demonstrate to them the steps to make a sprite say something.
Action Plan
Attempt the activity on the Assignment page.
Conclude the concepts
Assign homework
5 mins
Warm Up
● Instruct the students to go to the Tekie’s Digital platform and open a Lab session on Make a sprite Say Something.
● Show the learning slides one by one and discuss the concepts shown on the slides in the panel.
Engage
Explain the following concept:
Learning Outcome
Make a sprite say something.
15 mins
Explanation
Tell them that we will use the ‘Say’ block to make the sprite talk in Scratch. Demonstrate to them the steps to make a sprite say something, as given on page 55.
● Ask the questions provided on the slides one by one to assess the students’ understanding. Discuss the answers to the questions with the students. If necessary, ask additional relevant questions.
7 mins
● Instruct the students to attempt the assignment by clicking on the Assignment tab.
● Explain the activity to the students.
3 mins
● Conclude the session by summarising that in order to make a sprite say something we use the Say block. Then demonstrate to them the steps to make a sprite say something.
● Assign the additional activity given on the panel to the students as homework.
● Assign the following questions from the Chapter Checkup given at the end of the chapter as homework.
A. Fill in the Blanks: Question 1
B. Tick the Correct Option: Question 2
D. Write T for True and F for False: Questions 2 and 4
At the end of the session, the students will be able to:
● describe about Sound blocks.
Keyword
● Sound blocks: Sound blocks are the blocks that control the sound.
Let the students watch the video or the learning slides related to the topic on the digital panel.
Describe what Sound blocks are. Tell them about some of the Sound blocks.
Action Plan
Attempt the activity on the Assignment page.
Conclude the concepts
Assign homework
5 mins
● Instruct the students to go to the Tekie’s Digital platform and open a Lab session on Sound Blocks
● Show the learning slides one by one and discuss the concepts shown on the slides in the panel.
Engage
Explain the following concept:
Learning Outcome Explanation
Describe about Sound blocks.
15 mins
Demonstrate to them what Sound blocks are. Also explain some blocks from the Sound block category such as play sound until done, start sound, stop all sound, etc., as given on page 56.
● Ask the questions provided on the slides one by one to assess the students’ understanding. Discuss the answers to the questions with the students. If necessary, ask additional relevant questions.
● Read aloud the questions provided in the Do It Yourself 5A section and encourage the students to solve the questions. Instruct the students to write the answers in their book.
Correct Responses: Do It Yourself 5A


Build
A sound in the Sound Pane.
Make a sprite say something for the specified amount of time.
Play a sound until it completes.
Add a new sound.
● Instruct the students to attempt the assignment by clicking on the Assignment tab.
● Explain the activity to the students.
Sum Up
7 mins
3 mins
● Conclude the session by summarising that Sound blocks are the blocks that control the sound. Tell them about some blocks from the Sound block category such as play sound until done, start sound, stop all sound, etc.
● Assign the additional activity given on the panel to the students as homework.
● Assign the following questions from the Chapter Checkup given at the end of the chapter as homework.
A. Fill in the Blanks: Questions 2 and 4
B. Tick the Correct Option: Questions 1, 3, and 4
C. Who Am I?: Questions 1 and 2
D. Write T for True and F for False: Questions 1 and 3
E. Answer the Following: Question 1
At the end of the session, the students will be able to:
● make a sprite play a sound.
Warm Up Engage Build Sum Up
Let the students watch the video or the learning slides related to the topic on the digital panel.
Demonstrate to the students the steps to make a sprite play a sound.
Action Plan
Attempt the activity on the Assignment page.
Conclude the concepts
Assign homework
5 mins
Warm Up
● Instruct the students to go to the Tekie’s Digital platform and open a Lab session on Making a Sprite Make Sound.
● Show the learning slides one by one and discuss the concepts shown on the slides in the panel.
Engage
Explain the following concept:
Learning Outcome Explanation
Make a sprite play a sound.
15 mins
Tell the students that we use the Play block to add music or sound effects to their Scratch project. Demonstrate to them the steps to make a sprite play a sound, as given on pages 56 to 59.
● Ask the questions provided on the slides one by one to assess the students’ understanding. Discuss the answers of the questions with the students. If necessary, ask additional relevant questions.
7 mins
● Instruct the students to attempt the assignment by clicking on the Assignment tab.
● Explain the activity to the students.
3 mins
● Conclude the session by summarising that we use the Play block to add music or sound effects to the Scratch project. Demonstrate to them the steps to make a sprite play a sound.
● Assign the additional activity given on the panel to the students as homework.
● Assign the following questions from the Chapter Checkup given at the end of the chapter as homework.
E. Answer the Following: Question 2
F. Apply Your Learning: Questions 1 and 2
A. Fill in the Blanks.
1. Data 2. information 3. Devices 4. 1024 5. GBs and TBs 6. ROM, RAM
7. Primary, Secondary
B. Tick () the Correct Option.
1. a. Hard Drive 2. b. Cloud Storage 3. a. Byte 4. b. Two
5. b. The user clicks on the Print command.
C. Who Am I?
1. Memory Card 2. Data 3. RAM 4. Cloud Storage
D. Write T for True and F for False.
1. F 2. F 3. T 4. T
E. Answer the Following.
1. Yes, a computer is an electronic device or machine that performs various calculations and carries out different tasks for us based on the instructions that we give it.
2. There are two types of computer memories—Primary and Secondary.
Primary Memory is the computer’s internal memory where it stores data related to currently running programs. It is the built-in memory of the computer. It is always accessible to the CPU.
Secondary memory is the computer’s external storage that stores data and programs that are not in use by the computer’s processor.
3. Secondary memory, also called auxiliary memory, is the computer’s external storage. It is used to store data and programs that are not in use by the computer’s processor. Some examples are hard disk drive (HDD), pen drive, memory card, etc.
4. Cloud Storage is a digital space where you can store your files and get them whenever you want, using the internet.
Some advantages are as follow:
● Cloud Storage can provide large storage capacity. Often, we get free Cloud Storage of up to a few GBs
● It is like a big storage space on the internet where you can keep all your files and access them from any device, anywhere, and anytime , as long as you are connected to the internet.
5. Data:
● Data is facts, numbers, or symbols that we collect and enter into the computer.
● Data takes up less space.
Information:
● Information is the knowledge or understanding that we gain when the computer analyses and organises the data that we entered in it.
● Information may require more storage due to added context and structure.
F. Apply Your Learning.
1. Cloud Storage
2. She should keep in mind the capacity of the RAM and hard disk.
3. No, Rahul will not find his website exactly as he left it when he turns his computer on again after the power cut. When a computer unexpectedly shuts down, such as during a power cut, any unsaved work or changes made since the last save will be lost.
A. Fill in the Blanks.
1. Operating system 2. booting 3. desktop 4. Cortana Search 5. notification
B. Tick () the Correct Option.
1. c. Mouse Pointer Personalization 2. c. Volume Control 3. b. Search Bar 4. c. Wallpaper
C. Who Am I?
1. Operating System 2. Desktop 3. Icon 4. Taskbar 5. Cortana
D. Write T for True and F for False.
1. F 2. F 3. T 4. T
E. Answer the Following.
1. An Operating System is a software that helps us to communicate with the computer and tell it what to do.
2. Features of the Windows 10 operating system are Aero Peek, Cortana, the Start button, the Search button, the Desktop Show/Hide button, etc.
3. When we press the power button to turn on a computer, the computer starts getting the system ready for use. This process is called booting.
4. Cortana Search helps you find things on your computer using voice or text-based searches. Cortana responds with a voice.
5. Aero Peek is a feature in Windows that lets you see your desktop without actually minimising any of your open windows. To use Aero Peek, you just need to hover your mouse over open applications in the taskbar.
F. Apply Your Learning.
1. Anika can customise the colour and font settings of her Windows 10 interface, by following the given steps:
i. Click the Start button and select the Settings option.
ii. Choose the Personalization option from the menu.
iii. Select the Colors option from the sidebar and choose a colour of your choice.
iv. Now, select the Fonts option from the sidebar and choose the font style and size.
v. Preview the font as you make the changes.
2. Rahul can customise the appearance of his mouse pointer by following the given steps:
i. Type “control” in the Search bar
ii. Choose the Control Panel app.
iii. Choose the Mouse option.
iv. Go to the Pointers tab in the Mouse Properties window.
v. Choose a Pointer of your choice from the Customize section.
vi. Preview and select your favourite pointers.
vii. Click on Apply and then the OK buttons to save the changes.
3. Anika can change the wallpaper on her Windows 10 desktop to a picture of her favourite superhero, by following the given steps:
i. Right-click on the desktop.
ii. Select the Personalize option.
iii. Select the Background option.
iv. Click on the Browse tab and select the picture from its location on the computer.
4. Rohit can adjust the volume of the music on his computer, by following the given steps:
i. Click on the Speaker icon at the right-hand corner of the taskbar.
ii. Choose the Open Volume mixer option.
iii. Move the volume slider up or down to adjust the volume as you want.
5. John should change the date and time settings on his computer by following the given steps:
i. Open Settings from the Start button.
ii. Select the Time & Language option.
iii. Select the Date & Time option.
iv. Toggle the switch to turn on the automatic time settings.
Chapter Checkup
A. Fill in the Blanks.
1. containers 2. Recycle Bin 3. information 4. Ctrl 5. Cut
B. Tick () the Correct Option.
1. a. Opens it 2. b. Group similar files together 3. a. Digital containers of information
4. a. folder inside another folder
C. Who Am I?
1. Folder 2. File 3. Recycle Bin 4. Cut and Paste
D. Write T for True and F for False.
1. T 2. F 3. T 4. F
E. Answer the Following.
1 A file is a digital space used to store different types of information on a computer. It acts like a container for items like images, videos, texts, and so on. A folder is a container that stores and organises files and other folders.
2.
Moving a file means removing it from its original position and pasting it to another location.
When we want to move a file on a computer, we can use a special command called Cut and Paste.
Duplicating a file means making an exact copy of a file and pasting the copied file into a different location.
When we want to duplicate a file on a computer, we can use a special command called Copy and Paste.
3. Shortcut icon helps us quickly open a file or folder. Shortcut icons are usually kept on the desktop to open the most frequently used items.
F. Apply Your Learning.
1. Avni should not explore the shared folder without Nishant’s permission because one must be respectful of others’ files. One must not explore the files that belong to someone else without their permission.
2. Raj can get the deleted picture back by restoring the file using the following steps:
i. Opening the Recycle Bin on his computer.
ii. Right-clicking on the file he wants to restore.
iii. Selecting the Restore option from the pop-up menu.
3. No, it is not a wise thing to do because folders can be used to organise files and make them easier to find. Tany should therefore, store the maths homework in the ‘Maths’ folder only.
4. Satish must follow the given steps to create a new folder:
i. Right-click on an empty space on the desktop. A pop-up menu will appear.
ii. Select the New option.
iii. Click on the Folder option.
5. Rina can make a copy of the file in another folder by following the given steps:
i. Right-click on the file that she wants to copy. A pop-up menu will appear.
ii. Click on the Copy option.
iii. Open the folder she wants to paste it in.
iv. Right-click on the empty space in the desired folder. Then, select the Paste option.
A. Fill in the Blanks.
1. computers 2. ARPANET 3. websites 4. information 5. Uniform Resource Locator
B. Tick () the Correct Option.
1. d. All of the above
2. a. A program that lets you see websites on the internet
3. a. Browsing the internet to visit various websites
4. a. To access websites on the internet
5. a. To connect our computer to the internet and exchange information between the two
C. Who Am I?
1. URL 2. Search Engines 3. WWW 4. Modem 5. DSL
D. Write T for True and F for False.
1. T 2. T 3. T 4. F 5. T
E. Answer the Following.
1. The internet is a network of networks that connects computers and devices from all over the world. It allows people to collect and share information, and communicate with each other.
2. Just as we can do only two things with the switch on the switchboard—turn it on or turn it off, similarly, a digital signal either comes in or does not come in.
Just as how a regulator on the switchboard changes the speed at which the fan spins- we can have the fan spin at the fastest speed, reduce it to a slower speed and finally switch it off. That is how analog signal is.
3. A webpage is a digital document on the internet. It can have text, images, videos, and other content.
4. The basic requirements for an internet connection are:
i. Modem: A device that will help connect the computer to the internet.
ii. Internet Service Provider: A company that provides access to the internet.
iii. Communication Media: Different types of connections, like DSL (telephone lines), television cable wires, and fibre optic cables, that connect the computers to the internet.
5. Search engines are used to find information on the internet. Some examples of search engines are Google, Bing, etc.
F. Apply Your Learning.
1. Riya can use the email service on the internet to wish her friend on his/her birthday. She would need a modem, an ISP and a communication media to connect to and use the internet.
2. DSL
3. Yes, I can help Rohan by telling him that:
a. A webpage is a single document on the internet that can have text, images, videos, and other content whereas, a website is a collection of multiple webpages that are all related to each other.
4. Some popular search engines that Lovey can use are:
a. Google b. Yahoo c. Bing
Chapter Checkup
A. Fill in the Blanks.
1. light bulbs 2. connected, communicate 3. sensing feature 4. electronic
1. a. Internet of Things
2. d. All of the above
3. b. Make it dim or bright
4. b. Using a smartphone or smart speaker
C. Who Am I?
1. IOT-enabled devices 2. Sensors 3. Smart Cars 4. Smartwatches 5. Smart Speakers
D. Write T for True and F for False.
1. F 2. T 3. T 4. F 5. T
E. Answer the Following.
1. IoT is a network of devices that are connected over the internet and can communicate with one another.
2. Feature Meaning Purpose
Connectivity Connecting devices together IoT connects devices to the internet, letting them share information with each other.
Analysing Observing our usage IoT observes how we use our devices so that it can keep helping us.
Automation Making things happen on their own IoT can make devices do things automatically based on our likes and dislikes.
Safety and Security Keeping things safe IoT helps us keep our devices and date safe.
Scalability Handling more or less number of devices. IoT can handle as many devices as we need. We can add more devices to it or remove them if we don’t need them anymore.
3. A smart speaker listens to what we say and replies accordingly, answer our questions, sets timers to help us remember things, and controls other smart devices as we ask it too; whereas regular speakers cannot do these things.
4. No, not all smart devices are IoT-enabled. Any device that can be connected to the internet does not necessarily mean that it can be connected to an IoT-based home. Only those devices that can be connected to the internet and can communicate with other devices in the network are called IoT-enabled devices.
F. Apply Your Learning.
1. IoT-enabled devices that are mentioned here are smart camera and security door.
2. Amit’s smart refrigerator can help him check if he has enough milk at home or not.
3. Mr Kapoor gets a message on his phone that his car is over-speeding because his smart car is IoT-enabled.
Chapter Checkup
A. Fill in the Blanks.
1. steps 2. problem solving 3. thinking, decision
B. Write T for True and F for False.
1. F 2. F 3. F
C. Number the Steps in the Correct Order.
1. i. Open the tap ii. Wash her hands iii. Close the tap iv. Apply Soap v. Open the tap again vi. Rinse hands again vii. Close the tap again viii. Wipe hands with a towel
2. i. Take brush from the shelf ii. Open the tap iii. Rinse the brush a little iv. Close the tap
v. Apply toothpaste on brush vi. Brush teeth vii. Open the tap again viii. Rinse mouth
ix. Clean the brush and close the tap
D. Apply Your Learning.
1. Steps to make a cucumber and tomato sandwich are:
i. Take 2 slices of bread.
ii. Toast the bread.
iii. Add slices of cucumber and tomato on one slice of bread.
iv. Place the second slice of bread on top of the first slice and serve.
2. Steps to organise a birthday party are:
1. Fix the date and venue of the party.
2. Call people to invite, and note the names of those who will come.
3. Decide the menu.
4. Decorate venue.
5. Get a gift and make/order the birthday cake.
3. We can make the card in 3 steps:
i. Get all the things we need—paper, markers, scissors, glitters, etc.
ii. Write the message.
iii. Decorate the card.
Yes, the step “Decorate the card” can be broken down into smaller steps like drawing pictures, adding stickers, glitters, etc.
Chapter Checkup
A. Fill in the Blanks.
1. plus (+) 2. raised 3. top 4. File 5. word processor
B. Tick () the Correct Option.
1. a. To add structure to the document
2. a. The text at the top of every page
3. a. Select the text and click on Superscript in the Format menu
4. d. Click on the Page setup option in the File menu
5. c. Insert menu
C. Who Am I?
1. Google Docs 2. Paint Format 3. Indentation 4. Page orientation 5. Header
D. Write T for True and F for False.
1. F 2. T 3. F 4. T 5. T
E. Answer the Following.
1. Superscript is used to raise the text or number above the regular line, in a document. For example, the “rd” in 3rd
2. Page orientation is choosing if we want our paper to be longer or wider when we type on it.
Steps to change the page orientation:
a. Click on File, and then select Page setup.
b. In the Page setup dialog box, in the Orientation section, select the Portrait or Landscape option.
c. Click on OK.
3. Steps to insert a line break:
a. Click where you want the line break to appear.
b. Press Enter.
4. Paint Format is used to copy and apply the styles from one text to another.
5. Page margins are the spaces around the edges of your paper where we don’t type. Steps to change the page margins:
a. Click on File, and then select Page setup.
b. In the Page setup dialog box, go to the Margins section, enter the numbers in the Top, Bottom, Left, and Right margins.
c. Click on OK.
F. Apply Your Learning.
1. Aman can add his name and roll number in the Header so that it appears on every page of the document.
2. Simran can adjust page margins under the File > Page setup to narrow the margins. She can also arrange her text in multiple columns through Format > Columns.
3. Rahul can use a line break to separate his poem into different stanzas. In order to do that, he can either press Enter at the start of the line he wants to separate or go to Insert > Break.
4. He can adjust the width of his document by clicking on File > Page setup and then changing the orientation to Landscape or reducing the values in Left and Right under Margins.
Chapter Checkup
A. Fill in the Blanks.
1. Drawing 2. text flow 3. background 4. Crop 5. look
B. Tick () the Correct Option.
1. c. To decorate the document with pre-made drawings
2. d. Click on the image → Click on Crop tool
3. b. Adjusting the text around an image
4. c. To show ownership of the document
C. Who Am I?
1. Crop tool 2. Text Wrap 3. Watermark 4. Find and Replace
D. Write T for True and F for False.
1. T 2. T 3. F 4. T 5. F
E. Answer the Following.
1. Click on Insert menu → Click on Watermark option → Select Image → Click on Browse button → Click Upload button
2. Different text-wrapping styles are:
● Inline with text
● Wrap text
● Break text
● Behind text
● In front of text
3. Cropping an image means to remove unwanted parts of an image.
4. Clipart is a computer-made image which is available on the internet. Clipart can be of anything—animals, people, objects, or even scenes. It is different from an image or a shape. Shapes are the outlines of things we see around us. Shapes can be flat or have depth. Examples of shapes are circles, squares, cubes, cones, etc. A shape can be filled using the Fill color tool. Shapes can be inserted from the drawing toolbar
of Google Docs. An image or a picture is a visual representation of a drawing, painting, or photograph. Images can be inserted from a computer or from the web.
5. Replace means to take out the old text and add a new text instead. In the Replace with box, enter the word you want to replace a pre-existing word with. Click on Next to locate the first instance of the word that you want to replace. If you want to replace all instances of that word, click Replace all
F. Apply Your Learning.
1. Click Insert → Drawing → New → Select shape → Click and drag in the drawing area → Fill color tool → Fill colours in the shape.
2. Aman should use the Find and replace tool.
3. Sonam can either insert images from the web or use Clipart.
4. Simran can insert images from her computer and save them.
5. Ritu can use a watermark.
Chapter Checkup
A. Fill in the Blanks.
1. presentation 2. move 3. Toolbar 4. automatically
B. Tick () the Correct Option.
1. b. Sharing information with others
2. d. Paint
3. a. By clicking on the + button on the toolbar
4. a. Insert
C. Who Am I?
1. Google Slides 2. Crop tool 3. Resize 4. Fill color tool
D. Write T for True and F for False.
1. F 2. T 3. F 4. T
E. Answer the Following.
1. Click on the Insert tab at the menu bar → Image menu → Select “Upload from computer” → Select the image you want to add to the slide.
2. Steps to duplicate a slide:
● Select the slide you want to duplicate from the Slides Panel.
● Right-click on the slide, and then select the Duplicate slide option.
3. Click on Insert tab → Text box → Move the mouse cursor on the screen where you want to add the text box, then press the left button on the mouse.
4. Google Slides are used for making online presentations.
5. The method to insert a shape in Google Slides is:
● Click on the Insert tab in the menu bar.
● Select the Shape option from the drop-down menu. Then, select the Shapes option.
● Click on the shape you want. It will appear on your slide.
F. Apply Your Learning.
1. Shikha can add an image to her slide with text by following these steps: Click on the Insert tab → Image → select “Upload from computer” option. A selection window opens. She can then select the image that you want to put on the slide.
2. Rahul can add shapes to his slides by clicking on Insert → selecting Shape → selecting any of the options in Shapes
3. Resizing is changing the size of image from small to large and vice versa, whereas Cropping means to remove those parts of the image that we do not want to show.
4. Right-click in the slide panel → Select the New slide option. A new slide will appear below Shubham’s current slide.
5. Jyoti can add colour to the shapes on her Google Slide in the following way:
● Select the part of the shape that you want to colour.
● Click on the Fill color tool on the toolbar and select the colour of your choice.
Chapter Checkup
A. Fill in the Blanks.
1. Artificial Intelligence 2. mental 3. voice 4. coding 5. human
B. Tick () the Correct Option.
1. Natural Intelligence 2. Artificial Intelligence 3. Artificial Intelligence 4. Natural Intelligence
5. Artificial Intelligence
Chapter-1 Introduction to Scratch 3.0
Chapter Checkup
A. Fill in the Blanks.
1. Coding 2. Blocks Palette 3. Stage 4. Sprites Pane 5. Stop
B. Tick () the Correct Option.
1. d. All of these 2. a. Open the Sound editor 3. a. Coding Area 4. b. run the script
5. d. All of these
C. Who Am I?
Sprites Pane
Backdrop Pane
Blocks Panel
Blocks Palette
Holds nine categories of blocks
Shows backdrops and sprites in action
Shows the details of sprites
Adds backgrounds
Stage Holds all blocks of each block category
D. Write T for True and F for False.
1. F 2. T 3. F 4. T 5. T
E. Answer the Following.
1. Block-based coding is a computer language where we use colourful coding blocks to make computers do a task.
2. Scratch 3.0 is a free and simple platform where we use colourful blocks to create our own games, stories, and art.
3. The Code tab has different code blocks and the Coding Area, where we can drag and join the blocks to make the sprite move and do things.
4. The Add Extensions button provides additional blocks that can be integrated into the Scratch editor’s block palette, expanding its functionality.
5. The green flag is the Go button. You can click on it to run the script. The red button is the Stop button. You can click on it to stop the script from running.
F. Apply Your Learning.
1. She can start with block-based coding like Scratch 3.0. It is a free and simple platform where we use colourful blocks to create our own games, stories, and art.
2. Sprite
3. Blocks Panel
4. Change costumes
5. Backdrop
A. Fill in the Blanks.
1. Sprite 2. Sprite Library 3. Costume 4. Upload Backdrop 5. Choose a Costume
B. Tick () the Correct Option.
1. c. Upload Sprite 2. c. Costumes 3. c. Duplicate 4. c. 5. c. Add sprite
C. Who Am I?

1. Backdrop 2. Delete 3. Duplicate 4. Costume 5. Upload Backdrop
D. Write T for True and F for False.
1. T 2. F 3. F 4. T 5. T
E. Answer the Following.
1. In Scratch, sprite is a character that can act. Ways to add a sprite to a project are:
1. Choose a Sprite
2. Paint
3. Surprise
4. Upload Sprite
2. Backdrop Pane is used to add background to our project.
3. Cat sprite is the default sprite in Scratch. Before adding the sprites to our project, we need to remove the Cat sprite. Steps to remove the Cat sprite are:
● Select the thumbnail of the Cat sprite from the Sprite List.
● Delete icon will appear.
● Click the delete icon to delete the sprite.
4. A costume is the appearance of a sprite.
Steps to add costume to a sprite:
● Select a sprite.
● Click the Costumes tab.
● On the left, you will see the Costumes Pane.
● At the bottom of the Costumes Pane, we have the option to add costumes to a sprite.
5. Steps to duplicate costume of a Sprite:
● Select the sprite in the Sprites List.
● Click the Costumes tab.
● Right-click the sprite in the Costumes Pane
● Click the duplicate option.
F. Apply Your Learning.
1. a. Delete b. Backdrop Pane
2. Steps to make copies of a sprite:
● Select the sprite.
● Click the Costumes tab.
● Right-click the sprite in the Costumes Pane
● Click the duplicate option.
3. 1. Upload Backdrop
2. Paint
3. Choose a Backdrop
4. Costumes tab
5. Steps to upload a sprite:
● Click the Upload Sprite option. An Open dialog box appears.
● Look for the picture of the sprite in the Downloads folder and select it.
● Click the Open button.
● Set the Size of the sprite.
● Repeat steps 1 to 4 to upload and resize the other two sprites.
Chapter Checkup
A. Fill in the Blanks.
1. go to random position
2. rotation
3. repeat
4. blue
5. Event
B. Tick () the Correct Option.
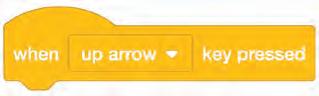
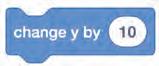
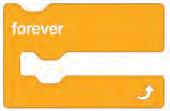
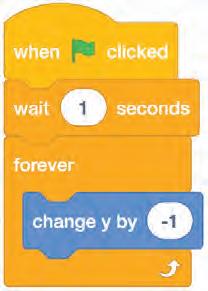


D. Write T for True and F for False.
1. T 2. T 3. F 4. T 5. T
E. Answer the Following.
Moves the sprite to forward or backwards with a positive or negative value, respectively.
Moves the sprite to upwards or downwards with a positive or negative value, respectively.
Pauses the script for specified seconds.
1. In Scratch, the repeat blocks help us to control the actions of a sprite as many number of times as we want.
2. a. “change x by 100” moves the sprite forward by 100 steps.
b. “change y by -100” moves the sprite downwards by 100 steps.
3. In Scratch, Events blocks tell the computer when to run a script.
4. The sprite will move forward by 10 steps on pressing the spacebar key.
5. Repeat: A loop that repeats for the specified number of times.
Forever: Runs the given set of blocks forever until the Stop button is pressed.
F. Apply Your Learning.
1.

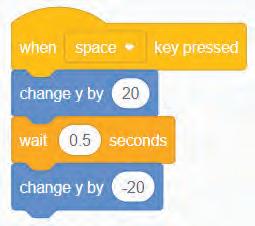
3. The sprite will move upwards by 2 steps.
4. Here, the rotation style of the sprite is incorrectly set to “all around”. The rotation style of the sprite must be set to “left-right”.

5. The Penguin sprites are moving along x-axis because they are going right.
Chapter Checkup
A. Fill in the Blanks.
1. condition 2. if…then, if…then…else 3. sprites 4. blue
B. Tick () the Correct Option.
1. b. Sensing blocks
2. c. It should disappear
3. d.

4. d. It changes costume
5. c. To change its appearance


D. Write T for True and F for False.
1. T 2. T 3. T 4. F 5. T
E. Answer the Following.
Activates the blocks below it when a sprite touches the specified colour.
Checks the condition and if the condition is true, the blocks inside it will be activated.
Shows the input box at the bottom of the screen to receive an answer from the user.
Activates the blocks below it when a sprite touches the specified object.
1. In Scratch, Sensing blocks are blocks that are used to detect when two characters touch each other. They are important as they detect other sprites, colours on stage, key press, mouse click, and user input.
2. Conditional blocks are blocks that help a computer make decisions depending on the condition it checks. In Scratch, we have two conditional blocks: if…then and if…then…else
3. We can use Sensing blocks in Scratch to make a character react.
4. The answer block stores the answer that was entered in the input box.
5. This block checks the condition and then lets the blocks inside the if block perform the operation. Otherwise, the blocks inside the else block will perform the operation.
F. Apply Your Learning.
1. 2 1 3
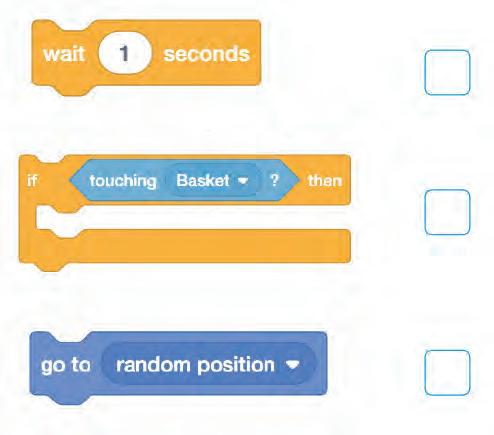
2. This block checks the if then block, if it is raining outside then you need to take your umbrella.
3. When the sprite will touch the given colour, the go to random position block will activate and it will make the sprite go to a random position that can be anywhere on the stage.
4. The switch costume to block will change the costume of Balloon 1 to Balloon 2 when the green flag is clicked. Since balloon 2 costume is yellow in colour, the balloon’s appearance will change from blue to yellow.
5. The “switch costume to” block will change the costume of the sprite to “watermelon-c” when it touches the given colour.
A. Fill in the Blanks.
1. Talk
2. Music, Sound Effects
3. Looks
4. Sound
B. Tick () the Correct Option.
1. b.
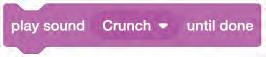
2. b. Make the sprite talk
3. c. Sound
4. c. Add music or sound effects
C. Who Am I?
1. Say block 2. Play Sound block
D. Write T for True and F for False.
1. F 2. F 3. T 4. T
E. Answer the Following.
1. The Play Sound block plays a sound and pauses the script until it finishes. It is used to add music and sound effects to your Scratch project.
2. In the Musical Band project, we can use both Say and Play Sound blocks.
F. Apply Your Learning.
1. a. A speech bubble appears over the sprite and stays for 2 seconds. If right arrow key is pressed then the sprite moves forward by 5. The next costume block changes the sprite’s costume to the next one in the costume list.
b. When left arrow key is pressed, play sound block will play a sound and pauses the script until it finishes. Then the sprite will move forward by 5 and the next costume block will then change the sprite’s costume to the next one in the costume list.
2. We can create a digital story of a Space Adventure. Here, we can use the Play Sound block to play a rocket launch sound effect. Then use the Say block to make the rocket sprite say, “3…2…1…Blast off!”
This teacher manual has been designed to implement Tekie, the storytelling-based Coding and Computer Science program. The manual consists of lesson plans within each chapter that teachers transact within classrooms and computer labs. Each lesson is based on a research-based ‘WEBS’ framework that simplifies pedagogical practices for teachers and enables them to deliver effectively.
• Sharp Lesson Planning: Each lesson plan focuses on specific sub-learning outcomes within a chapter and are designed for delivery within the stipulated class or lab time.
• Real-life and Application-based Questions: Additional questions that link Computer Science to real-life contexts and assist teachers to develop learners’ conceptual understanding and application skills.
• Support and Detailed Solutions: In-depth solutions for in-class and post-class activities to reinforce learning.
Uolo partners with K-12 schools to bring technology-based learning programs. We believe pedagogy and technology must come together to deliver scalable learning experiences that generate measurable outcomes. Uolo is trusted by over 10,000 schools across India, South East Asia, and the Middle East.

hello@uolo.com
