


NEP 2020 based | Technology powered
Accelerate TERM II
COMPUTER SCIENCE GRADE 7


Standing at the forefront of the digital and AI revolution, the importance of coding and computational skills has reached unprecedented heights. In today’s professional landscape, whether it’s in the fields of medicine, space exploration, education, science, or business, no sector remains untouched by this transformative wave. To not just survive but thrive in the 21st century, basic computer literacy is no longer sufficient. Learners must evolve into “digital natives” who can fluently read, write, and communicate in the languages that machines and AI comprehend.
Recognizing this imperative, the National Education Policy of 2020 (NEP 2020) has strongly recommended the integration of coding skills, computational thinking, critical analysis, and problem-solving abilities into the curriculum. Moreover, forward-looking subjects like AI, Data Sciences, Computer Applications, and IT have been introduced as elective subjects from grade 9 onwards. It wouldn’t be surprising if further transformative measures are taken even at the elementary education level.
Uolo has introduced an innovative 360-degree program for a coding-focused computer science curriculum, known as Tekie, spanning grades 1 to 8. Tekie is a significant stride towards STEM education that aims at making learners future ready—enabling them with skills needed in the ever-changing, technology-driven, and dynamic 21st-century world.
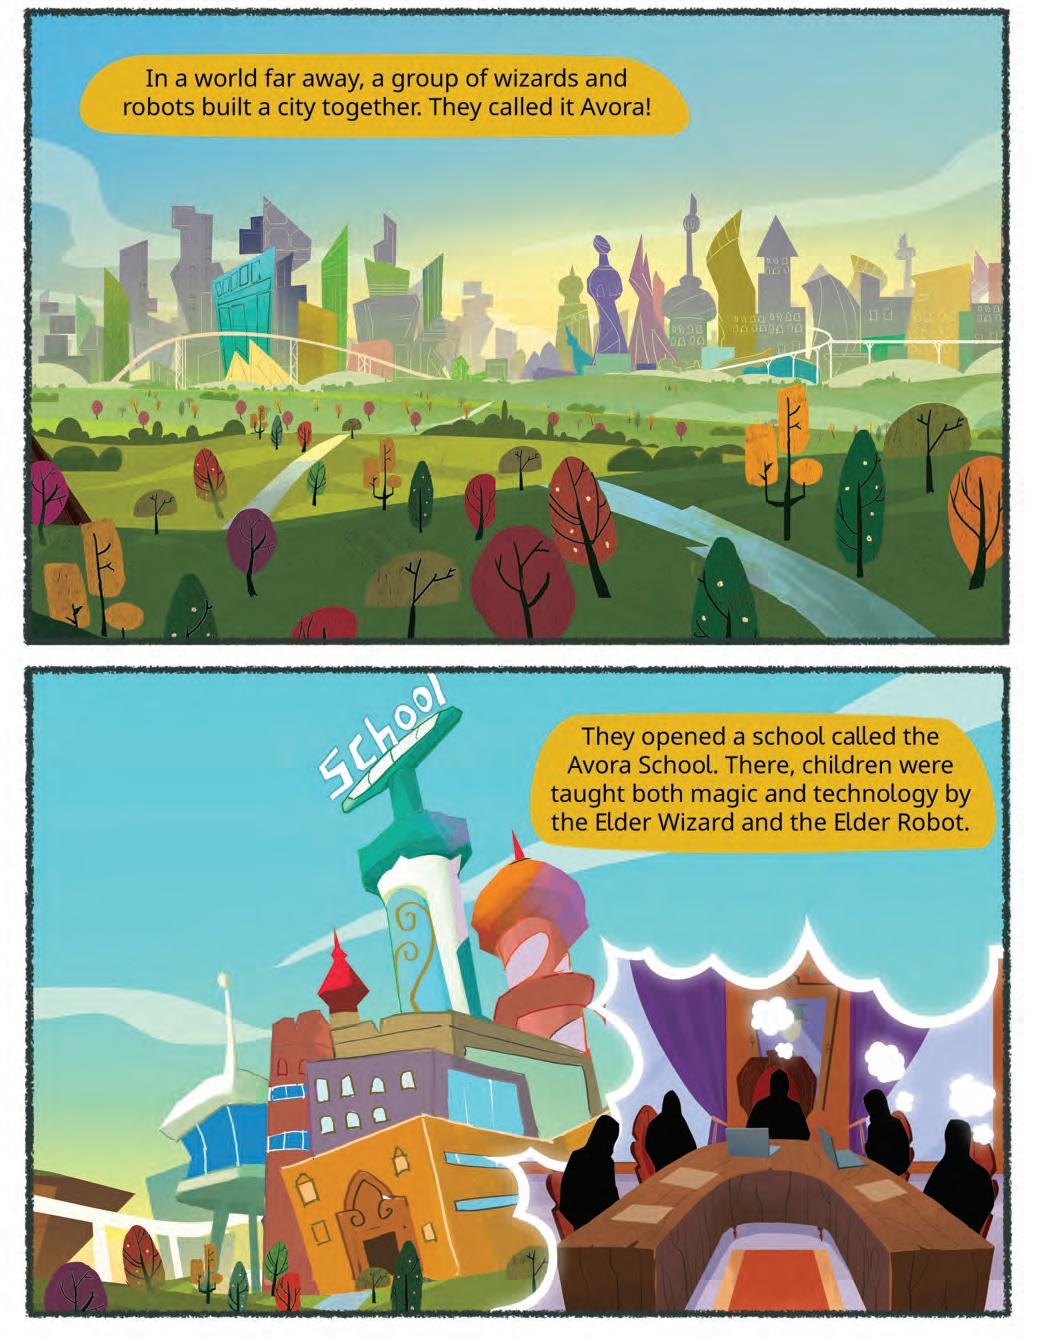
Tekie adopts a captivating and engaging approach to learning, in line with the recommendations of the NEP 2020. The curriculum is ingeniously woven into the thrilling adventures of Mel and Conji, fictional characters from the enchanting land of Avora. The Mel and Conji series epitomizes a modern method of acquiring Computer Science knowledge and honing coding skills and computational thinking.
Tekie is a technology-empowered curriculum that encompasses a few key components:
• Main Content Books: These introduce learners to the theory of computer science and the tools used in the field. Topics in AI are also covered, along with experiential and curiosity-based learning resources.
• Coding Book: Specifically designed to nurture coding skills, this booklet aligns with the experiential and contextual learning approach of the curriculum, fostering critical thinking and problem-solving abilities.
• Animated Learning Videos: The program is powered by high-quality animation-based learning videos that deliver learning in an engaging manner.
• Teacher Manual: This valuable resource supports classroom instruction, ensuring that educators can effectively deliver the curriculum.
Welcome to the captivating realm of Tekie! We hope you relish this educational journey as it equips you with the tools you need to thrive in the exciting and ever-changing world of the 21st century.
Each chapter has been divided into two key sections.
In every grade, students embark on an immersive experience in the “Adventures of Mel and Conji”. Within each chapter, in the initial section (Section A), the story unfolds, enveloping learners in an exciting journey. Through the story, students actively connect with fundamental concepts in the realm of Computer Science.
This section of the chapter focuses on the essential academic content. It provides the learning goals and assists teachers in their classroom instruction.
This section also includes the following academic assets:
HOTS questions to trigger engaging group discussions in the classroom.

Interesting facts related to the application of a concept.
What is the difference between a database and a DBMS?
The first DBMS was developed in the early by Charles Bachman.

Probing questions to stimulate HOTS at individual level.
Think and Tell
To enter a record into a table, which command can be used?

Milestone exercises to practice specific concepts.
QR codes to explore an exciting application of the concept. This element builds curiosity in children and helps them grasp concepts through digital visual aids.

Big Data is a huge collection of information. Companies use it to recommend movies, and songs, you might enjoy. Know more about Big data by scanning this QR code.
This is the chapter summary. It enables learners to glance through all key concepts covered in the chapter.
A pool of questions catering to all topics and skills covered in the chapter.


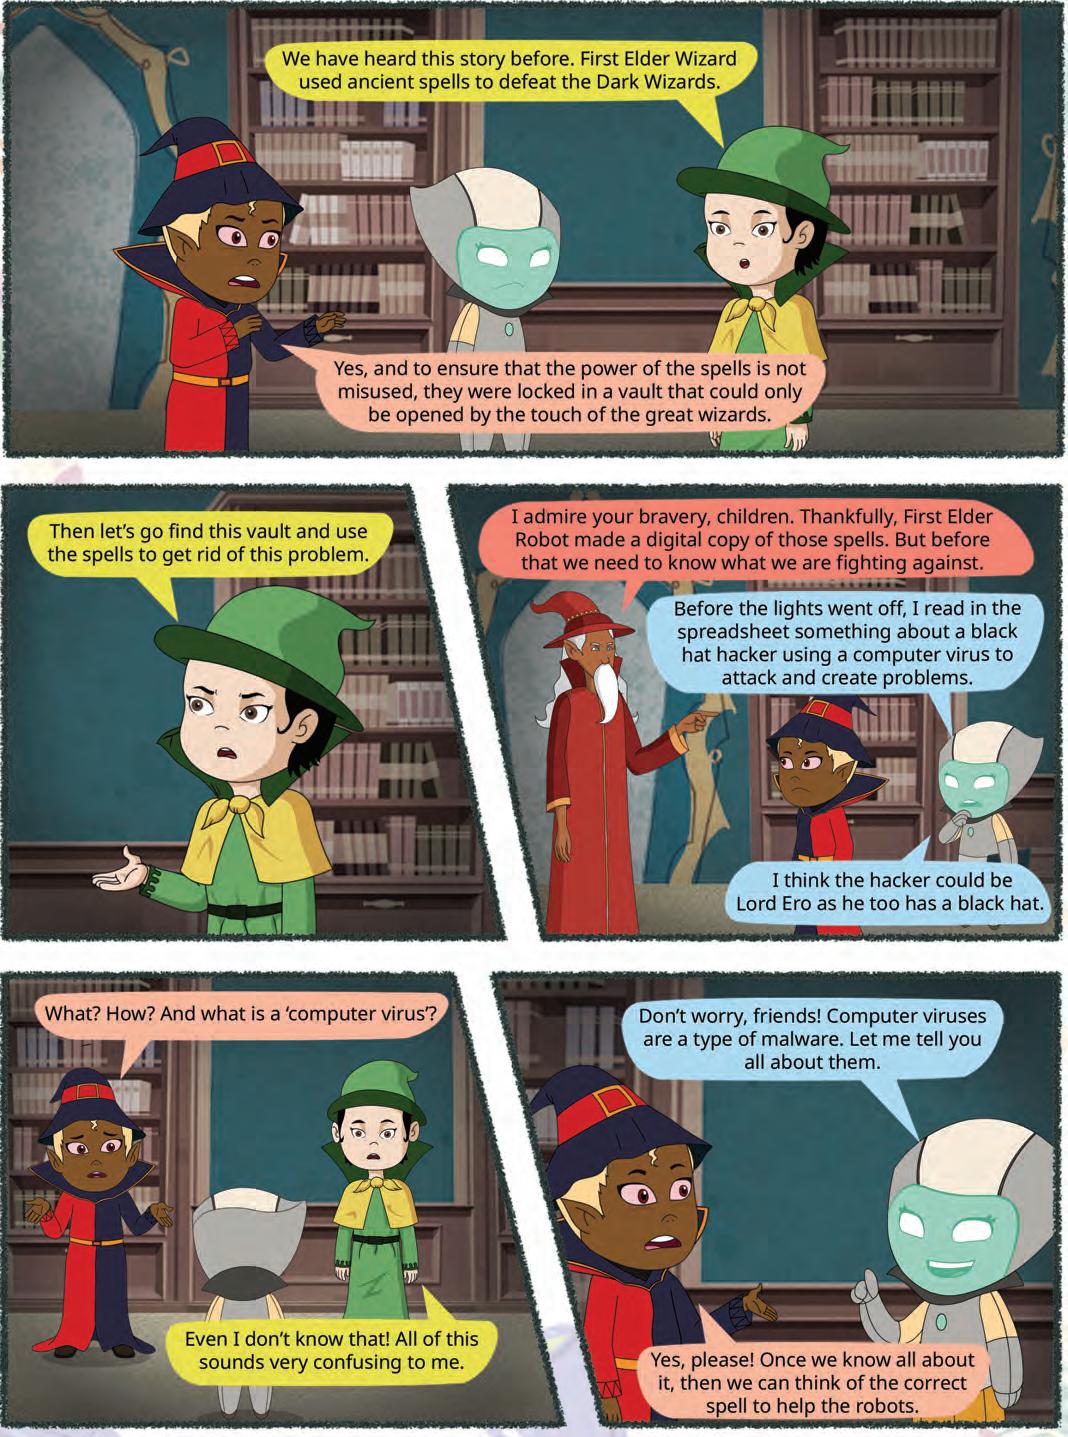
The term malware is a composite of malicious and software. Any malicious software or code that is designed to harm, exploit, or compromise computer systems, devices, or networks is called malware. It not only disrupts a computer’s usual operation but also steals vital information.
Computer malware comes in various forms, each with its own set of characteristics and methods of attack. Here are some common forms of computer malware attacks:
1. Virus: A computer virus is a form of malicious software or malware that can infiltrate a computer system. The term VIRUS stands for Vital Information Resources Under Seize.
Computer viruses can spread through infected data via e-mail attachments, USB flash drives, and other sources. The essential resources of a computer, like memory, processing speed, data, and programs are hampered when a virus spreads into the system.
2. Worms: A computer worm is similar to a virus but can spread on its own without human help. This self-replicating activity frequently causes computers and networks to become unresponsive due to excessive memory or bandwidth usage. One famous example is the Blaster Worm, which affected Microsoft’s operating systems.
3. Spyware: Spyware is a harmful software that secretly enters your computer, watches what you do without your knowledge, and shares the gathered information with others who want it. This data can include things like your internet habits, visited websites, passwords, and even credit card numbers. It can also check your files and programs like messaging apps, all while quietly sending this information to someone else. They might sell this data or use it for advertising. Sometimes, spyware can mess up your computer settings, causing slow internet and problems with other programs.
4. Trojan Horse: The term Trojan Horse refers to the wooden horse used by the Greek Army during the Trojan War to enter the city of Troy. A Trojan horse may look like helpful software, but harms your computer once it’s installed. People are tricked into opening it. When Trojans enter your system, they can change your desktop, block programs (especially antivirus ones), and grant unauthorised access to outsiders who can steal your information. Unlike viruses and worms, Trojans don’t spread on their own, you need to open them.
Examples of Trojan Horses include the Beast and Zeus.

5. Sweeper: A sweeper is a malware that pretends to be an antivirus program, fooling users into downloading it unintentionally from malicious websites. Once installed on your computer, it creates fake malware files that start automatically when you log in to Windows. It secretly monitors your online activity, makes changes to your system files, and more, all without your knowledge. When you run it, it pretends to scan your computer and displays fake malware alerts to scare you into thinking your computer is infected.
In this chapter, we will study the computer virus in detail.
1 Write T for true and F for false.
a Malware is a term that specifically refers to software that steals sensitive information from a computer.
b Worms require human intervention to spread from one computer to another.
c Trojan Horses can spread on their own, infecting multiple computers without user interaction.
d Spyware is a harmful software that secretly enters your computer.
2 Fill in the blanks.
a Computer viruses can spread through infected data via , USB flash drives, and other sources.
b Any malicious software or code that is designed to harm, exploit, or compromise computer systems, devices, or networks is called .
c Unlike viruses and worms, don’t spread on their own. You need to open them.
d A sweeper is a virus that pretends to be an antivirus program, fooling users into downloading it unintentionally from websites.
Imagine you have a fever caused by a human virus. This virus makes you weaker. In the same way, your computer can get sick too, but not with human viruses. Instead, it is something called a “computer virus”. A computer virus is like a harmful computer program that sneaks into your computer without your knowledge. Once it is in, it can cause all sorts of problems. It might slow down your computer, mess up your important files and programs, make your computer stop working properly, steal sensitive information, etc.
Just like you need medicine to get better from a real virus, your computer needs special software to get rid of a computer virus. This special software is called antivirus software.
Computer viruses can cause different problems. Here are some common symptoms that may indicate that a computer is infected with a virus:
1. Slow performance: A virus in action can take up a lot of space in a computer’s memory, leading to slower performance. Your computer may take longer to boot up, open applications, or respond to your commands.
2. Pop-up windows: One may start getting too many pop-up windows on their screen which may be virus-affected and can harm the device even more.
3. Self-execution of programs: Malware can run in the background without your knowledge. This could include launching unauthorised programs. This behaviour may indicate a virus or other malware.
4. Account issues: Some viruses are designed to steal login credentials or manipulate your accounts. It could be a sign of a security breach caused by malware.
5. Crashing of the device: In most cases, if the virus spreads in multiple files and programs, there are chances that the entire device may crash and stop working.
A computer virus is a type of harmful software that can sneak into your computer and cause trouble. Let us learn about the harmful effects a computer virus might have.
1. Spread to others: Computer viruses can spread to other computers through various means, such as email attachments, infected files shared over networks, or compromised software installations. This can lead to a widespread outbreak of the virus.
2. Data loss: Some viruses can corrupt or delete your files and data, leading to permanent loss. This loss can be damaging, especially if you haven’t backed up your important information.
ERROR 404
3. Stealing information: Certain viruses are designed to steal your personal information, like passwords, credit card numbers, and other sensitive data. This can lead to identity theft and other serious problems.
4. Spreading: Computer viruses often have the capability to replicate and spread to other computers through infected files. They can also take advantage of weaknesses in network connections, which can cause more harm.
5. Privacy breach: Some viruses are designed to collect personal or sensitive information from infected computers, including login credentials, credit card numbers, and more. This information can then be used for identity theft or other malicious purposes.
There are different types of computer viruses:
Boot Sector Virus
Multipartite
Polymorphic
Computer Virus
Macro


Program File Virus
Network Virus
1. Boot sector virus: This virus category targets the boot sector of a hard drive, which is made up of smaller units called sectors. The initial sector is referred to as the boot sector and contains the master boot record (MBR), responsible for initiating the process of reading and loading the operating system. Boot sector viruses become active during the machine’s boot-up sequence. Examples of such viruses include Disk Killer and Stoned virus.
2. Program file virus: A program file virus, also known as an executable file virus, is a type of computer virus that infects executable program files. These viruses attach themselves to executable files. Executable files usually have file extensions like .exe, .com, .dll, or .sys. When you run an infected program, the virus gets activated and can spread to other executable files on the same system or to other computers.
3. Multipartite viruses: A multipartite virus combines the characteristics of both boot sector and program file viruses. It infiltrates computer systems via contaminated media and subsequently lodges itself in the computer’s memory. Following this, the virus migrates to the hard drive, where it corrupts the boot sector and initiates its propagation throughout the system by infecting executable files. Examples of multipartite viruses include Invader, Flip Tequila, and others.
4. Macro viruses: This virus infects files created with software like Word, Excel, and PowerPoint that support Macros. Macros are sets of instructions that automate tasks. When you open an infected document, the virus enters the memory of your computer. Once active any document you create can get infected too. Examples of such viruses include Melissa A, Relax, Bablas, and more.


5. Polymorphic viruses: The term “polymorphic virus” (poly meaning many, morph indicating changing forms) refers to a virus that manifests in various forms each time it infiltrates a file, altering its binary structure (which is the way a file is organised and stored on a computer’s hard drive) to avoid detection by antivirus software. Some notable examples include Elkern, Marburg, and Satan Bag.
6. Network virus: A network virus can rapidly spread through a LAN (local area network) and sometimes across the internet. It multiplies using shared resources like drives and folders. When it infects a computer, it seeks out more targets, creating a repeating cycle. Examples include Nimda and SQL Slammer.
1 Who am I?

a I am a type of virus that rapidly spreads through shared resources like drives and folders on a network.
b I am a type of virus that alters the binary structure of a file to avoid detection by antivirus software.
c I am a type of virus that corrupts the boot sector of a hard disk and also infects executable program files.
2 Write T for true and F for false.
a Slowing down a computer system is a common symptom of a computer virus infection.
b Computer viruses cannot delete or corrupt files on your computer

c Viruses have the capability to interfere with computer systems resulting in crashes, data corruption, and loss.
d Pop-up ads are a symptom of a computer virus infection.
A computer virus spreads from one computer to another. It’s like when you have cold and you pass it on to your friends.
Here’s how a computer virus spreads:
1. Removable storage devices: Sharing files using pen drives is common today. If a pen drive has a virus, it can infect the computer it is connected to. If a virus-infected pen drive is inserted into another computer with the AutoRun feature enabled, it can spread the virus automatically. Even if AutoRun is disabled, a virus can still infect a computer when a file on the pen drive is opened.
2. Internet: Computer viruses spread quickly on the internet because they can infect many websites at once. Some websites try to install adware bugs, which flood your screen with pop-up ads. This adware often allows other harmful programs to be installed, filling your computer with unwanted content. Adware, short for “advertising-supported software”, refers to a type of software that displays advertisements on a user’s device, typically without their consent or in an intrusive and disruptive manner.
3. Email attachments: One of the most common ways viruses spread is through email attachments. Cybercriminals send infected files as email attachments, and when you open or download the attachment, the virus infects your computer.

Today, data is as valuable as money or gold, so it’s crucial to protect it from loss or damage. Computer viruses can be spread through infected data via email, USB flash drives, and other sources. To prevent virus attacks:
1. Use antivirus software and keep it updated.
2. Check if your antivirus detects spyware and install anti-spyware if needed.
3. Install a firewall to control network traffic. Always scan USB flash drives.
4. Avoid downloading pirated software.
5. Scan downloaded files before opening.
6. Regularly scan your hard disk.
7. Back up important files daily.
8. Be cautious with email attachments and only open trusted ones.
Elk Cloner was one of the first microcomputer viruses to spread beyond its original computer or lab.

An antivirus, is a type of computer program or software designed to detect, prevent, and remove malicious software, commonly known as malware, from a computer system. The primary purpose of antivirus software is to protect your computer and data from various types of threats, including viruses, worms, Trojans, ransomware, spyware, adware, and other forms of malicious software.

Ransomware is a harmful program that locks a person’s files or computer and asks for money in exchange for the key to unlock them.
Here’s an overview of how antivirus software works:
1. Scanning: Antivirus software works primarily by scanning files and programs on your computer or device for known patterns or signatures of malware.
2. Heuristic analysis: This technique looks for suspicious behaviour or code patterns that may indicate the presence of malware, even if no specific signature matches are found. It helps identify new and previously unknown threats.

3. Real-time protection: Many modern antivirus programs offer real-time protection. They monitor the system continuously and scan files as they are accessed, downloaded, or executed.
4. Quarantine: When the antivirus software detects a potentially malicious file or program, it typically quarantines it, isolating it from the rest of the system.
5. Scheduled scans: Users can schedule regular scans of their computer or specific directories to ensure that no malware has evaded real-time protection.
6. Behavioural analysis: Some advanced antivirus solutions use behavioural analysis to monitor the behaviour of programs and processes running on a system to detect viruses.
7. Email and web filtering: Many antivirus programs also offer email and web filtering features to block malicious attachments or websites that may distribute malware.
The Morris worm, from November 2, 1988, was one of the first internet worms and the first to grab widespread media attention.
Using antivirus software is crucial for protecting your computer and data from malware, viruses, and other security threats. Two common tasks when using antivirus software are:
1. Scanning your system.
2. Scanning external media.
1. Install antivirus software: Install antivirus software on your computer. There are many options available, both free and paid. Popular choices include Norton, McAfee, Bitdefender, Avast, and Windows Defender (built into Windows).


2. Update the antivirus database: Ensure that your antivirus software is up-to-date. Most antivirus programs regularly release updates to their virus definitions to detect the latest threats.
3. Open the antivirus program: Launch your antivirus software. You can typically do this by clicking on its icon in the system tray or by searching for it in your computer’s programs.
4. Initiate a full system scan: Most antivirus software provides an option for a full system scan. This scan checks all files and directories on your computer for viruses, malware, and other threats. You will find an option like “Full Scan,” “Complete Scan,” or something similar.
5. Review and take action: After the scan is complete, the software will provide a report. If any threats are detected, the software will provide options for quarantining or deleting infected files.
1. Connect the external media: Plug in the external media device (e.g., USB drive, external hard drive) that you want to scan into an available USB port on your computer.
2. Open the antivirus program: Launch your antivirus software.
3. Select the external media scan option: Look for an option that allows you to scan external media or removable devices. This option is often labelled “USB Scan” or something similar.
4. Choose the external media: Select the external media device you want to scan from the list of available drives.
5. Start the scan: Click the “Scan” or “Start Scan” button to begin scanning the external media, and the software will examine the files and folders to find any threats.
6. Review and take action: Once the scan is complete, the software will provide a report and recommended actions to quarantine or remove any detected threats.
7. Safely eject the external media: After scanning and ensuring that the external media is free from threats, safely eject it from your computer to avoid spreading malware to other devices.
Regular updates are essential for antivirus software for several important reasons:
1. Virus definition updates: Regular updates ensure that your software has the latest virus definitions, enabling it to detect and remove the most recent threats effectively.
2. Protection against new threats: Cybercriminals are always inventing new types of harmful software and ways to attack your computer. If you don’t keep your antivirus program up to date, it might not be ready to protect your computer from these new threats.
3. Security fixing: Antivirus software sometimes needs to be fixed to keep it safe from bad people on the internet. These fixes are like updates that make sure your antivirus software stays strong and does not allow malware to enter.
4. Improved performance: When your antivirus program gets old, it might start to slow down or have trouble working with your computer and other programs. But when you do updates regularly, it can make your antivirus program work better and be more dependable.
5. Improved features: Antivirus companies frequently add new things and tools in their updates to offer users extra protection. Keeping your antivirus up to date ensures that you can use the newest features, which can make your online security even better.
1 Number the following steps for scanning your system.
Initiate a Full System Scan
Review and Take Action
Update the Antivirus Database
Install Antivirus Software
Open the Antivirus Program
2 Match the following.
Column A
Column B
Identify new threats Virus Definition Updates
Continuous monitoring Heuristic Analysis
Isolation method
Updates to improve computer performance
Real-time Protection
Quarantine
1 A computer virus is a type of malicious software designed to infect and spread from one computer to another, often with harmful intent.
2 Computer viruses can cause various issues, including slow performance, pop-up windows, self-execution of programs, account issues, and device crashes.
3 There are different types of computer viruses, including boot sector viruses, program file viruses, multipartite viruses, macro viruses, polymorphic viruses, and network viruses.
4 Computer viruses can spread via removable storage devices, the internet, and email attachments.
5 Other forms of malware include virus, worms, spyware, Trojans, and sweepers, each with its own methods of attack and consequences.
6 To prevent virus attacks, use antivirus software, keep it updated, and install anti-spyware and firewalls if necessary.
7 Avoid downloading pirated software, scan downloaded files before opening, and regularly scan your hard disk.
8 Back up important files daily to protect against data loss from virus infections.
9 Antivirus software is designed to detect, prevent, and remove various forms of malware from a computer system.
10 Antivirus software works through scanning, heuristic analysis, real-time protection, quarantine, scheduled scans, behavioural analysis, and email/web filtering.
11 Common antivirus software includes Norton, McAfee, Bitdefender, Avast, and Windows Defender.
12 Regularly update your antivirus software to ensure it can detect and remove the latest threats effectively.
13 Regular updates also provide security fixes, improved performance, new features, etc.
A. Fill in the Blanks.
Hints slowdown sweeper malware boot sector Program file
1 A computer virus is a type of designed to infect and spread from one computer to another.
2 One common symptom of a computer virus is a noticeable in computer performance.
3 A virus targets the boot sector of a hard drive.
4 is a virus that pretends to be an antivirus program, fooling users into downloading it unintentionally from malicious websites.
5 viruses attach themselves to executable program files.
1 What is a computer virus?
a A type of computer hardware
c A computer ’s operating system
b A type of malicious software
d A network protocol
2 Which of the following is NOT a common symptom of a computer infected with a virus?
a Faster performance
c Unexpected pop-up windows
3 What is the primary motive behind malware attack?
a Improving computer performance
c Stealing sensitive information or causing harm
4 What does the term “heuristic analysis” refer to in antivirus software?
a Real-time scanning of files
c Detecting suspicious behaviour or code patterns
5 What is a “Trojan horse” in the context of computer security?
a A type of antivirus software
c Malicious software that pretends to be helpful
1 I am a type of software designed to detect and remove malicious programs from a computer.
2 I replicate myself by modifying other computer programs and can cause a computer to crash if I spread massively.
3 I am a type of malware that secretly enters your computer and steals your personal information.
4 I am a set of instructions that automate tasks.
5 I am a type of malicious software that pretends to be something useful but actually harms your computer when you install me.
1 Computer viruses can slow down a computer’s performance.
b Slow performance
d Unauthorised program execution
b Enhancing data security
d Supporting open-source software
b Scanning of email attachments
d Quarantining infected files
b A self-replicating worm
d A type of firewall
2 Adware refers to a type of software that displays advertisements on a user’s device, typically without their consent.
3 Many antivirus programs also offer email and web filtering features.
4 The term “VIRUS’’ stands for Vital Information Resources Under Seize.
5 Antivirus software can scan and remove viruses from external media devices.
1 What is a computer virus?
2 Define any one through which a computer virus spreads from one system to another.
3 What is the role of antivirus software in protecting a computer?
4 Write any two precautions one can take to prevent a virus infection.
5 How can users safely scan external media like USB flash drives using antivirus software?
1 Sree notices that his computer has become significantly slower over the past week. He also experiences frequent pop-up windows while browsing the internet. What could be causing Sree’s computer to slow down noticeably, and why?
2 Raj receives an email from an unknown sender with an attachment. The email claims to contain an important document, but he is worried it might be a virus. What precautions should he take?
3 Archi’s computer has been infected with a polymorphic virus. She has antivirus software installed but is struggling to remove the virus. Why is it that she is finding it difficult to remove polymorphic viruses from her system?
4 Raju unknowingly downloaded a program that claimed to be useful but is now experiencing issues with his computer. What type of malware could this be?
5 Tanya’s computer displays a message saying that her files have been locked and she needs to pay to unlock them. What type of malware is likely responsible for this?
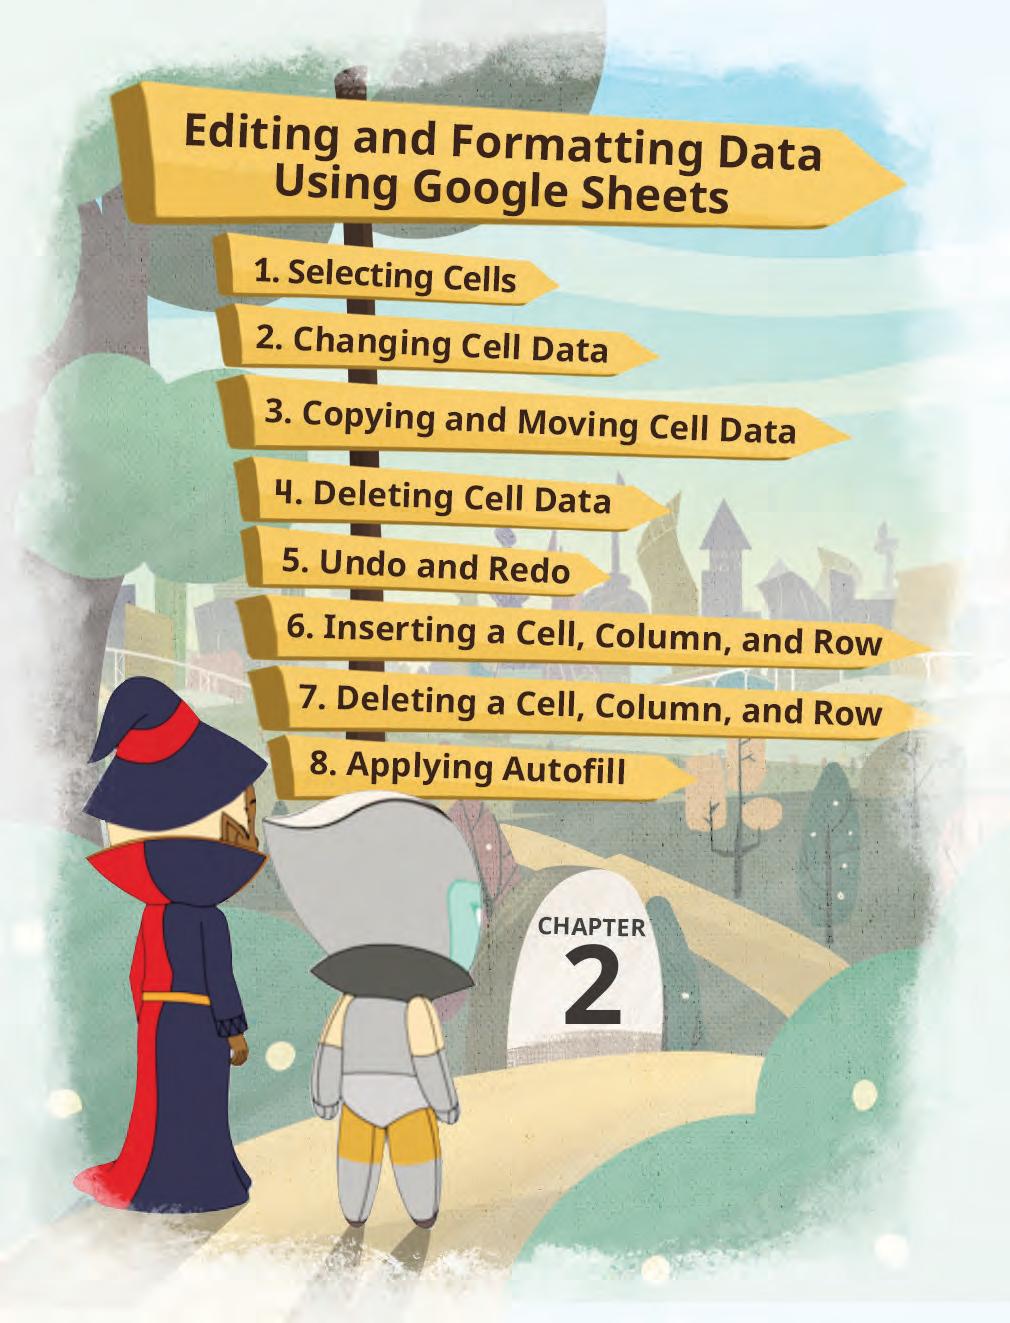

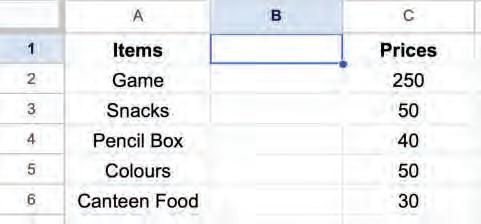
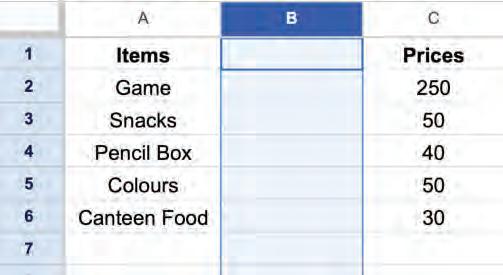
In the previous chapter, you learnt how to enter data in a spreadsheet and how to use formulas and functions. Now, we will learn about some advanced features of spreadsheets, such as copying and moving data, inserting and deleting cells, undo, redo, and autofill.
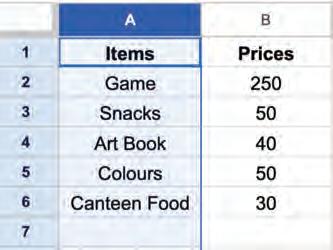
Let us learn to select cells first. We often need to select a group of cells to perform various operations such as copying, moving, inserting, or deleting.
We can select cells in a Google Sheet in various ways:
1. Selecting a cell: Left-click on the cell you want to select.
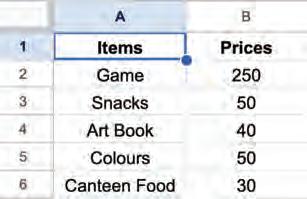
3. Selecting a column: Left-click on the column letter to select all cells in a column.
5. Selecting all data cells: Select a cell holding some data and then press Ctrl + A shortcut key. All the cells containing data will be selected.
2. Selecting a row: Left-click on the row number to select all cells in a row.
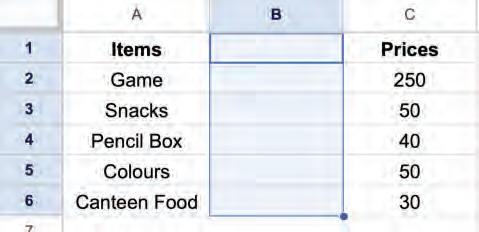
4. Selecting multiple cells: Click on the required starting cell and then drag the mouse to the last cell you want to select.
6. Selecting all cells in a sheet: To select all the cells in a sheet, select a blank cell and press Ctrl + A
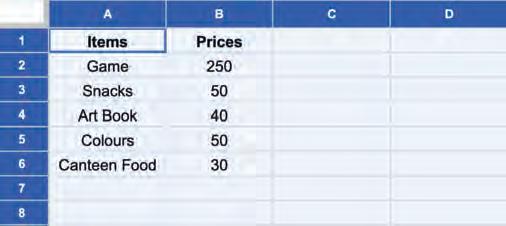
If you select a data cell, then press the Ctrl + A twice to select all the cells in a sheet.
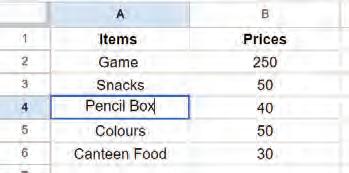
Changing cell data refers to modifying, replacing, or deleting the data in a cell.
You can follow these steps to change the cell data:
1. Click on the cell you want to edit. A blue border will appear to indicate that it is now the active cell.
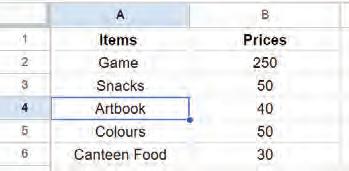
2. Start typing to edit or replace the existing data. The new data will appear in the cell as you type.
Spreadsheets support real-time collaboration, meaning multiple users can work on the same spreadsheet simultaneously.

3. Confirm the changes by changing the active cell using the arrow keys or pressing the Enter key.
Why is it important to know how to select, edit, and format cells in a spreadsheet?
In Google Sheets, you can copy the data of a cell and paste it in the same sheet or in a different one. You can also move the data and keep it at some other place in the same sheet or a different one. Let us see how to copy and move data from one place to another.
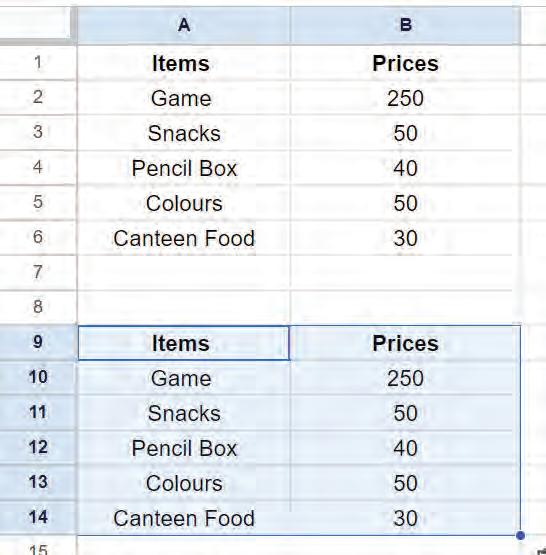
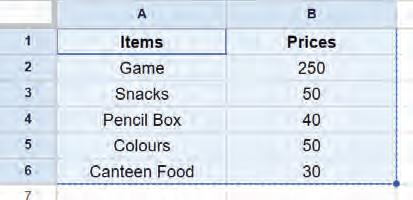
Copying cell data means copying the data from one or more cells and pasting it into another cell or cells in the same spreadsheet or another one. This will keep the data in both places.
You can follow these steps to copy cell data:
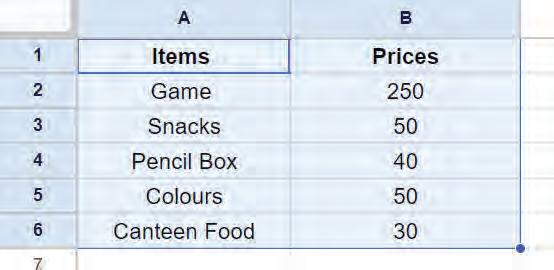
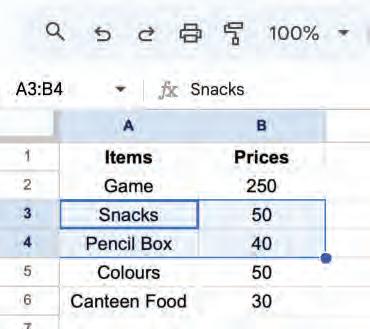
1. Select the cell or cells you want to copy.
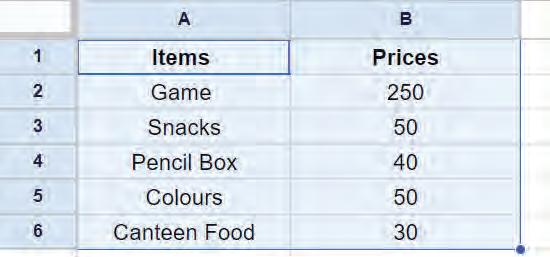
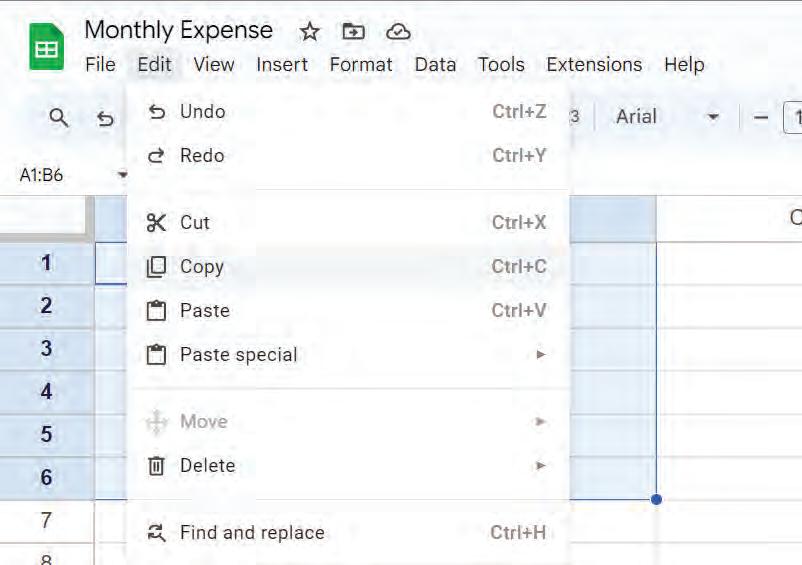
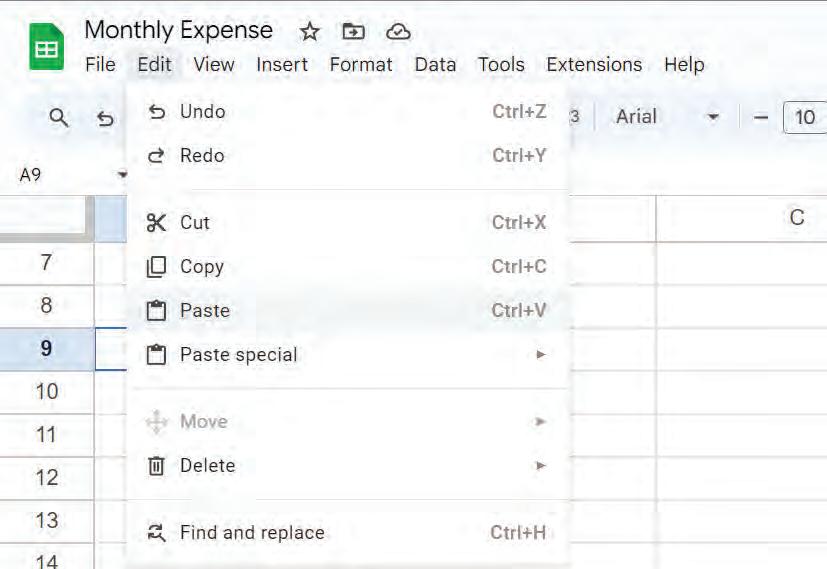
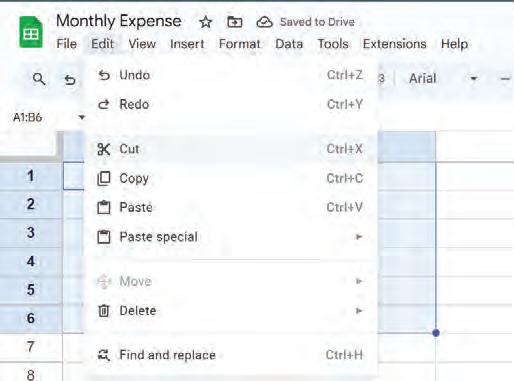
2. Go to the Edit menu and choose the Copy option to copy the selected cell(s).
OR
Right-click and choose the Copy option from the pop-up menu to copy the selected cell(s).

OR
Press the Ctrl + C shortcut key on the keyboard to copy the selected cell(s).
The cell data will be copied.
You can follow these steps to paste the copied cell data:
1. Select the cell where you want to paste the copied cell data.
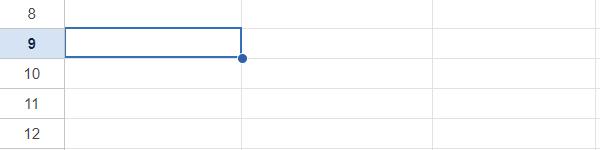
2. Go to the Edit menu and choose the Paste option to paste the copied cell data.
OR
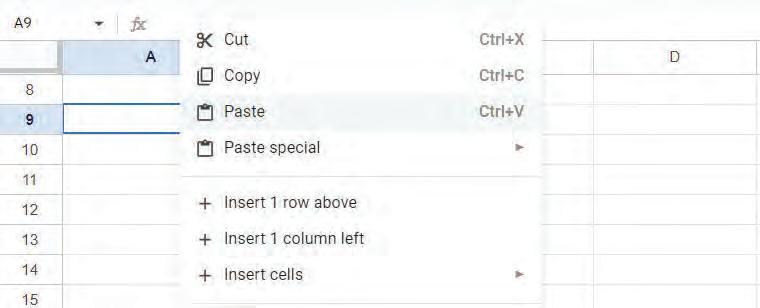
Right-click on the cell and choose the Paste option from the pop-up menu to paste the copied cell data.
OR
Press the Ctrl + V shortcut key on the keyboard to paste the copied cell data. The cell data will be pasted.
1
Match the columns.
Column A
Shortcut key to paste copied cell data
Copy option icon
Paste option icon
Shortcut key to copy selected cell(s)
2
Answer the following.
a How can you change cell data in a Google Sheet?
Column B

Ctrl + C

Ctrl + V
b What are the ways to copy cell data in a Google Sheet?
Moving cell data means cutting the data from one or more cells and pasting it into another cell or cells in the same spreadsheet or another one. The data will only be in one place after you move it.
You can follow these steps to move cell data:
1. Select the cell data to be moved.
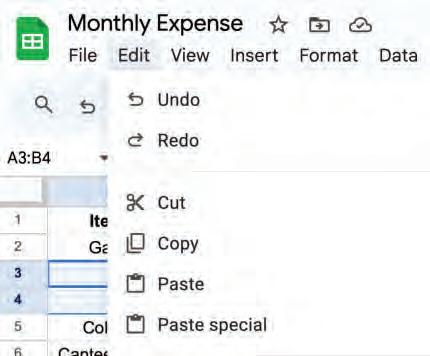
2. Go to the Edit menu and choose the Cut option to cut the selected data.
OR
Right-click and choose the Cut option from the pop-up menu to cut the selected data.
OR
Press the Ctrl + X shortcut key on the keyboard to cut the selected data.
A dashed border around the cut data will appear.
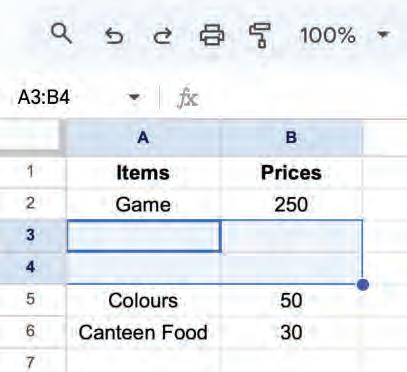
3. Select the cell where you want to move the cut cell data.
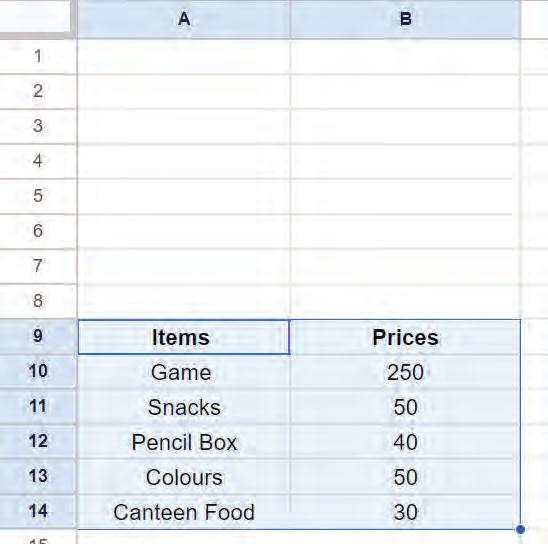
4. Choose any of the three ways to paste the cell data. The data will be moved to the new cells.
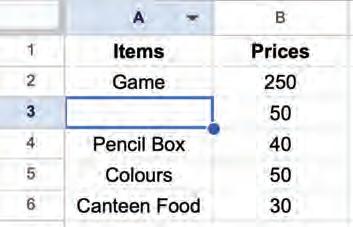
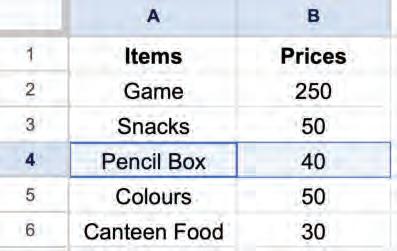
Deleting cell data means removing the data from a cell and making it blank. You can follow these steps to delete cell data:
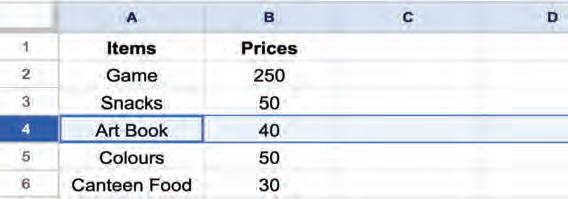
1. Select the cell(s) from which you want to delete the data.
Selecting a cell
2. Press the delete key on the keyboard to delete data from the selected cells. The cells will be blank.
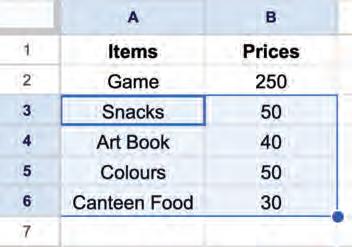
Selecting a group of cells
Undo and Redo are two useful features that save our time and help us avoid mistakes such as accidentally removing a row of data, entering the wrong data, or applying the wrong formula.
You can reverse or repeat recent changes made in a spreadsheet using the undo and redo commands.
The Undo feature allows you to undo or revert recent changes made in a spreadsheet.
You can follow these steps to undo changes:
1. Go to the Edit menu and choose the Undo option.
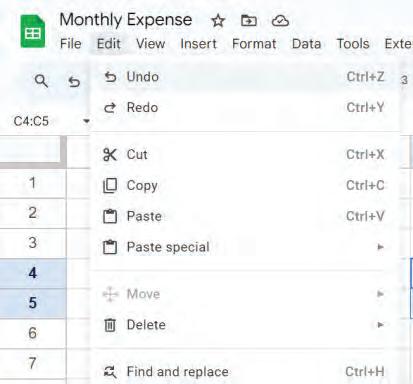
OR
Click on the Undo option in the toolbar.
OR
Press the Ctrl + Z shortcut key on the keyboard.
The last change made will be reverted.
Imagine that you undo some changes you made, but later you realise that you want those changes back. Instead of making the changes again, you can use the redo command.
The redo feature allows you to redo or repeat the recent changes. It will redo the last change that you have undone using the undo command.
You can follow these steps to redo changes:
1. Go to the Edit menu and choose the Redo option.
2
OR
Click on the Redo option in the toolbar.
OR
Press the Ctrl + Y shortcut key on the keyboard.
The last change undone will be repeated.
When do you think undo and redo can be helpful?

Which keyboard shortcut is used to cut the cells in a spreadsheet?
Match the following with their meaning.
Column A
Moving cell data
Redo
Undo
Deleting cell data
Column B
It reverses your last spreadsheet action.
This means removing the content from a cell.
The process of relocating information from one location to another within or between spreadsheets.
It lets you do something again that you did before.
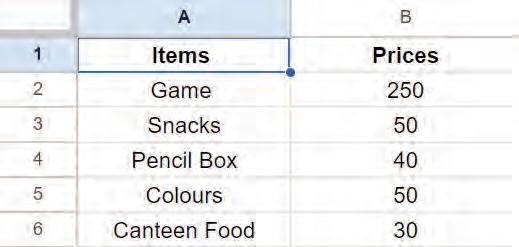
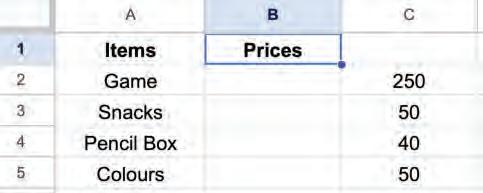
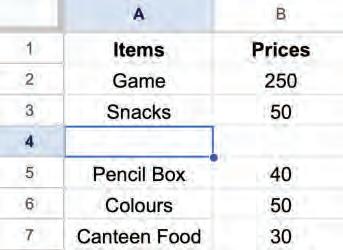
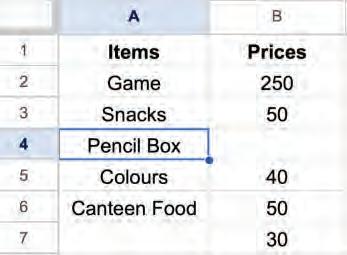
You can insert a cell, column, and row as you require. Let us see how you can do it.
Inserting a cell means adding a cell within a row or column.
You can follow these steps to insert a cell:
1. Select the cell where you want to insert the new cell.
2. Right-click on the cell and choose Insert cells > Insert cells and shift right option from the shortcut menu.
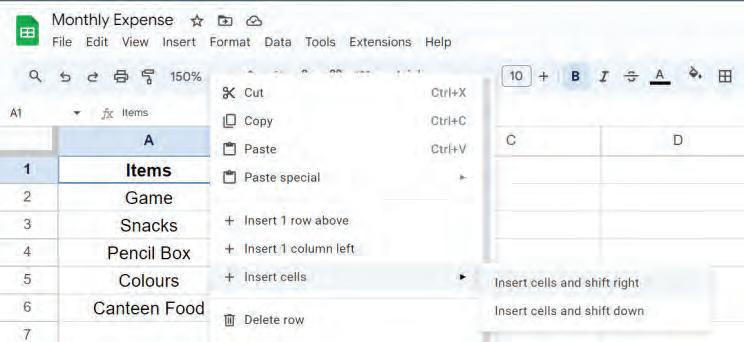
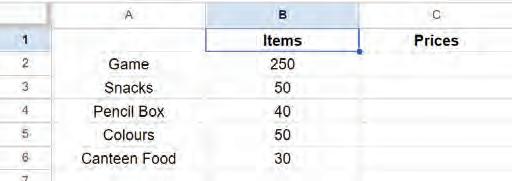
The cell will be inserted, shifting the existing cells to the right.
OR
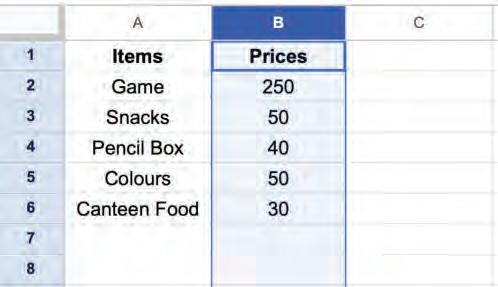
Right-click on the cell and choose Insert cells > Insert cells and shift down.

The cell will be inserted, shifting the existing cells downwards.

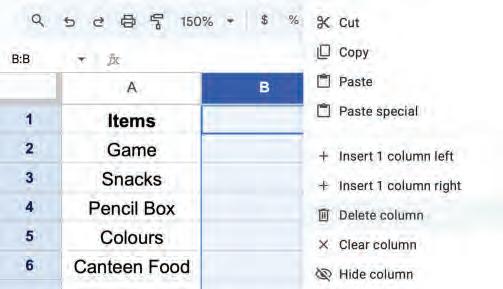
Inserting a column means adding a new column to a spreadsheet. We can add a column to the left or right of an existing column.
You can follow these steps to insert a column:
1. Choose the column next to where you want to add a new column.
Left-click on the column letter to select the column.
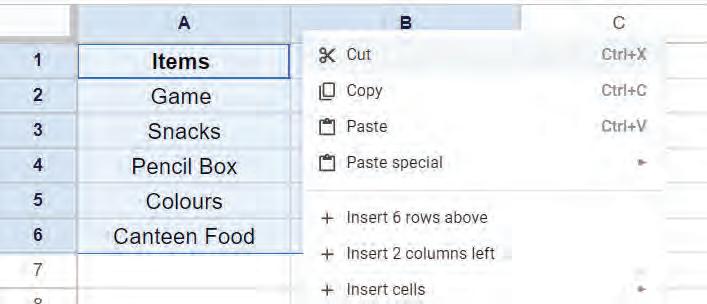
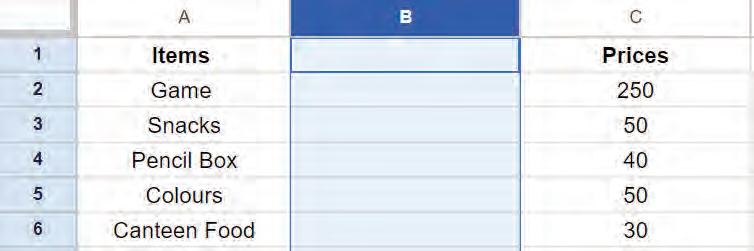
2. Right-click and select the Insert 1 column left option from the pop-up menu.
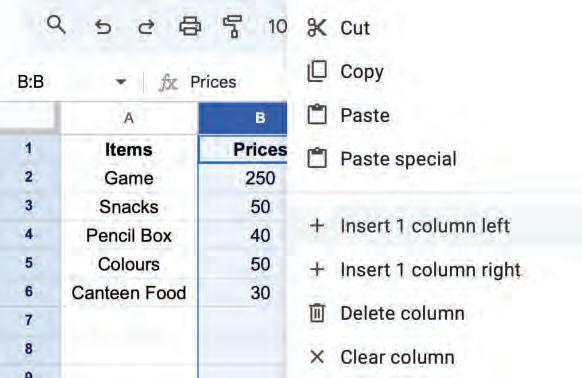
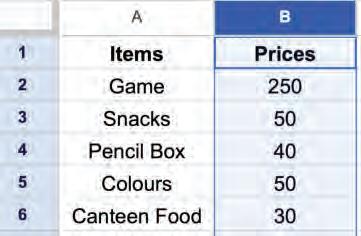
A new column will appear on the left-hand side of the column.
OR
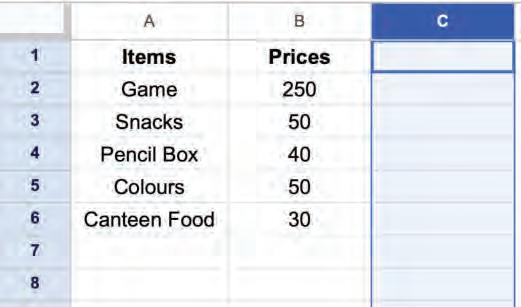
Right-click and select the Insert 1 column right option from the pop-up menu.

A new column will appear on the right-hand side of the selected column.
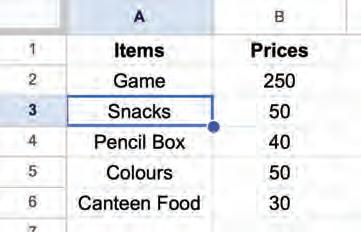
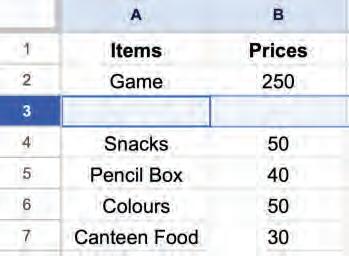
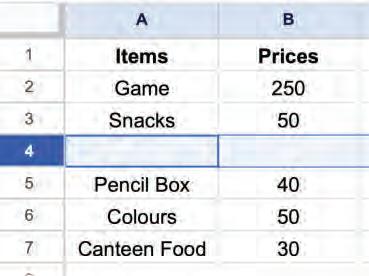
Inserting a row means adding a new row in a spreadsheet. We can add a row above or below an existing row. You can follow these steps to insert a row:
1. Choose the row next to where you want to add a new row.
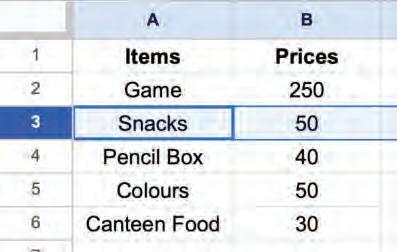
Left-click on the row number to select the row.
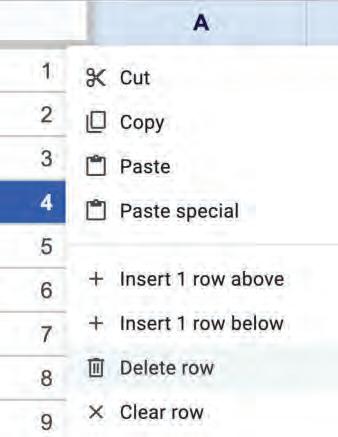
2. Right-click and select the Insert 1 row above option from the pop-up menu.
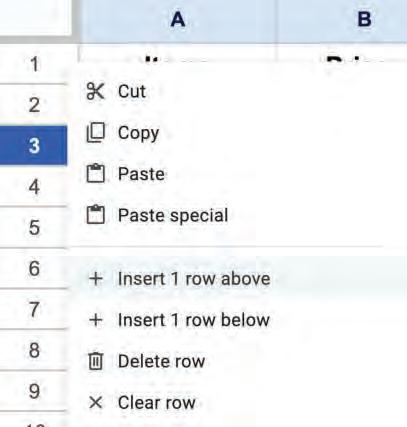
A new row will appear above the row.
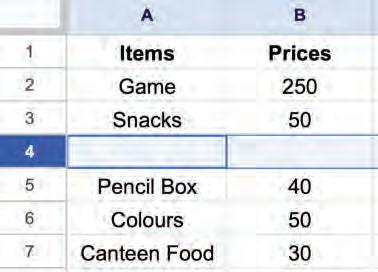
Right-click and select the Insert 1 row below option from the pop-up menu.
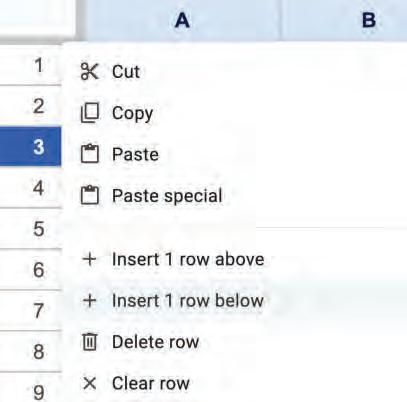
A new row will appear below the row.
You can delete a cell, column, and row as you require. Let us see how you can do it.
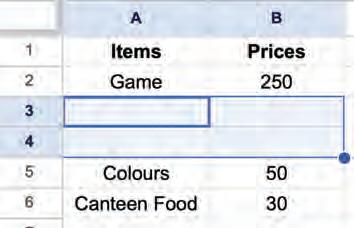
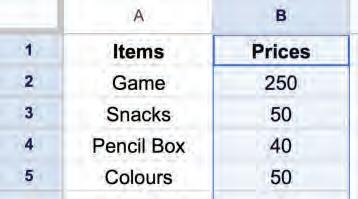
Deleting a cell or cells means removing the selected cells. After deleting the cell(s), the surrounding cells will shift to fill the gap.
You can follow these steps to delete cells:
1. Select a cell or cells you want to delete.
2. Right-click and select the Delete cells > Delete cells and shift left option from the pop-up menu.
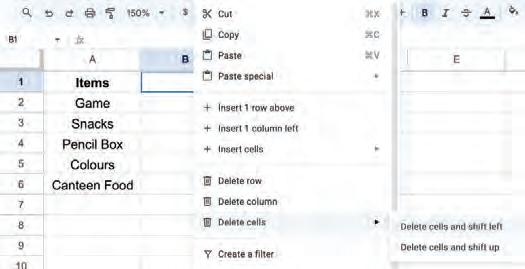
The cell will be deleted and cells next to it will be shifted to the left.
OR
1. Select a cell or cells that you want to delete.
2. Right-click and select the Delete cells > Delete cells and shift up option from the pop-up menu.
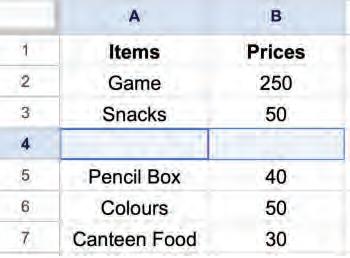
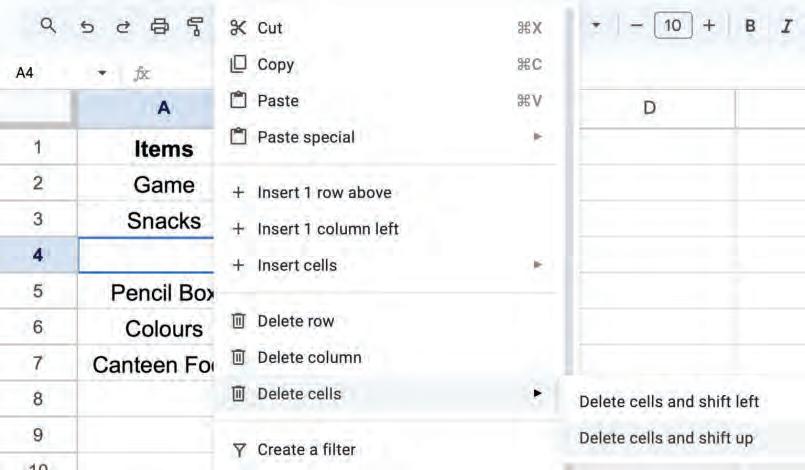
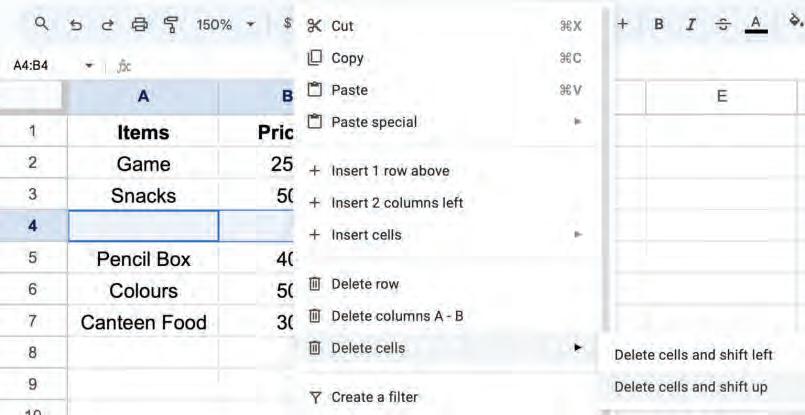
The cell will be deleted, and cells next to it will be shifted upward.
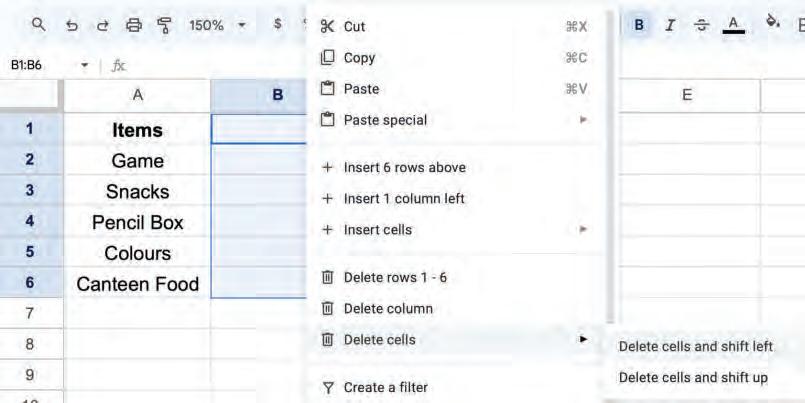
Deleting columns means removing one or more columns. You can follow these steps to delete a column:
1. Left-click on the column letter to select the column you want to delete.
2. Right-click and choose the Delete column option from the pop-up menu to delete the column.
The column will be deleted, and the column on the right will be shifted left.
Deleting rows means removing one or more rows. You can follow these steps to delete a row:
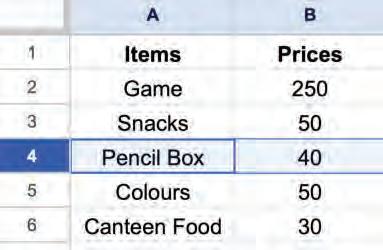
1. Left-click on the row number to select the row you want to delete.
2. Right-click and choose the Delete row option from the pop-up menu to delete the row.
The row will be deleted, and the row below will be shifted up.
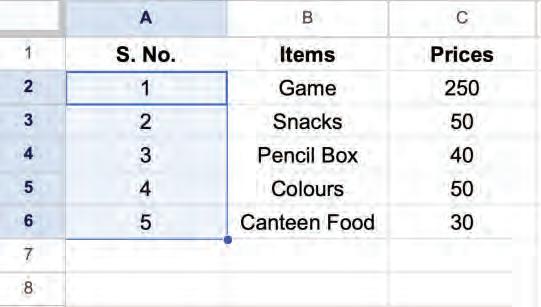
Autofill is a feature that allows you to automatically fill in a series of cells with data based on the pattern of the first few cells.
You can follow these steps to autofill a series of cells:
1. Select the cells for the pattern to be followed to generate new data and fill the series of cells with it.
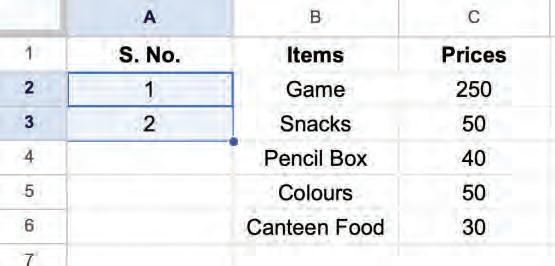
2. Hold the left mouse button and drag the Fill Handle (the small dot that appears at the bottom-right corner of the last cell of the selection) to autofill the cells with new data.
Autofill can be used to generate number series, date series, and text series.
Which of the following is NOT a step to insert a cell in a spreadsheet?
a Select the cell where you want to insert the new cell.
b Left-click on the cell and choose Insert cells, then shift right.
c Right-click on the cell and choose Insert cells, then shift right.
d Right-click on the cell and choose Insert cells, then shift down.
How do you delete a column?
a Left-click the column letter to delete the column.
b Right-click the column letter and choose the Delete column option from the pop-up menu.
c Left-click the column letter and press the Delete key.
d Right-click the column letter and press Ctrl + X.
What is the purpose of the fill handle in Autofill?
a To change the font style of selected cells.
b To insert new rows or columns.
c To fill a series of cells based on a pattern of data.
d To perform calculations in the selected cells.
What kind of series can you create using Autofill if you enter "Monday" in one cell and "Tuesday" in the next cell?
a A series of numbers.
b A series of random texts.
c A series of days of the week.
d Autofill cannot be used with text.
1 Cells can be selected in Google Sheets by:
a Clicking on a cell.
b Clicking on a row number to select all cells in a row.
c Clicking on a column letter to select all cells in a column.
d Holding left-click and dragging the mouse over multiple cells.
e Pressing the Ctrl + A shortcut key to select all the cells.
2 Changing cell data means modifying, replacing, or deleting the data in a cell.
3 To replace existing cell data, select the cell and type over it. Press the Enter key or click away from the cell to confirm the change.
4 Copying cell data means to copy the data from one or more cells and paste it into another cell or cells in the same spreadsheet or another one. This will keep the data in both places.
5 Moving cell data means to cut the data from one or more cells and paste it into another cell or cells in the same spreadsheet or another one. The data will only be in one place after you move it.
6 Deleting cell data means removing the data from a cell and making it blank.
7 The undo feature allows you to undo or revert recent changes made in a spreadsheet.
8 The redo feature allows you to redo or repeat the recent changes. It will redo the last change that you have undone.
9 Inserting a cell means adding a cell within a row or column.
10 Inserting a column means adding a new column to a spreadsheet. We can add a column to the left or right of an existing column.
11 Inserting a row means adding a new row in a spreadsheet. We can add a row above or below an existing row.
12 Deleting a cell or cells means removing the selected cells, and the surrounding cells will shift to fill the gap.
13 Deleting rows or columns means removing one or more rows or columns from a Google Sheet.
14 Autofill is a feature that allows you to automatically fill in a series of cells with data based on the pattern of the first few cells.
Hints
1 To copy cell data, you can use the shortcut key.
2 Undo allows you to the most recent change.
3 allows you to reapply actions you have previously undone.
4 To paste cell data, you can use the shortcut key.
5 To select multiple cells, hold the left mouse button and the mouse.
1 After selecting a cell, you can replace its data by
a Clicking
c Typing
2 Which shortcut key combination can be used to paste cell data?
a Ctrl + C
c Ctrl + V
3 What does the undo feature do?
a Delete the selected cell
c Apply formatting
4 What is Autofill used for?
a To automatically fill in a series of cells with data based on the pattern of the first few cells
c To move data from one cell to another
5 How can you delete a cell in Google Sheets?
a Press the Delete key
c Right-click on the cell, select Delete cells and shift up
b Deleting
d Formatting
b Ctrl + Z
d Ctrl + Y
b Adds a new row or column
d Reverses the most recent change
b To copy and paste data from one cell to another
d To delete data from a cell
b Right-click on the cell, select Delete cells and shift left
d All of these
1 I am the process of cutting and pasting cell data.
2 I am a way to select multiple cells with a mouse.
3 I am the small dot that appears at the bottom-right corner of a cell.
4 I am the shortcut key to select all cells in a Google Sheet.
5 I help you automatically fill in a series of cells with data based on a pattern.
1 To select an entire row, you can left-click on the row number.
2 To insert a new row, you can left-click on the row number and select Insert 1 row above or below.
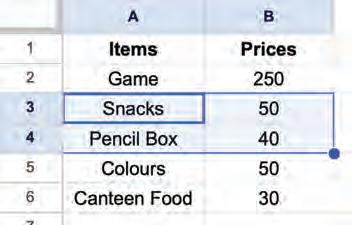
3 To select multiple cells, you can hold down the left mouse button on the first cell in the range and then drag the mouse to the last cell in the range.
4 Deleting a row in a spreadsheet will shift the remaining rows left to fill the gap.
5 You can use autofill to generate number series only.
1 What is the difference between copying and moving cell data?
2 How do the undo and redo features work?
3 Write the steps to insert a column.
4 How can you use Autofill in a Google Sheet?
5 What are the different types of series that Autofill can generate?
1 You are making a spreadsheet to keep track of how many books you read in a year. You want to choose the cells in the row for the month of January so that you can type the number of books you read that month. How can you choose the cells in the row for the month of January?
2 Rahul is making a budget table with different types of expenses and how much he spends on each one. He has missed an entry. How can he add a new row in between for the missed entry in his budget table?
3 You want to create a schedule for your next school project. You create a column with the header "Day" and then fill in Monday and Tuesday in the two cells below. How can you autofill the remaining days?
4 Ananya has a spreadsheet with some information. She needs to delete a group of cells that have wrong information. How can she delete a range of cells from a spreadsheet?
5 Shreya keeps track of the items that she sells in her store. She needs to add a new column to track how many of each item are left. How can she add a new column to track the availability of the items?
We are surrounded by data all the time. It is basically the information that we can use to learn about things and make decisions.
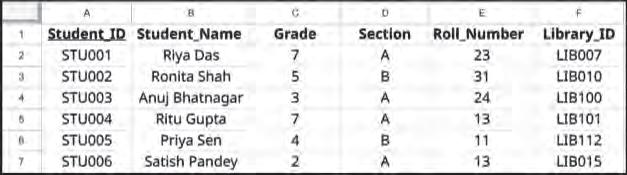
Take the example of your school. It keeps data about all the students, like their names, ages, grades, and library card numbers, to maintain records and track their progress.
Databases are a way to organise and store data so that it is easy to find and use. Databases are used by a wide range of users, including schools, businesses, and scientists.
Imagine your school library without a database. In that case, your school will not know what books are there, which books are issued to whom, and which books are needed. A database is an organised collection of data that is stored electronically on a computer system.

Databases are made up of tables. Each table contains information about a specific topic.
Databases help us store information in a way that is organised, easy to find, and secure.
Here are some of the reasons why databases are important:
Handle a huge amount of data: Databases can store a huge amount of data, which is helpful for keeping track of customers, products, or inventories.
Organisation: Databases help to keep data organised and easy-to-find. They store data in tables made of rows and columns, making it simple to search, sort, and create reports.
Efficiency: Databases can help improve efficiency by reducing the amount of time and effort required to find and manage data.
Accuracy: Databases can help improve the accuracy of data by eliminating the need for manual data entry. This can help reduce errors and improve the overall quality of the data.
Centralisation: Keeping all the information in one place helps structure data, prevents duplication, saves space, and makes you work better and faster, boosting productivity.
Data integrity: Data integrity means making sure data is accurate, complete, and consistent from start to finish. It is important because it affects the quality of decisions based on the data.
Security: Databases can be protected with passwords and other security measures to keep our information safe from unauthorised access.

Scalability: Databases can grow to hold a lot of data and handle many users. That is why they are ideal for all kinds of organisations, big and small.
Avoid data redundancy: Data redundancy means when the same data is stored in multiple places within a database. To make data management more efficient and secure, we can reduce redundancy by organising data using specific rules or using special software to keep one trustworthy source of data.
Collaboration: Collaboration in a database means that lots of people can work on it together without causing problems. Also, it is very easy in a database to check what changes each person has made because their name and ID are recorded for each change they make.
Big Data is a huge collection of information. Companies use it to recommend movies, and songs, you might enjoy. Know more about Big data by scanning this QR code.
The objects of a database are the building blocks that make up a database. They are used to store and organise data in a way that is efficient and easy to access.
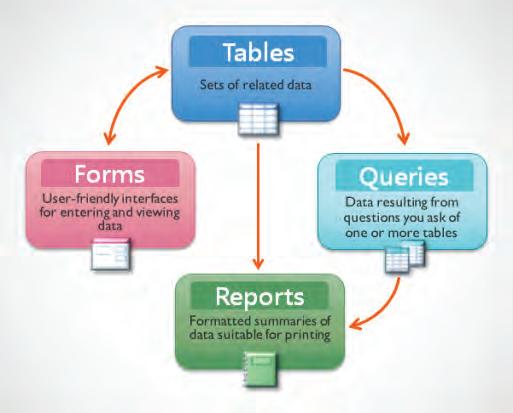
The main objects of a database are:
Tables: Tables are the basic building blocks of a database. A table is a collection of rows and columns, where each row represents a single record and each column represents a single piece of data about the record
Queries: A query is a request for data from a database. Queries can be used to retrieve, store, update, or delete data in a database. They also help to generate reports, perform data analysis, find and fix data errors, and more.
Reports: Reports are used to display data from a database in a formatted and organised way. They can be used to generate invoices, statements, mailing lists, and other types of documents.
Forms: Forms are user-friendly interfaces used to enter, edit, or get data from a database. They can be used to create new records, update existing records, and delete records.
A DBMS (Database Management System) is a software that helps us store, retrieve, and manipulate data in a database.
Did You Know?
The first DBMS was developed in the early 1960s by Charles Bachman.
a DBMS?
It acts as an interface between the database and user applications. It protects and keeps the database safe by restricting access for multiple users.
Database Management System consists of six main components.
These are:
Hardware
Software
People
Procedures
Data
Database Access Language
1. Hardware: The hardware of computers consists of physical components such as a keyboard, mouse, monitor, and processor.
Hardware captures the data and presents the output to the user. For example, input devices like a keyboard and mouse help us take input from the user, and storage devices such as a hard disk store that data. The CPU then processes the data and provides the output through output devices like a monitor or printer.
2. Software: Software is a set of programs that help hardware perform its job. It is made up of procedures and programs that can understand the language used for databases.
Some examples of DBMS software are MySQL, Oracle, SQL Server, dBase, FileMaker, Clipper, and Microsoft Access. FoxPro is a discontinued DBMS developed by Microsoft.


Smart home gadgets, such as those that control lights and music, use databases to work.
People: People interacting with computers are also referred to as the “live-ware” of the computer system.
They form the most crucial part of the DBMS.
These individuals control and manage databases, performing various operations within the DBMS. This group comprises the database administrators, software developers, and end-users.
4. Procedures: A procedure is a form of general instructions or guidelines for using a DBMS. These instructions include how to set up the database, install it, log in and out, manage it, create a backup, and generate reports from the database.
5. Data: These are the actual pieces of information, like numbers or text, that are input into a computer system.
Data refers to the collection of raw facts stored in a database. The database contains both the actual data and metadata. Metadata can be defined as data about the data.
For example, when you want to store data in a database, you need to identify the attributes needed to organise that data, such as the size of the data, name, and other related details. These specific pieces of information about the data to be stored are known as metadata.
6. Database Access Language: Database Access Language is a language that allows users to give commands to a database to operate the stored data. You can use this language to ask the database to do many things, such as getting data, modifying it, or removing it.
The most widely used Database Access Language is SQL. SQL stands for Structured Query Language.
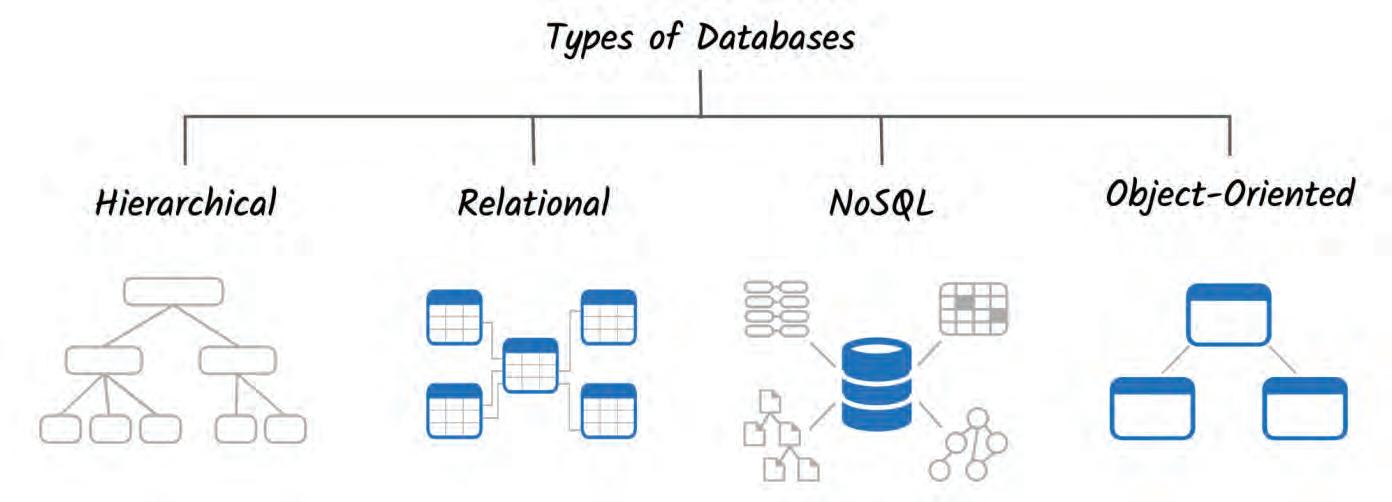
There are four main types of DBMS:
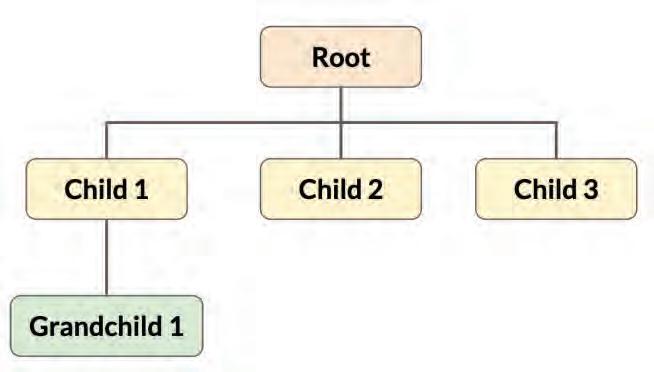
Hierarchical databases are like trees, where each piece of data has one parent and zero or more children. This makes it easier to add and remove data, but it can be difficult to find specific pieces of data. Hierarchical databases were invented in the 1960s and were used to store data on big computers. Today, they are still used in some applications, such as the Microsoft Windows Registry and XML.
In a hierarchical database, the top-level data element is called the root node. It is like the trunk of the tree, and all of the other data elements are like the branches and leaves. The endpoints of the branches are called leaves. Leaves contain the actual data, while the branches just show how the data is related to each other. Consider the example of a hierarchical database. In this example, the root node is the parent of child nodes 1, 2, and 3. Child node 1 is the parent of Grandchild node 1.
A relational database management system (RDBMS) is a software program that helps us to store and manage data in a relational database. A relational database is a type of database that stores data in tables, often called relations, and links them together based on defined relationships.
RDBMSs are the most common type of database, and they are used by all sorts of businesses and organisations. Some common examples of RDBMS are MySQL, Microsoft SQL Server, and Oracle.
RDBMSs use a language called SQL to access and manage data. SQL is a relatively easy language to learn, which is why RDBMSs are so popular.
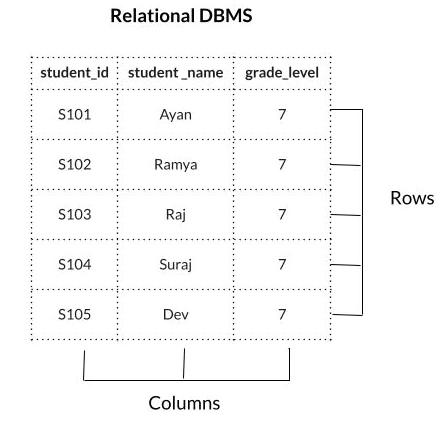
In the example, there are three columns (student_id, student_name, and grade_level) and 5 rows.
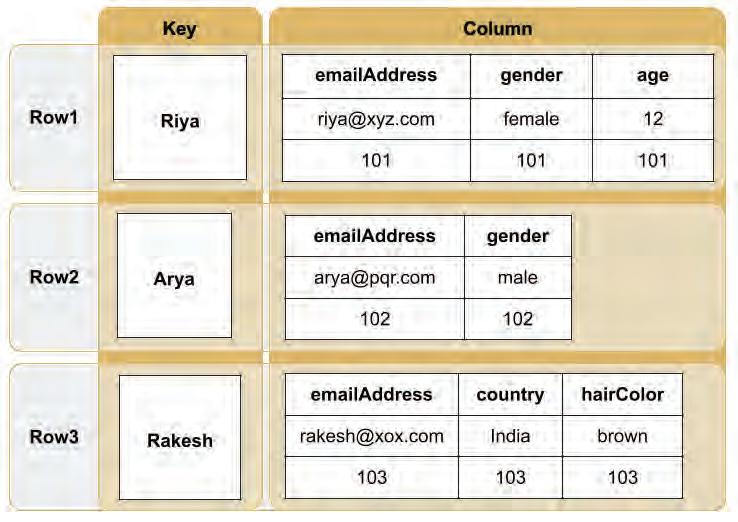
NoSQL DBMS stands for not only SQL database management system. NoSQL databases are different from relational databases. Relational databases store data in tables with rows and columns.
NoSQL databases use flexible data storage methods, including key-value pairs, document-oriented collections, column-family stores, and graph databases. Some examples of NoSQL databases are MongoDB, Cassandra, DynamoDB, and Redis.
NoSQL databases are often used for big data applications. This is because they can scale easily to handle large amounts of data.
Here is an example of a NoSQL database:
In this example, there are 3 rows or records with a key and columns or attributes as values for the key. The columns can be the same or different across the keys. This is how NoSQL supports flexible data to store for each key.
Object-oriented database management systems (OODBMSs) are different from relational database management systems (RDBMSs). RDBMSs store data in tables, while OODBMSs store data in objects.
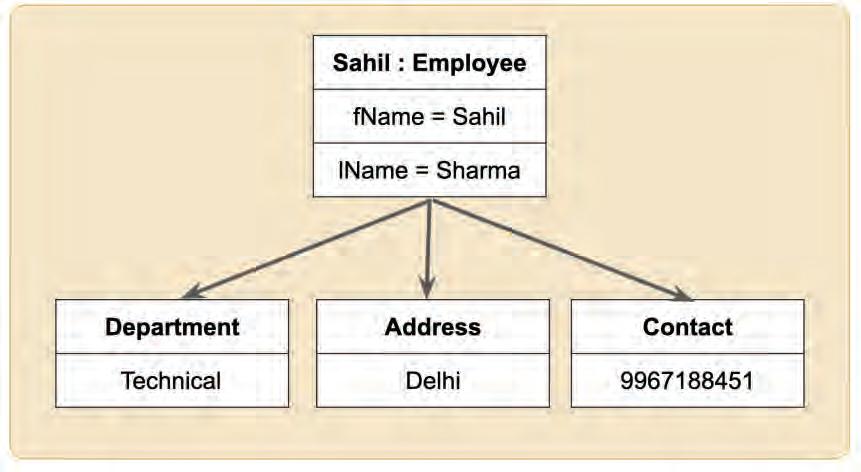
Objects are like boxes that can store all sorts of data, such as a person’s name, address, and phone number. Objects can also store relationships between each other. Many objects of the same type form a class. OODBMSs are often used for complex applications, such as engineering and telecommunications applications. They are also used for applications that need to store a lot of data, such as social media applications. Here is an example of OODBMS:
In this example, Sahil is an object of the Employee class. He has different relationships with other objects, such as:
1. He works in the Technical department.
2. He lives in Delhi.
3. He has the phone number 9967188451.
The words “works”, “lives”, and “has” represent the relationships.
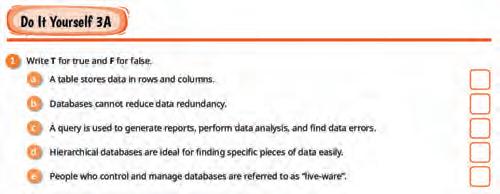
3A
1
c
d Hierarchical databases are ideal for finding specific pieces of data easily.
Match the columns. 2
Column A
Database
Data integrity
Database management system
Data redundancy
Column B
Occurrence of duplicate copies of similar data
A special computer program for managing databases
An organised collection of data
A process that makes sure data is accurate, complete, and consistent throughout the database
MySQL is a database management system that allows you to create your own databases. It allows you to create, update, and retrieve data using SQL. It is open-source, which means it is free to use. It is popular for its speed, reliability, and scalability.
SQL (Structured Query Language) is a language that can help ask questions only from structured data and give useful information. It allows you to perform various operations on the data stored in the database, such as updating, inserting, deleting, and modifying data, etc.
SQL is not a database management system, but a query language.
In SQL, we can frame queries (the questions to ask) using commands to get the information we want. For example, we can use SQL to ask the database for a list of all the people who live in a certain city or the names of all the books that have been written by a certain author.
The SQL commands can be divided into two categories: DDL and DML.
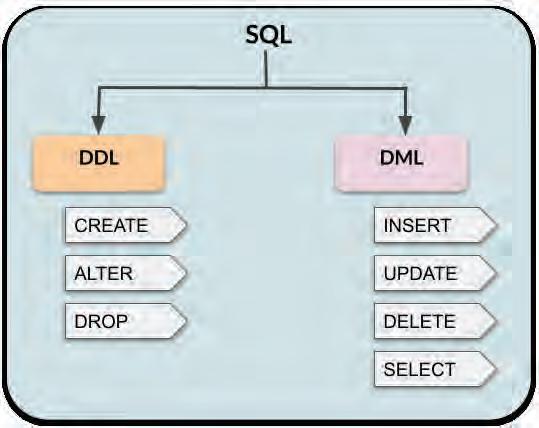
Stands for Data Definition Language
Purpose
Defines the structure of a database by creating database and tables
Commands CREATE TABLE, ALTER TABLE, DROP TABLE, CREATE INDEX, CREATE VIEW, etc.
Effect on data
Does not affect the data in database tables but rather affects the structure of databases and tables
Used by Typically used by database administrators to create and maintain the database schema
Filtering Data
Not used to filter data, so we do not have a WHERE clause for the DDL commands
Examples CREATE TABLE customers (
id INT NOT NULL AUTO_INCREMENT, name VARCHAR(255) NOT NULL, email VARCHAR(255) NOT NULL, PRIMARY KEY (id) );
ALTER TABLE customers ADD COLUMN phone VARCHAR(255);
DROP TABLE customers;
DML
Data Manipulation Language
Populates and Manipulates data in tables within databases
INSERT, UPDATE, DELETE, SELECT, etc.
Can affect the data in database tables but not the structure.
Typically used by application developers and end-users to interact with the database
WHERE clause is used with commands to filter the data
INSERT INTO customers (name, email) VALUES (‘John Doe’, ‘john.doe@example. com’);
UPDATE customers SET phone = ‘123-456-7890’ WHERE id = 1;
DELETE FROM customers WHERE id = 2;
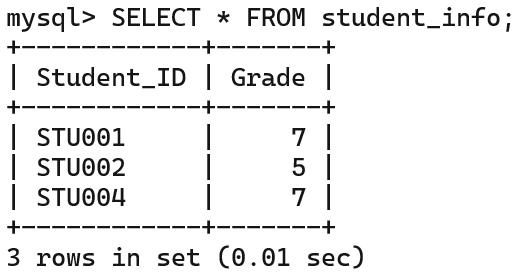
SELECT * FROM customers;
SQL commands are not case-sensitive, but in some DBMS, the table name and field names are casesensitive. This means you can write the SQL commands like SELECT, FROM, and WHERE in uppercase or lowercase letters.
Now, let us learn how to open MySQL on your computer.
To enter a record into a table, which command can be used?
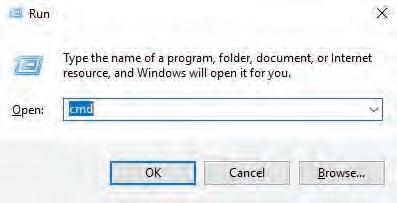
Follow the given steps to open MySQL on your system:
1. Press the Win + R shortcut key to open the Run window.
2. Type cmd and click on the OK button to open the Command Prompt.
3. Type the given command to login to your MySQL server.
mysql-uroot-p
4. Enter the password.
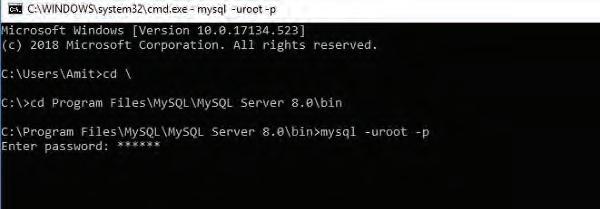
You will be logged into MySQL. Now, let us create a database.
The SQL command to create a database is:
This command will create a database with the name mydatabase.
Once you press the Enter key, the query will be executed and a database will be created.
The command to check if our database has been created and view the existing databases is:
It will return a list of all the databases.

Once we have created a database, the next step is to use it to create tables. To do so, we first need to enter the database we just created.
The command to enter a database:

Now, you can use this database to create as many tables as you want. Before creating the tables, let us understand the structure of a table.
A table is made up of rows and columns. The rows are called Records and the columns are called Fields. The column headers are called Attributes.
A record consists of related details about an entity.
An entity is the object about which you want to store data in a table. For example, Student, Employee, Library, Hospital, etc.
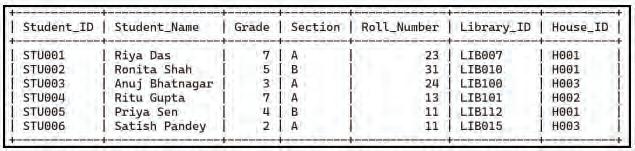
Consider the following Student table:
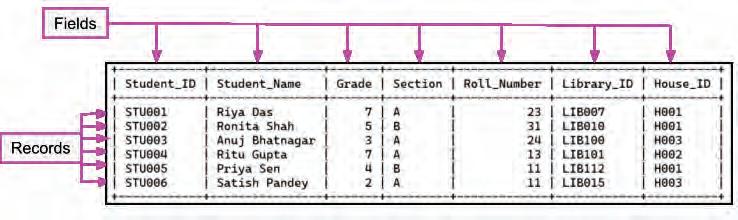
In the Students table, the fields or attributes are Student_ID, Student_Name, Grade, Section, Roll_Number, Library_ID, and House_ID. The values related to one student comprises a record.
If you look at the data within the columns or fields of the Students table, you will notice that they contain similar types of information. For example, Student_Name and Section contain characters representing names, Grade and Roll_Number consist of numbers, and Student_ID, Library_ID, and House_ID include a combination of letters and numbers. These characteristics are known as data types.
A data type defines what kind of data an attribute can hold.
Let us learn about the various data types we can have for fields in a table in MySQL.
The commonly used SQL data types are:
Data type Description Example
Number Used to store numeric values, such as integers, decimals, and floats. INT, DECIMAL, FLOAT
String Used to store text data, such as names, addresses, and descriptions.
Date and timeUsed to store date and time values, such as birthdays, appointment times, and product expiration dates.
VARCHAR, CHAR, TEXT
DATE, TIME, DATETIME
Boolean Used to store true or false values. BOOL
In the Students table, there are two columns that can only have unique values: Student_ID and Library_ID. However, other columns can have repeated values. For example, two students can have the same name, be in the same grade or section, or live in the same house. Also, a roll number can repeat if students are from different grades.
We can use the unique columns in a table as keys.
Keys are used to uniquely identify records in a table and establish relationships between tables. There are four main types of keys:
1. Primary key: A primary key is a unique identifier for each record in a table. It can be a single column or a combination of multiple columns. For example, in the Students table, we can make Student_ID the Primary Key as it uniquely identifies each row in the table.
2. Candidate key: A candidate key is a column or combination of columns that can uniquely identify each record in a table. A table can have multiple candidate keys, but only one can be the primary key.
For example, in the Students table, Student_ID, and Library_ID are the candidate keys, as they both uniquely identify each record in a table.
3. Composite key: A primary key can consist of more than one attribute. For example, in the Students table, Grade, Section, and Roll_Number when combined together, can identify a row uniquely. Hence, it can be a primary key.
When a primary key consists of more than one attribute, it is called a composite key.
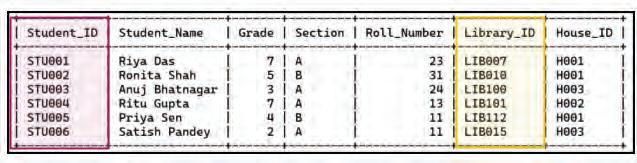
4. Foreign key: A foreign key is a column in one table that references the primary key of another table. This creates a relationship between the two tables.
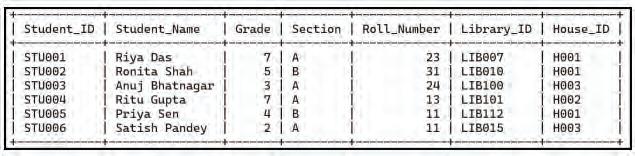
Consider the following tables:
Students table:

House Table:
House_ID House_name
H001 Red house
H002 Yellow house
H003 Green house
Both tables have an attribute named House_ID. The field House_ID is the primary key in House_table, but it is not a primary key in students_table. That is why House_ID is considered a foreign key in the students_table.
The CREATE table command is used to create a table. The syntax is as follows:
Syntax:
CREATE table <table_name>
(Field1 datatype, Field2 datatype, … );
The command to create the Students table is as follows:
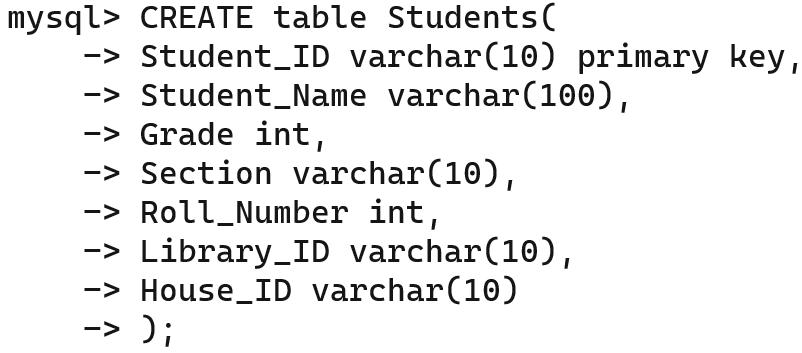
It has seven columns: Student_ID, Student_Name, Grade, Section, Roll_Number, Library_ID, House_ID. Each column has a specific data type, such as varchar for Student_ID, Student_Name, Section, Library_ID, and House_ID, INT for Grade, and Roll_Number.
The command to see tables inside a database is:
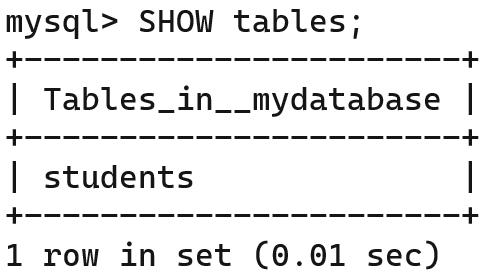
Now, let us add records of the students to the table we have created.
Syntax:
INSERT into <table_name>
(value1, value2, …);
To insert a record in the Students table, use the command:
This command will add a record to the table. You can repeat this command to add multiple records to your table.
What data types can add a numeric value to the table?
Queries allow us to retrieve, manipulate, and analyse data as we need. We use DML commands to make queries to retrieve data in MySQL. DML commands apply filtering and sorting techniques to extract relevant information from the database.
Let us learn about some DML commands to make queries and retrieve data.
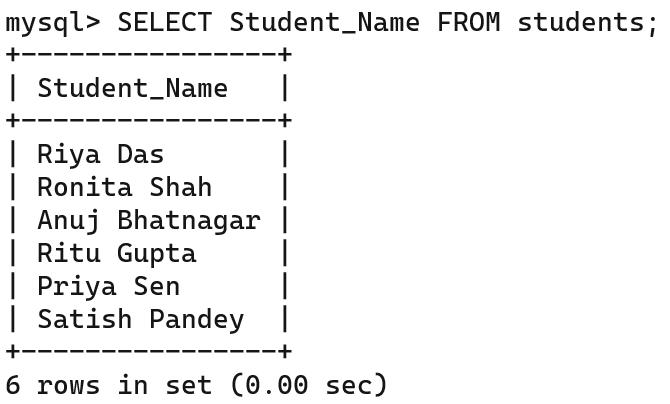
We have already seen how the SELECT command is used to display records from a table. The SELECT command can be used in multiple ways to display data.
1. To display all the records from the table with all the columns.
SELECT * FROM table_name;
This will display all the records from the table.
2. To display all the data of a specified column(s).
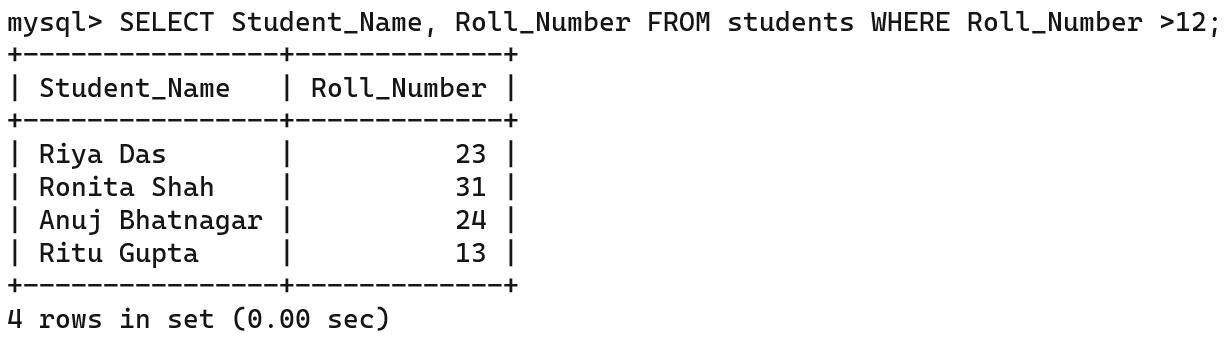
You can filter data using the WHERE clause with the SELECT command to display records based on a condition.
Syntax:
SELECT column1, column2, ...
FROM table_name
WHERE condition;
You can build conditions using arithmetic operators, such as =, >, <, >= or <=.

The logical operators are used to create more complex conditions in SQL queries. The most commonly used logical operators are AND and OR.
The AND logical operator is used when you want to have more than one condition, and all the conditions must be true.
For example, to retrieve the records of the students who are in Grade 7 and are in Section A:

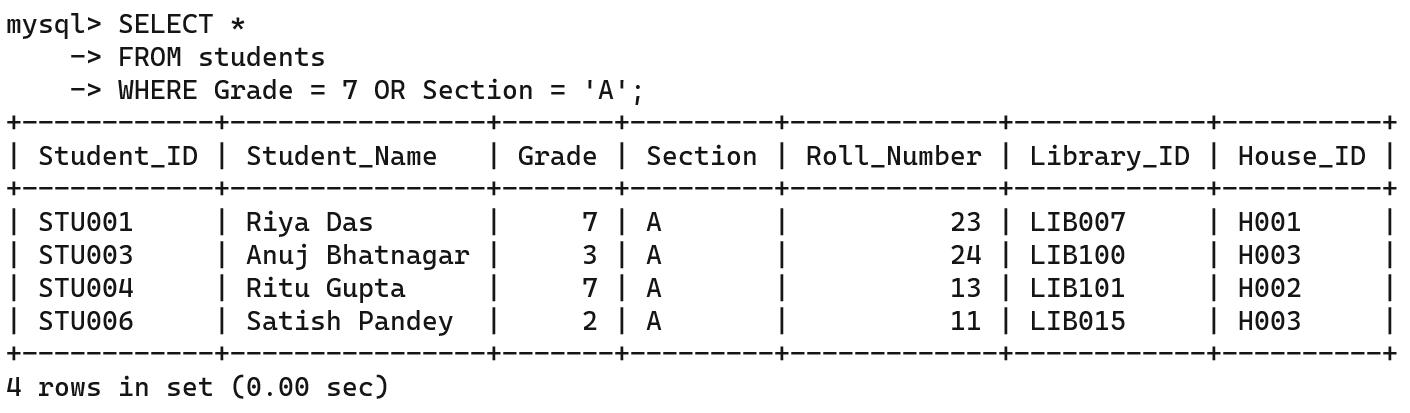
The OR logical operator is used when you want to have more than one condition, and either of the conditions can be true.
For example, to retrieve the records of the students who are either in Grade 7 or in Section A (or both). You can use the OR operator like this:
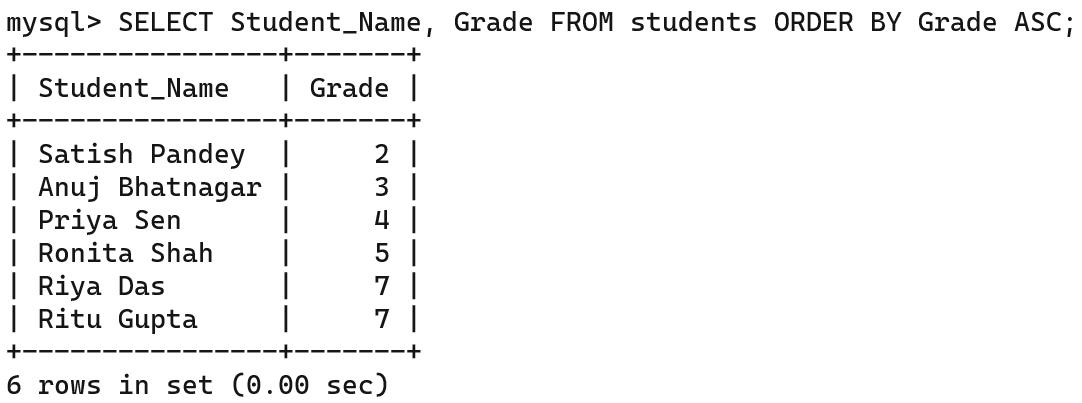
The ORDER BY clause allows you to sort the retrieved data in ascending (ASC) or descending (DESC) order based on one or more columns.
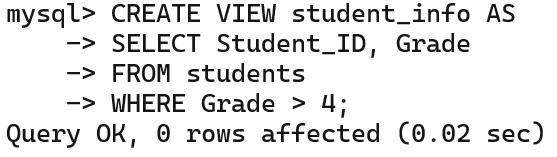
A view is a virtual table that is based on one or more tables. It does not store any data but instead displays the data from the underlying tables in a specific way. Views are used to simplify complex queries, restrict access to data, and create custom reports.
To create a view in MySQL, use the given command:
Syntax:
CREATE VIEW view_name AS
SELECT column1, column2, ...
FROM table_name
WHERE condition;
Example:
To see the records of a view in MySQL, you can simply query the view using a SELECT statement.
Views and tables in MySQL serve different purposes and have distinct characteristics.
DefinitionA virtual table is based on one or more tables.
Storage Does not store any data.
PerformanceCan be slower than tables, as the view needs to be evaluated each time it is queried.
Security Can be used to restrict access to data by only showing certain columns or rows of data to certain users.
A physical table that stores data.
Stores data on disk.
Can be faster than views, as the data is already stored in memory.
Does not have built-in security features.
ComplexityCan simplify complex queries. Can make complex queries more difficult to write and understand.
Use casesUsed to simplify complex queries, restrict access to data, and create custom reports.
1 Fill in the blanks.
a SQL commands can be categorised into and
Used to store and organise data.
b DDL commands are used to define the of a database.
c DML commands are used to manipulate and data.
d The WHERE clause is used with the command to filter data.
e To enter a record into a table, you can use the command.
2 Answer the following questions.
a Identify and write down the field names if you had to create a table named Library in the School database.
b Write SQL commands to create the table for your idea and to add records.
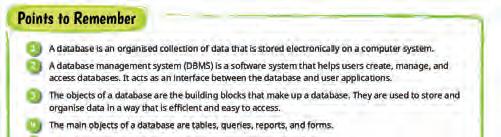
1 A database is an organised collection of data that is stored electronically on a computer system.
2 A database management system (DBMS) is a software system that helps users create, manage, and access databases. It acts as an interface between the database and user applications.
3 The objects of a database are the building blocks that make up a database. They are used to store and organise data in a way that is efficient and easy to access.
4 The main objects of a database are tables, queries, reports, and forms.
5 Database management system consists of six main components: Hardware, Software, Data, Procedures, Database Access Language, and People.
6 There are four main types of DBMS: Hierarchical, Relational, NoSQL, Object-Oriented.
7 MySQL is a database management system that allows us to create our own database.
8 SQL (Structured Query Language) is a language that can help us ask questions only from structured data and gives useful information. The SQL commands can be grouped into two: DDL and DML.
9 A table is made up of rows and columns. The rows are called Records and the columns are called Fields. The column headers are called Attributes.
10 A data type defines what kind of data an attribute can hold.
11 The common data types that are used to define the type of data used in the table are: INT, FLOAT, CHAR, VARCHAR, DATE, and DATETIME.
12 Keys are used to uniquely identify records in a table and establish relationships between tables.
13 You can filter data using the WHERE clause with the SELECT command to display records based on a condition.
14 The AND logical operator is used when you want to have more than one condition, and all the conditions joined should be true.
15 The OR logical operator is used when you want to have more than one condition, and either of the conditions can be true.
16 The ORDER BY clause allows you to sort the retrieved data in ascending (ASC) or descending (DESC) order based on one or more columns.
17 A view is a virtual table that is based on one or more tables.
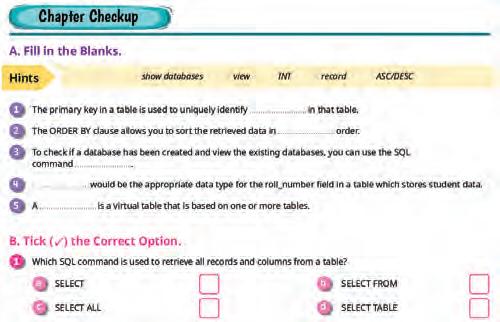
Hints show databases view INT record ASC/DESC
1 The primary key in a table is used to uniquely identify in that table.
2 The ORDER BY clause allows you to sort the retrieved data in order.
3 To check if a database has been created and view the existing databases, you can use the SQL command
4 would be the appropriate data type for the roll_number field in a table which stores student data.
5 A is a virtual table that is based on one or more tables.
1 Which SQL command is used to retrieve all records and columns from a table?
a SELECT
c SELECT ALL
2 In SQL, what does the WHERE clause do?
a Orders the result
c Groups the result
b SELECT FROM
d SELECT TABLE
b Filters the result
d Joins multiple tables
3 Which SQL operator is used to filter data based on multiple conditions where all conditions must be true?
a OR
c AND
4 Which SQL operator is used to sort the result set in descending order?
a SORT BY
c DESC
5 What is a primary key in SQL?
a A key used for foreign table references
c A key used for sorting records
b =
d NOT
b ASC
d ORDER BY
b A key that uniquely identifies a record in a table
d A key used for ordering records
1 I am a collection of data which is stored electronically on the computer system in the form of tables.
2 I am a language used to create new databases, insert data, delete data, and more.
3 I am a software that helps us store, retrieve, and manipulate data in a database.
4 I am the collection of data, organised in terms of rows and columns.
5 I am a type of key that uniquely identifies each record in a table and is used to establish relationships between tables.
1 Databases are like digital filing systems that help organise and store information.
2 The CREATE TABLE command is a DDL command.
3 The ALTER TABLE command is used to create a new table.
4 Data types define what kind of data a field can have, such as numbers, text, or dates.
5 Views are used to restrict access to data.
1 What are the main components of a database management system (DBMS), and what do they do?
2 Explain the significance of DDL (Data Definition Language) and DML (Data Manipulation Language) commands in managing a database.
3 Describe the purpose of the WHERE clause in SQL queries and provide an example of its usage.
4 Discuss the differences between a primary key and a composite key in the context of a database.
5 Explain the function of the ORDER BY clause in SQL and how it can be used to sort retrieved data.
1 Your school’s database contains a table Student_Record with the attributes Student_Name, Grade, and Section. A new student, Sarah, has joined Grade 6, Section B.
Write the command to insert her record in the table.
2 You want to see the list of students who are in Grade 5, Section A at your school in the table named Student_ Record.
What SQL query would you use to get this information?
3 Your school has many students with the same name, such as “Raj”. The database has a table of students with their names. What can help you uniquely identify each student in the database?
4 Riya wants to retrieve a list of books by a specific author from the library’s database. What SQL command can she use to obtain this information?
5 Shreya needs to generate a list of all the students in Grade 7 who are in the school’s basketball team. What SQL command can she use to obtain the list?

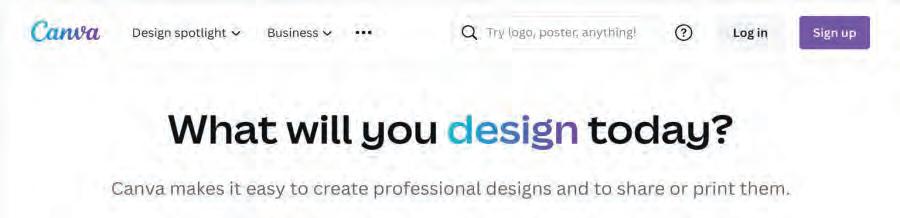
Canva is a free graphic design platform used to create graphics and presentations. The word ‘graphics’ refers to visual art or images. Using graphics and text, we can easily convey ideas and information to a reader.
Canva is used for making various types of visuals that can be used in posters, on social media, presentations, flyers, infographics, and many more.
Let us learn how to create projects with graphics using Canva!
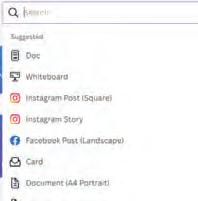
To get started with Canva, follow the steps:
1. Open a web browser.
2. Type www.canva.com in the address bar. The home page of the website opens.

3. Create a new account by clicking on the Sign up button. Or, log in to Canva by using your existing mail address by clicking on the Log in button.
To log in to an existing account
To create a new account
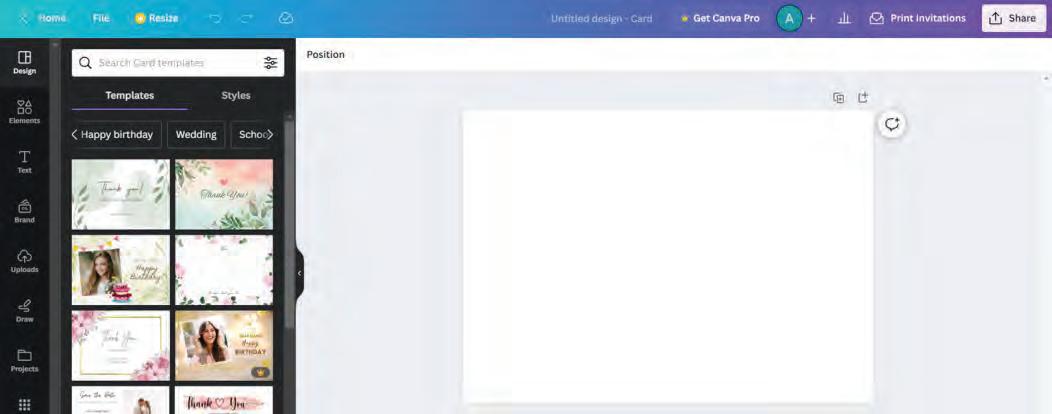
After you log in, the first screen will look like the image given here. You can see a variety of design templates and tools that you can choose from.
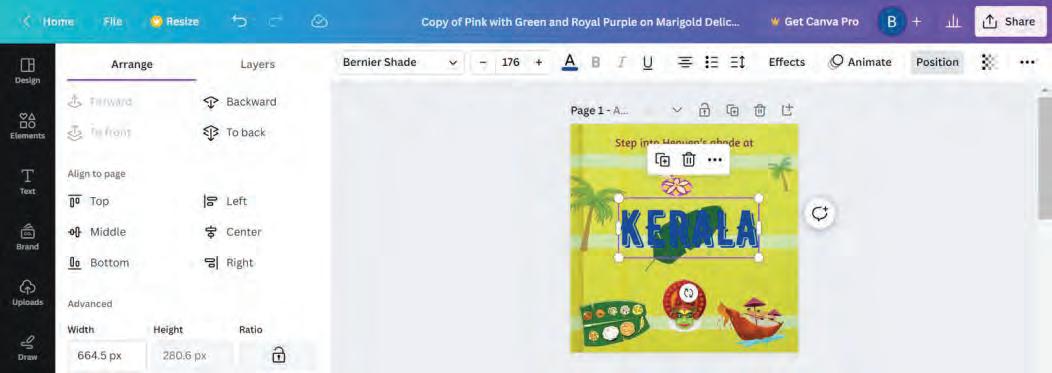
Let us create a card using Canva. The card will be on the culture of Kerala. Once you learn how to make a card, you can make another one on any other state of your choice.
To create a card:
1. Click the Create a design button in the top right-hand corner of the screen. A drop-down menu will appear.
2. Choose Card as the design type from the menu.

3. A new window opens where you can design the card.
To set the background image for your card, follow the steps:
1. Scroll down the left-hand sidebar and then select the Background option.
2. Choose a suitable background from the list.

Now, you can add various elements to your design.
Elements in Canva are colourful images, stickers, icons, and shapes that you can easily add to your designs to make them interesting.
Let us follow these steps to add some elements on the card:
1. Click the Elements option on the sidebar. A drawer menu appears.
2. Browse the various elements displayed in the menu
3. You can also type a keyword in the Search elements box and press Enter.
4. The elements related to the keyword will appear.
5. Select an element to add. The selected element appears in the design area.

Other than elements, you can also add text to your design. Follow the steps to add text to your project:
1. Click the Text option on the sidebar. A drawer menu appears.
2. Select the Add a text box button.
3. A text box with default settings appears in the design area.
4. You can select the font style and font size from the text options displayed in the options bar above the design area. Now, type the desired text in the text box.

In a similar manner, add more elements and text to your design.
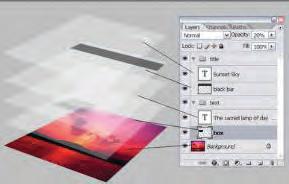
When you add new elements to Canva, they get placed on top of each other, creating layers of elements.
A layer can be considered as a transparent sheet. Suppose you need to create a drawing with various elements. There are multiple transparent sheets with one element drawn on each sheet. Now, put these sheets on top of each other. You can observe a complete drawing with multiple elements.

After all the elements are placed in the design area, you can position them as required. Let us explore the various ways to position an element or a layer.
1. Click on an element.
2. Click on Position in the Options bar.
3. A sidebar opens on the left-hand side, consisting of two tabs, Arrange and Layers.
3
Let us learn about the various options in the Arrange and Layers tabs.
In the Arrange tab, the general settings for arranging various elements appear. This panel is further divided into various sections.
The first section helps us with the arrangement of layers.
Forward—moves the selected layer a layer above.
To front—moves the selected layer to the top of the stack.
Backward—moves the selected layer a layer below.
To back—moves the selected layer to the bottom of the stack.
2
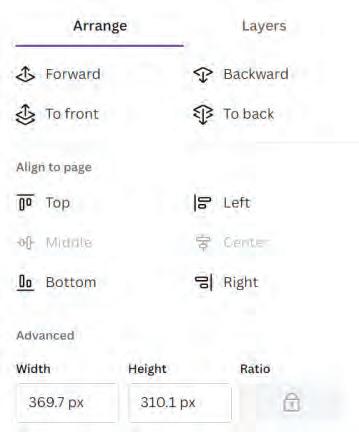
This section helps you to align the elements on your page.
For vertical alignment, use the options Top, Middle, and Bottom.
For horizontal alignment, use the options Left, Center, and Right.
Let us align the text “KERALA” in the middle of our design:
1. Select the text to be aligned.
2. Then, select the Middle option, to position the element vertically in the middle of the design page.
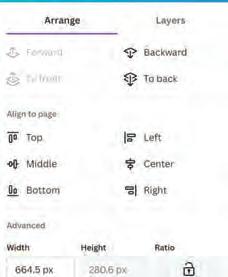

The Advanced section lets you move, turn, or resize elements in your design, using exact values. It is like using a ruler to place any element exactly where you want it.
Width refers to how wide an object is, and height refers to how tall an object is.
In Canva, you can type the values to specify the exact object size. You can change the values of width and height by typing the required values in the Width and Height fields. Here, px stands for pixels.
Rotate
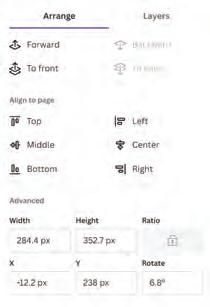
The Rotate option in Canva allows you to turn the element around at the required angle. You can use this feature to show elements from various angles.
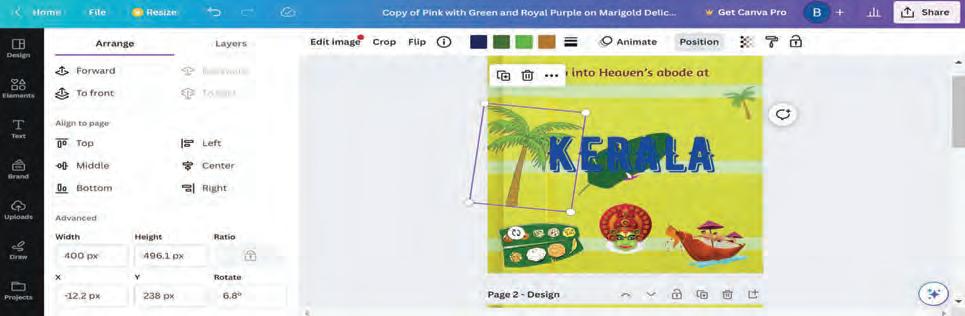
To rotate an element:
1. Select the element to be rotated.
2. Change the value of the Rotate field to the required angle. Alternatively, you can also rotate elements with the help of the Rotate icon.
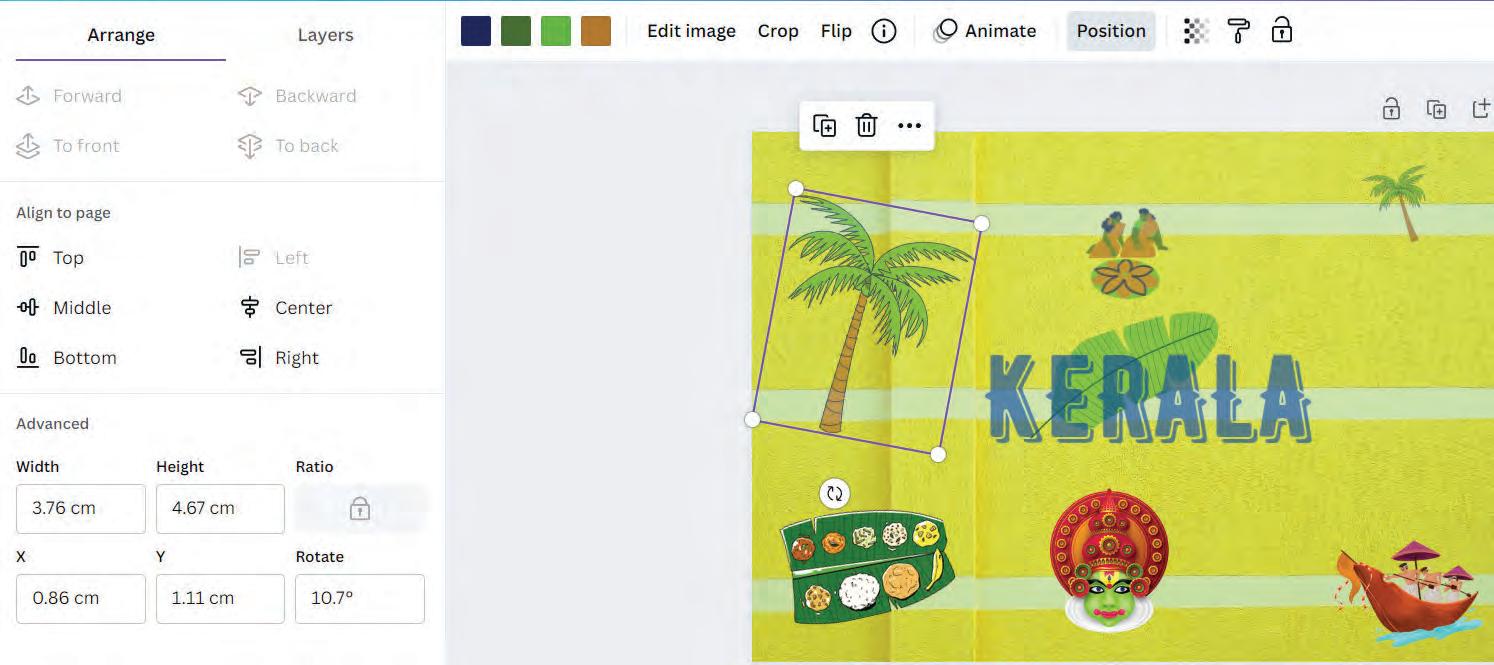
Hold the Rotate icon and move it to change the angle of the element.
You can use the Layers tab to view the list of the layers in your project. By dragging the layers using a mouse, you can arrange the layers from this tab as well.
Go to the Layers tab and select the All tab under it.
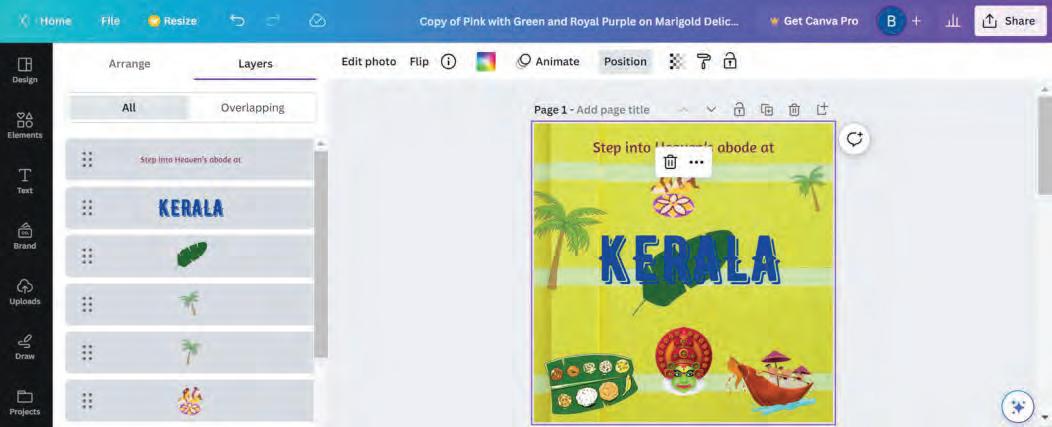
Top Layer
Different layers in the design
Bottom Layer
If there are multiple layers in a project, it becomes difficult to select the exact layer on which you want to work. In such a case, the Overlapping tab is helpful.
1. Go to the Layers tab and select the Overlapping tab under it.
2. This tab shows only the layers that overlap with a selected layer. Select the layer you are looking for and make the required changes.
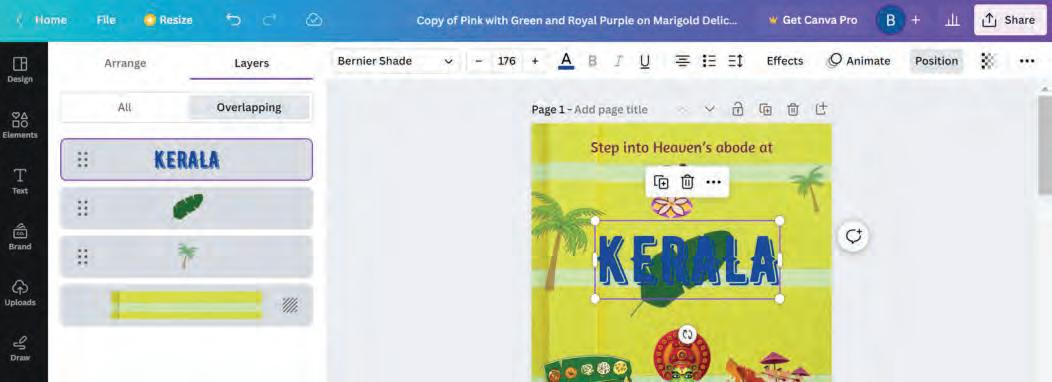
Imagine you are creating graphics in Microsoft Paint. You have added a few shapes and text overlapping each other. Later, you realise that the text is hiding behind the shapes. Is it possible to correct it without re-creating it in Paint? If you create the same project in Canva, how would it be helpful?
Duplicating a layer means creating a copy of it. This can save a lot of time when you want to use the same element multiple times in a project. What if you want to add two trees? You will simply duplicate the layers.
To duplicate a layer:
1. In the Layers tab, right-click the layer that you want to duplicate. A drop-down menu appears.
2. Select the Duplicate option.
3. The selected layer is duplicated.
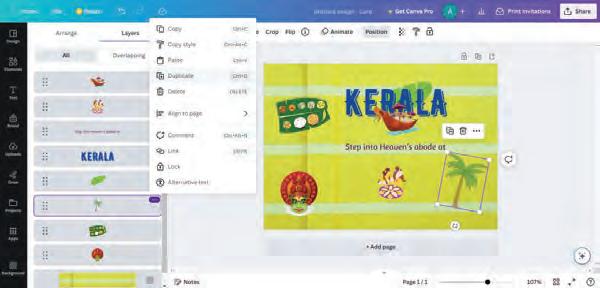

Deleting layers that are not needed helps maintain an organised design. To delete an element from your design, delete its corresponding layer.
To delete a layer:
1. In the Layers tab, right-click the layer you want to delete.
2. Select the Delete option.
3. The selected layer is deleted.
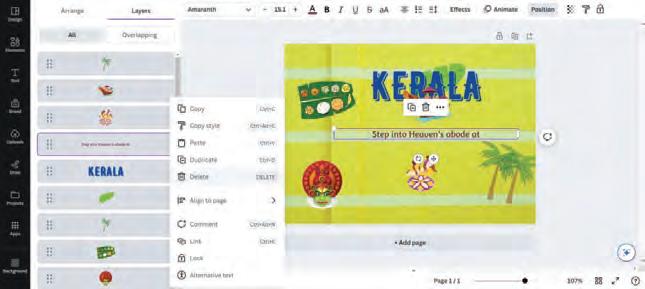

Do It Yourself 4A
1

As of 2023, 80 crore designs have been created using Canva since its launch.
Guess the alignment of the text “Happy Birthday” in the given designs.

Alignment:

Alignment:
Write T for True and F for False.
a The Middle and Center alignment options serve the same purpose.
b The To Front option is different from the Forward option.
c The To Back option places an element immediately behind the other element.
d You can change the order in which the elements are layered.
Tick () the correct option.
a The Align to Page feature helps you to:
i Make elements invisible.
iii Align the elements on page.
Have you ever seen a flipbook?
ii Create complex designs.
iv Change the colour of the element.
It is a small book with a series of images at various positions on separate pages. When you quickly flip through such a book, it creates the illusion of movement of the objects drawn on the pages.
The cartoon movies that you watch are created in a similar fashion. Many images are drawn and flipped through at a fast pace so that the characters seem to be moving. This is what we call animation.

“Snow White and the Seven Dwarfs”, released in 1937, is Disney’s first full-length animated movie!
After creating a design in Canva, you can make it look interactive by adding animations. Canva has many useful tools using which you can create interesting animations. Let us learn how to use them.
Page animations decide how your page will enter the screen.
To add page animation:
1. Select the page. (Make sure you select only the background, not the other elements.)
2. Click the Animate option on the top bar. A sidebar with the tab Page Animations opens showing a list of animations.
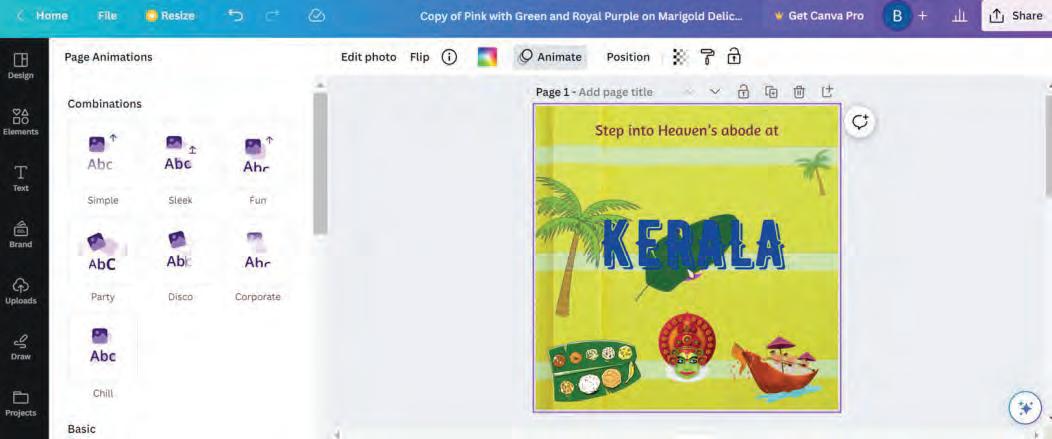
3. Place the mouse cursor over the effects to see what they look like on your page.
4. Click the Play button, at the top right-hand side of your screen.
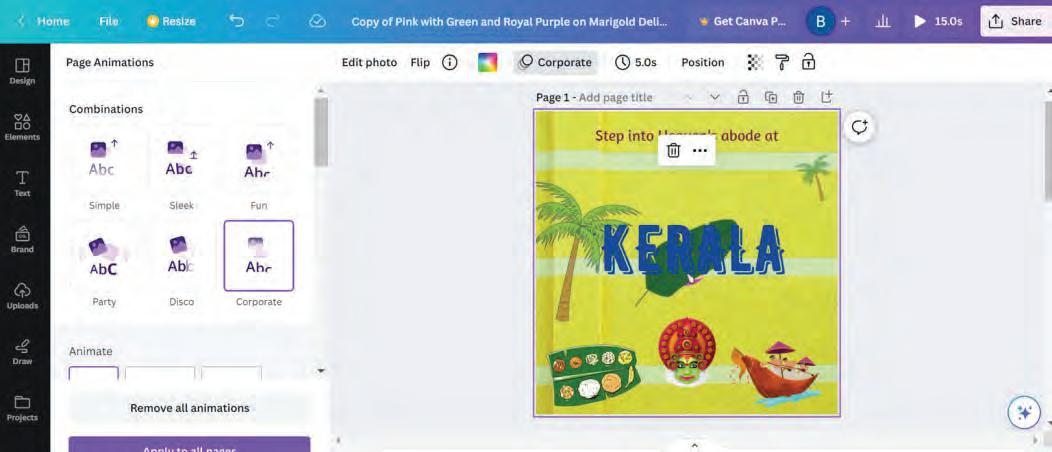
You can animate specific texts and elements present on a page in the same way as you can animate the entire page.
To add element animation:
1. Click the text/element you want to animate.
2. Select the Element Animation tab from the sidebar and apply the desired animation effect to your element.
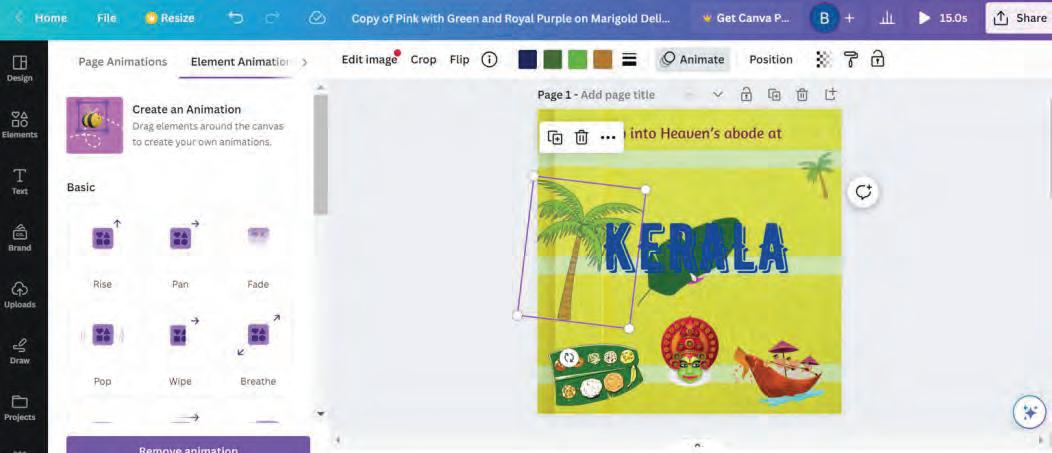
Now, let us learn about some more features Canva has to offer.
Applying transparency means making the elements look see-through. In Canva, all elements are fully visible by default. This means that Transparency is set to 100.
To apply transparency:
1. Select an element from your design, for example, the boat.
2. Click the Transparency icon from the options bar above the design area. The Transparency slider appears.
3. Move the slider to the left to decrease the transparency of the boat and to the right to increase the transparency.
4. Observe the effect on the element’s transparency. 1
2 3
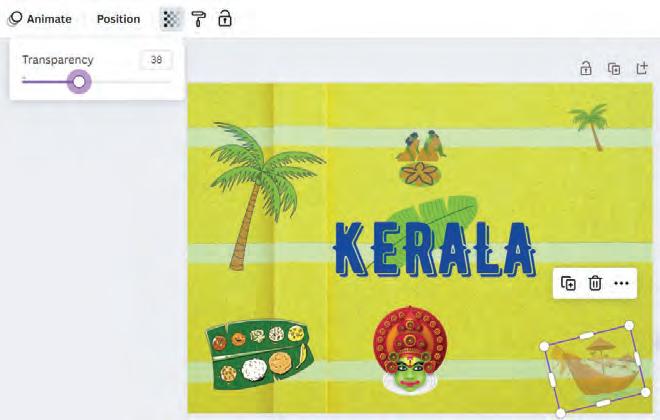
Suppose you like the style of an element or a page, such as font, colour, effects, or transparency. You can apply the same styles to other elements or pages as well.
To copy and apply a style, follow the given steps:
1. Let’s say, you like the boat for its transparency and want to copy the same to another element.
2. Right-click the boat. A context menu appears.
3. Click the Copy style option. The style is copied.
4. Click the element where you want to apply the copied style. For example, click the mask placed below the word “KERALA”.
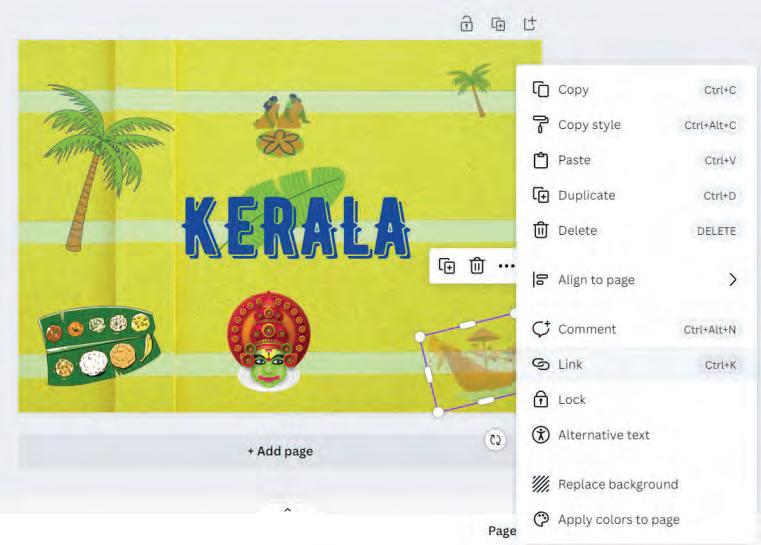
The mask becomes transparent with the same transparency value, just like the boat.

Locking an object makes sure that the object remains in its place while you work on the other parts of the design. You can either lock an individual element or the entire page.
To lock the entire page, select the page and click the Lock page option, as shown in the given image.
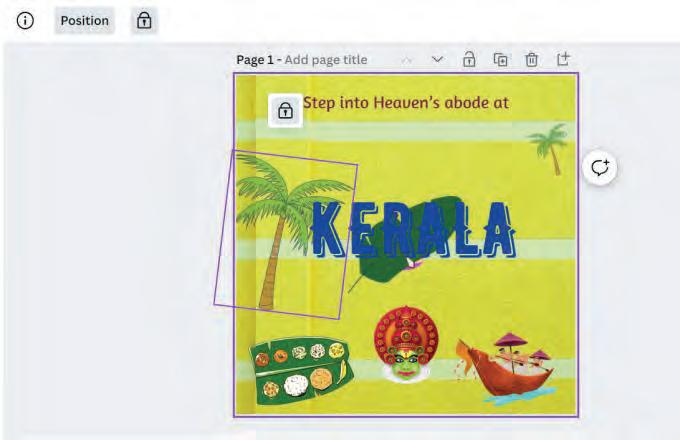
To lock the specific elements, right-click the element and select the Lock option from the context menu. You can also click the Lock symbol present on the top bar. The element is locked. Note that another Lock symbol appears near the locked element.
To unlock the element, click the Lock symbol again.
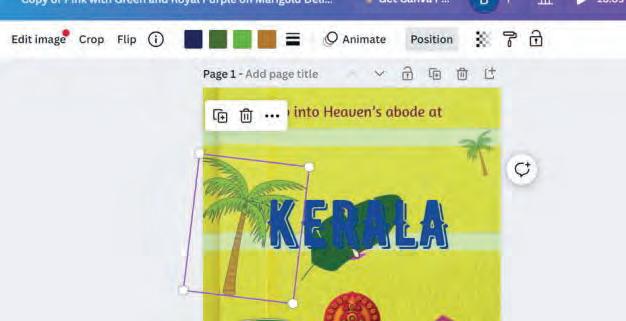
How can the Lock feature be helpful when you are creating a project?
Create the designs in Canva, as shown here.


Wonder how animation works practically?
Fill in the blanks.
a Page Animation decides how the will enter the screen.
b To see how your animation looks on an element, you use the button.
c The feature is used to copy the style of an element to another.
Match the following:
Task Icon
When you have completed a design and want no change in it
When you want to make the elements look see-through
When you want to have the same style as the current element
Canva is a free graphic design platform that is used to create various visual contents, such as graphics, presentations, posters, social media graphics, flyers, and more.
Canva has a wide variety of design templates and tools to choose from for your projects.
Canva offers colourful images, stickers, icons, and shapes as elements that you can easily add to the designs to make them more engaging.
You can also add text to your design using the Text option from the sidebar. You can choose various options for fonts, sizes, and types.
When you add new elements in Canva, they are placed on top of the ones you have already added, creating layers of elements.
You can use the Position option to adjust the layering, alignment, and size of elements.
You can make your designs look interactive by adding animations.
You can use the Copy Style option to copy the style of one element and apply it to other elements.
You can use the Lock option to lock specific elements or the entire page to prevent accidental changes while working on other parts of your design.
A. Fill in the Blanks.
Hints create a design position shapes visuals
Canva is a popular online tool used for creating various types of .
To create a design in Canva, you need to click the button. Elements in Canva include graphics, stickers, icons, and .
The option in Canva allows you to control the arrangement of various elements in your design.
B. Tick () the Correct Option.
What can layers in Canva NOT be compared to?
a Transparent sheets placed on top of each other
c Layers of paint
In Canva, what can you add animation effects to?
a Only the text elements
c The entire design
What can you do with text animation in Canva?
a Change the font of the text
c Make the letters move, slide, bounce, or fade
What does adjusting transparency in Canva do?
a Changes the font size of the element
c Makes a layer see-through
How does the Copy Style feature in Canva help your design?
a It changes the animation effects.
c It duplicates the entire design.
b Jigsaw puzzle
d Images put on top of each other
b Only the images
d Only the background colour
b Adjust the transparency of the text
d Convert text into images
b Rotates the element
d Duplicates the element
b It applies the same style from one element to another.
d It adds comments to the design.
I make layers see-through, creating visual effects and overlays.
I can animate elements to slide, bounce, or fade in and out.
I prevent unwanted changes in the project.
I help you position the element at the top, in the middle, or centre of the design area.
I am used to turn elements around to a desired angle.
D. Write T for True and F for False.
Canva is difficult to use and requires professional design skills.
The Layers tab in Canva helps order the elements like a stack.
Locking objects in Canva prevents any changes to that element.
The element will not be visible if the transparency value is 100.
The Forward option brings the layer to the top of the stack.
What is the purpose of the Position option in Canva?
Explain the difference between the Forward/Backward and To Front/To Back arrangement options.
What is animation?
What are layers? Give an example.
Aleena is making a poster for Diwali. She places various elements in her design. Which Canva feature can she use to put the elements exactly in the centre?
Archita made a crossword puzzle for her classmates, using Canva. However, she made some adjustments to the project, causing the crossword to become nearly invisible. What do you think she must have done?
Maya is creating a design with lots of elements. She wants some objects to be in front while others hide behind them. Which Canva feature can she use to control the layers and make her design look like a playful scene?
Imagine you are a young chef who wants to share your favourite recipes. You have designed a digital recipe card using Canva. You have created multiple layers of elements in the recipe card. The text of the recipe card is hidden behind the images. What might be the problem?
Rani created a card for her friend’s birthday. She was showing it to her younger brother Anuj. Anuj was very curious and deleted the text in the card by mistake. How could Rani have prevented this mistake?


Can you imagine a world where:
your smartphone understands your commands;
your email accurately filters out spam; and
your car automatically navigates through traffic and parks at the right spot?
All of this is actually possible with the help of Artificial Intelligence or AI. Artificial Intelligence is the ability of machines to think and act like humans.
Therefore, Artificial Intelligence is a branch of computer science that helps to create intelligent machines capable of simulating human-like reasoning, problem-solving, and decision-making.

Want to know more about artificial intelligence? Scan here!
Be it in your classroom or in the marketplace, or at your home, you can find applications of AI everywhere. Some prominent fields where AI has made a significant impact are given as follows:
Field Application
Healthcare
Business
Education
Banking
Transport
Social Media
Security
Robotics
Smart homes
Detecting diseases, discovering new drugs, doing remote surgery
Preventing fraud, helping us shop by giving recommendations
Smart content that helps us learn
Managing money and bank accounts, preventing fraud
Autonomous vehicles, ride-hailing apps, navigation system
Face recognition, content filtration
Data security, identification of fraud, threats, etc.
Heavy industry, robotic surgeries, home assistants
Smart devices and connectivity to mobile applications
In
There are three main domains of AI:
Machine Learning: Machine learning is like teaching a computer to learn from experiences. It is used to help computers do smart things on their own.
Let us understand this concept with the help of an example:
When you teach your pet to recognise your friends, you may reward it every time when it correctly recognises them. Over time, your pet is able to recognise your friends and family more quickly than earlier. Similarly, AI machines also learn from vast datasets, becoming increasingly intelligent over time.
Computer Vision: This domain of AI makes the computers ‘see’ and ‘recognise’ objects.
For example, just as we see an object and immediately recognise it, similarly the AI machine looks at an object using cameras, and matches it with the thousands and thousands of images in its dataset. If the object matches the description of the given object, then the machine recognises it.
Natural Language Processing: Natural Language Processing or NLP makes the computers understand the human language in text and spoken form.
Digital assistants and chatbots use the concept of NLP to interact with humans. In this chapter, you will learn more about NLP. Let’s get started.
Have you ever wondered how AI assistants like Alexa or Siri listen to your commands and respond? It is possible with the help of a domain of AI, that is called Natural Language Processing.
Imagine a situation where you are talking to a computer or a robot. As it is a machine, it will not be able to understand your language. Here, NLP plays its role. NLP makes the machine understand your language and respond to you in a way that makes sense.
NLP helps computers understand us and talk to us like people. To understand the concept of NLP practically, let us create an app which will convert the input text to speech. For this, we will use the MIT App Inventor.
This app will process the input text and convert it to speech.
So, let’s get started.
The MIT App Inventor is an online platform for creating apps for mobile phones and tablets. It is a very easy and simple platform to learn app creation and coding. This platform focuses on teaching everyone, especially young children, to create their own apps.
The Tekie platform allows you to access MIT App Inventor directly.
If you are accessing MIT App Inventor directly, follow the steps given. Otherwise jump straight to starting a new project.
1. Visit the following link to open MIT App Inventor: https://appinventor.mit.edu/
2. The following screen appears:

3. Click on the Create Apps! Button.
4. A sign in screen appears. You can use your Gmail id to login or you can create a new one.
5. After signing in, the Welcome to App Inventor pop-up box appears. Click on the Continue button at the bottom of the screen.
6. Another screen appears, from where you can choose to view the tutorials or you can start a new blank project.


Continue Button
1. Click on START A BLANK PROJECT.
2. The Project View window appears.
3. A dialog box appears asking to give a project name to your project.
4. Give an appropriate name to your project, for example, text_to_speech and click on OK.
5. A new project with the same name will be created.

Click here to start a blank project
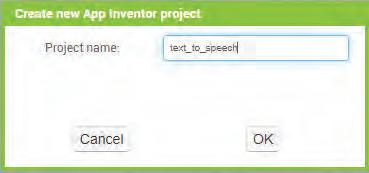
6. Click on it. The Project View window will open.
The Project View window is divided into four sections:
Palette: Various components are present under different categories in the palette.
Viewer: You can select any component from the palette and drag and drop it on the screen in the Viewer section.
Components: The components section shows the various components that are placed in the Viewer.
Properties: The Properties section shows the properties of the selected component.
Palette
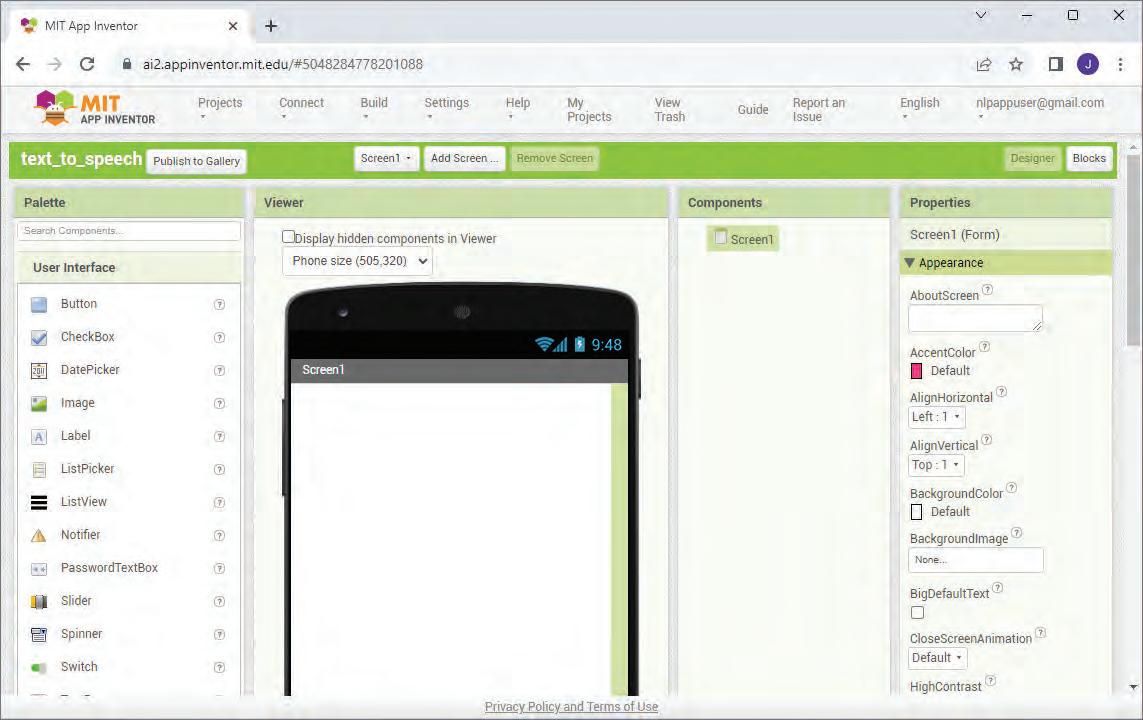
Viewer Properties
Components
Let us now create the interface of the app.
1. From the Palette section, drag the Button component and place it in the Viewer section on Screen1.

Button 1 added in
Components section
2. You can observe the Button1 component is also added under the Components section.
3. Now in the Properties section, scroll down to the Text property of the button. Replace the text “Text for Button1” with “Text to Speech”.
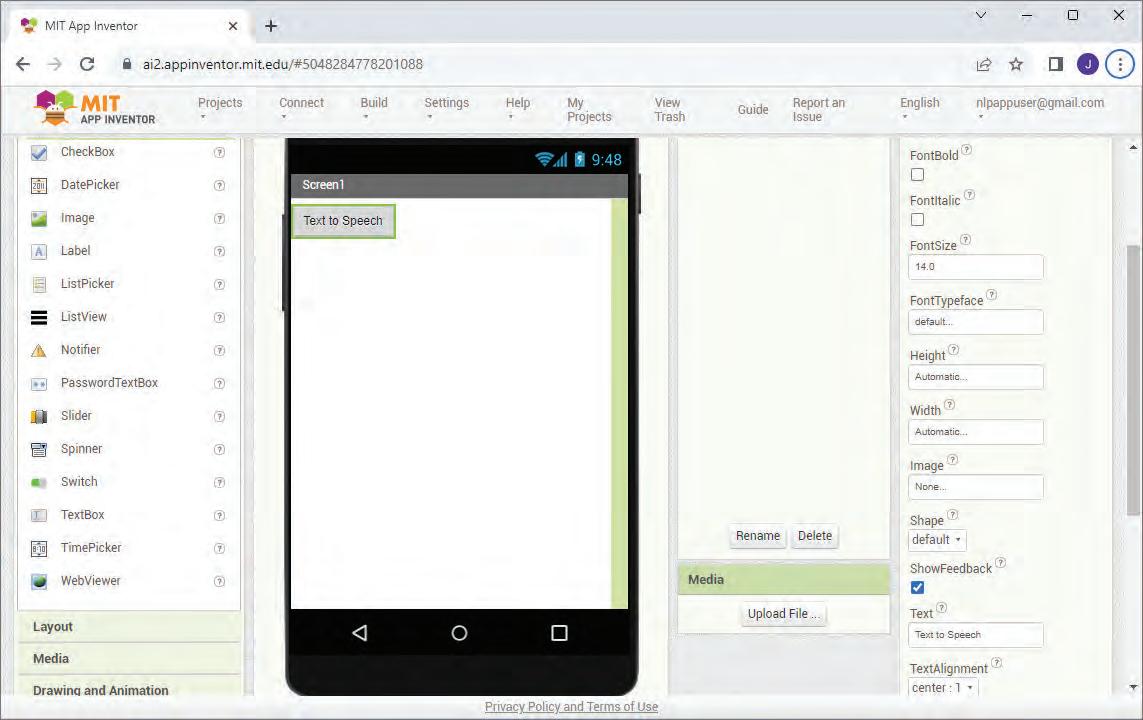
4. Now, in the Palette section, click on the Media drawer.
5. Select the Text to Speech component and drop it on Screen1.
6. It will not be visible on the screen. However, you can see it below Screen1 as a Non-visible component.
The interface of the app is created. Now, let’s create a code for it.
The next step is to create a code for the app. To code in MIT App Inventor is very easy and userfriendly. You can create code for your app by using various blocks present in the Blocks Editor
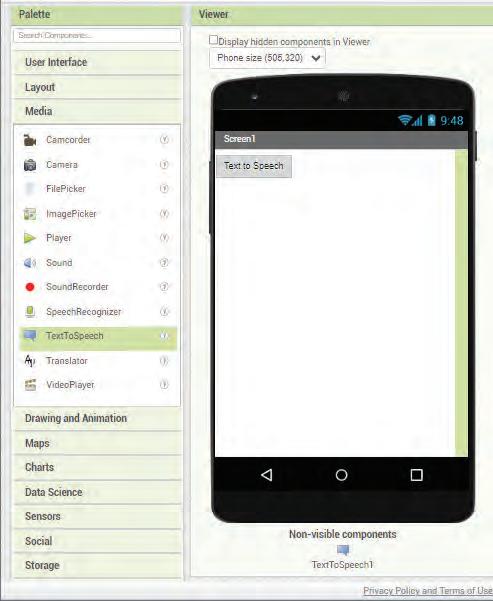
To create code for your app, follow the given steps:
1. Click on the Blocks Editor button in the right-hand upper corner of the Project View window.
2. The Blocks Editor will open with the Blocks section on the left and the Viewer section on the right.
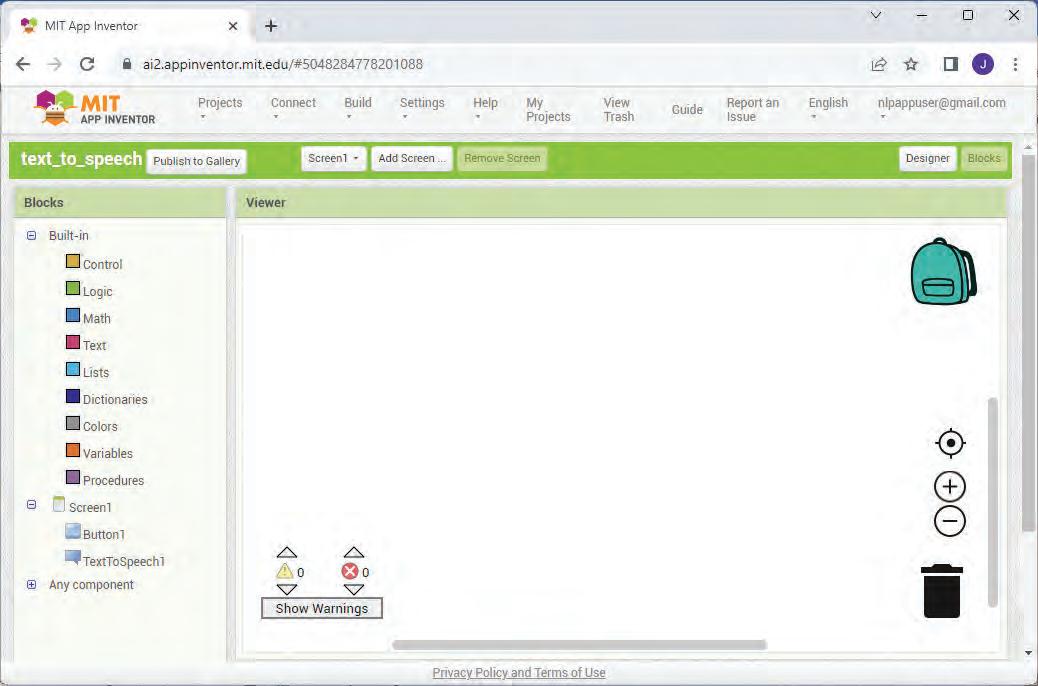
3. Click on Screen1 > Button1 from the Blocks pane.
4. The blocks related to Button1 will appear.
5. Drag when Button1.Click block from the Blocks drawer and drop it in the Viewer pane.
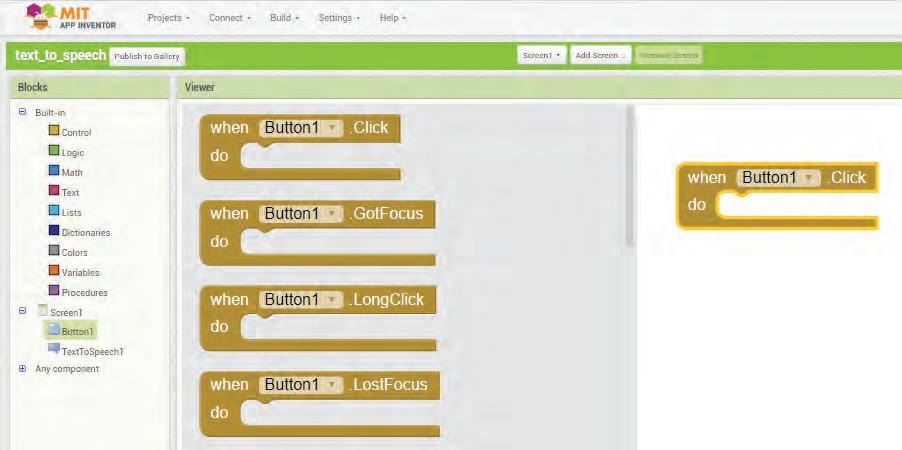
6. Similarly, click on Screen1 > TextToSpeech1
7. The blocks related to Text to Speech component will appear.
8. From the Blocks drawer, drag the call Text to Speech1.Speak block and drop it inside the when Button1.Click block.
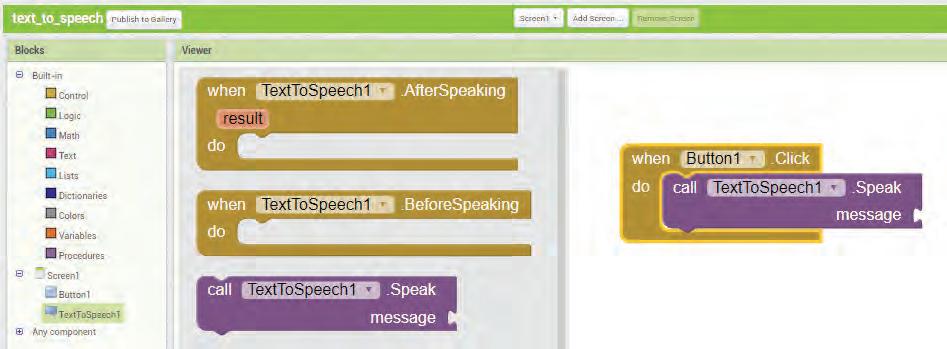
9. Now, from Built-in > Text drawer, drag the “A text string” block and plug it into the socket labelled message.
10. Click inside the text string block and type your desired message. For example, “Welcome to the world of coding!”
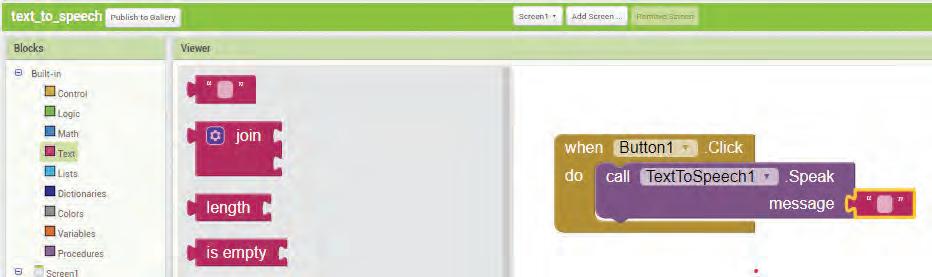
11. Your app and its code are ready to use.

1. To test your app, you will need a mobile phone.
2. Go to the Google Play Store of your android phone and download MIT AI2 Companion App
3. Install the app by clicking on “Install”.
4. After installation, open the app. You have to provide a six-character code to connect.
5. Now, to get the code, go to your computer where you have created your app.
6. Go to the Connect menu and select the AI Companion option.
You can scan this QR Code to get the MIT AI2 Companion App on your mobile phone.
7. A Connect to Companion window will open with a six-character code.

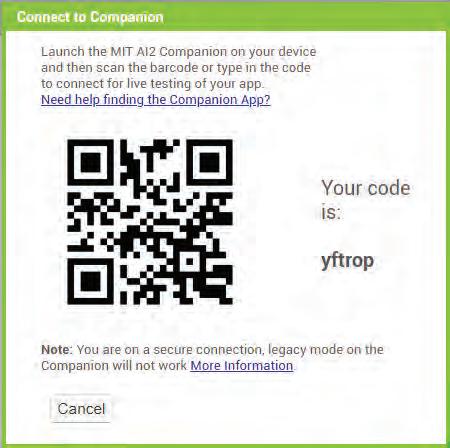
You can now fill in this six-character code on the mobile phone app.
1. The app will now open on your mobile.
2. Click on the button that you have created.
3. You will be able to hear the message that you have provided in the app code, that is “Welcome to the world of coding!”
4. Keep exploring!
Welcome to the world of coding!

Artificial Intelligence is the ability of machines to think and act like humans.
Some of the applications of AI are in the fields of healthcare, business, education, banking, transport, social media, security, robotics, and smart homes.
There are three main domains of AI: Machine Learning, Computer Vision, and Natural Language Processing.
Machine learning is like teaching a computer to learn from experiences.
Computer vision makes the computers see and recognise objects.
Natural Language Processing or NLP makes the computers understand the human language in text and spoken form.
MIT App Inventor is an online platform for creating apps for mobile phones and tablets.
The Project View window of MIT App Inventor is divided into four sections, Palette, Viewer, Components, and Properties.
Hints natural language processing experience computer vision humans
1 2
3 4
Artificial Intelligence is the ability of machines to think and act like . NLP stands for
Machine Learning is like teaching a computer to learn from helps computers see and recognise objects.
1 2 3
What does AI stand for?
a Advanced intelligence
c Artificial intelligence
b Artificial information
d Automated invention
Which domain of AI focuses on teaching computers through experience?
a Computer vision
c Machine learning
What is the main purpose of Natural Language Processing?
a To make computers understand human language
c To design mobile apps
b Natural language processing
d Deep learning
b To create virtual reality games
d To analyse images
Which of the following is NOT an application of AI?
a Predicting the weather
c Personalised shopping recommendations
I am a branch of computer science that enables machines to simulate human-like reasoning, problem-solving, and decision-making.
I am a domain of AI that help computers do smart things on their own.
I am often used by digital assistants and chatbots.
I am an online platform that makes it easy for people, especially young children, to create their own mobile apps.
D. Write T for True and F for False.
Artificial Intelligence refers to the artificial intelligence of humans.
b Detecting diseases in healthcare
d None of these
Natural language processing makes computers understand human language only in written form.
Machine learning involves teaching computers using experiences.
Computer vision allows computers to recognise objects through touch.
What are the three main domains of AI mentioned in the chapter?
How does Machine Learning work? Give an example.
Describe the concept of Computer Vision and provide an example.
Explain how Natural Language Processing (NLP) makes computers understand human language.
What is the purpose of the MIT App Inventor?
Amitesh is a healthcare professional. Explain to him how he can make use of AI in the healthcare field.
Sharvi is creating a project in which she wants to create a code for the computer to recognise things. Which domain of AI will she be using to create this project?
Nimisha owns a pet cat. She is training her to recognise various objects in her room. Which domain of AI learns in a similar manner?
Rudra wants to create a personalised app for his business. Which application would you suggest that he use?
Just like pictures make a book more interesting, images make websites more exciting and interesting. Images are used for many purposes, such as providing visual support to written content, conveying feelings, telling stories, providing clarity of purpose, and making the content easy to remember.


Let us learn to add and style images.
In an HTML document, you can add images using the following methods:
1 Using the <img> element: The most common way to add images is by using the <img> element. You need to specify the source (URL) of the image, using the src attribute.
Here is an example:
<img src=”image.jpg” alt=”A beautiful landscape”>
In this example, ‘image.jpg’ is the source file for the image, and “A beautiful landscape” is the alternative text (alt text) that appears if the image cannot be displayed.
2 Using background images: You can set background images for HTML elements (like <div> or the entire <body>), using CSS.
Note the following points while adding images in a web page:
1 You can acquire the image to be inserted into the web page from any resource. It can be a file downloaded and saved on your computer, or you can provide a direct link to an online resource.
2 If the image is on your computer, both the image and your web page should be saved in the same folder or location. In this case, you can reference the image file like this:
<img src=”image.jpg”>
3 If the image and the HTML file are in different folders, then you should give the full path or relative path to the image in the code. The corrected example should look like this:
<img src=”C:\images\image.jpg”>
or using a relative path like:
<img src=”../images/image.jpg”>.
4 You can provide the URL of the image directly if it’s hosted on the internet:
<img src=”https://www.example.com/image.jpg”>.
5 In case you are using the Tekie platform for developing your project, then you will get the required resources for the respective projects on the platform.
Here is an example of setting a background image for a <div> element:
<style> .my-div {
background-image: url(‘background.jpg’); background-size: cover; /* Adjust the size as needed */ } </style>
<div class=”my-div”>
<!-- Content of the div goes here --> </div>
In this example, ‘background.jpg’ is the source file for the background image and ‘background-size: cover;’ ensures that the image covers the entire div.
In the last chapter, we created a project called Space Exploration. In this chapter, we will add an astronaut image to the project.
Project: Space Exploration
Task 3: Adding an astronaut image Code
<body>
<h1>Space Exploration</h1>
<img src=”rocket.jpg” alt=”rocket” width=”100” height=”100”>
<div class=content>
<html>
<head>
<title>Space Exploration</title>
<style>
body { background-image: url(“space_background.jpg”); color: white; text-align: center;
}
.content{ text-align: left; }
</style>
</head>
We can style an image in two ways:
1 Using a style attribute: To use a style attribute, specify the CSS properties you want to apply to the image, separated by semicolons.
For example, the following code makes the image 100% wide and auto height:
<img src=”https://example.com/image.jpg” style=”width: 100%; height: auto;”>
2 Using a class: To use CSS to style an image, you can either create a CSS class or ID and apply it to the image using the class or id attribute, or you can use an inline CSS block.
Here is an example of how to use a CSS class to style an image:
<img src=”https://example.com/image.jpg” class=”image-style”>
.image-style {
width: 100%; height: auto; margin: 10px; }
You can use CSS to style images in many ways.
Here are some of the most common CSS properties used to style images:
• width: Specifies the width of the image.
• height: Specifies the height of the image.
• margin: Specifies the amount of space around the image.
• padding: Specifies the amount of space between the border of the image and its contents.
• border: Specifies the border around the image.
• border-radius: Specifies the radius of the corners of the image border.
• box-shadow: Specifies a shadow around the image.
• opacity: Specifies the transparency of the image.
• filter: Specifies a filter to apply to the image.
Project: Space Exploration
Task 5: Adding an image and styling it using a class
<html>
<head>
<title>Space Exploration</title> <style> body {
Code
background-image: url(“space_background.jpg”); color: white; text-align: center;
.img-style{
border: 5px solid orangered; border-radius: 15px; width: 120px; height: 80px; margin: 10px;
} .content{ text-align: left; margin: 10px;
} </style>
</head>
<body>
<img src=”planet.jpg” align=left class=”img-style”>
<h1>Space Exploration</h1>
<!-- The remaining code will be same-->
1 Match the columns.
Column A
Column B
Is an attribute for specifying the source of an image Used to provide alternative text for images
Is an HTML element for adding images Using a class
Is a purpose of the alt attribute margin
Is a way to apply CSS styles directly to an HTML element src Specifies the amount of space around the image <img>
Hints class height border-radius <img> background-image
a In an HTML document, you can add images using the element.
b The attribute of an <img> tag is used to style an image using a class.
c The property specifies the height of the image.
d To set background images for HTML elements, you use the property.
e The property can make the corners of an image round.
Imagine that a container element is like a box and the flex items are like the objects inside the box.
A flexbox is a CSS layout module that allows you to easily create flexible and responsive layouts by arranging the objects inside the box in a flexible and responsive way.
You can line up the objects in a row or a column, and you can control how much space each object takes up. You can also control how the objects are aligned inside the box, such as horizontally centred or vertically centred.
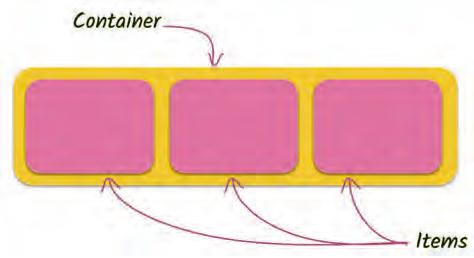
A flexbox works by dividing a container element into flex items. These items can be any type of an HTML element, such as divs, spans, and images. Flex items can be resized and rearranged to fit the available space in the container.
Here is a simple example of how to use a flexbox:
<div class=”container”>
<div class=”item”>Item 1</div>
<div class=”item”>Item 2</div>
<div class=”item”>Item 3</div>
</div> .container { display: flex;
}
.item { flex: 1; }
This code creates a container element with three flex items. The flex items are arranged horizontally and take up equal amounts of space.
You can also use a flexbox to control the alignment of flex items. For example, the following code vertically aligns the flex items in the centre of the container: .container { display: flex; align-items: center; }
You can also use a flexbox to control the direction of flex items.
Share some of the applications or websites where you notice the use of flexboxes.
For example, the following code arranges the flex items vertically instead of horizontally: .container { display: flex;
flex-direction: column; }
Property Purpose
display: flex
flex-direction: row | column
flex-wrap: wrap | nowrap
Makes the parent container flexible.
Allows flex items of the container to be displayed row-wise or column-wise.
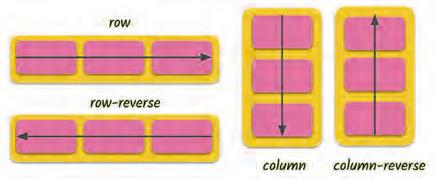
Allows flex items to wrap onto more than one line.

justify-content: centre | flex-start | flex-end Allows items to align along the main axis.
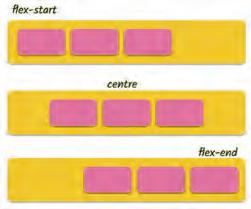
align-items: centre | flex-start | flex-end Allows multiple lines of items to align along the cross axis.
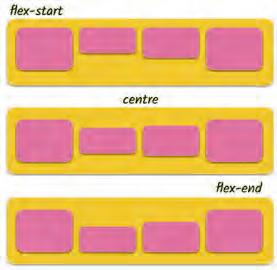
Property Purpose
align-content: centre | flex-start | flex-end Allows items to align along the cross axis in a single line.
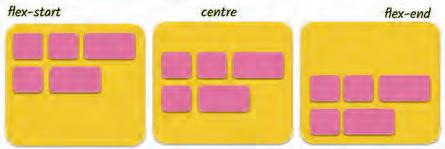
Property Purpose
order allows the change in order of items without altering the source order.
flex-grow allows an item to fill up the available free space.
flex-shrink allows an item to shrink if there is not enough free space available.
flex-basis defines the size of an item before space is distributed.
flex shorthand for flex-grow + flex-shrink + flex-basis
flex-self can align a single item within the flex container.
Project: Space Exploration
Task 6: Use a flexbox to place items within a web page.
1 Replace the body element with the header class and update as shown to add a flex container for the header part of your web page.
2 Update the content class by adding a flex container.
<html>
<head>
<title>Space Exploration</title>
<style>
.header{
display: flex; background-image: url”(space_background.jpg”); justify-content: center; color: white; border-radius: 5px; width: 100%; }
.img-style{
border: 5px solid orangered; border-radius: 15px; width: 120px; height: 80px; margin: 10px;
Code
.content{
display:flex;
text-align: left; margin: 10px;
3 Add the new classes for cards.
a .card-holder – a flex container for flex items
b .cards - flex items
c .cards-img - for images in flex items
d .cards:hover - to add a hover feature Code
.card-holder {
display: flex; justify-content: space-around; flex-wrap: wrap;
.cards {
width: 16%; color: white; background-color: #2c3350; padding: 10px; border-radius: 5px; margin: 0.35%; font-size: 14px; text-align: center;
.cards-img { position: relative; width: 90px; height: 65px; border-radius: 5px;
.cards:hover {
background-color: #646f9a; box-shadow: 5px 5px 5px 5px #d3d3d3;
</style> </head>
4 Add the header division. Code <body>
<div class=header> <img src=”planet.jpg” align=”left” class=”img-style”>
<h1>Space Exploration</h1>
<img src=”rocket.jpg” alt=”rocket” width=”100” height=”100”>
</div>
5 Add a sub-heading for the article cards.
<div class=content>
<p><b>Space exploration</b> is the study of space and everything beyond Earth’s atmosphere. We use robots and spacecrafts to explore space and learn new things about it. <br><br> Space exploration has led to many <i><b>amazing discoveries</b></i>, such as exoplanets (planets that orbit other stars), water on Mars, and black holes. <br><br> Space exploration is also important for inspiring people and showing us what is possible.
</p>
</div>
<h3> Links of interesting articles about Space:</h3>
6 Add the card-holder and cards div tags.
7 Add the image and text for the first article card.
<div class=card-holder>
<div class=cards>
<img src=”exoplanet.jpg” class=cards-img>
<p>What is an exoplanet?</p>
</div>
8 Duplicate the cards div of the first card.
9 Change the details of the second card.
<div class=cards>
<img src=”another_Earth.jpg” class=cards-img> <p>Another earth?</p>
</div>
10 Repeat the process to create remaining cards.
<div class=cards>
<img src=”neutron_star.jpg” class=cards-img>
<p>Neutron Star</p>
</div>
<div class=cards>
<img src=”far_away_galaxies.jpg” class=cards-img>
<p>Far-away Galaxies</p>
</div>
When done, run your code to test it.
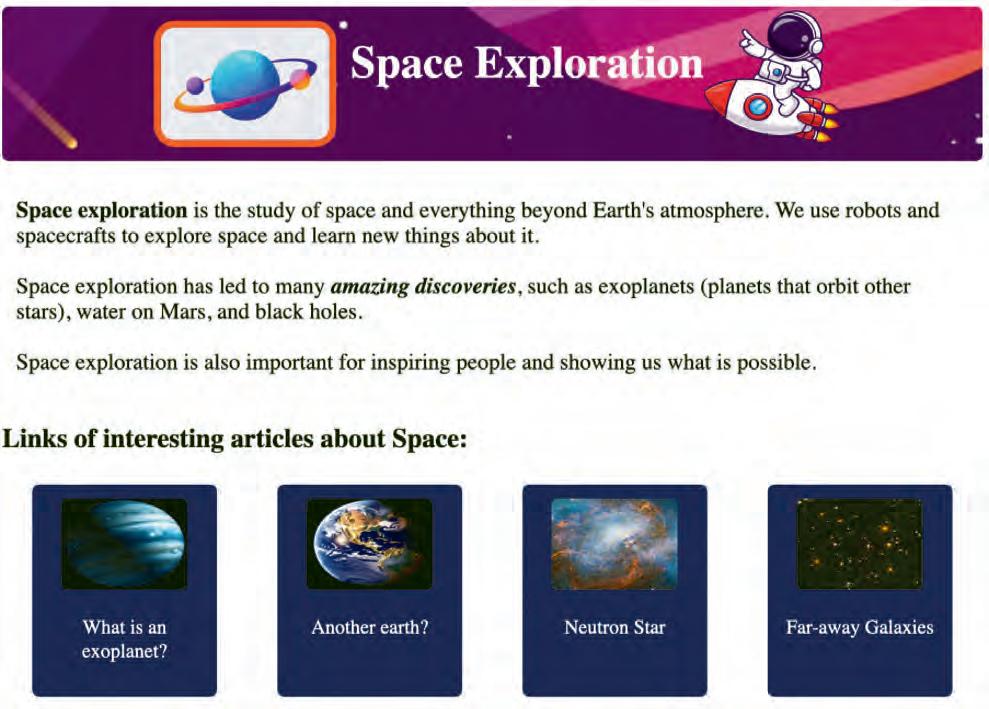
Hyperlinks, also known as links, allow users to navigate from one web page to another by clicking a text or an image link.
To create a hyperlink in HTML, use the <a> tag. The <a> tag has the required href attribute, which specifies the URL of the linked page. The text or the image that you want to be the link should be between the opening and closing <a> tags.
For example, the following HTML code creates a hyperlink to the Uolo home page: Code
<a href=“https://www.uolo.com”>Uolo</a>
Uolo
When a user clicks the word “Uolo”, the web browser opens the Uolo home page.

You can also use the <a> tag to create links to other resources, such as images, PDFs, and other types of files. Let us hyperlink the article cards for the Space Exploration project.
Project: Space Exploration
Task 7: Hyperlink the card images. Use an anchor tag to add a link to the card image. Don’t forget to close the tag.
Code
<div class=cards>
<a href=”https://en.wikipedia.org/wiki/Exoplanet”>
<img src=”exoplanet.jpg” class=cards-img>
</a>
<div class=cards>
Code
<a href=”https://www.space.com/30172-six-most-earth-like-alien-planets.html”>
<img src=”another_Earth.jpg” class=cards-img>
</a>
Repeat the process for the remaining cards. Code
<div class=cards>
<a href=”https://en.wikipedia.org/wiki/Neutron_star”>
<img src=”neutron_star.jpg” class=cards-img>
</a>
<p>Neutron Star</p>
</div>
<div class=cards>
<a href=”https://en.wikipedia.org/wiki/List_of_galaxies”>
<img src=”far_away_galaxies.jpg” class=cards-img>
</a>
<p>Far-away Galaxies</p>
</div>
</div>
</body>
</html>
Click a card to check if the link is opening or not.
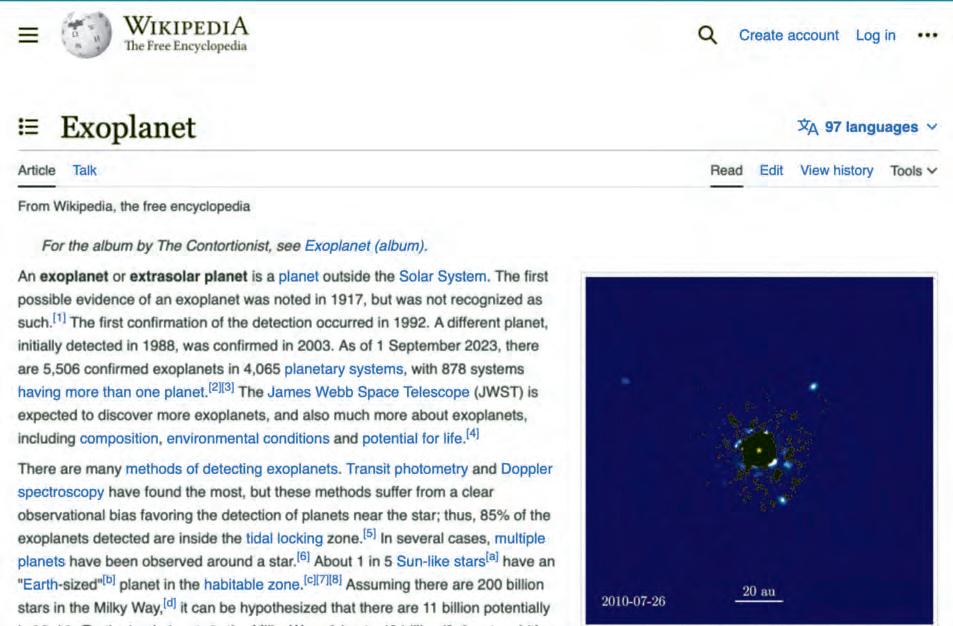
Consider any four famous persons from the past in whom who you are interested. Make a web page about them using flexboxes. Include a picture of them, a short story about their lives, and a link to another web page with more information about them.
A Fill in the Blanks.
1 The attribute is used to display the alternative text describing the image, if the image does not load on the web page.
2 The property allows flex items to wrap onto more than one line.
3 The tag is used to create a hyperlink.
4 The property allows multiple lines of items to align along the cross axis.
5 The flex container can change the width, height, and order of the elements.
1 How do you create a hyperlink to an external website, using the <a> tag in HTML?
a <a href=”#external-website”>External Website</a>
b <a href=”http://www.example.com”>Visit Website</a>
c <a src=”http://www.example.com”>Open Link</a>
d <a link=”http://www.example.com”>Go There</a>
2 Which CSS property is used to create rounded images?
a border-radius
c round-image
b image-shape
d Image-border
3 What is the main purpose of flexboxes in web development?
a To add images to a web page
c To change the font style on a web page
b To create flexible layouts and arrange elements flexibly
d To add animations to web pages
4 How can you set a background image for an HTML <div> element, using CSS?
a Using the <background> element
c Using the src attribute
b Using the background-image property
d Using the alt attribute
5 Which CSS property is used to make a parent container flexible in flexbox?
a display: flex
c flex-direction
C Who Am I?
b flex-grow
d align-items
1 I have attributes like ‘src’ and ‘alt’ to specify the image source and the alternative text.
2 I ensure that a background image covers the entire HTML element.
3 I create a shadow around an image, using CSS.
4 I am a CSS property to specify a filter to apply to the image.
5 I control the alignment of items in a flex container.
D Write T for True and F for False.
1 In CSS, the ‘border-radius’ property is used to make images transparent.
2 You can style images using CSS in two ways—using the style attribute and using classes.
3 Hyperlinks can be created using text only, and images cannot be linked to other web pages.
4 The ‘margin’ property in CSS determines the space around an image.
5 The ‘flex-direction’ property determines whether flex items are arranged horizontally or vertically.
E Answer the Following.
1 Identify and correct the error in the following HTML code for inserting an image: </img src=”image.jpg” alt=”A beautiful landscape”>
2 Which CSS property is used to specify the amount of space between the border of the image and its contents?
3 Correct the CSS code that sets the background image for a <div> with class “my-div” and ensures that it covers the entire div:
.my-div { background: url(‘background.jpg’); background-size: cover; }
4 Find the error in the following CSS code that arranges the flex items vertically in a flexbox: .container { display: flex; flex-direction: row; }
5 Explain the purpose of the ‘flex-grow’ property in a CSS flexbox.
1 Given the following HTML and CSS code, what will be the background colour of the div when you hover over it?
<div class=”hover-button”>Hover Me</div>
.hover-button:hover { background-color: yellow; }
2 If you have a web page with three images styled using the class ‘image-style’ and the following CSS code, what will be the output?
<img src=”image1.jpg” class=”image-style”>
<img src=”image2.jpg” class=”image-style”>
<img src=”image3.jpg” class=”image-style”>
.image-style { width: 80%; margin: 10px; }
3 What is the output of the following HTML code?
<img src=”https://example.com/image.png” alt=”Image of my cat”>
What error will you get if you try to display an image that is not found?
What error will you get if you forget to add the alt attribute to an image tag?
4 Consider the following HTML code:
<div class=”flex-container”>
<img src=”https://example.com/image.png” alt=”Image of my cat”>
<a href=”https://example.com/cat-breeds”>Read more about cat breeds</a> </div>
What output will you get if you try to display the above HTML code without using a flexbox?
In this chapter, we will learn about lists and tables in HTML. Lists in HTML are similar to a shopping list or a to-do list. They help us organise items in a neat and easy-to-read way on a web page.
In HTML, we can create three types of lists:
• Ordered (numbered)
• Unordered (bulleted)
• Description
Ordered Lists
Ordered lists, also known as numbered lists, are used to list items in a specific order. They are defined using the <ol> tag.
Each list item in an ordered list is defined using the <li> tag. Here is an example of an ordered list:
You can use the type attribute to specify the type of numbering for your ordered list. The default numbering type is numbers, but you can also use uppercase letters, lowercase letters, or Roman numerals.
Here are some examples of different numbering schemes:
Types of Numbering Description
type=” 1”
type=” A”
type=” a”
type=” I”
type=” i”
The list items will be numbered with numbers (default).
The list items will be numbered with uppercase letters.
The list items will be numbered with lowercase letters.
The list items will be numbered with uppercase Roman numbers.
The list items will be numbered with lowercase Roman numbers.
Unordered lists, also known as bulleted lists, are used to list items in no particular order. They are defined using the <ul> tag.
Each list item on an unordered list is defined using the <li> tag.
Here is an example of an unordered list: Code
<ul>
<li>Item 1</li>
<li>Item 2</li>
<li>Item 3</li> </ul>
You can use the style attribute to specify the bullet style for your unordered list. The default bullet style is a disc, but you can also use squares, circles, or other symbols.
Code Output
<ul style=”list-style-type: square;”>
<li>Item 1</li>
<li>Item 2</li>
<li>Item 3</li>
</ul>
Here are some examples of different bullet point styles:
Bullet Style
disc
circle
square
none
Description
Change the list item marker to a bullet.
Change the list item marker to a circle.
Change the list item marker to a square.
No list item marker will be displayed
Description lists are used to display a list of terms and their definitions. They are defined using the <dl> tag. Each term in a description list is defined using the <dt> tag, and each definition is defined using the <dd> tag.
Here is an example of a description list:
<dl>
<dt>Term 1</dt>
<dd>Definition 1</dd>
<dt>Term 2</dt>
<dd>Definition 2</dd>
<dt>Term 3</dt>
<dd>Definition 3</dd>
</dl>
Styling lists means improving the appearance of the list items, such as the bullet style, numbering, padding, and margin. There are two main ways to style HTML lists:
1 Using the style attribute
2 Using CSS classes
The style attribute can be used to specify the appearance of individual list items or entire lists. To use the style attribute, simply add it to the opening tag of the list or list item and specify the desired CSS properties.
Styling a List Item: We can style a list item in a list using the style attribute.
For example, the following HTML code styles a list item to have grey background colour:
<ul>
<li style=”background-color: #ccc;”>Item 1</li>
<li>Item 2</li>
<li>Item 3</li>
</ul>
Styling a List: We can also use the style attribute to style entire lists.
For example, the following HTML code defines an unordered list with square bullet points and 10px padding and margin:
<ul style=”list-style-type: square; padding:10px; margin:10px;”>
<li>Item 1</li>
<li>Item 2</li>
<li>Item 3</li>
</ul>
Item 1
Item 2
Item 3
Here are some of the most common CSS properties that can be used to style lists:
• List-style-type: Specifies the style of the bullet points or numbers in a list.
• List-style-position: Specifies whether the bullet points or numbers are placed inside or outside of the list items.
• List-style-image: Specifies an image to use as the bullet points in a list.
• Padding: Specifies the amount of padding around the list items.
• Margin: Specifies the amount of margin around the list items.
• Font-size: Specifies the font size of the text in the list items.
• Font-colour: Specifies the font colour of the text in the list items.
• Border: Specifies a border around the list items.
CSS classes can be used to style lists in a more reusable way.
To use a CSS class to style a list, simply add the class name to the opening tag of the list or list item.
For example, the following HTML code adds the CSS class list-style-square to an unordered list:
<ul class="list-style-square">
<li>Item 1</li>
<li>Item 2</li>
<li>Item 3</li>
</ul>
Then, you can use CSS to style the list items with the list-style-square class.
For example, the following CSS will give all list items with the list-style-square class square bullet points and 10px padding and margin:
.list-style-square { list-style-type: square; padding: 10px; margin: 10px;
If you need to style only a few individual list items or lists, then using the style attribute is fine.
However, if you need to style a lot of lists or you need to reuse the same list style throughout your web page, then it is better to use CSS classes.
Project: Space Exploration
Task 8: Create and style an unordered list of fun facts about space.
To do so, we first need to identify where the list will appear and what flex container do we need. We need four flex containers to place our content on the web page as shown.
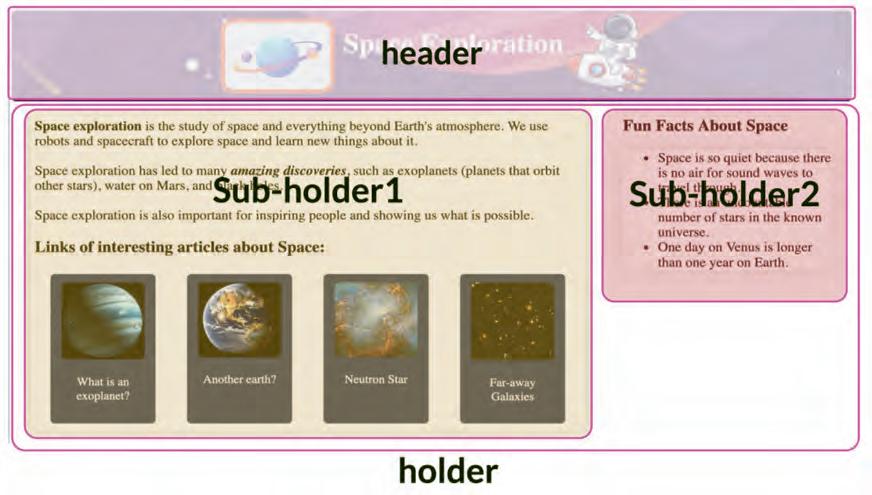
1 Create an unordered list of fun facts about space in sub-holder2 after the cards’ code.
Code
<div class=sub-holder2>
<div>
<h3> Fun Facts About Space </h3>
<ul>
<li>Space is so quiet because there is no air for sound waves to travel through.</li>
<li>There is an uncountable number of stars in the known universe.</li>
<li>One day on Venus is longer than one year on Earth.</li>
</ul>
</div>
</div>
2 Update and add div for containers for header, holder and sub-holder1.
Code
<body>
<div class=header>
<img src="planet.jpg" align=left class=img-style>
<h1>Space Exploration</h1>
<img src="rocket.jpg" alt="rocket" width="100" height="100">
</div>
Code
<div class=holder>
<div class=sub-holder1>
<div>
<p><b>Space exploration</b> is the study of space and everything beyond Earth's atmosphere. We use robots and spacecraft to explore space and learn new things about it. <br><br> Space exploration has led to many <i><b>amazing discoveries</b></i>, such as exoplanets (planets that orbit other stars), water on Mars, and black holes. <br><br> Space exploration is also important for inspiring people and showing us what is possible.
</p>
</div>
3 Create style classes for containers and the list inside the style tag.
Code
.holder { display: flex; justify-content: space-around;
}
.sub-holder1 { width: 65%;
box-shadow: 0 0 20px rgba(0, 0, 0, 0.15); padding: 5px;
.sub-holder2 { width: 25%;
ul{
box-shadow: 0 0 20px rgba(0, 0, 0, 0.15);
</style>
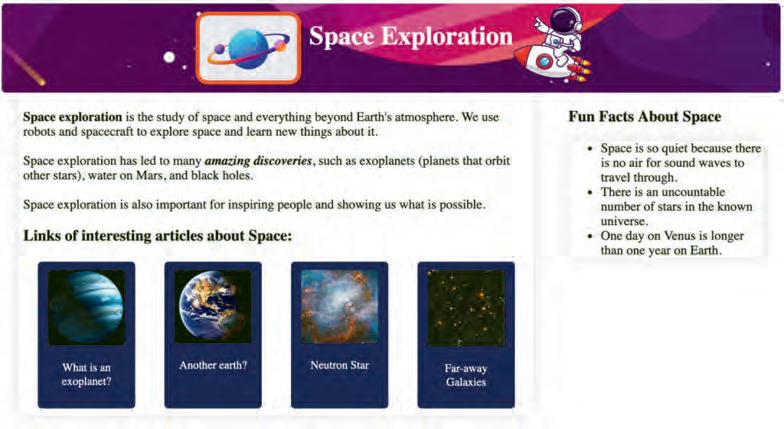
Just like the bookmarks we use in our books to quickly jump to a specific page, HTML bookmarks help us jump to a specific part of a web page on the internet.
To add a bookmark in an HTML document, follow these steps:
1 Choose the element you want to bookmark. This could be a heading, a paragraph, an image, or any other HTML element.
2 Add an id attribute to the element. The id attribute must be unique on the page.
<h2 id=”mybookmark”>This is my bookmark</h2>
3 Create a link to the bookmark. To do this, use the a element and the href attribute. The href attribute should point to the id of the element you want to bookmark.
<a href=”#mybookmark”>Click here to go to my bookmark</a>
Project: Space Exploration
Task 9: Add Bookmarks
1 Add information about Documentaries on Space Exploration after the cards’ details.
Code
<p>Far-away Galaxies</p>
</div>
<h3>Documentaries on Space Explorations</h3>
<p><b>Cosmos: Possible Worlds (2020):</b> This 13-part documentary series hosted by Neil deGrasse Tyson explores the universe and humanity's place in it. It covers a wide range of topics, including the origins of the universe, the search for life beyond Earth, and the future of space exploration.<br><br>
<b>Voyage of Time (2016):</b> This Terrence Malick-directed documentary is a visually stunning meditation on the cosmic journey of the universe, from the Big Bang to the present day. It features a voiceover by Brad Pitt.<br><br>
<b>One Strange Rock (2018):</b> This 10-part documentary series hosted by Will Smith explores the wonders of Earth and humanity's place in the universe. Each episode focuses on a different aspect of Earth, such as its atmosphere, oceans, and life forms.<br><br>
<b> The Last Man on the Moon (2019):</b> This documentary tells the story of Eugene Cernan, the last astronaut to walk on the moon. It features interviews with Cernan and his fellow Apollo 17 crew members, as well as archival footage from the mission.<br><br>
<b>Apollo 11 (2019):</b> This documentary tells the story of the Apollo 11 mission, which landed the first humans on the moon. It features restored footage from the mission, as well as interviews with the astronauts and other people involved in the mission.<br><br><br></p>
2 Add an id attribute to the elements you want to bookmark:
a The h3 element for the articles section.
<h3 id=b1> Links of interesting articles about Space:</h3>
b The h3 element for the documentaries section.
<h3 id=b2>Documentaries on Space Explorations</h3>
c The h3 element for Fun facts.
<h3 id=b3> Fun Facts About Space </h3>
3 Create link to the bookmarks
<div class=holder>
<div class=sub-holder1>
<div>
<p><a href="#b1">Interesting Articles</a></p>
<p><a href="#b2">Documentaries on Space Explorations</a></p>
<p><a href="#b3">Fun Facts about Space</a></p>
<p><b>Space exploration</b> is the study of space and everything beyond Earth's atmosphere. We use robots and spacecrafts to explore space and learn new things about it. <br><br> Space exploration has led to many <i><b>amazing discoveries</b></i>, such as exoplanets (planets that orbit other stars), water on Mars, and black holes. <br><br> Space exploration is also important for inspiring people and showing us what is possible.
</p>
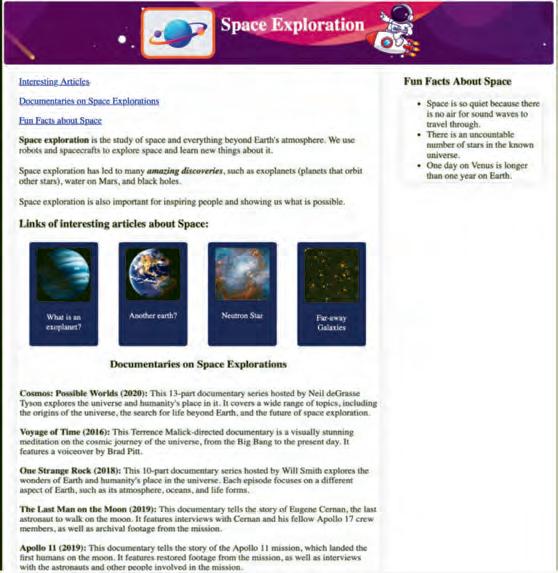
1 Read the statements and solve the puzzle.
Across
a CSS property can be used to add space around list items.
b The HTML tag used to create an unordered list.
c This HTML tag is used to create an ordered list. Down
d A type of HTML list that doesn’t have any specific order.
e The HTML tag is used for individual list items.
2 Match the Following.
Column A
Column B
HTML tag used for ordered lists disc
The default bullet style for an unordered list ol
CSS property used to specify the style of bullet points or numbers in a list style an individual list item using HTML attributes
Using the style attribute list-style-type
Imagine you have a list of your favourite video games. You want to write down the name of each game, the genre, and the release date. You could write this information in a list, but it would be difficult to read and understand. A better way to organise this information is to use a table.
A table is a grid of rows and columns. Each row represents one item on your list, and each column represents a different piece of information about that item.
To create a table in HTML, we use the following tags:
Tag Purpose
<table></table>
<th></th>
<tr></tr>
Web designers choose colours for websites based on colour psychology. Like blue is often used for trustworthiness, while red can create a sense of urgency.
This tag is used to create a table.
This tag is used to add table headers. The headings are bold and centred by default.
This tag is used to create table rows.
<td></td>
<caption></caption>
<thead></thead>
<tbody></tbody>
<tfoot></tfoot>
This tag is used to create a data cell and add data to the cell. The data in a cell is left-aligned by default.
This tag is used to add captions to a table. It must be added right after the <table> tag. A table caption will be centred above a table by default.
This stands for ‘table header’ and is used to group the header content in your table.
This stands for ‘table body’ and contains the main content of your table, such as data rows with <td> (table data) elements.
This stands for ‘table footer’ and is used for any footer content in your table.
Here is an example of a simple HTML table: Code
<table>
<caption>Favourite Video Games</caption>
<thead>
<tr>
<th>Video Game</th>
<th>Genre</th>
<th>Release Date</th>
</tr>
</thead>
<tbody>
<tr>
<td>Minecraft</td>
<td>Sandbox</td>
<td>2011</td>
</tr>
<tr>
<td>Fortnite</td>
<td>Battle Royale</td>
<td>2017</td>
</tr>
</tbody>
<tfoot>
<tr>
<td>
Total Games: 2
</td>
</tr>
</tfoot>
</table>
To style tables in HTML, you can use CSS. CSS is a language that allows you to control the appearance of HTML elements.
Here are some basic CSS properties that you can use to style tables:
• Border: This property controls the border of the table. You can specify the border thickness, style, and colour.
• Border-collapse: This property controls the collapse of table borders. By default, the borders of adjacent table cells will touch each other. You can use the border-collapse property to collapse the borders of adjacent table cells into a single border.
• Margin: This property controls the margin around the table. The margin is the space between the table and the other elements on the web page.
• Padding: This property controls the padding inside the table. The padding is the space between the border of the table and the content of the table cells.
• Width: This property controls the width of the table.
• Height: This property controls the height of the table.
You can also use CSS to style the individual elements of a table, such as the table header cells, table data cells, and table caption.
Here is an example of how to use CSS to style a table: Code
<html>
<head>
<style>
table {
border: 1px solid black; border-collapse: collapse; margin: 0 auto; padding: 10px; width: 400px; }
th {
background-color: #ab2f; text-align: center; }
td {
text-align: center; }
</style>
</head>
<body> <table>
<tr>
<th>Video Game</th>
<th>Genre</th>
<th>Release Date</th>
</tr>
<tr>
<td>Minecraft</td>
<td>Sandbox</td>
<td>2011</td>
</tr>
<tr> <td>Fortnite</td> <td>Battle Royale</td> <td>2017</td>
</tr>
<tr>
<td>Among Us</td> <td>Social Deduction</td> <td>2018</td>
</tr>
</table> </body> </html>
Project: Space Exploration
Task 10: Add a table and style it.
1 Add the table on Stars with Exoplanets in sub-holder2 before Fun facts. Code
<div class=sub-holder2>
<div>
<h3 id=b3>Stars with Exoplanets</h3>
<table>
<tr>
<th>Name of the Star</th> <th>Number of Exoplanets</th>
</tr>
<tr>
<td>Epsilon Eridani</td> <td>3</td>
</tr>
<tr>
<td>Lacaille 9352</td> <td>2</td>
</tr>
<tr>
<td>Ross 128</td> <td>1</td>
</tr>
<tr>
<td>Epsilon Indi</td> <td>6</td>
</tr>
</table>
</div>
<div>
<h3 id=b4> Fun Facts About Space </h3>
2 Style the table by adding shadow.
table {
box-shadow: 0 0 20px rgba(0, 0, 0, 0.15); }
</style>
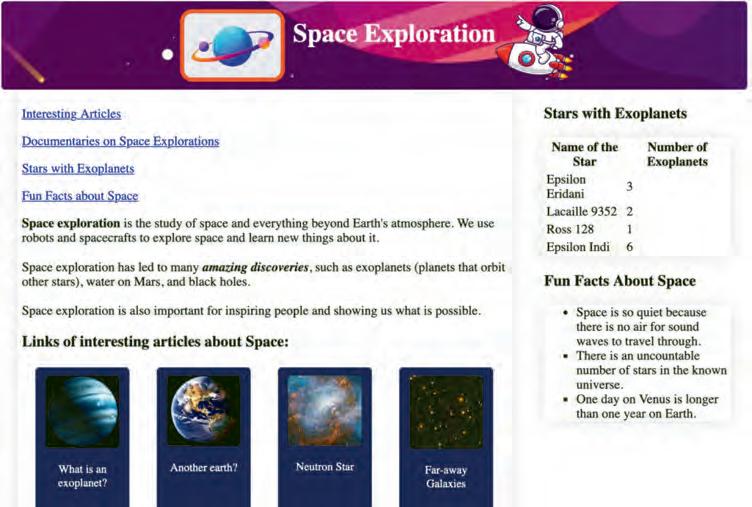
You can add a bookmark for the newly added table as well.
1. Create a web page for your travel bucket list.
2. Create a web page about your favourite book. Add bookmarks to different sections of the book, such as chapters or characters, and create links to jump to those bookmarks.
A Fill in the Blanks.
Think and Tell
Does CSS allow us to change the appearance of multiple web page by modifying just one stylesheet?
1 Ordered lists are also known as lists and are used to list items in a specific order.
2 You can change the style of unordered list items using the property.
3 To style an individual list item using HTML attributes, we can use the attribute.
4 You can change the type of numbering in ordered lists using the attribute.
5 The HTML tag used to contain the main content of your table, such as data rows with <td> (table data) elements is tag.
1 Which CSS property specifies an image to use as the bullet points in a list?
a List-style-image
c List-style-type
2 Which tag is used to define a term in a description list?
a <dd>
c <dl>
3 What property is used to add a border to a table in CSS?
a Border-style
c Border-collapse
4 The data in a table's cell is:
a Left-aligned by default.
c Centre-aligned by default.
C Who Am I?
b Padding
d None of these
b <dt>
d <li>
b Border
d Table-border-style
b Right-aligned by default.
d Top Left-aligned by default.
1 I am an attribute to specify the type of numbering for your ordered list.
2 I am an HTML tag used to create a table header. I am commonly found inside the <thead> element.
3 I am a CSS property that helps you set the background colour for table cells. I can make your tables visually distinct.
4 I am centred above the table by default.
5 I am used to mark a specific spot on a web page to quickly jump back to it when needed.
D Write T for True and F for False.
1 There must be at least one ‘tr’ tag inside the ‘thead’ element.
2 <style> table,th,td{ margin:2px; border-collapse: collapse; } </style>
In the code snippet other than ‘solid’, you can use any other style.
3 <th> tag does not have a closing tag.
4 <td> tag is used to create a row in a table.
5 <a href=”#bookmark”> is a valid way to create a link to a bookmark within the same HTML document.
E Answer the Following.
1 What happens when you click on a link with the following HTML code? <a href=”#myBookmark”>Jump to Important Information</a>
2 Write the code to change the bullet style of the list to squares.
3 How would you change the text colour of all the list items to blue?
4 What is the purpose of using the id attribute when creating bookmarks?
5 Identify the error in this CSS code and provide the corrected version: body {
background-color: #f0f0f0; font:size: 14px; font-color: #333; margin 15px; padding: 10px; }
F Apply Your Learning.
1 Make an ordered list of your hobbies and number the list with lowercase letters.
2 Identify the error in the following HTML code snippets:
a <ol>
<li>Item 1</li>
<li>Item 2</ol>
<li>Item 3</li>
</ol>
b <table>
<caption>Table of Products</capiton> <tr>
<th>Product</th> <th>Price</th> <tr>
</table>
3 What’s the mistake in this code for creating a bookmark link?
<a href=”section2”>Jump to Section 2</a>
4 Write a program that creates a table of the planets in the solar system, including their names, distances from the sun, and number of moons.
5 Write a program that creates a table of the scores for a soccer game, including the team names, goals scored, and yellow and red cards received.
6 Create an HTML list of your favourite foods. Add CSS to change the colour of the list items when you hover over them.
This book embodies the principles outlined in the National Education Policy (NEP) 2020. It unveils the world of computer science through a unique and captivating pedagogical approach—seamlessly integrating curriculum content into the mesmerizing adventures of Mel and Conji, fictional figures hailing from the enchanting world of Avora. Our aim is to prepare learners for the dynamic and technology-driven landscape of the 21st century, equipping them with the essential skills they need to thrive in an ever-evolving world.

• Explore More: QR codes to explore an exciting application of the concept. This element builds curiosity in children and helps them grasp concepts through digital visual aids.
• Discuss: Questions to trigger engaging group discussions in the classroom.
• Think and Tell: Probing questions to stimulate thinking at an individual level.
• Did You Know? Interesting facts related to the application of a concept.
• Points to Remember: Chapter end summary.
• Do It Yourself: Milestone exercises to practice specific concepts.
• Chapter Checkup: A pool of questions catering to all topics and skills covered in the chapter.
Uolo partners with K-12 schools to bring technology-based learning programs. We believe pedagogy and technology must come together to deliver scalable learning experiences that generate measurable outcomes. Uolo is trusted by over 10,000 schools across India, South East Asia, and the Middle East.
hello@uolo.com
�274