


NEP 2020 based | Technology powered 6
SCIENCE Accelerate TERM I & II
Teacher Manual COMPUTER


Uolo’s Tekie program offers a coding-focused curriculum for grades 1 to 8, preparing students for the technology-driven world. We present a carefully crafted Teacher Manual to assist teachers in delivering effective and engaging lessons to students. Rather than prescribing teaching methods, the manual provides examples and demonstrates how and why teachers can apply these examples in their classes.
Within the academic year, the Tekie program prescribes the following types of chapters and sessions:
Theory: these periods are dedicated to the Computer Science Theory chapters. These topics are mostly delivered in the classroom.
Tools: these periods are dedicated to the Computer Tools chapters. These topics involve almost equal numbers of classroom and computer labs sessions.
Coding: these periods are dedicated to the Coding chapters. These topics have more computer lab sessions.
Each chapter in this manual is structured to provide a comprehensive lesson plan. The chapters are divided into multiple sessions, each following the Warm up, Engage, Build, and Sum up (WEBS) strategy. The Warm up phase sets the stage for learning by connecting to prior knowledge and building curiosity. The Engage phase captures the students’ attention and motivates them to participate actively. In the Build phase, questions from various sections are discussed to build the understanding of the students. Finally, the Sum up phase reinforces learning through easy-to-recall activities and questions. Time duration for each section has been suggested based on the requirements of the students. Additionally, an answer key for every chapter is provided to assist teachers in assessing their students’ understanding and guiding their learning effectively.
We hope that this teacher manual will empower teachers to use the curriculum effectively, support the learning of all students thoroughly, create learning opportunities and design interactive learning environments that cater to the students’ needs and interests.

Translator
Creating a Table, Entering, and Editing Data I
Creating a Table, Entering, and Editing Data II
Formatting Tables in Google Docs I
Formatting Tables in Google Docs II
Mail Merge II
Mail Merge III
Mail Merge IV
What is the Internet?
Popular Services on the Internet
Applying Animation and Transitions-I
Applying Animation and Transitions-II
Inserting Multimedia-I
Inserting Multimedia-II
Advanced Features of Google Slides and Viewing a Presentation-I
Advanced Features of Google Slides and Viewing a Presentation-II
Editing with Canva 67
Introduction to Canva and Adding Shapes and Graphics-I
Introduction to Canva and Adding Shapes and Graphics-II
Editing Images-I
Editing Images-II
Artificial Intelligence-I
Artificial Intelligence-II
Comparison Blocks
Random Blocks
Potential Threats of Using the Internet and Netiquette 7 More Features of Google Slides 53
Structure of an HTML Document
Creating an HTML Document
Basic HTML Coding Conventions and More HTML Tags
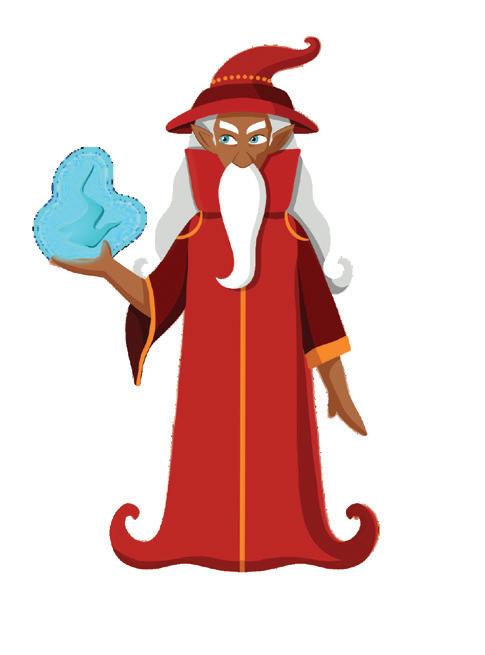
Mel and Conji are going to the Computer Lab to submit their project. They notice that the computer screens are going out of control. They are infected by a virus, which is a mix of magic and technology and was created by Lord Ero and Cyborg. The trio tries to find more information about the virus with the help of the Elders. They want to find an ancient magical tool which could assist them in dealing with the virus. They get to know about the Enigmus through the internet, which is a magical encyclopaedia and can undo the virus. They go on a digital treasure hunt by following various clues, which lead them to Ms Idea in the Void. Ms Idea is like a guardian of that place and shows the Enigmus to them. The Elders give a secret file to the trio, which they got from Cyborg’s system. The trio follows the clues and patterns inside it carefully, and it leads them to the final solution. There is a battle between the two sides where Ero’s dangerous spell hits Eva, and she faints. Mel and Conji use a spell from the Enigmus to defeat Lord Ero and Cyborg and save their friend, Eva.
● Mel and Conji are flying to the Computer Lab to submit their project.
● Mel sees that something is wrong with the screen. Conji agrees and says all these machines are acting strange.
● Eva rushes over to join them, looking concerned about the machines.
● Conji says these are strange numbers and says 0.1.1... seems like a virus.
● Eva says, “Yes, a virus! A mix of magic and technology that is causing all of this chaos.”
● Mel says, “What if someone has tried to change the computer language? A tiny change in the computer language could have led to this situation.”
● Conji asks, “What is a computer language?”
● Eva says, “This could be sets. A small change that sets off a chain reaction.”
● Conji says, “We should learn more about computer languages, and understand how this happened.”
This chapter is divided into the following classroom sessions
1. Computer Languages
2. Translator Programs
3. Categories of Computers
At the end of the session, the students will be able to:
● define computer languages.
● describe first-generation languages and their advantages and disadvantages.
● describe second-generation languages and their advantages and disadvantages.
● describe third-generation languages and their advantages and disadvantages.
● describe fourth-generation languages and their advantages and disadvantages.
● describe fifth-generation languages and their advantages and disadvantages.
Keyword
● Computer languages: It can be defined as a set of instructions that computers can understand and follow.
Ask the students about different communicating languages. Explain to the students the concept of computer languages and five generations of computer languages. Also, discuss their advantages and disadvantages.
Group discussion Conclude the concepts Assign homework
● Ask the students about different communicating languages.
● Now, build the concept by discussing that as humans communicate using different languages, computers also have their own languages to understand and follow instructions.
Explain the following concepts:
Define computer languages. Tell the student that a computer language can be defined as a set of instructions that computers can understand and follow, as given on page 5.
Describe first-generation languages and their advantages and disadvantages.
Describe second-generation languages and their advantages and disadvantages.
Describe third-generation languages and their advantages and disadvantages.
Describe fourth-generation languages and their advantages and disadvantages.
Describe fifth-generation languages and their advantages and disadvantages.
Tell them that a first-generation language is also called machine language or low-level language. Also, tell about its advantages and disadvantages, as given on page 5.
Tell them that second-generation language is also called assembly language. It is also a low-level language. Also, tell about its advantages and disadvantages, as given on page 6.
Tell them that third-generation languages are called high-level languages. Also, tell about its advantages and disadvantages, as given on page 6.
Tell them that fourth-generation languages are called non-procedural languages. They are very high-level languages. Also, tell about its advantages and disadvantages, as given on page 7.
Tell them that fifth-generation languages are used for creating programs for Artificial Intelligence. Also, talk about its advantages and disadvantages, as given on page 7.
Ask the following questions to the students to check their understanding:
● Give some examples of third-generation languages.
Correct Responses: FORTRAN, COBOL, C, C++, Java, C#, etc.
● Which generation language uses simple mnemonic code?
Correct Response: Second-generation languages
● What is the advantage of 5GL?
Correct Response: 5GLs require less code to accomplish tasks.
● Conduct a group discussion in the class among students on the topic 'Evolution of Computer Languages From Fourth Generation to Fifth Generation'.
Possible Response: Fourth-generation languages are very high-level languages. These languages were created to reduce the time, expense, and effort required for creating various software applications. Whereas fifth-generation languages are used for creating programs for Artificial Intelligence.
● Conclude the session by summarising that computer language can be defined as a set of instructions that computers can understand and follow. Also, revise the students about all the generations of computers.
● Assign the following from the Chapter Checkup given at the end of the chapter as homework.
A. Fill in the Blanks: Questions 4 and 5
B. Tick the Correct Option: Questions 1, 2, 4, and 5
C. Who Am I?: Questions 1 and 2
D. Write T for True and F for False: Question 5
E. Answer the Following: Questions 1 and 5
F. Apply Your Learning: Questions 1 and 4
At the end of the session, the students will be able to:
● describe what a translator program is.
● differentiate between compiler, interpreter, and assembler.
Keywords
● Compiler: A compiler is a language processor that reads the source programs written in high-level language and converts them into an equivalent program written in machine code in one go.
● Interpreter: Interpreter is a translator program that converts high-level language code to machine language line by line as the program runs.
● Assembler: A translator, called an assembler, is used to convert assembly language code into machine language code.
Ask the students the meaning of translation.
Tell them about translator programs. Also, discuss about the three main types of translator programs: compiler, interpreter, and assembler.
Group discussion Conclude the concepts Assign homework
Action Plan
Warm Up
● Ask the students the meaning of translation then introduce them to translator programs.
Engage
Explain the following concepts:
Describe what a translator program is.
Differentiate between compiler, interpreter, and assembler.
Explanation
Tell the students that a translator program for computer languages is similar to a unique tool that enables the computer to understand user requests, as given on page 8.
Tell students about three main types of translator programs namely, compiler, interpreter, and assembler, as given on page 8.
● Read aloud the questions provided in the Do It Yourself 1A section and encourage students to solve them. Instruct them to write the answers in their book.
Correct Responses:
1. a. Assembler b. Fifth-generation
2. a. T b. F
Build
7 mins
● Conduct a group discussion in the class on the topic: 'The Difference Between a Compiler and an Interpreter'.
Correct Response: Interpreter is a translator program that converts high-level language code to machine language line by line as the program runs. Whereas a compiler is a language processor that reads the source programs written in high-level language and converts them into an equivalent program written in machine code in one go.
3 mins
Sum Up
● Conclude the session by summarising that a translator program converts instructions written in a computer language into something the machine can understand. A compiler translates the source code written in a high-level language into machine language in one go. An interpreter is a translator program that converts high-level language code to machine language line by line as the program runs. An assembler is used to convert assembly language code into machine language code.
● Assign the following from the Chapter Checkup given at the end of the chapter as homework.
B. Tick the Correct Option: Question 3
C. Who Am I?: Question 3
E. Answer the Following: Question 4
F. Apply Your Learning: Question 5
At the end of the session, the students will be able to:
● describe supercomputers and their advantages and disadvantages.
● describe mainframe computers and their advantages and disadvantages.
● describe minicomputers and their advantages and disadvantages.
● describe workstations and their advantages and disadvantages.
● describe personal computers and their advantages and disadvantages.
● describe tablets and smartphones and their advantages and disadvantages.
Keywords
● Supercomputers: These are super-fast and large computers. They have huge storage space. They can do lots of tasks very quickly, like a billion tasks in just one second.
● Personal computers: PCs are the most common type of computer and are designed for individual use. They include desktop computers and laptops.
Ask the students about different types of computers they have seen such as laptops, desktops, tablets, etc.
Describe different categories of computers such as supercomputers, mainframe computers, minicomputers, etc.
Group discussion Conclude the concepts Assign homework
● Ask the students about different types of computers they have seen such as laptops, desktops, tablets, etc. Then, discuss the different categories of computers.
Explain the following concepts:
Describe supercomputers and their advantages and disadvantages.
Explanation
Tell the students that supercomputers are super-fast and very big computers with huge storage space. Also, tell about its advantages and disadvantages, as given on page 9.
Describe mainframe computers and their advantages and disadvantages.
Describe minicomputers and their advantages and disadvantages.
Describe workstations and their advantages and disadvantages.
Tell the students that mainframe computers are also big and super-fast, but smaller than supercomputers. Also, tell about its advantages and disadvantages, as given on page 10.
Tell the students that minicomputers are smaller than mainframes but still offer significant computing power. Also, tell about its advantages and disadvantages, as given on pages 10 and 11.
Tell the students that workstations are high-performance computers used for specialised tasks like professional photo and video editing, 3D design, scientific modelling, and software development. Also, tell about its advantages and disadvantages, as given on page 11.
Describe personal computers and their advantages and disadvantages.
Describe tablets and smartphones and their advantages and disadvantages.
Tell the students that PCs are the most common type of computer and are designed for individual use. Also, tell about its advantages and disadvantages, as given on pages 11 and 12.
Tell the students that tablets and smartphones are portable devices that combine computing capabilities with touchscreens. Also, tell about its advantages and disadvantages, as given on page 12.
● Read aloud the questions provided in the Do It Yourself 1B section and encourage students to solve them. Instruct them to write the answers in their book.
Correct Responses:
Tablet and smartphones
Supercomputer
Mainframe computer
Minicomputer
Build
Feature
Smaller than mainframes
Need a lot of power and specialised cooling to stay cool
Can be carried anywhere
Performance is meaured in FLOPS
7 mins
● Ask the students to give the answer to the question “What other tasks can be performed using personal computers?" asked in the Think and Tell section on page 12.
Possible Responses: Finding information on a topic, listening to songs, watching films, organising data, etc.
● Conduct a group discussion in the class among students on the topic 'Why Tablets and Smartphones Are More Popular?'.
Possible Response: You can carry tablets and smartphones anywhere you want, they serve as phones, cameras, music players, and more, etc.
● Conclude the session by summarising that the supercomputers are super-fast and very big computers with huge storage space; mainframe computers are also big and super-fast, but smaller than supercomputers. Minicomputers are smaller than mainframes but still offer significant computing power. Workstations are high-performance computers used for specialised tasks like professional photo and video editing, 3D design, scientific modelling, and software development. PCs are the most common type of computer and are designed for individual use. Tablets and smartphones are portable devices that combine computing capabilities with touchscreens.
● Assign the following from the Chapter Checkup given at the end of the chapter as homework.
A. Fill in the Blanks: Questions 1, 2, and 3
C. Who Am I?: Questions 4 and 5
D. Write T for True and F for False: Questions 1, 2, 3, and 4
E. Answer the Following: Questions 2 and 3
F. Apply Your Learning: Questions 2 and 3
Mel and Conji are helping Elder Robot update the robots’ system in the factory when someone tries to attack the server. Elder Robot is affected by this attack and starts speaking the computer language. Conji is confused by what computer languages are. Upon learning about it, they go to Elder Wizard for help where they find him arguing with Mr Time. Elder Wizard tells them that they can restore Elder Robot’s ability to speak by backing up his data using data management. When Elder Robot starts talking again, they find out that someone must have betrayed them and used a Dark Spell to break down Avora’s magical barrier. Mel and Conji go to Mr Time’s office to ask him for help. It is there that they find out that it was Mr Time who had attacked the server, as he wanted to use Dark Magic to prevent something terrible in the future. They start searching for the spell in his office using the internet. The children realise that only a Dark Wizard can tell them about the spell that Mr Time used. They go to the Void to talk to Cyborg. They free him, but he attacks them. Eva arrives in time to knock Cyborg down and tell them about the spells that the Elders have found. Mel thinks they can use Google Sheets to organise this data. After learning about it, they take Cyborg with them to Avora where he faces Lord Ero and helps to take him down. The trio helps in freeing Mr Time and also learns about various new concepts, like Mail Merge, Slides, and Canva. Cyborg realises the error of his ways and vows to protect his new home, and becomes a teacher at Avora school!
● Mel and Conji visit Elder Wizard’s Office and find him arguing with Mr Time.
● Mr Time reveals that the magical barrier has been destroyed, and the future cannot be changed.
● Elder Wizard disagrees with Mr Time, stating that his suggestion goes against the principles of Avora.
● Conji apologises for disturbing them, and Elder Wizard reassures them, mentioning they were discussing something important.
● Mr Time invites Mel and Conji to help Elder Wizard make the right decision, then leaves for his office.
● Elder Wizard informs Mel and Conji about the attack and the destruction of the magical barrier.
● Mel discovers Elder Robot’s data loss issue, but they realise there is a backup on his laptop.
● Mel explains the process of transferring the backup to Elder Robot using data organisation, and they head back to the Factory to fix Elder Robot’s communication problem.
At the end of the session, the students will be able to:
● explain file management.
● move data from one drive to another.
● copy or move data between storage devices.
Keyword
● File management: It is the way by which we organise and handle our digital documents and files on a computer or a device.
Ask the students how they manage their different items, such as toys, books, and drawings, in their home.
Explain the concept of file management by giving real-life examples.
Tell the students about how to move data from one drive to another. Tell them how to copy or move data from one storage device to another.
Group discussion Conclude the concepts
Assign homework
Warm Up
● Ask the students how they manage their different items, such as toys, books, and drawings, in their daily lives. You can encourage the students to share their views and experiences in the class.
● Now, relate the concept of managing things to file management using the appropriate examples.
Engage
Explain the following concepts:
Learning Outcomes
Explanation
Explain file management. Describe to the students that file management is the way by which we organise and handle our digital documents and files on a computer or a device, as given on page 20.
Move data from one drive to another.
Copy or move data between storage devices.
Tell them that moving data from one drive to another means taking files and folders from one place to another, as given on page 20. Also demonstrate the various steps to move data from one drive to another by using the cut and paste method, as given on pages 20 to 22. Also, demonstrate the various steps to move data from one drive to another by using the drag and drop method, as given on page 22.
Tell them that moving or copying data between storage devices means transferring information like files or documents from one place, such as a computer, to another, like a USB drive or external hard disk, as given on page 22. Discuss with them the various steps to copy data between storage devices, as given on page 23. Demonstrate the various steps to move data between storage devices, as given on page 23. Also, demonstrate the various steps to move files from an external device to a PC, as given on page 24.
Ask the following questions to the students to check their understanding:
● Ask the students ‘Is file management about keeping your digital space tidy and organised?’ Possible Responses: Yes/No
Build
7 mins
● Conduct a group discussion in the class based on the topic “Why is File Management Important?” provided in the Discuss section on page 24.
Correct Response: File management is important because it helps to organise, locate, and access digital files efficiently.
3 mins
Correct Response: Yes. When the files are managed properly, the digital space becomes organised. Sum Up
● Conclude the session by summarising that file management is the way by which we organise and handle our digital documents and files on a computer or a device. Also tell them that moving data from one drive to another means taking files and folders from one place to another. Tell them that moving or copying data between storage devices means transferring information from one device to another. Also, tell them that in moving data, the data gets removed from the original location while copying duplicates it.
● Assign the following questions from the Chapter Checkup given at the end of the chapter as homework.
A. Fill in the Blanks: Question 1
B. Tick the Correct Option: Questions 1 and 2
C. Who Am I?: Questions 1, 3, and 5
D. Write T for True and F for False: Questions 1 and 2
E. Answer the Following: Questions 1 and 2
At the end of the session, the students will be able to:
● sort files and folders.
● describe the guidelines for file management.
● search files and folders.
● explain file formats.
● work with multiple applications.
Keywords
● Sorting files: It means to arrange the files in a particular order.
● Searching files: It means looking for specific documents or data on a computer or a device.
● Wildcards: It refers to special symbols that are used to narrow down your search results.
● File format: It defines how information is organised and stored for a specific program’s use.
● Multitasking: It allows you to switch between apps without closing them.
Ask the students if having their belongings sorted and organised helps them find them more easily.
Explain the concept of sorting file by giving real-life examples.
Tell the students about the general guidelines that needs to be followed while managing files or folders on the computer.
Describe the various steps to search files in the computer.
Discuss the concept of file format.
Explain to them how to work with multiple applications.
Think and Tell Conclude the concepts
Assign homework
● Ask the students if it’s easy to find an item when everything is sorted and well-organised.
● Relate the same concept of sorting and searching in computers.
Explain the following concepts:
Sort files and folders. Explain to the students that sorting files means arranging the files in a particular order. Discuss with the students that ascending order means to arrange the files in increasing order of their size, and descending order means to arrange the files in decreasing order of their size. Also, demonstrate how to sort files on a computer, as given on pages 24 and 25.
Describe the guidelines for file management.
Discuss the basic guidelines for file management with the students, as given on page 25.
Search files and folders. Tell them that searching files means looking for specific documents or data on a computer or a device, as given on page 26. Discuss with them that wildcards are the special symbols that are used to narrow down your search results, as given on page 26. Demonstrate the steps to use the asterisk and question mark to search files, as given on page 27.
Explain file formats. Tell them that file format defines how information is organised and stored for a specific program’s use, as given on page 28. Discuss with them different types of file formats, such as JPEG, PNG, MP4, MP3, DOCX, etc., as given on page 28.
Work with multiple applications.
Tell them working with multiple applications means using several software programs or apps on a computer or a device at the same time, as given on pages 28 and 29. Also, discuss with them multitasking allows you to switch between apps without closing them. Demonstrate how to work with multiple applications, as given on page 29.
● Read aloud the question provided in the Do It Yourself 2A section and encourage the students to solve the question. Instruct the students to write the answers in their book.
Correct Responses:
The steps to observe how data transfer works are:
1. Plug the USB drive or external hard disk into an available USB port on your computer.
2. Open File Explorer and navigate to the location of the files you want to transfer.
3. Select and copy the files you want to transfer.
4. Open another File Explorer and navigate to the external storage device.
5. Paste the selected file.
6. Wait until the transfer process is complete.
7. Before physically disconnecting the device, make sure to safely eject. This ensures all data is written properly on the drive and it is ready for removal.
8. Unplug the USB drive or external hard disk from the computer.
9. Plug the external storage device back into the computer.
10. Open File Explorer and navigate to the external storage device.
11. Select the files on the external storage device and copy them.
12. Paste the copied file into the desired location on your computer.
13. Monitor the transfer progress, and once completed, your files should be on your computer.
● Ask the students to give the answer to the question “What are some other file formats that you have seen?” asked in the Think and Tell section on page 28.
Possible Responses:
Some common file formats that you might see are:
● .txt: Plain text file.
● .docx, .doc: Microsoft Word documents.
● .pdf: Portable Document Format, widely used for documents that should look the same on all devices.
● .xlsx, .xls: Microsoft Excel spreadsheets.
● .pptx, .ppt: Microsoft PowerPoint presentations.
Sum Up
3 mins
● Conclude the session by summarising that sorting files means arranging the files in a particular order, either in ascending order or descending order. Tell them that searching files means looking for specific documents or data on a computer or a device. Revise the various symbols used for searching the files and folders. Also, conclude that file format defines how information is organised and stored for a specific program’s use, along with the steps of how to work with multiple applications.
● Assign the following questions from the Chapter Checkup given at the end of the chapter as homework.
A. Fill in the Blanks: Questions 1, 3, 4, and 5
B. Tick the Correct Option: Questions 3, 4, and 5
C. Who Am I?: Question 2 and 4
D. Write T for True and F for False: Questions 3, 4, and 5
E. Answer the Following: Questions 3, 4, and 5
F. Apply Your Learning: Questions 1 and 2 Build 7 mins
Mel and Conji’s summer vacations have started. Conji expresses his wish to see the new Computer Museum which has opened in Avora, and he goes there with Mel. They learn about the evolution of computers and, hence, wish to learn more about the evolution of Avora. They go to the library to read about it but find that the book is missing from the shelf. They rush to inform the Elders about it and find out that the same information is available on the internet. Mel and Conji want to tell Eva about the same and go to her room. She is planning her birthday party, and they both decide to help her. They make the guest lists, design personalised letters and an invitation card together. They ask for Ms Idea’s help while deciding a theme for the birthday party, which turns out to be ROBOTICS. The Elders also tell Eva about the importance of managing expenses while planning an event. Mr Fate also sends a surprise birthday gift for Eva, which includes a new magic wand and a letter. The letter gave a crucial life lesson to all three kids about the importance of happiness.
● After reading about the evolution of Avora, Mel and Conji decide to go to Eva’s room to share this.
● Eva is making a list for her birthday party when Mel and Conji enter her room.
● Mel and Conji tell Eva that they have learnt on the internet how Avora was created.
● Eva tells them that she is busy planning for her birthday party, but it is very difficult to plan everything.
● Conji wants Mel to help Eva.
● Mel suggests using tables in Google Docs to reduce work.
● Conji and Eva both want to learn about tables in Google Docs.
This chapter is divided into the following classroom and lab sessions
1. Creating a Table, Entering, and Editing Data I
2. Creating a Table, Entering, and Editing Data II
3. Formatting Tables in Google Docs I
4. Formatting Tables in Google Docs II
At the end of the session, the students will be able to:
● create a table in Google Docs.
● enter data into a table.
● edit a table.
Keywords
● Table: A table is a grid made up of rows and columns.
● Cell: A cell refers to the intersection of a row and a column.
Ask the students to observe the structure of the timetable of their class.
Explain to the students what a table is and how we can create it. Also, tell them how to enter data into the table and how to edit it.
● Ask the students to observe the structure of the timetable of their class.
● Build the concept that a table is like a grid made up of rows and columns.
15 mins Engage
Explain the following concepts:
Learning Outcomes
Create a table in Google Docs.
Explanation
Tell the students that a table is like a grid made up of rows and columns, as given on pages 54 and 55. Also, explain the steps to create a table.
Enter data into a table. Explain the steps to enter data into a table to the students, as given on pages 55 and 56. Explain how to use the Tab key to move to the next cell and Shift + Tab key to move to the previous cell.
Edit a table.
Discuss with the students that editing a table means making some modifications to the table structure or changing the data in it, as given on page 56.
● Read aloud the questions provided in the Do It Yourself 4A section and encourage the students to solve the questions. Instruct the students to write the answers in their books.
Correct Responses:
1. Ask the students to solve this question by themselves. Responses may vary.
2. a. Editing a table means making some modifications to the table structure or changing the data in it.
b. Shift + Tab
● If you want to create a table in Google Docs, what steps would you take?
Possible Response: Click Insert > Table > Select the size
● If you want to go to the next cell in a table, which key of the keyboard will help you do so?
Possible Response: Tab
Note: Ask the students the additional questions, if time permits.
7 mins
● Conduct a group discussion in the class among students on the topic ‘How to Edit Data in a Table?’.
Possible Response: Locate the cell, click on it to edit, and make the required changes.
3 mins
● Conclude the session by summarising that a table is like a grid made up of rows and columns. The intersection of a row and a column is called a cell. Tables can be created using the Table option from the Insert menu. After creating a table, you can enter data in it. Editing a table means making some modifications to the table structure or changing the data in it. You can click on a cell to edit its data.
● Assign the following questions from the Chapter Checkup given at the end of the chapter as homework.
A. Fill in the Blanks: Questions 1 and 2
B. Tick the Correct Option: Question 1
C. Who Am I?: Question 2
D. Write T for True and F for False: Questions 1 and 2
E. Answer the Following: Questions 1 and 2
F. Apply Your Learning: Questions 1, 2, 3, and 4
At the end of the session, the students will be able to:
● create a table in Google Docs.
● enter data into a table.
● edit a table.
Keywords
● Table: A table is a grid made up of rows and columns.
● Cell: A cell refers to the intersection of a row and a column.
Let the students watch the video or the learning slides related to the topic on the digital panel.
Discuss what a table is. Demonstrate the steps to create a table and enter data into it. Also, show them how to edit a table.
Attempt the activity on the Assignment page.
Conclude the concepts Assign homework
Warm Up
● Instruct the students to go to the Tekie’s Digital platform and open a Lab session on Creating a Table, Entering, and Editing Data II.
● Show the learning slides one by one and discuss the concepts shown on the slides in the panel.
Engage
Explain the following concepts:
Learning Outcomes
Create a table in Google Docs.
Explanation
Tell the students that a table is like a grid made up of rows and columns, as given on pages 54 and 55. Also, explain the steps to create a table.
Enter data into a table. Explain the steps to enter data into a table to the students, as given on pages 55 and 56. Explain how to use the Tab key to move to the next cell and Shift + Tab key to move to the previous cell.
Edit a table. Discuss with the students that editing a table means making some modifications to the table structure or changing the data in it, as given on page 56.
● Ask the questions provided on the slides one by one to assess the students’ understanding. Discuss the answers of the questions with the students. If necessary, ask additional relevant questions.
7 mins
● Instruct the students to attempt the assignment by clicking on the Assignment tab.
● Explain the activity to the students.
Sum Up
3 mins
● Conclude the session by summarising that a table is like a grid made up of rows and columns. The intersection of a row and a column is called a cell. Tables can be created using the Table option from the Insert menu. After creating a table, you can enter data in it. Editing a table means making some modifications to the table structure or changing the data in it. You can click on a cell to edit its data.
● Assign the additional activity given on the panel to the students as homework.
At the end of the session, the students will be able to:
● format a table.
● change row height and column width in a table.
● split and merge cells in a table.
● add and remove rows and columns in a table.
● apply border and shading to a table.
● align the text horizontally and vertically.
Keywords
● Formatting: It means to change the overall appearance of a table.
● Row: A horizontal arrangement of cells is known as a row.
● Column: A vertical arrangement of cells is known as a column.
● Border: The border refers to a dark outline around any text or picture that makes it look a little standout.
● Shading: Shading means to set the background colour of a cell.
● Cell padding: Cell padding refers to the space between the edges of the cell and the content of the cell.
Ask the students whether they can modify the height of the rows and the width of the columns once the table is drawn on paper or not.
Explain about different types of formatting options for tables like changing row height/column width and splitting/merging cells. Also, discuss how to add and remove rows or columns to and from a table. Group
Warm Up
● Ask the students to draw a table in their notebooks. Now, ask them whether they can modify the height of the rows and the width of the columns once the table is drawn on paper or not.
● Now, relate the concept that while you cannot change the row height and column width of a table created on paper, Google Docs allows you to alter the overall appearance of a table. This includes the ability to modify row heights, column widths, and perform actions, such as merging and splitting cells.
Explain the following concepts:
Format a table. Explain to the students that formatting means to change the overall appearance of a table, as given on page 57.
Change row height and column width in a table. Discuss with the students that row height is the vertical distance between the top and bottom borders of a row in a table, as given on pages 57 and 58. Also, demonstrate the steps to do so. Also, define that column width is the horizontal distance between the left and right borders of a column in a table, as given on pages 59 and 60. Also, demonstrate the steps to do so.
Split and merge cells in a table.
Add rows and columns to a table.
Apply borders and shading.
Align text horizontally and vertically.
Explain to the students that splitting cells in a table can help us separate and categorise information in a clear and structured way, as given on pages 60 and 61. Also, discuss with the students that merging cells is like combining two or more cells in a table to create a single, larger cell, as given on pages 61 and 62.
Tell the students that after creating a table, they can add more rows and columns by right-clicking on the row/column and selecting the appropriate option, as given on page 62. Similarly, they can remove the rows and columns also, as given on pages 62 and 63.
Describe that applying borders and shading to a table in Google Docs can enhance its visual appeal and make it stand out, as given on pages 63 and 64.
Tell them that horizontal text alignment refers to how the text is positioned within a cell, deciding whether it aligns with the left, centre, or right margins, as given on page 65. Also, discuss with them that vertical alignment refers to the position of a text within the top and bottom edges of a cell in a table, as given on pages 65 and 66.
● Read aloud the questions provided in the Do It Yourself 4B section and encourage the students to solve the questions. Instruct the students to write the answers in their books.
Correct Responses:
1.
Merging cells is like combining two or more cells in a table to create a single cell.
Splitting cells in a table can help you separate and categorise information in a clear and structured way.
2. The border is like a dark outline around any text or picture that makes it look a little standout.
● Conduct a group discussion in the class among students on the topic ‘The significance of changing the row height and column width’.
Possible Response: You can change the height of the rows and width of the columns to make things easier to read and more organised.
3 mins
● Conclude the session by summarising that formatting means to change the overall appearance of a table which includes changing row height, column width, and merging and splitting cells. Tell them how to change the row height and column width. Also, discuss with them the process of splitting and merging cells in a table.
● Assign the following questions from the Chapter Checkup given at the end of the chapter as homework.
A. Fill in the Blanks: Questions 3, 4, and 5
B. Tick the Correct Option: Questions 2, 3, 4, and 5
C. Who Am I?: Questions 1, 3, 4, and 5
E. Answer the Following: Question 3
F. Apply Your Learning: Question 5
At the end of the session, the students will be able to:
● format a table.
● change row height and column width in a table.
● split and merge cells in a table.
● add and remove rows and columns in a table.
● apply border and shading to a table.
● align the text horizontally and vertically.
Keywords
● Formatting: It means to change the overall appearance of a table.
● Row: A horizontal arrangement of cells is known as a row.
● Column: A vertical arrangement of cells is known as a column.
● Border: The border refers to a dark outline around any text or picture that makes it look a little standout.
● Shading: Shading means to set the background colour of a cell.
● Cell padding: Cell padding refers to the space between the edges of the cell and the content of the cell.
Let the students watch the video or the learning slides related to the topic on the digital panel.
Discuss the concepts given in slides.
Attempt the activity given on the Assignment page.
Conclude the concepts Assign homework
● Instruct the students to go to the Tekie’s Digital platform and open a Lab session on Formatting Tables in Google Docs II
● Show the learning slides one by one and discuss the concepts shown on the slides in the panel.
Explain the following concepts:
Format a table. Explain to the students that formatting means to change the overall appearance of a table, as given on page 57.
Change row height and column width in a table.
Split and merge cells in a table.
Discuss with the students that row height is the vertical distance between the top and bottom borders of a row in a table, as given on pages 57 and 58. Also, demonstrate the steps to do so. Also, define that column width is the horizontal distance between the left and right borders of a column in a table, as given on pages 59 and 60. Also, demonstrate the steps to do so.
Explain to the students that splitting cells in a table can help us separate and categorise information in a clear and structured way, as given on pages 60 and 61. Also, discuss with the students that merging cells is like combining two or more cells in a table to create a single, larger cell, as given on pages 61 and 62.
Add rows and columns to a table.
Apply borders and shading.
Align text horizontally and vertically.
Tell the students that after creating a table, they can add more rows and columns by right-clicking on the row/column and selecting the appropriate option, as given on page 62. Similarly, they can remove the rows and columns also, as given on pages 62 and 63.
Describe that applying borders and shading to a table in Google Docs can enhance its visual appeal and make it stand out, as given on pages 63 and 64.
Tell them that horizontal text alignment refers to how the text is positioned within a cell, deciding whether it aligns with the left, centre, or right margins, as given on page 65. Also, discuss with them that vertical alignment refers to the position of a text within the top and bottom edges of a cell in a table, as given on pages 65 and 66.
● Ask the questions provided on the slides one by one to assess the students’ understanding. Discuss the answers of the questions with the students. If necessary, ask additional relevant questions.
● Instruct the students to attempt the assignment by clicking on the Assignment tab.
● Explain the activity to the students.
● Conclude the session by summarising that formatting means to change the overall appearance of a table which includes changing row height, column width, and merging and splitting cells. Tell them how to change the row height and column width. Also, discuss with them the process of splitting and merging cells in a table.
● Assign the additional activity given on the panel to the students as homework.
Mel and Conji’s summer vacations have started. Conji expresses his wish to see the new Computer Museum which has opened in Avora, and he goes there with Mel. They learn about the evolution of computers and, hence, wish to learn more about the evolution of Avora. They go to the library to read about it but find that the book is missing from the shelf. They rush to inform the Elders about it and find out that the same information is available on the internet. Mel and Conji want to tell Eva about the same and go to her room. She is planning her birthday party, and they both decide to help her. They make the guest lists, design personalised letters, and create an invitation card together. They ask for Ms Idea’s help while deciding on a theme for the birthday party, which turns out to be—ROBOTICS. The Elders also tell Eva about the importance of managing expenses while planning an event. Mr Fate also sends a surprise birthday gift for Eva, which includes a new magic wand and a letter. The letter gave a crucial life lesson to all three kids about the importance of happiness.
● Eva plans her birthday party and wants to send personal letters to her guests before sending out formal invitations.
● She aims to thank them for making her year special and inform them about the date, as the formal invitations will take time.
● Concerned about the time it will take to send individual letters to a long guest list, Mel suggests using Mail Merge.
● Mail Merge is a computer function that allows sending personalised letters to multiple recipients, saving time, and ensuring all guests receive their letters.
● To understand Mail Merge better, they head to the computer lab, where Mel will demonstrate how to use it for Eva’s personalised letters.
At the end of the session, the students will be able to:
● describe Mail Merge and its two documents.
● create the main document.
● create a datasource.
Keywords
● Mail Merge: Mail Merge is a tool in Google Docs that helps you send the same letter or document to many people.
Tell the students about Gmail and ask them if they have ever sent an email.
Explain Mail Merge to the students. Also, elaborate about the main document and datasource.
● Datasource: A datasource is the list of recipients to whom you want to send the invite. 15
Group discussion Conclude the concepts Assign homework
● Tell the students about Gmail and ask them if they have ever sent an email. Then, introduce them to the mail merge.
Engage
Explain the following concepts:
Describe Mail Merge and its two documents.
Explanation
Tell the students that mail merge is a tool in Google Docs that helps you send the same document to many people. Describe its two documents, as given on page 75.
Create the main document. Describe to the students that the main document is the primary file in a mail merge that contains the layout and structure of the document. The steps to create the main document include launching Google Docs on your computer and selecting the Blank option to create a new document for your invitation, as shown on pages 76 and 77.
In the Mail Merge pane, you will see the List of Friends is the name of the selected sheet, which is currently active for Mail Merge.
Create a datasource. Describe to the students that the datasource is a file or database containing the information that needs to be merged into the main document during a mail merge. The steps to create the datasource include launching Google Docs on your computer and selecting the Blank option to create a new sheet to create a list of ten friends. Then, provide a unique title for the sheet, such as “List of Friends,” as given on pages 77 and 78.
What can be the recipient list if you are sending a report card through Mail Merge?
Think and Tell Do It Yourself 4A
● Read aloud the question provided in the Do It Yourself 5A section and encourage the students to solve the questions. Instruct the students to write the answers in their book.
Correct Responses:
1 Find these words in the word grid.
1.
2. The main document is the document which contains the text that is to be sent to all recipients.
2 Answer the following questions.
3. The Extension menu is used to add the mail merge extension.
a What is the main document in Mail Merge?
b Name the menu used to add the Mail Merge extension.
● Conduct a group discussion in the class among the students based on the topic “What would be a better idea—writing an invitation by yourself or doing this job using Mail Merge?” provided in the Discuss section as mentioned on page 75.
Possible Response: Handwritten invitations are more personal when you only need a few; however, mail merge can save you time and allow you to customise each one when you have many to send.
Once you attach the Invite to the List of Friends, you can merge fields to personalise a document with information from the List of Friends. You need to insert fields that are
● Conclude the session by summarising that the Mail Merge is a tool in Google Docs which helps to send a single document to multiple people at the same time. Describe its two documents and how we can create them.
● Assign the following questions from the Chapter Checkup given at the end of the chapter as homework.
A. Fill in the Blanks: Questions 1, 2, and 3
B. Tick the Correct Option: Questions 1 and 2
C. Who Am I?: Questions 1, 2, and 3
D. Write T for True and F for False: Questions 1, 3, and 4
E. Answer the Following: Questions 1, 2, and 3
F. Apply Your Learning: Questions 1, 2, and 4
At the end of the session, the students will be able to:
● describe Mail Merge and its two documents.
● create the main document.
● create the data source.
Keywords
● Mail Merge: Mail Merge is a tool in Google Docs that helps you send the same letter or document to many people.
● Datasource: A datasource is the list of recipients to whom you want to send the invite.
Let the students watch the video or the learning slides related to the topic on the digital panel.
Explain Mail Merge. Also, elaborate about the main document and datasource. Attempt the activity on the Assignment page.
Conclude the concepts
Assign homework
● Instruct the students to go to the Tekie’s Digital platform and open a Lab session on Mail Merge II.
● Show the learning slides one by one and discuss the concepts shown on the slides in the panel.
Explain the following concepts:
Learning Outcomes
Describe mail merge and its two documents.
Explanation
Tell the students that mail merge is a tool in Google Docs that helps you send the same document to many people. Describe its two documents, as given on page 75.
Create the main document. Describe to the students that the main document is the primary file in a mail merge that contains the layout and structure of the document. Demonstrate the steps to create a new document for your invitation, as given on pages 76 and 77.
Create the datasource. Describe that a datasource is a file or database containing the information that needs to be merged into the main document during a mail merge. Demonstrate the steps to create a datasource as given on pages 77 to 81.
● Ask the questions provided on the slides one by one to assess the students’ understanding. Discuss the answers of the questions with the students. If necessary, ask additional relevant questions.
12 mins
● Instruct the students to attempt the assignment by clicking on the Assignment tab.
● Explain the activity to the students. Sum Up
3 mins
● Conclude the session by summarising that Mail Merge is a tool which helps to send a single document to multiple people at the same time. Describe about its two documents and how we can create these documents.
● Assign the additional activity given on the panel to the students as homework.
At the end of the session, the students will be able to:
● define how to insert merge fields.
● describe how to view merge fields.
● print the letter.
Keyword
● Merge field: A merge field is an area within a main document where data from a spreadsheet document or another data source is inserted.
Imagine you’re writing invitations for your birthday party. You want to send each guest a personal invitation with their name and other details. Would it be easier to write each one by hand, or could there be a quicker way?
Explain to the students the steps for inserting and viewing merge fields. Also, elaborate on how to print the letters.
Group discussion Conclude the concepts
Assign homework
Warm Up
● Imagine you’re writing invitations for your birthday party. You want to send each guest a personal invitation with their name and other details. Would it be easier to write each one by hand, or could there be a quicker way?
Explain the following concepts:
Learning Outcomes
Define how to insert merge fields.
Explanation
Describe what a merge field is and then tell the students the steps to insert merge fields as given on pages 81 to 83.
Describe how to view merge fields.
Explain to them that viewing the merge field is to check whether the letter has been created with all recipients on the list. Also, describe the various steps involved in viewing merge fields as given on pages 83 and 84.
Print the letter. Tell the students that after merging the letters, you can take printouts of the letters. Then discuss the steps to print the letter as given on page 85.
● Read aloud the question provided in the Do It Yourself 5B section and encourage the students to solve the questions. Instruct the students to write the answers in their book.
Correct Responses:
1. 1. Prepare the invite 2. Prepare the list of friends 3. Insert the merge fields
4. View the letter 5. Print the letter
2. a. F b. T c. F
Build
7 mins
● Conduct a group discussion in the class among students based on the topic “Share some real-life scenarios where you can use mail merge.” provided in the Discuss section as mentioned on page 85.
Possible Responses:
1. You can use mail merge for a school project, like making personalised letters to invite people to a class event.
2. If you’re in a club and need to send the same information to lots of members, mail merge helps make it easier.
3. Maybe for a family party, sending invites with everyone’s names using mail merge saves time.
4. Teachers could use mail merge to send report cards or announcements to all students and parents.
3 mins
Sum Up
● Conclude the session by summarising that a merge field is an area within a main document where data from a spreadsheet document or another data source is inserted. Discuss the steps to insert merge fields, view fields, and print a letter.
● Assign the following questions from the Chapter Checkup given at the end of the chapter as homework.
A. Fill in the Blanks: Questions 4 and 5
B. Tick the Correct Option: Questions 3, 4, and 5
C. Who Am I?: Questions 4 and 5
D. Write T for True and F for False: Questions 2 and 5
E. Answer the Following: Questions 4 and 5
F. Apply Your Learning: Questions 3 and 5
At the end of the session, the students will be able to:
● define how to insert merge fields.
● describe how to view merge fields.
● print the letter.
Keyword
● Merge field: A merge field is an area within a main document where data from a spreadsheet document or another data source is inserted.
Let the students watch the video or the learning slides related to the topic on the digital panel.
Explain to the students the steps for inserting and viewing merge fields. Also, elaborate about how to print the letters.
Attempt the activity on the Assignment page. Conclude the concepts Assign homework
● Instruct the students to go to the Tekie’s Digital platform and open a Lab session on Mail Merge IV
● Show the learning slides one by one and discuss the concepts shown on the slides in the panel.
Explain the following concepts:
Define how to insert merge fields.
Describe how to view merge fields.
Describe what a merge field is and then demonstrate to the students the steps to insert merge fields as given on pages 81 to 83.
Explain to them that viewing the merge field is to check whether the letter has been created with all recipients on the list. Also, describe the various steps involved in viewing merge fields as given on pages 83 and 84.
Print the letter. Tell the students that after merging the letters, you can take printouts of the letters. Then discuss the steps to print the letter as given on page 85.
● Ask the questions provided on the slides one by one to assess the students’ understanding. Discuss the answers of the questions with the students. If necessary, ask additional relevant questions.
● Instruct the students to attempt the assignment by clicking on the Assignment tab.
● Explain the activity to the students.
3 mins
● Conclude the session by summarising that a merge field is an area within a main document where data from a spreadsheet document or another data source is inserted. Discuss the steps to insert merge fields, view fields, and print a letter.
● Assign the additional activity given on the panel to the students as homework.
This chapter is divided into the following classroom and lab sessions
At the end of the session, the students will be able to:
● describe HTML and its advantages and disadvantages.
Keyword
● HTML: HTML stands for HyperText Markup Language. It helps you to display colourful text, images, and attractive backgrounds to your web page.
Let the students watch the video or the learning slides related to the topic on the digital panel.
Describe to the students what HTML is. Tell its advantages and disadvantages.
Attempt the activity on the Assignment page.
Conclude the concepts
Assign homework
● Instruct the students to go to the Tekie’s Digital platform and open a Lab session on HTML-I.
● Show the learning slides one by one and discuss the concepts shown on the slides in the panel.
Explain the following concepts:
Describe HTML and its advantages and disadvantages. Tell the students that we use various computer languages or technologies to create web pages. HTML is one of the technologies used to create web pages, as given on pages 60 and 61.
● Ask the questions provided on the slides one by one to assess the students’ understanding. Discuss the answers to the questions with the students. If necessary, ask additional relevant questions. Build
● Instruct the students to attempt the assignment by clicking on the Assignment tab.
● Explain the activity to the students.
7 mins
● Conclude the session by summarising that HTML helps you display colourful text, images, and attractive backgrounds to your web page. Revise its advantages and disadvantages.
● Assign the following questions from the Chapter Checkup given at the end of the chapter as homework.
A. Fill in the Blanks: Question 3
B. Tick the Correct Option: Question 1
C. Who Am I?: Questions 1 and 4
D. Write T for True and F for False: Questions 1, 2, and 3
E. Answer the Following: Questions 1, 2, 3, and 5
F. Apply Your Learning: Question 2
Learning Outcomes
At the end of the session, the students will be able to:
● explain about web browsers.
● describe the basic structure of an HTML document.
Keyword
● Web browser: A web browser is a software application that processes HTML and other web technologies to display web pages to users.
Ask the students which application will they use to open a website. Explain to the students what a web browser is.
Describe the basic structure of an HTML document. Think and Tell Conclude the concepts Assign homework
● Ask the students which application will they use to open a website.
● Then, tell them about the web browsers.
Explain the following concepts:
Learning Outcomes
Explanation
Explain about web browsers. Describe to them what a web browser is. Tell them that Google Chrome, Mozilla Firefox, and Microsoft Edge are some common examples of web browsers, as given on page 61.
Describe the basic structure of an HTML document.
Describe the basic structure of an HTML document, which includes a header section and a body section, as given on page 61.
● Read aloud the questions provided in the Do It Yourself 4B section. Encourage the students to solve the questions. Instruct the students to write the answers in their book.
Correct Responses:
● Ask the students to give the answer to the question “What type of websites do you want to create using HTML?” asked in the Think and Tell section given on page 61.
Possible Responses: Game websites, news websites, and social networking websites.
3 mins
● Conclude the session by summarising what a web browser is. Also, revise that HTML contains two sections: a head section and a body section.
● Assign the following questions from the Chapter Checkup given at the end of the chapter as homework.
A. Fill in the Blanks: Question 3
C. Who Am I?: Question 1
D. Write T for True and F for False: Question 2
E. Answer the Following: Question 2
At the end of the session, the students will be able to:
● design web pages in HTML.
● create the structure of an HTML document.
Let the students watch the video or the learning slides related to the topic on the digital panel.
Explain to the students how to design web pages in HTML. Demonstrate to them how to create the structure of an HTML document.
Attempt the activity on the Assignment page. Conclude the concepts Assign homework
● Instruct the students to go to Tekie’s Digital platform and open a Lab session on HTML-III.
● Show the learning slides one by one and discuss the concepts shown on the slides in the panel.
Explain the following concepts:
Design web pages in HTML.
Create the structure of an HTML document.
Explanation
Describe the steps involved in designing a web page in HTML are open an editor, write HTML code, save a file, open a browser, and check the web page, as given on page 62.
Describe to them that to create an HTML document, you need to know about a few essential elements, such as doctype HTML, HTML, head, etc. To create a basic HTML document structure, refer to pages 62 and 63 for the necessary elements.
● Ask the questions provided on the slides one by one to assess the students’ understanding. Discuss the answers to the questions with the students. If necessary, ask additional relevant questions. Build
● Instruct the students to attempt the assignment by clicking on the Assignment tab.
● Explain the activity to the students. Sum Up
7 mins
3 mins
● Conclude the session by summarising how to design web pages in HTML. Also revise how to create the structure of an HTML document.
● Assign the additional activity given on the panel to the students as homework.
● Assign the following questions from the Chapter Checkup given at the end of the chapter as homework.
A. Fill in the Blanks: Question 4
At the end of the session, the students will be able to:
● describe basic terminologies in HTML.
● explain different types of tags.
Keywords
● Tags: A tag is a keyword that tells the browser how to display a piece of text or content.
● Container tags: These tags consist of an opening tag as well as a closing tag. This start tag and end tag pair are known as the ON and OFF tags and are used to open and close the document.
Now, as the students know about the structure of an HTML document, ask them if they know about tags.
Describe to them the basic terminologies in HTML. Explain about different types of tags.
Group discussion Conclude the concepts Assign homework
● Empty tags: An empty tag is a tag without a closing tag. 5 mins
Warm Up
Now, as the students know about the structure of an HTML document, ask them if they know about tags.
Tell them before writing the HTML code, they need to know about a few terms that they can use in the HTML code.
Explain the following concepts:
Describe basic terminologies in HTML.
Explain different types of tags.
Explanation
Describe basic terminologies of HTML, such as tags, elements, attributes, as given on page 63.
Describe types of tags, such as container tags and empty tags. Also, tell them about basic tags in HTML, as given on pages 63 to 66.
● Read aloud the questions provided in the Do It Yourself 4C section and encourage the students to solve the questions. Instruct the students to write the answers in their book.
Correct Responses:
Tag Meaning
hr Italics
br Horizontal rule
b Underline
i Line break
u Bold
Build
7 mins
● Conduct a group discussion among the students in the class on the topic “What is the difference between tags and elements?” mentioned in the Discuss section, as given on page 66.
Possible Responses: A tag is a keyword that tells the browser how to display a piece of text or content. On the other hand, an element is a building block of an HTML, which is defined by a start tag, some content, and an end tag.
3 mins
Sum Up
● Conclude the session by summarising that a tag is a keyword that tells the browser how to display a piece of text or content. Tell them about elements and attributes. Also, describe to them the various types of tags, such as paragraph, break, body, head, etc.
● Assign the additional activity given on the panel to the students as homework.
● Assign the following questions from the Chapter Checkup given at the end of the chapter as homework.
A. Fill in the Blanks: Questions 1, 2, 4, and 5
B. Tick the Correct Option: Questions 2, 3, 4, and 5
C. Who Am I?: Questions 2, 3, and 5
D. Write T for True and F for False: Questions 4 and 5
E. Answer the Following: Question 4
F. Apply Your Learning: Questions 1, 3, 4, and 5
Mel and Conji are going to the Computer Lab to submit their project. They notice that the computer screens are going out of control. They are infected by a virus, which is a mix of magic and technology and was created by Lord Ero and Cyborg. The trio tries to find more information about the virus with the help of the Elders. They want to find an ancient magical tool which could assist them in dealing with the virus. They get to know about the Enigmus through the internet, which is a magical encyclopaedia and can undo the virus. They go on a digital treasure hunt by following various clues, which lead them to Ms Idea in the Void. Ms Idea is like a guardian of that place and shows the Enigmus to them. The Elders give a secret file to the trio, which they got from Cyborg’s system. The trio follows the clues and patterns inside it carefully, and it leads them to the final solution. There is a battle between the two sides where Ero’s dangerous spell hits Eva and she faints. Mel and Conji use a spell from the Enigmus to defeat Lord Ero and Cyborg and save their friend, Eva.
● Mel Conji and Eva are at the Computer Lab, pondering the virus in the system.
● They decide to create a plan and head to the Records Room to find an ancient magical tool.
● Concerned about time, they realise the internet might offer a faster solution than searching through physical documents.
● Sceptical, Mel questions how the internet can solve magic and tech issues when the local computers are malfunctioning.
● Eva explains that the internet is like a vast digital library with information on everything.
● They decide to go to Elder Robot’s Office to access the internet and find a solution to the virus threatening Avora.
This chapter is divided into the following classroom sessions
1. What is the Internet?
2. Popular Services on the Internet
3. Potential Threats of Using the Internet and Netiquette
At the end of the session, the students will be able to:
● define what internet is.
● describe history of internet.
● elaborate advantages of internet.
● discuss disadvantages of internet.
Keyword
● Internet: The internet is a network that connects computers all over the world.
Warm Up Engage
Think about your favourite online game or app. Do you ever wonder how did it get to your device?
Elaborate with the students about History of the internet, advantages and disadvantages of the internet.
Build Sum Up
Think and Tell Conclude the concepts Assign homework
Warm Up
● Think about your favourite online game or app. Do you ever wonder how did it get to your device?
● Now, relate the concept that these games or apps are available because of the Internet.
Engage
Explain the following concepts:
Explanation
Define what internet is. Discuss with the students, internet is a network that connects computers all over the world, as given on page 38.
Describe history of internet. Tell the students that in the early 1960s, the U.S. military laid the groundwork for the internet by creating ARPANET, a network for sharing information between universities, as given on page 38.
Communication: The internet has revolutionised the way we communicate. It allows people to connect instantly through email, social media, video calls, and messaging apps, making it easy to stay in touch with family, friends, and colleagues worldwide.
Communication: The internet has revolutionised the way we communicate. It allows people to connect instantly through email, social media, video calls, and messaging apps, making it easy to stay in touch with family, friends, and colleagues worldwide.
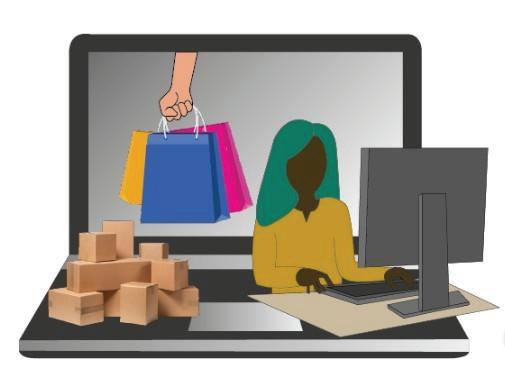
Elaborate advantages of internet. Tell them various advantages of the internet from instant connections across continents to virtual classrooms and convenient shopping, the internet has irrevocably changed how we communicate, learn, navigate, shop, and manage finances, as given on pages 38 and 39.
Discuss disadvantages of internet.
Communication: The internet has revolutionised the way we communicate. It allows people to connect instantly through email, social media, video calls, and messaging apps, making it easy to stay in touch with family, friends, and colleagues worldwide.
Online Learning: The internet offers access to a vast number of educational resources and online courses. Students and learners of all ages can acquire new skills, take courses, and earn degrees from the comfort of their homes.
Online Learning: The internet offers access to a vast number of educational resources and online courses. Students and learners of all ages can acquire new skills, take courses, and earn degrees from the comfort of their homes.
Describe the different disadvantages of the Internet: that it leads to addiction and neglecting personal health; unsecured connections expose us to cyber threats; while misinformation and cyberbullying can have emotional impacts, as given on pages 39 and 40.
Online Learning: The internet offers access to a vast number of educational resources and online courses. Students and learners of all ages can acquire new skills, take courses, and earn degrees from the comfort of their homes.
Maps and Navigation: Online maps and GPS services help people find addresses, get directions, and navigate unfamiliar places effortlessly. Services like Google Maps provide real-time traffic updates and even public transportation options.
Maps and Navigation: Online maps and GPS services help people find addresses, get directions, and navigate unfamiliar places effortlessly. Services like Google Maps provide real-time traffic updates and even public transportation options.
● Read aloud the questions provided in the Do It Yourself 3A section and encourage the students to solve the questions. Instruct the students to write the answers in their book.
Online Shopping: E-commerce platforms have made shopping more convenient than ever before. People can browse and purchase products from a wide range of retailers, without leaving their homes. Online shopping also offers the advantage of comparing prices and reading reviews.
Maps and Navigation: Online maps and GPS services help people find addresses, get directions, and navigate unfamiliar places effortlessly. Services like Google Maps provide real-time traffic updates and even public transportation options.
Online Shopping: E-commerce platforms have made shopping more convenient than ever before. People can browse and purchase products from a wide range of retailers, without leaving their homes. Online shopping also offers the advantage of comparing prices and reading reviews.
Online Payment: The internet has streamlined financial transactions through online payment systems like PayPal and Paytm, and digital wallets. Such services make it secure and easy to send and receive money, pay bills, and make online purchases.
Online Learning: The internet offers access to a vast number of educational resources and online courses. Students and learners of all ages can acquire new skills, take courses, and earn degrees from the comfort of their homes.
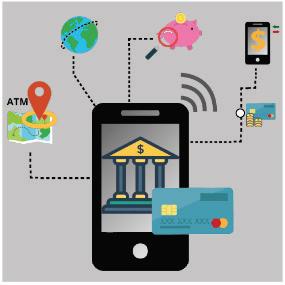
Online Payment: The internet has streamlined financial transactions through online payment systems like PayPal and Paytm, and digital wallets. Such services make it secure and easy to send and receive money, pay bills, and make online purchases.
Maps and Navigation: Online maps and GPS services help people find addresses, get directions, and navigate unfamiliar places effortlessly.
Services like Google Maps provide real-time traffic updates and even public transportation options.
Online Shopping: E-commerce platforms have made shopping more convenient than ever before. People can browse and purchase products from a wide range of retailers, without leaving their homes. Online shopping also offers the advantage of comparing prices and reading reviews.
Despite many advantages, the internet has some disadvantages too. Wastage of Time: The internet has a lot of information that can kill people’s time while surfing the internet. Impact on Health: People may become addicted to using the internet. It can disturb their minds and affect their physical health in the long run. Spending an excessive amount of time on phones, laptops, or other such devices can cause health problems such as reduced eyesight, lower backache, and neckache.
Online Shopping Communication Maps & Navigation Online Payment
Cybersecurity Threats: The internet, if not used correctly, can be a bit like leaving your front door unlocked. Some not-so-nice people may try to sneak into your personal networks and systems and cause harm for their gain or just for fun. If your computer is not secured, they can gain unauthorised access to your personal documents and other information such as stealing your bank account details and using them for their benefit.
Online Payment: The internet has streamlined financial transactions through online payment systems like PayPal and Paytm, and digital wallets. Such services make it secure and easy to send and receive money, pay bills, and make online purchases.
Despite many advantages, the internet has some disadvantages too.
● Ask the students to give the answer of the question “Is using the internet an advantage or a disadvantage?” asked in the Think and Tell section on page 40.
Online Shopping: E-commerce platforms have made shopping more convenient than ever before. People can browse and purchase products from a wide range of retailers, without leaving their homes. Online shopping also offers the advantage of comparing prices and reading reviews.
Online Payment: The internet has streamlined financial transactions through online payment systems like PayPal and Paytm, and digital wallets. Such services make it secure and easy to send and receive money, pay bills, and make online purchases.
Wastage of Time: The internet has a lot of information that can kill people’s time while surfing the internet.
Correct Responses: Sum Up 3 mins
Possible Response: The internet has advantages, aiding quick information access for school projects, but it can also be a distraction, requiring a balance in usage to ensure effective learning without neglecting other tasks.
Despite many advantages, the internet has some disadvantages too.
42 Communication: The internet has revolutionised the way we communicate. It allows people to connect instantly through email, social media, video calls, and messaging apps, making it easy to stay in touch with family, friends, and colleagues worldwide.
Impact on Health: People may become addicted to using the internet. It can disturb their minds and affect their physical health in the long run. Spending an excessive amount of time on phones, laptops, or other such devices can cause health problems such as reduced eyesight, lower backache, and neckache.
Wastage of Time: The internet has a lot of information that can kill people’s time while surfing the internet.
Cybersecurity Threats: The internet, if not used correctly, can be a bit like leaving your front door unlocked. Some not-so-nice people may try to sneak into your personal networks and systems and cause harm for their gain or just for fun. If your computer is not secured, they can gain unauthorised access to your personal documents and other information such as stealing your bank account details and using them for their benefit.
Despite many advantages, the internet has some disadvantages too.
Wastage of Time: The internet has a lot of information that can kill people’s time while surfing the internet. Impact on Health: People may become addicted to using the internet. It can disturb their minds and affect their physical health in the long run. Spending an excessive amount of time on phones, laptops, or other such devices can cause health problems such as reduced eyesight, lower backache, and neckache. Cybersecurity Threats: The internet, if not used correctly, can be a bit like leaving your front door unlocked. Some not-so-nice people may try to sneak into your personal networks and systems and cause harm for their gain or just for fun. If your computer is not secured, they can gain unauthorised access to your personal documents and other information such as stealing your bank account details and using them for their benefit.
Impact on Health: People may become addicted to using the internet. It can disturb their minds and affect their physical health in the long run. Spending an excessive amount of time on phones, laptops, or other such devices can cause health problems such as reduced eyesight, lower backache, and neckache.
● Conclude the session by summarising that the internet is a network that connects computers all over the world. The history of the internet goes back to the early 1960s when the U.S. military laid the groundwork for the Internet by creating ARPANET, a network for sharing information between universities. The internet has irrevocably changed how we communicate, learn, and navigate. The internet’s vast amount of information can be a time sink, leading to addiction and neglecting personal health. Unsecured connections expose us to cyber threats.
Cybersecurity Threats: The internet, if not used correctly, can be a bit like leaving your front door unlocked. Some not-so-nice people may try to sneak into your personal networks and systems and cause harm for their gain or just for fun. If your computer is not secured, they can gain unauthorised access to your personal documents and other information such as stealing your bank account details and using them for their benefit.
● Assign the following questions from the Chapter Checkup given at the end of the chapter as homework.
A. Fill in the Blanks: Questions 1 and 4
D. Write T for True and F for False: Question 1
E. Answer the Following: Question 1
F. Apply Your Learning: Question 1
At the end of the session, the students will be able to:
● describe about email and its features, advantages, and disadvantages.
● define Google Drive.
● explain about e-commerce.
● elaborate online payments.
● describe blogging.
● define podcasting.
Keywords
● Email: Email stands for electronic mail. It is a way to send messages over the internet to other people.
● Google Drive: It is a cloud storage service that lets you store files online and access them from anywhere using the internet.
● E-commerce: It refers to buying and selling of products and services online.
● Blog: It is a website where people can write about their thoughts, experiences, and interests.
● Podcasting: It involves creating and sharing audio content.
Ask the students about some earlier methods of sending messages to friends or relatives.
What’s your favourite store? Could you ever buy something from them without leaving your house?
Tell the students about different services of the internet like email, Google Drive, e-commerce, podcasting, blogging. Also describe about the online payments.
Think and Tell Conclude the concepts Assign homework
● Ask the students about some earlier methods of sending messages to friends or relatives.
● What’s your favourite store? Could you ever buy something from them without leaving your house?
● Now, relate the concept by describing different services of the internet.
Explain the following concepts:
Describe about email and its features, advantages, and disadvantages.
An email is a short form for electronic mail which lets you share messages across the internet. Also tell about its features, advantages and disadvantages as given on pages 40 and 41.
Define Google Drive. Tell the students that Google Drive is their personal vault, which lets you store any file online and access it from anywhere with an internet connection as given on page 41.
Explain about e-commerce. Define that e-commerce is an online shopping wonderland which lets you browse and buy anytime, anywhere, as given on pages 41 and 42.
Elaborate online payments. Explain to the students that online payments are the convenient way to pay for goods and services over the internet without the need for cash or checks, as given on page 42.
Describe blogging.
Discuss with the students that a blog is your own corner of the internet, a platform where you can share your thoughts, experiences, and passions with the world, as given on page 43.
Define podcasting. Tell students that podcasts are like radio on demand, but with a twist. Instead of one-size-fits-all broadcasts, you get to choose your own story, as given on pages 43 and 44.
Ask the following questions to the students to check their understanding:
● What is an email?
Correct Response: Email stands for electronic mail. It is a way to send messages to other people over the internet.
● Name some of the online modes of payment.
Correct Responses: Credit Card, Debit Card, Net Banking, Mobile Wallet, UPI
7 mins
● Ask the students to give the answer of the question “Is using email a more convenient way to send or receive messages than the traditional mail?” asked in the Think and Tell section on page 41.
Possible Response: An email offers quick communication, while traditional mail takes longer. Preferences depend on the situation, with email for speed and traditional mail for meaningful experiences.
● Conclude the session by summarising Email is a short form for electronic mail, which lets you share messages across the internet. Google Drive is their personal vault, which lets you store any file online and access it from anywhere with an internet connection. E-commerce is an online shopping wonderland which lets you browse and buy anytime, anywhere. Online payments are a convenient way to pay for goods and services over the internet without the need for cash or checks. A blog is your own corner of the internet, a platform where you can share your thoughts. Podcasts are like radio on demand, but with a twist. Instead of one-size-fits-all broadcasts, you get to choose your own story.
● Assign the following questions from the Chapter Checkup given at the end of the chapter as homework.
A. Fill in the Blanks: Questions 2, 3, and 5
B. Tick the Correct Option: Questions 1, 2, 3, and 5
C. Who Am I?: Questions 1, 2, 3, and 5
D. Write T for True and F for False: Questions 2, 3, 4, and 5
E. Answer the Following: Questions 2, 3, and 5
F. Apply Your Learning: Questions 2, 3, and 4
At the end of the session, the students will be able to:
● define various potential threats and risks.
● describe netiquette.
Keyword
● Netiquette: It refers to a set of rules and regulations for behaving politely and respectfully online.
Can you think of a situation where someone might try to trick you into sharing personal information online? How would you recognise and avoid such a scenario?
If you accidentally come across inappropriate content while using the internet, what steps would you take, and why is it important to report such incidents?
Tell the students about the potential threats and risks associated with the use of internet.
Also tell them about the netiquette.
Group discussion
Conclude the concepts
Assign homework
● Can you think of a situation where someone might try to trick you into sharing personal information online? How would you recognise and avoid such a scenario?
● If you accidentally come across inappropriate content while using the internet, what steps would you take, and why is it important to report such incidents?
● Now, build the concept that there are various potential threats when you use the internet, and to avoid them you should follow certain guidelines.
Explain the following concepts:
Define various potential threats and risks.
Tell students that there are various risks related to the use of the internet, starting from malware hiding in the shadows to fake links phishing for your personal information, the online world can be a minefield for the unwary, as given on page 44.
Describe netiquette. Discuss with them netiquette refers to a set of rules and regulations for behaving politely and respectfully online, that means being polite, avoiding unnecessary drama, and respecting privacy, as given on pages 44 and 45.
● Read aloud the questions provided in the Do It Yourself 3B section and encourage the students to solve the questions. Instruct the students to write the answers in their book.
Correct Responses: 1. B 2. G 3. B 4. B 5. B
Build
7 mins
● Conduct a group discussion in the class among students based on the topic ‘What is personal information and why it’s important to keep it private online?’
Possible Response: Personal information includes details like name and address. Keeping it private online is vital to stay safe, preventing issues like identity theft and unwanted attention from strangers.
Sum Up
3 mins
● Conclude the session by summarising that the internet is as vast and wonderful as it is, comes with its own set of dangers. From malware hiding in the shadows to fake links phishing for your personal information, the online world can be a minefield for the unwary. Netiquette refers to a set of rules and regulations for behaving politely and respectfully online, which means being polite, avoiding unnecessary drama, and respecting privacy.
● Assign the following questions from the Chapter Checkup given at the end of the chapter as homework.
B. Tick the Correct Option: Question 4
C. Who Am I?: Question 4
E. Answer the Following: Question 4
F. Apply Your Learning: Question 5
Mel and Conji, along with Eva, are going to the computer lab to submit their project. They notice that the computer screens are going out of control. They are infected by a virus, which is a mix of magic and technology and was created by Lord Ero and Cyborg. The trio tries to find more information about the virus with the help of the Elders. They want to find an ancient magical tool which could assist them in dealing with the virus. They get to know about the Enigmus through the internet, which is a magical encyclopedia and can undo the virus. They go on a digital treasure hunt by following various clues, which lead them to Ms Idea in the Void. Ms Idea is like a guardian of that place and shows the Enigmus to them. The Elders give a secret file to the trio, which they got from Cyborg’s system. The trio follows the clues and patterns inside it carefully, and it leads them to the final solution. There is a battle between the two sides where Ero’s dangerous spell hits Eva, and she faints. Mel and Conji use a spell from the Enigmus to defeat Lord Ero and Cyborg and save their friend, Eva.
● The trio, Mel, Conji, and Eva, are curious about the Enigmus and seek knowledge in the Anywhere Room.
● They find a door labelled ‘VOID’ and use it to enter the Void, a mysterious and seemingly scary place with floating rocks.
● Ms Idea, a guardian of the Void, welcomes them and reveals her connection to the place.
● Ms Idea presents the Enigmus, a source of wisdom and magic, in response to the trio’s quest for knowledge about the virus affecting Avora.
● Ms Idea explains that the Enigmus is like a magical encyclopedia and suggests spreading awareness about it in Avora.
● The trio decides to use presentations to make the Enigmus known to everyone in Avora.
● Ms Idea recommends making the presentations attractive to ensure widespread reading.
● Mel suggests going to the computer lab to explore different ways of creating an interesting presentation.
● The group leaves for the computer lab to learn and implement strategies for spreading awareness about the Enigmus.
This chapter is divided into the following classroom and lab sessions
1. Applying Animation and Transitions-I
2. Applying Animation and Transitions-II
3. Inserting Multimedia-I
4. Inserting Multimedia-II
5. Advanced Features of Google Slides and Viewing a Presentation-I
6. Advanced Features of Google Slides and Viewing a Presentation-II
At the end of the session, the students will be able to:
● describe animation and apply animation effects in Google Slides.
● determine the use of transitions and how to apply them in Google Slides.
● Animation: Animation is a special visual effect that you add to text and different objects on a slide.
● Transition: Transition is the way one slide follows the other on the screen in a presentation.
Ask the students if they have ever thought about how moving effects are added to the objects and slides in a presentation.
Explain to the students what animation is and how it can be applied in Google Slides. Also, tell them how to apply transition effects.
Group discussion Conclude the concepts Assign homework
● Ask the students if they have ever thought about how moving effects are added to the objects and slides in a presentation.
● Now, build the concept that animations are used to add moving effects to the objects on the slides in a presentation.
● Also discuss with the students that they can also apply special effects to slides which are known as slide transition effects.
Explain the following concepts:
Describe animation and apply animation effects in Google Slides.
Determine the use of transitions and how to apply them in Google Slides.
Tell the students that the animations are special visual effects that they add to the text and different objects on a slide, as given on pages 95 and 96.
Discuss with the students that the way one slide follows the other on the screen in a presentation is called a transition, as given on pages 97 and 98.
● Read aloud the questions provided in the Do It Yourself 6A and 6B sections and encourage the students to solve the questions. Instruct the students to write the answers in their book.
Correct Responses: (Do It Yourself 6A)
1. False 2. True
Correct Responses: (Do It Yourself 6B)
1. You can preview the transition by clicking the Play button in the Transition sidebar.
2. The Apply to all Slides Button is used to apply the same transition effect to all slides in the presentation.
7 mins
Build
● Conduct a group discussion in the class among students on the topic “How do animations add life to videos and presentations?” as given in the Discuss section on page 96.
Possible Response: Animations add life to videos and presentations by making content more visually appealing, emphasising key points, improving clarity, and enhancing overall engagement.
3 mins
● Conclude the session by summarising that animation effects are computer magic for making things on the screen move, change size, or appear and disappear in a fun way. In Google Slides, you can add animations by choosing an effect, deciding when it starts (on click, after previous, or with previous), and even make text appear one part at a time. Transitions are moves between slides in presentations.
● Assign the following questions from the Chapter Checkup given at the end of the chapter as homework.
A. Fill in the Blanks: Question 3
B. Write T for True and F for False: Question 2
D. Answer the Following: Question 4
At the end of the session, the students will be able to:
● describe animation and apply animation effects in Google Slides.
● determine the use of transitions and how to apply in Google Slides.
Keywords
● Animation: Animation is a special visual effect that you add to the text and different objects on a slide.
● Transition: Transition is the way one slide follows the other on the screen in a presentation.
Let the students watch the video or the learning slides related to the topic on the digital panel. Demonstrate the steps to apply animation and transition effects in a presentation. Attempt the activity on the Assignment page.
Conclude the concepts Assign homework
5 mins
Warm Up
● Instruct the students to go to the Tekie’s Digital platform and open a Lab session on Applying Animation and Transitions-II.
● Show the learning slides one by one and discuss the concepts shown on the slides in the panel.
15 mins
Engage
Explain the following concepts:
Learning Outcomes
Describe animation and apply animation effects in Google Slides.
Explanation
Tell the students that the animations are special visual effects that you add to the text and different objects on a slide, as given on pages 95 and 96.
Determine the use of transitions and how to apply them in Google Slides.
Discuss with the students that the way one slide follows the other on the screen in a presentation is called transition, as given on pages 97 and 98.
● Ask the questions provided on the slides one by one to assess the students’ understanding. Discuss the answers to the questions with the students. If necessary, ask additional relevant questions.
7 mins
Build
● Instruct the students to attempt the assignment by clicking on the Assignment tab.
● Explain the activity to the students.
3 mins
● Conclude the session by summarising that animation effects are computer magic for making things on the screen move, change size, or appear and disappear in a fun way. In Google Slides, you can add animations by choosing an effect, deciding when it starts (on click, after previous, or with previous), and even make text appear one part at a time. Transitions are moves between slides in presentations.
● Assign the additional activity given on the panel to the students as homework.
At the end of the session, the students will be able to:
● explain the use of multimedia in a presentation.
● determine how to insert audio and video in a presentation.
● Multimedia: It refers to the combination of multiple forms of content such as text, audio, video, images, etc.
Ask the students what they think about the importance of videos and audios in their learning.
Explain the process of inserting audio and video into the presentation.
Think and Tell Conclude the concepts Assign homework
● Ask the students what they think about the importance of videos and audios in their learning.
● Now, relate the concept that we can insert multimedia in Google Slides to convey information or engage the audience.
Explain the following concepts:
Explain the use of multimedia in a presentation.
Determine how to insert audio and video in a presentation.
Explain to the students that multimedia refers to the combination of multiple forms of content, such as text, audio, video, images, etc., as given on page 99.
Discuss with the students that sound can capture the audience’s attention and make the presentation more engaging and memorable. Explain that videos can break the monotony of text and static images, making the content more engaging, as given on pages 99 to 101.
● Read aloud the questions provided in the Do It Yourself 6C and 6D sections and encourage the students to solve the questions. Instruct the students to write the answers in their book.
Correct Responses: (Do It Yourself 6C)
1. The speaker icon on the slide indicates that the audio file is attached to your presentation. 2. Sound can capture the audience’s attention and make the presentation more engaging and memorable.
Correct Responses: (Do It Yourself 6D)
1. Insert, Video 2. URL
7 mins
● Ask the students to give the answer to the question, “What is the importance of videos? Should they be used or avoided? Present your opinion”, asked in the Think and Tell section given on page 102. Possible Response: Videos can break the monotony of text and static images, making the content more engaging. While videos can make your presentation unique and interesting, it is important to use them thoughtfully, and ensure they are relevant to your topic, and add meaning to your message. Sum Up
3 mins
● Conclude the session by summarising that multimedia means using different things like text, audio, video, and images together. In Google Slides, we can make our presentations more interesting by adding sounds and videos.
● Assign the following questions from the Chapter Checkup given at the end of the chapter as homework.
A. Fill in the Blanks: Question 4
B. Write T for True and F for False: Question 3
D. Answer the Following: Question 3
At the end of the session, the students will be able to:
● explain the use of multimedia in a presentation.
● determine how to insert audio and video in a presentation.
Keyword
● Multimedia: It refers to the combination of multiple forms of content, such as text, audio, video, images, etc.
Let the students watch the video or the learning slides related to the topic on the digital panel. Explain to them the process of inserting audio and video into the presentation. Attempt the activity on the Assignment page.
Conclude the concepts Assign homework
● Instruct the students to go to the Tekie’s Digital platform and open a Lab session on Inserting Multimedia-II.
● Show the learning slides one by one and discuss the concepts shown on the slides in the panel.
Engage
Explain the following concepts:
Explain the use of multimedia in a presentation.
Explanation
Explain to the students that multimedia refers to the combination of multiple forms of content, such as text, audio, video, images, etc., as given on page 99.
Determine how to insert audio and video in a presentation.
Discuss with the students that the way one slide follows the other on the screen in a presentation is called transition, as given on pages 99 to 101.
● Instruct the students to attempt the assignment by clicking on the Assignment tab.
● Explain the activity to the students.
7 mins
3 mins
● Ask the questions provided on the slides one by one to assess the students’ understanding. Discuss the answers to the questions with the students. If necessary, ask additional relevant questions. Sum Up
● Conclude the session by summarising that multimedia means using different things like text, audio, video, and images together. In Google Slides, we can make our presentations more interesting by adding sounds and videos.
● Assign the additional activity given on the panel to the students as homework.
At the end of the session, the students will be able to:
● explain how to use action buttons in a presentation.
● import external data into a presentation.
● describe how to add comments into a presentation.
● explain the use of a dictionary in Google Slides.
● use ink annotations in a presentation.
● illustrate how to zoom a slide and arrange slides in the Slide sorter view.
● describe how to view a presentation.
Keywords
● Comments: The comments facilitate collaboration among multiple authors or reviewers working on the same presentation.
● Action buttons: Buttons that are used to make the presentation more interactive.
Ask the students: Have you seen buttons in presentations which make the presentation more interactive?
Explain to them the process of inserting action buttons into the presentation. Think and Tell Conclude the concepts Assign homework
Warm Up
● Ask the students: Have you seen buttons in presentations which make the presentation more interactive?
● Now, relate the concept that we can insert action buttons to make presentations more interactive. We can also write at the time of slideshow, add comments, zoom slides, etc.
Explain the following concepts:
Explain how to use action buttons in a presentation.
Import external data into a presentation.
Describe how to add comments into a presentation.
Explain the use of a dictionary in Google Slides.
Use ink annotations in a presentation.
Illustrate how to zoom a slide and arrange slides in the Slide sorter view.
Describe how to view a presentation.
Explain to the students that action buttons in a presentation are like magic buttons. Also, tell them that it is used to make the slides more interactive, as given on pages 102 to 104.
Discuss with the students that importing data into a presentation is the process of bringing external content or data into your own presentation, as given on pages 104 and 105.
Define that comments facilitate collaboration among multiple authors or reviewers working on the same presentation, as given on pages 106 and 107.
Describe to the students that they can learn more about words or phrases used in the presentation with the help of a dictionary, as given on pages 107 and 108.
Elaborate to them that ink annotations in presentations is like drawing or writing on the slides with colourful pens, just like we do on paper, as given on page 109.
Discuss with the students that slide zoom in presentations makes a small part of the slide look enlarged on the screen. Also, tell them that rearranging slides means changing the order of your slides in your presentation, as given on pages 110 and 111.
Discuss with the students that viewing a presentation means to watch the slides in action, as given on page 112.
● Read aloud the questions provided in the Do It Yourself 6E, 6F, 6G, 6H, and 6I sections and encourage the students to solve the questions. Instruct the students to write the answers in their book.
Correct Responses: (Do It Yourself 6E)
1. Insert
2. With the button selected, click on Insert in the menu bar. Choose Link from the drop-down menu. In the Link dialog box, you can add a link to a specific slide, such as the previous slide or slide 1, in your presentation.
Correct Responses: (Do It Yourself 6F)
1. T 2. F
Correct Responses: (Do It Yourself 6G)
1. Insert, Comment 2. Comment
Correct Responses: (Do It Yourself 6H)
1. T 2. F
Correct Responses: (Do It Yourself 6I)
1. Open your presentation in Google Slides
2. Running a slideshow
3. Navigate through slides
4. End the presentation
5. Close Google Slides Build
7 mins
● Conduct a group discussion in the class among the students on the topic, “If you are given the option to choose the shape for an action button you would like to insert in your presentation, which one would you select, and why do you think it will be suitable?” given in the Discuss section on page 104.
Possible Response: Arrow shapes are more suitable as they denote the direction.
● Ask the students to give the answer to the question, “In what ways can importing data benefit the presenter?” in the Think and Tell section given on page 105.
Possible Response: Importing slides helps to add slides from another presentation to your current presentation. You can also import data from Google Sheets into your Google Slides presentation.
3 mins
Sum Up
● Conclude the session by summarising that we can set action buttons to open external content, such as a website, another PowerPoint presentation, a document, a spreadsheet, and much more. Also, tell the students that there are many interesting tools in Google Slides that are used to import data, add comments, search for information about a word, and many more.
● Assign the following questions from the Chapter Checkup given at the end of the chapter as homework.
A. Fill in the Blanks: Questions 1, 2, and 5
B. Write T for True and F for False: Questions 1, 3, and 5
C. Explain the Functions of the Icons: Questions 1, 2, 3, and 4
D. Answer the Following: Questions 1, 2, and 5
E. Apply Your Learning: Questions 1, 2, 3, and 4
At the end of the session, the students will be able to:
● explain how to use action buttons in a presentation.
● import external data into a presentation.
● describe how to add comments into a presentation.
● explain the use of a dictionary in Google Slides.
● use ink annotations in a presentation.
● illustrate how to zoom a slide and arrange slides in the Slide sorter view.
● describe how to view a presentation.
Keywords
● Comments: The comments facilitate collaboration among multiple authors or reviewers working on the same presentation.
● Action buttons: Buttons that are used to make the presentation more interactive.
Let the students watch the video or the learning slides related to the topic on the digital panel.
Explain the process of inserting action buttons into the presentation. Attempt the activity on the Assignment page. Conclude the concepts Assign homework
● Instruct the students to go to the Tekie’s Digital platform and open a Lab session on Advanced Features of Google Slides and Viewing a Presentation-II.
● Show the learning slides one by one and discuss the concepts shown on the slides in the panel.
Explain the following concepts:
Explain how to use action buttons in a presentation.
Import external data into a presentation.
Describe how to add comments into a presentation.
Explain the use of a dictionary in Google Slides.
Use ink annotations in a presentation.
Illustrate how to zoom a slide and arrange slides in the Slide sorter view.
Describe how to view a presentation.
Explain to the students that action buttons in a presentation are like magic buttons. Also, tell them that it is used to make the slides more interactive, as given on pages 102 to 104.
Discuss with the students that importing data into a presentation is the process of bringing external content or data into your own presentation, as given on pages 104 and 105.
Define that comments facilitate collaboration among multiple authors or reviewers working on the same presentation, as given on pages 106 and 107.
Describe to the students that they can learn more about words or phrases used in the presentation with the help of a dictionary, as given on pages 107 and 108.
Elaborate to them that ink annotations in presentations is like drawing or writing on the slides with colourful pens, just like we do on paper, as given on page 109.
Discuss with the students that slide zoom in presentations makes a small part of the slide look enlarged on the screen. Also, tell them that rearranging slides means changing the order of your slides in your presentation, as given on pages 110 and 111.
Discuss with the students that Slideshow views are used to view a presentation in action, as given on page 112.
● Ask the questions provided on the slides one by one to assess the students’ understanding. Discuss the answers of the questions with the students. If necessary, ask additional relevant questions.
● Instruct the students to attempt the assignment by clicking on the Assignment tab.
● Explain the activity to the students.
● Conclude the session by summarising that we can set action buttons to open external content, such as a website, another PowerPoint presentation, a document, a spreadsheet, and much more. Also, tell the students that there are many interesting tools in Google Slides that are used to import data, add comments, search for information about a word, and many more.
● Assign the additional activity given on the panel to the students as homework.
Mel and Conji are going to the Computer Lab to submit their project. They notice that the computer screens are going out of control. They are infected by a virus which is a mix of magic and technology and was created by Lord Ero and Cyborg. The trio tries to find more information about the virus with the help of Elders. They want to find an ancient magical tool which could assist them in dealing with the virus. They get to know about the Enigmus through the Internet which is a magical encyclopaedia and can undo the virus. They go on a digital treasure hunt by following various clues, which lead them to Ms Idea in the Void. Ms Idea is like a guardian of that place and shows the Enigmus to them. The Elders give a secret file to the trio, which they got from Cyborg’s system. The trio follows the clues and patterns inside it carefully, and it leads them to the final solution. There is a battle between the two sides where Ero’s dangerous spell hits Eva and she faints. Mel and Conji use a spell from the Enigmus to defeat Lord Ero and Cyborg and save their friend, Eva.
● The trio continues to search for clues in the secret file.
● Conji believes that the file holds the key to the next step.
● Eva looks at some random pictures on screen.
● They speculate that the pictures are part of Cyborg’s hidden message.
● They decided to use Canva for editing and arranging pictures.
● Mel told them that Canva is an online design tool with graphics, templates, and editing capabilities.
1. Introduction to Canva and Adding Shapes and Graphics-I
2. Introduction to Canva and Adding Shapes and Graphics-II
3. Editing Images-I
4. Editing Images-II
At the end of the session, the students will be able to:
● define Canva.
● open Canva.
● create a blank card and define its components.
● apply templates in Canva.
● apply styles in Canva.
● add shapes and graphics.
Keywords
● Canva: It is a user-friendly online tool that allows you to create and edit images, design cards, and make various visual projects.
● Cards: They are special images with words and designs that you can create for birthdays, holidays, or other occasions.
Imagine you’re creating a poster for the upcoming school talent show. What kind of images, text, and colours would you use to make it eye-catching and exciting? Have you ever used any apps to edit photos or create collages? What do you like or dislike about them?
Tell students about the Canva and how to open it.
Elaborate the steps to create a blank card and explain its components.
Explain the steps to apply templates and styles in Canva. Also, discuss the steps to add shapes and graphics.
Conclude the concepts Assign homework
● Imagine you’re creating a poster for the upcoming school talent show. What kind of images, text, and colours would you use to make it eye-catching and exciting?
● Have you ever used any apps to edit photos or create collages? What do you like or dislike about them?
● Tell students that Canva is a free online design platform that allows you to create stunning visuals without being a professional designer.
Explain the following concepts:
Define Canva. Explain to the students that Canva is a user-friendly online tool that allows you to create and edit images, design cards, and make various visual projects, as given on page 121.
Open Canva. Tell them to open Canva, begin by launching your preferred web browser, such as Google Chrome. In the browser’s Address bar, type www.canva.com and press Enter key, as given on page 121.
Create a blank card and define its components.
Apply templates in Canva.
Apply styles in Canva.
Add shapes and graphics.
Describe to create a blank card in Canva, start by clicking the “Create a design” button on the Home page. Then, select the “Custom Size” option and input the dimensions for your project. The Canva editor window will open, featuring essential components: Canvas, Design, Elements, Text, Zoom, Notes, Preview, Draw, as given on pages 122 and 123.
Discuss with them that templates in Canva serve as pre-designed structures to kickstart your projects, resembling outlines in a colouring book, as given on pages 123 and 124.
Explain to them Canva’s Styles feature enhances the visual appeal of your projects by offering unique colour combinations and font styles, as given on page 124.
Elaborate that in Canva, the addition of lines, shapes, and graphics allows for the customisation and modification of design templates, bringing creativity to your projects, as given on pages 125 and 126.
● Read aloud the questions provided in the Do It Yourself 6A section and encourage the students to solve the questions. Instruct the students to write the answers in their book.
Correct Responses:
Match the component of Canva with its correct description. Do It Yourself 6A
1 Notes Different types of templates and styles
2 Design Wide range of design elements
3 Canvas Notes to keep track of ideas, reminders, etc.
4 Elements Central workspace
● Conduct a group discussion in the class among the students based on the topic “Imagine you are designing a Christmas card for your best friend. What elements would you include in the card, and how would you make it special?” provided in the Discuss section, as mentioned on page 126.
Possible Responses: To create a special Christmas card for a best friend, include festive elements like Santa Claus, reindeer, a decorated Christmas tree, snowflakes, and presents. Make it unique by personalising with inside jokes and shared memories. Add a heartfelt message expressing gratitude and friendship.
● Conclude the session by summarising that Canva is a user-friendly online design tool for creating visuals. To start, visit www.canva.com, click “Create a design,” choose “Custom Size,” and enter dimensions. The editor includes a central canvas, design tools, elements, text tools, zoom controls, notes, and preview. The Draw tool allows freehand sketches. Templates are pre-designed structures; access them in the Design option, customise by altering text, colours, and elements. Styles feature enhances projects with unique colour and font combinations. Adding lines, shapes, and graphics is easy through the Elements tab. Canva empowers users to effortlessly create personalised, professionally designed projects.
● Assign the following questions from the Chapter Checkup given at the end of the chapter as homework.
A. Fill in the Blanks: Questions 1, 2, 3, and 4
B. Tick the Correct Option: Questions 1, 3, and 4
C. Who Am I?: Questions 2, 3, and 4
D. Write T for True and F for False: Questions 1, 2, 3, and 4
E. Answer the Following: Questions 1 and 4
F. Apply Your Learning: Questions 1 and 4
At the end of the session, the students will be able to:
● define Canva.
● open Canva.
● create a blank card and define its components.
● apply templates in Canva.
● apply styles in Canva.
● add shapes and graphics.
Keywords
● Canva: Canva is a user-friendly online tool that allows you to create and edit images, design cards, and make various visual projects.
● Cards: They are special images with words and designs that you can create for birthdays, holidays, or other occasions.
Let the students watch the video or the learning slides related to the topic on the digital panel.
Tell the students about the Canva and how to open it. Elaborate the steps to create a blank card and explain its components.
Explain the steps to apply templates and styles in Canva.
Also, discuss the steps to add shapes and graphics.
Attempt the activity on the
Assignment page. Conclude the concepts Assign homework
5 mins
Warm Up
● Instruct the students to go to the Tekie’s Digital platform and open a Lab session on Introduction to Canva and Adding Shapes and Graphics-II
● Show the learning slides one by one and discuss the concepts shown on the slides in the panel.
Explain the following concepts:
Define Canva. Explain to the students that Canva is a user-friendly online tool that allows you to create and edit images, design cards, and make various visual projects, as given on page 121.
Open Canva. Tell them to open Canva, begin by launching your preferred web browser, such as Google Chrome. In the browser’s Address bar, type www.canva.com and press Enter, as given on page 121.
Create a blank card and define its components.
Describe to create a blank card in Canva, start by clicking the “Create a design” button on the Home page. Then, select the “Custom Size” option and input the dimensions for your project. The Canva editor window will open, featuring essential components: Canvas, Design, Elements, Text, Zoom, Notes, Preview, Draw, as given on pages 122 and 123.
Apply templates in Canva.
Discuss with them that templates in Canva serve as pre-designed structures to kickstart your projects, resembling outlines in a colouring book, as given on pages 123 and 124.
Apply styles in Canva. Explain to them Canva’s Styles feature enhances the visual appeal of your projects by offering unique colour combinations and font styles, as given on page 124.
Add shapes and graphics.
Elaborate that in Canva, the addition of lines, shapes, and graphics allows for the customisation and modification of design templates, bringing creativity to your projects, as given on pages 125 and 126.
● Ask the questions provided on the slides one by one to assess the students’ understanding. Discuss the answers of the questions with the students. If necessary, ask additional relevant questions.
● Instruct the students to attempt the assignment by clicking on the Assignment tab.
● Explain the activity to the students. Sum Up
● Conclude the session by summarising that Canva is a user-friendly online design tool for creating visuals. To start, visit www.canva.com, click “Create a design,” choose “Custom Size,” and enter dimensions. The editor includes a central canvas, design tools, elements, text tools, zoom controls, notes, and preview. The Draw tool allows freehand sketches. Templates are pre-designed structures; access them in the Design option, customise by altering text, colours, and elements. Styles feature enhances projects with unique colour and font combinations. Adding lines, shapes, and graphics is easy through the Elements tab. Canva empowers users to effortlessly create personalised, professionally designed projects.
● Assign the additional activity given on the panel to the students as homework.
Learning Outcomes
At the end of the session, the students will be able to:
● edit an image in Canva.
● change colour scheme and style.
● flip an image.
● auto—adjust, foreground, background.
● adjust white balance, light, colour.
● crop and rotate image.
Keywords
● Editing an image: It means making changes to a picture to make it look better or different.
● Flipping an image: It means creating a mirrored or reversed version of the original image.
Suggest how different colours or styles can impact the overall look of a project.
Tell the students about how to edit images in Canva.
Warm Up Action Plan
Think and Tell Conclude the concepts Assign homework
● Suggest how different colours or styles can impact the overall look of a project.
● Tell them how editing an image can enhance the overall project and assignments.
Explain the following concepts:
Learning Outcomes
5 mins
Explanation
Edit an image in Canva. Discuss with the students that editing an image in Canva means making changes to a picture to make it look better or different, as given on page 126.
Change colour scheme and style. Tell them to make any changes to the image, you need to upload it onto your canvas. You can select any image that is saved on your computer, as given on pages 126 and 127.
Flip an image. Elaborate to them that flipping an image means creating a mirrored or reversed version of the original image, as given on pages 127 and 128.
Auto—adjust, foreground, background.
Adjust white balance, light, colour.
Explain to them there are many options that you can apply to your design to make it attractive. You can change the foreground and background of the image. Also, you can select the option to auto-adjust various aspects of your image, as given on pages 128 and 129.
Discuss with them to adjust the brightness of the image, various options are available, as given on page 129.
Crop and rotate image. Tell them cropping means to remove the unwanted parts from your image so that you can focus on the important area of your image, as given on pages 129 and 130.
● Read aloud the questions provided in the Do It Yourself 6B section and encourage the students to solve the questions. Instruct the students to write the answers in their book.
Flipping an image means creating a mirrored or reversed version of the original image. Cropping means to remove the unwanted parts from your image so that you can focus on the important area of your image.
● Ask the students to give the answer of the questions “Suppose you have taken a picture using your digital camera. How could you use Canva to enhance it or add a creative touch?” asked in the Think and Tell section, as given on page 130.
Possible Responses: Using Canva, a 6th-grade student can enhance a digital camera photo by uploading it, applying templates for style, and adding colours, fonts, and fun elements from the Styles and Elements tabs. Canva’s user-friendly features allow students to turn a regular photo into a creative masterpiece effortlessly. Sum Up
3 mins
● Conclude the session by summarising that editing an image in Canva means making changes to a picture to make it look better or different. To make any changes to the image, you need to upload it onto your canvas. You can select any image that is saved on your computer. Flipping an image means creating a mirrored or reversed version of the original image. You can change the foreground and background of the image. To adjust the brightness of the image, various options are available. Cropping means to remove the unwanted parts from your image so that you can focus on the important area of your image.
● Assign the following questions from the Chapter Checkup given at the end of the chapter as homework.
A. Fill in the Blanks: Question 5
B. Tick the Correct Option: Questions 2 and 5
C. Who Am I?: Questions 1 and 5
D. Write T for True and F for False: Question 5
E. Answer the Following: Questions 2, 3, and 5
F. Apply Your Learning: Questions 2, 3, and 5
At the end of the session, the students will be able to:
● edit an image in Canva.
● change colour scheme and style.
● flip an image.
● auto–adjust, foreground, background.
● adjust white balance, light, colour.
● crop and rotate image.
Keywords
● Editing an image: It means making changes to a picture to make it look better or different.
● Flipping an image: It means creating a mirrored or reversed version of the original image.
Let the students watch the video or the learning slides related to the topic on the digital panel.
Tell the students about how to edit images in Canva. Attempt the activity on the Assignment page.
Conclude the concepts Assign homework
5 mins
Warm Up
● Instruct the students to go to the Tekie’s Digital platform and open a Lab session on Editing Images-II
● Show the learning slides one by one and discuss the concepts shown on the slides in the panel. 15 mins
Engage
Explain the following concepts:
Edit an image in Canva. Discuss with the students that editing an image in Canva means making changes to a picture to make it look better or different, as given on page 126.
Change colour scheme and style.
Flip an image.
Auto—adjust, foreground, background.
Adjust white balance, light, colour.
Tell them to make any changes to the image, you need to upload it onto your canvas. You can select any image that is saved on your computer, as given on pages 126 and 127.
Elaborate to them that flipping an image means creating a mirrored or reversed version of the original image, as given on pages 127 and 128.
Explain to them there are many options that you can apply to your design to make it attractive. You can change the foreground and background of the image. Also, you can select the option to auto-adjust various aspects of your image, as given on pages 128 and 129.
Discuss with them to adjust the brightness of the image, various options are available, as given on page 129.
Crop and rotate image. Tell them cropping means to remove the unwanted parts from your image so that you can focus on the important area of your image, as given on pages 129 and 130.
● Ask the questions provided on the slides one by one to assess the students’ understanding. Discuss the answers of the questions with the students. If necessary, ask additional relevant questions.
7 mins
● Instruct the students to attempt the assignment by clicking on the Assignment tab.
● Explain the activity to the students.
Sum Up
3 mins
● Conclude the session by summarising that editing an image in Canva means making changes to a picture to make it look better or different. To make any changes to the image, you need to upload it onto your canvas. You can select any image that is saved on your computer. Flipping an image means creating a mirrored or reversed version of the original image. You can change the foreground and background of the image. To adjust the brightness of the image, various options are available. Cropping means to remove the unwanted parts from your image so that you can focus on the important area of your image.
● Assign the additional activity given on the panel to the students as homework.
Mel and Conji are going to the Computer Lab to submit their project. They notice that the computer screens are going out of control. They are infected by a virus which is a mix of magic and technology and created by Lord Ero and Cyborg. The trio tries to find more information about the virus with the help of the Elders. They want to find an ancient magical tool which could assist them in dealing with the virus. They get to know about the Enigmus through the Internet which is a magical encyclopaedia and can undo the virus. They go on a digital treasure hunt by following various clues which leads them to Ms Idea in the Void. Ms Idea is like a guardian of that place and shows the Enigmus to them. The Elders give a secret file to the trio which they got from Cyborg’s system. The trio follows the clues and patterns inside it carefully and it leads them to the final solution. There is a battle between the two sides where Ero’s dangerous spell hits Eva and she faints. Mel and Conji use a spell from the Enigmus to defeat Lord Ero and Cyborg and save their friend, Eva.
This chapter is divided into the following classroom sessions
1. Artificial Intelligence-I
2. Artificial Intelligence-II
Learning
At the end of the session, the students will be able to:
● explain what AI is.
● describe the evolution of AI.
● describe the applications of AI.
● differentiate between natural and artificial intelligence.
Keyword
● Artificial Intelligence: It is the capability of a machine, typically a computer or a robot, to mimic human intelligence.
Ask the students the full form of AI.
Describe AI and its evolution. Also, explain the different applications of AI. Then tell them the difference between natural and artificial intelligence.
Group discussion Conclude the concepts Assign homework
● Ask the students the full form of AI. Then, build the concept by telling the definition of AI.
Explain the following concepts:
Learning Outcomes
Explanation
Explain what AI is. Tell the students that AI is the capability of a machine, to mimic human intelligence, as given on page 136.
Describe the evolution of AI.
Tell the students how AI got smarter and better over time from initial AI to Future adventures, as given on page 136.
Describe the applications of AI.
Differentiate between natural and artificial intelligence.
Discuss the various applications of AI such as smart assistants, video games, chatbots, robots, etc., with the students as given on pages 137 and 138.
Discuss the difference between natural and artificial intelligence based on learning, emotions and consciousness, flexibility, physical presence, etc., as given on pages 138 and 139.
● Read aloud the questions provided in the Do It Yourself 8A, Do It Yourself 8B, and Do It Yourself 8C sections and encourage the students to solve the questions. Instruct the students to write the answers in their book.
Correct Responses: Do It Yourself 8A
1. Talking AI 2. Initial AI
3. Future adventures 4. Super Smart AI 5. Learning AI Do It Yourself 8B
1. Translator 2. Sensors and Cameras Do It Yourself 8C
1. F 2. F
Build
7 mins
● Conduct a group discussion in the class among students based on the topic “Which one is more reliable, artificial intelligence or natural intelligence?”, as provided in the Discuss section on page 139.
Possible Responses: Natural intelligence, artificial intelligence.
3 mins
● Conclude the session by summarising that AI means artificial intelligence. It is a technology which enables machines to think and learn like humans. Discuss how AI has evolved over time. Tell them about its applications and discuss the difference between AI and Natural intelligence.
● Assign the following questions from the Chapter Checkup given at the end of the chapter as homework.
A. Fill in the Blanks: Questions 1, 2, and 3
B. Who Am I?: Questions 1, 2, 3, and 4
C. Write T for True and F for False: Questions 2 and 4
D. Answer the Following: Questions 1, 2, 3, and 4
E. Apply Your Learning: Questions 2, 4, and 5
At the end of the session, the students will be able to:
● describe computer vision it’s working and applications.
● describe augmented reality.
● describe virtual reality.
● explain AI ethics.
Keywords
● Computer Vision: It is a domain of AI that focuses on enabling computers and machines to interpret and understand visual information from the real world, through cameras.
● Augmented Reality (AR): It is a technology that blends digital content with the real world in real time.
● Virtual Reality (VR): It is a technology that immerses users in a completely digital or virtual environment.
Ask the students if they have ever seen in any movies or in real life some doors that open after recognising your face.
Describe to the students the concepts of computer vision, how it works and its various applications. Also tell them about augmented, virtual reality and AI ethics.
Warm Up Action Plan
● Ask the students if they have ever seen in any movies or in real life some doors that open after recognising your face.
● Now, build the concept by describing the computer vision.
Explain the following concepts:
Describe computer vision—its working and applications.
Explain to the students what computer vision is. Explain to them the working of CV. Also, introduce them with various applications of CV such as object recognition, face recognition, robotics, etc., as given on pages 139 to 141.
Describe augmented reality. Explain to the students that AR enhances the user’s perception of reality by overlaying virtual elements on their view of the physical environment, as given on page 141.
Describe virtual reality. Explain to the students that VR involves the use of a headset or goggles that block out the real world and replace it with a computer generated one, as given on page 141.
Explain AI ethics. Explain to the students what AI ethics are. Discuss the basic code of conduct for AI, as given on page 142.
● Read aloud the questions provided in the Do It Yourself 8D and Do It Yourself 8E sections and encourage the students to solve the questions. Instruct the students to write the answers in their book.
Correct Responses:
Do It Yourself 8D
1. Computer Vision
2. Augmented Reality
3. Virtual Reality
Do It Yourself 8E Match the following.
Column A
Data protection
Column B
Treat everyone the same
Environmental responsibility Reduce energy use
Making the world better
Helping others
Bias avoidance
Build
Personal information
Solving big problems
Diagnosing diseases
7 mins
● Conduct a group discussion in the class among the students based on the topic ‘Applications of Computer Vision in Everyday Life’.
Possible Response: Facial recognition in smartphone cameras, security cameras watching for suspicious activity.
● Conclude the session by summarising that the CV is a domain of AI that focuses on enabling computers and machines to interpret and understand visual information from the real world, through cameras. Explain its working and various applications. Tell them about the role of AR and VR. Discuss the rules of AI ethics.
● Assign the following questions from the Chapter Checkup given at the end of the chapter as homework.
A. Fill in the Blanks: Questions 4 and 5
B. Who Am I?: Question 5
C. Write T for True and F for False: Questions 1, 3, and 5
D. Answer the Following: Question 5
E. Apply Your Learning: Questions 1 and 3
This chapter is divided into the following classroom and lab sessions
1. Structure of an HTML Document
2. Creating an HTML Document
3. Basic HTML Coding Conventions and More HTML Tags
At the end of the session, the students will be able to:
● describe the structure of an HTML document.
Keyword
● HTML: HTML stands for HyperText Markup Language. It helps you to display colourful text, images, and attractive backgrounds to your web page
Let the students watch the video or the learning slides related to the topic on the digital panel.
Describe the structure of an HTML document to the students.
Attempt the activity on the Assignment page.
Conclude the concepts Assign homework
● Instruct the students to go to the Tekie’s Digital platform and open a Lab session on Structure of an HTML Document
● Show the learning slides one by one and discuss the concepts shown on the slides in the panel.
Explain the following concepts:
Describe the structure of an HTML document.
Describe to the students that the structure of an HTML document includes a header section and a body section. Tell them that the basic structure of an HTML document consists of five elements, as given on pages 70 and 71.
● Ask the questions provided on the slides one by one to assess the students’ understanding. Discuss the answers to the questions with the students. If necessary, ask additional relevant questions.
● Instruct the students to attempt the assignment by clicking on the Assignment tab.
● Explain the activity to the students.
● Conclude the session by summarising that HTML helps you to display colourful text, images, and attractive backgrounds to your web page. Explain to them the structure of an HTML document. Also, revise them that HTML contains two sections: a head section and a body section.
● Assign the additional activity given on the panel to the students as homework.
● Assign the following questions from the Chapter Checkup given at the end of the chapter as homework.
A. Fill in the Blanks: Questions 2 and 3
B. Tick the Correct Option: Questions 1 and 2
C. Who Am I?: Questions 2, 3, 4, and 5
D. Write T for True and F for False: Questions 3 and 5
E. Answer the Following: Questions 1, 2, and 3
At the end of the session, the students will be able to:
● create an HTML document.
● view an HTML document using a web browser.
Ask the students what type of a web page they would like to create.
Demonstrate to them how to create an HTML document and the steps to view an HTML document using a web browser. Group discussion Conclude the concepts Assign homework
Warm Up
Ask the students what type of a web page they would like to create. Then, tell them that HTML provides a lot of tags that are useful for creating a web page.
Engage
Explain the following concepts:
Learning Outcomes
Explanation
Create an HTML document. Demonstrate the steps to create an HTML document, as given on pages 71 and 72.
View an HTML document using a web browser.
Demonstrate the steps to view an HTML document using a web browser, as given on page 73.
Ask the following questions to the students to check their understanding:
● Which type of editor can be used for creating a web page?
Correct Response: Text-based editors, such as Notepad and WordPad.
● Conduct a group discussion in the class among the students on the topic ‘Different web browsers in which the web page can open’.
Possible Responses: There are many web browsers which can be used to open the web pages, such as Mozilla FireFox, Microsoft Edge, Google Chrome, etc.
● Conclude the session by summarising the steps to create an HTML document. Also, demonstrate the steps to view an HTML document using a web browser.
● Assign the following questions from the Chapter Checkup given at the end of the chapter as homework.
C. Who Am I?: Question 1
At the end of the session, the students will be able to:
● describe the basic HTML coding conventions.
Let the students watch the video or the learning slides related to the topic on the digital panel.
Describe the basic HTML coding conventions to the students. Also, demonstrate the use of various HTML tags.
Attempt the activity on the Assignment page.
Conclude the concepts Assign homework 5 mins 15 mins
● describe more HTML tags. 5 mins
Warm Up
Instruct the students to go to the Tekie’s Digital platform and open a Lab session on Basic HTML Coding Conventions and More HTML Tags.
Show the learning slides one by one and discuss the concepts shown on the slides in the panel.
15 mins
Engage
Explain the following concepts:
Learning Outcomes
Explanation
Describe the basic HTML coding conventions. Describe to the students that while writing HTML documents, you should follow some coding conventions, as given on page 73.
Describe more HTML tags. Demonstrate to them the use, syntax, and code for some more HTML tags, as given on pages 74 to 76.
Ask the questions provided on the slides one by one to assess the students’ understanding. Discuss the answers to the questions with the students. If necessary, ask additional relevant questions.
● Read aloud the questions provided in the Do It Yourself 6A section and encourage the students to solve the questions. Instruct the students to write the answers in their book.
Correct Responses:
1. Do it yourself

● Instruct the students to attempt the assignment by clicking on the Assignment tab.
● Explain the activity to the students.
2. Sum Up
3 mins
● Conclude the session by summarising that while writing HTML documents, you should follow the coding conventions such as, always declare the document type as the first line in your document; use either small or capital letters for element names because mixing capital and small letters may be confusing and difficult to debug, etc. Then, revise the <em> tag, <strong> tag, <sub> tag, <sup> tag, <section> tag, and <article> tag. Also, demonstrate the complete project.
● Assign the additional activity given on the panel to the students as homework.
● Assign the following questions from the Chapter Checkup given at the end of the chapter as homework.
A. Fill in the Blanks: Questions 1, 4, and 5
B. Tick the Correct Option: Questions 3, 4, and 5
D. Write T for True and F for False: Questions 1, 2, and 4
E. Answer the Following: Questions 4 and 5
F. Apply Your Learning: Questions 1, 2, 3, 4, and 5
Chapter Checkup
A. Fill in the Blanks.
1. FLOPS 2. Mainframe 3. Personal 4. binary 5. mnemonic
B. Tick () the Correct Option.
1. b. A way in which computers understand instructions. 2. a. Binary 3. b. Interpreter 4. d. Fifth-generation 5. d. Fourth-generation
C. Who Am I?
1. Assembly language 2. Binary language 3. Translator program 4. Workstation
5. Personal Computer
D. Write T for True and F for False.
1. T 2. F 3. F 4. F 5. F
E. Answer the Following.
1. A computer language can be defined as a set of instructions that computers can understand and follow.
2. Based on their size and capacity, the computers can be categorised into supercomputers, mainframes, minicomputers, workstations, personal computers, laptops, and tablets.
3. The features of mainframe computers are:
● Mainframe computers are big and super-fast, but they are smaller than supercomputers.
● They can do lots of jobs quickly.
● They are used in places where high precision is required, such as in banks to handle money transactions or in aeroplane guidance.
● Mainframes are super reliable, and they can work for a long time—at least 10 years.
● Examples: IBM z15, IBM z14, Unisys ClearPath Libra, Fujitsu GS21 360, and Hitachi VOS3.
4. A compiler is a language processor that reads the source programs written in high-level language and converts them into an equivalent program written in machine code in one go. On the other hand, the interpreter is a translator program that converts high-level language code to machine language line by line as the program runs.
5. Assembly language uses a simple mnemonic code to communicate with computers. On the other hand, the language that includes the use of binary codes is called binary language.
F. Apply Your Learning.
1. She must have used high-level languages, for example, C, C++, and Java.
2. Supercomputers.
3. Laptop
4. Fifth generation
5. Translator program
Chapter-2 File Management
Chapter Checkup
A. Fill in the Blanks.
1. move 2. Wildcards 3. format 4. Alt+Tab 5. Multitasking
B. Tick () the Correct Option.
1. c. To organise files and make them easier to access
2. c. Use the Cut and Paste method or drag and drop
3. b. To represent any number of characters
4. c. It determines how information is stored and which software can open files
5. c. Using several software programs or apps simultaneously
C. Who Am I?
1. Cut and Paste or Drag and Drop
2. Wildcards
3. Organising files and making them easier to find
4. File format
5. Copying data from one storage device to another
D. Write T for True and F for False.
1. T 2. F 3. T 4. T 5. T
E. Answer the Following.
1. File management is the way by which we organise and handle our digital documents and files on a computer or a device. On a computer, you can create files using various software applications. To organise these files on your computer, it is better to keep them in separate folders. This is called file management.
2. Copying files means creating a duplicate copy of the file without removing it from the original place, while moving files means relocating the file to a new location and removing it from the original place. Choosing between them depends on whether you want to keep the file in its original place or move it to a new location.
3. In Windows 10, you can use special symbols called wildcards to narrow down your search results. The asterisk (*) symbol is used to search all the files of the same type. For example, you can type *.docx to find all the files that have the .docx extension. The question mark (?) is used to match a single character in the name of the file. For example, if you search for “document?.txt”. Windows will find both “document1.txt” and “document2.txt” because the question mark represents a single character and it can match any single character in the file name.
4. A file format defines how information is organised and stored for a specific program’s use. For example, a .docx file is a Microsoft Word document. Understanding file formats means knowing how different kinds of computer files are built and the rules they follow. These files are important because they help computers make sense of the information stored in them.
5. Working with multiple applications means using several software programs or apps on a computer or device at the same time. In multitasking, you can easily switch between applications based on what you need to do at a particular moment. Compatibility ensures that different apps can work together and share information smoothly. Both multitasking and compatibility help users complete various tasks and projects with ease.
F. Apply Your Learning.
1. By following these steps, you efficiently organise files into subfolders based on their types:
i. Create a new main folder and name it in a way that makes sense to you.
ii. Open File Explorer on your computer.
iii. Navigate to the folder containing the various types of files that need organisation.
iv. Sort the files in the folder by type.
v. Select and copy the files based on the specific type.
vi. Create a new subfolder and name the new folder based on the file type.
vii. Drag the selected files into the newly created subfolder.
viii. Repeat steps v-vii for each file type (e.g., images, spreadsheets). Create a new subfolder for each type and move the corresponding files into their respective subfolders.
ix. Double-check the subfolders to ensure the files are correctly organised.
2. The steps to insert an image in a word processing document are as follows:
i. Open the word processing program, such as Microsoft Word.
ii. Create a new document, type your content, and format it as needed.
iii. Save the document with a name, and it will typically be saved as a .docx file.
iv. Open an image editing program, such as Microsoft Paint.
v. Edit or create an image in it.
vi. Save the image in a commonly used format, like .png or .jpg.
vii. Switch to the Microsoft Word program and go to the location in the document where you want to insert the image.
viii. Click on the Insert tab in the Ribbon. The Insert Picture dialog box opens.
ix. Choose the image file you saved from Microsoft Paint and click the Insert button.
x. Now, the image is inserted in the document in the Microsoft Word.
The file formats associated with the word processing program are .docx, .doc, and .txt and, the file formats associated with the image editing program are .jpg, .png, and .bmp.
Chapter Checkup
A. Fill in the Blanks.
1. grid 2. rows, columns 3. vertical 4. adjacent 5. center
B. Tick () the Correct Option.
1. b. Click on the Insert menu.
2. c. Dividing a cell into smaller parts.
3. c. To make the table visually appealing and stand out.
4. a. Merging Cells
5. c. By adjusting the row height value in the Table properties pane.
C. Who Am I?
1. Format 2. Column 3. Column width 4. Border 5. Cell Alignment
D. Write T for True and F for False.
1. F 2. F 3. T 4. F 5. T
E. Answer the Following.
1. The intersection of a row and a column is called a cell.
2. A row is a horizontal arrangement of cells or boxes that runs from left to right. On the other hand, a column is a vertical arrangement of cells or boxes that run from top to bottom.
3. Two methods to open the Table properties pane are: Method 1:
a. Right-click on any cell of your table.
b. Select the Table properties option. The Table properties pane will appear. Method 2:
Select the Format menu Table Table properties option from the menu bar.
4. The Border dash option is used to change the type of border of a table.
5. The three types of alignments available in Google Docs are: Left, Right, and Center.
F. Apply Your Learning.
1. Do it yourself.
2. Do it yourself.
3. Do it yourself.
4. Do it yourself.
5. Merging cells.
Chapter Checkup
A. Fill in the Blanks.
1. Recipients 2. Main document 3. Data source 4. personalise 5. view
B. Tick () the Correct Option.
1. b. Sending many personalised letters at once. 2. b. Details which will be merged with the letters.
3. b. Information inserted from the data source. 4. d. All of these.
5. c. By checking the document which is created after merging.
C. Who Am I?
1. Mail Merge 2. Main Document 3. Data source 4. Insert Merge Field 5. Print Icon
D. Write T for True and F for False.
1. T 2. F 3. T 4. T 5. F
E. Answer the Following.
1. i. Mail merge is important because it can save time and effort by producing mass mailings.
ii. Users can select many people at once and send them a letter easily.
iii. Users don’t have to type each recipient’s name separately in each letter.
iv. Users only need to proofread the main document.
v. Mail merge is economical.
2. A data source is a list of recipients to whom you want to send the invite. The datasource contains the details of the recipients like name, address, phone number etc. that will be used in mail merge.
3. The first file is the Main Document. The main document contains the text that is to be sent to all the recipients.
4. When you use Mail Merge, it takes information from the Google Sheets and inserts it into the empty spaces in the letter, one by one, until all the letters are ready to be sent.
5. A merge field is where you want to insert information from a spreadsheet document or data source into a main document.
F. Apply Your Learning.
1. Main Document
2. Data Source
3. The merge fields would be the personalised details like names, addresses, and any other individual information.
4. Data Source
5. Yes, it is possible for Pihu to send these letters as an email. She can use the mail merge feature in an email to personalise and send emails to her friends.
Chapter-5 Introduction to HTML
Chapter Checkup
A. Fill in the Blanks.
1. Angular brackets 2. element 3. Microsoft Edge 4. <body> 5. Text paragraph
B. Tick () the Correct Option.
1. b. A markup language
2. d. All of these
3. b. To create a division
4. c. Additional information that can be added to a tag
5. a. A combination of a start tag, some content, and an end tag
C. Who Am I?
1. Web browser 2. <HR> tag 3. Attribute 4. HTML 5. <I>
D. Write T for True and F for False.
1. T 2. T 3. F 4. F 5. T
E. Answer the Following.
1. HTML stands for HyperText Markup Language. It helps you to display colourful text, images, and attractive backgrounds to your web page. Some features of HTML are:
● HTML is a simple and easy language to learn.
● HTML can create web pages that run on any device (computers, mobiles, and tablets).
● HTML helps you to add videos, images, and audio files to web pages. This feature enhances the experience for website visitors.
● Using HTML, you can link various web pages with each other. It allows users to click text or images and navigate various websites.
2. A web browser is a software application that processes HTML and other web technologies to display the web pages to the users. For example, Google Chrome, Mozilla Firefox, Microsoft Edge, etc.
3. Structural Elements of HTML are:
<html>: The <html> tag is the root element of an HTML document. This tag contains all other HTML elements and is the starting point for creating an HTML page. You can see this tag at the beginning of an HTML document.
<head>: The <head> tag contains metadata (data about data) and other information about the HTML document.
<title>: The <title> tag is written inside the <head> tag and is used to define the title of the HTML document, which appears in the browser title bar or tab.
<body>: The <body> tag contains the main content of the web page, including text, images, links, and other elements visible to the user.
4. Container Tags: These tags consist of an opening tag as well as a closing tag. This start tag and end tag pair are known as the ON and OFF tags and are used to open and close the document.
Syntax: <tag_name>.......</tag_name>
Example: <B> tag is a container tag in HTML.
Empty Tags: An empty tag is a tag without a closing tag.
Syntax: <tag_name>
Example: <img> tag is an empty tag in HTML.
5. The basic structure of an HTML document is: <!Doctype html> <html> <head>
<title>My Web Page</title> </head> <body> … </body> </html>
F. Apply Your Learning.
1. Shreya can use the <I> tag to make the text italics.
2. Some of the features of HTML are:
● HTML is a simple and easy language to learn.
● HTML can create web pages that run on any device (computers, mobiles, and tablets).
● HTML helps add videos, images, and audio files to web pages. This feature enhances the experience for the website visitors.
● Using HTML, you can link various web pages with each other. It allows users to click text or images and navigate various websites.
3. Anmol can use the <HR> tag as it is used to create divisions in an HTML web page.
4. Tanya can use the <BR> tag as it is used to create a line break in an HTML web page.
5. First, we will create a web page using the basic structure of HTML such as: <!Doctype html> <html> <head> <title>My Web Page</title> </head> <body> </body> </html>
Then, we can make use of various text formatting tags, such as <B>, <I>, <U>, <BR>, <HR>, etc.
Chapter Checkup
A. Fill in the Blanks.
1. global 2. send 3. share 4. 1960s 5. sell
B. Tick () the Correct Option.
1. d. Television
2. a. A writer’s thoughts and opinions on a particular topic
3. d. None of these
4. c. Share personal information about yourself or others
5. a. You can share your thoughts and experiences with the world
C. Who Am I?
1. E-mail 2. Blog 3. Podcasting 4. Netiquette 5. UPI
D. Write T for True and F for False.
1. T 2. F 3. T 4. T 5. F
E. Answer the Following.
1. The internet is a network that connects computers all over the world.
2. Email stands for electronic mail. It is a way to send messages over the internet to other people. Emails can be used to send textual content, photos, documents, and others as attachments. Following are the advantages of an email:
● Most email services are free and easy to use.
● You can send a message in real time to a person anywhere across the globe.
● Emails are personal and are secured with passwords.
3. Podcasting is a way to create and distribute the audio content. This content can include discussions, interviews, storytelling, music, and more.
4. Following are the netiquette rule one should follow while online:
● Treat others on the internet the way you want to be treated. Do not say or write mean or hurtful things.
● Write in a way that is easy to understand, and avoid using all capital letters (LIKE THIS) or unnecessary punctuation (!!!! Or *!?*#), which can seem like shouting or being rude.
5. Examples of Modes of Online Payments:
Credit Card: Customers can make online payments using their credit cards. The customers need to enter card details like their card number, expiration date, and CVV code for transactions.
Debit Card: Debit cards are another popular option for making online payments. These cards allow users to pay online by entering debit card information, and the transaction amount is deducted directly from their bank account.
F. Apply Your Learning.
1. Nishi can search for information online using the internet.
2. You can find it on the internet by browsing a web browser.
3. No, she should not share her personal information. The potential threats she can be exposed to include: financial fraud, identity theft.
4. Blogs
5. ● Write in a way that is easy to understand, and avoid using all capital letters (LIKE THIS) or unnecessary punctuation (!!!! Or *!?*#), which can seem like shouting or being rude.
● Do not be mean or make fun of others online. Cyberbullying hurts people, just like physical bullying.
● Emojis can help show emotions, but do not use too many. It can be confusing.
● Sometimes, people on the internet may not respond right away. Be patient, and give them time.
Chapter Checkup
A. Fill in the Blanks.
1. View, Zoom menu 2. Dictionary 3. Play 4. Insert 5. Slide Sorter
B. Write T for True and F for False.
1. F 2. F 3. F 4. T 5. F
C. Explain the Functions of the Icons.
1. The comments facilitate collaboration among multiple authors or reviewers working on the same presentation.
2. The Shapes icon is used to select a shape that you want to use as an action button.
3. The Slide zoom feature in presentations makes a small part of your slides look enlarged on the screen.
4. The Grid View icon represents the Slide Sorter view.
D. Answer the Following.
1. Using the “Dictionary” feature in presentations can help you learn more about words or phrases used in your presentation. This allows you to quickly access definitions, explanations, and other relevant information about a word or phrase within your presentation.
2. Action buttons in a presentation are used to make your slides more interactive. You can set action buttons to open the external content, such as a website, another PowerPoint presentation, a document, a spreadsheet, and much more.
3. You can choose one of the following sources to insert a video into your presentation: YouTube: Look for a video on the YouTube by typing the keywords in the search box. Google Drive: You can also insert an uploaded video from your Google Drive.
URL: You can paste the URL of a specific YouTube video or the link of an uploaded video from the Google Drive in the search bar.
4. Animations are special visual effects that you add to a text and different objects on a slide. On the other hand, the way one slide follows the other on the screen in a presentation is called a transition.
5. Importing data into a presentation is the process of bringing external content or data into your own presentation. Importing slides helps you to add slides from another presentation to your current presentation. You can also import data from the Google Sheets into your Google Slides presentation.
E. Apply Your Learning.
1. Mahima can use the Ink Annotation feature of the Google Slides.
2. To zoom in on a presentation slide, you can use the shortcut key Ctrl + =.
3. She can use the Dictionary feature to find the meaning of the word.
4. To reply to a comment, click on it and type your response in the comment box. Click on the Reply button.
Chapter Checkup
A. Fill in the Blanks.
1. message 2. Create a design 3. design 4. zoom 5. Flipping
B. Tick () the Correct Option.
1. a. creating and editing images
2. b. Selecting the part you want to keep
3. d. It is the working area where you create your project
4. c. Elements
5. a. Upload
C. Who Am I?
1. Flip Tool 2. Text tools 3. Customise size button 4. Canvas 5. Smart crop
D. Write T for True and F for False.
1. F 2. F 3. T 4. T 5. F
E. Answer the Following.
1. Canva is a user-friendly online tool that allows you to create and edit images, design cards, and make various visual projects. You can use Canva for doing a variety of things, like creating and editing cards, videos, docs, presentations, etc.
2. Editing an image in Canva means making changes to a picture to make it look better or different. It includes editing the colour scheme and style, cropping, and flipping an image. Canva offers tools to help you enhance images for your card or project.
3. Flipping an image means creating a mirrored or reversed version of the original image, whereas cropping means removing the unwanted parts from your image so that you can focus on the important area of your image.
4. Canva templates offer three key benefits:
● Time-saving: They let you skip the design process and jump straight to the customisation, saving you valuable time.
● Professional look: Even without design expertise, templates can elevate your work with a polished and professional appearance.
● Flexibility: You can personalise templates with your own colours, images, and texts for a unique and customised design.
5. Two flipping options are: Flip Horizontal or Flip Vertical
F. Apply Your Learning.
1. Step 1: On the home page of Canva, click on the Create a design button.
Step 2: Click on the Custom size button and enter the dimension 5 inches by 7 inches.
Step 3: The Canva editor window with a blank canvas for designing will open.
2. Step 1: Select the image you want to flip.
Step 2: Click on the Flip button.
Step 3: Choose Flip horizontally.
3. Editing an image
4. Style Tab
5. Step 1: Select the image you want to crop in Canva.
Step 2: Click on the Edit photo button to open the editing menu.
Step 3: Click on the Crop tab. You will see handles or corners around the image.
Step 4: Click and drag these handles to select the part of the image you want to keep.
Step 5: Adjust the cropping area until it looks the way you want.
Chapter Checkup
A. Fill in the Blanks.
1. Initial 2. Chatbot 3. Computer vision 4. Virtual Reality 5. Equally
B. Who Am I?
1. Upper smart AI 2. Robots 3. Chatbots 4. Natural Intelligence 5. Augmented Reality
C. Write T for True and F for False.
1. F 2. F 3. T 4. T 5. T
D. Answer the Following.
1. Artificial intelligence is the capability of a machine, typically a computer or a robot, to mimic human intelligence.
2. Natural Intelligence is biological in nature, arising from the complexity of the brain and nervous system. AI is synthetic, created by humans using technology and the computer system.
3. AI can translate one language into another. It helps when you want to talk to someone who speaks a different language. Google Translate is a commonly used AI language Translator.
4. As time went on, people taught AI to learn from the information and the data on its own. It became better at recognising patterns, like telling the difference between a cat and a dog in pictures.
5. Computer Vision is a domain of AI that focuses on enabling computers and machines to interpret and understand visual information from the real world, typically through cameras.
E. Apply Your Learning.
1. Augmented Reality (AR) is a technology that blends digital content with the real world in real-time. It enhances the user’s perception of reality by overlaying virtual elements on their view of the physical environment. On the other hand, Virtual Reality (VR) is a technology that immerses users in a completely digital or virtual environment. It often involves the use of a headset or goggles that block out the real world and replace it with a computer-generated one.
2. Various applications of AI are:
Smart assistants: AI helps make smart assistants like Siri or Alexa. They can answer questions, set reminders, and play music when you ask them.
Video games: AI makes video games more fun. It controls characters in games, making them smart opponents, or helpful allies.
Chatbots: Al helps create chatbots on websites. These chatbots can chat with you and answer your questions.
Recommendations: AI suggests things you might like.
Self-driving cars: Al helps cars drive themselves safely. The cars use sensors and cameras to see the road and make sure they do not crash.
Healthcare: AI can help doctors by analysing X-rays and MRIs to find problems in your body.
Language translation: AI can translate one language into another.
Robots: AI makes robots intelligent. Some robots can clean your floors, while others can even dance and play music!
Weather forecast: AI helps predict the weather. It uses data to tell us if it is going to be sunny or rainy, so we know what to wear and if we need an umbrella or not.
3. Ethics of AI:
Bias avoidance: AI should not have unfair preferences. It should treat people of all races, genders, and backgrounds equally.
Data protection: AI should keep our personal information safe, just as we keep our secrets and passwords safe from others.
Environmental responsibility: AI should be used in ways that do not harm the environment.
Helping others: AI can be used to help people in need, like diagnosing diseases in healthcare or predicting natural disasters.
No cheating: AI should not be used to cheat or do bad things, like hacking into computer systems or cheating in games.
Learning and improving: AI should always try to learn and get better at what it does. The more data is fed to the AI machines, the smarter they become.
Making the world better: Al can be used to solve big problems, like climate change. Finding cures for diseases, and making our world a better place for everyone.
4. Artificial intelligence is the capability of a machine, typically a computer or a robot, to mimic human intelligence whereas Natural Intelligence is biological in nature, arising from the complexity of the brain and nervous system. AI is synthetic, created by humans using technology and computer system.
5. The evolution of AI is its story, how AI got smarter over time. Let us learn when AI came into existence and how it was developed into the form that we see today.
● Initial AI (1950s-1960s): AI came into existence in the 1950s. It could only do simple things, like adding numbers together or following the basic instructions. It was not very smart.
● Learning AI (1970s-1980s): As time went on, people taught AI to learn from the information and the data on its own. It became better at recognising patterns like telling the difference between a cat and a dog in pictures.
● Talking AI (1990s-2000s): AI learnt to talk and understand human language. It could answer questions and have conversations with people, like the chatbots you might have seen online.
● Super smart AI (Present): Today, AI has become super smart! It can do amazing things, like play chess and other games, drive cars and even help doctors diagnose diseases. It is getting smarter and learning new things every day.
● Future adventures (Future): Al is still growing and learning. In the future, it might become even smarter and help us with even more exciting and important tasks like exploring space, solving big problems, and making our lives better.
Chapter Checkup
A. Fill in the Blanks.
1. .html 2. Case-sensitive 3. <HTML> 4. <strong> 5. subscript
B. Tick () the Correct Option.
1. c. HyperText Markup Language
2. c and d. HTML, Head, Title, Body
3. c. <sup>
4. c. <section>
5. c. <em>
C. Who Am I?
1. Web page 2. <!DOCTYPE html> 3. Body 4. <!DOCTYPE html> tag 5. <title>
D. Write T for True and F for False.
1. T 2. F 3. T 4. T 5. F
E. Answer the Following.
1. An HTML document is divided into two parts:
Head part: The title and metadata of a web document are contained in the head part.
Body part: The content you want to display on a web page is contained in the body part.
2. The basic structure of an HTML document consists of 5 elements.
<!DOCTYPE html>: This tag informs the browser about the document type.
<html>Tag: The <html> tag informs the browser that this is an HTML document.
<head>Tag: It contains information about the HTML document.
<title>Tag: The <title> tag provides a suitable title for the entire HTML document.
<body>Tag: The primary content of an HTML document that displays on the browser is specified by the <body> tag.
3. The <title> tag provides a suitable title for the entire HTML document.
4. The <em> tag is used to emphasise text and is typically displayed in italics. Whereas, the <strong> tag is used to represent strongly emphasised text and is typically displayed in bold.
5. The <sub> tag is used to represent text as a subscript. A subscript is the text that is below the baseline of the surrounding text. For example, 2 in H2O is a subscript. Whereas, the <sup> tag is used to represent text as a superscript. A superscript is the text that is above the baseline of the surrounding text. For example, 2 in E = mc2 is a superscript.
F. Apply Your Learning.
1. An HTML page containing your name, father’s name, mother’s name, school name, postal address, and contact number.
<!DOCTYPE html>
<html lang=”en”>
<head> <title>My Information</title> </head> <body>
<section>
<h2>Name:</h2> <p>Your Name</p> </section>
<section>
<h2>Father’s Name:</h2> <p>Your Father’s Name</p> </section>
<section>
<h2>Mother’s Name:</h2> <p>Your Mother’s Name</p> </section>
<section>
<h2>School Name:</h2> <p>Your School Name</p> </section>
<section>
<h2>Postal Address:</h2>
<p>Your Postal Address</p> </section>
<section>
<h2>Contact Number:</h2>
<p>Your Contact Number</p>
</section> </body> </html>
2. An HTML document to display the daily news of your school in various fields.
<!DOCTYPE html>
<html lang=”en”> <head>
<title>Daily School News</title> </head> <body>
<h1>Daily School News</h1>
<section>
<h2>Sports News</h2>
<p>The Ganga House has won the Inter-school Hockey tournament. Amit Bhardwaj has been declared the ‘Man of the Match.’ In the girls swimming championship, Gurlove of class 6 bagged the Champion’s Trophy. </p>
</section> <section>
<h2>Academic News</h2>
<p>The inter-school declamation contest has been won by the Delhi Public School, Greater Noida. Ishpreet Kaur has bagged the first position. Her topic for the declamation contest was, “how to overcome the fear of examination.” </p>
</section>
<section>
<h2>Events News</h2>
<p>The upcoming events in the school are: Fancy dress competition, Annual sports day, and Singing competition. The interested students can give their names to Ms Sangeeta. </p> </section> <section> </body> </html>
3. An HTML page with the title as ‘Formulae in Maths’.
<!DOCTYPE html>
<html lang=”en”> <head>
<title>Formulae in Maths</title> </head> <body>
<h1>Formulae in Maths</h1> <section>
<h2>Area of a Circle:</h2>
<p>The area of a circle is given by the formula:</p>
<p>Area = πr<sup>2</sup></p>
<p>Where r is the radius of the circle.</p> </section> <section>
<h2>Area of a Square:</h2>
<p>The area of a square is given by the formula:</p>
<p>Area = side<sup>2</sup></p>
<p>Where side is the length of a side of the square.</p> </section> <section>
<h2>Area of a Rectangle:</h2>
<p>The area of a rectangle is given by the formula:</p>
<p>Area = length × width</p>
<p>Where length is the length of the rectangle and width is the width of the rectangle. </p> </section> <section>
<h2>Area of a Triangle:</h2>
<p>The area of a triangle is given by the formula:</p>
<p>Area = (base × height) / 2</p>
<p>Where base is the base of the triangle and height is the height of the triangle.</p> </section> </body>
</html>
4. An HTML page to display information about the eastern states of India, often known as ‘the Seven Sisters’. <!DOCTYPE html> <html lang=”en”>
<head>
<title>Eastern States of India</title> </head> <body>
<h1>Eastern States of India</h1> <section>
<h2>Arunachal Pradesh</h2>
<p>Arunachal Pradesh is known for its picturesque mountains, rich cultural heritage, and diverse tribal communities.</p> </section>
<section>
<h2>Assam</h2>
<p>Assam is famous for its tea gardens, wildlife sanctuaries, and the mighty Brahmaputra River.</p> </section> <section>
<h2>Manipur</h2>
<p>Manipur is known for its vibrant culture, traditional dance forms, and scenic landscapes.</p> </section>
<section>
<h2>Meghalaya</h2>
<p>Meghalaya is renowned for its stunning waterfalls, living root bridges, and lush greenery.</p> </section> <section>
<h2>Mizoram</h2>
<p>Mizoram is known for its peaceful atmosphere, rich tribal culture, and beautiful landscapes.</p> </section> <section>
<h2>Nagaland</h2>
<p>Nagaland is famous for its vibrant festivals, unique tribal traditions, and beautiful handicrafts.</p> </section> <section>
<h2>Tripura</h2>
<p>Tripura is known for its rich history, ancient temples, and diverse cultural heritage.</p> </section> </body> </html>
5. A web page showing information about your favourite sports persons. <!DOCTYPE html> <html lang=”en”> <head>
<title>Favourite Sports Persons</title> </head> <body>
<h1>Favourite Sports Persons</h1> <section>
<h2>Basketball</h2>
<p>LeBron James - LeBron Raymone James Sr. is an American professional basketball player for the Los Angeles Lakers of the National Basketball Association (NBA).</p> </section> <section>
<h2>Football</h2>
<p>Lionel Messi - Lionel Andrés Messi is an Argentine professional footballer who plays as a forward for Paris Saint-Germain and the Argentina national team.</p> </section> <section>
<h2>Tennis</h2>
<p>Roger Federer - Roger Federer is a Swiss professional tennis player. He has been ranked world No. 1 in the ATP rankings a total of 310 weeks – including a record 237 consecutive weeks – the most in the Open Era.</p> </section> </body> </html>
This teacher manual has been designed to implement Tekie, the storytelling-based Coding and Computer Science program. The manual consists of lesson plans within each chapter that teachers transact within classrooms and computer labs. Each lesson is based on a research-based ‘WEBS’ framework that simplifies pedagogical practices for teachers and enables them to deliver effectively.
• Sharp Lesson Planning: Each lesson plan focuses on specific sub-learning outcomes within a chapter and are designed for delivery within the stipulated class or lab time.
• Real-life and Application-based Questions: Additional questions that link Computer Science to real-life contexts and assist teachers to develop learners’ conceptual understanding and application skills.
• Support and Detailed Solutions: In-depth solutions for in-class and post-class activities to reinforce learning.
Uolo partners with K-12 schools to bring technology-based learning programs. We believe pedagogy and technology must come together to deliver scalable learning experiences that generate measurable outcomes. Uolo is trusted by over 10,000 schools across India, South East Asia, and the Middle East.