Academic Authors: Jatinder Kaur, Ayushi Jain, Anuj Gupta, Simran Singh
Creative Directors: Bhavna Tripathi, Mangal Singh Rana, Satish
Book Production: Rakesh Kumar Singh, Sakshi Gupta
Project Lead: Jatinder Kaur
VP, Learning: Abhishek Bhatnagar
All products and brand names used in this book are trademarks, registered trademarks or trade names of their respective owners.
© Uolo EdTech Private Limited
First published 2023
Second published 2024
Third published 2025
This book is sold subject to the condition that it shall not by way of trade or otherwise, be lent, resold, hired out, or otherwise circulated without the publisher’s prior written consent in any form of binding or cover other than that in which it is published and without a similar condition including this condition being imposed on the subsequent purchaser and without limiting the rights under copyright reserved above, no part of this publication may be reproduced, stored in or introduced into a retrieval system, or transmitted in any form or by any means, electronic, mechanical, photocopying, recording or otherwise, without the prior written permission of both the copyright owner and the above-mentioned publisher of this book.
Book Title: Tekie Computer Science Scratch 3.0 I
ISBN: 978-81-979297-9-3
Published by Uolo EdTech Private Limited
Corporate Office Address:
85, Sector 44, Gurugram, Haryana 122003
CIN: U74999DL2017PTC322986
Illustrations and images: www.shutterstock.com, www.stock.adobe.com and www.freepik.com
All suggested use of the internet should be under adult supervision.
Standing at the forefront of the digital and AI revolution, the importance of coding and computational skills has reached unprecedented heights. In today’s professional landscape, whether it is in the fields of medicine, space exploration, education, science, or business, no sector remains untouched by this transformative wave. To thrive in the 21st century, basic computer literacy is no longer sufficient. Learners must evolve into “digital natives” who can fluently read, write, and communicate in the languages that machines and AI comprehend. Recognising this imperative, the National Education Policy of 2020 (NEP 2020) has strongly recommended the integration of coding skills, computational thinking, critical analysis, and problem-solving abilities into the curriculum. Moreover, forward-looking subjects like AI, Data Science, Computer Applications, and IT have been introduced as elective subjects from grade 9 onwards. It would not be surprising if further transformative measures are taken even at the elementary education level.
Inspired by these insights, Uolo has introduced an innovative 360-degree program for a codingfocused computer science curriculum, known as Tekie, spanning grades 1 to 8. The program provides an experiential learning approach, going beyond theoretical knowledge. It not only covers theoretical aspects of computer science and coding, but includes hands-on activities and technology-based projects that enable students to experience computer science first hand. The program includes chapters that provide a deeper immersion in computer science that both learners and teachers may find interesting.
This coding book is a part of the larger Tekie program that also includes a main computer science textbook, covering the basics of computing, the latest technologies, and essential computer tools.
In addition to the textbooks, we provide a digital platform where students can actively engage in practical activities and hands-on learning projects. This platform is designed to enhance the learning process by allowing students to experiment and apply their knowledge in a real-world context.
We have meticulously aligned our activities with the guidelines of the National Education Policy (NEP) 2020, which emphasises a holistic approach to learning. This approach is aimed at developing critical thinking, logical reasoning, and practical skills among students. By integrating these elements into our coding program, we aim to prepare students for the future, equipping them with the necessary skills to navigate and excel in the ever-evolving world of technology.
Our mission is to cultivate a passion for coding and computer science among young learners, making the learning process enjoyable and impactful. We are confident that this series will not only help students grasp the fundamentals of coding but also inspire them to explore the endless possibilities that technology offers.
We invite you to embark on this exciting journey of learning and discovery. Let’s empower the next generation with the skills and knowledge they need to thrive in a digital world.
The National Education Policy (NEP) 2020 outlines essential skills, values, dispositions, and learning approaches necessary for students to thrive in the 21st century. This textbook identifies and incorporates these elements throughout its content, activities, and exercises, ensuring students develop coding skills and essential life skills. Referred to as “NEP Tags”, they are defined as follows:
INTEGRATED

CRITICAL THINKING
Art Integration
Bringing creativity and fun into learning by integrating art with computer science and coding
Sports Integration
Using games and sports in daily life to enrich computer-related activities
Holistic & Integrated Learning
Cross-curricular linkages to make learning-experiences more holistic and joyful and meaningful
Critical Thinking
Coding opportunities to apply higher-order skills like algorithmic and computational thinking and problem-solving
Hands-on Activity
Coding opportunities that enable learners to put theoretical knowledge into practice
SDG
Sustainable Development Goals
Coding opportunities related to real-world issues and sustainable development
SEL
Social Emotional Learning
Developing emotional intelligence and collaboration skills through coding exercises


Here are the steps to wash clothes:
1 Gather all the clothes you want to wash.
Here are the steps to wash clothes:
2 Sort your clothes by colour. Keep dark-coloured clothes in one pile and white or light-coloured clothes in another pile.
1 Gather all the clothes you want to wash.
3 Check the pockets for tissues, candy wrappers, and other items, and take them out.
2 Sort your clothes by colour. Keep dark-coloured clothes in one pile and white or light-coloured clothes in another pile.
4 Put your clothes in the washing machine, one pile at a time.
Discuss
2 Drag the block to after the repeat block. Code
3 Check the pockets for tissues, candy wrappers, and other items, and take them out.
4 Put your clothes in the washing machine, one pile at a time.
What is the difference between the stage and the backdrop?
Discuss What is the difference between the stage and the backdrop?
We will be using block-based coding to make computers do things for us.
Block-based coding is the language in which we use colourful code blocks to tell computers what to do
You must have drawn things on a computer earlier, right?
Click the Go button
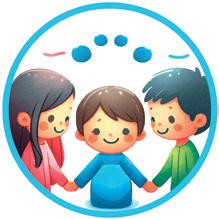
Discuss: A multi-faceted probing question related to the concept that arouses curiosity
We will be using block-based coding to make computers do things for us.
Block-based coding is the language in which we use colourful code blocks to tell computers what to do
We are going to use a block-based coding platform called Scratch 3.0 to create code for drawing and shapes.
Identify and label the components based on the
You must have drawn things on a computer earlier, right?
Code Snippets: Complete code for each activity with output facilitating hands-on learning and immediate feedback
Chapter Checkup

We are going to use a block-based coding platform called drawing and shapes.
NEP Tags: To show alignment with NEP skills and values
a I am a character in your project.
Did You Know: Interesting facts related to the topic
What happens when you run your project? The Pencil sprite moves quickly and draws the rectangle.


e I hold all the blocks for a block category. A Fill in the blanks.


c I hold colour-coded categories of blocks.
d I am the area where you drag and join the blocks.
It Yourself 1A
Open Scratch.


We have completed the script to draw a rectangle. 'Drawing a Rectangle'.
Hints menu bar untitled backdrop blocks create
b I show you the options to change the name, size, and location of a character.
We have completed the script to draw a rectangle. Save this project with the name 'Drawing a Rectangle'.
1 In Scratch, we use colourful to create our own games, stories, and drawing.
Short exercises between the chapter to pause and assess comprehension
Identify and label the components based on the clues given below.
Go to the Backdrops pane. Click on Choose a Backdrop option and select Blue Sky.
Now, go to the sprites pane. Click on Choose a Sprite option and select the Amon sprite.
The stage will look like the figure below.
2 To create a project in Scratch, you need to click
3 By default, the name of the Scratch project is .
Think and Tell

4 The purple bar at the top of the Scratch editor is called the
Hands-on challenges to encourage and actively engage with the concepts learnt throughout the chapter

Chapter Checkup
F Apply your learning.
a character in your project.
Identify and label the components based on the clues given
5 The background of the stage is called the .
What are the other platforms you know of that assist in block-based coding?
Think and Tell: Analysis, reflection, and text-to-self connection-based prompts for discussion in class
e I hold all the blocks for a block category.
A Fill in the blanks.
c I hold colour-coded categories of blocks.
d I am the area where you drag and join the blocks.
b I show you the options to change the name, size, and location of a character.
1 Nia is making a Scratch project where she needs to move the dog from left to right. Which block should she use?
Chapter Checkup: Chapter-end practice exercises aligned to different levels of Bloom’s Taxonomy
Apply your learning: Intellectually stimulating questions designed for higher-order thinking and analysis
Test Papers: Designed to evaluate understanding of core concepts and application of skills
A. Fill in the blanks.
Hints menu bar untitled backdrop blocks create
1 In Scratch, we use colourful to create our own games, stories, and drawing.
Chapter Checkup 1
2 To create a project in Scratch, you need to click
e I hold all the blocks for a block category. A Fill in the blanks.
The stage will look like the figure below. What are the other platforms you know of that assist in block-based coding?
3 By default, the name of the Scratch project is
4 The purple bar at the top of the Scratch editor is called the
Hints menu bar untitled backdrop blocks create
5 The background of the stage is called the F Apply your learning.
1 In Scratch, we use colourful to create our own games, stories, and drawing.

1 Nia is making a Scratch project where she needs to move the dog from left to right. Which block should she use?
2 To create a project in Scratch, you need to click
3 By default, the name of the Scratch project is
4 The purple bar at the top of the Scratch editor is called the

5 The background of the stage is called the F Apply your learning.
Test Paper (Based on Chapters 1 to 4)
1 Nia is making a Scratch project where she needs to move the dog from left to right. Which block should she use?
Test Paper (Based on Chapters 1 to 4)
1 In Scratch, the blocks you put together in the script area are called a
A. Fill in the blanks.

2 The is the background of the stage.
1 In Scratch, the blocks you put together in the script area are called a
2 The is the background of the stage.
1
• Block-based Coding
• Scratch 3.0
• Creating a Project
• Components of Scratch
• Motion Blocks
• Looks Blocks
• Events Blocks
• Sound Blocks • Control Blocks
3 Making a Scratch Project
• Naming a Project
• Deleting a Sprite
• Adding a Sprite
• Positioning a Sprite
• Moving a Sprite
• Pen Extension
• Drawing a Line
• Saving a Scratch Project
• Drawing a Rectangle
• Using Loops
• Drawing a Circle
Being hygienic means keeping ourselves clean and healthy. Just like washing our hands with soap keeps germs away, wearing clean clothes is another way to stay clean. Dirty clothes can collect sweat and germs, so washing them regularly helps keep our skin free of germs and itch.
Here are the steps to wash clothes:
1 Gather all the clothes you want to wash.
2 Sort your clothes by colour. Keep dark-coloured clothes in one pile and white or light-coloured clothes in another pile.
3 Check the pockets for tissues, candy wrappers, and other items, and take them out.
4 Put your clothes in the washing machine, one pile at a time.
5 Ask your mother to add detergent, close the lid, set the timer, and start the machine.
6 The machine will fill with water, wash your clothes clean, and spin them to let the extra water out.
7 Once the washing is finished, take your clothes out of the machine and hang them for drying.
These steps are the instructions we follow to wash the clothes.
Just like how we use instructions to do something step-by-step, we need to tell computers how to do something step-by-step too.
But computers do not understand our language, so we need to use a special language that they can understand. We call that language coding.
Coding is a way of giving instructions to tell a computer what to do.
We will be using block-based coding to make computers do things for us.
Block-based coding is the language in which we use colourful code blocks to tell computers what to do.
You must have drawn things on a computer earlier, right?
But did you know that you can use block-based coding to make computers draw shapes and drawings for you?
We are going to use a block-based coding platform called Scratch 3.0 to create code for drawing and shapes.
Scratch 3.0 is a free and simple platform where we use colourful blocks to create our own games, stories, and drawings.
Now, let us learn to create a blank project.
1 Click Create.
Did You Know?
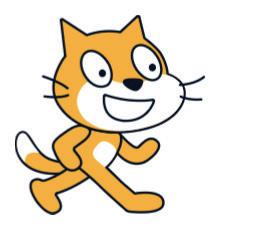
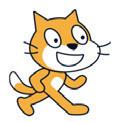
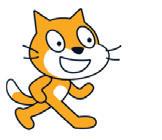
Scratch Cat is the official mascot of Scratch because cats are curious and playful animals, just like the children who use Scratch.
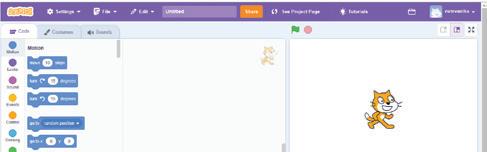
2 The Scratch editor opens. By default, the name of a Scratch project is shown as Untitled.
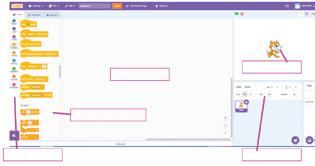
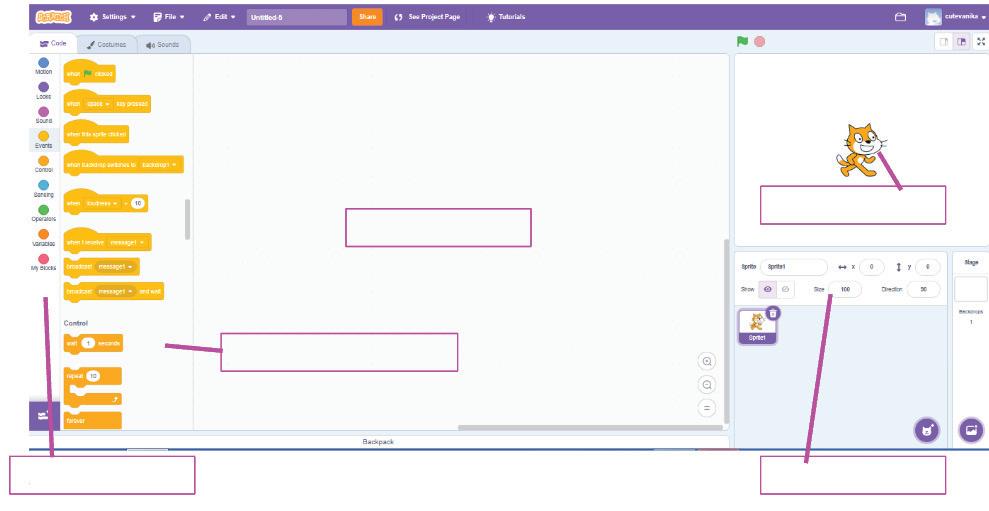
The Scratch editor holds all the components needed to create and run a Scratch project.
The components of the Scratch editor are:
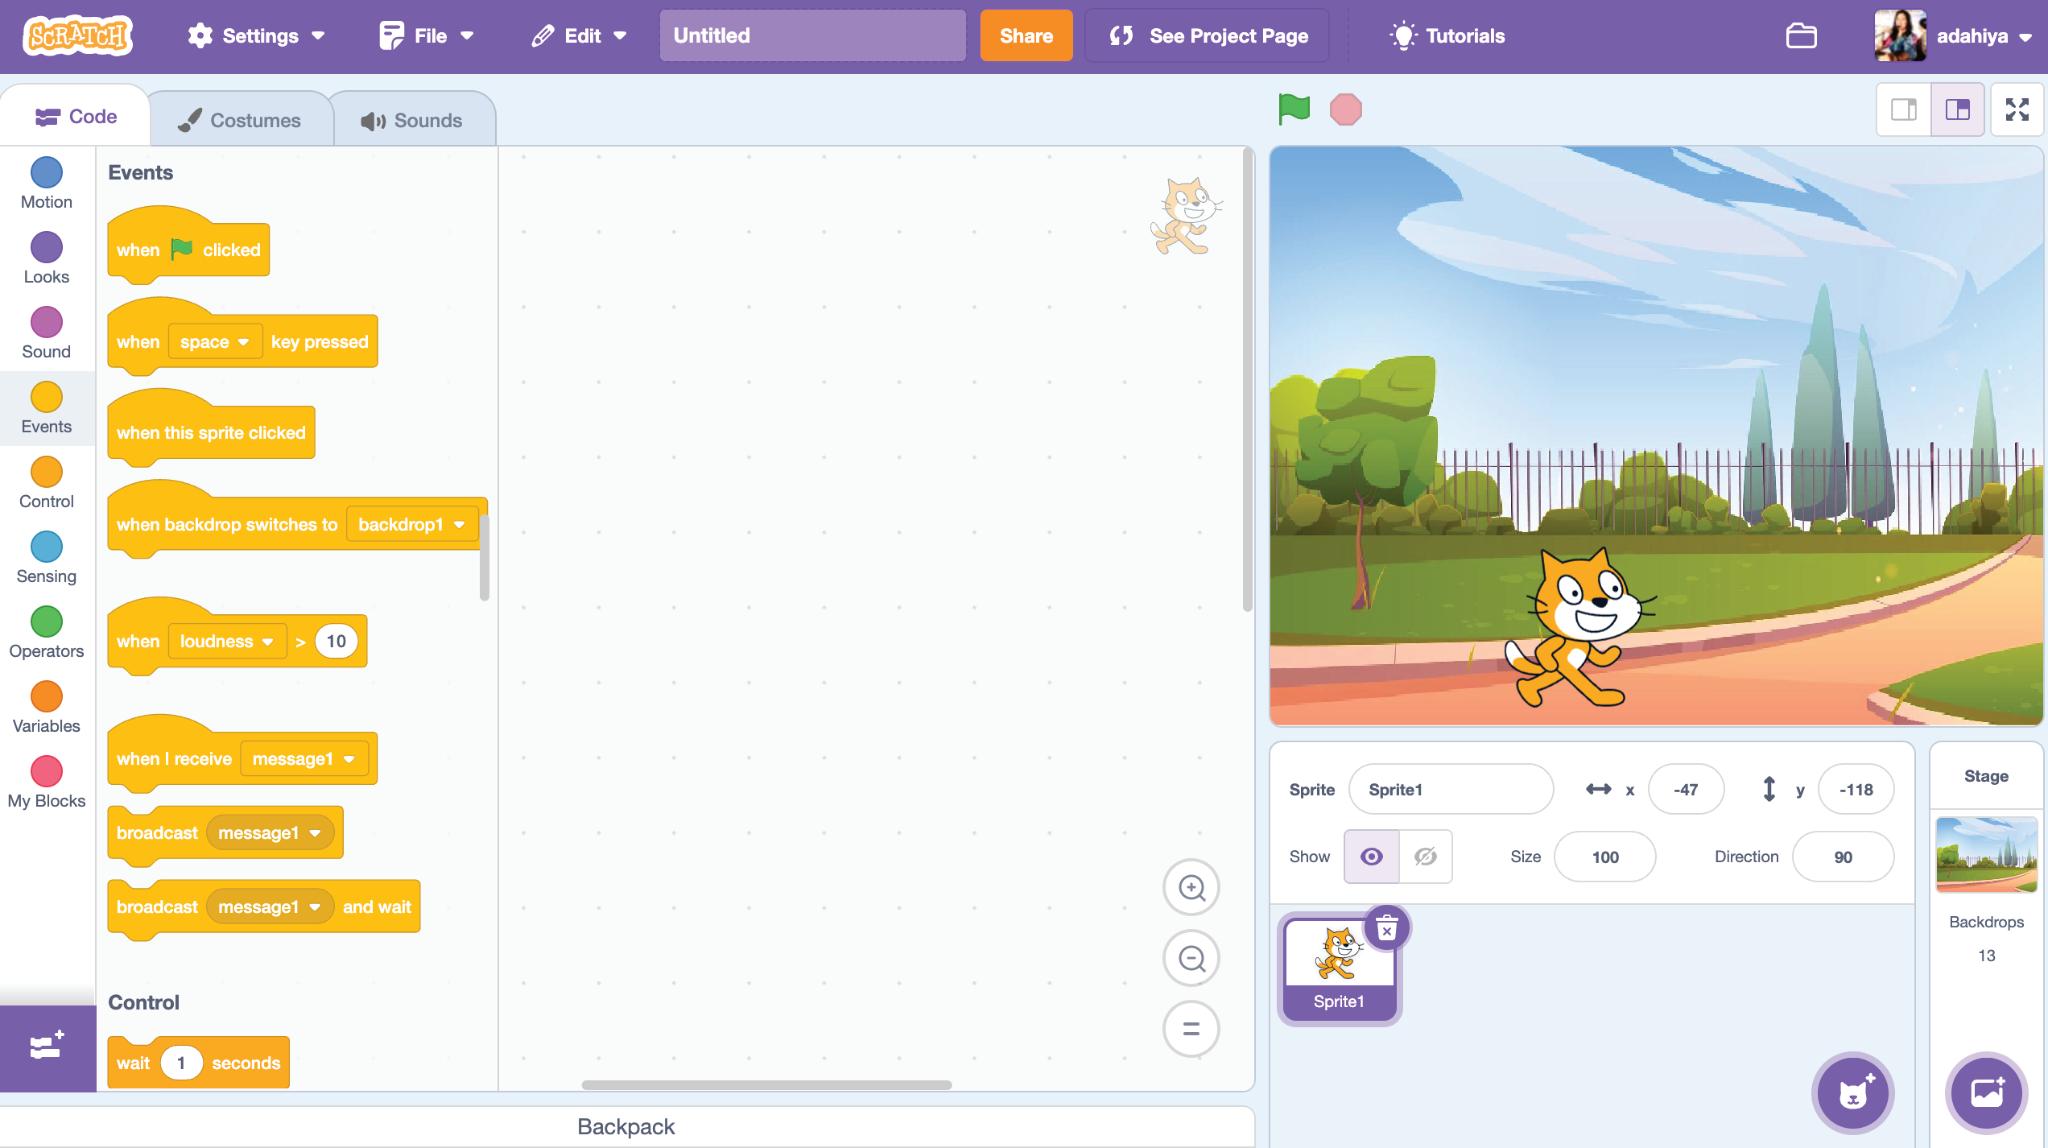

1 Menu bar: The purple bar at the top of the Scratch editor is called the Menu bar.
The main parts of the menu bar are:
a File and Edit menus: These let us create, save, and open a project.
b Project name: This space shows the name of your project.
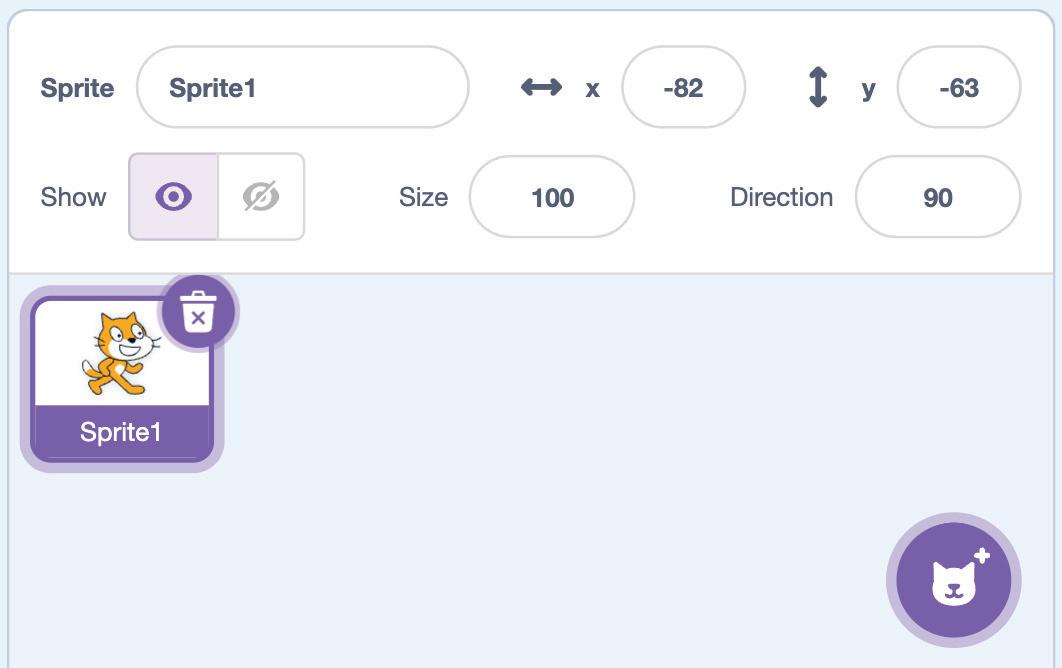
2 Sprite: A sprite can be a character or an object in a Scratch project.
3 Tabs: There are three tabs in the Scratch editor:


a Code: This tab has various code blocks to make the sprite move and do things.
b Costumes: This tab opens the Costumes editor where we can change how a sprite looks.
c Sounds: This tab opens the Sound editor to add and make changes to the sound effects of the sprite and to the backdrop.
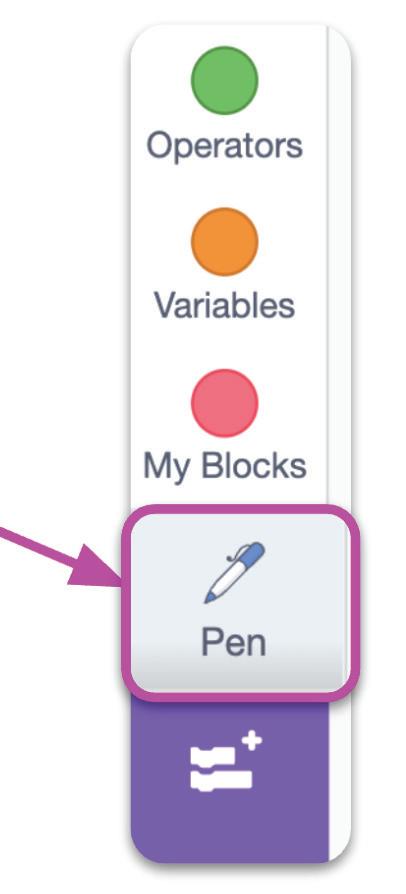
4 Blocks panel: This panel has nine colour-coded categories of blocks: We can even add more categories using the Add Extension button.
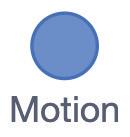


5 Blocks palette: This is the area where you can see all the blocks for a selected block category. The figure shows the various blocks of Motion block category.
6 Scripts area: The scripts area is next to the Blocks palette. This is where you drag the blocks to make your sprite do something. It is also called Coding area.
7 Stage: The stage is where you can see sprites in action.
8
9 Backdrop: It is the background of the stage. You can add backdrops from the Scratch library or from your computer.
Sprites pane: The Sprites pane is below the stage. This pane shows all the details of sprites, like their name, position, and size.
Backdrop
10 Backdrops pane: It is below the stage and next to the Sprites pane. You can use it to add, upload, edit, or delete backdrops.

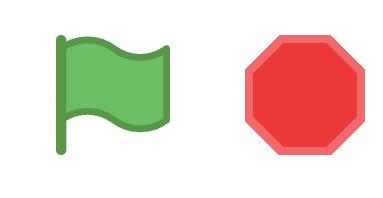
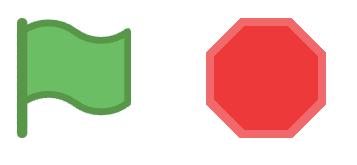
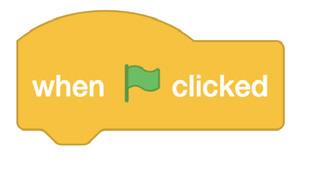
11 Go button and Stop button: The green flag is the Go button. You click it to run the script. The red button is the Stop button. You click it to stop the running script.
What is the difference between the stage and the backdrop?
Identify and label the components based on the clues given below.
a I am a character in your project.
b I show you the options to change the name, size, and location of a character.
c I hold colour-coded categories of blocks.
d I am the area where you drag and join the blocks.
e I hold all the blocks for a block category.
Open Scratch.
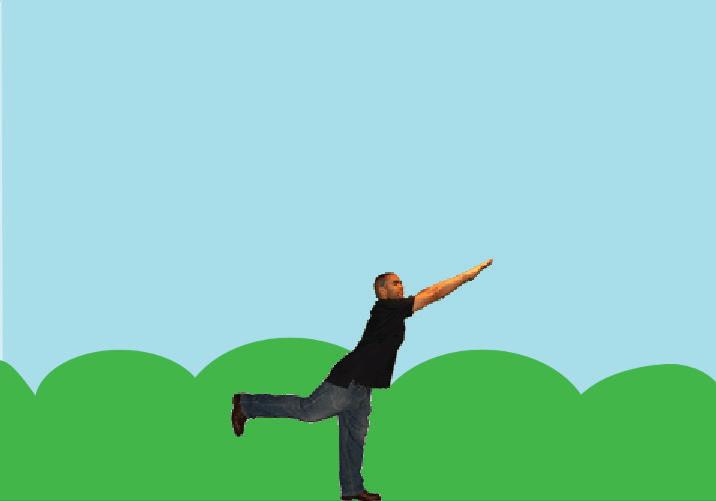
Go to the Backdrops pane. Click on Choose a Backdrop option and select Blue Sky.
Now, go to the sprites pane. Click on Choose a Sprite option and select the Amon sprite.
The stage will look like the figure below.
A Fill in the blanks.
1 In Scratch, we use colourful to create our own games, stories, and drawing.
2 To create a project in Scratch, you need to click .
3 By default, the name of the Scratch project is .
4 The purple bar at the top of the Scratch editor is called the .
5 The background of the stage is called the . B Tick () the correct option.
1 What is the name of the area where you can see all the details of sprites? a Stage b Sprites pane c Blocks palette d Scripts area

2 What do you use to stop your running scripts? a c d


3 The tab is used to .

a open the Sound editor b listen to songs
c close the Sound editor d open the Costumes editor

4 Which of the following option has the icon?
a File menu b Edit menu
c Stage d Costumes tab

5 Which of the following options has this icon?
a Sprites pane b Stage
c Backdrops pane d All of these
C Who am I?


D Write T for True and F for False.
Sprite
Scripts Area
Costumes Tab Go button and Stop button
Sounds Tab
1 The default project name in Scratch is Project1.
2 You can add and make changes to the sound effects of your sprite and backdrop in the Sound editor.
3 The Go button is used to stop the running project.
4 Events are one of the categories of blocks.
5 The colour of the Go button is green.
E Answer the following questions.
1 What is block-based coding?
2 What is the use of the Costumes tab?
3 What is the role of the Sounds tab?
4 What is a Script?
5 Describe the Go and Stop buttons.
F Apply your learning.
1 Rahul wants to make a project related to mountains in Scratch. Which background should he use?
2 What is a script in a project?

b
d None of these
3 Sheena wants to change the appearance of the sprite. What should she use?


4 Ritu wants to change the name of the sprite. Where should she go?
5 Arun wants to change the backdrop of the Stage. Which option should he choose?


Colour the fruits correctly in the given picture.
Just like each fruit has its own natural colour, each Scratch block category too is represented by its assigned colour. This makes it easy to find the blocks you need when you are creating a project.
Scratch blocks are grouped into categories based on what they do. For example, the Motion blocks are used to control the movement of sprites, whereas the Looks blocks are used to change the appearance of sprites. Let us learn more about the Scratch blocks.
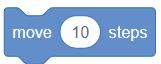
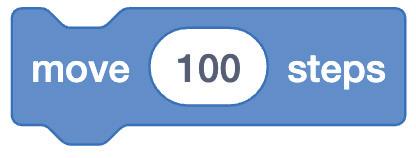
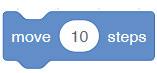
blocks are used to control the movement of the sprites. They are blue in colour.
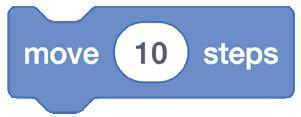
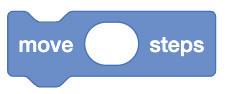
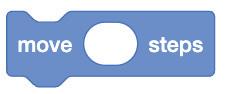
For example, the block makes this sprite move 10 steps towards the right.
Let us learn about some of the Motion blocks.
Description
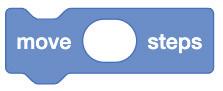
Moves the sprite forward the specified number of steps.
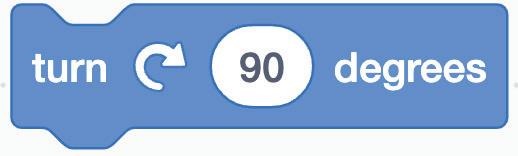
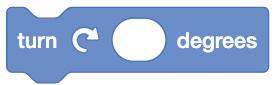
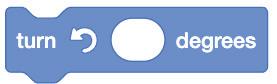
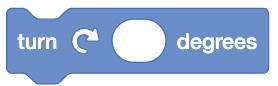
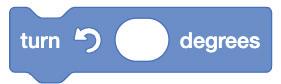
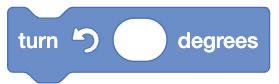
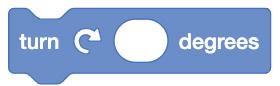
Turns the sprite clockwise to the specified value.
Turns the sprite anti-clockwise to the specified value.
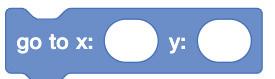
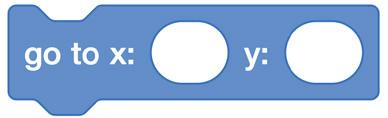
Moves the sprite to the specified x and y positions.

blocks are used to control how a sprite looks. They are purple in colour.
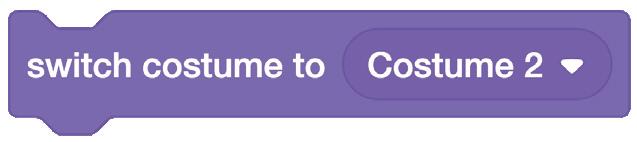
For example, the block will change the butterfly sprite’s costume from its current costume 1 to Costume 2.
Let us learn about some of the Looks blocks.
Blocks


Discuss

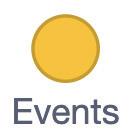
blocks are used to tell a computer when to run a script to make things happen. They are yellow in colour. An event is something that makes an action happen. Costume 1 Costume 2
Description
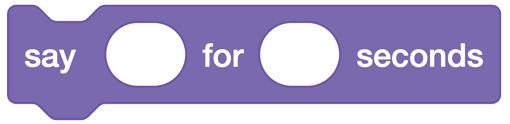
Makes the sprite say the specified text.
Makes the sprite say the specified text for the specified number of seconds.
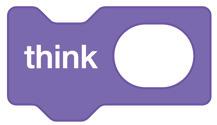
Makes the sprite think of the specified text.
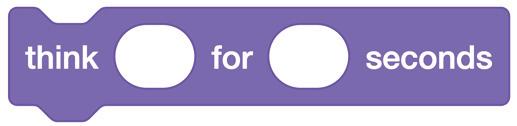
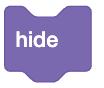
Makes the sprite think of the specified text for the specified number of seconds. Shows the sprite.
Hides the sprite.
Changes the costume of the sprite to the specified one.
For example, the girl feeling hungry is an event; eating food is the action.
Let us learn about some of the Events blocks.
Blocks

Description
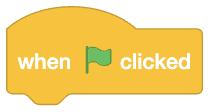
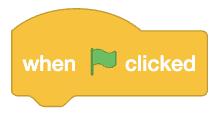
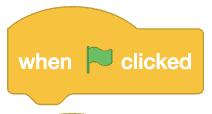
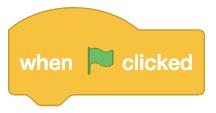
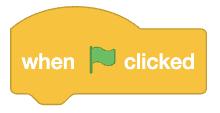
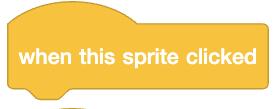
Runs the script when the green flag (the Go button) is clicked.
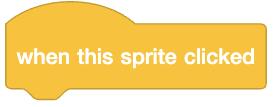
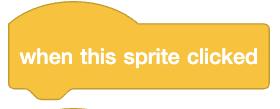
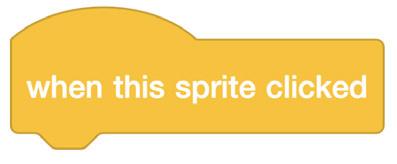
Runs the script when the sprite is clicked.
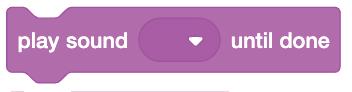
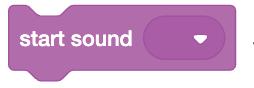
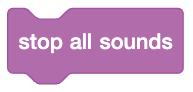
blocks are used to control the sound. They are pink in colour.
For example, the bell will play a sound when you use a sound block.
Let us learn about some of the Sound blocks.
Blocks
Description
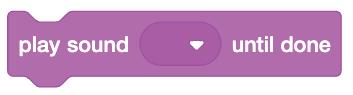
Plays a sound and pauses the script until it finishes.
Plays a sound without pausing the script.
Stops all playing sounds.
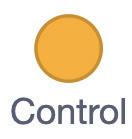
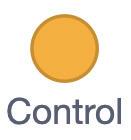
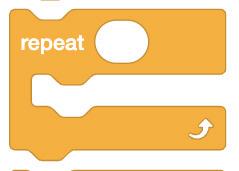
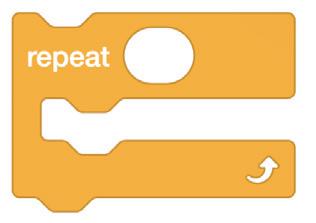
blocks are used to control the scripts. They are orange in colour.
For example, to make a sprite move towards the right 3 times, we need a repeat block from the Control blocks category.

Let us learn about some more blocks from the Control blocks category.
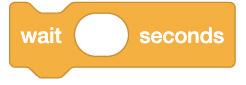


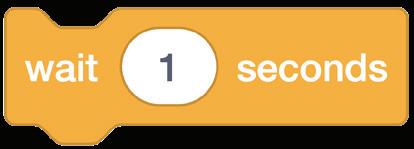
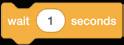
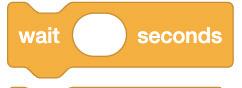
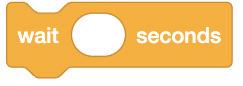
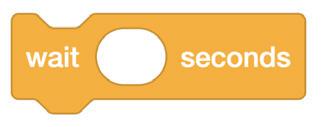
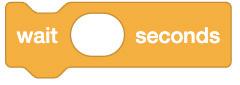
Pauses the script for the specified number of seconds.
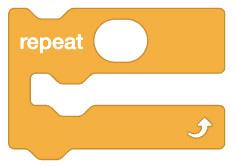
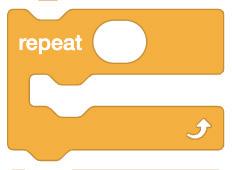
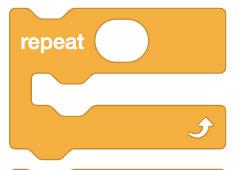
Repeats the instructions inside it a specified number of times.
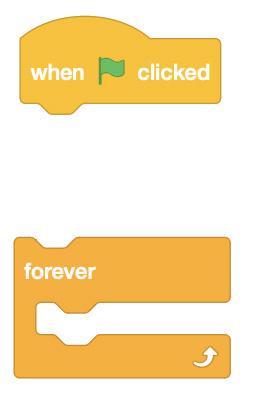
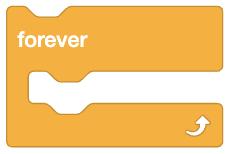
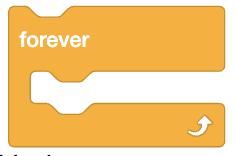
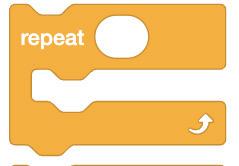
Repeats the instructions inside it forever, unless the Stop button is clicked.
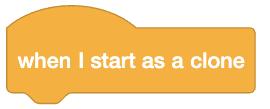
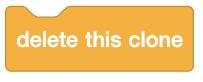
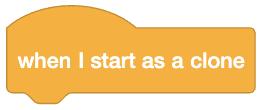
Runs the script for the clone (the copy of a sprite) when it is created.
Creates a clone of the specified sprite.
Deletes a clone.
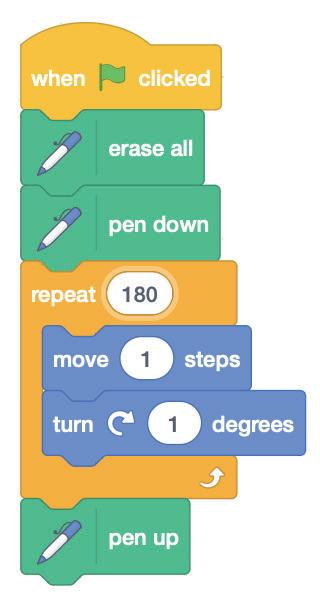
Let us create our first script to move and turn a sprite by using some of these blocks.
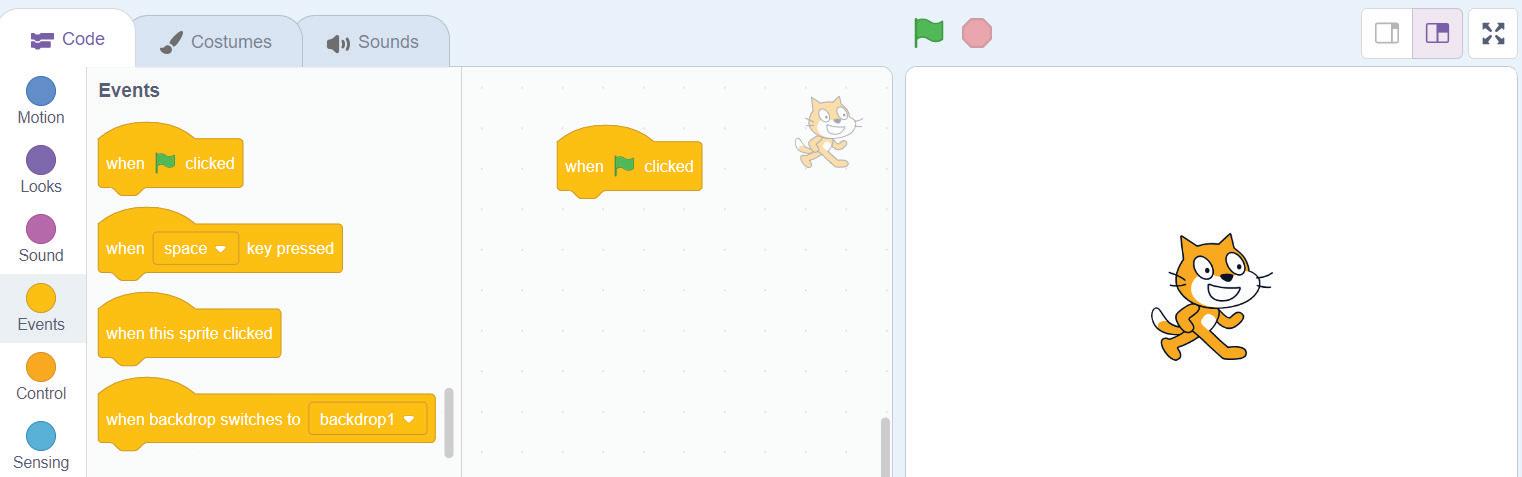
1 Click the Events category.
2 Drag the block in the scripts area.
3 Click the Motion category.

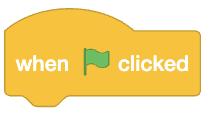
4 Drag the block to below the block, as shown in the image below.
5 Drag the block to the scripts area just below the block, as shown in the image below.

6 Click the Go button to run the script. The Sprite turns 15 degrees clockwise and then moves forward 10 steps each time you click the button.

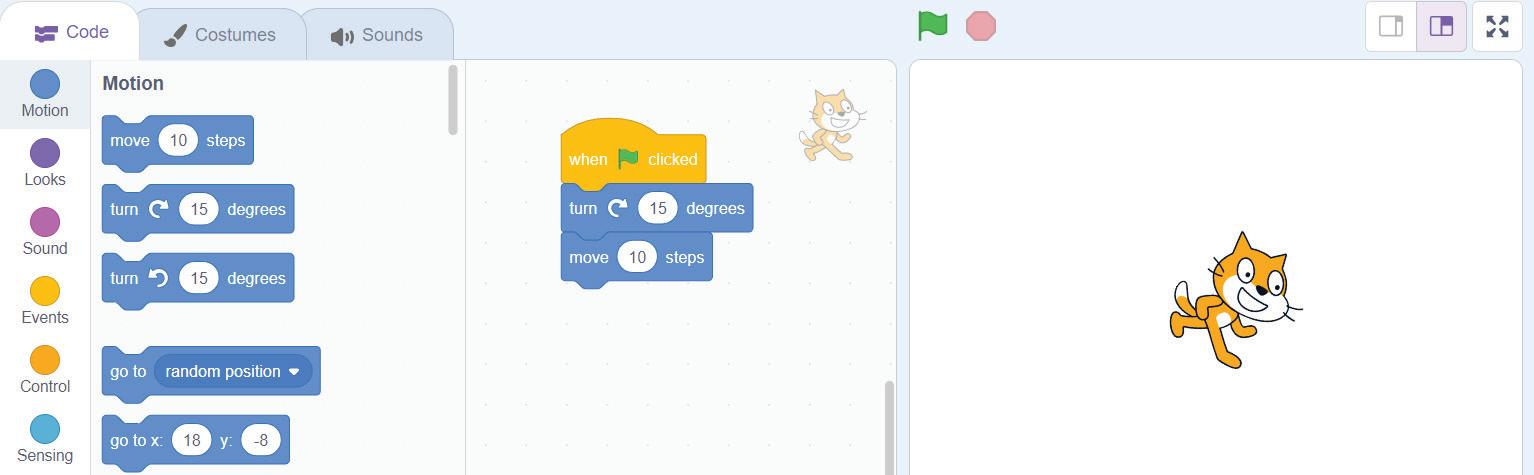
We can also change the values in the and blocks to turn by specified degrees and move a specified number of steps at once.
Scratch is available in more than 40 languages, so kids from all over the world can code in their language!


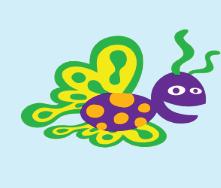
1 We have different colours of butterflies here. Write the names of the blocks that are represented by the same colours as the butterflies.
2 Match the columns.
Column A
A Fill in the blanks.
Plays a sound and pauses the script until it finishes.
Turns the sprite clockwise to the specified value.
Repeats the instructions inside the block specified number of times.
Runs the script when the green flag (the Go button) is clicked.
Pauses the script for the specified time.
1 are grouped into categories based on what they do.
2 blocks are orange in colour.
3 The block moves the sprite to the specified x and y position.
4 The block runs the script when the is clicked.
5 The block pauses the script for the specified number of seconds.
1 Which block is used to move a sprite?

2 Which block is used to make a sprite turn clockwise?
3 Which block is used to run a script when the sprite is clicked?
4 Which block can pause a script for the specified number of seconds?

5 Which block can repeat a script the specified number of times?
C Who am I?
1 I change the costume of a sprite to a specified one.
2 I delete a clone of a sprite.
3 I repeat the instructions inside me forever.
4 I stop all playing sounds.
5 I run the script for a clone when it is created.
D Write T for True and F for False.
1 The Motion blocks in Scratch are used to control the appearance of sprites.
2 Events blocks are used to tell a computer when to run a script.
3 Sound blocks can make a 'hitting' sound when a ball hits a sprite.
4 Each Scratch block stands for a different instruction.
5 You can use a Control block to delete a sprite from your project.
E Answer the following questions.
1 What is an event?
2 What is the purpose of the Looks blocks in Scratch?
3 What is the use of the say block? Where can we find this block in Scratch?
4 Which category of Scratch blocks controls sound, and what is the colour of these blocks?
5 What is the purpose of the think for seconds block?
1 Nia is making a Scratch project where she needs to move the dog from left to right. Which block should she use?

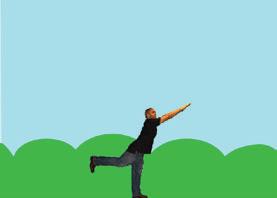
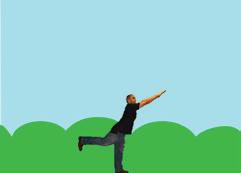
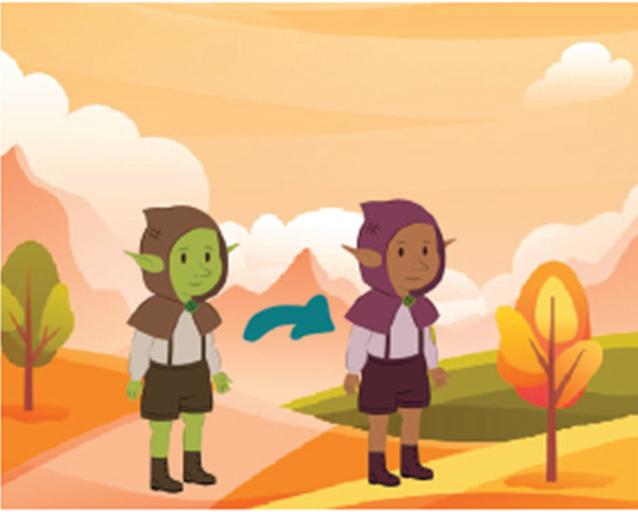
2 Simran wants to turn her pufferfish clockwise, as shown in the picture. Which blocks can she use?
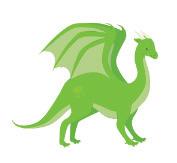
3 Ria has a Giga sprite in her project with two different looks, as shown in the picture. Which block must she use to change the look of the Giga sprite?
4 Rohit has made a project and wants to add sound to it. Which block can he use?
5 Priya wants to make the frog sprite move forward 3 times. Which blocks should she use?
Unscramble the following words to find the names of the Scratch blocks.
tniooM
nsvEet
unoSd
ornolCt
oklso
Now that you have completed the activity and revised the Scratch blocks, let us create our first Scratch project to draw a line.
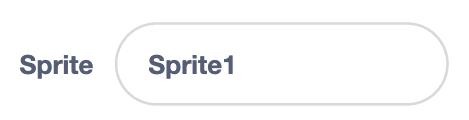
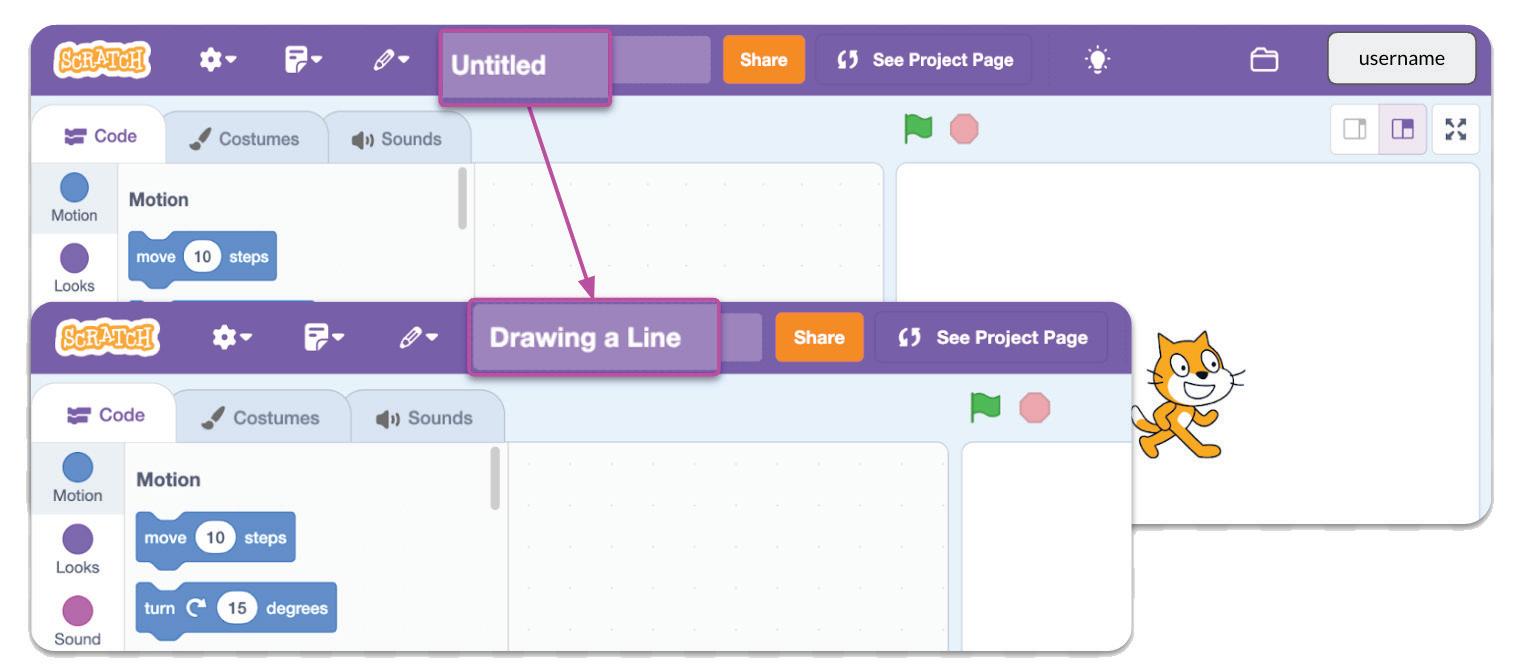
When a new Scratch project gets created, it comes with a default name 'Untitled' and a default cat sprite 'Sprite1'.
To change the default name, click it and replace it with the new name 'Drawing a Line'.
Now, let us recall what a Sprite is.
A Sprite is a character or an object that you can move around on the stage and make this object do things.
Follow the given steps to delete the default Cat sprite.
1 Select the sprite to be deleted in the Sprites pane. The button appears.


2 Click the button to delete the sprite.

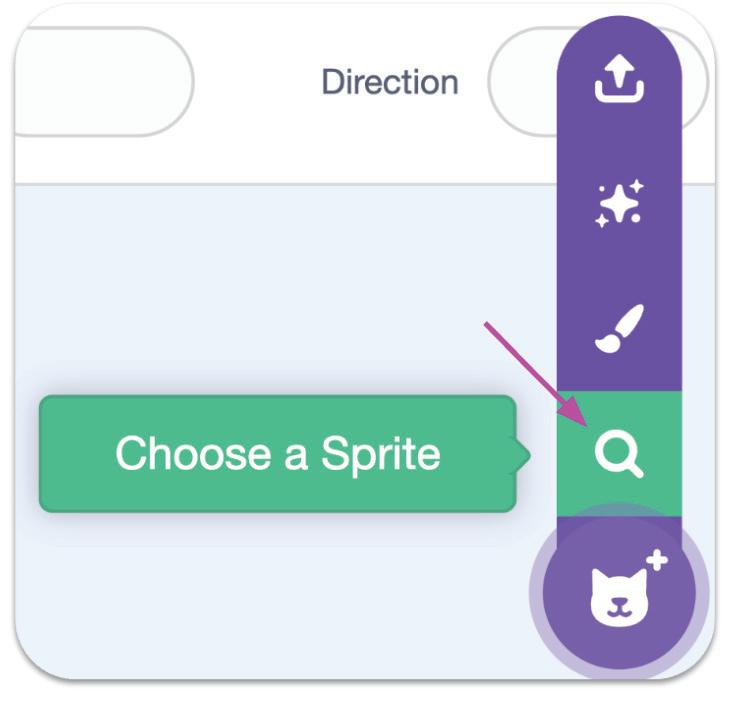
In Scratch, you can choose to add a sprite from the Sprites pane in four ways:
1 Choose a Sprite: To choose a sprite from the Scratch Sprite Library.
2 Paint: To create a sprite using Paint editor.
3 Surprise: To add a random sprite.
4 Upload Sprite: To upload a sprite from your computer.

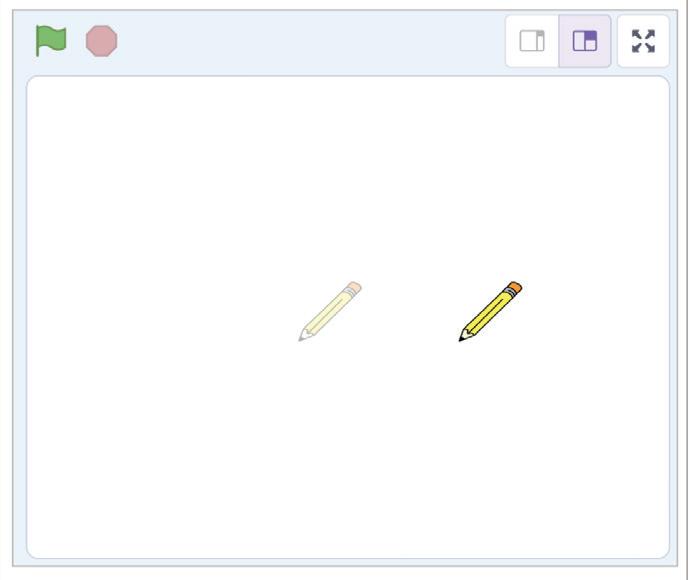
Now, let us add our first sprite, the Magic Wand , from the Sprite Library into our project.
Steps to add a sprite from Sprite Library:
1 Click the Choose a Sprite option in the Sprites pane. The Sprite Library opens.
2 Type 'Magic wand' in the search bar and then click the Magic Wand sprite.
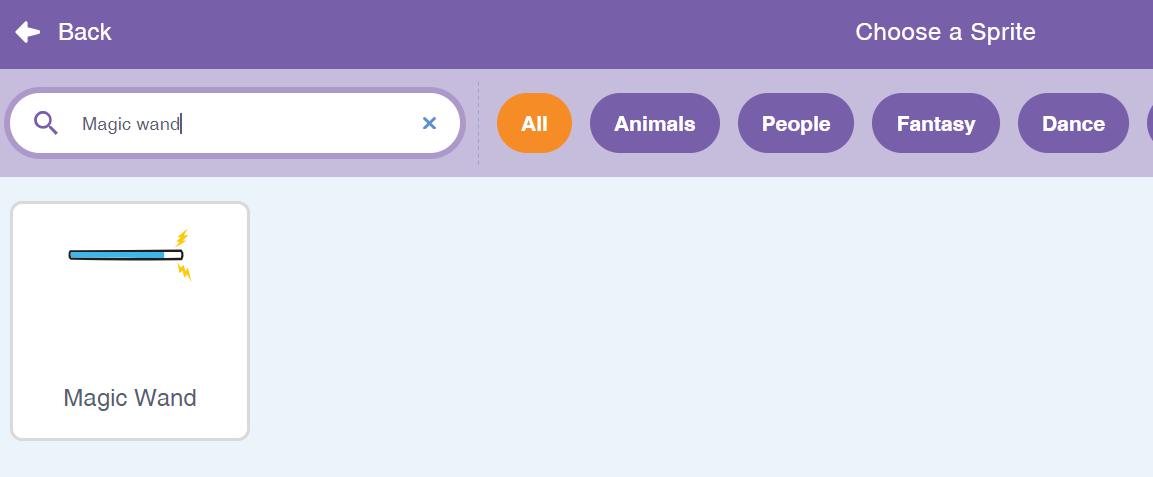
The Magic Wand sprite is added to the stage and is also visible in the Sprites pane.
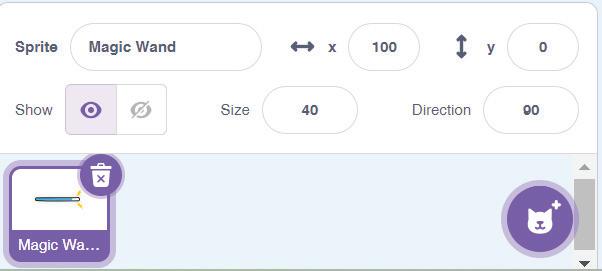
3 Set the Size of the Magic Wand sprite to 40.
Let us now learn to position our Magic Wand sprite.
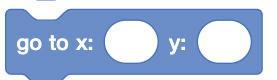
A position is a place on the stage where you want a sprite to go.
A position on the Scratch stage is made up of two values: x and y.
The x value tells the horizontal (left to right) position of the sprite.
The y value tells the vertical (top to down) position of the sprite.
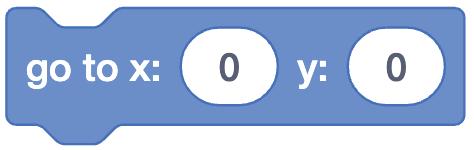
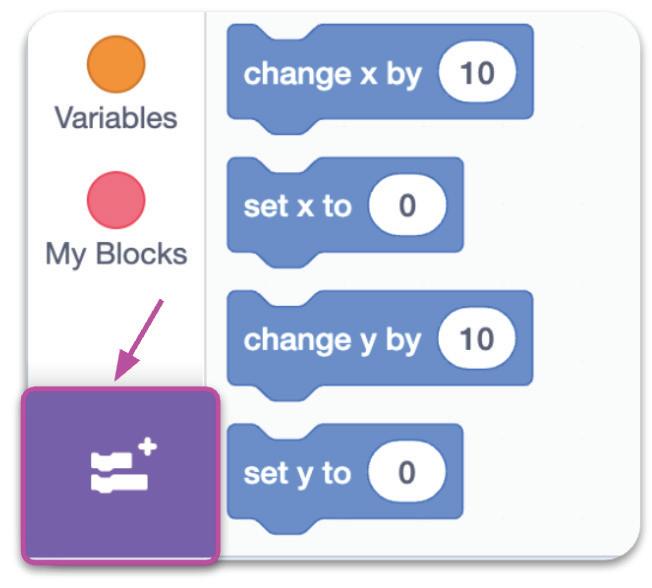
To set the position of a sprite, you can use the block.

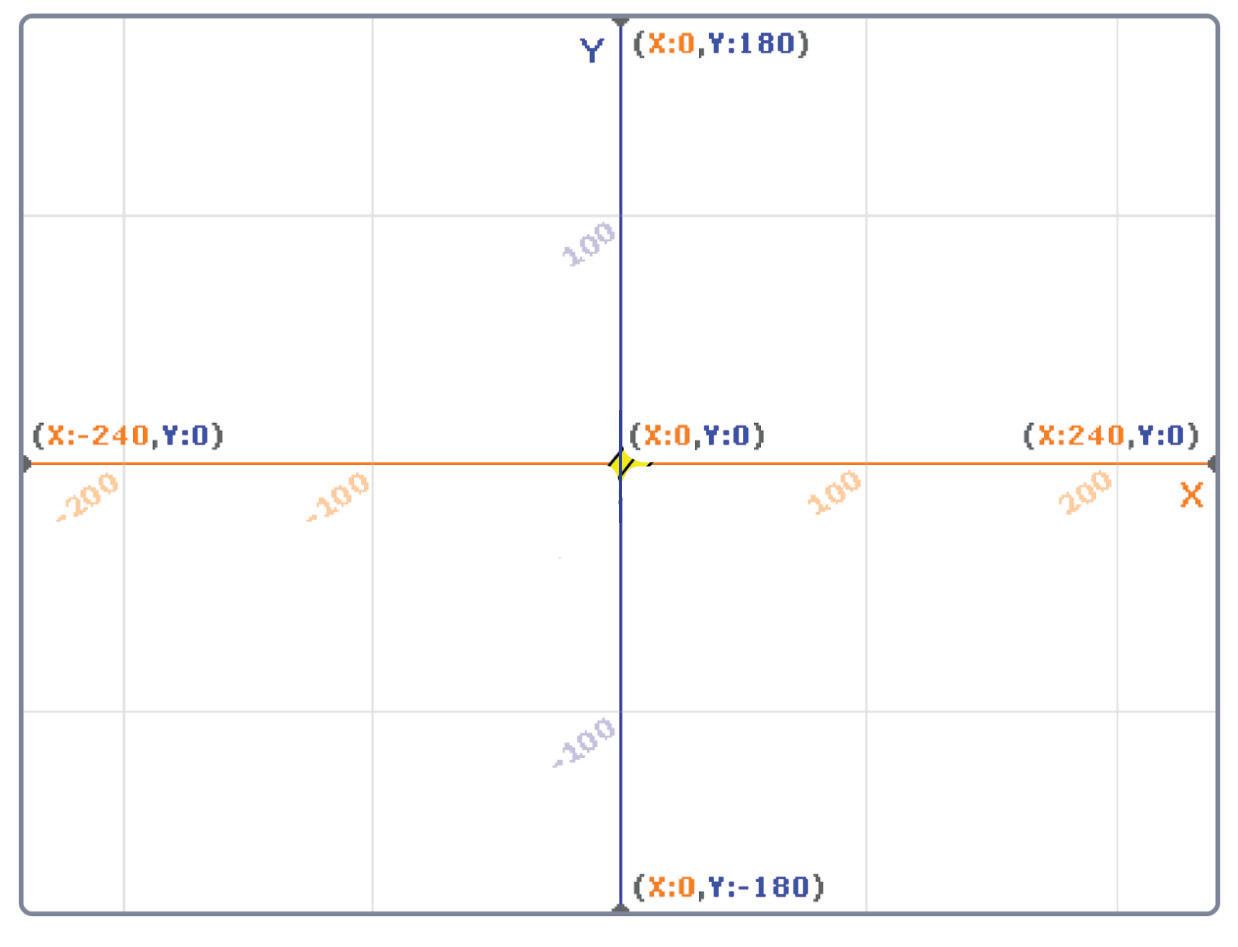

This block makes the sprite go to the position specified by the values of x and y.
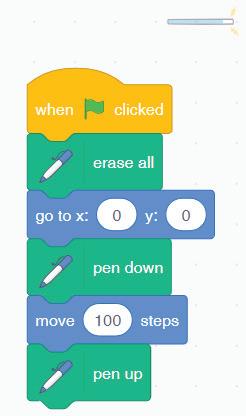
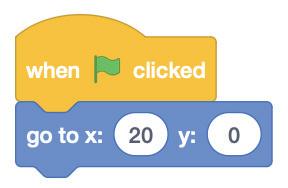
Let us make the Magic Wand sprite go to the centre of the stage when the green flag is clicked.
1 Select the Magic Wand sprite in the Sprites pane.
2 Click the Events category in the block panel.
3 Drag the block in the scripts area.

4 Click the Motion category.

6 Set the value of x and y to 0.
5 Drag the block to under the block in the scripts area.
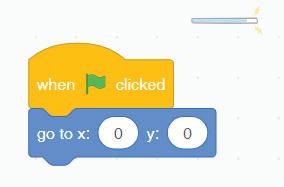
Click the Go button to run your project.

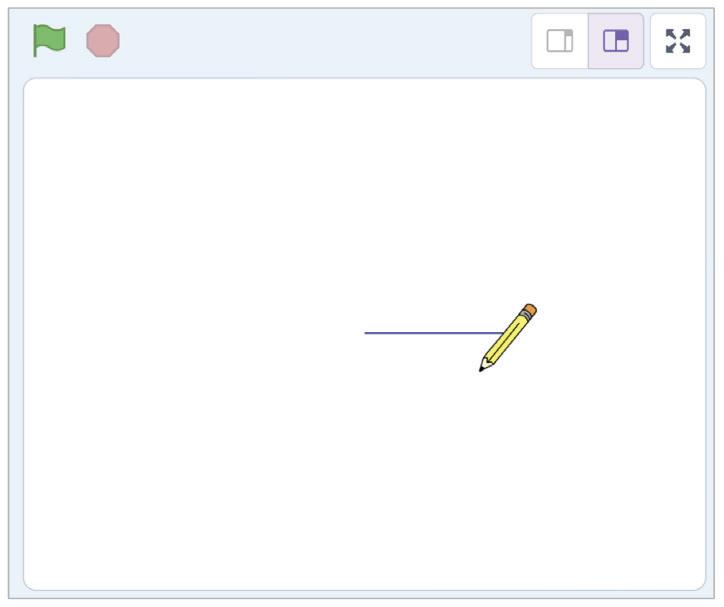
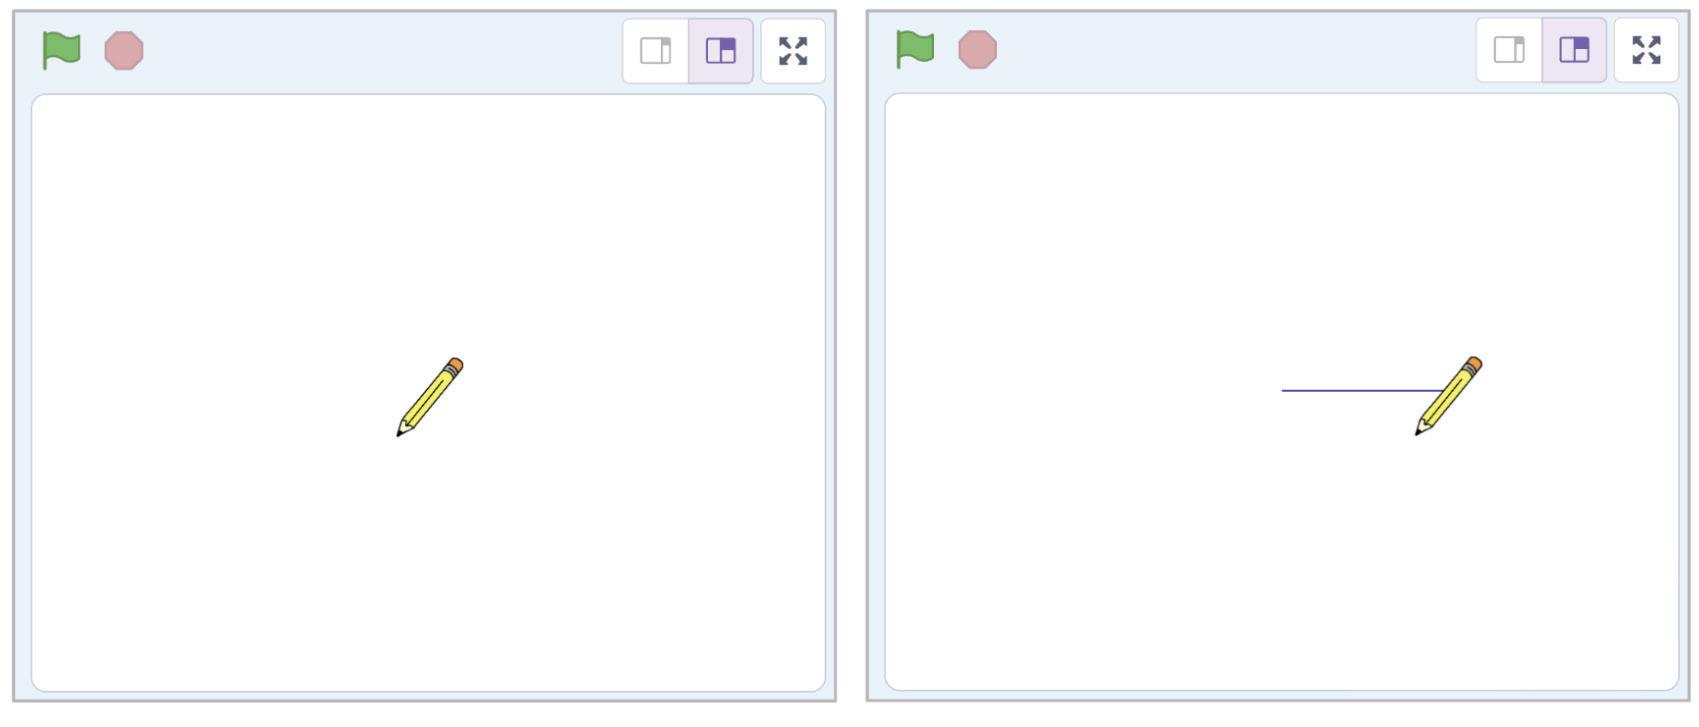
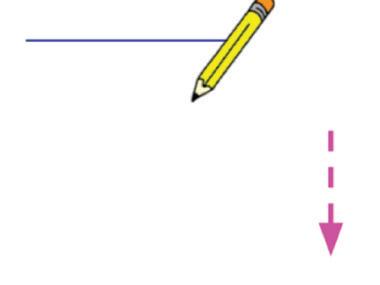
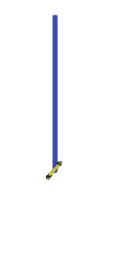
Now, we need to move the Magic Wand sprite to draw a line.
To move a sprite, you can use the block.
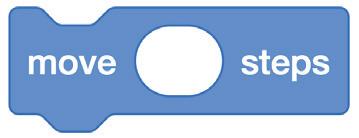
Let us move the Magic Wand sprite 100 steps forward to draw a line.
1 Select the Magic Wand sprite in the Sprites pane.
2 Click the Motion category in the block panel.
3 Drag the block to under the block in the scripts area.
4 Set the value of steps to 100.
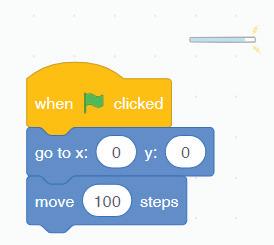
Click the Go button to run your project.

Did the Magic Wand sprite draw a line when moved forward by 100 steps? No.
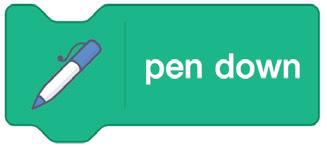
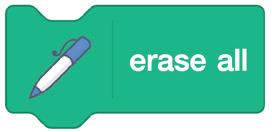
To make the Magic Wand sprite draw a line, you need to use the Pen extension.
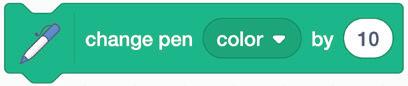
The Pen Extension in Scratch allows sprites to draw on the stage. The Pen blocks are green in colour. They are used to create simple drawings such as lines, shapes, and patterns or more complex drawings such as pictures and animations.
To use the Pen extension, you must first add it to your Scratch project.
Adding the Pen Extension
Steps to add the pen extension:
1 Click the purple Add Extension button in the bottom left corner of the Scratch Editor window.
2 The Extension Library opens up. Click the Pen extension.
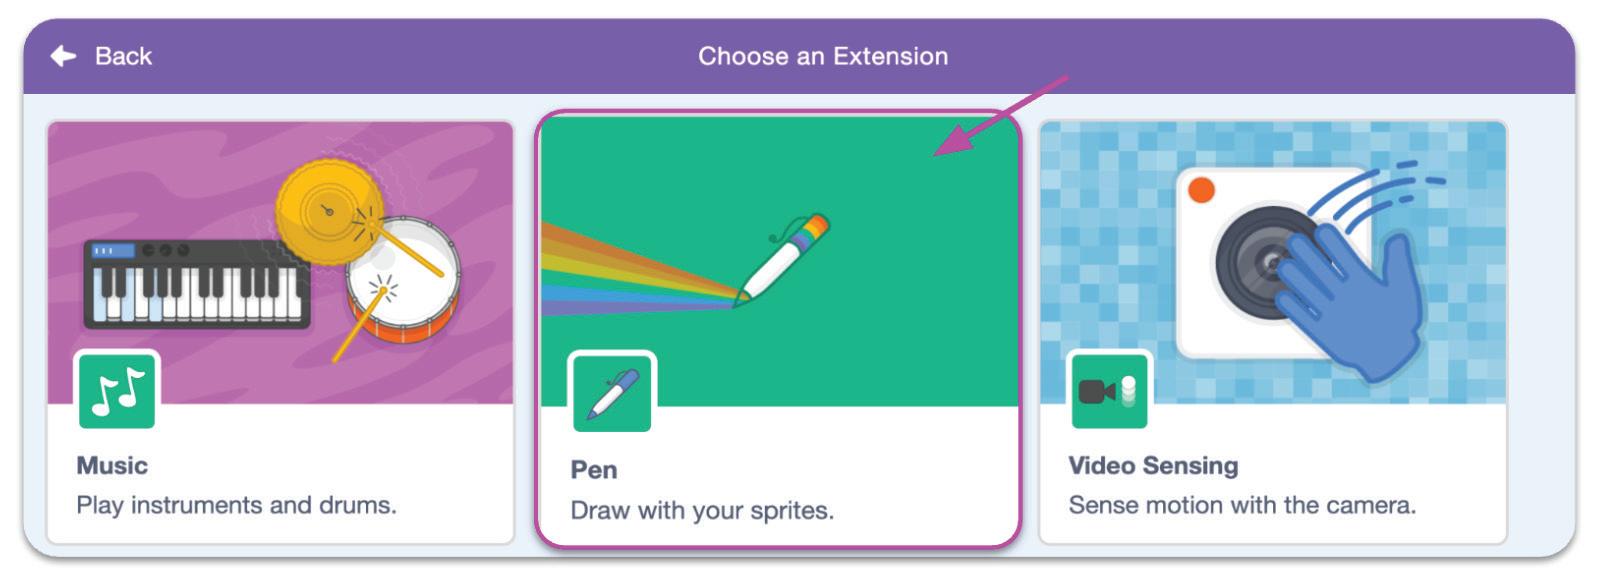
The Pen extension is added to the Blocks panel.
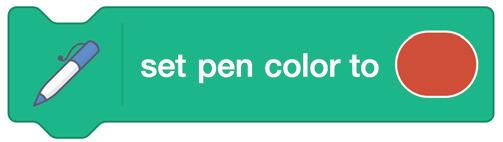
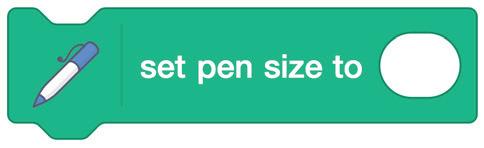
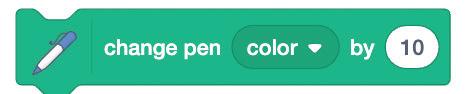
Let us learn about some of the Pen blocks.
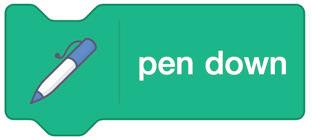


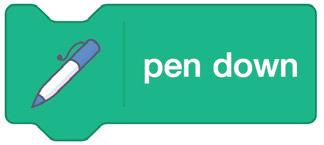
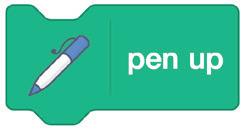
Tells the sprite to start drawing on the stage.
Tells the sprite to stop drawing on the stage.
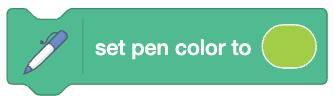
Sets the colour of the pen.
Sets the thickness of the pen.
Makes your pen lighter or darker.
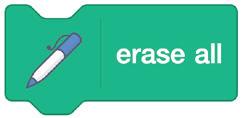
Clears all pen marks on the stage.
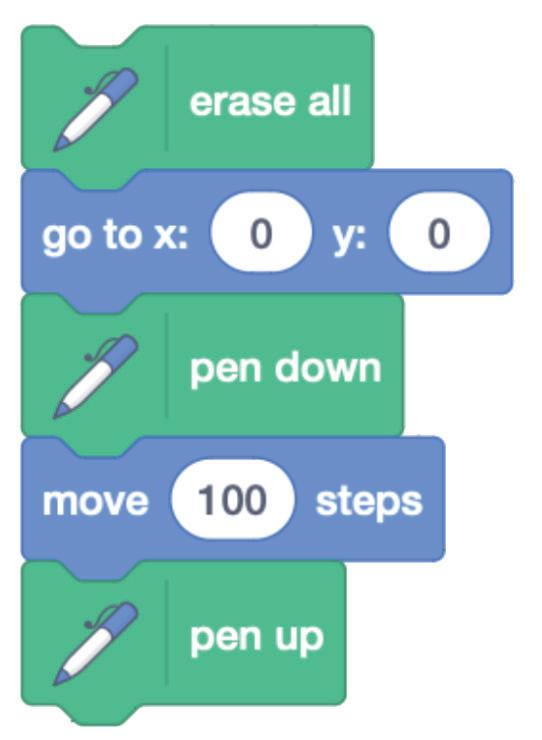
Now, let us use Pen blocks to make the Magic Wand sprite draw a line.
Steps to make the Magic Wand sprite draw a line:

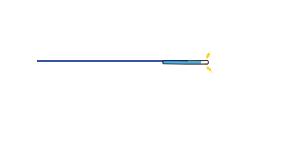
1 Drag the block between the block and the block (before the Magic Wand sprite starts moving).


2 Drag the block under the block (once the Magic Wand sprite stops moving). 0 0
Click the Go button to run your project.
What happens when you run your project again?
Nothing changes.
What should happen?
The older drawing should be removed.
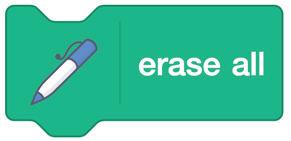
To remove the older drawing, we can use the block.
Steps to erase the old drawing when the green flag is clicked:
1 Click the Pen category in the blocks panel.

block.

2 Drag the block between the block and the
Click the Go button to run your project.
Did the old drawing get removed or not?
No.
The problem is that the new drawing is created so quickly that we cannot see the gap between the old drawing and the new drawing.
To solve the problem, we can use the block. It adds a delay between the erasing of the old drawing and creation of the new drawing.
Let us add a delay of 1 second between erasing of the old drawing and creation of the new drawing.
Steps to add a delay of 1 second:
1 Click Control in the blocks panel.
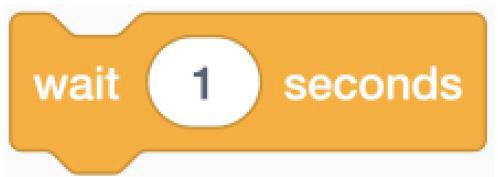
2 Drag the block between the 0 0 block and the block.

Click the Go button to run your project.
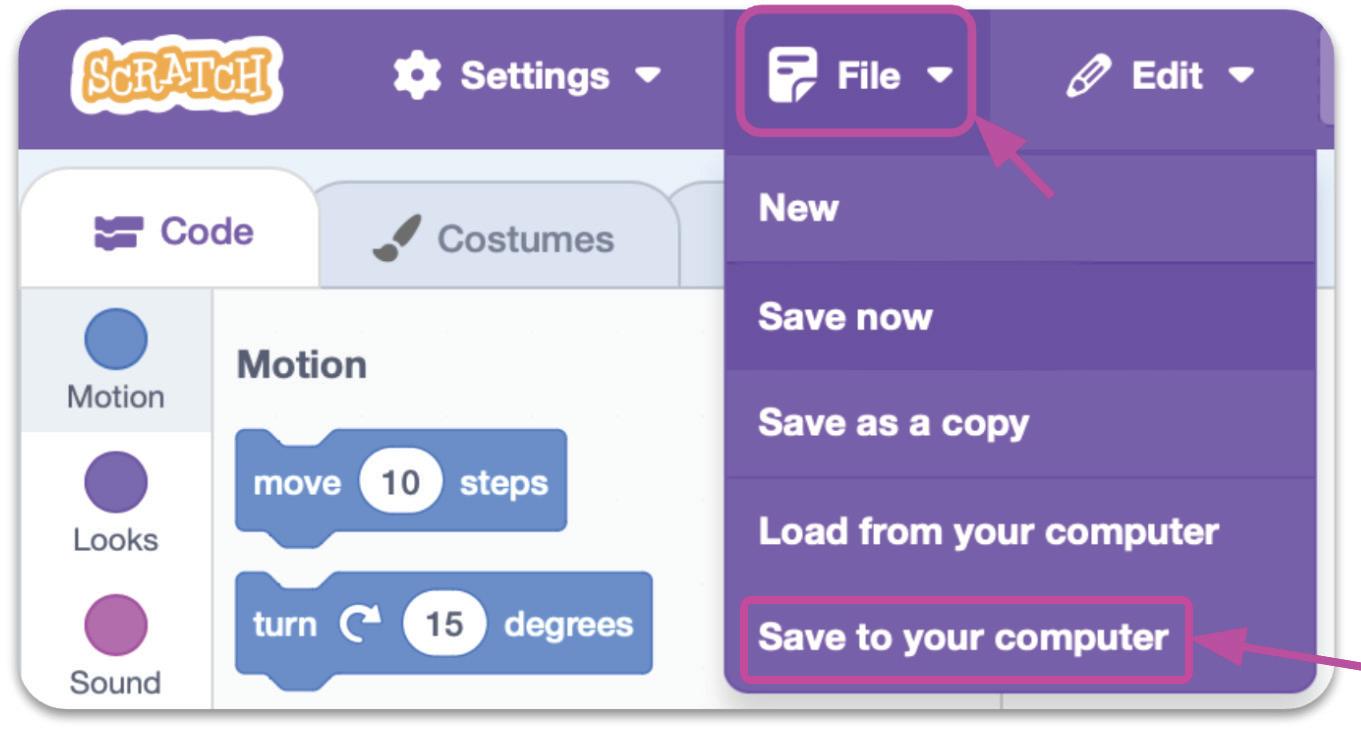
The project 'Drawing a Line' is complete. Now, let us learn how to save a project in Scratch.
1 Click the File menu in the Menu bar.
2 Click Save to your computer.
Discuss What happens when you click the green flag in a Scratch project that does not have any code attached to it?
Do It Yourself 3A
1 Identify the missing code block in the given script.
2 What does the block do?
a Tells the sprite to stop drawing
b Tells the sprite to start drawing
c Changes the colour of the sprite’s pen
d None of these
A Fill in the blanks. Hints pen up draw pen down erase
1 A is a character or object that you can move on the stage and make it do things.
2 To start drawing a line, you need to use the block.
3 The Pen extension allows sprites to on the stage.
4 To stop drawing a line, you need to use the block.
5 To erase all pen marks on a screen, you need to use the block.
B Tick () the correct option.
1 What extension do you need to make the sprite draw? a Video b Pen c Music
Text
2 What block can be used to add delay?
3 Which block can be used to set the colour of the sprite’s pen?

4 What does the block do?
a Turns the pen feature off inside a sprite
b Stops drawing
c Starts drawing
d Changes the pen colour
C Who am I?
What I Do?
Performs different actions on stage.
Makes your pen lighter or darker.
Moves the sprite to the specified x and y values.
Clears all pen marks on the screen.
Sets the colour of the sprite’s pen.
D Write T for True and F for False.
Who Am I?
1 The set pen colour to block sets the thickness of the pen.
2 The erase all block adds delay to the script.
3 The x value tells the vertical (top to down) position of the sprite.
4 To change the default name, click it and replace it with the new name.
5 To save a Scratch project, you should click the File menu and then select Save to your computer.
E Answer the following questions.
1 What is a sprite?
2 Write any two ways to add a sprite to your project.
3 What is the use of the pen blocks?
4 What is the difference between the pen down and pen up blocks?
5 Which block is used to move a sprite to a specific position, and where can we find it?
F Apply your learning.
1 Nikhil added a bear sprite to his Scratch project. Can you tell where will the sprite be visible now?
2 What code block can Pihu use to make a sprite move by 300 steps?
3 Imagine the girl sprite is 200 steps away from the boy sprite. Write down the script to make the ball reach the girl when the green flag is clicked.
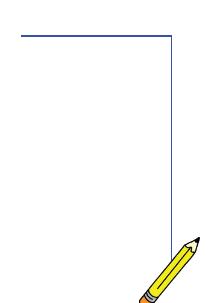
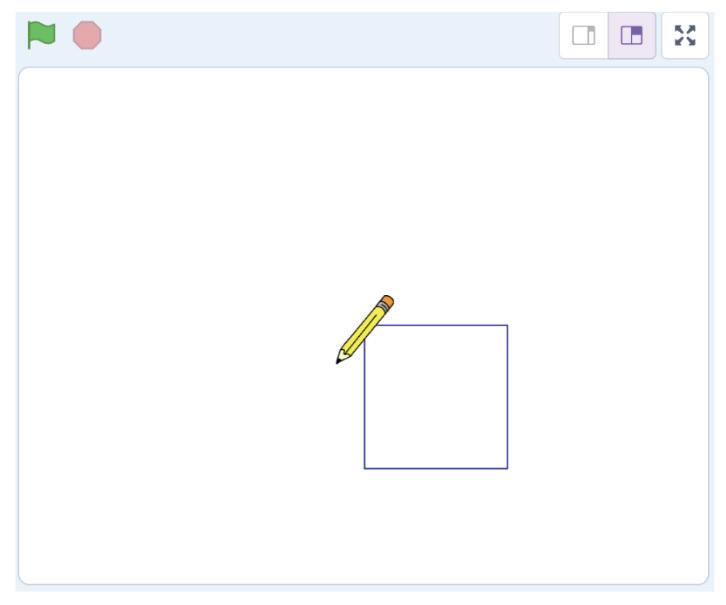
In the previous chapter, you have learnt how to draw a line using the Pen extension blocks. Let us now learn how to draw more shapes using the Pen extension. First, we will start with drawing a rectangle.
Do you know what a rectangle is?

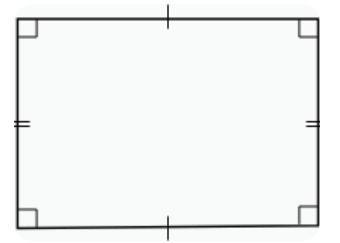
A rectangle is a 2D shape with four sides and four corners. The opposite sides of a rectangle are of the same length.
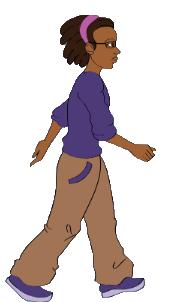
Imagine you are walking in a rectangular garden. How would you move in it?
To walk in a rectangle, you would walk straight for a few steps, then turn, walk straight for a longer distance, and then turn again. You would do this two more times to make the rectangle.
But what is a turn?
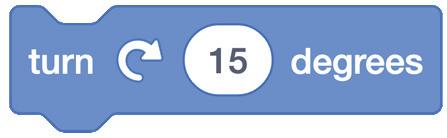
A turn is a change in the direction you are walking, either clockwise or anticlockwise.
Just like you use measuring units centimetre and metre to measure a length, you can use a unit called degrees to measure how much you turn.
To make a rectangle, you need to turn 90 degrees four times.
A degree is a measure of how much you turn.
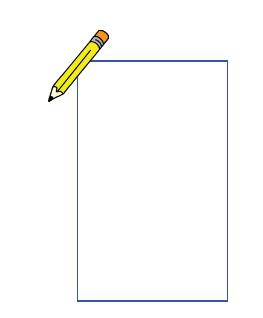
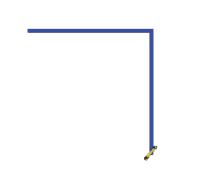
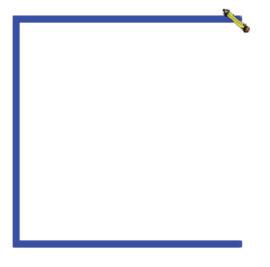
First, select the sprite of your choice; here we are using Pencil sprite. Now, let us look at the steps to draw a rectangle.
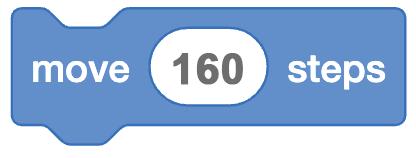
1 Move forward 100 steps.
2 Turn 90 degrees to the right.
3 Move forward 160 steps.
4 Turn 90 degrees to the right.
5 Move forward 100 steps.
6 Turn 90 degrees to the right.
7 Move forward 160 steps.
8 Turn 90 degrees to the right.
In the given steps, do you observe a pattern?
Right! We are repeating steps 1 to 4 two times.
Now, observe the following:
Repeat the following steps 2 times:
1 Move forward 100 steps.
2 Turn 90 degrees to the right.
3 Move forward 160 steps.
4 Turn 90 degrees to the right.
Which of the two ways looks simple, easy, and quick to make a script?
The second way, right?
But how can we do this in Scratch?
For this, we need to learn about loops.
How is a loop helpful to draw a rectangle?


Rectangles are used in electronic screens, like TVs and monitors because they fit well with how we see things and make it easy to watch everything on the screen.
A loop is doing something again and again to complete a task.
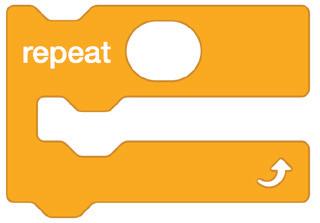
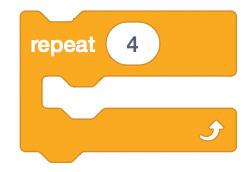
We have the block that repeats the instructions in it for the given number of times.
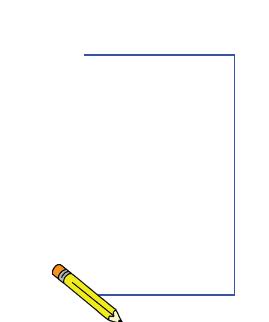
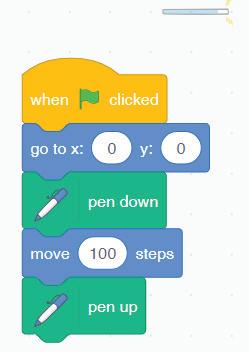
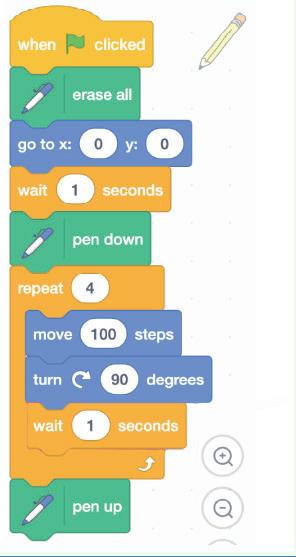
We will use the script we made for 'Drawing a Line' and add more code blocks to draw a rectangle.
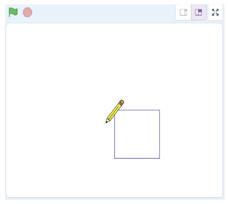
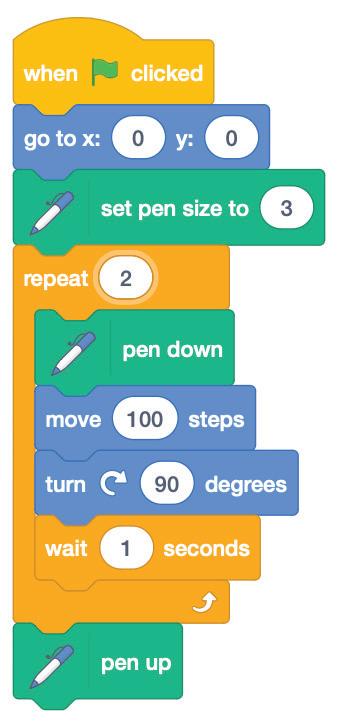
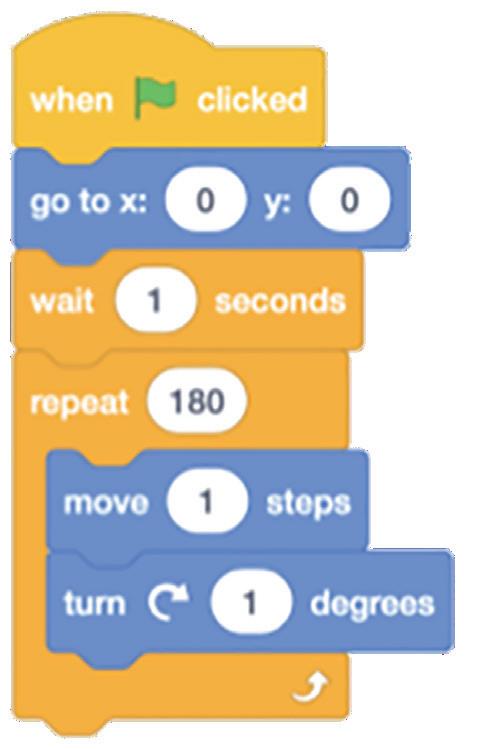
Steps to draw a rectangle:
1 Select the Pencil sprite.

2 Detach the and blocks from the script. But keep them in the scripts area.
3 Click Control category in the blocks panel.
4 Drag the repeat block to under the block.
5 Change the number of times to 2.
6 Drag the block to inside the repeat 2 block.
7 Drag the block to below the repeat 2 block.
8 Drag the block to below the block inside the repeat 2 block.
9 Now, again drag the block to below the block inside the repeat 2 block and change its value to 160.
10 Again, drag the block to below the block inside the repeat 2 block.
11 Change the value of degrees to 90.

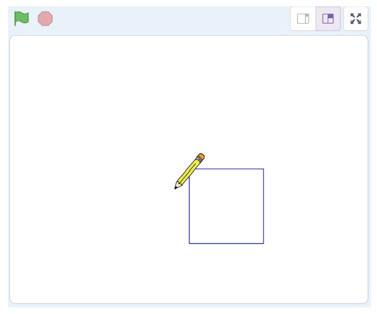
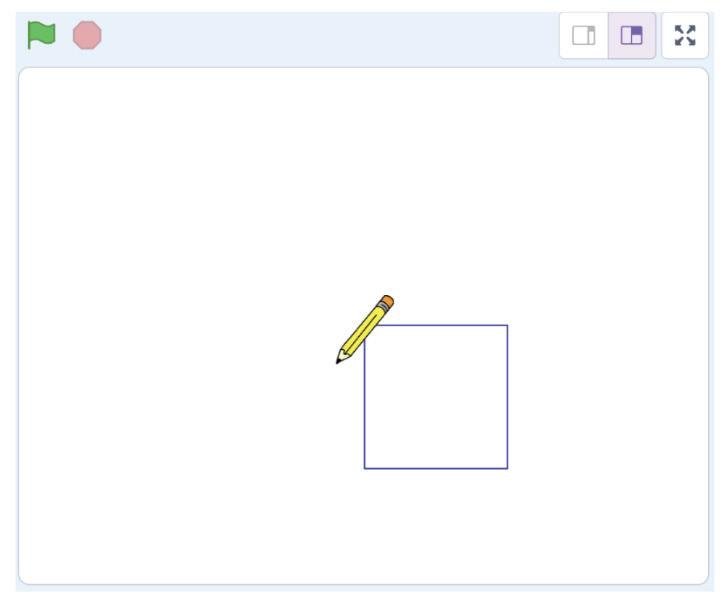
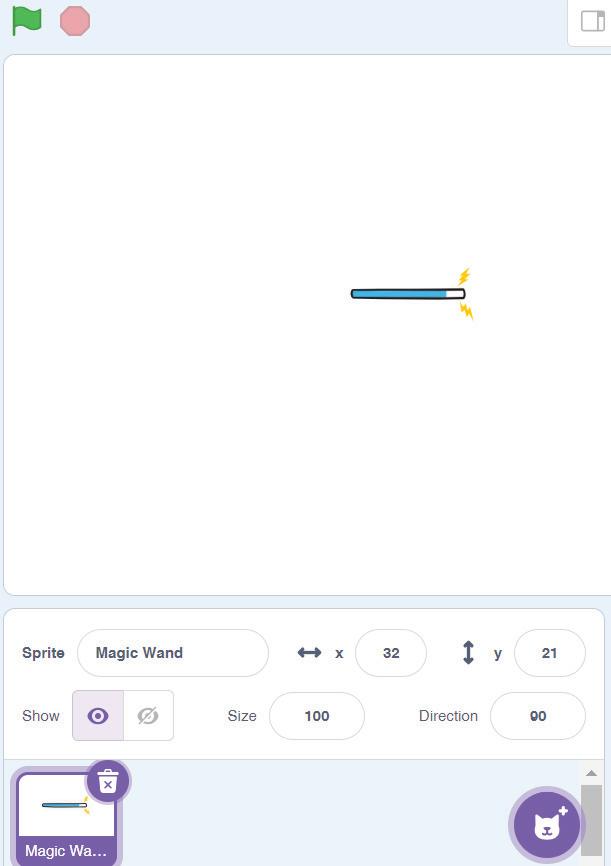
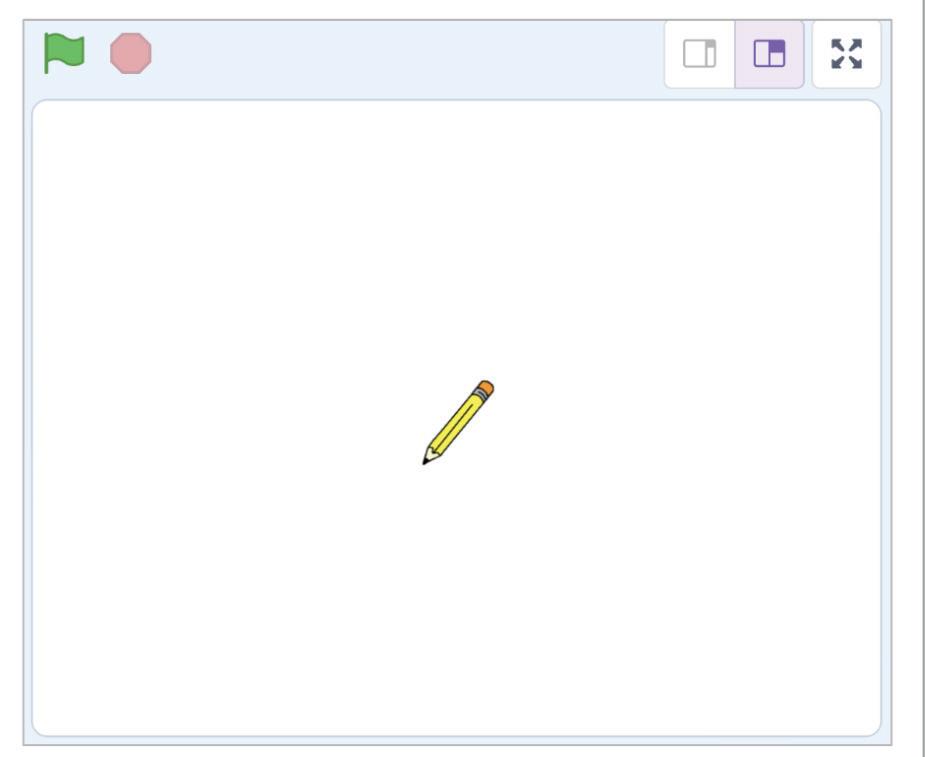
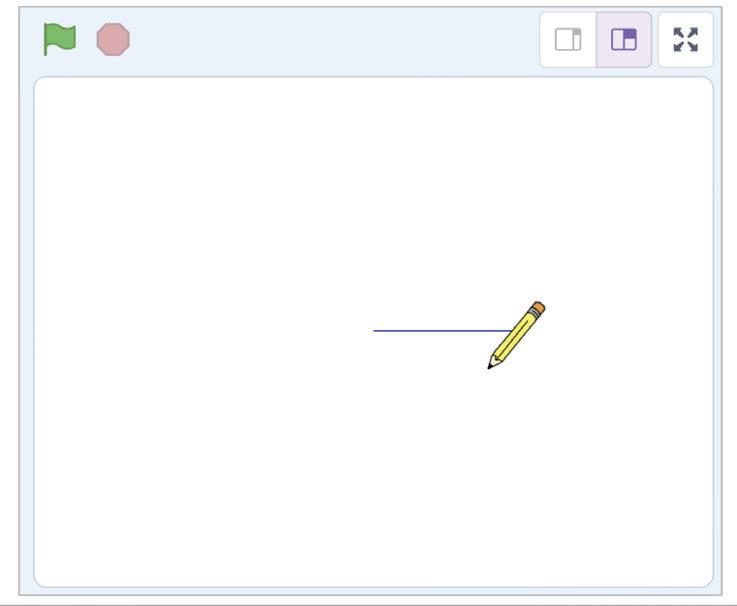
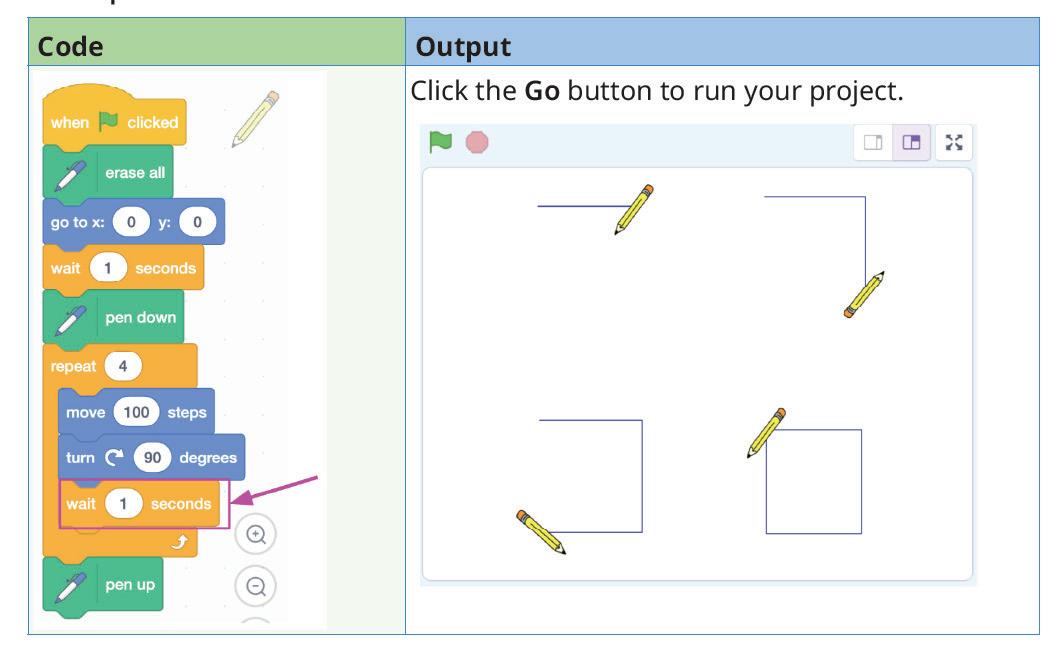
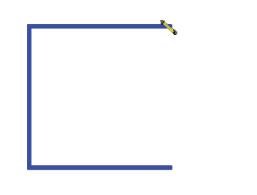
Click the Go button to run your project.

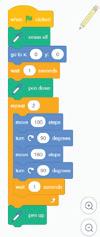
What happens when you run your project?
The Pencil sprite moves quickly and draws the rectangle. It is tough to see how the Pencil sprite turns and when.
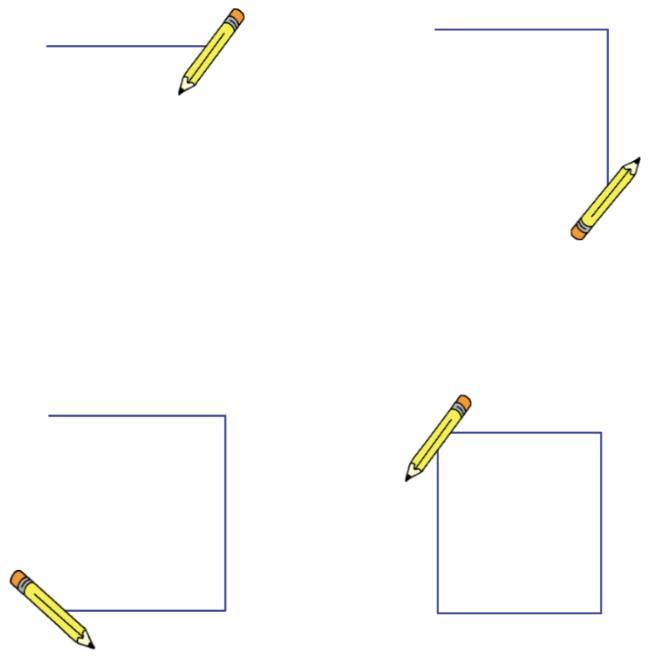
We can make the Pencil sprite pause on a turn by adding a delay.
Steps to add a delay of 1 second:
1 Click Control category in the blocks panel.

2 Drag the block to after the block inside the repeat block.
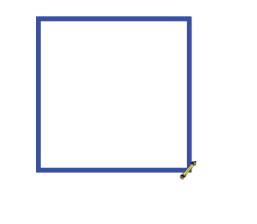
Click the Go button to run your project.
We have completed the script to draw a rectangle. Save this project with the name 'Drawing a Rectangle'.
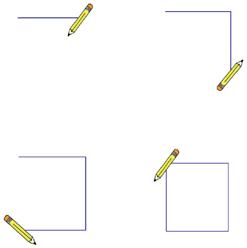
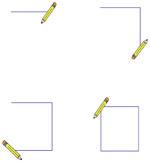
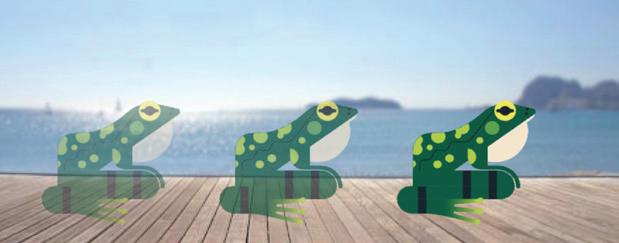
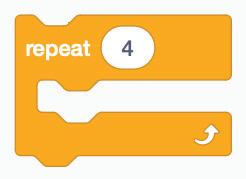
1 A square is a 2D shape with four sides and four corners. All sides of a square are of the same length. Draw a square using a pencil sprite and the given script.
A circle is a round shape with no corners or sides.
Imagine you are standing in the middle of a circle.
If you turn around all the way, you have turned 360 degrees.
If you turn halfway around, you have turned 180 degrees.
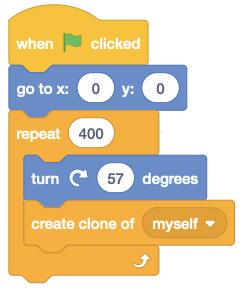
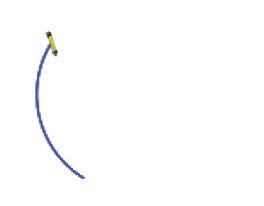
But to make a complete circle, we need to walk around the circle 360 steps, turning 1 degree with each step.
We will use the script we made for a square (Do it yourself 4A) and make some changes to draw a circle.
Steps to draw a circle:
The equator is an imaginary line that encircles the Earth horizontally in the middle.
1 Drag the block inside the repeat block to the blocks palette to remove it.
2 Change the value of the repeat block from 4 to 360 to make a full circle.
3 Change the number of steps in the block from 100 to 1.
4 Change the value of degrees in the block from 90 to 1.
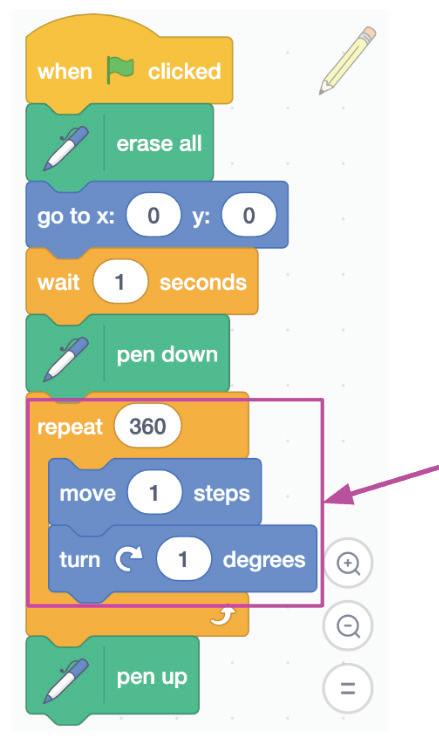
Think and Tell
Click the Go button to run your project.

Why do we need to repeat 360 times to draw a full circle?
Do It Yourself 4B
1 What will be the output when you run the given script?
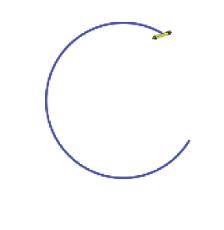
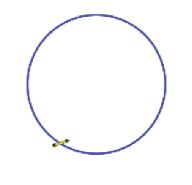
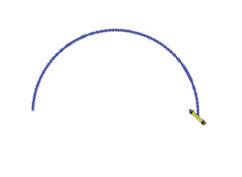
2 What will be the output when you run the given script?
a b c d
Chapter Checkup
A Fill in the blanks.
Hints 90 4 rectangle turn corners sides
1 A is a 2D shape with four sides of equal length of the opposite side.
2 A is to change the direction you are walking in.
3 A circle is a round shape with no or .
4 The code inside the block repeats times.
5 To make a square, we need to turn degrees four times.
B Tick () the correct option.
1 The given code block is an example of which block category? a Control b Events c Motion
2 How many move blocks do you need to create the given figure without loop?
3 Identify the shape of the carrom board.
a Circle b Square
c Triangle d Rectangle
4 What is the value of x in the given script?
a 0 b 100
c 50 d 20
C Who am I?
Code Block
Block Category
D Write T for True and F for False.
1 A circle is a shape with four equal sides.
2 You need to turn 1 degree 360 times to make a rectangle.
3 A degree is a measure of how much you turn.
4 To add a pause or delay in a sequence of actions, you can use the 'wait' block.
E Answer the following questions.
1 What is a turn?
2 What is a rectangle?
3 How many times will the move block be used to draw a circle without the repeat block?
4 How many degrees do we need to turn to make a semi-circle?
F Apply your learning.
1 Arya has made a project to make his sprite run a circle shaped track, but the sprite is not completing the track. What is wrong in the script?
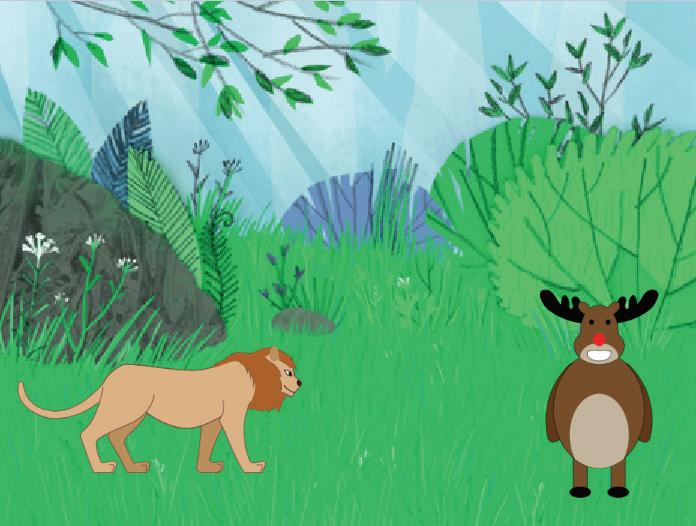
2 Ritik wants to make the lion reach the reindeer who is 150 steps away. On which sprite does he need to add the script? Write the script to make the lion reach the reindeer.
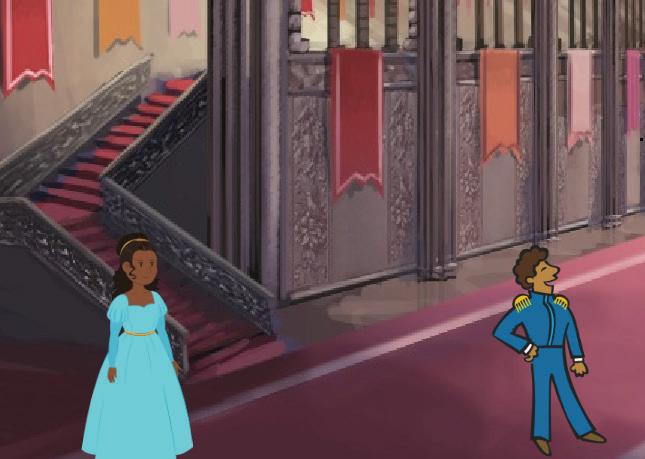
3 Aarav wants to measure the distance between the princess and the prince. Help him create a script to make the princess sprite draw a line to the prince sprite.
4 Rayan wants to make a ball move around a rectangle with sides 100 and 250. Help him write a script to make the ball move in a rectangle.
Test Paper (Based on Chapters 1 to 4)
A. Fill in the blanks.
1 In Scratch, the blocks you put together in the script area are called a .
2 The is the background of the stage.
3 block changes the costume of the sprite to the specified one.
4 To draw a line, you must use the extension in Scratch.
B. Tick () the correct option.
1 Which button do you click to run the script in Scratch?
a Red button
c Go button
2 Which blocks are blue in colour?
a Motion blocks
c Sound blocks
3 is used to add a random sprite.
a Choose a sprite
c Surprise
b Stop button
d Block palette
b Control blocks
d Events blocks
b Paint
d Upload sprite
4 A on the Scratch stage is made up of two values: x and y.
a Position
c Sprite Library
D. Write T for True and F for False.
b Object
d Add extension
1 The Blocks panel contains nine colour-coded categories of blocks.
2 The stage in Scratch is used to edit the scripts.
3 The [go to x: () y: ()] block is found in the Looks category.
4 All sides of a rectangle are of the same length.
E. Answer the following questions.
1 Define coding.
2 What is block palette?
3 What is the use of block?
4 What are pen blocks?
F. Apply your learning.
1 Sneha wants to change the background of the Stage. Which option should she choose?
2 Akshit has a goblin sprite in his project with two different looks, as shown in the picture. Which block can he use to change the current look of the goblin to the other one?
3 Pragati wants to change the default sprite on the stage but forgets the steps to delete a sprite. Help her by writing the steps to do so.
This coding book is supplementary to the main “Mel and Conji” content book. This book represents a 21st-century approach to learning coding concepts and developing computational thinking and problem-solving skills. To prepare students for the digital age, the curriculum is interwoven with well-thought-out concept progression, real-life examples, and practice problems.
• Project-based learning: Engaging hands-on projects encouraging practical application of computer science and coding.
• NEP Tags: To showcase alignment with NEP skills and values.
• Code snippets: Complete code for each activity with output facilitating hands-on learning and immediate feedback.
• Coding challenges: Includes projects through which learners can demonstrate their learning outcomes in coding and computer science.
• Test Papers: Designed to evaluate understanding of core concepts and application of skills.
Uolo partners with K-12 schools to provide technology-enabled learning programs. We believe that pedagogy and technology must come together to deliver scalable learning experiences that generate measurable outcomes. Uolo is trusted by over 15,000+ schools across India, Southeast Asia, and the Middle East.
ISBN 978-81-979297-9-3